Articles
How To Install A Clopay Garage Door
Modified: August 27, 2024
Looking for step-by-step instructions on installing a Clopay garage door? Check out our informative articles for expert guidance on your installation process.
(Many of the links in this article redirect to a specific reviewed product. Your purchase of these products through affiliate links helps to generate commission for Storables.com, at no extra cost. Learn more)
Introduction
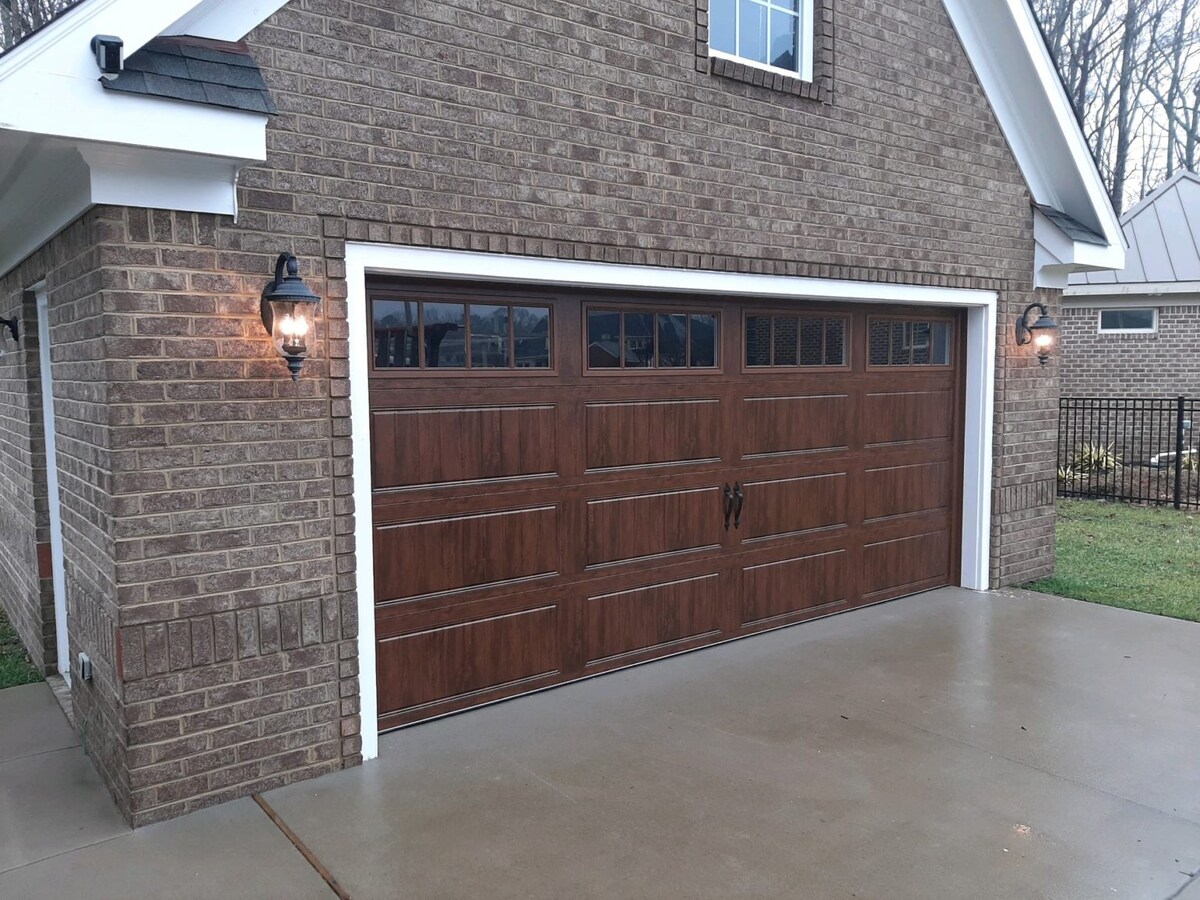
Installing a Clopay garage door is a great way to enhance the functionality and aesthetics of your home. Whether you’re replacing an old door or installing a brand new one, this guide will provide you with a step-by-step process to successfully complete the installation.
A garage door is not only a practical component of your home, but it also plays a crucial role in enhancing the overall curb appeal. With different styles, materials, and colors available, you can find a Clopay garage door that matches your home’s architectural design and personal preferences.
Before you begin the installation process, it’s important to measure and prepare the area where the garage door will be installed. This ensures that the new door will fit properly and function smoothly.
In this comprehensive guide, we will go through each step of the installation process, from measuring and preparing the area to attaching the necessary hardware and testing the door for proper operation. We’ll also cover optional steps like installing an opener for added convenience.
It’s worth noting that the installation process may vary depending on the specific model and type of Clopay garage door you have chosen. Always refer to the manufacturer’s instructions for your particular door to ensure proper installation.
Now, let’s dive into the step-by-step process of installing a Clopay garage door!
Key Takeaways:
- Enhance Your Home with a Clopay Garage Door
Installing a Clopay garage door not only adds functionality but also enhances your home’s curb appeal. Follow the step-by-step guide for a successful installation process. - Ensure Smooth Operation and Safety
Thoroughly test and adjust your installed Clopay garage door to ensure smooth operation, proper balance, and safety features. Regular maintenance will prolong its lifespan.
Read more: How Much To Install Garage Door
Step 1: Measure and Prepare
Before you begin the installation of your Clopay garage door, it is crucial to accurately measure and prepare the area where the door will be installed. This will help ensure a proper fit and smooth operation.
Here are the steps to measure and prepare for the installation:
- Measure the Opening: Using a measuring tape, measure the width and height of the garage door opening. Take measurements in multiple places to account for any irregularities in the opening. Make note of the smallest measurement.
- Clear the Area: Remove any objects or clutter from the garage, ensuring that there is ample space to work. This includes vehicles, tools, and any other items that may obstruct the installation process.
- Check the Floor: Inspect the garage floor for any cracks or unevenness. If necessary, repair or level the floor to provide a solid foundation for the garage door installation.
- Clear the Walls: Remove any obstructions along the sides of the garage opening. This includes shelves, hooks, or any other items that may interfere with the installation.
- Check the Ceiling: Measure the distance between the top of the garage door opening and the ceiling. This measurement is important for determining the required headroom and clearance for the garage door tracks and opener (if applicable).
- Check for Proper Framing: Inspect the framing of the garage door opening. Ensure that there is adequate support for the door tracks and hardware. If any modifications or reinforcements are necessary, consult a professional.
- Prepare the Electrical Wiring (if applicable): If you plan to install a garage door opener that requires electrical wiring, make sure the necessary electrical outlets are in place and properly grounded. If not, consult an electrician for assistance.
By thoroughly measuring and preparing the area, you can ensure a smooth and successful installation of your Clopay garage door. Taking the time to properly prepare will save you from any potential issues or setbacks during the installation process.
Step 2: Gather Necessary Tools and Materials
Before you start installing your Clopay garage door, it’s important to gather all the necessary tools and materials. Having everything you need on hand will make the installation process more efficient and streamlined.
Here’s a list of the essential tools and materials you’ll need:
- Measuring tape
- Screwdriver set (both flathead and Phillips)
- Drill and drill bits
- Level
- Adjustable wrench
- Hammer
- Nail gun and nails
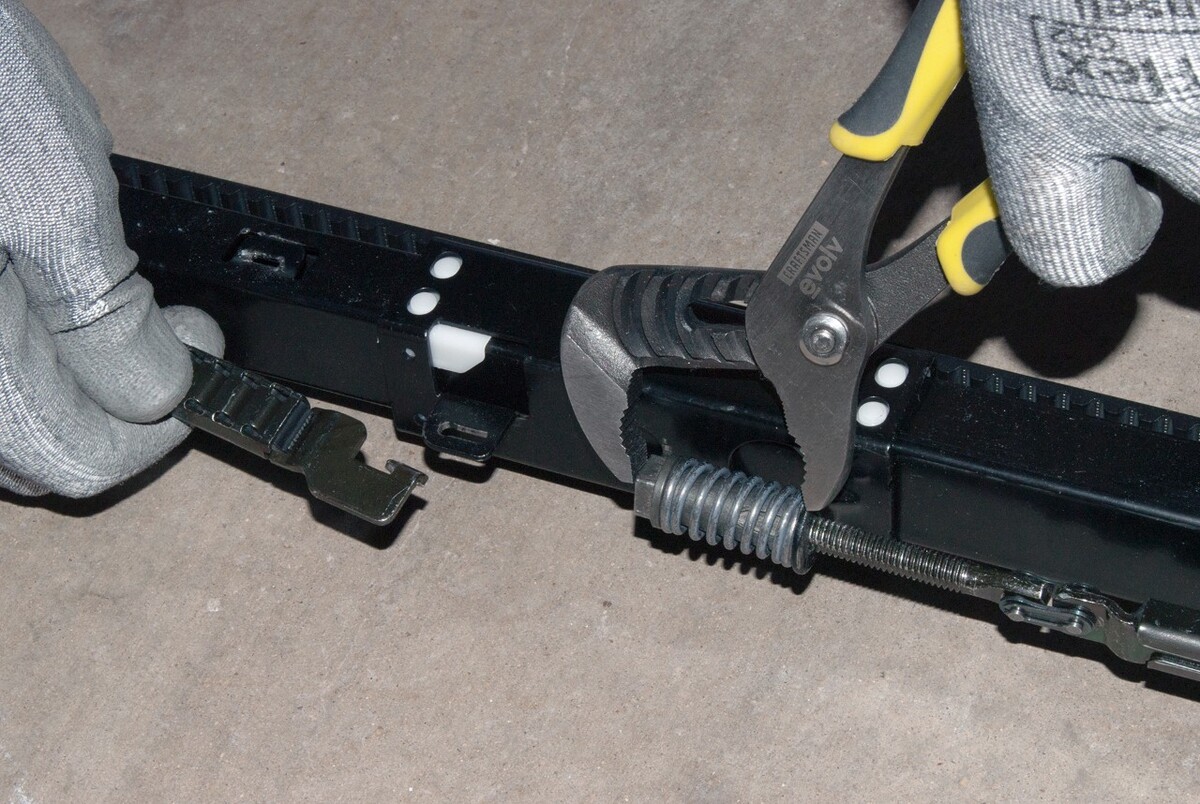
- Pliers
- C-clamps
- Hacksaw or reciprocating saw
- Ladder or step stool
- Safety glasses and gloves
In addition to the tools, you’ll also need the following materials:
- Clopay garage door sections
- Garage door track system
- Rollers
- Hinges and brackets
- Springs and cables
- Bottom seal
- Opener (if desired)
- Fasteners (screws, bolts, nails)
- Weatherstripping
Make sure to check the instructions and specifications provided by Clopay for your specific garage door model. This will ensure that you have all the required tools and materials before starting the installation.
Having everything prepared in advance will save you time and prevent unnecessary delays during the installation process. It’s always better to be fully equipped and ready to tackle the project.
Step 3: Remove Old Garage Door
Before you can proceed with the installation of your new Clopay garage door, you’ll need to remove the old garage door first. This step is essential to make way for the new door and ensure a smooth installation process. Here’s how to remove the old garage door:
- Disconnect the Opener: If your old garage door has an opener connected to it, disconnect it from the power source. This typically involves unplugging the opener or turning off the circuit breaker. Also, detach the emergency release handle from the door.
- Release Tension on the Springs: Depending on the type of spring system your old door has, you may need to release tension from the springs. This is important for safety as the springs are under high tension. Follow the manufacturer’s instructions or consult a professional if you’re unsure how to do this.
- Remove Hardware and Tracks: Start by removing the hinges, brackets, and other hardware that secure the door to the tracks. Use a screwdriver or drill to unscrew the fasteners and detach the hardware. Then, carefully remove the garage door sections from the tracks.
- Take Safety Precautions: Garage doors can be heavy, so it’s important to take safety precautions when removing them. Use proper lifting techniques, and consider enlisting the help of a friend or family member to assist you. Wear safety glasses and gloves to protect yourself.
- Clear the Area: Once you’ve removed the old garage door, clear the area of any debris or clutter. This will provide a clean and safe space for the installation of the new door.
It’s vital to handle the removal of the old garage door with caution and care. If you’re unsure about any aspect of this step, it’s best to seek assistance from a professional to ensure a safe and smooth removal process.
With the old door successfully removed, you’re now ready to move on to the next step of the installation process: installing the tracks and hardware for your new Clopay garage door.
Step 4: Install Tracks and Hardware
With the old garage door removed, it’s time to move on to installing the tracks and hardware for your new Clopay garage door. This step is crucial as it provides the foundation for the proper functioning of the door. Here’s how to install the tracks and hardware:
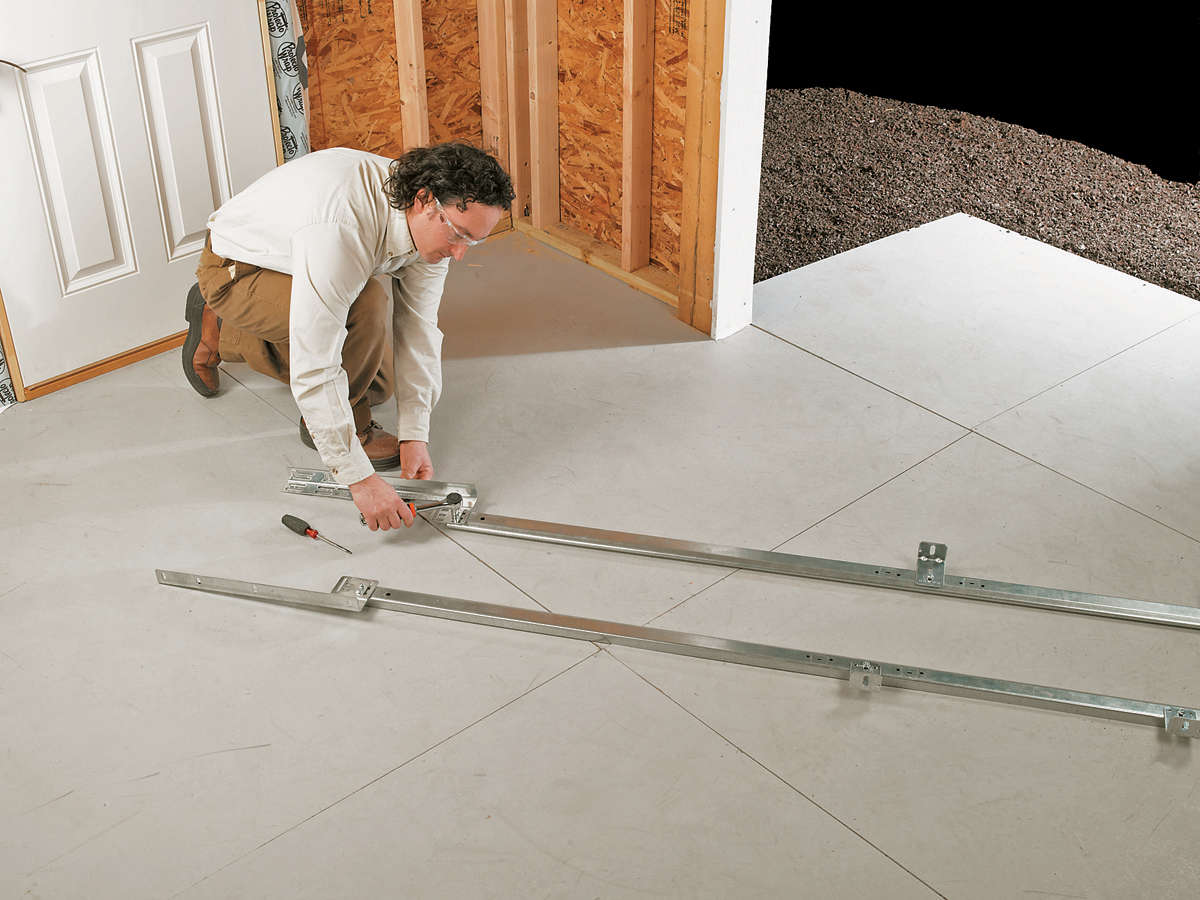
- Begin with the Vertical Tracks: Start by installing the vertical tracks on both sides of the garage door opening. Use a level to ensure they are plumb and secure them to the wall using fasteners. Make sure the tracks are evenly spaced and aligned.
- Position the Horizontal Tracks: Next, position the horizontal tracks on the ceiling of the garage. Attach them securely to the ceiling joists using lag screws or other suitable fasteners. Again, use a level to ensure they are level and aligned.
- Install the Track Brackets: Attach the track brackets to the wall, ensuring they align with the positioning of the vertical tracks. Use a level to ensure they are plumb, and secure them firmly using the provided hardware.
- Attach the Rollers: Install the rollers onto the garage door sections according to the manufacturer’s instructions. Typically, this involves inserting the rollers into the designated slots on the sides of the door sections. Make sure the rollers move freely along the vertical tracks.
- Mount the Bottom Bracket: Mount the bottom bracket to the bottom of the door sections. This bracket will connect the door sections to the cables and springs. Use the provided fasteners to secure it firmly in place.
- Connect the Cables: Attach the lifting cables to the bottom brackets, following the instructions provided by Clopay. Make sure the cables are properly aligned and securely fastened to the brackets. It’s important to ensure proper tension on the cables for smooth operation.
- Test the Door: Before proceeding to the next step, test the door by manually opening and closing it. Ensure that it moves smoothly along the tracks and doesn’t bind or catch on any obstructions. Make any necessary adjustments to the track alignment or hardware as needed.
Proper installation of the tracks and hardware is crucial for the smooth operation and longevity of your Clopay garage door. Take your time to ensure everything is aligned and securely fastened before proceeding to the next step.
In the next step, we’ll guide you through the process of installing the garage door sections onto the tracks. Stay tuned!
When installing a Clopay garage door, make sure to carefully follow the manufacturer’s instructions and use the recommended tools for a safe and proper installation.
Read more: How To Install Insulation On Garage Door
Step 5: Install Garage Door Sections
Now that the tracks and hardware are in place, it’s time to install the garage door sections onto the tracks. This step brings you closer to completing the installation of your Clopay garage door. Follow these steps to install the sections:
- Start with the Bottom Section: Begin by installing the bottom section of the garage door. Position it in the opening and align it with the vertical and horizontal tracks. Use a level to ensure it is plumb and adjust the positioning if necessary.
- Attach the Hinges: Once the bottom section is in place, attach the hinges to connect it to the next section. Typically, there will be pre-drilled holes on the sections for easy installation of the hinges. Secure the hinges using the provided screws or fasteners.
- Continue with the Remaining Sections: Repeat the same process for each subsequent section of the garage door. Align each section with the tracks and attach the hinges to connect them together. Use the level to ensure each section is plumb before moving on to the next one.
- Install the Rollers: As you install each section, ensure that the rollers are properly seated in the vertical tracks. The rollers should move smoothly along the tracks without any binding or friction. Make any necessary adjustments to ensure proper alignment.
- Secure the Top Section: Once all the sections are installed and connected, secure the top section to the horizontal tracks. Use the provided fasteners to firmly attach the section to the tracks, ensuring stability and proper alignment.
- Check for Smooth Operation: Test the garage door by manually opening and closing it. Verify that all sections move smoothly along the tracks without any resistance or obstructions. Make any necessary adjustments to the hinges or tracks to ensure proper alignment and functionality.
Take your time during this step to ensure that each section is properly aligned and securely connected. Proper installation of the garage door sections is crucial for the smooth and efficient functioning of your Clopay garage door.
In the next step, we’ll guide you through the process of attaching the springs and cables for optimal door performance. Stay tuned!
Step 6: Attach Springs and Cables
Attaching the springs and cables is a critical step in the installation of your Clopay garage door. The springs and cables work together to counterbalance the weight of the door and ensure smooth and controlled opening and closing. Follow the steps below to properly attach the springs and cables:
- Determine the Type of Spring System: Clopay garage doors typically come with either torsion springs or extension springs. Torsion springs are mounted above the door, while extension springs are located on the sides. Identify which type of spring system your door has before proceeding.
- Installing Torsion Springs:
- Secure the Spring Anchor Bracket: Attach the spring anchor bracket to the vertical track above the garage door on both sides. Ensure it is firmly fastened and aligned with the track.
- Install the Torsion Spring Shaft: Slide the torsion spring shaft into the spring anchor bracket on one side of the door. Make sure it is centered and level.
- Attach the Spring and Cables: Attach the torsion spring to the center bracket and connect the cables to the bottom bracket. Wind the spring using a winding bar, following the manufacturer’s instructions. Ensure that the cables are properly wound and under tension.
- Repeat for the Other Side: Repeat the above steps to install the torsion spring, cables, and wind it on the other side of the door.
- Installing Extension Springs:
- Secure the Extension Spring Assembly: Attach the extension spring assembly to the vertical track on both sides of the garage door. Ensure the assembly is securely fastened and aligned with the track.
- Attach the Springs and Cables: Attach the extension springs to the rear track hanger and connect the cables to the bottom bracket. Ensure that the springs are properly tensioned and the cables are securely attached.
- Test the Spring Tension: Once the springs and cables are installed, test the tension by manually opening and closing the garage door. The door should open and close smoothly, staying in place when fully open or closed. Adjust the spring tension if necessary to achieve the proper balance.
Attaching the springs and cables should be done with caution as there is a high amount of tension involved. If you are unsure or uncomfortable with this step, it is recommended to seek professional assistance to ensure proper installation and safety.
In the next step, we’ll cover the optional process of installing a garage door opener for added convenience. Stay tuned!
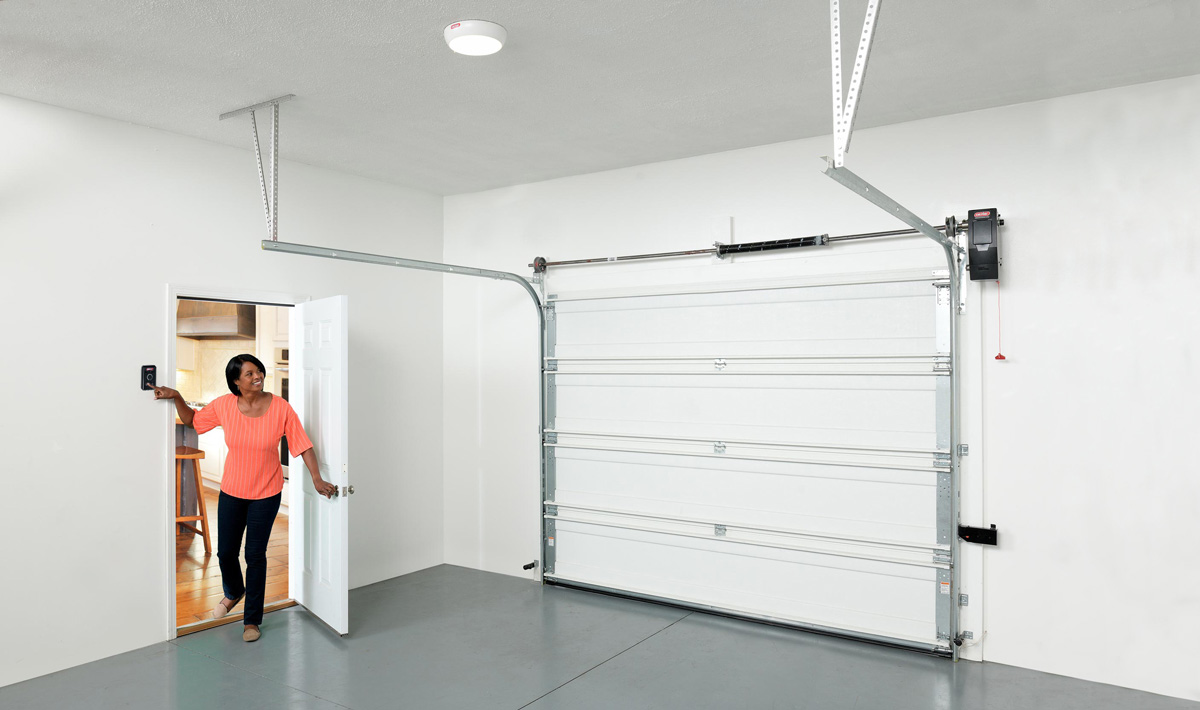
Step 7: Install Opener (Optional)
If you want to add convenience and automation to your Clopay garage door, installing a garage door opener is a great option. While this step is optional, it offers many benefits such as remote operation and improved security. Follow these steps to install a garage door opener:
- Choose the Right Opener: Select a compatible garage door opener that suits your needs and is recommended for use with your specific Clopay garage door model. Consider factors such as horsepower, drive type (chain, belt, or screw), and additional features.
- Prepare the Opener:
- Read the Instructions: Carefully read and familiarize yourself with the installation manual provided by the opener manufacturer. It contains specific instructions and diagrams for your particular model.
- Assemble the Opener: Follow the manual to assemble the opener, including attaching the rail, motor unit, and other components. Ensure all connections are secure and tight.
- Install the Safety Sensors: Attach the safety sensors to each side of the garage door, near the bottom. These sensors detect any obstacles and prevent the door from closing if something is in its path. Align them properly and secure them firmly.
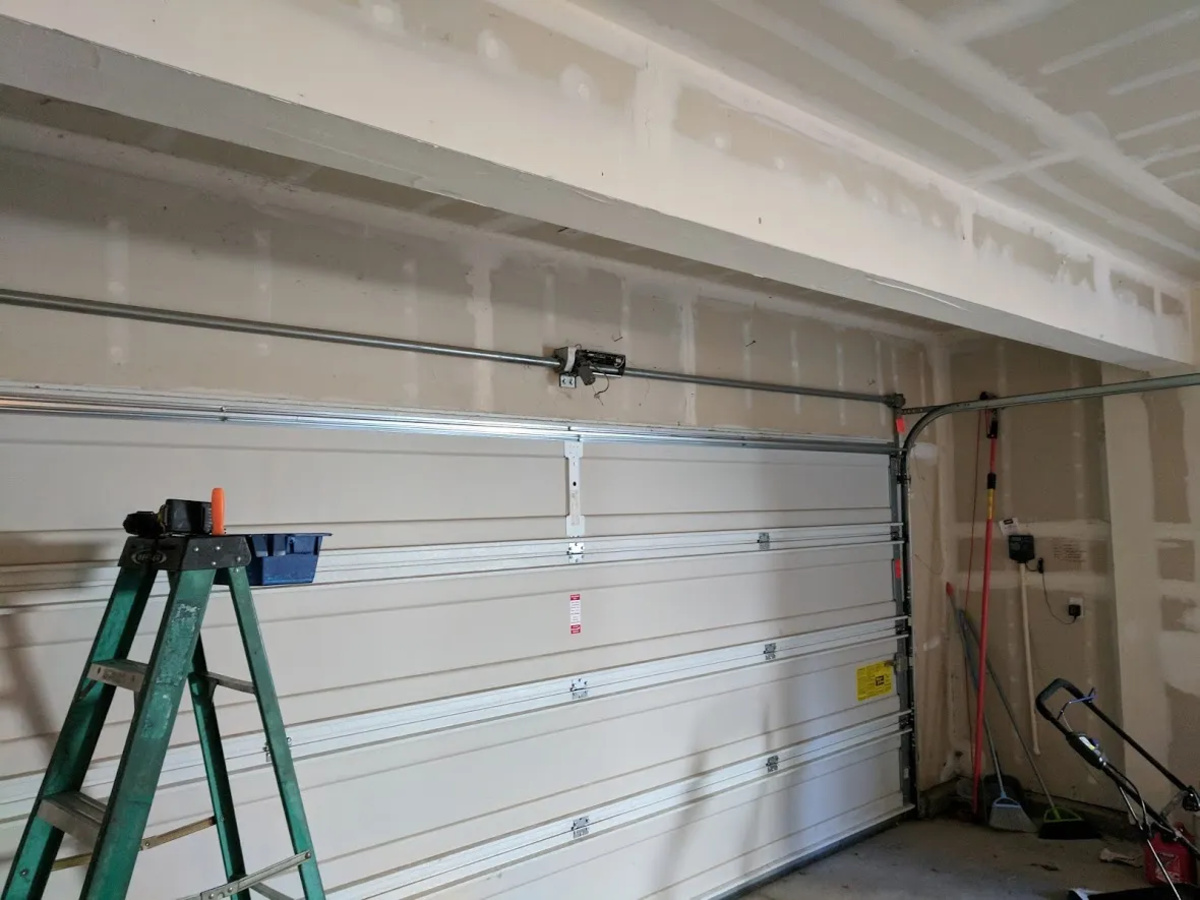
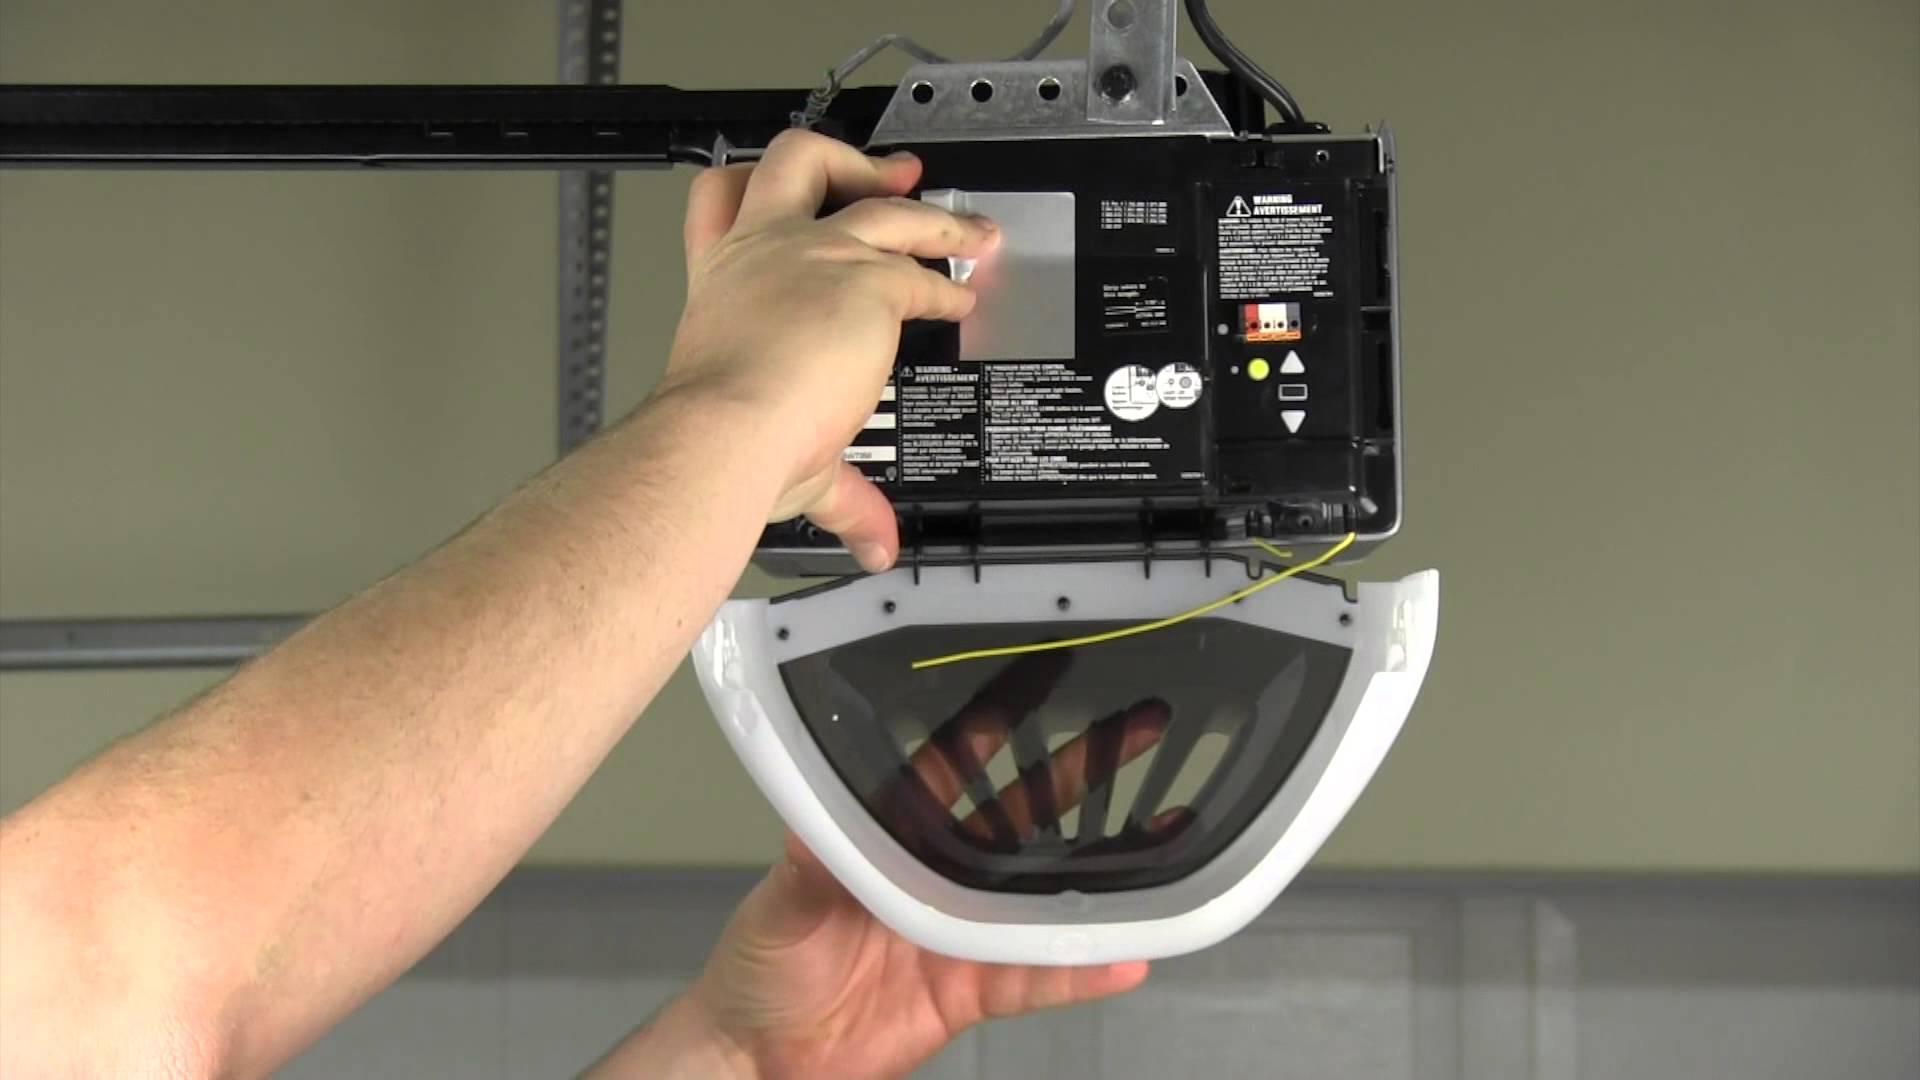
- Mount the Opener:
- Position the Opener: Mount the opener to the ceiling, following the manufacturer’s instructions. Ensure it is securely fastened and level.
- Install the Garage Door Arm: Attach the garage door arm to the opener trolley, making sure it is properly aligned with the door and ready for operation.
- Connect the Opener to the Garage Door:
- Attach the Opener Bracket: Install the opener bracket to the top section of the garage door. Ensure it is securely fastened and aligned.
- Connect the Garage Door Arm: Connect the garage door arm to the opener bracket. Adjust the length and positioning as needed to ensure proper operation.
- Configure and Test:
- Set the Opener Limits: Follow the manufacturer’s instructions to set the opener limits, which control the open and close positions of the garage door. This ensures that the door opens and closes fully without causing damage.
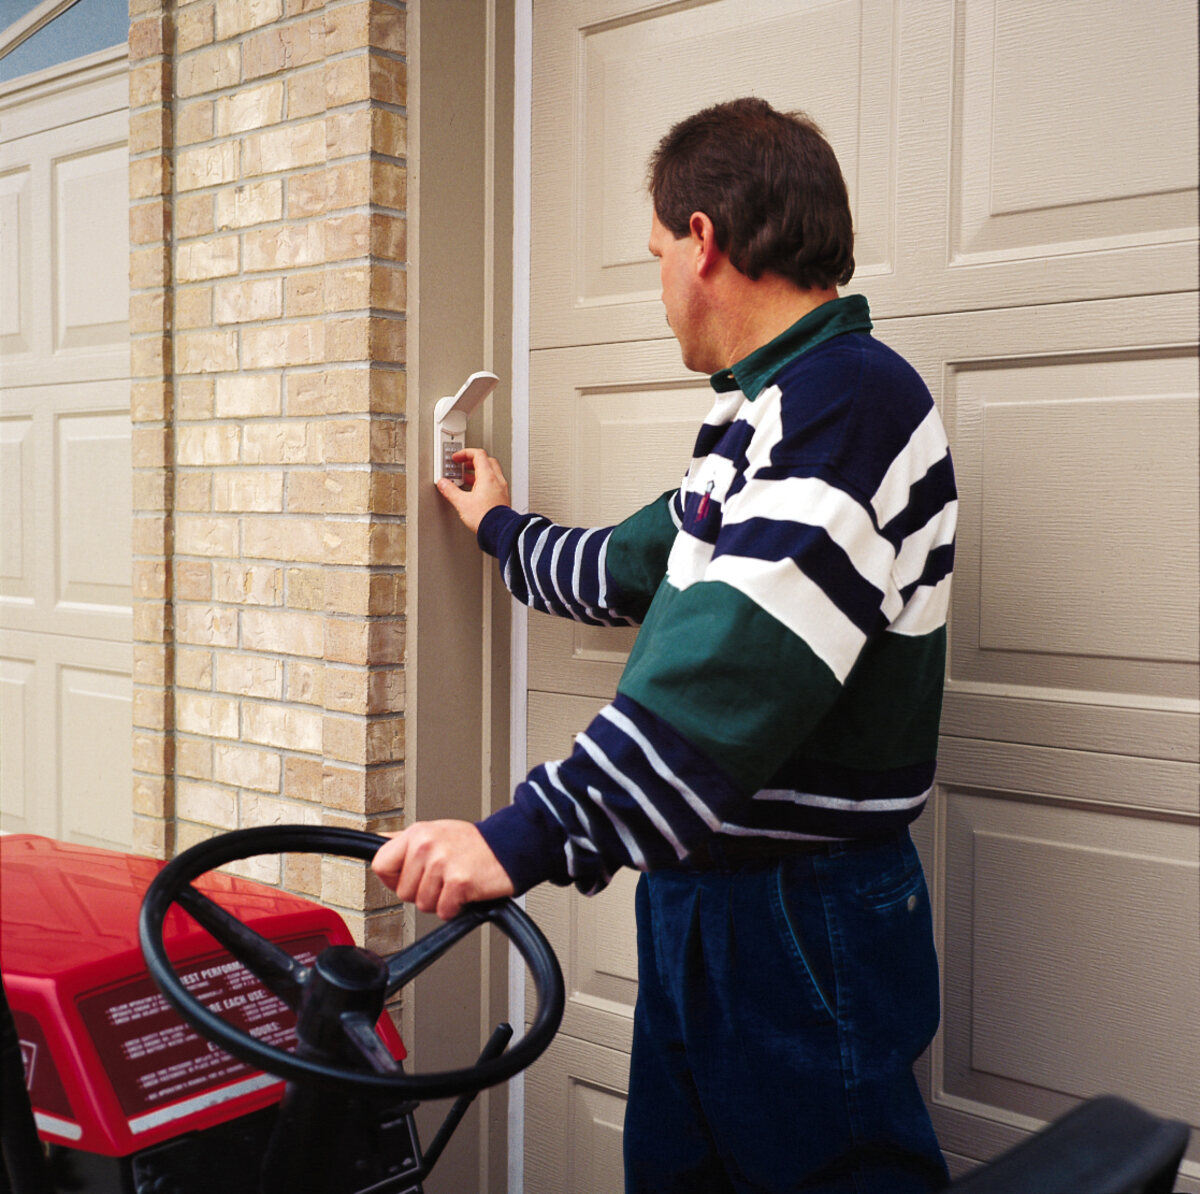
- Program the Remote Control: Program the remote control(s) according to the manufacturer’s instructions. Test them to ensure they operate the garage door smoothly from a distance.
- Test the Opener: Test the opener by opening and closing the garage door using the remote control and/or the wireless wall console. Ensure the door operates smoothly and without any issues.
Installing a garage door opener can greatly enhance the convenience and functionality of your Clopay garage door. However, if you are unsure about any aspect of this step or encounter any difficulties, it is recommended to seek professional assistance.
In the final step, we’ll cover testing and adjusting the installed garage door to ensure optimal performance. Stay tuned!
Step 8: Test and Adjust
Once you have completed the installation of your Clopay garage door and any optional components, it’s important to thoroughly test and make any necessary adjustments to ensure optimal performance. Follow these steps to test and adjust your installed garage door:
- Test the Opening and Closing: Use the remote control and/or the wireless wall console to test the garage door’s opening and closing. Verify that it moves smoothly along the tracks, without any jerking or binding. Pay attention to any unusual noises or obstacles in the door’s path.
- Check the Balance: Disconnect the garage door opener by pulling the emergency release handle. Attempt to manually lift the garage door up to its halfway position. If the door stays in place, it is properly balanced. If it doesn’t stay in place or feels too heavy to lift, the springs may need adjustment. Consult the manufacturer’s instructions or a professional to make necessary adjustments.
- Inspect the Seals and Weatherstripping: Examine the bottom seal and weatherstripping to ensure they are properly attached and effectively seal the bottom edge of the garage door. Replace any damaged or worn-out seals to prevent drafts and improve energy efficiency.
- Check the Safety Features: Test the safety features of your garage door opener, including the auto-reverse function. Place a small object, such as a block of wood, in the path of the closing door. The door should reverse immediately upon contact with the object. If it doesn’t, consult the opener’s manual for instructions on adjusting the sensitivity or seek professional assistance.
- Inspect and Tighten Hardware: Inspect all the hardware, including the tracks, hinges, brackets, and fasteners. Ensure they are securely fastened and tightened. Loose or misaligned hardware can hinder the smooth operation of the door and may require adjustments.
- Check the Opener Programming: Review the programming settings of your garage door opener, such as the open and close limits, force settings, and any additional features you have set. Make any necessary adjustments based on the manufacturer’s instructions and your specific needs.
- Test the Remote Controls: Test all the remote controls and wireless keypads to ensure they are functioning properly. Replace the batteries if needed and reprogram them according to the manufacturer’s instructions.
- Perform Regular Maintenance: To keep your garage door in optimal condition, establish a regular maintenance routine. This may include lubricating moving parts, checking the condition of cables and springs, and inspecting the overall operation of the door. Refer to the manufacturer’s recommendations for specific maintenance guidelines.
By thoroughly testing and making necessary adjustments, you can ensure that your Clopay garage door operates smoothly, efficiently, and safely. Regular maintenance and periodic inspections will help prolong the lifespan of your garage door and prevent potential issues from arising.
Congratulations on successfully completing the installation and testing of your Clopay garage door! Enjoy the improved functionality, aesthetics, and convenience it brings to your home.
Conclusion
Installing a Clopay garage door is a worthwhile investment that enhances both the functionality and aesthetics of your home. By following the step-by-step installation guide provided in this article, you can successfully install your new garage door and reap the benefits it offers.
The process begins with measuring and preparing the area, gathering the necessary tools and materials, and removing the old garage door. Then, you progress to installing the tracks and hardware, attaching the garage door sections, and connecting the springs and cables. You also have the option to install a garage door opener for added convenience.
Once the installation is complete, it’s crucial to thoroughly test and make any necessary adjustments. This includes testing the door’s opening and closing, ensuring proper balance, inspecting seals and weatherstripping, checking safety features, and tightening hardware. Regular maintenance and periodic inspections will help keep your garage door in optimal condition for years to come.
Remember to consult the manufacturer’s instructions specific to your Clopay garage door model and reach out to professionals if you encounter any challenges or uncertainties during the installation process.
Enjoy the enhanced functionality, improved aesthetics, and convenience that your new Clopay garage door brings to your home. A well-installed and maintained garage door not only adds value to your property but also provides security and peace of mind. You can now take pride in the successful installation of your Clopay garage door!
Frequently Asked Questions about How To Install A Clopay Garage Door
Was this page helpful?
At Storables.com, we guarantee accurate and reliable information. Our content, validated by Expert Board Contributors, is crafted following stringent Editorial Policies. We're committed to providing you with well-researched, expert-backed insights for all your informational needs.


0 thoughts on “How To Install A Clopay Garage Door”