Articles
How To Install Fence Gate
Modified: October 18, 2024
Learn the step-by-step process of installing a fence gate with our comprehensive articles. Enhance your DIY skills and create a secure and stylish entryway for your property.
(Many of the links in this article redirect to a specific reviewed product. Your purchase of these products through affiliate links helps to generate commission for Storables.com, at no extra cost. Learn more)
Introduction
Welcome to this comprehensive guide on how to install a fence gate. Whether you’re looking to secure your property, add some curb appeal, or create a safe space for your pets and children, installing a fence gate is an essential part of the process. A well-installed fence gate not only serves a functional purpose but also adds aesthetic value to your property.
Before you begin the installation process, it’s crucial to have all the necessary tools and materials on hand. This will help ensure a smooth and efficient installation process. Additionally, it’s important to measure and mark the placement of the gate correctly to prevent any miscalculations.
In this step-by-step guide, we will walk you through the process of installing a fence gate from start to finish. We will cover essential steps like digging the post holes, setting the fence posts, attaching the gate hinges, and hanging the gate. By following these instructions, you’ll be able to install your fence gate with confidence and precision.
Remember, safety should always be a priority when undertaking any type of home improvement project. It’s essential to wear appropriate protective gear such as gloves and safety goggles throughout the installation process. Additionally, be mindful of any underground utility lines and use caution when digging the post holes.
Now that we’ve covered the basics, let’s dive into the first step: preparing the tools and materials needed for this project.
Key Takeaways:
- Proper preparation, precise measurements, and secure installation are essential for successfully installing a fence gate. Following each step diligently ensures a functional and visually appealing addition to your property.
- Regular maintenance and attention to finishing touches, such as protective coatings and decorative elements, contribute to the longevity and aesthetic appeal of your newly installed fence gate.
Read more: How Much For A Fence Gate
Step 1: Prepare the Tools and Materials
Before you can start installing your fence gate, it’s important to gather all the necessary tools and materials. Having everything readily available will save you time and frustration during the installation process. Here’s a list of the essential items you’ll need:
- Fence gate kit or gate materials: This includes the gate frame, gate hardware, gate hinges, latch, and any additional accessories.
- Tape measure: This will help you accurately measure the placement of the gate.
- Level: A level tool is crucial for ensuring that the gate is properly aligned and plumb.
- Post hole digger: This tool is necessary for digging the post holes for the gate posts.
- Shovel: You’ll need a shovel to remove any excess soil and debris from the post holes.
- Concrete mix: This is required to secure the fence posts in the ground.
- Drill: A drill will be needed to attach the gate hinges and latch to the fence posts.
- Screwdriver or wrench: Depending on the type of hardware used, you’ll need a screwdriver or wrench to tighten screws and bolts.
- Safety gear: Don’t forget to wear safety goggles and gloves to protect yourself during the installation process.
Once you’ve gathered all the necessary tools and materials, double-check that you have everything before moving on to the next step. This will help prevent any delays or interruptions during the installation process.
It’s also worth noting that the specific tools and materials you’ll need may vary depending on the type of fence gate you’re installing. Whether you’re using a pre-made gate kit or building a custom gate, be sure to refer to the manufacturer’s instructions for any additional tools or materials that may be required.
With your tools and materials prepared, you’re ready to move on to the next step: measuring and marking the placement of the gate.
Step 2: Measure and Mark the Placement
Once you have all the necessary tools and materials ready, it’s time to measure and mark the placement of your fence gate. This step is crucial as it ensures that your gate is placed in the correct location and aligns with the rest of your fence. Follow these steps to accurately measure and mark the placement:
- Start by determining where you want your fence gate to be located. Consider factors such as ease of access, functionality, and aesthetics.
- Using a tape measure, measure the distance between the two existing fence posts or the desired distance if you’re installing a standalone gate. Ensure that the measurements are accurate and level.
- Mark the placement of the gate posts by making small indentations in the ground with a pointed object or by using marking spray paint. These marks will serve as a reference when digging the post holes.
- Next, measure and mark the height of the gate on the fence posts. Typically, a gate should be a few inches shorter than the overall fence height to allow for clearance when opening and closing.
Take your time during this step to ensure accuracy. Remember, precise measurements and markings will result in a correctly positioned gate. It’s also important to consider any local building codes or regulations regarding fence gate placement and height. Familiarize yourself with any guidelines applicable to your area to avoid any potential issues down the line.
Once you have measured and marked the placement of your fence gate, step back and evaluate the positioning. Make any necessary adjustments to ensure that the gate is aligned with the rest of your fence and looks visually appealing.
Now that you’ve measured and marked the placement of your fence gate, it’s time to move on to the next step: digging the post holes.
Step 3: Dig the Post Holes
With the measurements and markings in place, it’s time to dig the post holes for your fence gate. The post holes will provide a stable foundation for your gate posts and ensure that the gate remains securely in place. Follow these steps to dig the post holes:
- Using a post hole digger, start digging at the marked placement of the first gate post. The size of the post hole will depend on the size of your gate posts, but generally, a diameter of 8 inches is recommended.
- Dig the hole to a depth that allows for at least one-third of the gate post to be buried in the ground. This will provide sufficient stability for the gate.
- Continue digging the post hole following the same depth and diameter guidelines for the other gate post. Ensure that the distance between the two post holes matches the measurements taken in the previous step.
- Once the post holes are dug, remove any excess soil and debris from the holes using a shovel or the post hole digger. This will ensure a clean and level surface for the gate posts to be installed.
It’s important to note that the depth and diameter of the post holes may vary depending on the specific requirements of your gate and the type of soil in your area. Be sure to consult the manufacturer’s instructions for any specific guidelines relating to post hole dimensions.
While digging the post holes, it’s important to be cautious of any underground utility lines. Before you start digging, contact your local utility company to mark the location of any buried lines. This will help prevent any damage or accidents during the digging process.
Once the post holes are dug and cleared, you’re ready to move on to the next step: setting the fence posts.
Step 4: Set the Fence Posts
Now that the post holes are dug, it’s time to set the fence posts. This step is crucial as it provides a solid foundation for your fence gate and ensures its stability and longevity. Follow these steps to set the fence posts:
- Start by placing the first gate post into its corresponding post hole. Make sure it is centered and level.
- Use a level to ensure that the post is perfectly vertical. Adjust the position as needed by adding or removing soil underneath the post.
- Once the post is level, pour a bag of fast-setting concrete mix into the hole around the post. Follow the manufacturer’s instructions for the correct ratio of water to concrete mix.
- Slowly pour water into the hole, allowing the concrete mix to absorb the water and set. Use a stick or rod to stir the concrete mix and remove any air pockets.
- Repeat the above steps for the second gate post, ensuring that it is aligned and level with the first post.
- Allow the concrete to dry and cure according to the manufacturer’s instructions. This typically takes around 24 to 48 hours.
It’s important to note that if you’re using wooden gate posts, you may want to consider treating the portion that will be buried in the ground with a wood preservative to protect it from moisture and decay.
While the concrete is drying, avoid putting any weight or pressure on the gate posts to ensure proper setting. Additionally, if necessary, use temporary braces or supports to keep the posts in place during the drying process.
Once the concrete has fully dried and cured, the fence posts will be securely set. This paves the way for the next step: attaching the gate hinges.
Read more: How Wide Is A Fence Gate
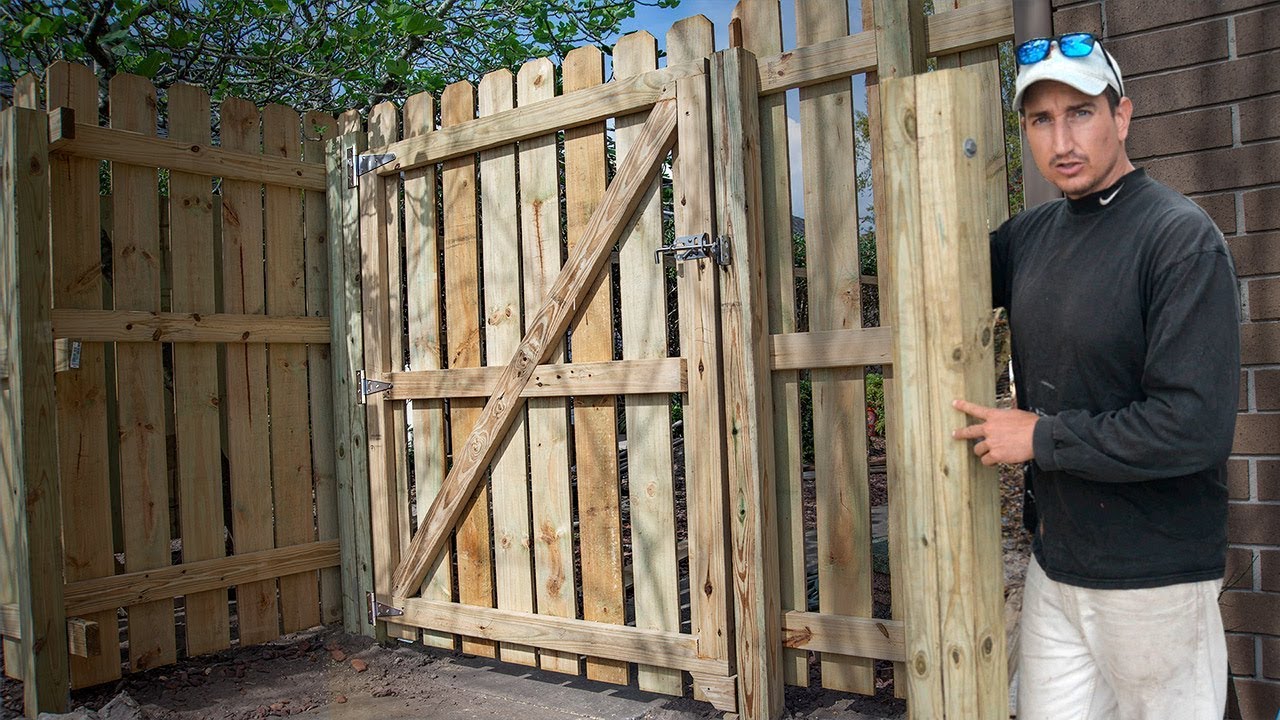
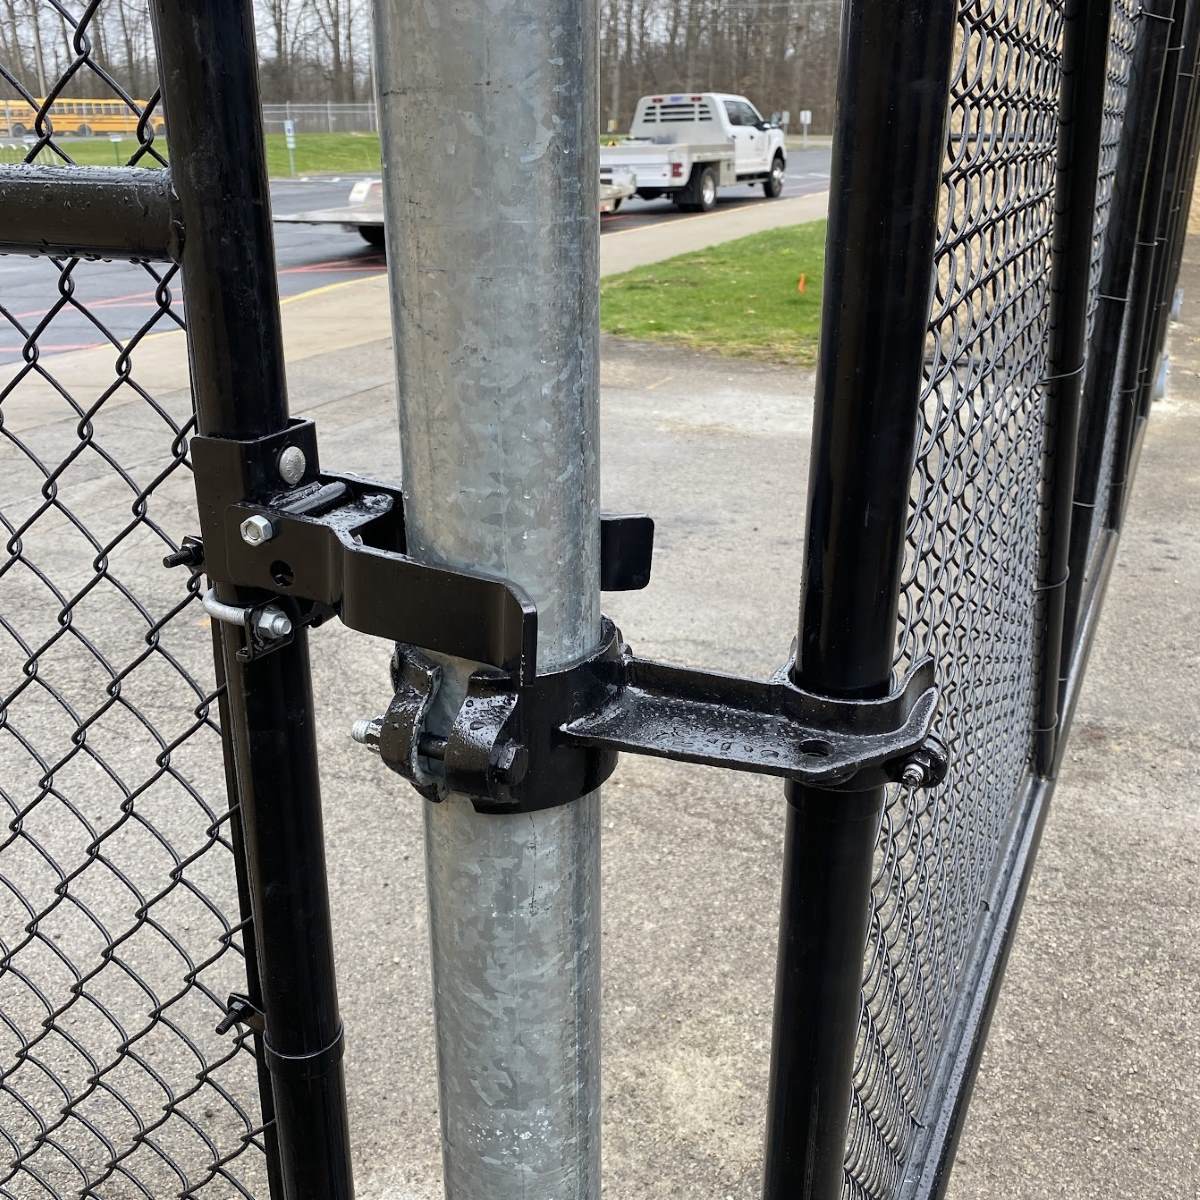
Step 5: Attach the Gate Hinges
With the fence posts securely set, it’s time to attach the gate hinges. The hinges are an essential component of the fence gate, allowing it to swing open and closed. Follow these steps to properly attach the gate hinges:
- Start by positioning the gate on its side, ensuring that the bottom of the gate is facing up.
- Using a drill, attach the gate hinges to the gate frame. The number of hinges required will depend on the size and weight of the gate, but typically two or three hinges are sufficient.
- Align the hinges on the gate with the corresponding hinges on the gate posts. Make sure they are evenly spaced and level.
- Secure the hinges to the gate posts using screws or bolts, depending on the type of hardware provided.
- Test the gate by gently swinging it open and closed to ensure smooth operation.
It’s important to ensure that the gate hinges are securely attached to both the gate and the gate posts. This will prevent any sagging or misalignment and ensure that the gate functions properly.
When attaching the hinges, it’s recommended to have someone assist you to hold the gate and provide additional stability. This will make the installation process easier and safer.
Once the gate hinges are securely attached, it’s time to move on to the next step: installing the gate frame.
When installing a fence gate, make sure to measure and mark the proper placement for the gate posts. Use a level to ensure the posts are plumb before securing them in place. This will help ensure that the gate operates smoothly and securely.
Step 6: Install the Gate Frame
Now that the gate hinges are securely attached, it’s time to install the gate frame. The gate frame provides support and structure to the gate itself. Follow these steps to correctly install the gate frame:
- Start by positioning the gate frame between the gate posts. Ensure that the frame is level and centered.
- Use a level to ensure that the gate frame is perfectly vertical. Adjust the position as needed by adding or removing soil underneath the frame.
- Once the frame is level, secure it to the gate posts using screws or nails, depending on the type of hardware provided.
- Check that the gate frame opens and closes smoothly and that it is aligned with the hinges.
- Make any necessary adjustments to ensure that the gate frame is stable and aligned with the gate posts.
When installing the gate frame, it’s important to ensure that it is securely fixed to both the gate posts and the gate itself. This will provide stability and prevent any sagging or misalignment over time.
During this step, it’s recommended to have someone assist you to hold the gate frame in place while securing it. This will make the installation process easier and more accurate.
Once the gate frame is properly installed, it’s time to move on to the next step: hanging the gate.
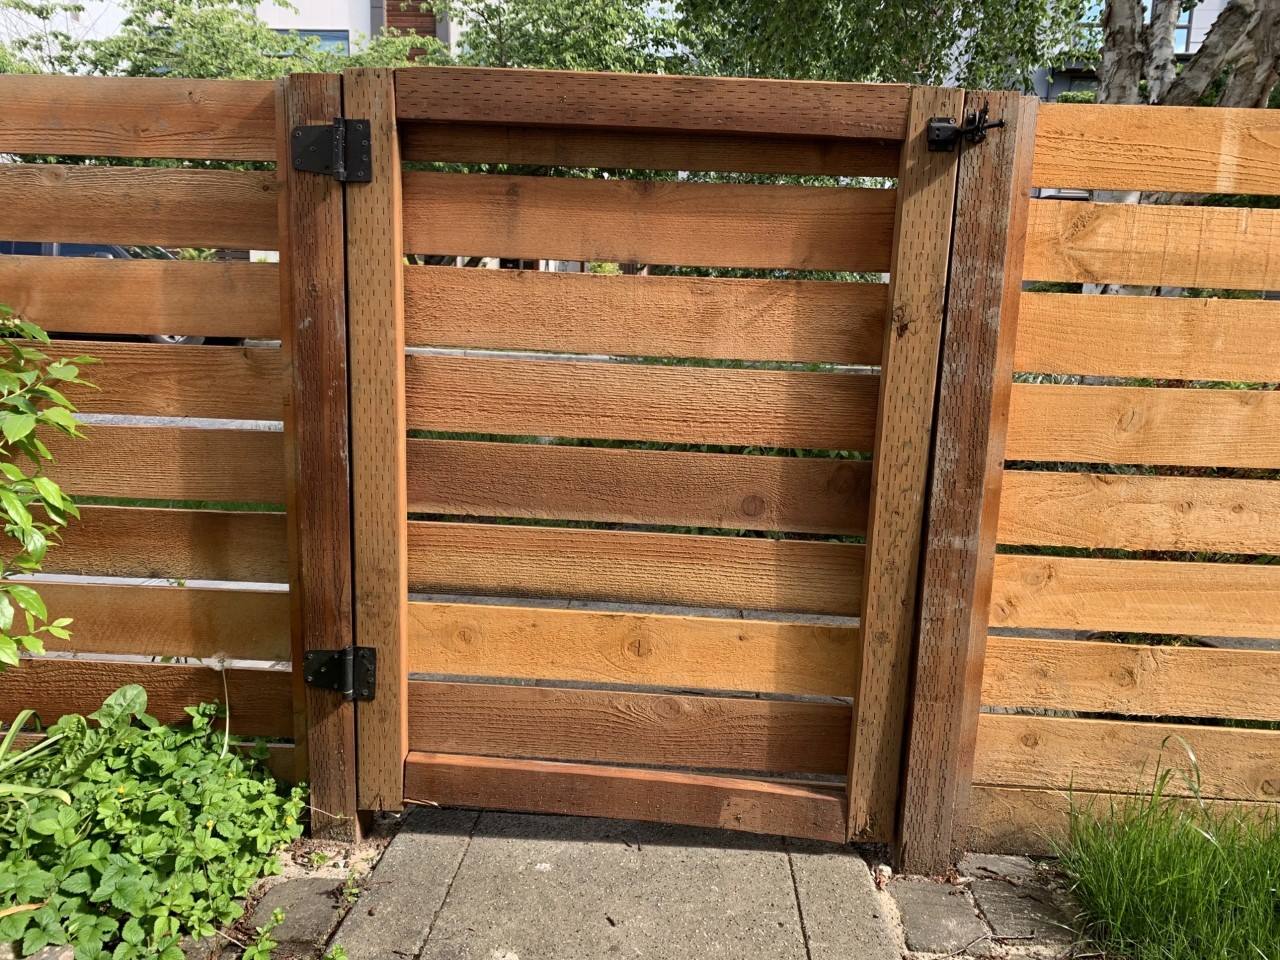
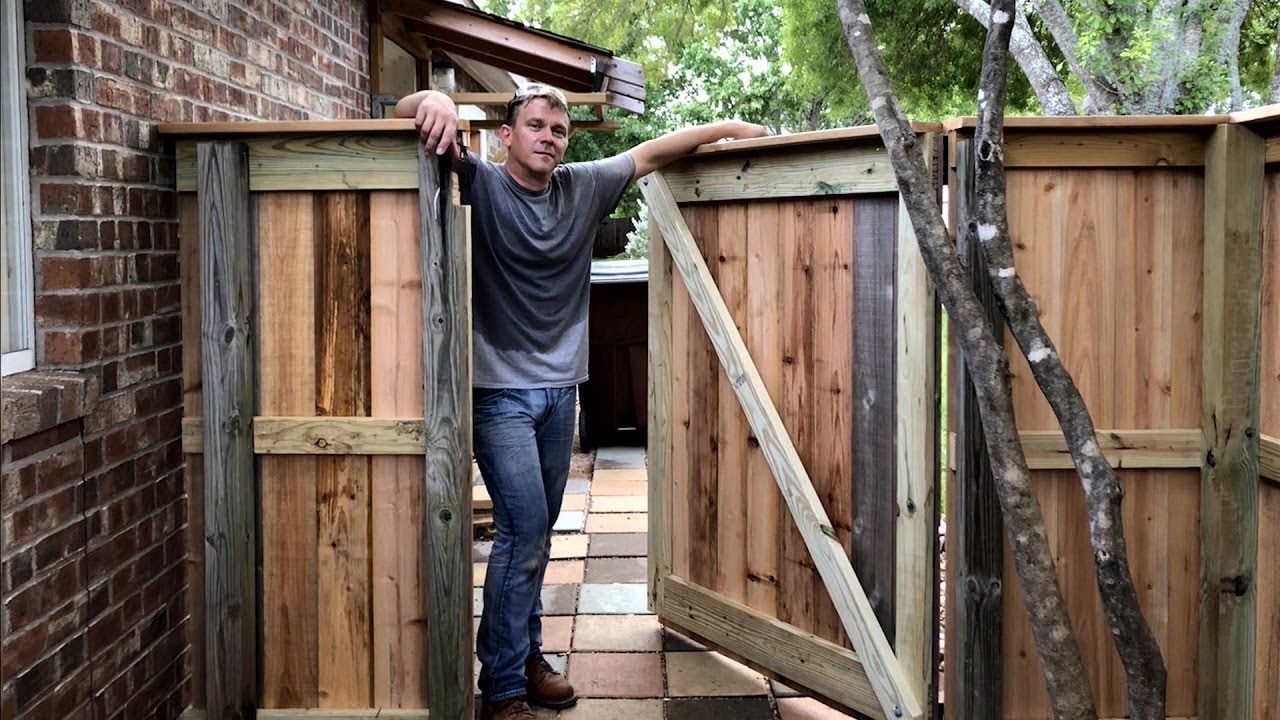
Step 7: Hang the Gate
With the gate frame securely installed, it’s time to hang the gate itself. Hanging the gate involves attaching the gate to the hinges already installed on the gate posts. Follow these steps to properly hang the gate:
- Start by positioning the gate between the gate posts, aligning the hinges on the gate with the hinges on the gate posts.
- With the assistance of another person, carefully lift the gate and align the hinges, making sure they are evenly spaced and level.
- Slide the hinge pins into place, securing the gate to the hinges. Ensure that the hinges are fully engaged with the pins for a secure connection.
- Test the gate by gently swinging it open and closed to ensure smooth operation and proper alignment.
When hanging the gate, it’s important to ensure that it is properly aligned with the gate posts and that the hinges are securely holding the gate in place. This will ensure that the gate functions properly and remains stable over time.
During this step, having someone assist you is crucial, as lifting and aligning the gate can be challenging and require extra hands.
Once the gate is hung and functioning correctly, it’s time to move on to the next step: securing the gate.
Step 8: Secure the Gate
After hanging the gate, it’s important to secure it to ensure that it remains firmly in place and provides the necessary security. Follow these steps to properly secure the gate:
- Start by checking the clearance between the gate and the ground. If needed, adjust the gate hinges or gate frame to ensure that the gate is level and properly aligned.
- Secure the gate latch or lock to the gate and gate post, following the manufacturer’s instructions. This will keep the gate closed and prevent unauthorized access.
- Test the latch or lock to ensure that it engages and disengages smoothly, providing a secure closure.
- Inspect the gate for any loose screws, bolts, or hinges. Tighten any loose hardware to ensure the gate remains stable and secure.
- Consider adding additional security measures such as padlocks or gate stoppers, depending on your specific needs.
By properly securing the gate, you ensure that it functions as intended and provides the necessary safety and security. Regularly inspect the gate and its hardware to identify any signs of wear or damage, and promptly make any necessary repairs to maintain its integrity.
Keep in mind that the specific method of securing the gate may vary depending on the type and design of the gate you have installed. Always refer to the manufacturer’s instructions for the recommended method of securing the gate and any additional security features.
Once the gate is securely fastened and properly locked, it’s time to move on to the final step: adding the finishing touches.
Read more: How To Make A Fence Panel Into A Gate
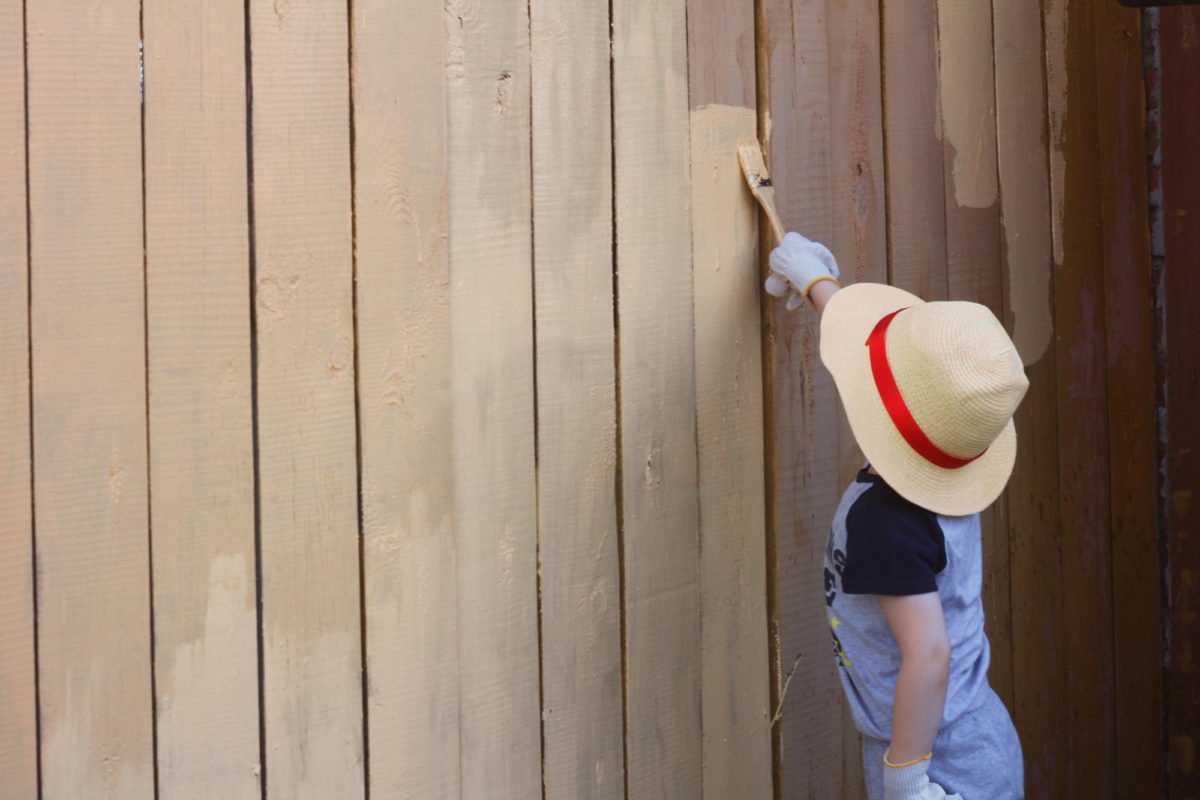
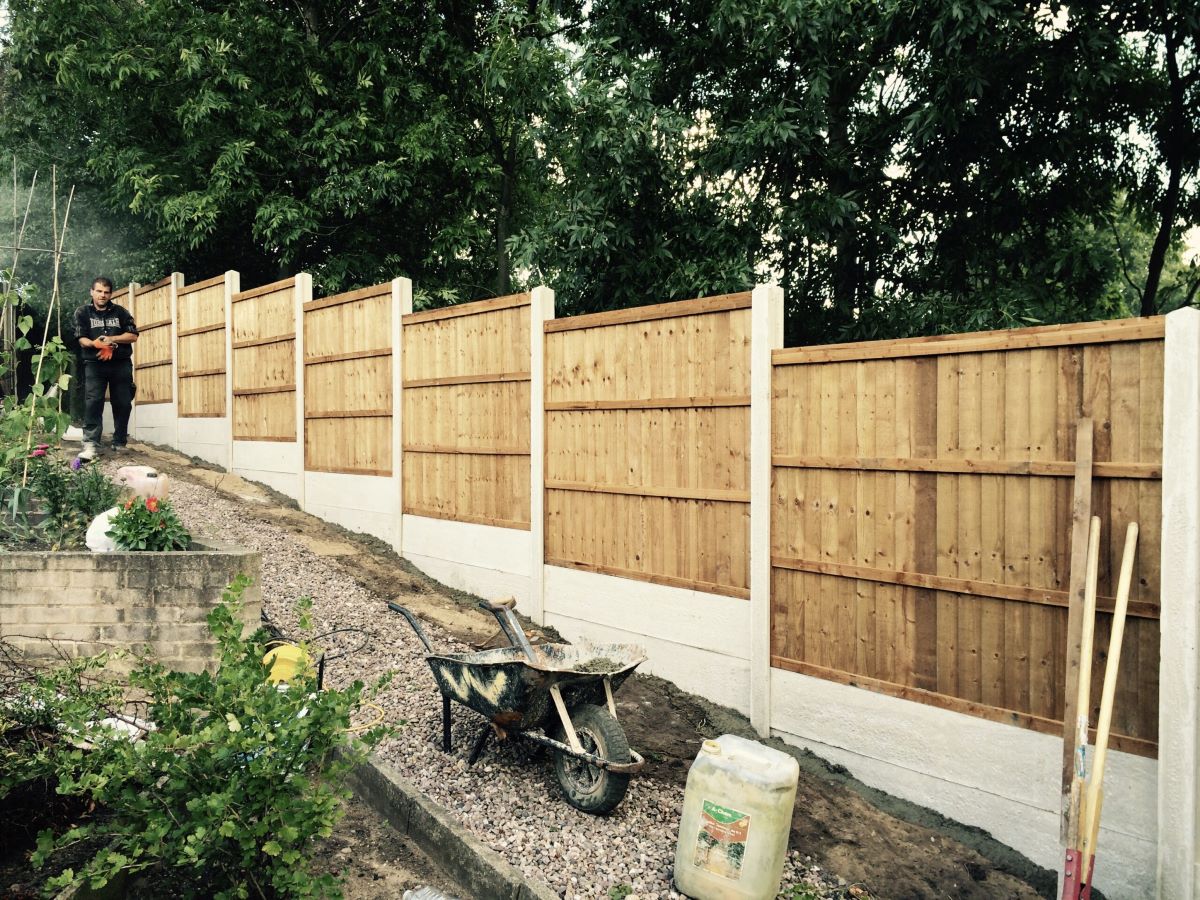
Step 9: Finishing Touches
Now that the gate is securely installed and properly secured, it’s time to add the finishing touches to complete the installation. These finishing touches will not only enhance the overall appearance of the gate but also contribute to its functionality and longevity. Follow these steps to add the final touches:
- Inspect the gate and fence for any sharp edges or protruding nails. Use a file or sandpaper to smooth down any rough areas and ensure a safe and polished finish.
- If you have a wooden gate, consider applying a coat of paint, stain, or sealant to protect it from the elements and enhance its appearance. Follow the manufacturer’s instructions for the proper application technique and drying time.
- Clear any debris, dirt, or vegetation around the gate area to maintain a clean and well-maintained appearance.
- Add decorative elements such as finials, caps, or trim to enhance the visual appeal of the gate. These embellishments can add a touch of elegance and personal style to your fence gate.
- Consider installing a gate stop or bumper to prevent the gate from swinging too far open or closed. This will help protect the gate and its hinges from damage.
By paying attention to these finishing touches, you can elevate the overall look and functionality of your fence gate. Regular maintenance, such as inspecting for any signs of wear or damage and making repairs as needed, will help extend the lifespan of your gate and keep it in optimal condition.
With the finishing touches complete, your fence gate installation is now finished. Take a step back and admire your handiwork. A well-installed and properly maintained fence gate not only enhances the security and privacy of your property but also adds a touch of charm and curb appeal.
Congratulations on successfully installing your fence gate!
Conclusion
Installing a fence gate is a rewarding and worthwhile project that adds both functionality and visual appeal to your property. By following the step-by-step guide outlined in this article, you have learned how to install a fence gate from start to finish. From preparing the tools and materials to hanging and securing the gate, each step is crucial in ensuring a successful installation.
Remember, safety should always be a priority during the installation process. Wear appropriate protective gear, be cautious of underground utility lines, and follow all local building codes and regulations. Taking these precautions will help you complete the project safely and without any setbacks.
By properly measuring and marking the placement, digging the post holes, setting the fence posts, attaching the gate hinges, installing the gate frame, hanging the gate, securing the gate, and adding the finishing touches, you have created a functional and visually appealing fence gate.
Regular maintenance and inspection of your gate will help ensure its durability and functionality over time. Keep an eye out for any signs of wear or damage, and make necessary repairs promptly to maintain the gate’s integrity.
Now that you have successfully installed your fence gate, take a moment to appreciate the improved security and aesthetic value it brings to your property. Whether it’s for maintaining privacy, keeping pets and children safe, or enhancing the overall appeal of your home, your fence gate is sure to be a valuable addition.
Enjoy the fruits of your labor and embrace the enhanced functionality and beauty of your newly installed fence gate!
Frequently Asked Questions about How To Install Fence Gate
Was this page helpful?
At Storables.com, we guarantee accurate and reliable information. Our content, validated by Expert Board Contributors, is crafted following stringent Editorial Policies. We're committed to providing you with well-researched, expert-backed insights for all your informational needs.


0 thoughts on “How To Install Fence Gate”