Articles
How To Hang Model Airplanes From The Ceiling
Modified: October 19, 2024
Learn how to hang model airplanes from your ceiling with these informative articles. Discover tips, techniques, and step-by-step instructions to showcase your collection.
(Many of the links in this article redirect to a specific reviewed product. Your purchase of these products through affiliate links helps to generate commission for Storables.com, at no extra cost. Learn more)
Introduction
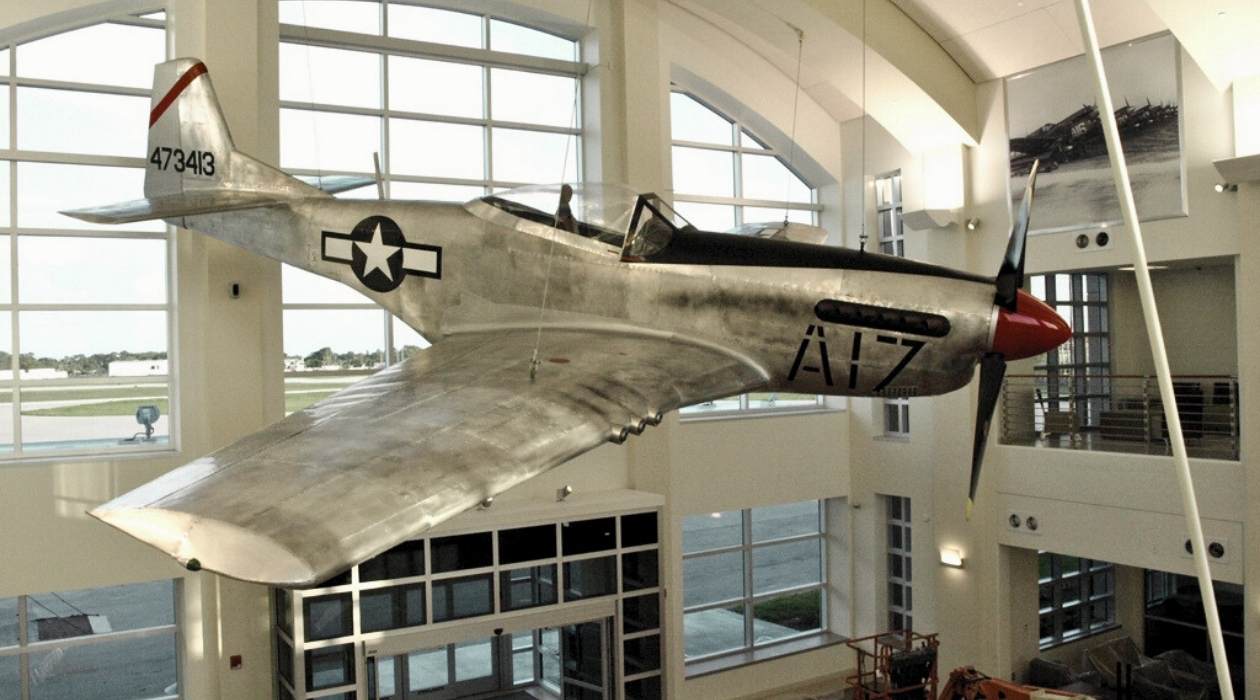
Do you have a collection of model airplanes that you want to showcase in your home or office? Hanging model airplanes from the ceiling can be a great way to display your collection and create a unique and eye-catching decor. Not only will it make your space more visually appealing, but it will also protect your valuable models from being accidentally damaged.
In this article, we will guide you through the process of hanging model airplanes from the ceiling. We will discuss the materials you’ll need, the step-by-step instructions, and provide some tips and tricks to ensure a successful hanging display.
Before we dive into the steps, it’s essential to note that the specific hanging method may vary depending on the weight and size of your model airplanes, as well as the type of ceiling you have. It’s always a good idea to consult the manufacturer’s instructions or seek professional advice if you are unsure about the suitability of your hanging method.
Now, let’s gather the materials needed for this project and get started on creating a stunning display for your model airplanes!
Key Takeaways:
- Showcase your model airplane collection with a stunning and secure ceiling display using the right hanging method, proper preparation, and careful adjustments for a visually appealing and captivating decor.
- Create a focal point in your space by hanging model airplanes from the ceiling, adding a unique touch that captivates visitors and brings your passion for aviation to life.
Read more: How To Hang Unistrut From The Ceiling
Materials Needed
Before you begin, gather the following materials:
- Ceiling hooks: Choose sturdy hooks that can support the weight of your model airplanes. Look for hooks specifically designed for hanging objects from ceilings.
- Drill: You will need a drill to create holes in the ceiling for installing the hooks. Make sure to use a drill bit that matches the size of your ceiling hooks.
- Wall plugs (if necessary): Depending on the type of ceiling material, you may need wall plugs to provide extra support for the hooks. Consult the manufacturer’s instructions to determine if wall plugs are required.
- Screwdriver: A screwdriver will be needed to secure the hooks in place.
- Model airplanes: Of course, you’ll need an impressive collection of model airplanes to hang from the ceiling! Make sure they are clean and in good condition before proceeding.
- Nylon fishing line or thin wire: This will be used to suspend the model airplanes from the ceiling hooks. Choose a material that is strong enough to hold the weight of your models.
- Optional: If you want to add an extra touch to your display, consider purchasing small LED lights or spotlights to illuminate your model airplanes.
Once you have gathered all the necessary materials, you’re ready to move on to the next step: choosing the right hanging method for your model airplanes. Let’s get started!
Step 1: Choosing the Right Hanging Method
When it comes to hanging model airplanes from the ceiling, there are a few different methods you can choose from. The method you select will depend on the weight and size of your models, as well as the type of ceiling you have. Here are a few common hanging methods to consider:
- Direct Ceiling Hooks: This method involves attaching ceiling hooks directly to the ceiling surface. It works well for lightweight models and ceilings made of wood or drywall. Measure and mark the desired hanging locations, drill pilot holes, insert wall plugs (if necessary), and screw in the hooks.
- Hanging Grid: A hanging grid system consists of a series of rails or wires installed across the ceiling, allowing you to easily rearrange and adjust the placement of your model airplanes. This method works well for larger collections or heavier models.
- Suspended Shelf: If you prefer a more unconventional approach, you can create a suspended shelf system using brackets or cables. This method is ideal if you want to display your model airplanes in a staggered or layered arrangement.
Consider the weight and size of your models, as well as the overall space available, to determine the most suitable hanging method for your needs. Additionally, ensure that the chosen method aligns with the aesthetic you want to achieve and complements the decor of your space.
Once you have decided on the hanging method, you are ready to prepare the ceiling for installation. This will involve assessing the ceiling material, checking for any potential obstacles, and ensuring that the installation area is safe and secure. Let’s move on to step 2: preparing the ceiling.
Step 2: Preparing the Ceiling
Before you install the ceiling hooks or any other hanging hardware, it’s essential to prepare the ceiling properly. This step ensures a secure and stable foundation for your model airplanes.
Here’s how to prepare the ceiling:
- Clear the area: Remove any furniture or obstacles that may hinder your access to the ceiling. This will give you plenty of space to work and reduce the risk of accidental damage.
- Inspect the ceiling material: Take a close look at the ceiling material to determine its composition. Common types include drywall, plaster, or wood. Understanding the material will help you choose the appropriate tools and hardware for installation.
- Identify any electrical wires or plumbing: It’s crucial to be aware of the location of electrical wires or plumbing within the ceiling before you begin drilling or installing hooks. Use a stud finder or consult a professional if you are unsure about the presence of hidden wires or pipes.
- Clean the ceiling: Dust and debris can interfere with the installation process and compromise the adherence of the hanging hardware. Use a soft cloth or a vacuum with a brush attachment to clean the area where you plan to install the hooks.
By taking the time to properly prepare the ceiling, you ensure a smooth installation process and minimize the risk of any damage or complications. Once the ceiling is prepped, it’s time to move on to the next step: installing the ceiling hooks. Let’s proceed to step 3 for the detailed instructions.
Step 3: Installing the Ceiling Hooks
With the ceiling prepared, it’s time to install the ceiling hooks. These hooks will serve as the anchor points to hang your model airplanes. Follow these steps to install the hooks securely:
- Measure and mark the hanging locations: Use a measuring tape and pencil to determine the exact spots where you want to hang your model airplanes. Ensure that the measurements are accurate and evenly spaced.
- Drill pilot holes: Using a drill with the appropriate drill bit, create pilot holes at the marked locations. The size of the drill bit should match the diameter of the ceiling hooks.
- Insert wall plugs (if necessary): Depending on the type of ceiling material, you may need to insert wall plugs into the pilot holes for added stability and support. This step is crucial for ceilings made of drywall or any other material that is not strong enough to hold the hooks on its own.
- Screw in the ceiling hooks: Screw the ceiling hooks into the pilot holes or wall plugs. Use a screwdriver to ensure they are tightly secured and flush with the ceiling surface.
Repeat these steps for each hanging location, ensuring that the hooks are aligned and installed at the desired heights and distances. Double-check the stability of the hooks, giving them a gentle tug to make sure they can withstand the weight of your model airplanes.
Once all the hooks are installed, you’re ready to move on to the next step: preparing the model airplanes for hanging. Keep reading to find out how to do it in step 4.
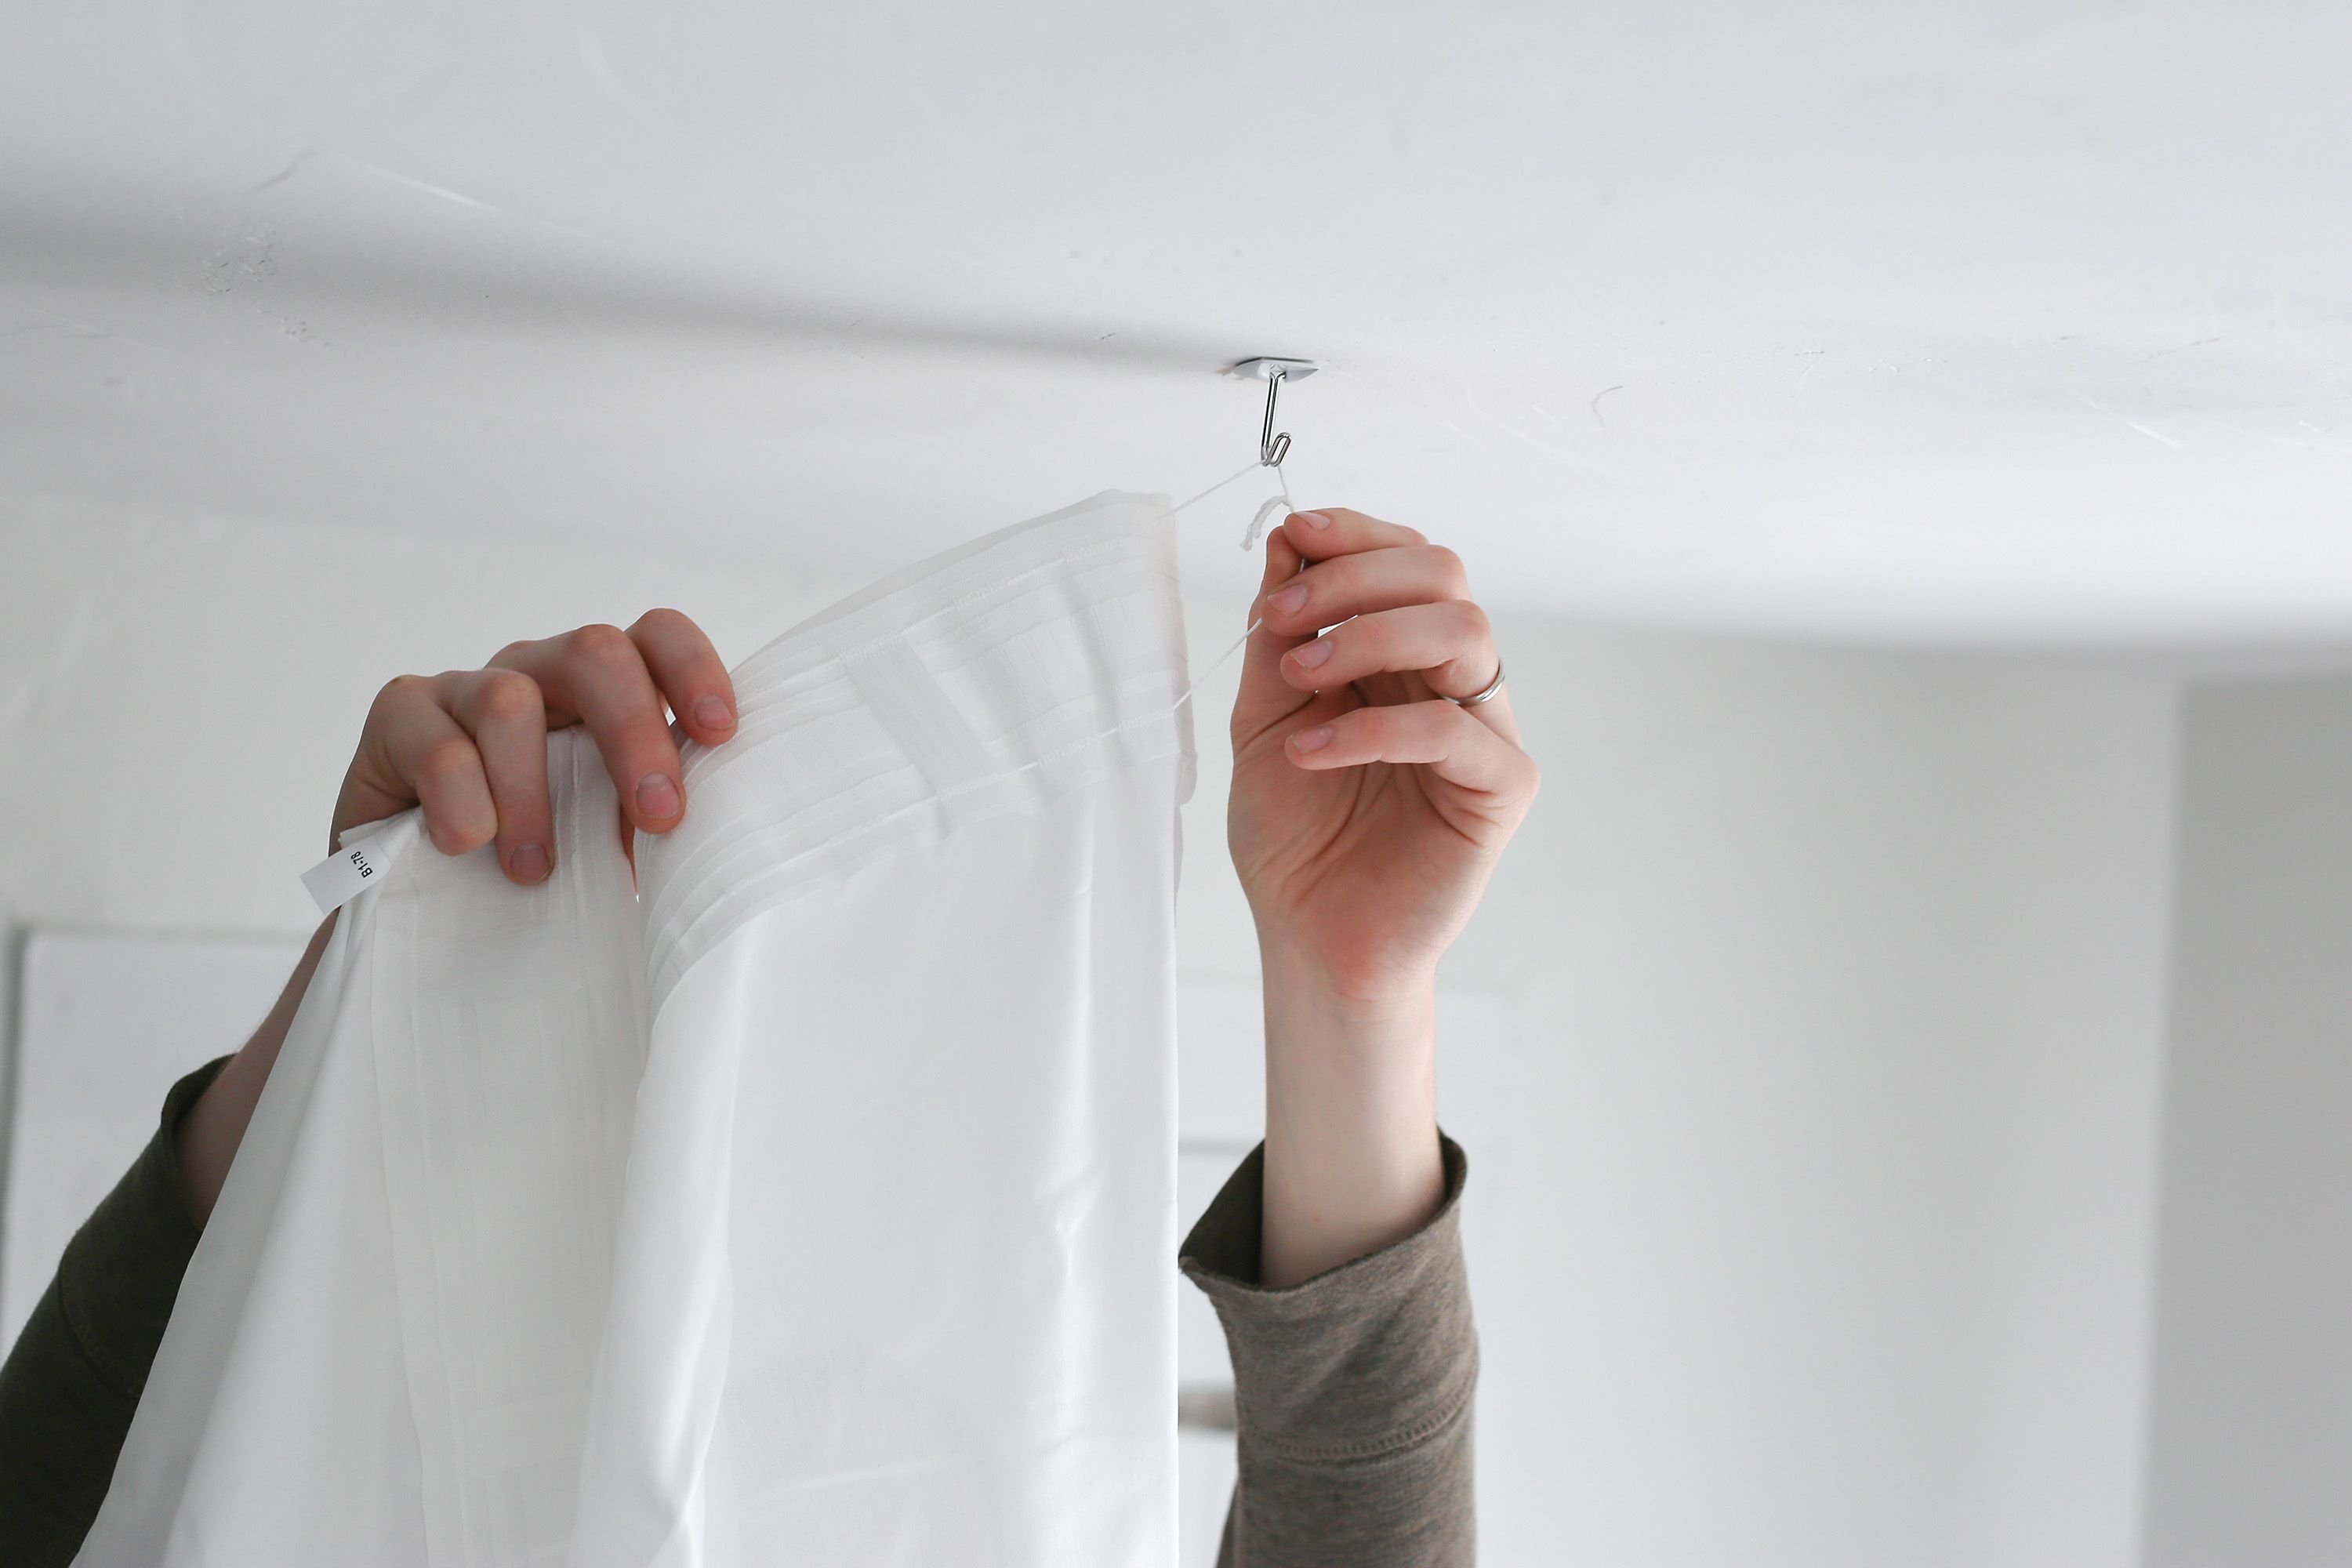
Use clear fishing line to hang model airplanes from the ceiling. It’s strong, nearly invisible, and won’t detract from the appearance of the models.
Read more: How To Hang Surfboard From The Ceiling
Step 4: Preparing the Model Airplanes
Before you hang your model airplanes from the ceiling hooks, it’s important to take the time to properly prepare them. This step ensures that your models are in the best condition for display and minimizes the risk of damage during the hanging process.
- Clean the model airplanes: Dust and debris can accumulate on the surface of your model airplanes over time. Use a soft, lint-free cloth or a small brush to gently remove any dirt or dust. If necessary, you can also use a mild cleaning solution specifically designed for cleaning models.
- Inspect for any loose parts: Give each model airplane a thorough inspection to check for any loose or fragile parts. Pay special attention to wings, propellers, and other delicate details. If you notice any loose parts, use a small amount of glue or adhesive specifically designed for models to secure them in place.
- Consider protective measures: Depending on the location of your display and the level of dust or sunlight in the area, you may want to consider applying a clear coat of varnish or a protective spray to your model airplanes. This will help preserve their appearance and protect them from potential damage.
By taking the time to clean, inspect, and protect your model airplanes, you ensure that they are in optimal condition and ready to be displayed. Now that the models are prepared, it’s time to move on to the exciting part: hanging the model airplanes. Let’s proceed to step 5 for the detailed instructions.
Step 5: Hanging the Model Airplanes
Now that your ceiling hooks are installed and your model airplanes are prepared, it’s time to hang them from the ceiling. Follow these steps to properly hang your model airplanes:
- Cut the nylon fishing line or thin wire: Measure and cut a length of nylon fishing line or thin wire for each model airplane you plan to hang. Make sure the length is sufficient for the desired hanging position.
- Tie the line to the model airplane: Carefully tie one end of the fishing line or wire to a secure and inconspicuous spot on the model airplane. You can tie it around a wing strut, propeller, or any other sturdy part that won’t damage the model. Make sure the knot is tight and secure.
- Attach the other end to the ceiling hook: Bring the other end of the line up to the corresponding ceiling hook. Securely tie or attach the line to the hook, ensuring that the model airplane is level and properly positioned.
- Repeat for the remaining model airplanes: Repeat the process for each model airplane, ensuring that they are evenly spaced and arranged according to your desired display. Take your time to adjust the position and height of each model airplane to achieve the desired aesthetic.
As you hang each model airplane, step back and assess the overall display. Make any necessary adjustments to ensure that the models are aligned and balanced. This will create a visually appealing and harmonious arrangement.
Remember to take your time and handle the models with care during the hanging process. Once all the model airplanes are hanging, move on to the next step to ensure their stability and security.
Step 6: Adjusting and Securing the Hangings
After hanging your model airplanes from the ceiling, it’s important to take a final step to ensure their stability and security. This step involves adjusting the hangings and implementing measures to prevent any accidental falls or damage.
- Check for balance and alignment: Stand back and visually inspect the display of model airplanes. Ensure that they are evenly spaced, aligned, and hanging at the desired heights. Make any necessary adjustments to achieve a balanced and aesthetically pleasing arrangement.
- Secure the hangings: To prevent any accidental falls, secure the hangings in place. You can use small pieces of adhesive putty or clear tape to fasten the fishing line or wire to the ceiling hooks. This will provide an extra layer of security and keep the hangings in place.
- Test the stability: Give each model airplane a gentle shake to ensure that it is securely attached to the ceiling hooks. If you notice any signs of instability or movement, double-check the knots and attachments to ensure they are tight.
- Make adjustments as needed: If you find that any model airplane is not hanging perfectly straight or at the desired angle, make the necessary adjustments to achieve the desired display. This may involve retying the fishing line or wire or adjusting the position of the model airplane on the hook.
By taking these final steps, you can ensure that your model airplanes are securely hung from the ceiling and will remain in place for a long time. Regularly inspect the hangings to ensure their stability and make any necessary adjustments if you notice any signs of movement or loosening.
Congratulations! You have successfully hung your model airplanes from the ceiling, creating a stunning display that showcases your collection. Take a step back and admire your handiwork. Your model airplanes will now be a focal point of your space, captivating visitors and bringing your passion for aviation to life.
Conclusion
Congratulations on successfully hanging your model airplanes from the ceiling! By following the steps outlined in this guide, you have created a captivating display that showcases your collection and adds a unique touch to your space.
Throughout this process, we discussed the materials needed, the steps involved in choosing the right hanging method, preparing the ceiling, installing the hooks, preparing the model airplanes, and finally, hanging and adjusting the hangings. Each step was designed to ensure a secure and visually pleasing display.
Remember to regularly inspect the hangings and make any necessary adjustments to maintain their stability. Additionally, keep in mind that the specific hanging method may vary depending on the weight and size of your model airplanes, as well as the type of ceiling you have. Always consult the manufacturer’s instructions or seek professional advice if you have any doubts or concerns.
Your model airplanes will now serve as a centerpiece, attracting attention and sparking conversations. Whether you’re a passionate aviation enthusiast or simply love collecting model airplanes, this hanging display will be a source of pride and admiration.
Enjoy the beauty and fascination of your model airplane collection as it gracefully hangs from the ceiling, creating a delightful and unique ambiance in your home or office space. It’s time to sit back, relax, and relish in the joy that your collection brings.
Thank you for joining us in this journey of hanging model airplanes from the ceiling. Happy displaying!
Frequently Asked Questions about How To Hang Model Airplanes From The Ceiling
Was this page helpful?
At Storables.com, we guarantee accurate and reliable information. Our content, validated by Expert Board Contributors, is crafted following stringent Editorial Policies. We're committed to providing you with well-researched, expert-backed insights for all your informational needs.


0 thoughts on “How To Hang Model Airplanes From The Ceiling”