Articles
How To Hide Pipes Under Floating Vanity
Modified: August 31, 2024
Learn how to hide pipes under a floating vanity with our comprehensive articles. Transform your bathroom into a sleek and modern space.
(Many of the links in this article redirect to a specific reviewed product. Your purchase of these products through affiliate links helps to generate commission for Storables.com, at no extra cost. Learn more)
Introduction
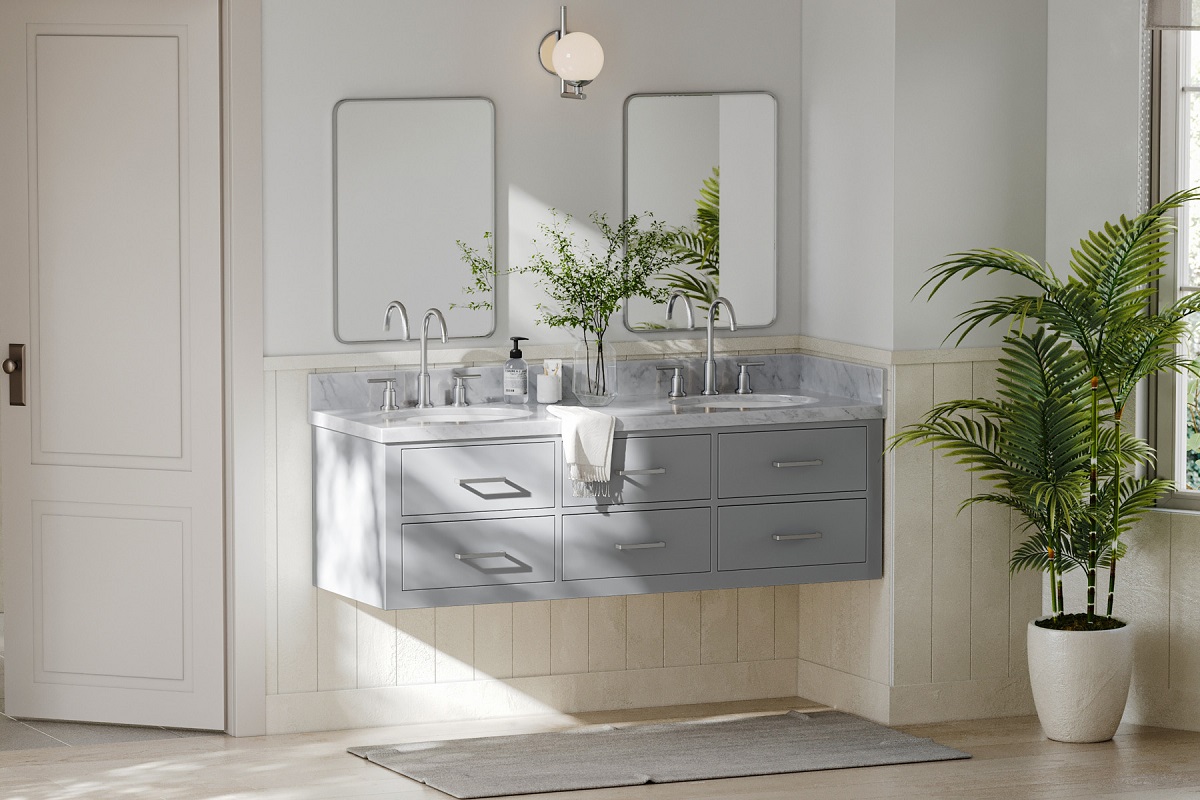
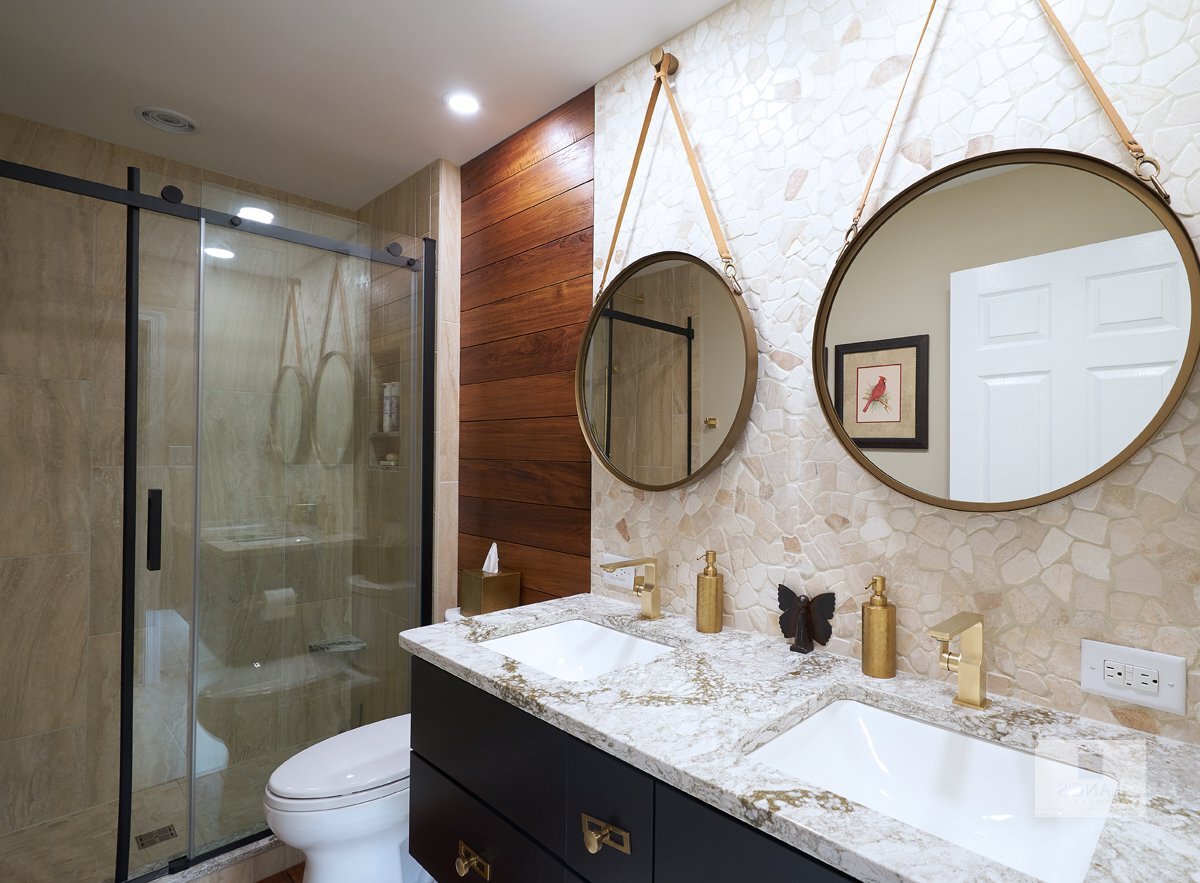
Having exposed pipes under a floating vanity can not only be unsightly but also disrupt the clean aesthetic you want to achieve in your bathroom. Fortunately, there are several methods you can use to hide those pipes and create a sleek and seamless look for your vanity.
In this article, we will guide you through the steps on how to hide pipes under a floating vanity. Whether you are a DIY enthusiast or just looking to give your bathroom a makeover, this guide will provide you with the knowledge and confidence to tackle this project.
Before we dive into the details, it’s important to note that the process may vary depending on the specific design and construction of your vanity. However, the general principles and techniques outlined here can be applied to most floating vanity installations.
Now, let’s gather the necessary materials and get started on transforming your bathroom!
Key Takeaways:
- Transform your bathroom with a sleek floating vanity by following 10 essential steps to hide unsightly pipes. From planning placement to reconnecting plumbing, this guide provides the knowledge and confidence for a successful installation.
- The finishing touches, including cleaning, organizing, and adding decorative elements, elevate the aesthetic appeal of your newly installed floating vanity. Enjoy a stylish and functional bathroom space with hidden pipes.
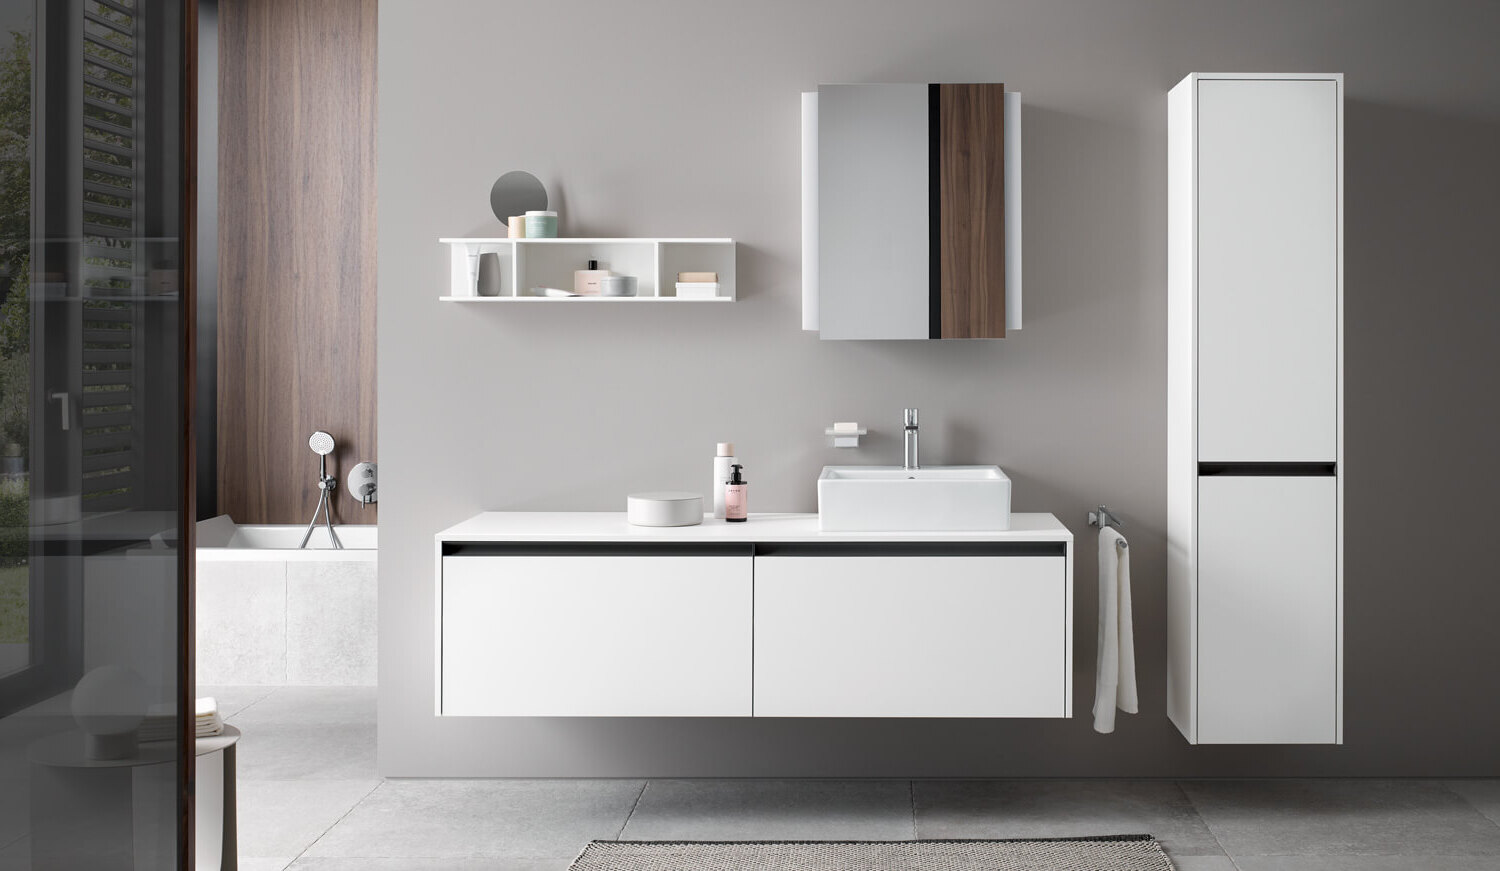
Read more: What Is A Floating Vanity
Materials Needed
Before you begin the process of hiding pipes under a floating vanity, make sure you have the following materials on hand:
- Pipe Insulation: This will help to cover and protect the exposed pipes.
- Pipe Sleeves or Covers: These can be used to conceal the pipes and provide a finished look.
- Measuring Tape: This will be used to accurately measure the space and ensure proper placement of the vanity.
- Saw or Cutting Tool: You may need to cut holes or make modifications to the vanity to accommodate the pipes.
- Screwdriver or Drill: These tools will be necessary for removing the old vanity and installing the new one.
- Plumber’s Tape: This will help to create a watertight seal when reconnecting the plumbing.
- Adjustable Wrench: You will need this tool to disconnect and reconnect the plumbing connections.
- Silicone Caulk: This will be used to seal any gaps or joints to prevent water leakage.
- Paint or Stain: If necessary, you may want to touch up or refine the appearance of the vanity after installation.
These materials will provide you with the essentials needed to complete the project. Depending on your specific needs and preferences, you may require additional tools or supplies.
Once you have gathered all the necessary materials, you’re ready to move on to the next step: planning the placement of the vanity.
Step 1: Plan the Placement of the Vanity
The first step in hiding pipes under a floating vanity is to carefully plan the placement of the vanity. This involves measuring the space, considering the location of the existing plumbing, and determining the optimal positioning for the vanity.
Start by measuring the width, depth, and height of the available space in your bathroom. Take note of any obstacles such as electrical outlets, baseboards, or other fixtures that may impact the placement of the vanity.
Next, locate the existing plumbing lines in your bathroom. These are typically found near the floor or coming out of the wall. Determine the position and size of the pipes that need to be concealed.
Based on these measurements and the location of the plumbing, you can now determine the best placement for your floating vanity. Consider factors such as aesthetic appeal, ease of access to plumbing connections, and functionality.
Keep in mind that your vanity should have enough clearance to accommodate the pipes and any necessary connections. Additionally, ensure that there is ample space for the vanity to be securely attached to the wall.
Once you have finalized the placement of the vanity, mark the positions on the wall and consider using a level to ensure that they are straight. This will help to guide you in the next steps of disconnecting and removing the old vanity.
With the planning and measuring complete, you are now ready to move on to step 2: turning off the water supply.
Step 2: Turn off the Water Supply
Before you begin any plumbing-related work, it is essential to turn off the water supply to your bathroom. This step is critical to avoid any potential leaks or accidents while working on the pipes.
The location of the main water shut-off valve can vary depending on the layout of your home. Typically, you can find it near the water meter or where the main water line enters your property. If you are unsure about the location of the shut-off valve, consult your home’s plumbing diagram or contact a professional plumber for assistance.
To turn off the water supply, locate the shut-off valve and close it by turning it clockwise (righty-tighty). This action will stop the flow of water to the entire bathroom, including the vanity and other fixtures. It’s imperative to ensure that the valve is completely closed to prevent any unexpected water leakage.
After closing the main shut-off valve, it’s a good practice to open the taps or faucets in your bathroom to release any remaining water pressure. This will help to prevent any potential water spurting or leaks when you disconnect the plumbing connections.
Take a moment to verify that the water supply is indeed turned off by testing the faucets in the bathroom. If no water is flowing, you can proceed to the next step with confidence.
By turning off the water supply, you’ve taken an important precautionary measure to ensure a safe and successful installation process. Now, it’s time to move on to step 3: disconnecting the plumbing.
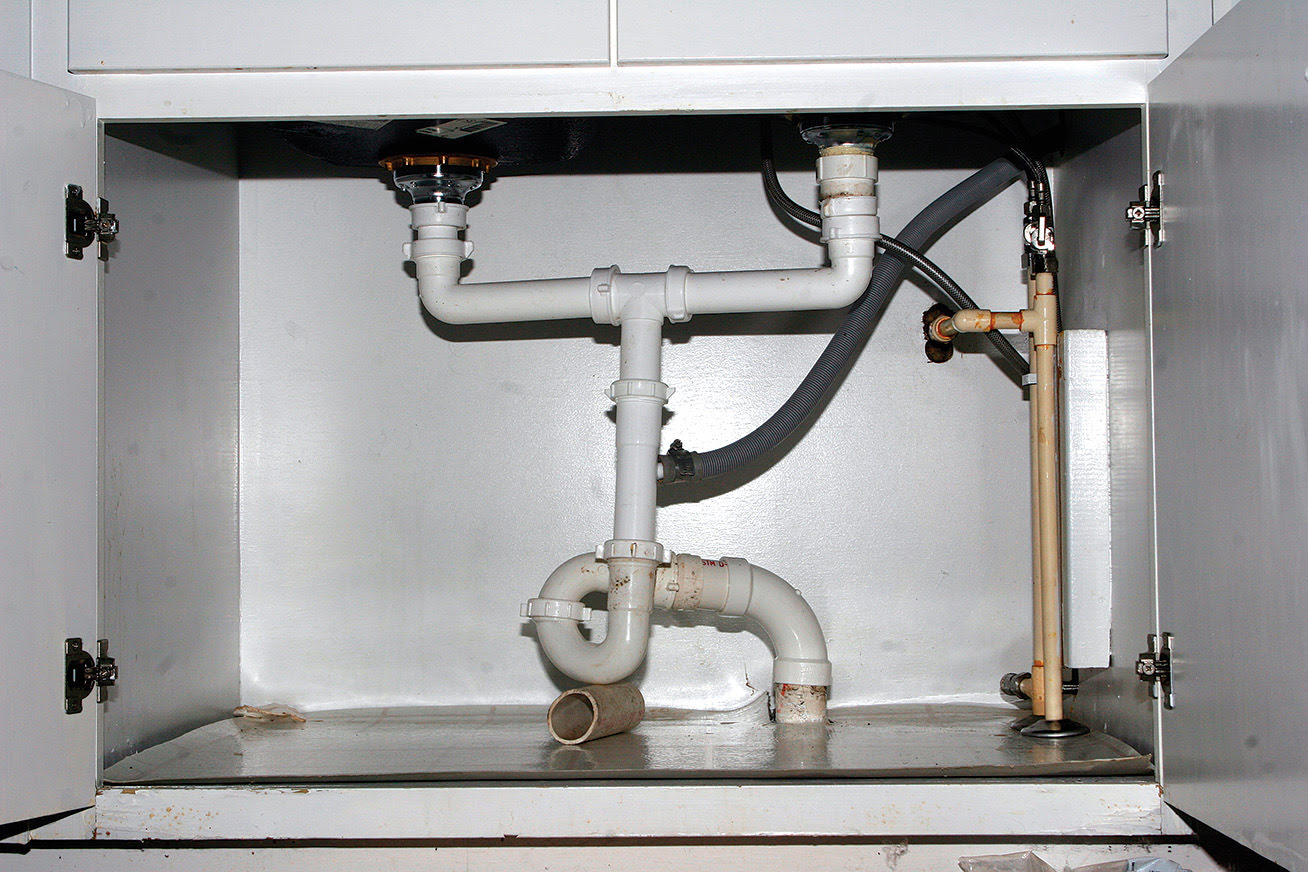
Step 3: Disconnect the Plumbing
Once you have turned off the water supply, it’s time to disconnect the plumbing from the old vanity. This step involves removing the connections to the sink, faucet, and drain to prepare for the installation of the new vanity.
Start by placing a bucket or towel under the sink to catch any water that may flow out when disconnecting the plumbing. This will help to prevent any water damage to your floors or cabinets.
Using an adjustable wrench, loosen the nuts connecting the water supply lines to the faucet. Slowly and carefully, loosen the nuts and disconnect the water lines. Make sure to hold the lines and direct them towards the bucket or towel to prevent any water from splashing around.
Next, locate the drain pipe connected to the sink. There will be a nut linking the drain pipe to the bottom of the sink. Loosen and remove this nut to disconnect the drain pipe. Again, have the bucket or towel nearby to catch any water that may drain out.
Once the water supply lines and drain pipe are disconnected, carefully lift the sink away from the old vanity. If the sink is attached with adhesive or caulking, gently pry it away from the vanity using a putty knife or similar tool.
With the sink removed, you now have access to the plumbing connections under the old vanity. Inspect the pipes and fittings for any signs of damage or corrosion. If necessary, this is an ideal time to replace any worn-out or faulty components.
As you move forward, be mindful of the pipes and connections as you don’t want to accidentally damage them. Take your time and be cautious during this step to maintain the integrity of the plumbing system.
Now that you have successfully disconnected the plumbing, you’re ready to progress to step 4: removing the old vanity.
Read more: How To Hide Plumbing Pipes
Step 4: Remove the Old Vanity
With the plumbing disconnected, it’s time to remove the old vanity from your bathroom. Removing the old vanity involves carefully detaching it from the wall and floor, allowing you to create a clean canvas for the installation of your new floating vanity.
Begin by removing any drawers, shelves, or doors from the vanity to make it lighter and easier to handle. Set these components aside in a safe place to avoid damage during the removal process.
Next, locate the screws or fasteners that are securing the vanity to the wall. Typically, these screws are located at the back of the vanity or inside the cabinet. Use a screwdriver or power drill to remove these screws and detach the vanity from the wall.
If your vanity is also attached to the floor, look for any additional screws or fasteners near the base or legs. Remove these screws to release the vanity from the floor.
Once all the screws and fasteners are removed, gently pull the vanity away from the wall. It may be helpful to have a partner assist you in this step, especially if the vanity is large or heavy.
As you remove the old vanity, be cautious not to damage the walls or any pipes that may be exposed. Take your time and ensure a smooth and careful removal process.
Once the old vanity is completely detached, carefully carry it out of the bathroom and set it aside or dispose of it according to your local regulations.
With the old vanity removed, you now have a blank canvas to work with. Congratulations! You’re ready to move on to the next step: measuring and cutting holes for pipes.
Step 5: Measure and Cut Holes for Pipes
Now that you have removed the old vanity, it’s time to measure and cut holes in the back of the new vanity to accommodate the pipes. This step is crucial to ensure a proper fit and seamless installation of your floating vanity.
Start by positioning the new vanity in its desired location against the wall. Take note of the height and position of the existing plumbing lines to determine where the holes need to be cut.
Using a measuring tape, carefully measure the dimensions and location of the pipes on the wall. Transfer these measurements to the back panel of the vanity, accounting for any necessary clearance around the pipes.
Once you have marked the dimensions, use a drill with a hole saw or a jigsaw to cut out the holes for the pipes. Start with a smaller hole and gradually increase the size to match the diameter of the pipes. Take your time and make precise cuts to ensure a neat and accurate fit.
As you cut the holes, check the fit of the pipes periodically to ensure they align properly with the openings. Adjust the size or shape of the holes as needed to accommodate the pipes without any tension or interference.
Once you have successfully cut the holes for the pipes, check the fit one final time to ensure that everything is aligned correctly. This step is important to prevent any future plumbing issues or potential damage to the vanity.
With the holes cut and the pipes aligned, you’re now ready to move on to step 6: installing the vanity.
Consider using a decorative box or a custom-built enclosure to hide the pipes under a floating vanity. This will not only conceal the pipes but also add a stylish touch to the bathroom.
Step 6: Install the Vanity
With the necessary holes cut in the back panel of the new vanity, it’s time to begin the installation process. Installing a floating vanity involves securing it to the wall and ensuring a stable and level position.
Start by positioning the vanity against the wall in the desired location, ensuring that the holes you cut for the pipes align properly with the plumbing connections. Use a level to ensure that the vanity is straight and adjust as necessary.
Once the vanity is properly positioned, mark the locations of the mounting brackets or screws on the wall. These brackets or screws will be used to secure the vanity to the wall and provide additional stability.
Using a drill and appropriate screws or anchors, attach the mounting brackets to the wall at the marked locations. Ensure that they are securely fastened and capable of supporting the weight of the vanity.
With the mounting brackets in place, carefully lift the vanity and align it with the brackets. Slowly lower the vanity onto the brackets and check for stability. Make any necessary adjustments to ensure an even and secure fit.
If the vanity has legs or supports, ensure that they are properly positioned and adjusted to provide additional support and stability. Use a level to ensure that the vanity is still straight and adjust as needed.
Once the vanity is securely installed and level, use a screwdriver or drill to fasten it to the mounting brackets. Tighten the screws or bolts until the vanity is firmly secured to the wall.
Take a step back and inspect the vanity to ensure that it is level, stable, and properly aligned. If needed, make any final adjustments to ensure a flawless installation.
Congratulations! You have successfully installed your floating vanity. Now, it’s time to move on to step 7: reconnecting the plumbing.
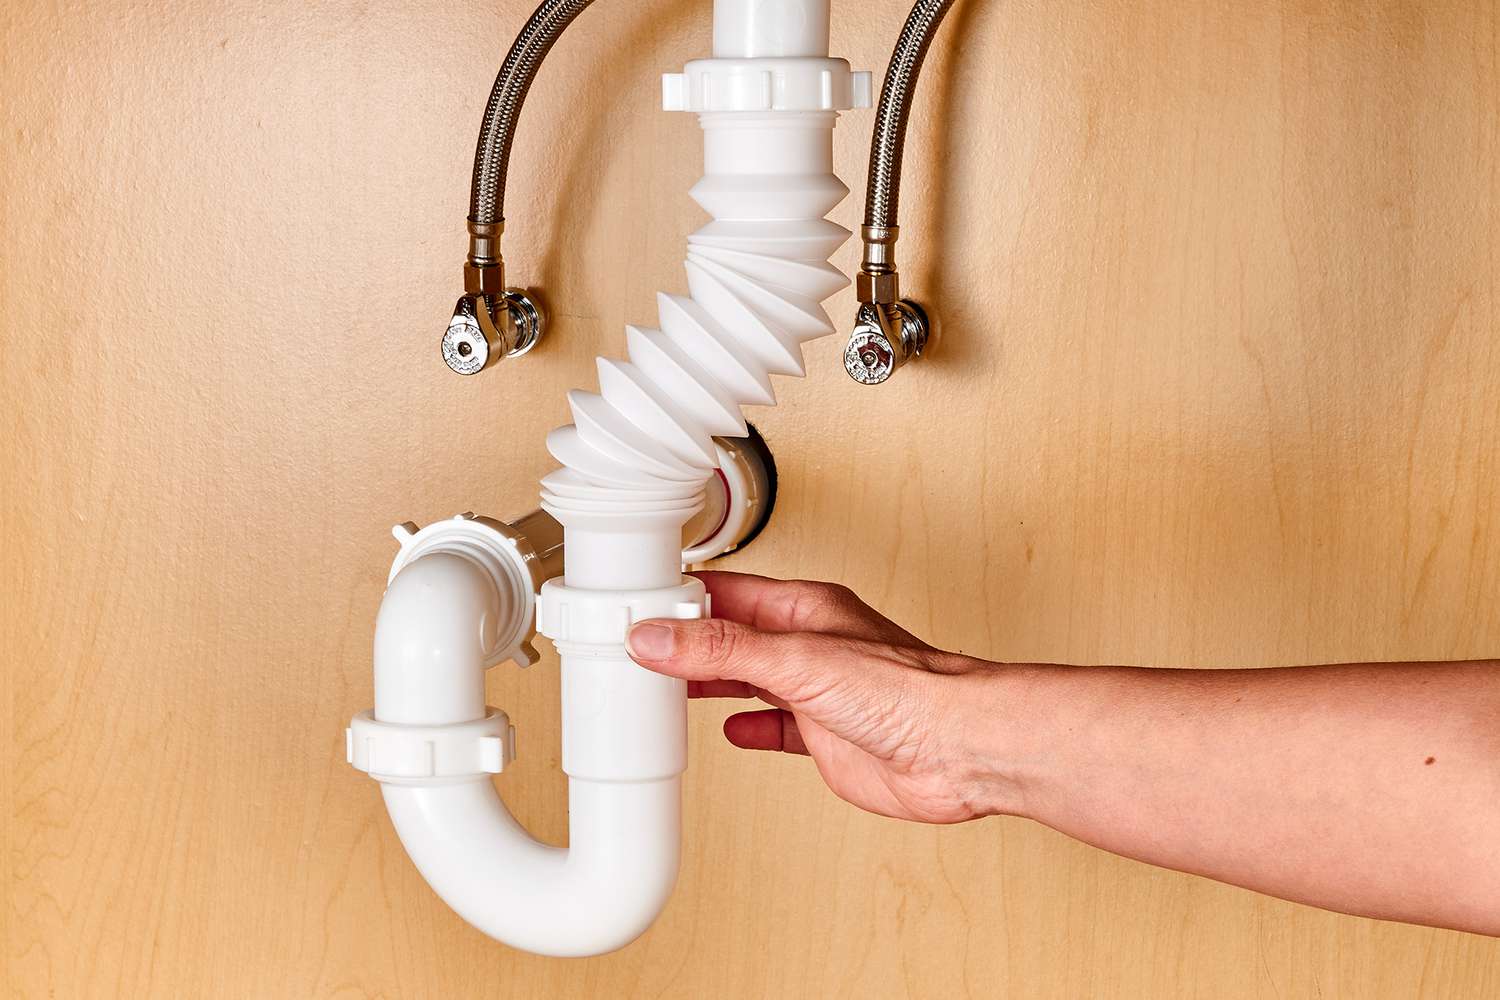
Step 7: Reconnect the Plumbing
Now that your floating vanity is securely installed, it’s time to reconnect the plumbing. This step involves attaching the water supply lines and drain to the vanity, ensuring a watertight and functional connection.
Start by applying plumber’s tape to the threaded ends of the water supply lines. This will help create a tight seal and prevent any potential leaks.
Position the vanity in such a way that you have easy access to the plumbing connections on the wall. Insert the water supply lines through the holes you cut in the back panel of the vanity.
Using an adjustable wrench, carefully tighten the nuts on the water supply lines to the corresponding connections on the faucet. Ensure that the connections are tight but not over-tightened to avoid damaging the threads.
Next, reconnect the drain pipe to the sink’s drain opening. Apply a small amount of plumber’s putty around the flange to create a waterproof seal. Insert the drain pipe into the sink’s drain opening and secure it by tightening the nut.
Once the water supply lines and drain pipe are connected, check the connections for any signs of leakage. Turn on the water supply and test the faucets to ensure there are no leaks or drips. If you notice any leaks, tighten the connections further or consider using plumber’s tape to create a better seal.
Take a moment to inspect the area around the connections to make sure there are no gaps or loose fittings. If necessary, apply a thin bead of silicone caulk around the connections to ensure a watertight seal and prevent any potential water damage.
Once you are confident that the plumbing connections are secure and leak-free, pat yourself on the back—you have successfully reconnected the plumbing! Now, it’s time to move on to step 8: turning on the water supply.
Read more: How To Hide Pipes In Basement
Step 8: Turn on the Water Supply
With the plumbing connections securely reconnected, it’s time to turn on the water supply and bring your bathroom back to life. This step involves restoring the water flow and checking for any potential leaks or issues.
Locate the main water shut-off valve that you previously turned off in Step 2. Turn the valve counterclockwise (lefty-loosey) to open it and restore the water flow to your bathroom.
Allow the water to run for a few moments to flush out any air or debris that may have entered the pipes during the installation process. Keep an eye out for any visible leaks or drips around the plumbing connections.
Test the water flow from the faucet and ensure that it is running smoothly and without any abnormal noises or fluctuations in pressure. Check both hot and cold water to verify that both supply lines are functioning properly.
If you notice any leaks or issues during this step, turn off the water supply immediately and revisit the connections to identify and resolve the problem. It’s crucial to address any leaks promptly to prevent water damage and maintain the integrity of your bathroom.
Take a moment to inspect the area around the vanity, including the back panel and the floor, for any signs of water leakage. If you spot any water or dampness, address the issue immediately and ensure that all connections are properly tightened and sealed.
If everything looks good and there are no leaks or issues, congratulations! You have successfully turned on the water supply and confirmed that the plumbing connections are functioning as intended.
With step 8 complete, it’s time to move on to step 9: testing for leaks.
Step 9: Test for Leaks
After turning on the water supply and ensuring the functionality of the plumbing connections, it’s essential to conduct a thorough test for leaks. This step will help you identify and address any potential issues before they cause water damage or disrupt the functionality of your bathroom.
Start by visually inspecting all of the plumbing connections, including the water supply lines, faucet connections, and drain pipe. Look for any signs of leakage, such as dripping water, wet spots, or puddles around the connections.
Next, place a dry towel or paper towel underneath each connection to monitor for any moisture or seepage. Leave the towels in place for a few hours or overnight to allow for sufficient time to detect any leaks that may occur.
Throughout this testing period, periodically check the towels for any signs of dampness or water absorption. If you notice any moisture, carefully inspect the corresponding connection to determine the source of the leak.
If you identify a leak, it’s important to address it promptly to prevent further damage. Tighten the affected connection gently with an adjustable wrench or consider applying plumber’s tape to create a better seal.
Continue monitoring the connections for any extended period to ensure that the leak has been properly resolved. Remember to check not only the visible connections but also the surrounding area for signs of water damage or leakage.
If no leaks are detected during the testing process, congratulations! You have successfully completed this step without any issues. However, it’s still good practice to keep an eye on the plumbing connections in the following days to confirm that there are no hidden leaks or ongoing problems.
With step 9 completed and any leaks resolved, you’re almost there! The final step, step 10, involves adding the finishing touches to your newly installed floating vanity.
Step 10: Finishing Touches
Congratulations on reaching the final step of hiding the pipes under your floating vanity! Step 10 involves adding the finishing touches to complete the installation process and enhance the overall look of your bathroom.
Start by cleaning the vanity and removing any debris or dust that may have accumulated during the installation process. Use a gentle cleaner or mild soap, along with a soft cloth or sponge, to wipe down the vanity’s surfaces, inside and out.
If your vanity has drawers or shelves, organize them neatly and consider using dividers or organizers to maximize storage space. This will help keep your bathroom essentials easily accessible and maintain a clutter-free look.
Next, inspect the vanity for any imperfections, such as scratches, dents, or blemishes. If necessary, touch up the vanity using paint or stain that matches its original finish. Allow sufficient drying time before using the vanity.
Consider adding decorative elements to enhance the aesthetic appeal of the vanity area. This can include placing a stylish mirror above the vanity, adding artwork or plants nearby, or incorporating decorative accents that complement your bathroom’s overall design.
If desired, install lighting above or around the vanity to provide optimal illumination while adding an extra element of style to the space. Ensure that the lighting fixtures are properly installed and follow all safety guidelines.
Finally, step back and admire your newly installed floating vanity. Take a moment to appreciate the transformation and how the hidden pipes contribute to the clean and seamless aesthetic of your bathroom.
Remember to periodically check the plumbing connections and surrounding areas for any signs of leakage or moisture. Routine maintenance and inspections will help ensure the long-term performance and functionality of your vanity and plumbing system.
With all the finishing touches complete, your bathroom now showcases a beautifully installed floating vanity with hidden pipes. Enjoy the improved aesthetics and functionality that this upgrade brings to your space!
That concludes the final step in our guide. We hope this article has provided you with the knowledge and confidence to successfully hide pipes under a floating vanity. If you have any further questions or need additional assistance, don’t hesitate to seek professional advice or consult a plumber.
Thank you for following along, and good luck with your bathroom transformation!
Conclusion
Updating your bathroom with a floating vanity not only adds modern style but also allows you to hide unsightly pipes, creating a clean and seamless look. By following the ten steps outlined in this guide, you can successfully hide pipes under a floating vanity and transform your bathroom into a stylish and functional space.
From planning the placement of the vanity to reconnecting the plumbing and adding the finishing touches, each step is crucial to ensure a successful installation process. Taking the time to measure, cut holes for the pipes, and secure the vanity to the wall will result in a sturdy and stable installation.
Throughout the process, it’s important to be mindful of the plumbing connections and test for any leaks or issues. Addressing any leaks promptly will help prevent water damage and ensure the longevity of your new vanity.
Once the installation is complete, adding the finishing touches such as cleaning the vanity, organizing the drawers, and incorporating decorative accents will contribute to the overall aesthetic of the bathroom.
We hope that this guide has provided you with the necessary knowledge and confidence to successfully hide pipes under a floating vanity. Remember to follow safety guidelines, consult professionals when needed, and enjoy the fruits of your hard work.
With your newly installed floating vanity, you can now appreciate a bathroom that combines both style and functionality. Embrace the transformed space and take pride in your accomplishment. Happy decorating!
Frequently Asked Questions about How To Hide Pipes Under Floating Vanity
Was this page helpful?
At Storables.com, we guarantee accurate and reliable information. Our content, validated by Expert Board Contributors, is crafted following stringent Editorial Policies. We're committed to providing you with well-researched, expert-backed insights for all your informational needs.


0 thoughts on “How To Hide Pipes Under Floating Vanity”