
Articles
How To Replace Pipe Under Kitchen Sink
Modified: August 16, 2024
Learn how to replace the pipe under your kitchen sink with step-by-step instructions and helpful tips. Read this informative article now!
(Many of the links in this article redirect to a specific reviewed product. Your purchase of these products through affiliate links helps to generate commission for Storables.com, at no extra cost. Learn more)
Introduction
Replacing a pipe under the kitchen sink may seem like a daunting task, but with the right tools and a little guidance, it can be a manageable DIY project. Whether you’re dealing with a leaky pipe or simply upgrading your plumbing system, replacing a pipe can help improve the functionality and efficiency of your kitchen.
A pipe under the sink is responsible for carrying water to and from the various fixtures in your kitchen, such as the faucet and the dishwasher. Over time, these pipes can become worn, corroded, or damaged, leading to leaks and potential water damage. In some cases, you may also need to replace a pipe if you’re upgrading your sink or making changes to your plumbing system.
Fortunately, replacing a pipe under the kitchen sink doesn’t require extensive plumbing knowledge. With the right tools and a systematic approach, you can get the job done efficiently and effectively. In this step-by-step guide, we’ll walk you through the process of replacing a pipe under your kitchen sink, ensuring a smooth and leak-free installation.
Before you begin, it’s important to gather all the necessary tools and materials. This will help ensure that you have everything you need at your fingertips, saving you time and frustration during the process. Some of the essential tools and materials you’ll need include:
– Adjustable wrench
– Pipe wrench
– Screwdriver
– Plumber’s tape
– Replacement pipe
– P-Trap
– Bucket (for catching water)
– Towels or rags (for drying surfaces)
Once you have all the necessary tools and materials ready, you can proceed with replacing the pipe under your kitchen sink. We’ll break down the process into easy-to-follow steps to help you navigate the task smoothly. So let’s get started with clearing the area and preparing for the pipe replacement.
(Note: While this guide provides general instructions for replacing a pipe under the kitchen sink, it’s important to note that plumbing systems can vary. If you’re unsure about any step or encounter any complications during the process, it is recommended to consult a professional plumber for assistance.)
Now that you understand the purpose of replacing a pipe under the kitchen sink and have gathered all the necessary tools, it’s time to dive into the step-by-step process. So, let’s get started with clearing the area and preparing for the pipe replacement.
Key Takeaways:
- Replacing a pipe under the kitchen sink is a manageable DIY project with the right tools and guidance. It improves plumbing efficiency and reduces the risk of leaks and water damage.
- Checking for leaks after installation is crucial for ensuring a watertight and reliable plumbing system. Regular maintenance and vigilance help prolong the lifespan of the kitchen sink’s plumbing.
Tools and Materials Needed
Before you embark on replacing a pipe under your kitchen sink, it’s important to ensure that you have all the necessary tools and materials. Having these items readily available will help streamline the process and make the task more manageable. Here’s a list of the essential tools and materials you’ll need:
1. Adjustable wrench: This tool is essential for tightening and loosening nuts and bolts. It allows you to easily grip and manipulate various sizes of pipes and fittings.
2. Pipe wrench: A pipe wrench is specifically designed for working with pipes. It has a set of sharp teeth that provide a firm grip, allowing you to loosen or tighten pipe connections.
3. Screwdriver: You’ll need a screwdriver to remove any screws holding the pipe fittings in place.
4. Plumber’s tape: Also known as Teflon tape, plumber’s tape is used to create a watertight seal between threaded pipe connections. It helps prevent leaks by filling in gaps and providing a secure connection.
5. Replacement pipe: Depending on your specific needs, you’ll need a replacement pipe that matches the size and type of the existing pipe. Common materials for kitchen sink pipes include PVC and stainless steel.
6. P-Trap: The P-Trap is a curved pipe that prevents sewer gases from entering your kitchen. It also acts as a trap for debris, preventing clogs. If you’re replacing a damaged or old P-Trap, make sure to have a replacement on hand.
7. Bucket: Having a bucket nearby is crucial for catching any water that may leak or spill during the pipe replacement process. This will help prevent water damage to your kitchen and make cleanup easier.
8. Towels or rags: Keep some towels or rags handy to dry any wet surfaces and clean up spills or leaks.
Having these tools and materials prepared before you start will save you time and ensure a smooth and efficient process. It’s always a good idea to double-check that you have everything you need, as running back and forth to gather missing items can be frustrating and disrupt the flow of your work.
Remember, if you’re unsure about any of the tools or materials needed, consult with a hardware store professional or a plumber to ensure you have the correct items for your specific plumbing system. Now that you have all the necessary tools and materials, you’re ready to begin the process of replacing the pipe under your kitchen sink.
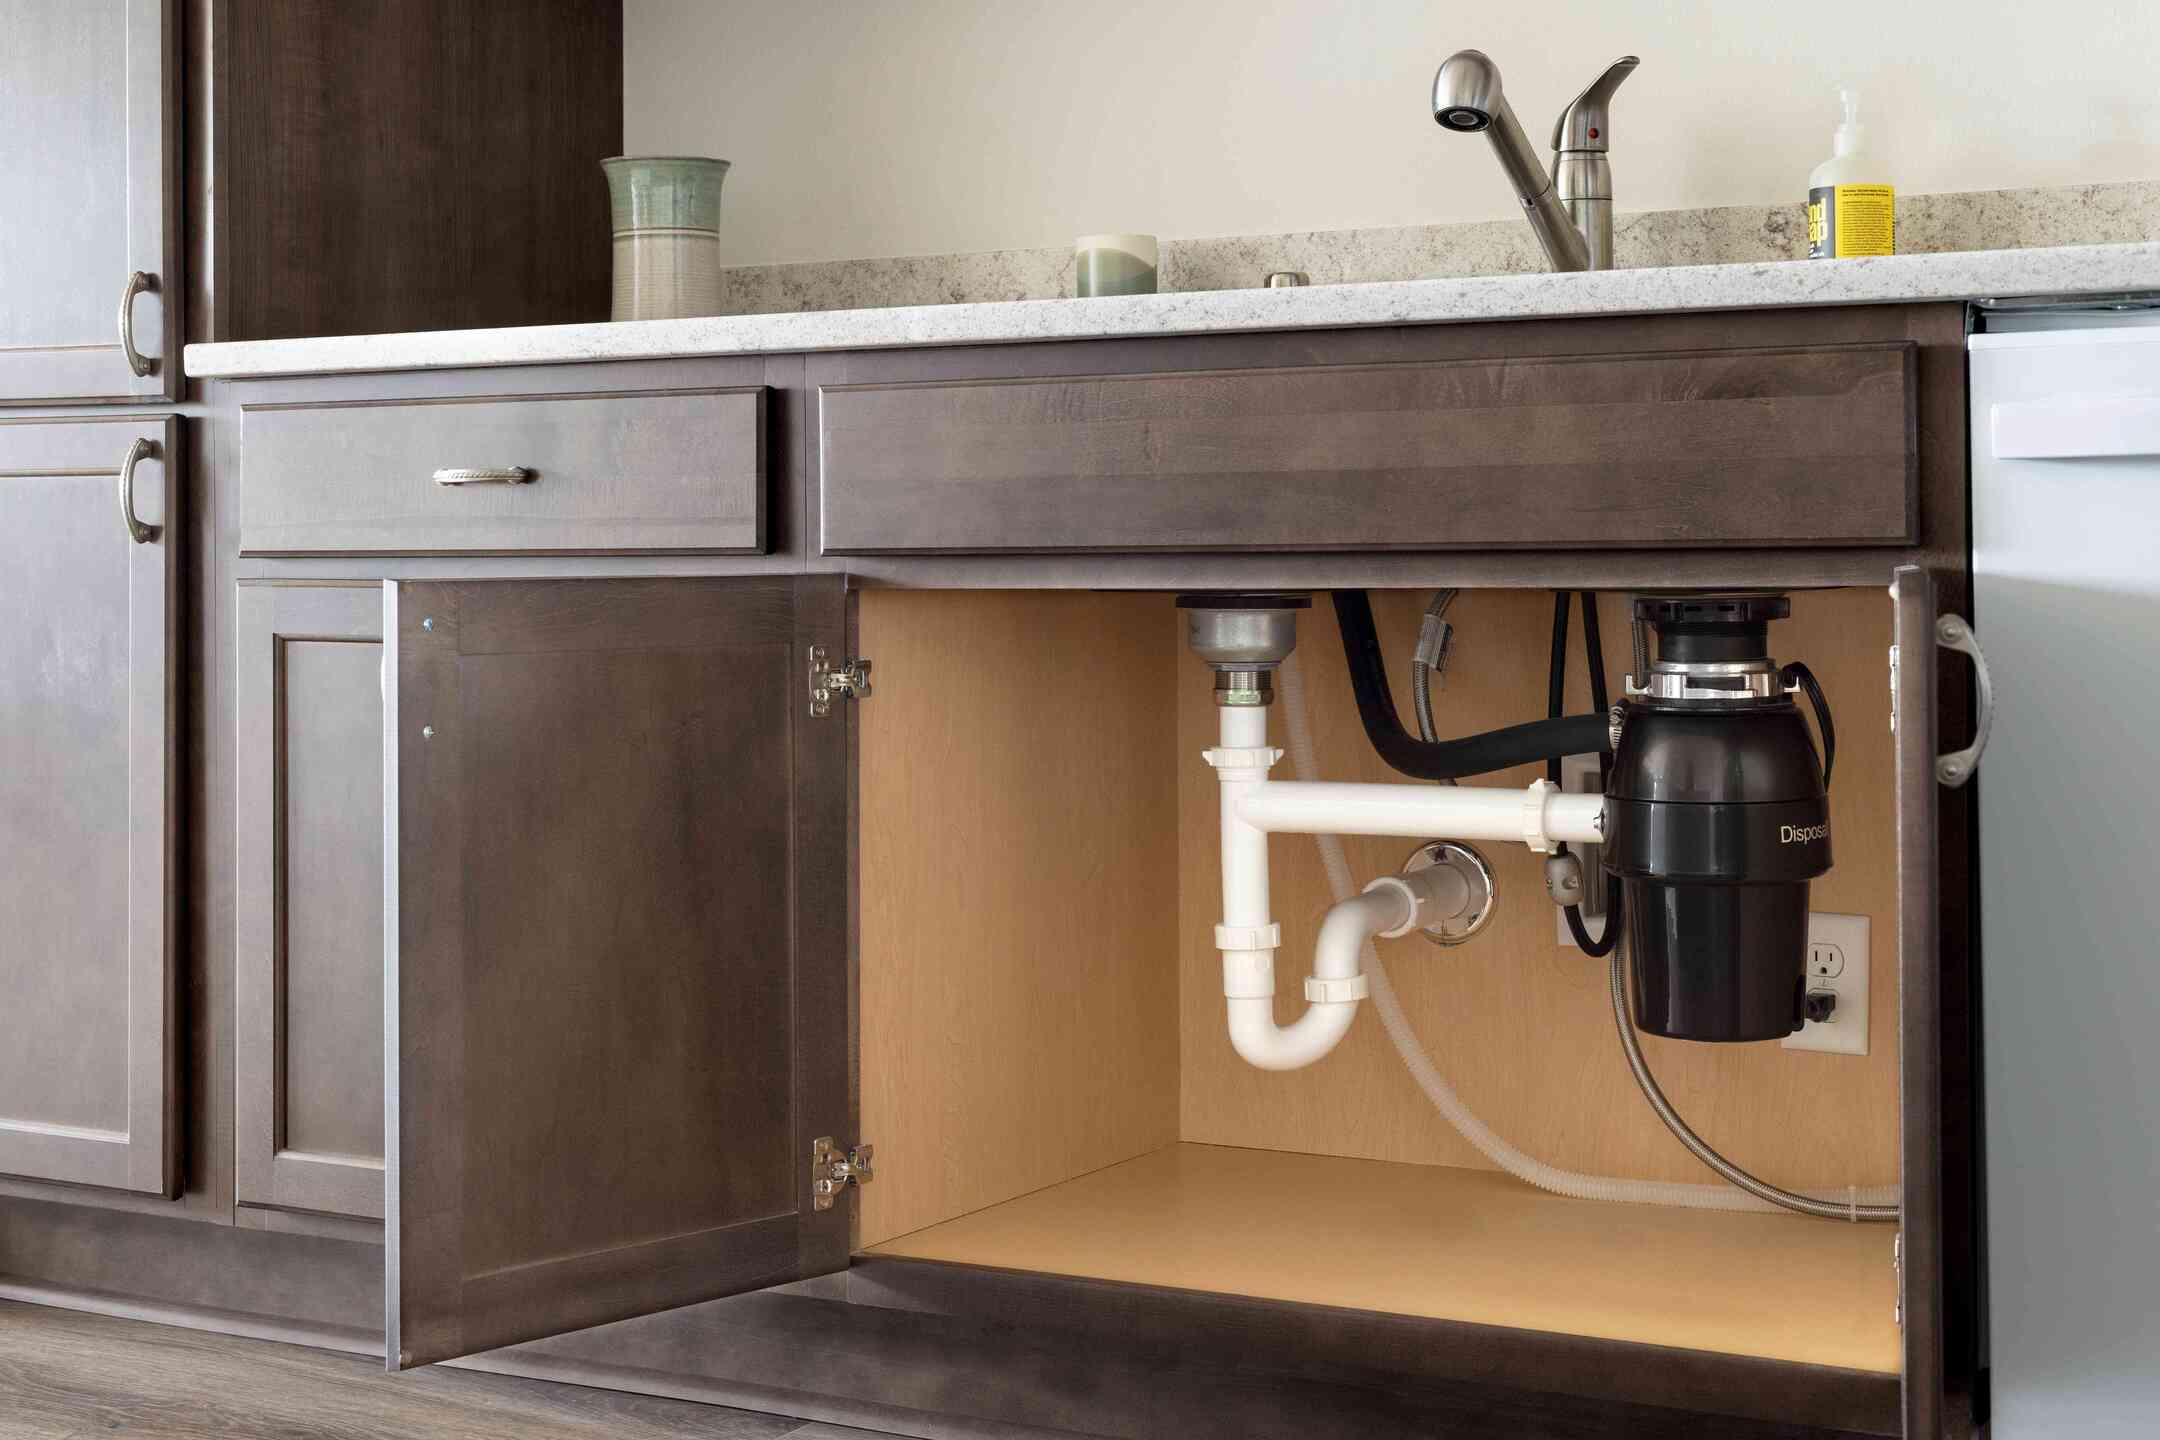
Step 1: Clearing the Area
Before you start replacing the pipe under your kitchen sink, it’s important to clear the area to provide yourself with ample workspace. This step will help you maneuver more easily and prevent any unnecessary obstacles during the pipe replacement process. Here’s how to clear the area effectively:
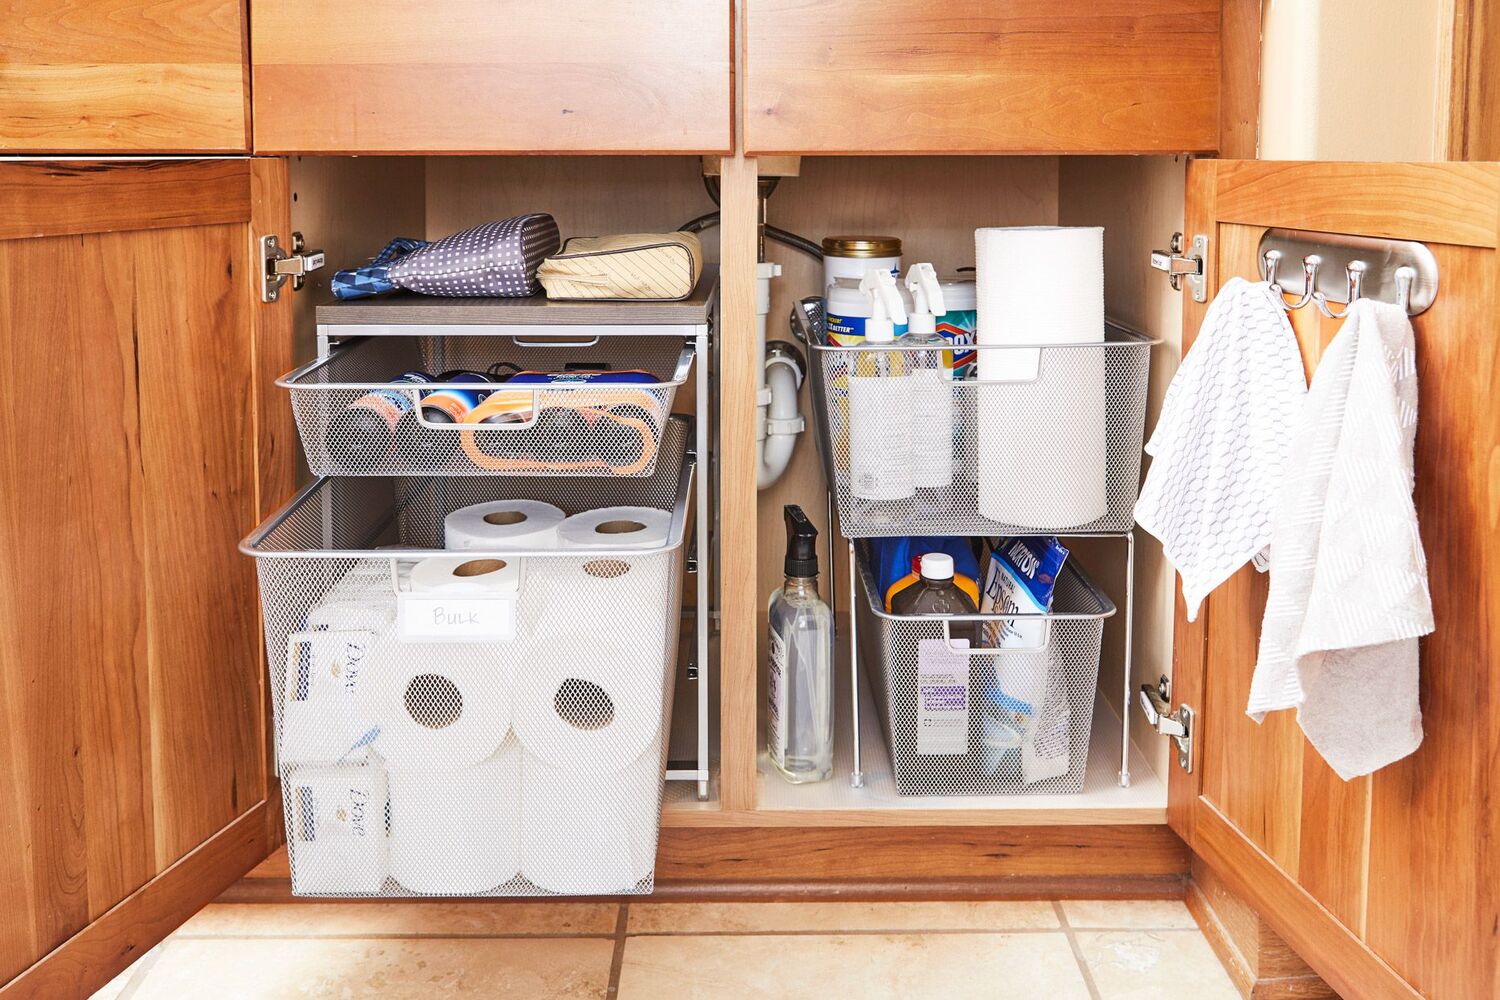
1. Remove any items stored under the sink: Take out all the items stored under the sink, such as cleaning supplies, dish soap, and kitchen utensils. Place them in a safe location away from the work area.
2. Clear any debris: Check the area under the sink for any loose debris or garbage. Clear out any unwanted items to ensure a clean and clutter-free workspace.
3. Protect the surrounding areas: Place a towel or a plastic mat on the floor under the sink to catch any water that might leak during the process. This will help prevent any potential damage to your flooring.
By clearing the area under the sink, you’ll have more room to work comfortably and safely. This step also allows for better visibility and accessibility to the pipes that need to be replaced. Additionally, it minimizes the chances of accidentally knocking over or damaging any items stored under the sink.
Before moving on to the next step, take a moment to ensure that the area is organized and free from any potential hazards. Now that you have cleared the area, you’re ready to proceed with shutting off the water supply.
Step 2: Shut Off the Water Supply
Before you begin replacing the pipe under your kitchen sink, it’s important to shut off the water supply to prevent any leaks or water damage. Here’s how to shut off the water supply effectively:
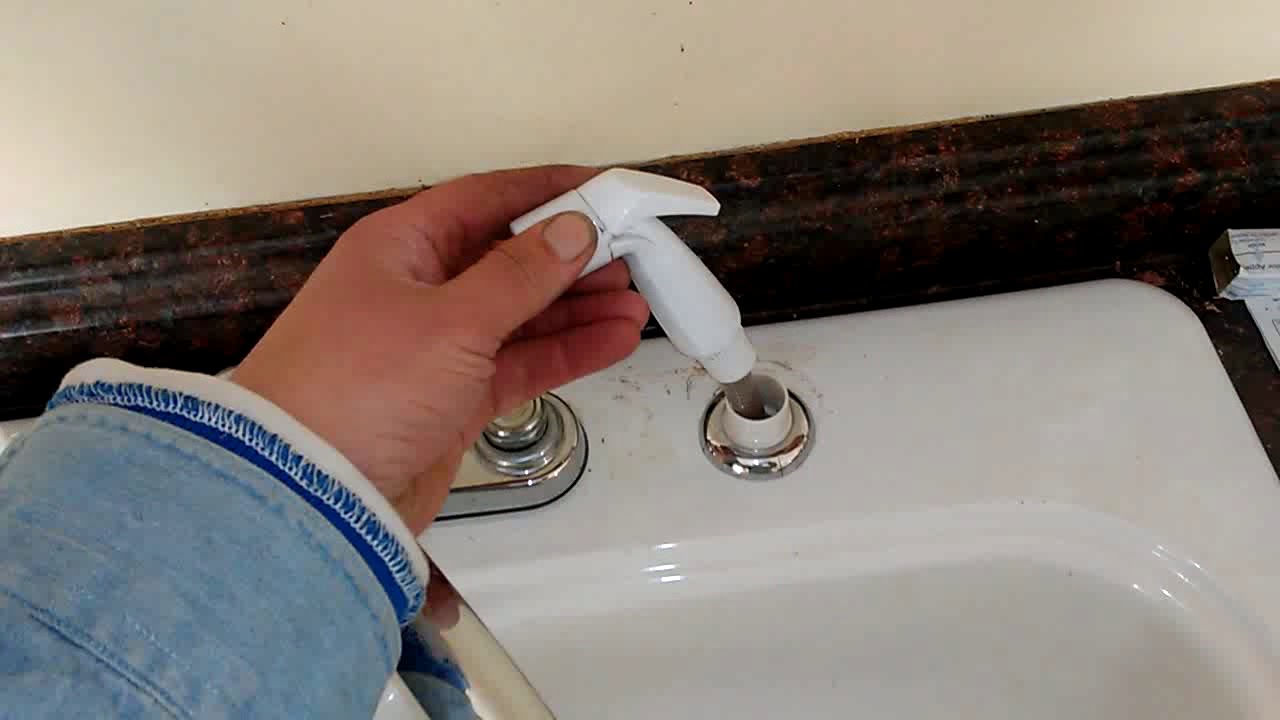
1. Locate the shut-off valve: Look for the shut-off valve that controls the water supply to your kitchen sink. In most cases, you will find the valve below the sink, either on the wall or inside a cabinet. It is typically a small knob or lever.
2. Turn off the valve: Once you have located the shut-off valve, turn it clockwise or perpendicular to the water pipe. This will cut off the water supply to the sink. Make sure to turn the valve firmly but not forcefully to avoid damaging it.
3. Test the water supply: After turning off the valve, turn on the kitchen faucet to check if the water supply has been successfully shut off. If no water comes out, it means that the shut-off valve has effectively stopped the water flow.
By shutting off the water supply, you prevent water from leaking or flowing while you replace the pipe. This step is crucial to avoid any mess or water damage during the process. It also ensures your safety and allows you to work on the pipe without any pressure from the water lines.
Before moving on to the next step, double-check that the water supply has been completely shut off. Take a moment to run the faucet and make sure no water is flowing. Once you’re certain that the water supply is off, you’re ready to remove the P-Trap in the next step.
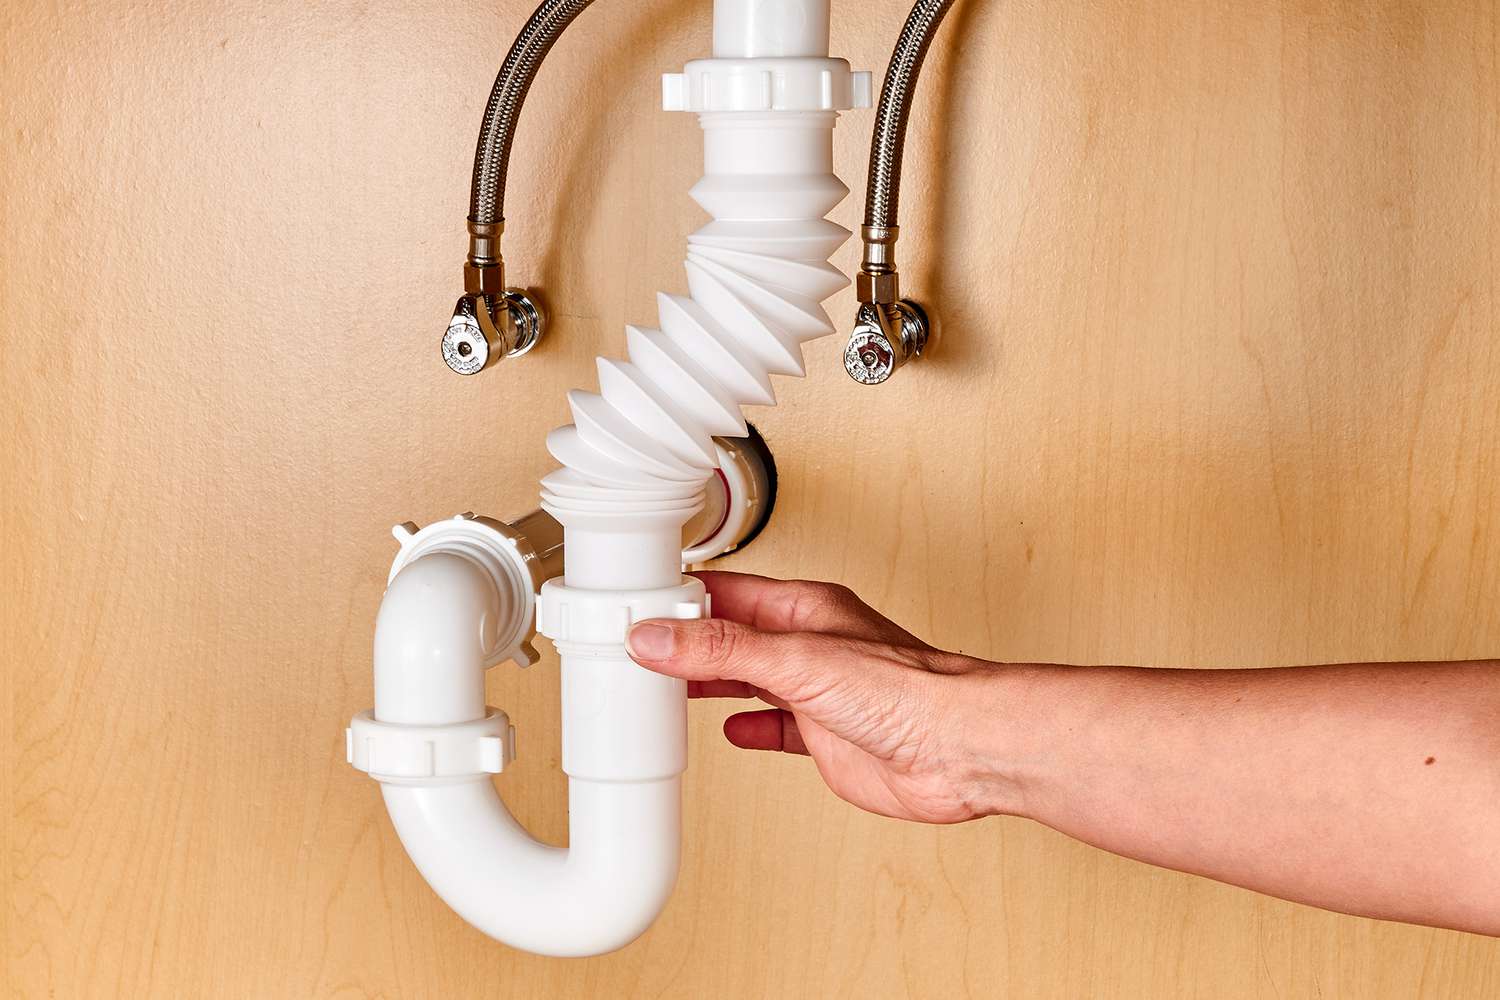
Step 3: Remove the P-Trap
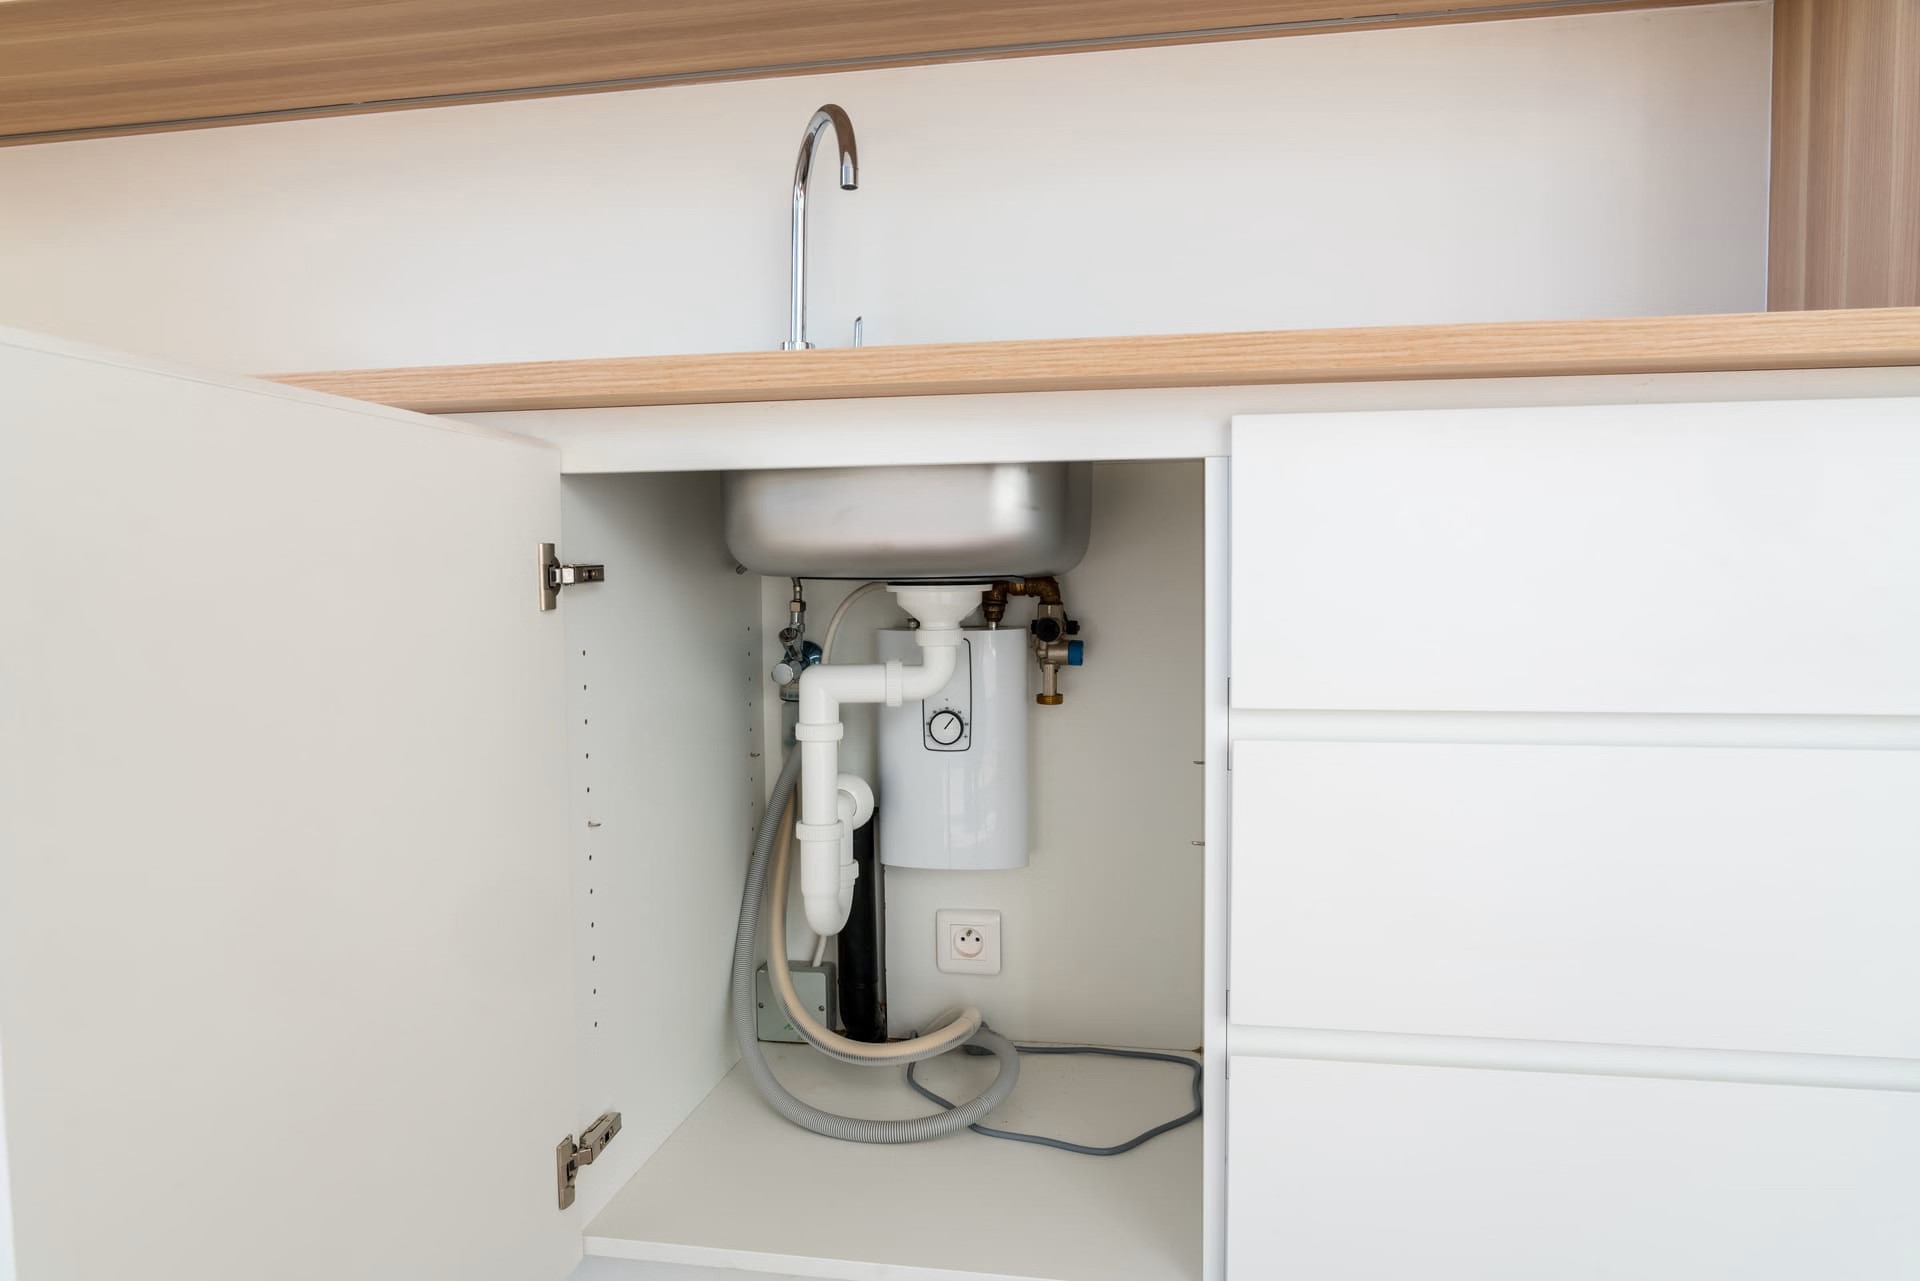
The P-Trap is a U-shaped pipe located beneath the sink that helps prevent sewer gases from entering your kitchen and acts as a trap for debris. Before replacing the pipe under your kitchen sink, you need to remove the P-Trap. Here’s how to remove it:
1. Place a bucket or a large pan under the P-Trap: Position a bucket or a pan below the P-Trap to catch any water or debris that may spill out during the removal process. This will help prevent a mess and make cleanup easier.
2. Loosen the slip nuts: The P-Trap is connected to the sink drain and the horizontal pipe with slip nuts. Use an adjustable wrench to loosen these nuts. Turn them counterclockwise to loosen and remove them. If the nuts are tight, you can use a pipe wrench for better leverage.
3. Disconnect the P-Trap from the sink drain: Once the slip nuts are loosened, carefully detach the P-Trap from the sink drain. Gently pull it downward and twist it to release it from the drain pipe. Be cautious as some water may still be trapped inside the P-Trap.
4. Remove the P-Trap from the horizontal pipe: After removing the P-Trap from the sink drain, detach it from the horizontal pipe connected to the wall or the main plumbing line. Loosen the slip nut connecting the P-Trap to the horizontal pipe and carefully slide the P-Trap out.
5. Empty the P-Trap: If there is any water or debris inside the P-Trap, pour it into the bucket or pan you placed earlier. Inspect the P-Trap for any clogs or obstructions and clean it if necessary.
By removing the P-Trap, you have now disconnected an important component of the plumbing system under your kitchen sink. Cleaning the P-Trap allows for a clear inspection and ensures that any potential clogs or debris are removed from the system. With the P-Trap removed, you can continue to the next step of removing the old pipe.
Before moving on, take a moment to inspect the P-Trap and the surrounding area for any signs of damage. If you notice any cracks or worn-out parts, it’s a good idea to replace the P-Trap to ensure proper functioning of your plumbing system.
Read more: How To Replace Water Valve Under Sink
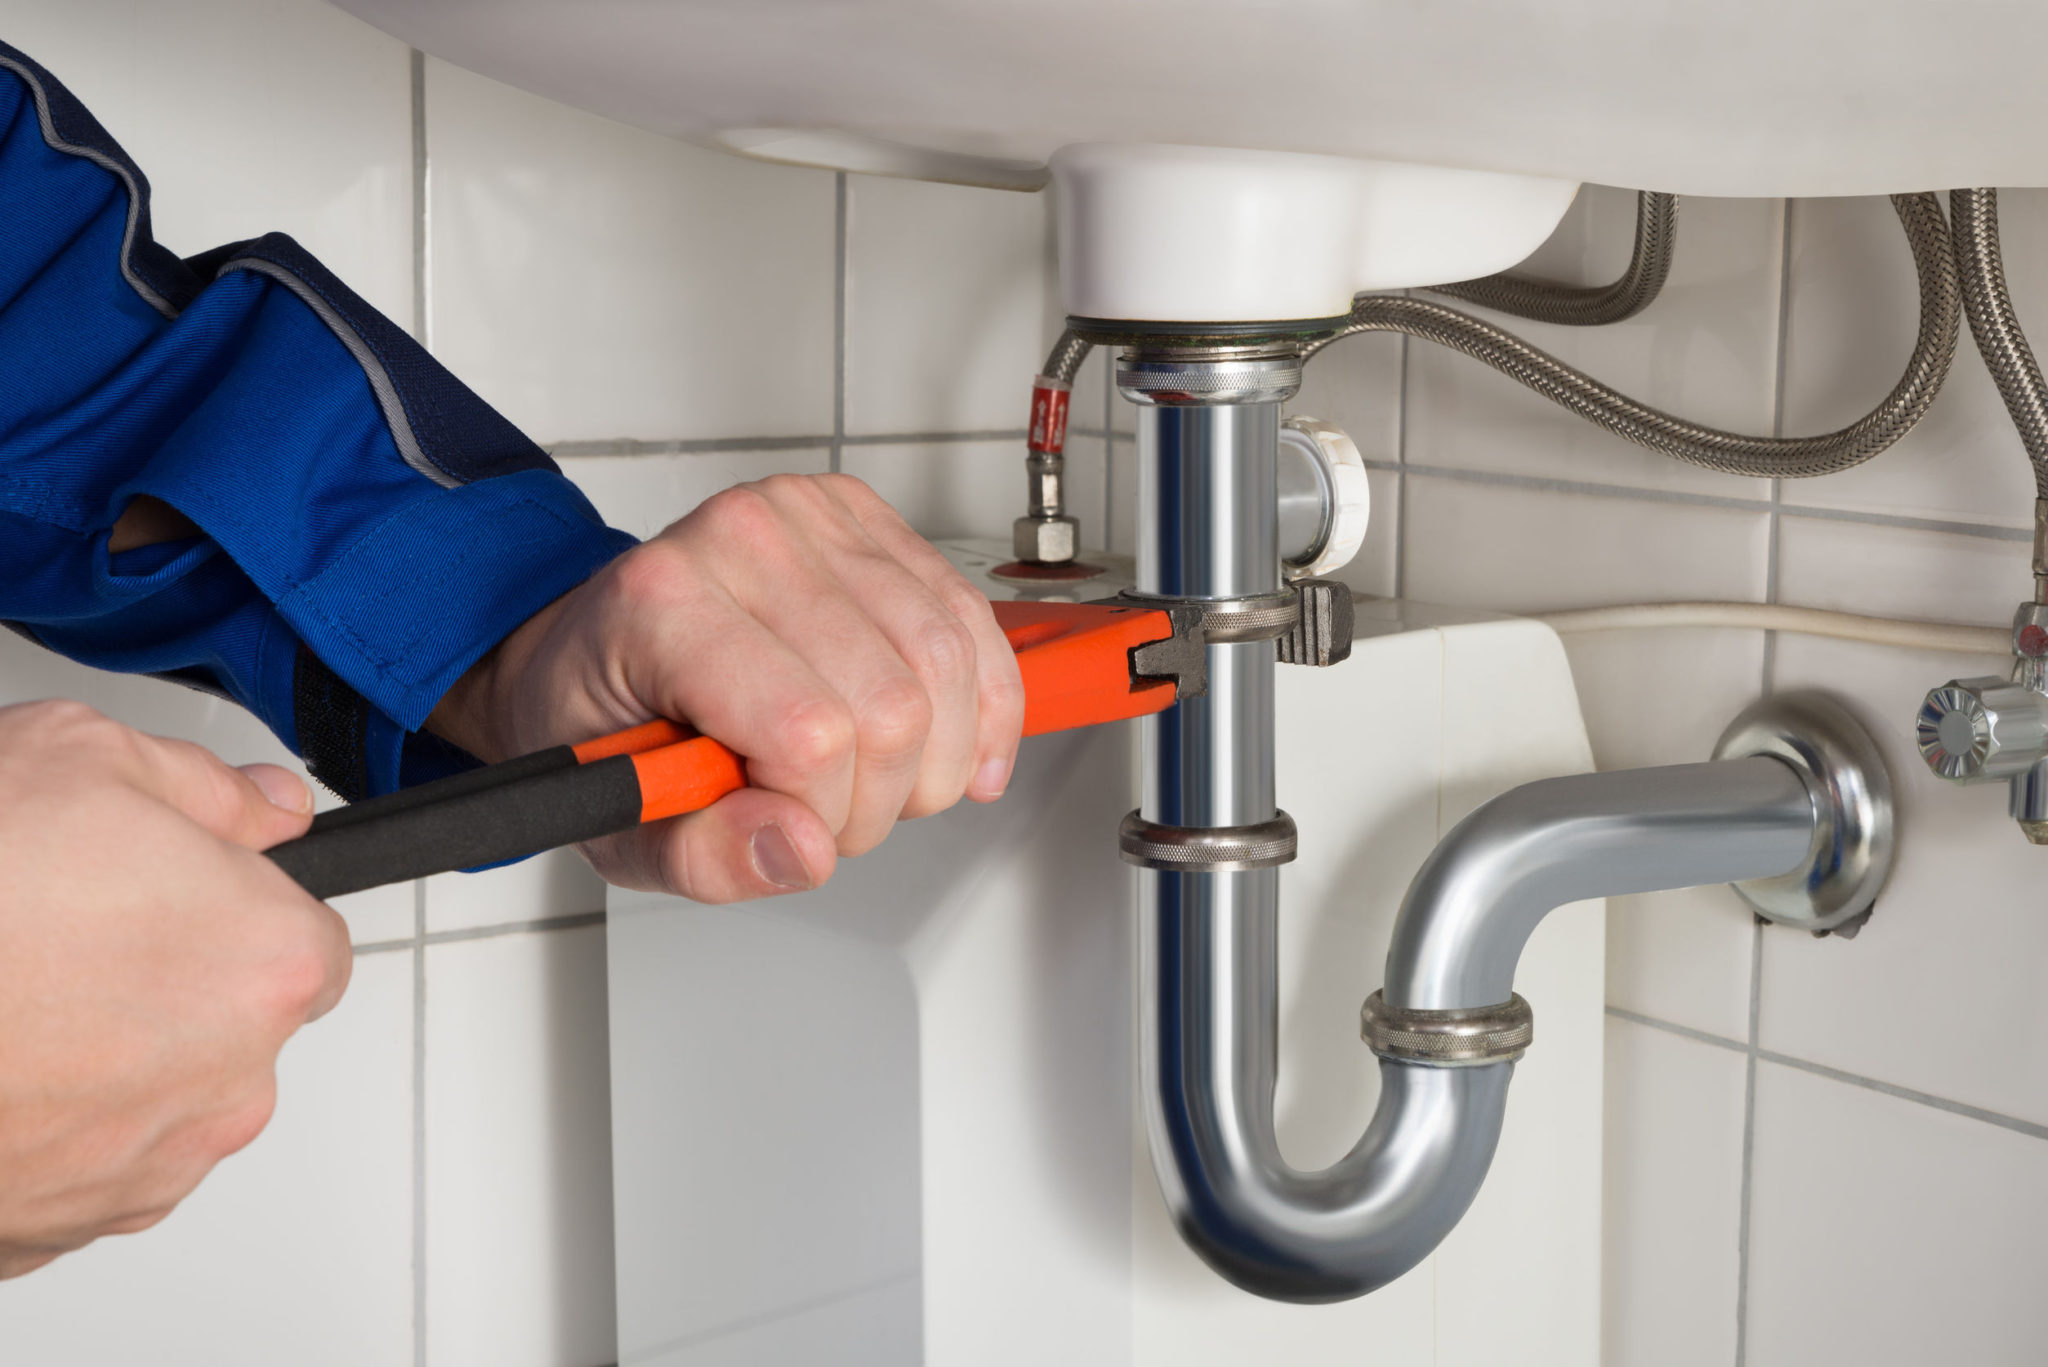
Step 4: Remove the Old Pipe
With the P-Trap removed, it’s time to tackle the next step in replacing the pipe under your kitchen sink: removing the old pipe. The old pipe refers to the sections of piping that need to be replaced due to leaks, damage, or upgrading to a new system. Here’s how to remove the old pipe:
1. Loosen the compression nuts: Locate the compression nuts that connect the old pipe to the sink drain and the wall or main plumbing line. Use an adjustable wrench to loosen these nuts by turning them counterclockwise. If they are tight, use a pipe wrench for additional leverage.
2. Disconnect the pipe from the sink drain: Once the compression nuts are loosened, carefully detach the old pipe from the sink drain. Gently pull it downward and twist it to release it from the drain pipe. There may be residual water, so be prepared to catch any spills with a towel or bucket.
3. Remove the pipe from the wall or main plumbing line: After disconnecting the pipe from the sink drain, proceed to remove it from the wall or the main plumbing line. Loosen the compression nuts or other fittings that secure the pipe to the wall or main plumbing line. Carefully slide the pipe out, ensuring not to damage any surrounding components.
4. Inspect the old pipe: Take a moment to inspect the old pipe for any signs of damage, corrosion, or leaks. This will help determine if it needs to be replaced entirely or if only specific sections need to be replaced.
5. Dispose of the old pipe: Safely dispose of the old pipe, following your local regulations and guidelines for proper disposal of plumbing materials. If the pipe is in good condition, you may consider recycling or repurposing it.
By removing the old pipe, you are making way for the installation of the new pipe. This step allows you to assess the condition of the existing plumbing system and replace any damaged or faulty sections. Remember to handle the old pipe with care and avoid any sharp edges or potential hazards.
Before moving on to the next step, take a moment to clean the surrounding area and inspect the sink drain and the wall or main plumbing line for any debris or obstructions. This will ensure a smooth installation of the new pipe and reduce the risk of leaks or complications.
When replacing a pipe under the kitchen sink, make sure to turn off the water supply first. Use a bucket to catch any water and have a towel handy to clean up any spills. Be sure to measure and cut the new pipe accurately before installing.
Step 5: Install the New Pipe
With the old pipe removed, it’s time to move on to the exciting step of installing the new pipe under your kitchen sink. This step involves connecting the new pipe to the sink drain and the wall or main plumbing line. Here’s how to install the new pipe:
1. Measure and cut the new pipe: Begin by measuring the length of the new pipe needed for the replacement. Use a pipe cutter or a hacksaw to cut the new pipe to the appropriate size. Make sure to use proper safety equipment, such as gloves and eye protection, when cutting the pipe.
2. Prepare the ends of the new pipe: Once the new pipe is cut, use sandpaper or a deburring tool to smooth any rough edges or burrs on the cut ends of the pipe. This will ensure a better fit and prevent any leaks.
3. Apply plumber’s tape: Take a small strip of plumber’s tape (Teflon tape) and wrap it clockwise around the threads of the pipe fittings. This will create a watertight seal when the fittings are tightened, helping to prevent leaks.
4. Connect the new pipe to the sink drain: Position one end of the new pipe to the sink drain and screw on the compression nut. Use an adjustable wrench to tighten the compression nut, ensuring a secure and snug fit. Be careful not to overtighten, as it may damage the pipe or fittings.
5. Connect the new pipe to the wall or main plumbing line: Align the other end of the new pipe with the wall or main plumbing line and screw on the compression nut or other fitting. Again, use an adjustable wrench to tighten the fitting, ensuring a secure connection.
6. Double-check the alignment and tightness: Before moving on to the next step, double-check that the new pipe is properly aligned with both the sink drain and the wall or main plumbing line. Ensure that all compression nuts or fittings are securely tightened but not overtightened.
By installing the new pipe, you are ensuring a reliable and functional plumbing system under your kitchen sink. This step allows for the proper flow of water and eliminates the risk of leaks or damage that may occur with old or faulty pipes.
Before continuing to the next step, take a moment to clean any excess plumber’s tape or debris from the installation area. This will help ensure a clean and professional finish to your new pipe installation.
Step 6: Reattach the P-Trap
Now that the new pipe is properly installed, it’s time to reattach the P-Trap under your kitchen sink. The P-Trap plays a crucial role in preventing sewer gases from entering your kitchen and trapping debris to prevent clogs. Here’s how to reattach the P-Trap:
1. Apply plumber’s tape: Take a small strip of plumber’s tape (Teflon tape) and wrap it clockwise around the threads of the P-Trap fittings. This will create a secure and watertight seal when the fittings are tightened.
2. Attach the P-Trap to the sink drain: Position one end of the P-Trap onto the sink drain pipe. Ensure that the trap is facing the correct way, with the curved portion facing down. Slide the compression nut onto the pipe and hand-tighten it.
3. Attach the P-Trap to the wall or main plumbing line: Align the other end of the P-Trap with the wall or the main plumbing line. Slide the compression nut onto the pipe and hand-tighten it.
4. Tighten the compression nuts: Once both ends of the P-Trap are securely attached, use an adjustable wrench to tighten the compression nuts. Start by tightening the nut on the sink drain side, followed by the nut on the wall or main plumbing line side. Be careful not to overtighten, as it may damage the P-Trap or the fittings.
5. Double-check for proper alignment: Ensure that the P-Trap is properly aligned with both the sink drain and the wall or main plumbing line. It should form a smooth curve without any kinks or obstructions.
6. Test for leaks: Once the P-Trap is securely reattached, turn on the water supply and run the sink faucet. Check for any potential leaks around the P-Trap and its connections. If you notice any leaks, tighten the compression nuts slightly until the leaks stop.
By reattaching the P-Trap, you are completing the plumbing system under your kitchen sink. This step ensures the proper functioning of the trap and prevents sewer gases from entering your kitchen. Additionally, it helps maintain a healthy and efficient plumbing system.
Before moving on to the final step, take a moment to wipe away any excess plumber’s tape or debris from the P-Trap and its connections. This will give the installation a clean and professional appearance and minimize potential sources of leaks or odors.
Step 7: Turn On the Water Supply
Now that the new pipe and P-Trap are securely installed, it’s time to turn on the water supply and ensure everything is working properly. By reactivating the water flow, you’ll be able to check for any leaks and confirm that the replacement has been successful. Here’s how to turn on the water supply:
1. Locate the shut-off valve: Identify the shut-off valve that controls the water supply to your kitchen sink. This valve is usually located below the sink, either on the wall or inside a cabinet. It is typically a small knob or lever.
2. Turn on the valve: Turn the shut-off valve counterclockwise or parallel to the water pipe. This will open the valve and allow water to flow into the newly installed pipe.
3. Check for leaks: After turning on the water supply, carefully inspect all the connections, including the new pipe, P-Trap, and any other fittings, for any signs of leakage. Pay close attention to the compression nuts and make sure they are tightly secured.
4. Run the faucet: Turn on the kitchen faucet and let the water flow for a few minutes. Observe the connections and check for any drips or leaks. If you notice any leaks, tighten the compression nuts slightly until the leaks stop.
5. Inspect for proper water flow: Ensure that water flows freely through the faucet and drains properly into the sink. Check for any unusual gurgling sounds or slow drainage, as these could indicate an issue with the plumbing system.
By turning on the water supply, you’re confirming that the new pipe and P-Trap are functioning as intended and delivering water to your kitchen fixtures. This step allows you to identify and address any potential leaks or issues before fully utilizing your sink.
Before concluding the process, take a final inspection to ensure that there are no leaks, proper water flow, and all connections are secure. Wipe away any remaining water or debris, and clean up the area under the sink.
Congratulations! You have successfully replaced the pipe under your kitchen sink. You can now proceed to the final step: checking for leaks.
Read more: How To Fix Leaking Pipe Under Sink
Step 8: Check for Leaks
After completing the entire process of replacing the pipe under your kitchen sink, it’s crucial to perform a thorough check for any potential leaks. Even with careful installation, there’s always a possibility of small leaks or drips that may occur. Checking for leaks ensures that your plumbing system is functioning correctly and that no water damage or issues will arise in the future. Here’s how to check for leaks:
1. Inspect all connections: Carefully examine all the connections, including the new pipe, P-Trap, and any other fittings. Look for any signs of moisture, drips, or water stains. Pay particular attention to the compression nuts and make sure they are tightly secured.
2. Observe the P-Trap: Check the P-Trap for any leaks or excess water. Look for drips or water accumulation along the curved section. Make sure the P-Trap is properly aligned and securely attached to both the sink drain and the wall or main plumbing line.
3. Run water through the sink: Turn on the kitchen faucet and let the water run at full force for a few minutes. Fill the sink with water and then release the stopper to allow the water to drain. Observe the connections and check for any drips or leaks during both the filling and draining processes.
4. Look for signs of water damage: Examine the area under the sink for any signs of water damage, such as water stains or mold growth. Pay attention to the surrounding walls or cabinets as well. If you notice any water damage, it may indicate a leak that needs to be addressed.
5. Repeat the inspection: Perform a second inspection a few hours after running the water. Sometimes, leaks that are initially undetectable may become more apparent over time. This second check allows you to catch any delayed leaks that may have occurred.
By diligently checking for leaks, you can identify and resolve any potential issues before they escalate and cause significant damage to your kitchen or plumbing system. Promptly fixing leaks ensures the efficiency and longevity of your new pipe installation.
If you discover any leaks during the inspection, tighten the affected connections slightly using an adjustable wrench. However, avoid over-tightening, as it can damage the fittings. If the leaks persist or if you’re uncertain about resolving them, it’s advisable to seek the assistance of a professional plumber.
Once you have ensured there are no leaks and the plumbing system is functioning properly, you can finally breathe a sigh of relief — knowing you successfully replaced the pipe under your kitchen sink and have a reliable and leak-free plumbing system.
Conclusion
Replacing a pipe under the kitchen sink may initially seem like a challenging task, but with the right tools, materials, and step-by-step guidance, it can be a manageable DIY project. By following the instructions outlined in this guide, you can successfully replace a pipe and restore the functionality and efficiency of your kitchen’s plumbing system.
Throughout the process, we covered essential steps such as clearing the area, shutting off the water supply, removing the P-Trap, replacing the old pipe, and reattaching the P-Trap. We also emphasized the importance of checking for leaks to ensure that your new pipe installation is watertight and free from any potential issues.
Remember, while this guide provides general instructions, it’s essential to note that plumbing systems can vary. If you encounter any complications or are unsure about any step, don’t hesitate to contact a professional plumber for assistance. Plumbing expertise ensures the best outcome and helps prevent any further damage or complications.
By replacing a damaged, corroded, or outdated pipe under your kitchen sink, you improve the functionality, safety, and overall performance of your plumbing system. It reduces the risk of leaks, water damage, and potential health hazards by preventing sewer gases from entering your kitchen.
Taking on this DIY project not only saves you money on professional fees but also gives you a sense of accomplishment and allows you to gain valuable knowledge about your home’s plumbing system.
Remember, safety is paramount throughout the process. Whether handling tools, shutting off the water supply, or assessing potential hazards, ensure your personal safety and take necessary precautions.
Lastly, regular maintenance and vigilance play a vital role in keeping your kitchen plumbing in good shape. Inspect the pipes periodically for any signs of damage or leaks and address them promptly. This proactive approach will help prolong the lifespan of your plumbing system and prevent major issues from arising.
With the knowledge and skills gained from replacing a pipe under your kitchen sink, you’re now well-equipped to tackle other minor plumbing repairs or upgrades in your home. Congratulations on completing this DIY project successfully, and remember to enjoy the benefits of a well-functioning and leak-free kitchen sink!
Frequently Asked Questions about How To Replace Pipe Under Kitchen Sink
Was this page helpful?
At Storables.com, we guarantee accurate and reliable information. Our content, validated by Expert Board Contributors, is crafted following stringent Editorial Policies. We're committed to providing you with well-researched, expert-backed insights for all your informational needs.


0 thoughts on “How To Replace Pipe Under Kitchen Sink”