
Articles
How Do You Install A Floating Vanity
Modified: October 31, 2024
Learn how to install a floating vanity with this comprehensive article. Discover step-by-step instructions and helpful tips to complete your bathroom renovation project.
(Many of the links in this article redirect to a specific reviewed product. Your purchase of these products through affiliate links helps to generate commission for Storables.com, at no extra cost. Learn more)
Introduction
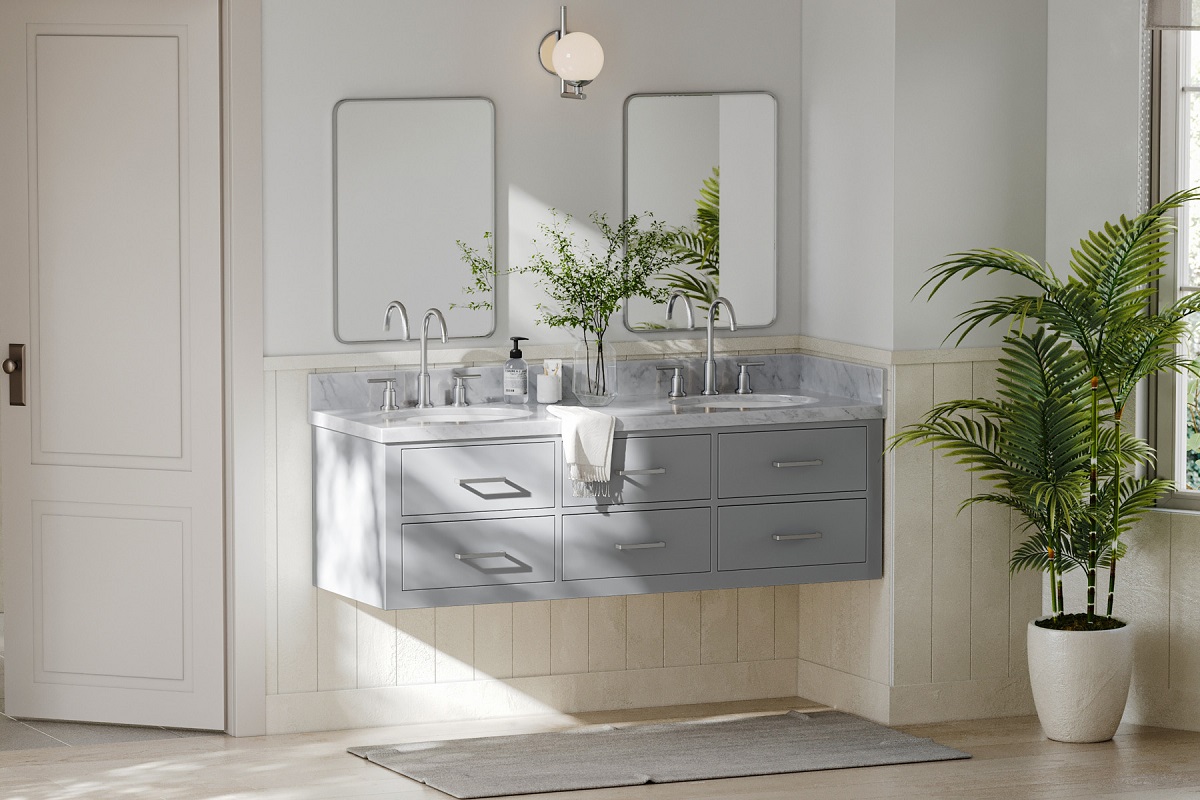
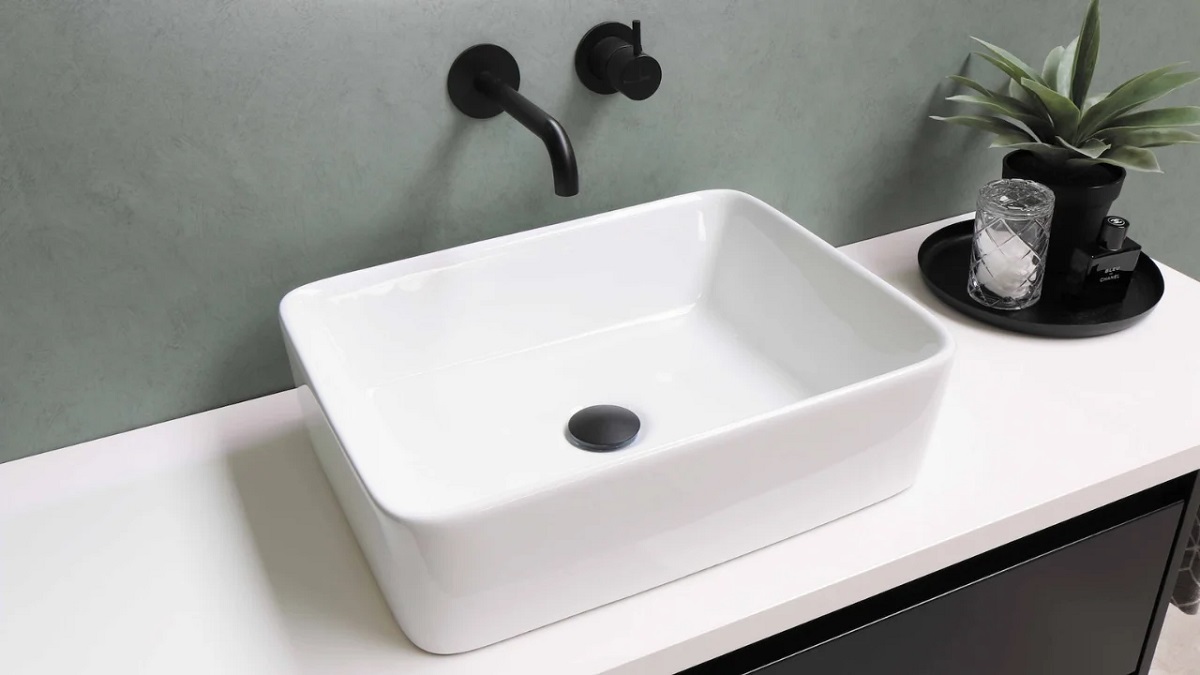
Installing a floating vanity in your bathroom can be a great way to add style, functionality, and a modern touch to the space. Unlike traditional vanities that rest on the floor, floating vanities are mounted directly to the wall, giving the illusion of extra space and creating a sleek and seamless look.
In this article, we will guide you through the step-by-step process of installing a floating vanity. We will cover everything from gathering the necessary tools and materials to connecting the plumbing, ensuring that you have all the information you need to complete the installation successfully.
Whether you’re a DIY enthusiast or a homeowner looking to take on a new project, installing a floating vanity can be a rewarding and satisfying experience. So let’s dive in and get started!
Key Takeaways:
- Installing a floating vanity involves gathering tools, preparing the wall, measuring the installation area, and securing the vanity to the wall and brackets. Proper plumbing connection and testing ensure a successful and functional installation.
- The step-by-step process of installing a floating vanity includes crucial steps such as securing the vanity to the wall, connecting the plumbing, and testing for stability and functionality. Following these steps can transform your bathroom into a stylish and functional space.
Step 1: Gather the necessary tools and materials
Before you begin the installation process, it’s essential to gather all the tools and materials you will need. Having everything prepared ahead of time will make the installation smoother and more efficient. Here’s a list of the necessary tools and materials:
- Measuring tape
- Level
- Pencil
- Drill
- Screwdriver
- Wall anchors
- Mounting brackets
- Screws
- Plumber’s putty
- Adjustable wrench
- Plumbing supplies (such as pipes, fittings, and P-trap)
- Silicone caulking
- Vanity cabinet
- Vanity top
- Faucet
Make sure to check the instructions provided by the manufacturer of your floating vanity for any specific tools or materials required. Additionally, it’s important to measure the space where the vanity will be installed to ensure that it will fit properly.
Once you have gathered all the necessary tools and materials, you’re ready to move on to the next step of the installation process.
Step 2: Prepare the wall
Preparing the wall is an important step in ensuring a sturdy and secure installation of your floating vanity. Follow these steps to properly prepare the wall:
- Clear the area: Remove any existing fixtures or items that may be in the way, such as towel racks or shelves. This will give you a clear space to work with and prevent any obstructions during the installation process.
- Locate the wall studs: Use a stud finder to locate the wall studs behind the drywall. Floating vanities need to be anchored to wall studs for stability. Mark the locations of the studs with a pencil.
- Mark the height: Determine the desired height of your vanity and mark it on the wall using a level. It’s important to consider the height of the vanity top and any additional backsplash that you plan to install.
- Mark the position: Use a measuring tape to mark the width of the vanity on the wall. This will help you visualize how the vanity will fit in the space and ensure that it is centered.
- Remove baseboard or trim: If there is baseboard or trim in the area where the vanity will be installed, remove it using a pry bar or a trim removal tool. This will create a flush surface for the vanity to be mounted.
By properly preparing the wall, you will create a strong and stable foundation for your floating vanity. This will help prevent any shifting or movement of the vanity over time, ensuring a long-lasting and secure installation.
Step 3: Measure and mark the installation area
Once you have prepared the wall, it’s time to measure and mark the installation area for your floating vanity. Follow these steps to ensure accurate measurements:
- Measure the width: Use a measuring tape to measure the width of the installation area. This will help you determine the size of the vanity cabinet that will fit in the space.
- Mark the position: Using a pencil, mark the top and bottom edges of the vanity cabinet on the wall. Make sure the marks are level and aligned with the desired height and position you determined in the previous step.
- Measure the height: Measure the height of the installation area from the floor to the marked position on the wall. This will help you ensure that the vanity is level and properly aligned.
- Double-check the measurements: Take a step back and double-check your measurements to ensure accuracy. It’s always better to be precise during this step to avoid any issues during the installation process.
By measuring and marking the installation area accurately, you will ensure that the floating vanity fits perfectly in the designated space. This step is crucial in achieving a professional and polished look for your bathroom.
Step 4: Install the mounting brackets
The next step in installing a floating vanity is to install the mounting brackets. These brackets will provide the support and stability needed to hold the vanity securely to the wall. Follow these steps to install the mounting brackets:
- Position the brackets: Place the mounting brackets on the wall at the marked positions. Make sure they are level and aligned with the edges of the vanity cabinet.
- Mark the screw holes: Use a pencil to mark the screw holes on the wall through the bracket holes. This will indicate where the screws need to be inserted.
- Prepare the wall for screws: If the wall studs align with the bracket positions, skip this step. Otherwise, you will need to use wall anchors to provide additional support. Drill pilot holes for the wall anchors at the marked screw hole locations.
- Insert the wall anchors: Insert the wall anchors into the pilot holes. Make sure they are flush with the wall surface. This will help strengthen the attachment of the brackets to the wall.
- Secure the brackets: Align the brackets with the marked screw holes and use a screwdriver or drill to secure them in place. Make sure the brackets are tight and stable.
By installing the mounting brackets properly, you will create a solid foundation for your floating vanity. This step ensures that the vanity is securely attached to the wall and will not shift or sag over time. It’s important to take your time and ensure the brackets are aligned and properly secured before moving on to the next step.
When installing a floating vanity, be sure to use a level to ensure it is straight and secure. Also, make sure to anchor it properly to the wall studs for stability.
Read more: What Is A Floating Vanity
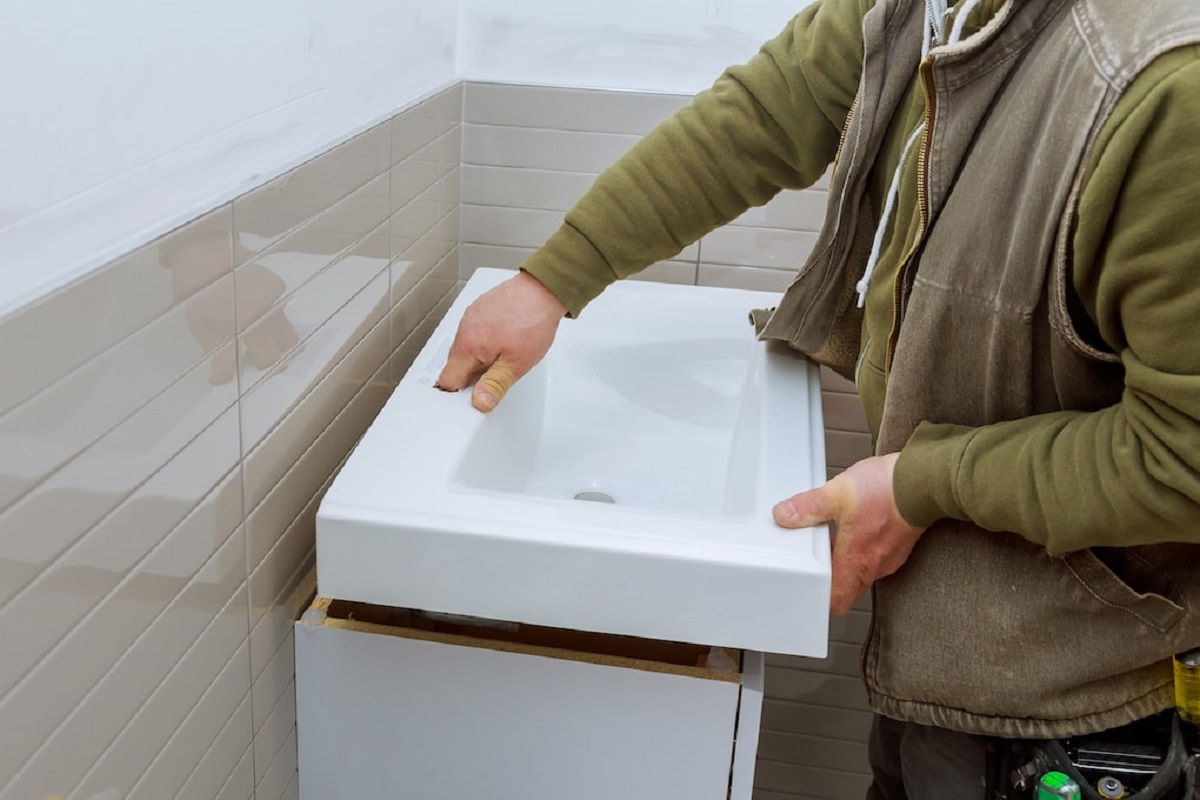
Step 5: Attach the vanity to the brackets
Now that the mounting brackets are securely installed, it’s time to attach the vanity cabinet to the brackets. This step will provide the necessary support for the vanity and ensure it stays in place. Follow these steps to attach the vanity to the brackets:
- Lift the vanity: Carefully lift the vanity cabinet and position it over the installed brackets. Align the mounting holes on the back of the vanity with the brackets.
- Slide the vanity onto the brackets: Slowly slide the vanity onto the brackets, ensuring that the mounting holes on the back of the vanity align with the brackets. Take your time to make sure the vanity is securely seated on the brackets.
- Secure the vanity to the brackets: Once the vanity is properly positioned, use a screwdriver or drill to insert screws through the mounting holes on the back of the vanity and into the brackets. Make sure the screws are tightened securely but be careful not to over-tighten them, as this can damage the vanity.
By attaching the vanity to the brackets, you are ensuring that it is firmly secured to the wall and will not move or wobble. This step is crucial in maintaining the stability and durability of your floating vanity.
Step 6: Secure the vanity to the wall
Securing the vanity to the wall is an important step to ensure its stability and prevent any potential accidents or damage. Here’s how you can secure the vanity to the wall:
- Locate the wall studs: Use a stud finder to locate the wall studs behind the drywall. This step is crucial as it will provide better support for the vanity.
- Mark the stud locations: Mark the locations of the wall studs on the back of the vanity cabinet with a pencil. This will guide you in attaching the vanity securely to the wall.
- Drill pilot holes: Use a drill with a drill bit slightly smaller than the diameter of the screws. Drill pilot holes at the marked stud locations on the back of the vanity.
- Align the vanity with the studs: Carefully lift the vanity and position it against the wall, aligning the pilot holes with the marked stud locations.
- Secure the vanity to the studs: Insert screws through the pilot holes and into the wall studs using a screwdriver or drill. Make sure the screws are tightened securely, but be careful not to overtighten and damage the vanity or the wall.
By securing the vanity to the wall studs, you are ensuring that it is properly anchored and stable. This step is crucial, especially for larger or heavier vanities, as it provides additional support and prevents any potential sagging or movement over time.
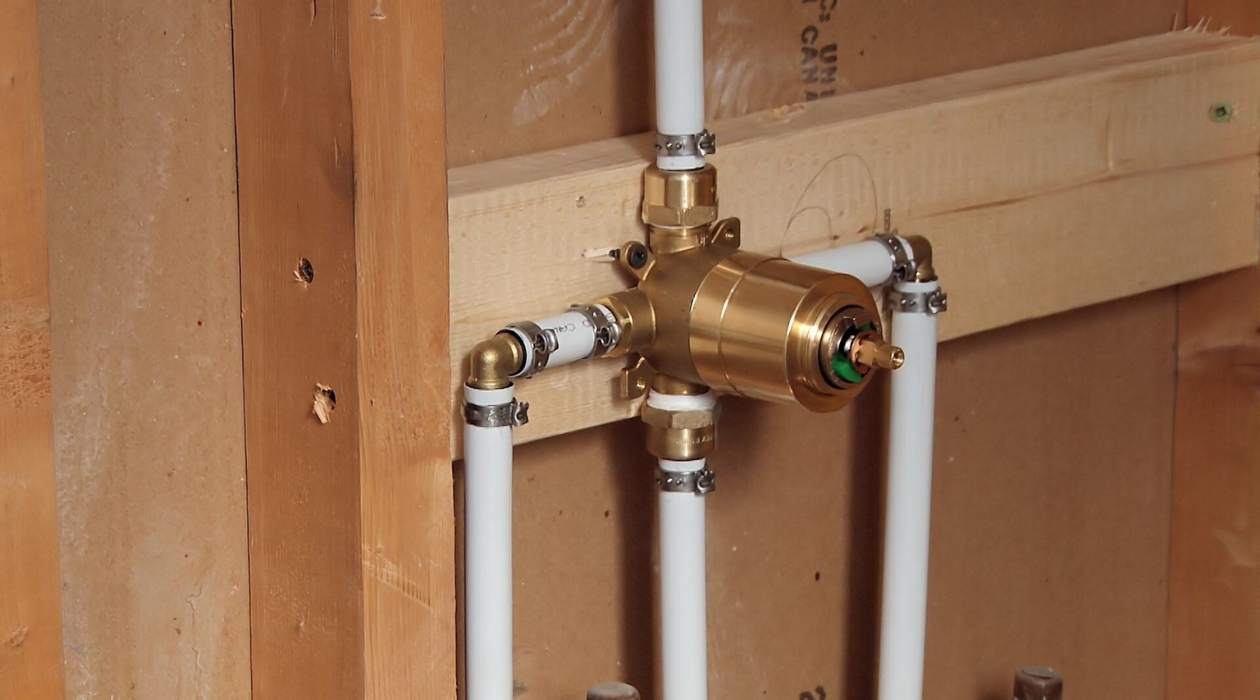
Step 7: Connect the plumbing
Now that the vanity is securely attached to the wall, it’s time to connect the plumbing. This step involves connecting the water supply lines, drain pipes, and any additional plumbing components. Follow these steps to connect the plumbing:
- Turn off the water supply: Before you begin working on the plumbing, locate the shut-off valves for the water supply and turn them off. This will prevent any potential leaks or water damage.
- Install the faucet: Follow the manufacturer’s instructions to install the faucet onto the vanity top. Make sure to use plumber’s putty or silicon caulking to create a watertight seal between the faucet and the vanity top.
- Connect the water supply lines: Attach the water supply lines to the corresponding hot and cold water valves. Use an adjustable wrench to tighten the connections, but be careful not to overtighten and damage the pipes or fittings.
- Install the drain assembly: Connect the drain assembly to the sink drain hole and tighten the nut underneath the sink using a wrench. Make sure the drain pipe is properly aligned and securely attached.
- Connect the P-trap: Install the P-trap by connecting it to the drainpipe and the wall drainpipe. Use an adjustable wrench to tighten the connections, ensuring they are snug but not overly tight.
- Turn on the water supply: Once all the connections are made, slowly turn on the water supply valves and check for any leaks. If there are any leaks, tighten the connections or apply plumbing tape or sealant as needed.
It’s essential to take your time during the plumbing connection step to ensure everything is properly aligned and tightly secured. Properly connected plumbing will ensure the smooth functioning of your vanity and prevent any water-related issues in the future.
Step 8: Test the vanity and make any necessary adjustments
After completing the installation and connecting the plumbing, it’s crucial to test the vanity and make any necessary adjustments to ensure its functionality and appearance. Follow these steps to test the vanity:
- Turn on the water supply: Fully open the shut-off valves to allow water to flow to the vanity. Check for any signs of leaks or drips around the faucet, water supply lines, and drain connections.
- Check for proper drainage: Fill the sink with water and let it drain. Observe the rate of drainage and ensure there are no clogs or slow draining issues. If there are any problems, check the drain pipes for any blockages or improper installation.
- Inspect the vanity’s stability: Gently shake or apply slight pressure to the vanity to test its stability. If there’s excessive movement or shaking, you may need to tighten the mounting brackets, screws, or connections. Make the necessary adjustments until the vanity feels secure and stable.
- Test the drawers and doors: Open and close the drawers and doors to ensure they operate smoothly and without any sticking or misalignment. Adjust the hinges or slides as required to ensure proper functionality.
- Check for levelness: Use a level tool to verify that the vanity is perfectly level both vertically and horizontally. Make any necessary adjustments by adjusting the mounting brackets or adding shims to achieve a level installation.
By testing the vanity and making any necessary adjustments, you can ensure that it is fully functional, stable, and aligned correctly. This final step is essential to address any issues or concerns before completing the installation process.
Conclusion
Installing a floating vanity can be a rewarding project that adds style and functionality to your bathroom. By following the step-by-step guide outlined in this article, you can successfully install a floating vanity with ease.
We began by gathering the necessary tools and materials, ensuring that we had everything on hand to complete the installation. We then prepared the wall by locating the studs and marking the installation area. Next, we measured and marked the area to ensure precise placement of the vanity.
After that, we installed the mounting brackets, providing the necessary support for the vanity. We then attached the vanity to the brackets, securing it in place. To further ensure stability, we secured the vanity to the wall by locating and attaching it to the wall studs.
Next, we moved on to connecting the plumbing, making sure to turn off the water supply before installation. We installed the faucet, connected the water supply lines, and installed the drain assembly and P-trap. Finally, we tested the vanity for leaks, proper drainage, stability, and functionality, making any necessary adjustments along the way.
By following these steps, you can achieve a successful floating vanity installation, transforming your bathroom into a stylish and functional space. Remember to always refer to the manufacturer’s instructions specific to your vanity for any additional guidance.
Now, armed with the knowledge and confidence gained from this article, it’s time to embark on your floating vanity installation journey. Happy DIY-ing!
Frequently Asked Questions about How Do You Install A Floating Vanity
Was this page helpful?
At Storables.com, we guarantee accurate and reliable information. Our content, validated by Expert Board Contributors, is crafted following stringent Editorial Policies. We're committed to providing you with well-researched, expert-backed insights for all your informational needs.


0 thoughts on “How Do You Install A Floating Vanity”