Articles
How To Lay A Floating Floor
Modified: February 26, 2024
Learn how to lay a floating floor with our comprehensive articles. Get expert tips and guidance for a successful installation.
(Many of the links in this article redirect to a specific reviewed product. Your purchase of these products through affiliate links helps to generate commission for Storables.com, at no extra cost. Learn more)
Introduction
In today’s modern world, homeowners have a wide range of options when it comes to flooring. One popular choice is a floating floor, which is a type of flooring installation method that does not require nails or glue. This versatile and DIY-friendly option allows homeowners to easily install and replace flooring without the need for professional help. Whether you’re looking to update the floors in your home or embark on a new DIY project, learning how to lay a floating floor is a valuable skill to have.
In this comprehensive guide, we will take you through the step-by-step process of installing a floating floor. From gathering materials to completing the installation, we’ll cover everything you need to know to achieve a successful and professional-looking result. So, let’s dive in and get started on transforming your space with a beautiful and functional floating floor!
Key Takeaways:
- Installing a floating floor is a DIY-friendly and versatile option for homeowners, providing a cost-effective way to transform spaces with a professional-looking result. Proper preparation, precise measurements, and attention to detail are crucial for success.
- From gathering materials to completing the installation, learning how to lay a floating floor involves essential steps such as preparing the subfloor, installing underlayment, planning the layout, and making precise cuts. Following manufacturer’s instructions and prioritizing safety are key for a successful DIY project.
Read more: What Is A Floating Floor
Step 1: Gather Materials
Before you begin installing a floating floor, it’s essential to gather all the necessary materials. By having everything you need within reach, you’ll be able to work efficiently and avoid any unnecessary delays. Here are the essential materials you’ll need:
- Your chosen flooring material: This can be laminate, engineered wood, vinyl plank, or any other type of flooring specifically designed for floating installations.
- Underlayment: This layer of material provides a moisture barrier, sound insulation, and cushioning for your floating floor. Make sure to purchase the appropriate underlayment for your chosen flooring material.
- Tape measure: Accurate measurements are crucial for a successful installation. Have a tape measure on hand to measure the dimensions of your room and calculate the amount of flooring material needed.
- Utility knife or flooring cutter: You’ll need a sharp tool to cut the flooring planks to the correct size.
- Saw: If you need to make any special cuts or adjustments, a saw will come in handy.
- Spacers: These small tools help maintain a consistent expansion gap between the flooring and the walls, allowing the floor to move slightly during temperature changes.
- Hammer: A hammer is necessary for tapping the flooring planks into place.
- Pry bar: If you have existing baseboards or trim, a pry bar will help you remove them without causing any damage.
- Notebook and pencil: It’s always helpful to have a notebook and pencil on hand to jot down measurements, make notes, or keep track of any adjustments or changes you make during the installation process.
- Safety gear: Lastly, don’t forget to prioritize safety. Wear safety glasses, gloves, and knee pads if necessary to protect yourself during the installation process.
By gathering these materials ahead of time, you’ll be well-prepared to tackle the next steps in the floating floor installation process. So, let’s move on to step two: preparing the subfloor.
Step 2: Prepare the Subfloor
Preparing the subfloor is an essential step in ensuring a smooth and durable floating floor installation. The subfloor is the foundation on which your new flooring will be installed, so taking the time to properly prepare it is crucial. Here’s what you need to do:
- Clean the subfloor: Start by thoroughly cleaning the subfloor to remove any debris, dust, or dirt. Use a broom and vacuum to ensure the surface is clean and free from any obstructions.
- Check for moisture: Before proceeding, it’s important to check the moisture levels in the subfloor. Excessive moisture can cause the flooring to warp or buckle over time. Use a moisture meter to detect any moisture issues. If the levels are high, you may need to address the underlying cause before proceeding with the installation.
- Level the subfloor: If you notice any uneven areas or dips in the subfloor, it’s crucial to level them. Use a floor leveler or self-leveling compound to fill in low spots and create a smooth and even surface. Follow the manufacturer’s instructions for mixing and applying the leveler.
- Repair any damage: Inspect the subfloor for any signs of damage such as cracks, holes, or loose boards. Repair these issues before proceeding with the installation. Fill in any cracks or holes with a suitable filler and secure any loose boards with screws or nails.
- Remove baseboards or trim: If you have existing baseboards or trim, it’s best to remove them before installing the floating floor. This will allow for a cleaner and more professional-looking finish. Use a pry bar to carefully remove the baseboards without causing any damage.
- Install a moisture barrier: Depending on your flooring material and the condition of your subfloor, you may need to install a moisture barrier. This is particularly important for areas with high moisture levels, such as basements or bathrooms. Follow the manufacturer’s instructions when installing the moisture barrier.
By taking the time to properly prepare the subfloor, you will ensure a solid foundation for your floating floor. A clean, level, and moisture-free subfloor will help prevent any future issues and contribute to the longevity of your new flooring. With the subfloor prepared, you’re ready to move on to the next step: installing the underlayment.
Step 3: Install the Underlayment
Installing the underlayment is a crucial step in the floating floor installation process. The underlayment provides several benefits, including moisture protection, sound insulation, and added cushioning. Follow these steps to install the underlayment:
- Prepare the space: Clear the subfloor of any debris and ensure it’s clean and dry. Remove any baseboards or trim that may interfere with the installation process.
- Roll out the underlayment: Begin by unrolling the underlayment material parallel to the longest wall in the room, with the shiny side facing up. Allow the underlayment to extend slightly up the adjacent walls, leaving a small gap to allow for expansion.
- Trim the underlayment: Use a utility knife or flooring cutter to trim the excess underlayment along the walls. Be sure to leave a small gap for expansion between the underlayment and the walls.
- Overlap the underlayment seams: If your underlayment comes in sections, overlap the seams by a few inches. Secure the seams together using adhesive or tape, following the manufacturer’s instructions. This will prevent moisture from seeping through the gaps.
- Secure the underlayment: Use staples or underlayment nails to secure the underlayment to the subfloor. Space the fasteners every 6-8 inches along the edges and every 12 inches in the field. Be careful not to puncture the underlayment or damage the subfloor.
- Repeat the process: Continue rolling out the underlayment, overlapping the seams, and securing it until the entire subfloor is covered.
Installing the underlayment is an important step in ensuring the longevity and performance of your floating floor. The underlayment provides a barrier against moisture, reduces noise, and adds comfort underfoot. With the underlayment installed, you’re ready to move on to planning the layout of your floating floor in step four.
Step 4: Plan the Layout
Before you begin installing the flooring planks, it’s important to plan the layout of your floating floor. Planning the layout will help you determine the best way to position the planks, ensure a balanced and aesthetically pleasing result, and minimize waste. Follow these steps to plan your layout:
- Measure the room: Use a tape measure to measure the length and width of the room. Multiply these measurements to calculate the total square footage.
- Consider the direction: Decide on the direction in which you want the planks to run. Typically, it’s recommended to install the planks parallel to the longest wall or in the direction of the natural light source.
- Create a guideline: Use a chalk line or straightedge to create a guideline along the starting wall. This will serve as a reference for the first row of planks.
- Consider the expansion gap: Remember to leave a small expansion gap, typically around 1/4 inch, between the flooring planks and the walls to allow for temperature and humidity fluctuations.
- Plan for staggering: To create a more natural and visually appealing result, stagger the end joints of the planks. Avoid having adjacent rows with identical plank lengths.
- Check for obstacles: Identify any obstacles in the room, such as doorways, heating vents, or irregular shapes. Plan the layout accordingly, making sure to leave space for transitions or cuts.
- Optimize material usage: Once you have a rough layout plan, assess how the planks will fit within the room. Try to optimize material usage and minimize waste by planning the cuts and transitions strategically.
Taking the time to plan the layout of your floating floor will ensure a more efficient and visually appealing installation. By considering the room dimensions, direction, expansion gap, staggering, and any obstacles, you can create a well-designed floor that meets your aesthetic preferences and functional needs. With the layout planned, you’re ready to move on to the actual installation of the flooring planks in step five.
When laying a floating floor, be sure to leave a small gap around the edges to allow for expansion and contraction of the flooring material. This will help prevent buckling and warping over time.
Read more: How To Lay Laminate Floor
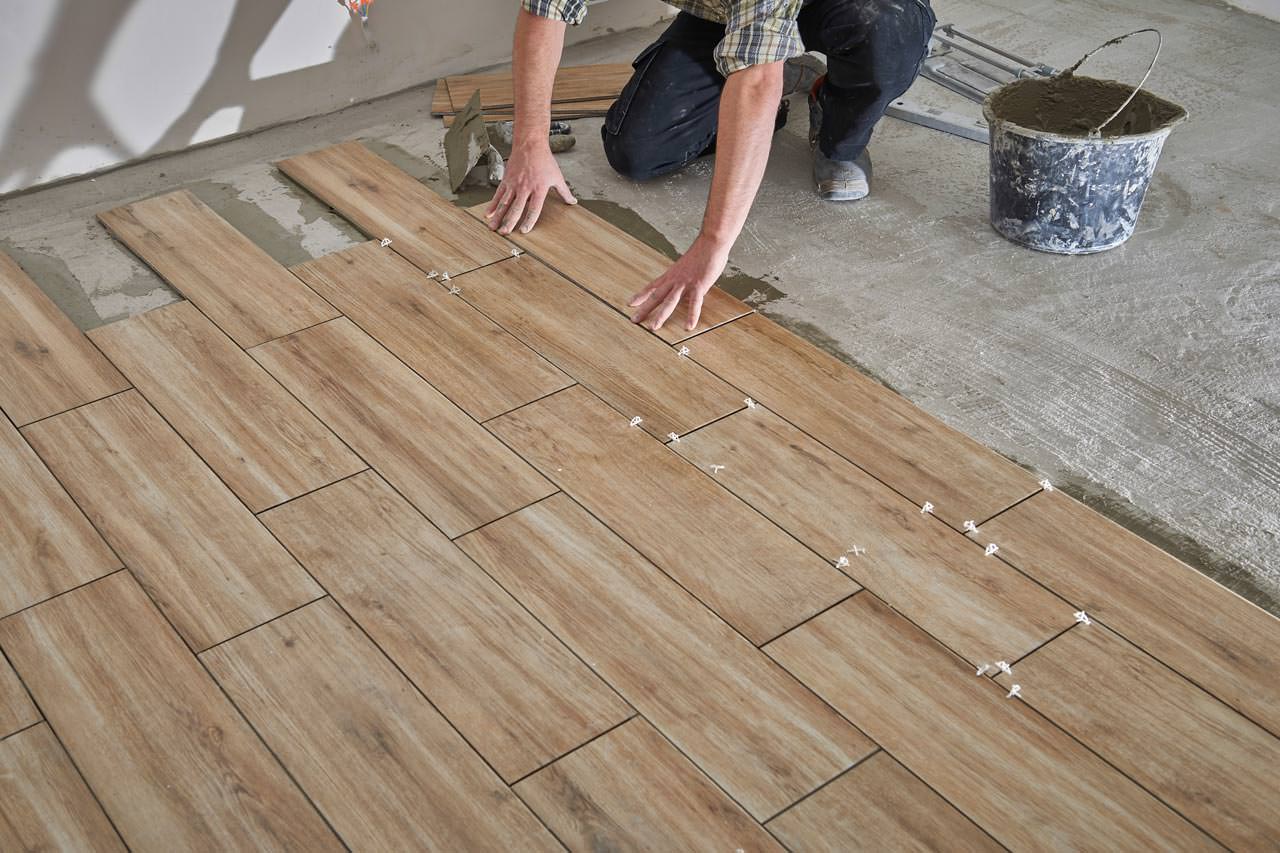
Step 5: Begin Floating Floor Installation
Now that you have prepared the subfloor, installed the underlayment, and planned the layout, it’s time to start installing the actual floating floor. This step-by-step guide will walk you through the process:
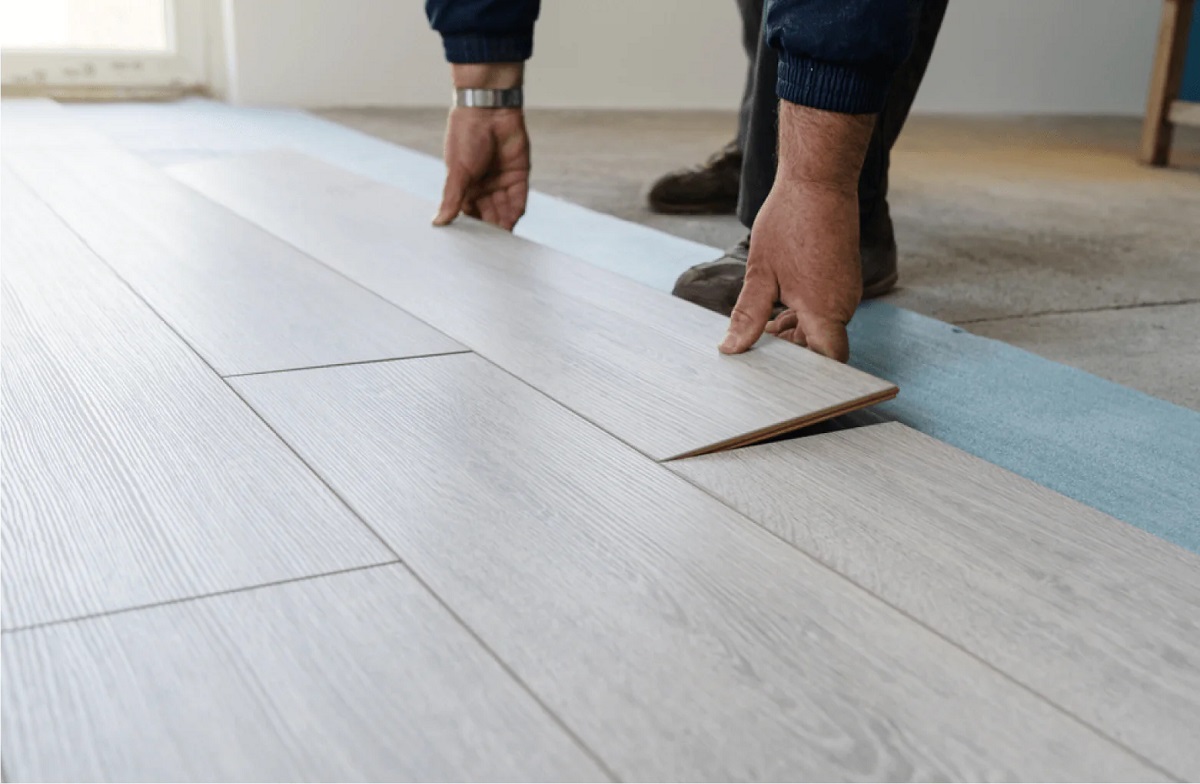
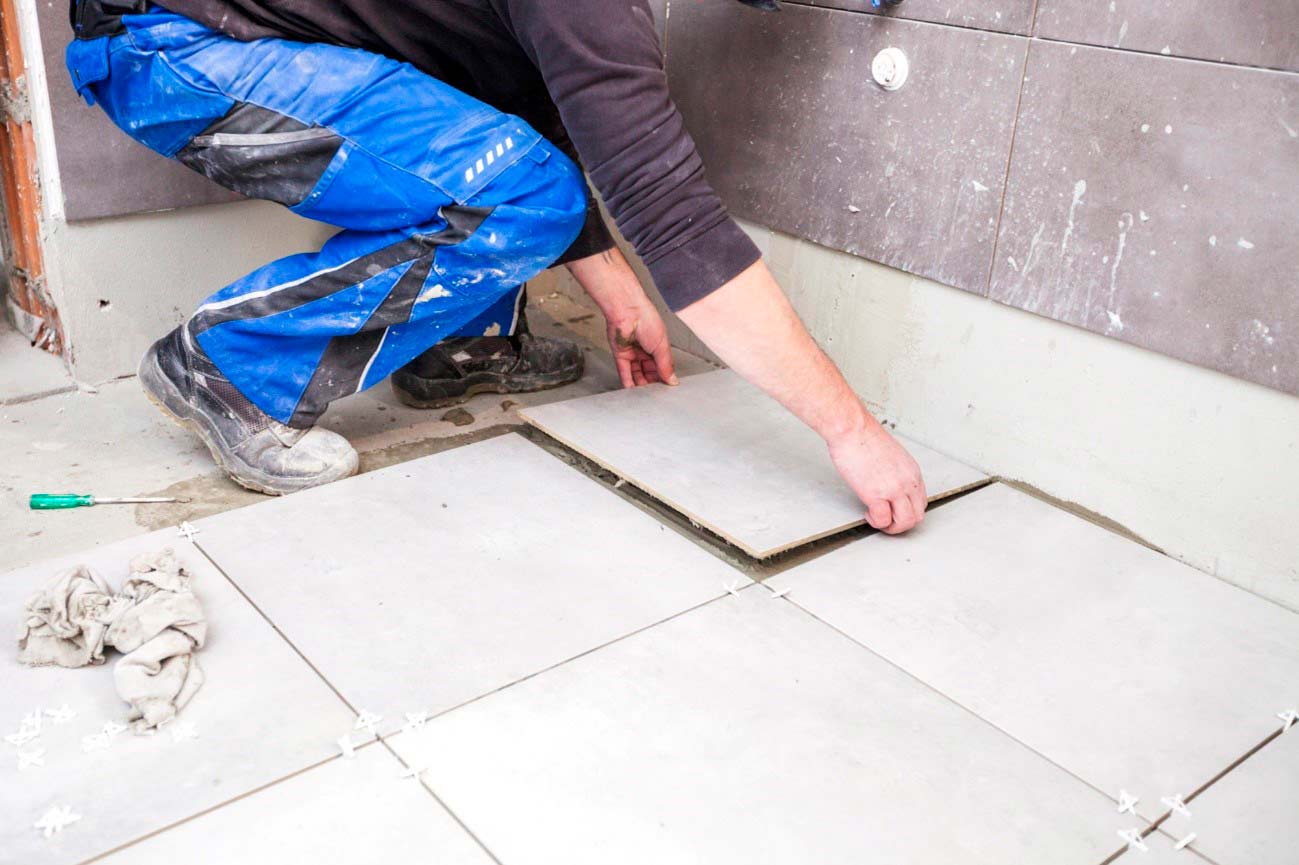
- Start at the first row: Begin at the starting wall, aligning the first flooring plank with the guideline you created during the layout planning. Remember to leave the appropriate expansion gap between the plank and the wall.
- Insert the tongue into the groove: Place the next plank at a slight angle, aligning the tongue of the new plank with the groove of the previous plank. Gently push the plank downward until it locks into place. Repeat this step for the entire first row.
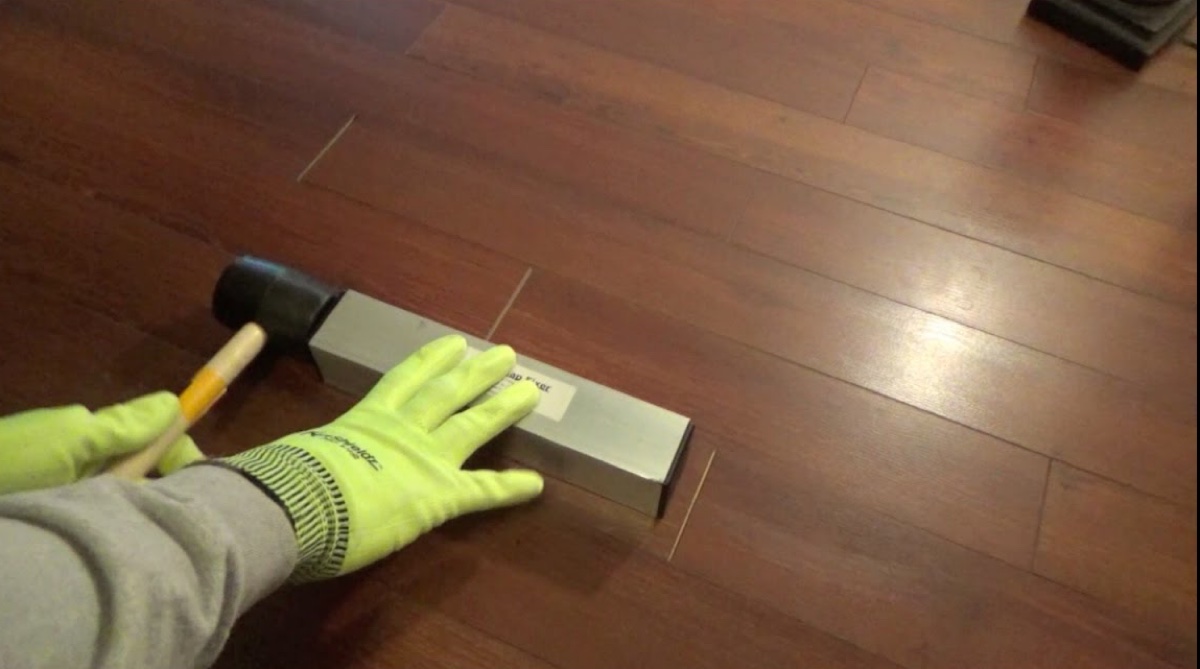
- Continue with subsequent rows: For the second row and onward, use the remaining piece from the previous row as the starting point. This will create a staggered pattern. Insert the tongue into the groove, fitting the planks tightly together. Use a tapping block and hammer to ensure a secure fit.
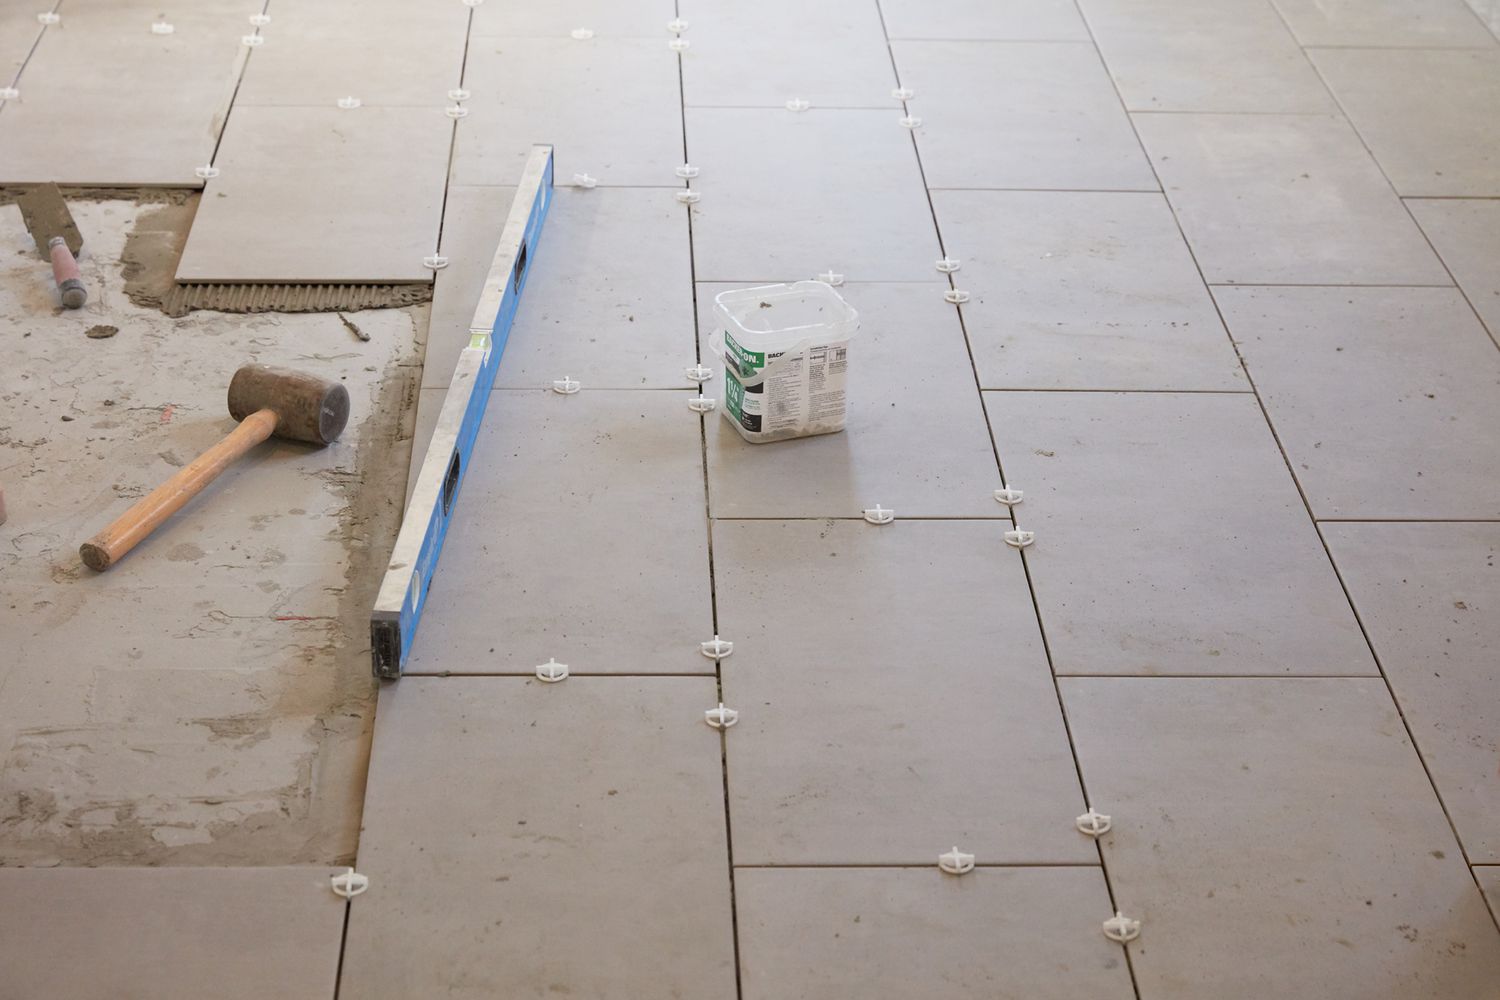
- Use spacers: As you install each row, place spacers along the edges to maintain the necessary expansion gap. These spacers will be removed once the installation is complete.
- Trim the last row: When you reach the final row, you may need to trim the planks to fit the remaining space. Measure and mark the planks, then use a saw to make the appropriate cuts. Remember to account for the expansion gap.
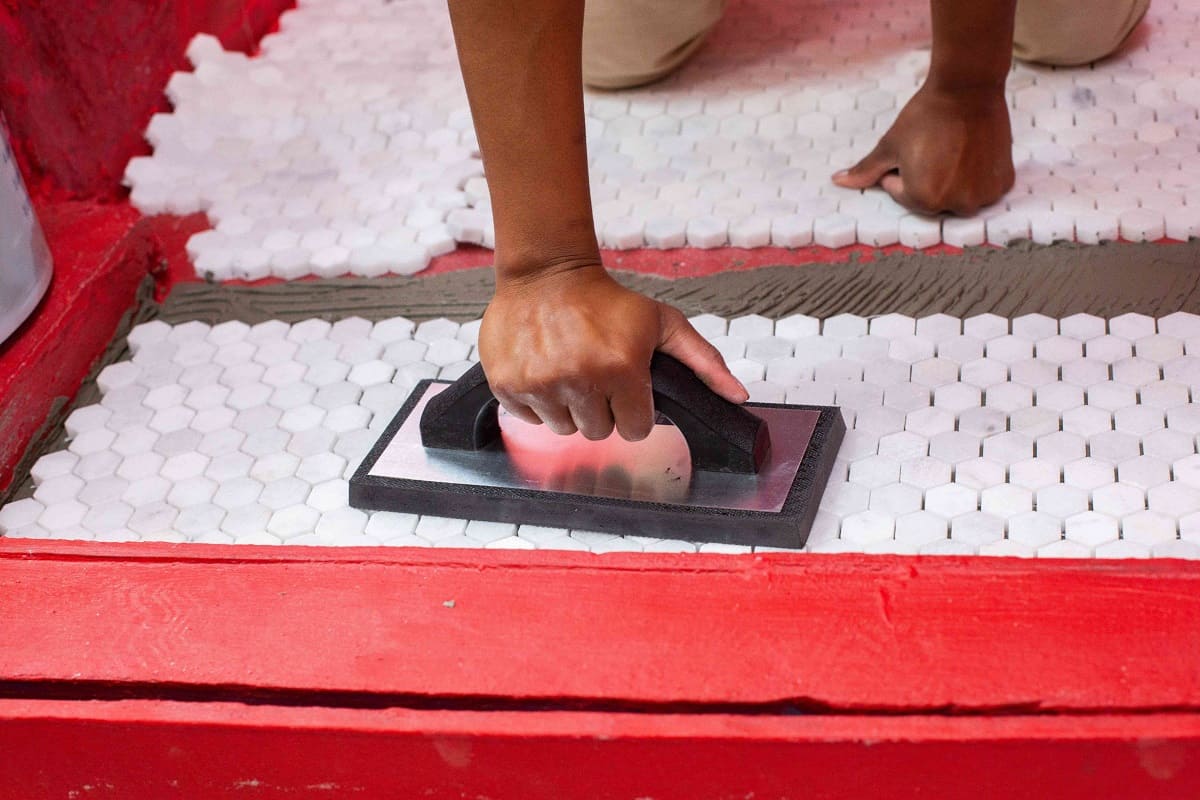
- Ensure a snug fit: Throughout the installation process, periodically check that the flooring planks are fitting snugly together. Use a tapping block and hammer to gently tap any stubborn planks into place.
- Work your way across the room: Continue installing the flooring planks row by row, working your way across the room. Take your time and pay attention to detail to ensure a professional-looking result.
It’s important to note that different flooring materials may have specific installation requirements, so always refer to the manufacturer’s instructions for the best practices. Following these steps will help you achieve a successful and visually appealing floating floor installation. Once you have completed the installation of the flooring planks, you can move on to the next step: cutting and fitting the planks in step six.
Step 6: Cut and Fit Flooring Planks
As you progress with the installation of the floating floor, you may encounter areas where the standard-sized planks don’t fit perfectly. In these cases, you’ll need to cut and fit the flooring planks to achieve a seamless and professional-looking result. Here’s how to do it:
- Measure the area: Take precise measurements of the area where you need to cut and fit the planks. Measure the length, width, and any irregular angles or obstacles that may require special cuts.
- Mark the plank: Transfer the measurements onto the plank that needs to be cut. Use a pencil to make accurate marks on the plank’s surface.
- Choose the appropriate cutting tool: Depending on the type of flooring material you’re working with, choose the appropriate cutting tool. For thinner materials like laminate or vinyl, a utility knife or flooring cutter may be sufficient. Thicker materials like hardwood may require a saw.
- Cut the plank: Carefully cut along the marked lines, ensuring a smooth and even cut. Follow the manufacturer’s guidelines and safety instructions when using cutting tools.
- Test the fit: After cutting the plank, test its fit in the desired area. Make any necessary adjustments and trim further if needed to achieve a precise fit. Remember to leave the appropriate expansion gap.
- Repeat the process: As you progress with the installation, you may encounter more areas that require cutting and fitting. Repeat the steps above for each section that needs customization.
Take your time when cutting and fitting the flooring planks to ensure accuracy and a seamless result. It’s better to make small adjustments gradually than to cut too much off at once. Remember to double-check your measurements before making any cuts. With proper cutting and fitting, you’ll be able to achieve a cohesive and professional-looking floating floor installation. In the next step, we’ll explore how to continue installing the planks in step seven.
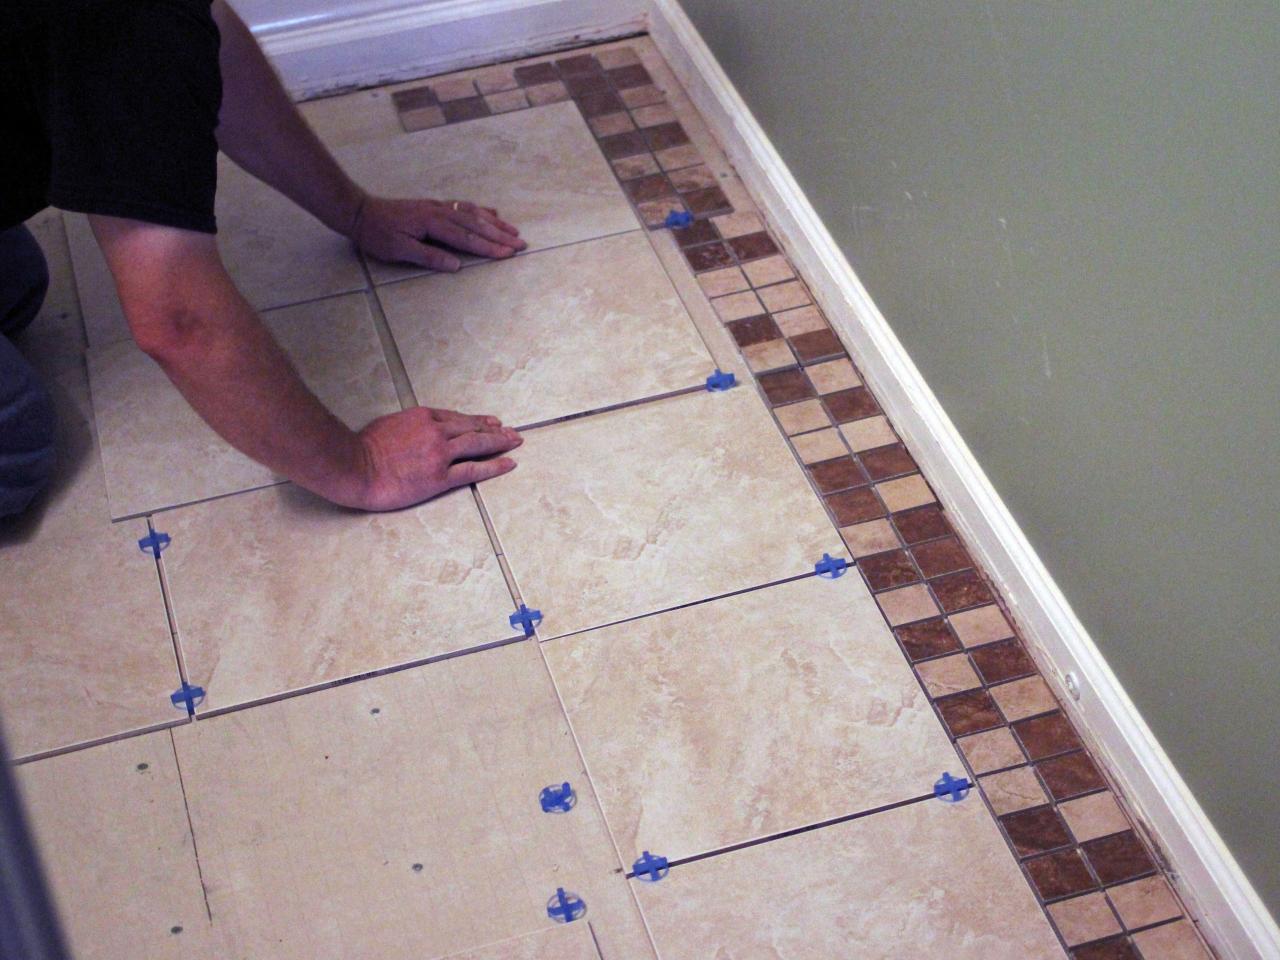
Step 7: Continue Installing Planks
After cutting and fitting the necessary planks, it’s time to continue installing the rest of the flooring to complete your floating floor. Follow these steps to ensure a smooth and efficient installation:
- Start with a full plank: Begin each new row with a full-length plank for a balanced and visually appealing result. This will help maintain the integrity of the staggered pattern.
- Secure the planks: As you insert each new plank, ensure a tight fit by gently tapping it into place with a tapping block and hammer. Make sure that there are no gaps or visible seams between the planks.
- Maintain the expansion gap: Throughout the installation process, remember to leave the necessary expansion gap between the flooring and the walls. This allows the flooring to naturally expand and contract with temperature and humidity changes.
- Work row by row: Continue installing the planks row by row, following the layout plan and staggering the end joints. Use spacers along the edges to maintain consistency in the expansion gap.
- Check for leveling: Periodically check for leveling as you progress with the installation. If you notice any areas that are not level, make adjustments as needed to ensure a uniform and flat surface.
- Trim the last row: When you reach the final row, you may need to trim the planks to fit the remaining space. Measure and mark the planks, then carefully cut them to size. Install the trimmed planks, making sure they fit snugly and leave the required expansion gap.
- Remove spacers: Once the installation is complete, carefully remove the spacers along the edges of the room. Be gentle to avoid causing any damage to the newly installed floor.
By following these steps and maintaining attention to detail, you’ll be able to continue installing the planks smoothly and efficiently. Remember to check for leveling and ensure a tight fit between the planks for a professional-looking result. With the planks in place, you’re ready for the final step: completing the installation in step eight.
Step 8: Complete the Installation
Congratulations, you’re almost finished! Step 8 is all about completing the installation of your floating floor and making the final touches. Follow these steps to wrap up the project:
- Inspect the floor: Take a step back and carefully inspect the installed flooring. Look for any visible gaps, uneven areas, or imperfections. Make any necessary adjustments or corrections before proceeding.
- Install baseboards or trim: Now is the time to reinstall or install new baseboards or trim to cover the expansion gap and provide a finished look. Use a nail gun or screws to secure the baseboards in place, making sure they are level and aligned properly.
- Clean up the space: Remove any debris or dust from the completed installation. Vacuum or sweep the floor thoroughly to ensure it’s free from any dirt or particles.
- Remove protective coverings: If you used any protective coverings or tape during the installation process, now is the time to remove them. Peel off any stickers or labels on the flooring planks.
- Place furniture and accessories: Once the floor is clean and ready, you can start placing your furniture and accessories back into the room. Be cautious when moving heavy items to prevent scratching or damaging the new floor.
- Enjoy your new floor: Finally, take a moment to admire your hard work and enjoy your newly installed floating floor. Not only does it enhance the beauty of your space, but it also adds value and functionality to your home.
Completing the installation of your floating floor is a gratifying moment. By following these final steps, you’re ensuring that the floor is in excellent condition and ready for use. Now, sit back, relax, and relish in the beauty and durability of your new floating floor!
Remember, proper maintenance of your floating floor will extend its lifespan and keep it looking its best. Follow the manufacturer’s guidelines for cleaning and care to keep your floor in optimal condition for years to come.
Thank you for joining us on this comprehensive journey to learn how to lay a floating floor. We hope you found this guide helpful and informative. Get ready to enjoy the benefits of your new flooring and take pride in your DIY achievement!
Read more: How To Lay Brick Floor
Conclusion
Installing a floating floor is a rewarding and cost-effective way to transform your space. By following the step-by-step process outlined in this guide, you’ve gained the knowledge and skills necessary to successfully lay a floating floor. From gathering materials to completing the installation, you’ve learned how to prepare the subfloor, install the underlayment, plan the layout, cut and fit flooring planks, and finish the installation.
Throughout the process, attention to detail, accuracy in measurements, and proper tool usage are essential for achieving a professional-looking result. By taking the time to properly prepare the subfloor, install the underlayment, plan the layout, and make precise cuts, you’ve created a solid foundation for your floating floor that is both beautiful and functional.
Remember to always refer to the manufacturer’s instructions for your specific flooring material and seek professional assistance if needed. Safety should also be a priority throughout the installation process, so be sure to use the appropriate tools and protective gear.
Now that you’ve completed the installation, it’s time to enjoy the benefits of your new floating floor. Revel in the beauty and durability it brings to your space, and take pride in the accomplishment of a successful DIY project. With proper care and maintenance, your floating floor will continue to enhance your home for years to come.
We hope this comprehensive guide has provided you with the knowledge and confidence to embark on your own floating floor installation. Whether you’re updating a single room or transforming your entire home, a floating floor is a versatile and cost-effective choice that can truly elevate your space.
Thank you for joining us on this journey, and best of luck with your floating floor installation!
Frequently Asked Questions about How To Lay A Floating Floor
Was this page helpful?
At Storables.com, we guarantee accurate and reliable information. Our content, validated by Expert Board Contributors, is crafted following stringent Editorial Policies. We're committed to providing you with well-researched, expert-backed insights for all your informational needs.


0 thoughts on “How To Lay A Floating Floor”