Home>Articles>How To Install A Euro Single Post Toilet Paper Holder
Articles
How To Install A Euro Single Post Toilet Paper Holder
Modified: August 19, 2024
Learn how to install a Euro single post toilet paper holder with our step-by-step guide. Find helpful articles and tips for a quick and easy installation.
(Many of the links in this article redirect to a specific reviewed product. Your purchase of these products through affiliate links helps to generate commission for Storables.com, at no extra cost. Learn more)
Introduction
Installing a Euro single post toilet paper holder can be a simple and rewarding DIY project. Not only does it add convenience to your bathroom, but it also brings a touch of elegance and modernity to your space. With just a few tools and materials, you can have a functional and stylish toilet paper holder in no time. In this article, we will guide you through the step-by-step process of installing a Euro single post toilet paper holder, ensuring a secure and professional installation.
Before you begin, make sure you have all the necessary tools and materials on hand. You will need a measuring tape, a pencil, a drill, a stud finder, screws or anchors, a screwdriver or drill bit, and, of course, your new Euro single post toilet paper holder.
Now, let’s dive into the installation process and transform your bathroom into a more organized and visually appealing space. Whether you are a seasoned DIY enthusiast or a beginner, this guide will help you successfully complete the installation.
Key Takeaways:
- Elevate your bathroom with a Euro single post toilet paper holder, adding convenience and modern elegance. Follow the step-by-step guide for a secure and professional DIY installation.
- Ensure stability and functionality by measuring accurately, locating the wall stud, and testing the holder’s ability to support a toilet paper roll. Enjoy the convenience and sophistication of your newly installed Euro single post toilet paper holder.
Tools and Materials
Before you begin installing the Euro single post toilet paper holder, it’s essential to gather all the necessary tools and materials. Having everything you need in one place will make the installation process smoother and more efficient. Here’s a list of what you’ll need:
- Measuring tape: A measuring tape is crucial for accurately determining the desired height and placement of the toilet paper holder.
- Pencil: You’ll need a pencil to mark the positions on the wall where the holder and mounting bracket will be installed.
- Drill: A drill is necessary for creating the holes in the wall to attach the mounting bracket securely.
- Stud finder: A stud finder will help you locate the wall stud, ensuring a sturdy and reliable installation.
- Screws or anchors: Depending on the type of wall you have, you’ll need either screws or anchors to secure the mounting bracket in place.
- Screwdriver or drill bit: You’ll need a screwdriver or a drill bit compatible with the screws you’re using to attach the holder and the mounting bracket.
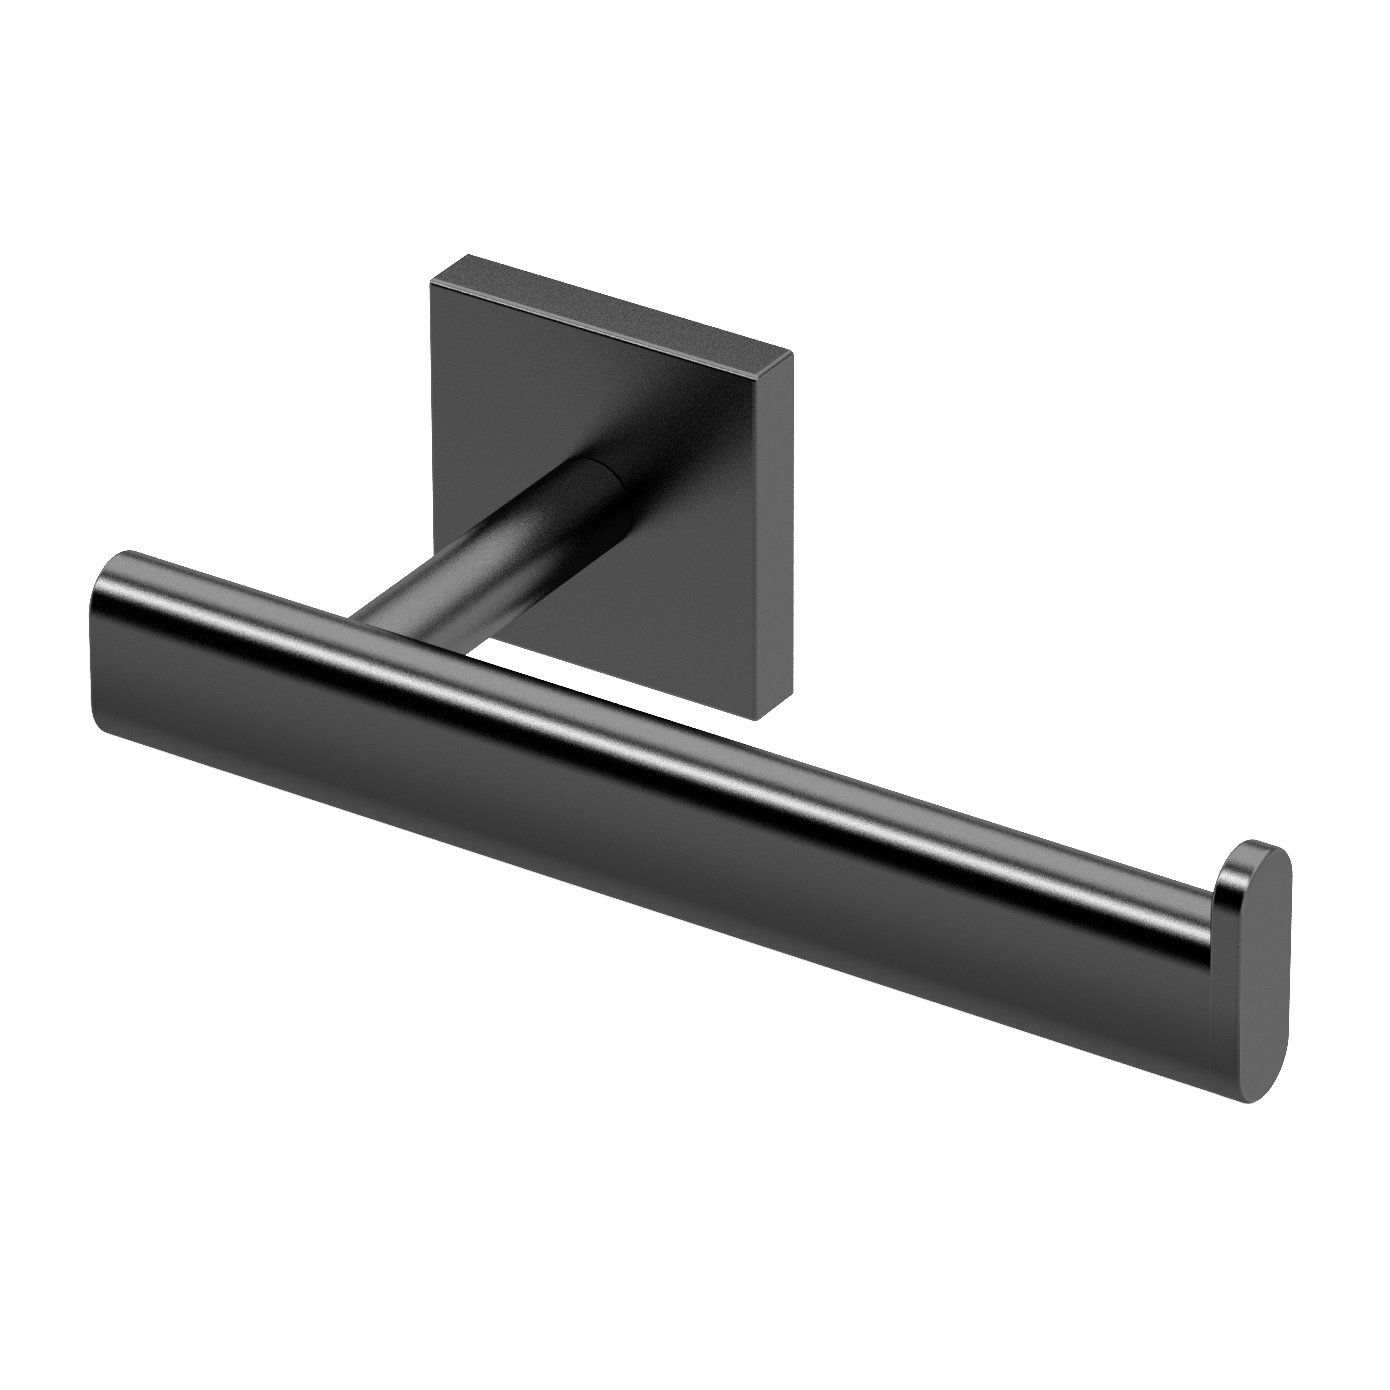
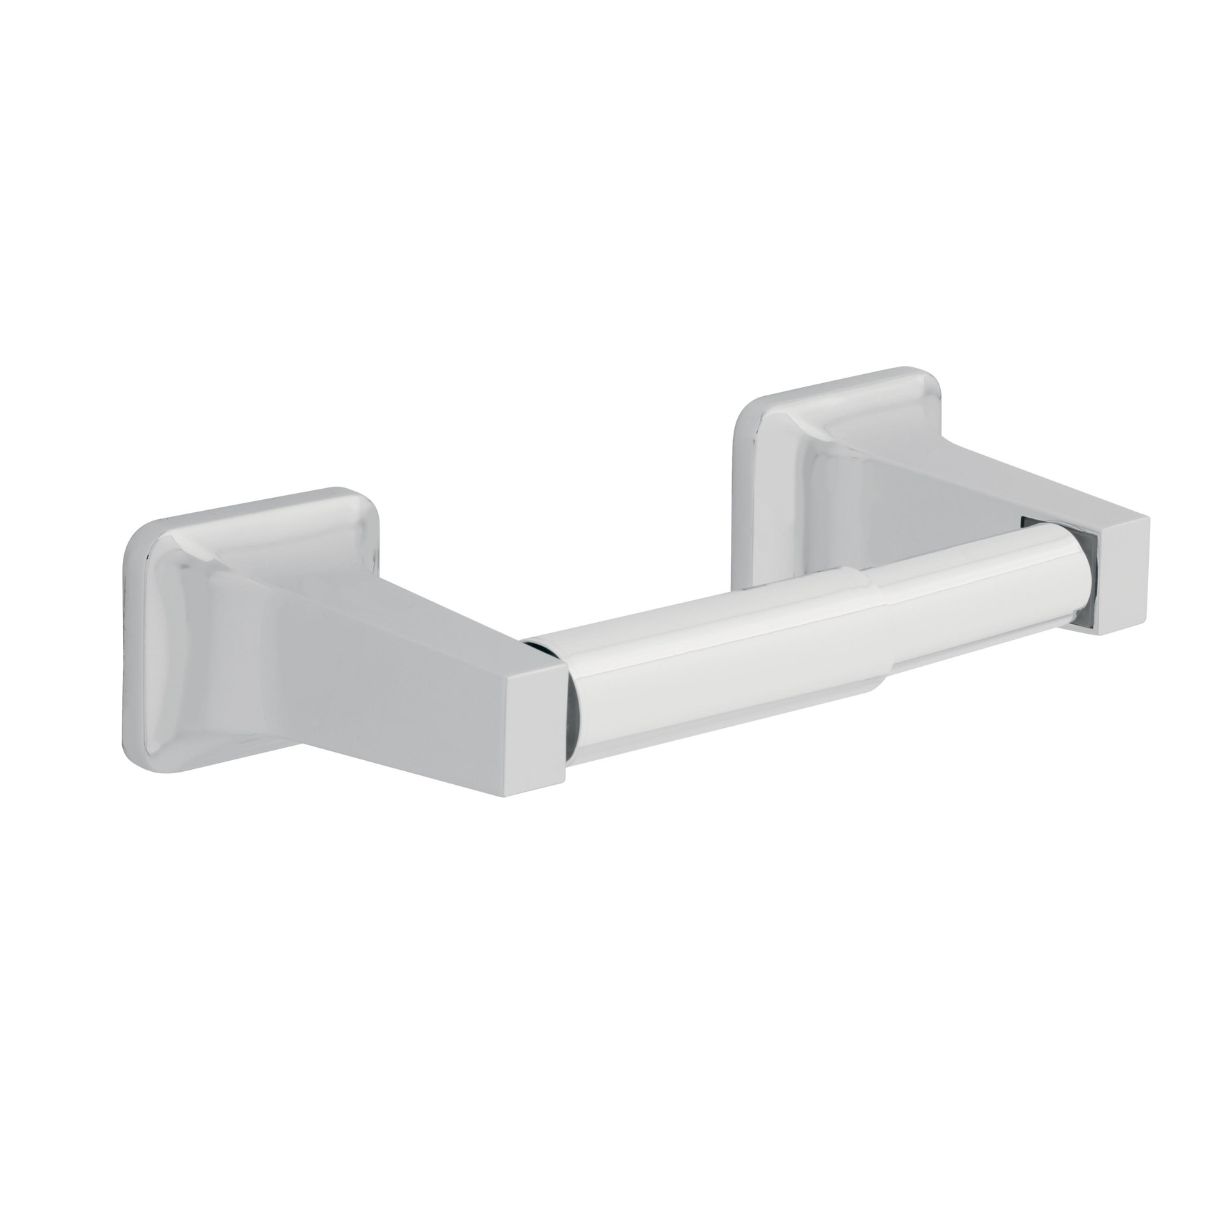
- Euro single post toilet paper holder: Choose a holder that suits your style and complements your bathroom décor.
Once you have all the necessary tools and materials ready, you’ll be able to proceed with confidence and efficiency. Make sure each item is in good condition and functioning properly before starting the installation.
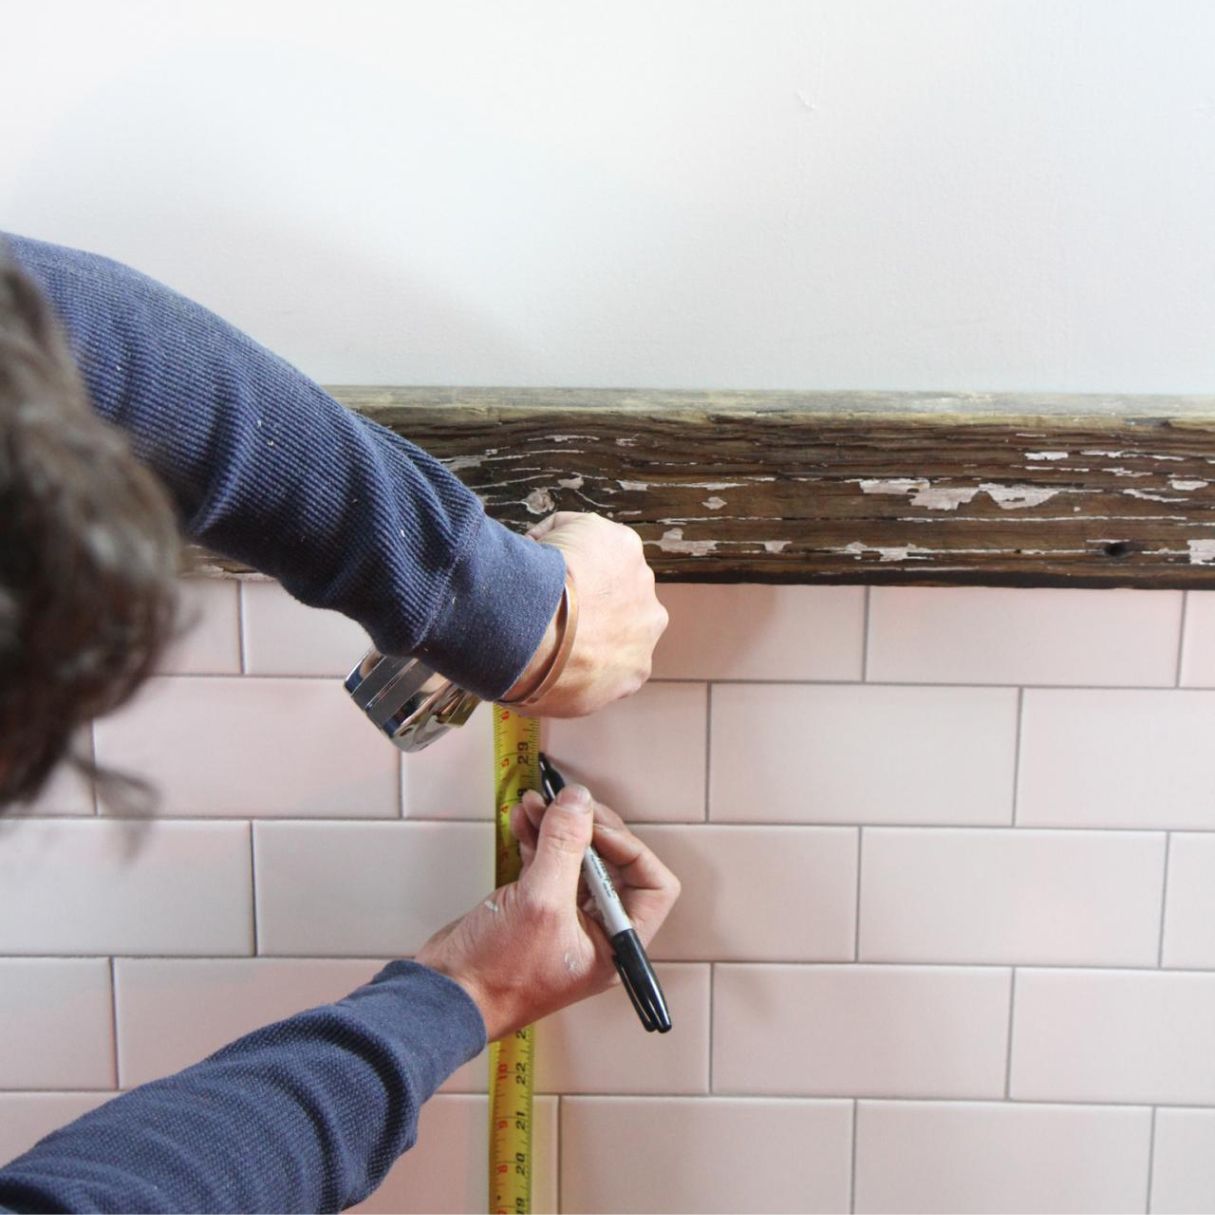
Step 1: Measure and Mark the Desired Height
The first step in installing a Euro single post toilet paper holder is to measure and mark the desired height on the wall. This will ensure that the holder is conveniently located for easy access.
Start by using a measuring tape to determine the ideal height for your toilet paper holder. Consider factors like the height of the toilet bowl and the comfort level of the users. A common height is around 26 inches from the floor to the center of the holder, but you can adjust this according to your preferences.
Once you’ve decided on the height, lightly mark the position on the wall with a pencil. Use a level to ensure that the mark is perfectly horizontal. This will prevent any misalignment or crooked installation.
If you’re planning to install the toilet paper holder near an existing towel rack or other bathroom fixtures, make sure to leave enough space between them so they don’t interfere with each other. Additionally, consider the distance from the toilet bowl to avoid any obstructions.
Take a step back and visually assess the marked position to ensure it looks balanced and visually appealing. Adjust the height if necessary before proceeding to the next step.
By measuring and marking the desired height accurately, you’ll be able to install the Euro single post toilet paper holder at the perfect level for easy use and a visually pleasing appearance. This initial step sets the foundation for a successful installation process.
Step 2: Locate the Wall Stud
Locating the wall stud is crucial for a secure and sturdy installation of the Euro single post toilet paper holder. The wall stud provides the necessary support to prevent the holder from coming loose or falling off over time.
Start by using a stud finder to scan the wall near the marked position. A stud finder is a handheld device that detects the presence of wooden studs or beams behind the wall. It helps you determine where to anchor the mounting bracket securely.
Place the stud finder flat against the wall and slowly move it horizontally until it indicates the presence of a stud. Most stud finders beep or light up when they detect a stud. Make note of the stud’s location by marking it with a pencil.
If you don’t have a stud finder, you can also locate a stud by gently tapping the wall with your knuckles or a small hammer. A solid, rather than hollow, sound indicates the presence of a stud. Again, mark the stud’s location for reference.
Once you’ve located the wall stud, double-check its position and ensure that it aligns with the marked height for the toilet paper holder. Adjust the marked position if needed.
If the stud is not located in the desired location, you may need to use wall anchors instead. Wall anchors provide additional support and stability for mounting the bracket onto the wall. They can be used in situations where studs are not conveniently placed or not available.
By locating the wall stud, you’ll ensure a secure and durable installation of the Euro single post toilet paper holder. This step is essential for the long-term functionality and stability of the holder in your bathroom.
Step 3: Prepare the Mounting Bracket
Before attaching the mounting bracket to the wall, it’s important to prepare it properly. This step will ensure that the bracket is ready for installation and will securely hold the Euro single post toilet paper holder.
Start by inspecting the mounting bracket and ensuring that all the necessary components are included. This typically includes the bracket itself, screws or mounting hardware, and any additional accessories specific to your toilet paper holder model.
If there are any loose or missing parts, contact the manufacturer or supplier to obtain replacements before proceeding. It’s crucial to have all the components ready to ensure a smooth installation process.
Next, check the mounting holes on the bracket. Make sure they are clean and free from any debris or obstructions. If necessary, use a small brush or cloth to wipe away any dirt or dust.
If your mounting bracket requires assembly, carefully follow the manufacturer’s instructions to assemble it correctly. Pay attention to any specific guidelines or recommendations provided to ensure a secure and stable attachment.
Once the mounting bracket is prepared, verify that it aligns with the marked height on the wall. Double-check the position of the bracket to ensure it corresponds to the desired location for the Euro single post toilet paper holder.
By preparing the mounting bracket properly, you’ll ensure that it is in optimal condition and ready to be securely attached to the wall. This step sets the stage for a successful installation of the toilet paper holder.
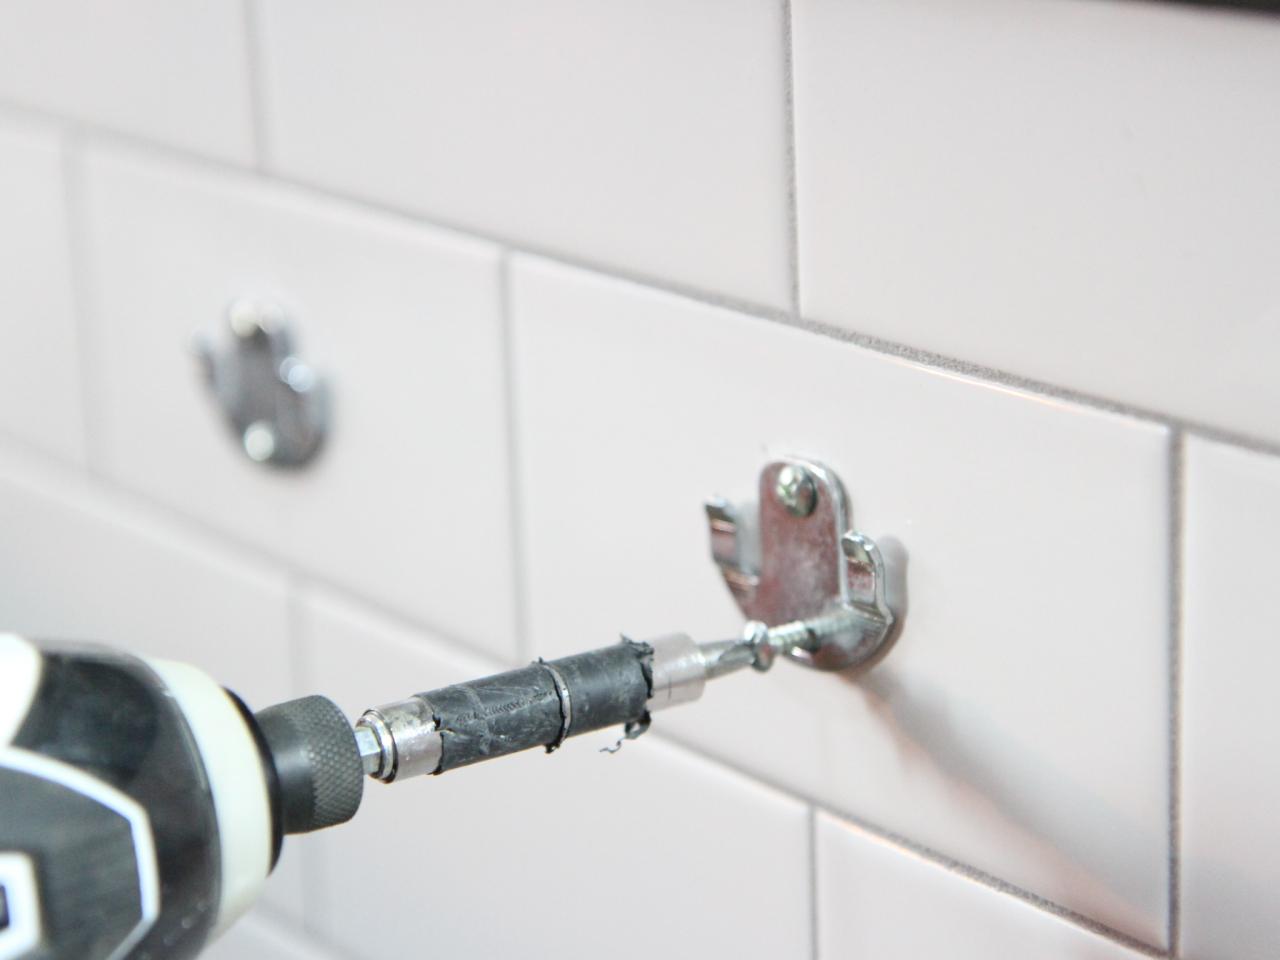
Step 4: Attach the Mounting Bracket to the Wall
Now that you have prepared the mounting bracket, it’s time to attach it securely to the wall. This step is crucial to provide a stable foundation for installing the Euro single post toilet paper holder.
Start by positioning the mounting bracket against the wall at the marked height. Make sure the bracket is level by using a bubble level or a smartphone app with a leveling function. Adjust the bracket as needed to ensure it is perfectly horizontal.
If you have located a wall stud in the desired position, align one of the mounting holes on the bracket with the center of the stud. Insert a screw or appropriate wall anchor into the hole, and then use a screwdriver or drill to secure it firmly. Repeat this process for all other mounting holes on the bracket.
If you are not able to attach the bracket directly to a wall stud, use wall anchors to provide additional stability. To do this, pre-drill holes into the wall at the marked positions for the mounting bracket. Insert wall anchors into the holes, and then attach the bracket by inserting screws through the bracket’s mounting holes and into the wall anchors.
Tighten the screws or wall anchors just enough to firmly secure the mounting bracket. Be careful not to overtighten, as this may damage the bracket or the wall.
Once the mounting bracket is attached to the wall, give it a gentle tug or shake to ensure its stability. The bracket should feel firm and secure without any noticeable movement.
Take a final look at the mounted bracket to confirm that it is level and properly aligned. Make any necessary adjustments before proceeding to the next step.
By attaching the mounting bracket securely to the wall, you lay the foundation for a stable and reliable installation of the Euro single post toilet paper holder. This step ensures that the holder will stay in place and withstand regular use over time.
When installing a Euro single post toilet paper holder, make sure to use a level to ensure it is straight before securing it to the wall. This will help prevent any future issues with the holder coming loose or causing damage to the wall.
Step 5: Install the Post Holder
With the mounting bracket securely attached to the wall, it’s time to install the post holder of the Euro single post toilet paper holder. This step will bring your installation one step closer to completion.
Start by closely examining the post holder and identifying the opening where the toilet paper roll will be placed. Ensure that the opening is facing in the correct direction for easy access.
Align the post holder with the mounting bracket, making sure it fits snugly into place. Depending on the design of your specific holder, you may need to slide it onto the bracket or insert it from the top or the side.
Gently push the post holder onto the bracket until it is securely in position. Give it a light twist or tug to confirm that it is stable and properly attached to the mounting bracket.
Take a moment to step back and visually inspect the installed post holder. Ensure that it is level and aligned with the other elements in your bathroom. Make any necessary adjustments to its position before moving on.
It’s important to note that some Euro single post toilet paper holders may come with additional features or securing mechanisms. If your holder has any screws, locks, or other fastening components, follow the manufacturer’s instructions to install them properly.
By installing the post holder securely onto the mounting bracket, you are one step closer to enjoying a functional and stylish Euro single post toilet paper holder in your bathroom. Take a moment to appreciate your progress before procee
d to the next step.
Step 6: Secure the Holder in Place
Now that the post holder is installed on the mounting bracket, it’s time to ensure that it is securely fixed in place. This step will prevent any movement or loosening of the Euro single post toilet paper holder over time.
If your post holder has a set screw or locking mechanism, locate it and make sure it is accessible. This may be located on the underside of the holder or on the side. Refer to the manufacturer’s instructions to identify the specific method of securing your holder.
Using a screwdriver or an appropriate tool, tighten the set screw or engage the locking mechanism. Apply enough pressure to secure the holder firmly against the mounting bracket, but be careful not to overtighten and risk damaging the holder.
For holders that do not have a set screw or locking mechanism, ensure that the holder is snugly in place on the mounting bracket. Gently give the holder a light twist or tug to verify its stability. If there is any noticeable movement, readjust the holder and check that it is properly aligned with the bracket.
Take a moment to visually inspect the holder once it is secured in place. Ensure that it is level and aligned with the mounting bracket and any other fixtures in your bathroom. Make any necessary adjustments to its position.
By securing the post holder in place, you ensure that the Euro single post toilet paper holder will remain stable and secure for everyday use. This step completes the installation process, and you’re now ready to test the holder’s stability and functionality.
Step 7: Test the Stability
After securing the Euro single post toilet paper holder in place, it’s essential to test its stability and ensure that it can handle the weight of a toilet paper roll. This step will help you verify the effectiveness of the installation and identify any potential issues.
Start by gently pulling on the holder to simulate the force of someone unrolling toilet paper. Apply a moderate amount of pressure to test its stability. The holder should remain firmly attached to the wall without any wobbling or movement.
If you notice any instability or movement, double-check that the mounting bracket is securely attached to the wall and that the post holder is properly aligned. Tighten any screws or set screws if necessary.
Next, place a full or partially filled toilet paper roll on the post holder. Ensure that the weight of the roll does not cause the holder to sag or come loose from the mounting bracket.
Give the holder a gentle shake to test how well it can withstand the weight of the roll. It should remain steady and firm, without any noticeable movement or bending.
If you encounter any issues with stability or the ability to support the weight of the roll, consider reinforcing the installation. This may involve adding additional screws, using stronger wall anchors, or consulting a professional if necessary.
By testing the stability of the Euro single post toilet paper holder, you can have confidence in its durability and reliability. This step ensures that the holder will securely hold your toilet paper roll and withstand regular use in your bathroom.
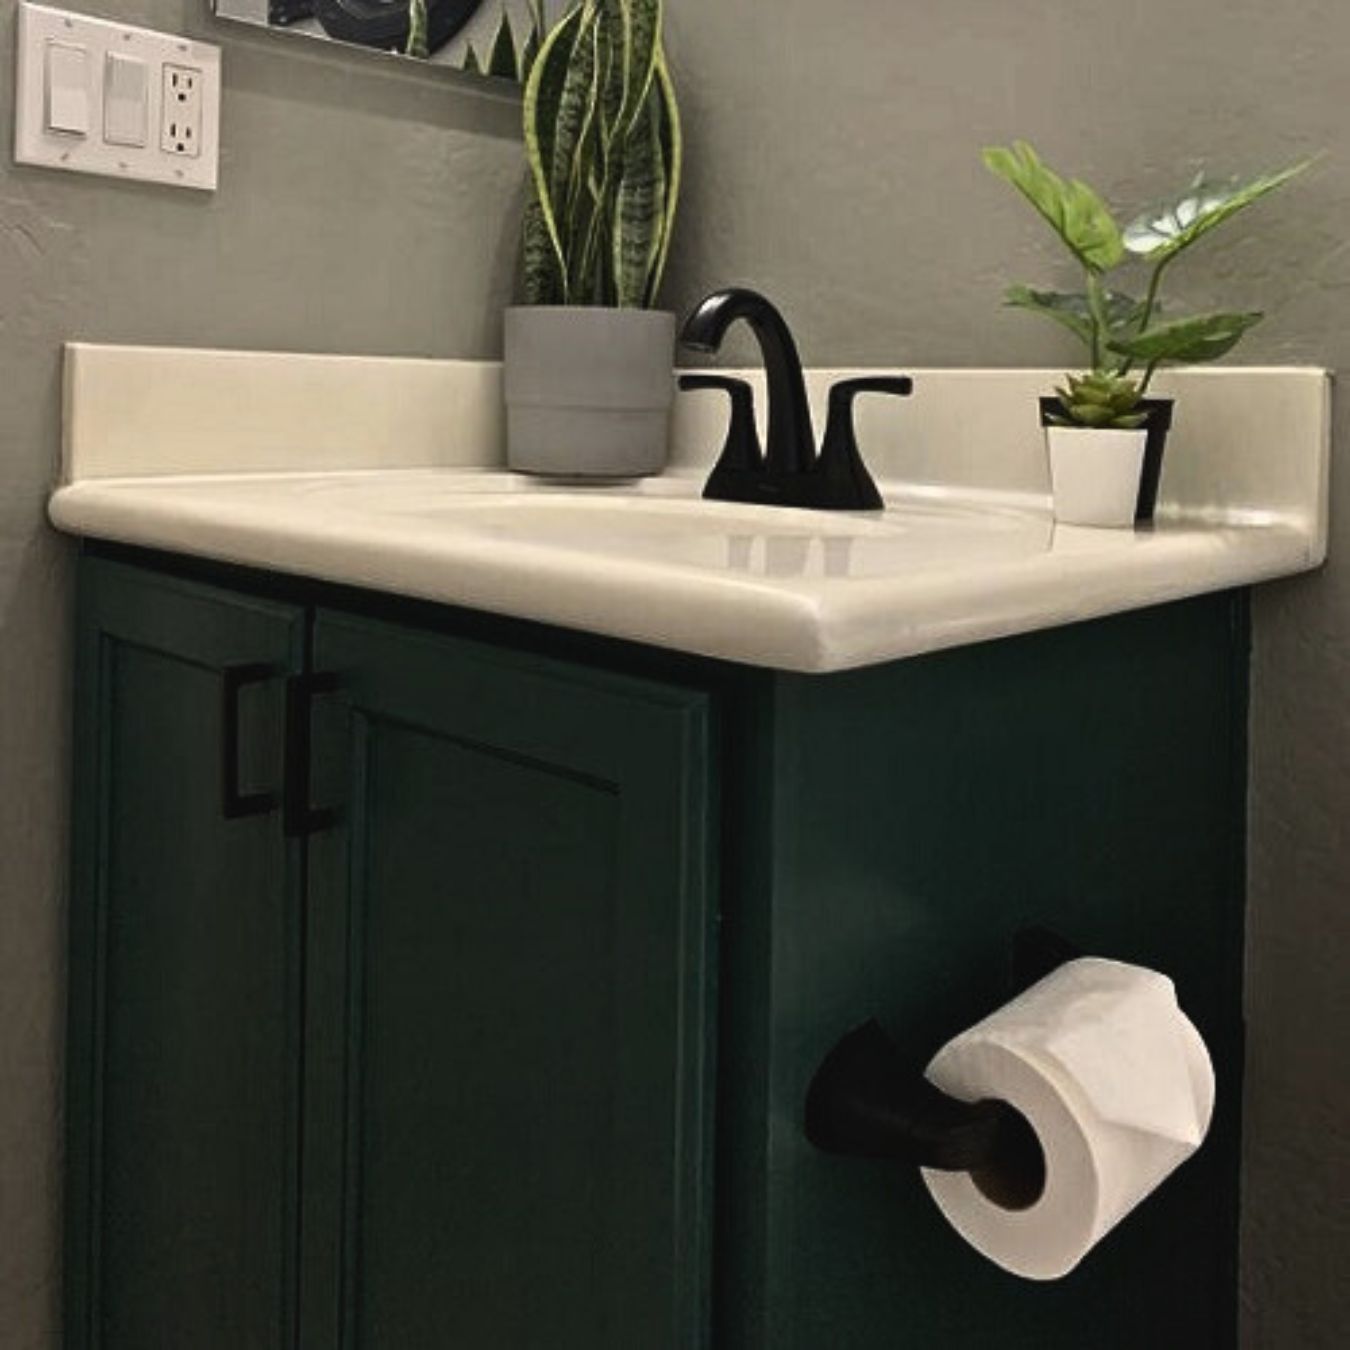
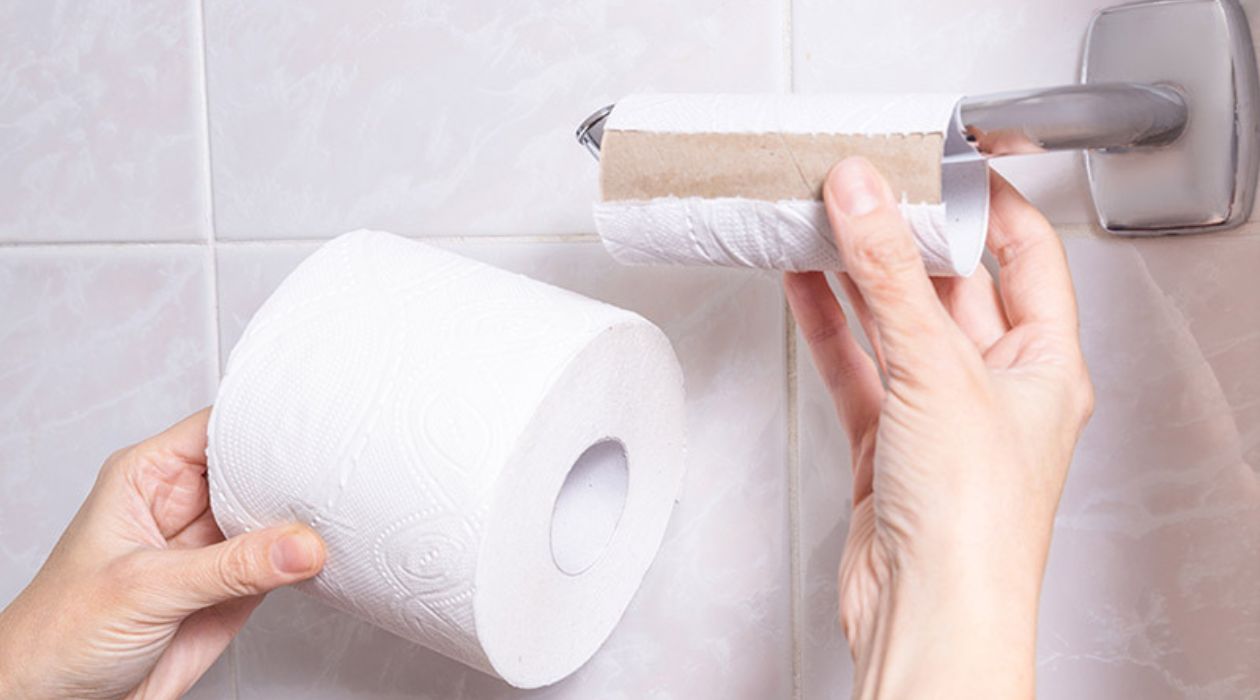
Step 8: Mount the Toilet Paper Roll
With the Euro single post toilet paper holder securely installed and tested for stability, it’s time to mount the toilet paper roll onto the holder. This final step will complete the installation process and make the holder functional for everyday use.
Start by removing the empty toilet paper roll from its packaging. Place it onto the post holder, ensuring that the roll slides onto the holder smoothly.
Make sure the toilet paper roll is centered on the holder and positioned in a way that allows for easy access and unrolling. Adjust the roll if necessary by gently rotating it on the post holder.
Take a moment to visually inspect the toilet paper roll and its alignment. Ensure that it is parallel to the wall and sits evenly on the holder. This will contribute to the overall aesthetic appeal of your bathroom.
Become familiar with the specific mechanism of your Euro single post toilet paper holder for unrolling and replacing the toilet paper. Some holders may have a spring-loaded mechanism, while others may require manual adjustment or removal of the central post. Refer to the manufacturer’s instructions if needed.
Test the functionality by unrolling a small portion of toilet paper. Ensure that the roll moves smoothly and that there are no obstructions or difficulties in accessing the toilet paper.
If the toilet paper roll does not move freely or is difficult to unroll, check for any misalignments or interferences in the holder. Adjust the position of the roll and make any necessary corrections to ensure proper functionality.
Finally, step back and admire your newly installed Euro single post toilet paper holder with the toilet paper roll in place. Not only does it add functionality to your bathroom, but it also enhances the overall appearance of the space.
By mounting the toilet paper roll onto the holder, you have successfully completed the installation process. You can now enjoy the convenience and elegance of your Euro single post toilet paper holder in your bathroom.
Conclusion
Installing a Euro single post toilet paper holder is a straightforward DIY project that can enhance the functionality and aesthetic appeal of your bathroom. By following the step-by-step process outlined in this article, you can successfully complete the installation and enjoy the convenience of a stylish toilet paper holder.
Remember to gather all the necessary tools and materials before you begin, ensuring a smooth installation process. Measure and mark the desired height on the wall, taking into consideration the comfort level and accessibility for users. Locate the wall stud to provide a secure foundation for the mounting bracket.
Prepare the mounting bracket and attach it securely to the wall, either by anchoring it to a wall stud or using wall anchors for additional support. Install the post holder onto the mounting bracket and ensure it is secure, adjusting its position if necessary.
Once the post holder is in place, secure it with any set screws or locking mechanisms provided. Test the stability of the holder by gently pulling on it and add a toilet paper roll to ensure it can support the weight without any wobbling or sagging.
Finally, mount the toilet paper roll onto the holder, ensuring it is centered and easily accessible for everyday use. Test its functionality by unrolling a small portion of toilet paper and make any necessary adjustments for smooth operation.
Once you have completed these steps, step back and admire your newly installed Euro single post toilet paper holder. It not only provides practical use but also adds a touch of elegance and organization to your bathroom space.
Remember, if you encounter any difficulties during the installation process or have any concerns about the stability of the holder, don’t hesitate to seek professional assistance. It’s important to have a safe and secure installation in your bathroom.
Enjoy the convenience and sophistication of your Euro single post toilet paper holder, and revel in the satisfaction of a successful DIY project. Your bathroom will thank you for the upgrade!
Frequently Asked Questions about How To Install A Euro Single Post Toilet Paper Holder
Was this page helpful?
At Storables.com, we guarantee accurate and reliable information. Our content, validated by Expert Board Contributors, is crafted following stringent Editorial Policies. We're committed to providing you with well-researched, expert-backed insights for all your informational needs.


0 thoughts on “How To Install A Euro Single Post Toilet Paper Holder”