Articles
How To Install A Kidde Wired Smoke Detector
Modified: August 27, 2024
Learn how to install a Kidde wired smoke detector with this informative article. Follow our step-by-step guide for a hassle-free installation process.
(Many of the links in this article redirect to a specific reviewed product. Your purchase of these products through affiliate links helps to generate commission for Storables.com, at no extra cost. Learn more)
Introduction
Installing a wired smoke detector is an essential safety measure for any home or establishment. It provides early warning of potential fires, allowing you and your loved ones to escape before the situation becomes life-threatening. While hiring a professional to install a smoke detector is an option, it is also possible for homeowners to tackle this project themselves.
In this article, we will guide you through the step-by-step process of installing a Kidde wired smoke detector. Kidde is a trusted brand known for its reliable and high-quality safety products. By following these instructions, you can ensure that your smoke detector is installed correctly and functions effectively to protect your home.
Before we dive into the installation process, it’s crucial to mention that electrical work can be dangerous if not done properly. If you are uncomfortable working with electricity or unsure about your abilities, it is strongly recommended to consult a licensed electrician. Safety should always be the top priority when it comes to any electrical installations.
That being said, if you feel comfortable and confident in your skills, let’s get started with the installation process. We will cover everything from preparing for installation to testing the smoke detector to ensure it is functioning correctly. So, grab your tools and let’s begin making your home a safer place.
Key Takeaways:
- Prioritize safety and preparation when installing a Kidde wired smoke detector. Familiarize yourself with the manual, check local building codes, and gather necessary tools for a smooth and efficient installation process.
- Regularly test and maintain your Kidde wired smoke detector to ensure ongoing functionality. Follow the manufacturer’s recommendations for testing and battery replacement, and integrate the detector into a comprehensive fire safety plan for maximum protection.
Read more: How To Clean A Kidde Smoke Detector
Step 1: Preparing for Installation
Before you begin the installation process, it’s essential to ensure that you are properly prepared. Taking the time to prepare will make the installation smoother and more efficient. Here are the key steps to follow:
1. Familiarize Yourself with the Manual: Start by reading the user manual that comes with your Kidde wired smoke detector. This will provide you with important information about the specific model you are installing, including any specific requirements or recommendations.
2. Check Local Building Codes: It’s important to familiarize yourself with the local building codes and regulations regarding smoke detector installations. Different regions may have specific requirements about the number of detectors required, their placement, and other factors. Ensure that you comply with these regulations to maintain safety standards.
3. Inspect the Area: Take a close look at the area where you plan to install the smoke detector. Ensure it is free from any obstructions, such as furniture, curtains, or other objects that could interfere with the detector’s operation.
4. Determine the Ideal Location: Consider the best location for the smoke detector. It is generally recommended to install one on each floor of your home, including the basement and attic. Additionally, install one in each bedroom and outside each sleeping area. The detectors should be placed on the ceiling or high on the wall, as smoke rises. Avoid installing them near windows, doors, or vents, as these areas may affect their effectiveness.
5. Clear the Path: Make sure that the path from the electrical panel to the installation area is clear of any obstacles. This will allow for easy access during the wiring process. Remove any furniture or objects that may hinder your ability to work safely and efficiently.
6. Gather Necessary Materials: Before starting the installation, gather all the materials you will need. This includes the Kidde wired smoke detector itself, wire connectors, electrical tape, a screwdriver, and a wire stripper. Having all the necessary tools at hand will save time and prevent delays during the installation.
By properly preparing for the installation, you can ensure a smooth and efficient process. Take the time to familiarize yourself with the user manual, check local building codes, and inspect the area where the smoke detector will be installed. Determining the ideal location and clearing the path will allow for easy installation. Lastly, gather all the necessary materials to have them readily available. With these preparations in place, you are now ready to proceed with the installation process.
Step 2: Gathering the Necessary Tools
To successfully install a Kidde wired smoke detector, it’s essential to gather all the necessary tools beforehand. Having the right tools at hand will make the installation process smoother and more efficient. Here are the tools you will need:
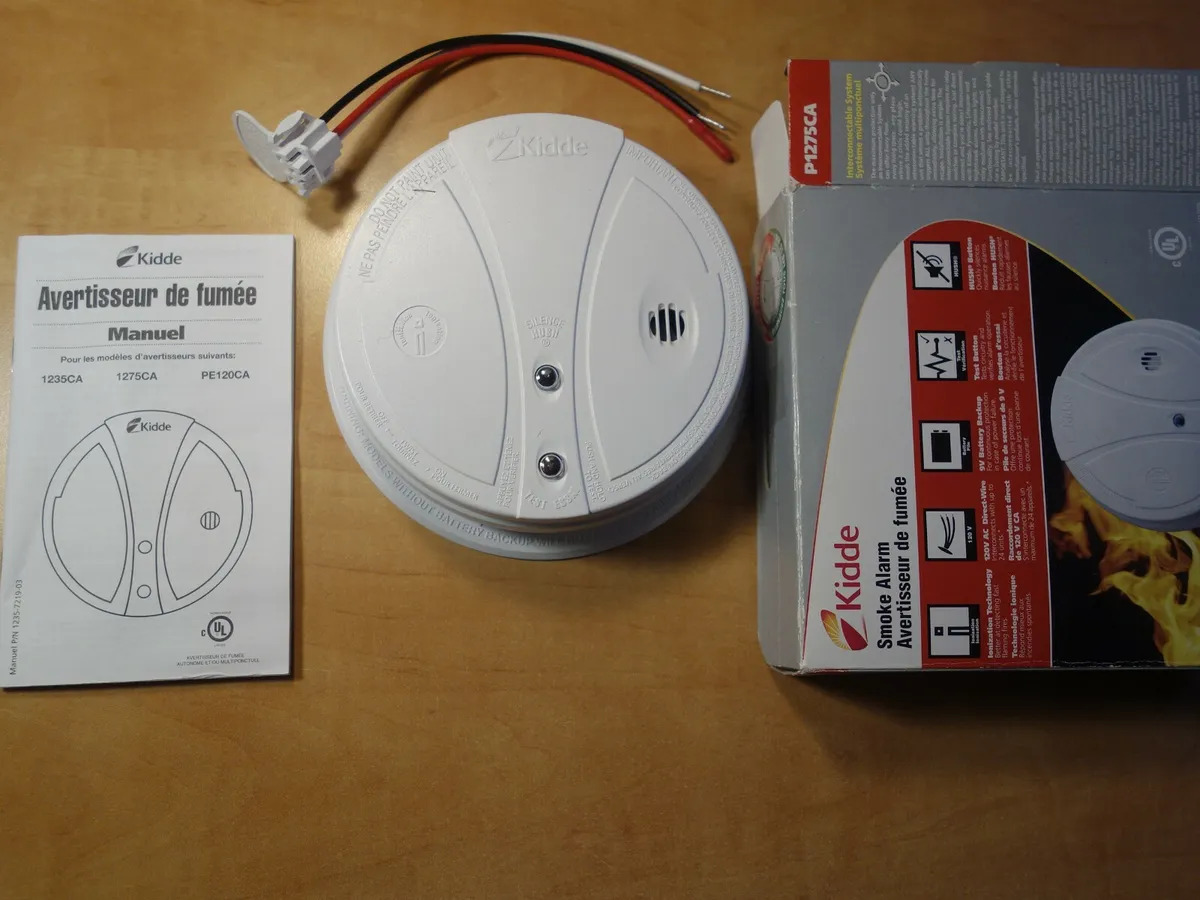
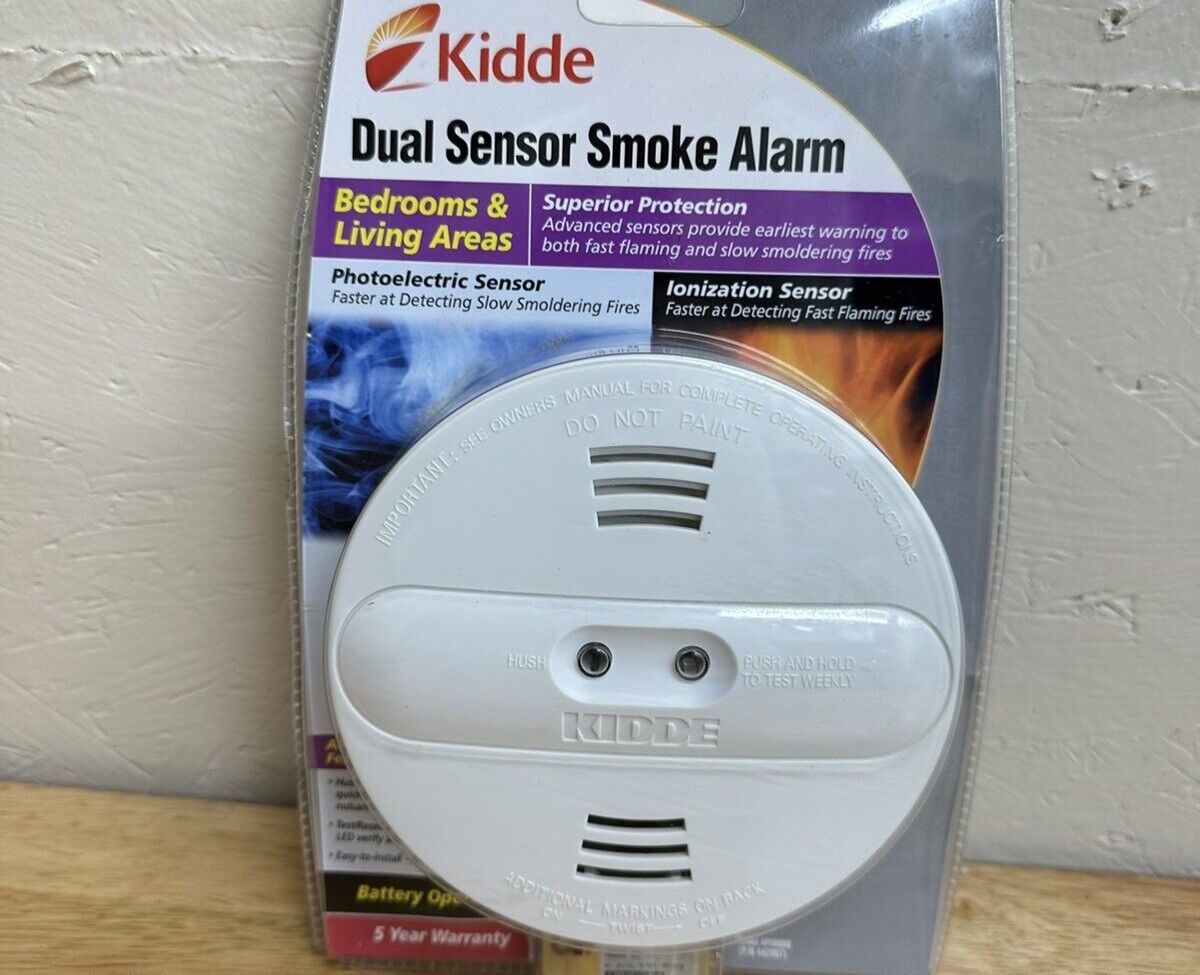
1. Kidde Wired Smoke Detector: Purchase a Kidde wired smoke detector that meets your specific needs. Ensure that it is compatible with your electrical system and has the desired features, such as battery backup or interconnected functionality.
2. Screwdriver: You will need a screwdriver to remove the cover plates and secure the smoke detector in place. Depending on the model, a flathead or Phillips screwdriver may be required. It’s a good idea to have both types available to ensure you have the correct one.
3. Wire Strippers: A wire stripper will be necessary to remove the insulation from the electrical wires. This tool allows for clean and precise wire stripping, ensuring a secure electrical connection.
4. Wire Connectors: Wire connectors, also known as wire nuts, are used to secure the electrical connections between the smoke detector and the home’s electrical wiring. Choose connectors that fit the gauge of your wires and provide a reliable and secure connection.
5. Electrical Tape: Electrical tape is essential for insulating and securing the wire connections. It helps prevent accidental electrical shocks and keeps the wires in place.
6. Ladder: If the installation location for your smoke detector is out of reach, you will need a sturdy ladder to safely access the area. Choose a ladder with a height that allows you to reach the desired location comfortably.
7. Flashlight: A flashlight will be handy during the installation process, especially if the area is dimly lit. It will help you see all the necessary components and ensure a precise and accurate installation.
Having these tools ready before starting the installation will save you time and prevent frustration. Ensure that you have the correct screwdriver, wire strippers, wire connectors, and electrical tape. If needed, have a ladder and flashlight on hand to aid in the installation process. With these tools at your disposal, you are well-prepared to proceed with the installation of your Kidde wired smoke detector.
Step 3: Turning Off the Power
Before you begin the installation process of your Kidde wired smoke detector, it’s vital to ensure the power supply to the area is turned off. This is a crucial safety step to prevent any electrical accidents or shocks while working on the installation. Follow these steps to turn off the power:
1. Locate the Electrical Panel: Identify the location of your home’s electrical panel or circuit breaker box. It is usually located in a basement, garage, utility room, or external housing.
2. Identify the Correct Circuit: Look for the circuit breaker that controls the area where you plan to install the smoke detector. If you are unsure about which circuit controls that area, you can turn off the main circuit breaker to be on the safe side. However, keep in mind that this will shut off power to the entire house. If possible, it’s best to target the specific circuit to minimize interruption.
3. Turn Off the Circuit Breaker: Once you have identified the correct circuit breaker, flip the switch to the “Off” position. This will cut off the power supply to the area where you will be working.
4. Verify Power Disconnection: To ensure that the power is completely disconnected, test the area by turning on a light switch or using a small appliance. If there is no power, it means you have successfully turned off the circuit breaker.
5. Use a Voltage Tester (Optional): If you want to double-check whether the power is completely off, you can use a voltage tester. Follow the manufacturer’s instructions to use the tester correctly. This step is optional but provides an extra layer of assurance.
Remember, turning off the power is a critical safety measure that should not be skipped or taken lightly. It protects you from potential electrical hazards while you work on the installation. Always exercise caution during this step and ensure that the power is effectively disconnected before proceeding to the next steps.
Taking the time to turn off the power ensures a safe working environment and reduces the risk of electrical accidents. Once you have confirmed that the power supply is shut off, you can proceed with confidence to the next steps in the installation process.
Step 4: Locating the Ideal Placement
Finding the ideal placement for your Kidde wired smoke detector is crucial for its effectiveness in detecting smoke and providing early warning in the event of a fire. Consider the following factors when determining the placement:
1. Follow Manufacturer’s Recommendations: Review the user manual of your particular model of Kidde wired smoke detector. The manufacturer will often provide specific guidelines for optimal placement based on the detector’s features and capabilities. Adhering to these recommendations ensures the best possible performance of your smoke detector.
2. Install on Each Floor: It is recommended to install at least one smoke detector on each level of your home. This includes the basement, main floor, and upper floors. If you have additional areas like an attic or a house extension, it’s advisable to install detectors there as well. This ensures maximum coverage throughout your home.
3. Bedrooms and Sleeping Areas: Place a smoke detector in each bedroom and near any sleeping areas, such as hallways leading to bedrooms. This ensures that occupants are alerted immediately in the event of a fire, giving them valuable time to escape.
4. Kitchen and Bathrooms: Install smoke detectors away from cooking areas, as cooking fumes can trigger false alarms. However, it’s still important to have a detector nearby to catch any smoke or fire that may occur in the kitchen. Similarly, bathrooms with showers or steam facilities should also have detectors installed to detect any potential fire hazards.
5. Ceiling Mount or Wall Mount: Smoke detectors can be mounted on the ceiling or high on the wall. Mounting on the ceiling is generally recommended as smoke rises and will reach the detector more quickly. If ceiling mounting is not possible or practical in certain areas, such as sloped ceilings or wall-mounted units, install the detector as high as possible on the wall, following the manufacturer’s guidelines.
6. Avoid Obstructions: Ensure that there are no obstructions near the smoke detector that may impede its ability to detect smoke effectively. Keep the area around the detector clear of furniture, drapes, or other objects that could block airflow and hinder its operation.
7. Interconnection Capability: If your Kidde wired smoke detector supports interconnection, consider installing multiple detectors throughout your home and connecting them. This allows all detectors to activate simultaneously if one detects smoke, providing an immediate and widespread warning.
By carefully considering these factors, you can determine the ideal placement for your Kidde wired smoke detector. Following the manufacturer’s recommendations, installing detectors on each floor and near bedrooms, and avoiding obstructions will ensure maximum coverage and early detection in the event of a fire. Take the time to plan and position the detectors strategically for optimal performance and peace of mind.
When installing a Kidde wired smoke detector, make sure to turn off the power to the circuit before connecting the wires. Follow the manufacturer’s instructions carefully to ensure proper installation and functionality.
Read more: How To Turn Off A Kidde Smoke Detector
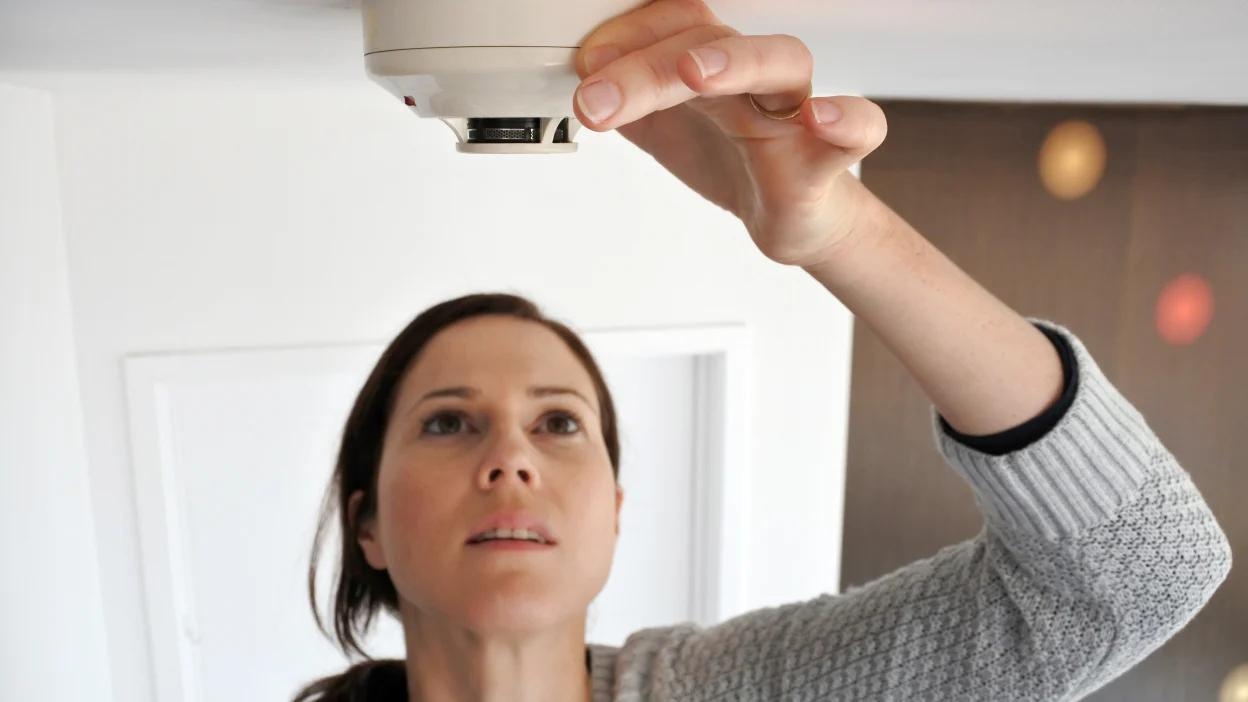
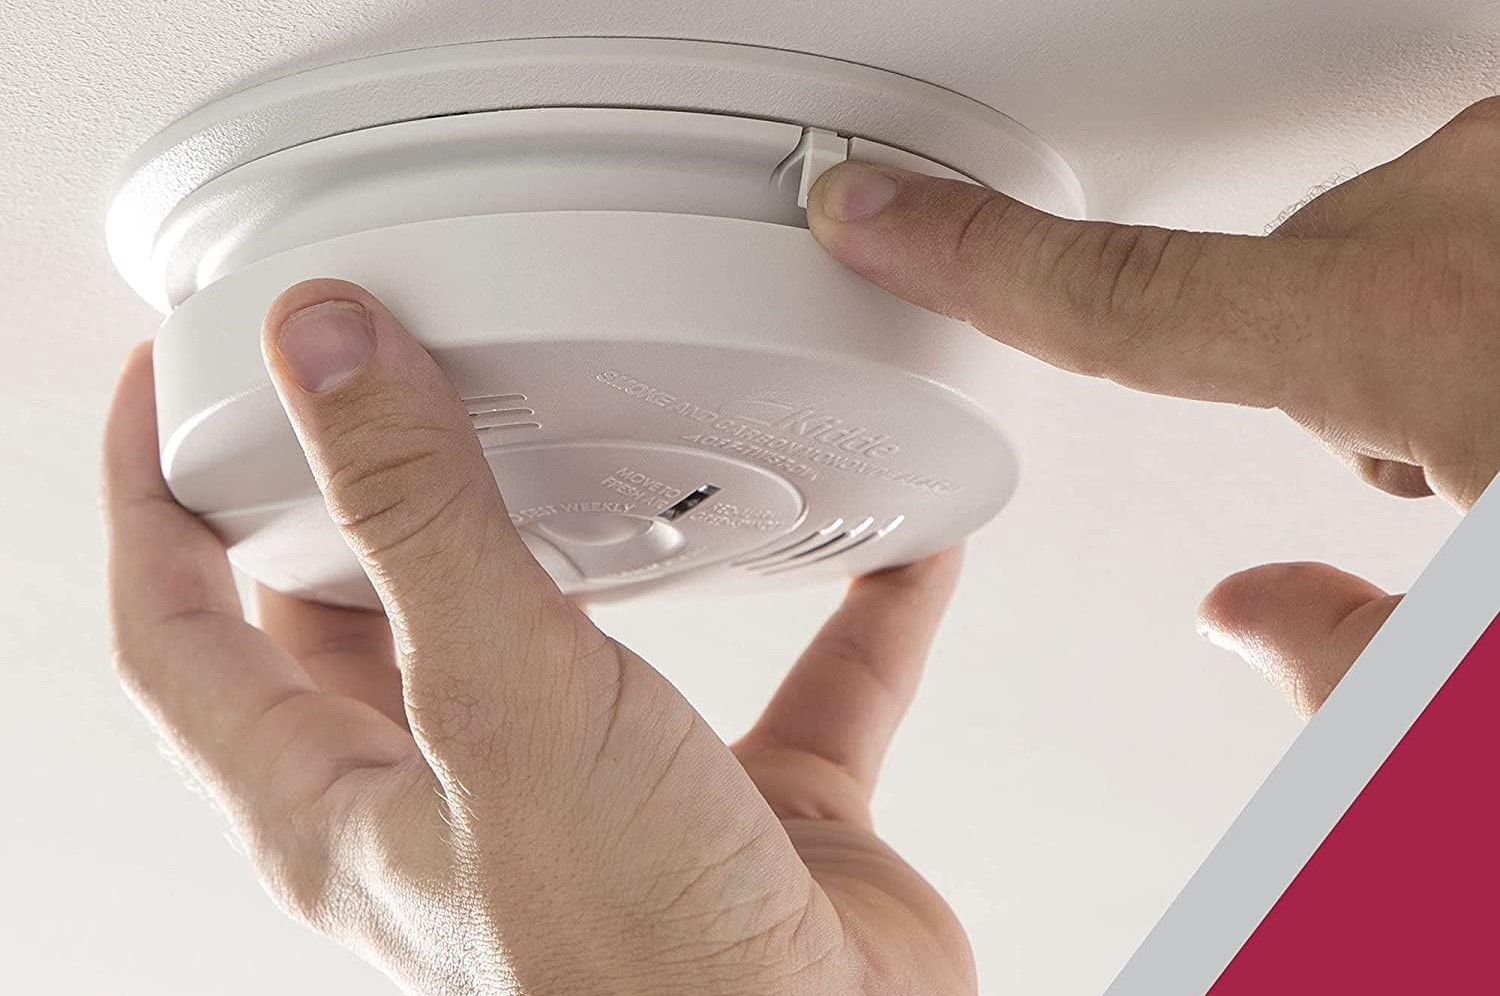
Step 5: Mounting the Smoke Detector
Now that you have determined the ideal placement for your Kidde wired smoke detector, it’s time to proceed with the mounting process. Mounting the smoke detector securely is crucial to ensure its stability and proper functioning. Follow these steps to mount your smoke detector:
1. Choose the Mounting Method: Depending on your Kidde wired smoke detector model and the surface where you are installing it, there may be different mounting methods available. Common options include using screws, adhesive pads, or a mounting bracket that comes with the detector. Refer to the user manual to determine the appropriate mounting method for your specific model.
2. Mark the Mounting Location: Using a pencil or marker, mark the exact spot where you will mount the smoke detector. Double-check that the location aligns with the ideal placement guidelines you determined in the previous step.
3. Prepare the Mounting Surface: If you are using screws for mounting, use a drill bit slightly smaller than the screw size to create pilot holes. This will prevent the surface from splitting or cracking when you insert the screws. If you are using adhesive pads or a mounting bracket, clean the surface thoroughly with a mild detergent or rubbing alcohol to ensure proper adhesion.
4. Mount the Smoke Detector: Align the mounting holes or bracket with the marked location on the surface. If using screws, insert them through the mounting holes and into the pilot holes or anchors. For adhesive pads, remove the protective backing and firmly press the detector onto the surface. If using a mounting bracket, attach it securely to the surface using screws or adhesive.
5. Test for Stability: Give the smoke detector a gentle tug or shake to ensure it is securely mounted. It should not wobble or move easily. If it feels loose, double-check the mounting method and make any necessary adjustments to ensure a stable installation.
6. Adjust the Orientation: Depending on the design of your smoke detector, you may need to rotate or adjust the orientation to ensure the smoke detection chamber is facing the right direction. Refer to the user manual for any specific instructions on aligning the detector correctly.
7. Double-Check Clearance: Ensure that there is enough clearance around the smoke detector as per the manufacturer’s recommendations. Avoid placing objects too close to the detector, as it may affect its ability to detect smoke effectively.
By following these steps, you can securely mount your Kidde wired smoke detector in the desired location. Double-check that the mounting method is appropriate for your model, mark the location accurately, and prepare the surface accordingly. Once mounted, test the stability of the detector and adjust the orientation if needed. With a properly mounted smoke detector, you can have confidence in its ability to detect and alert you to potential fires.
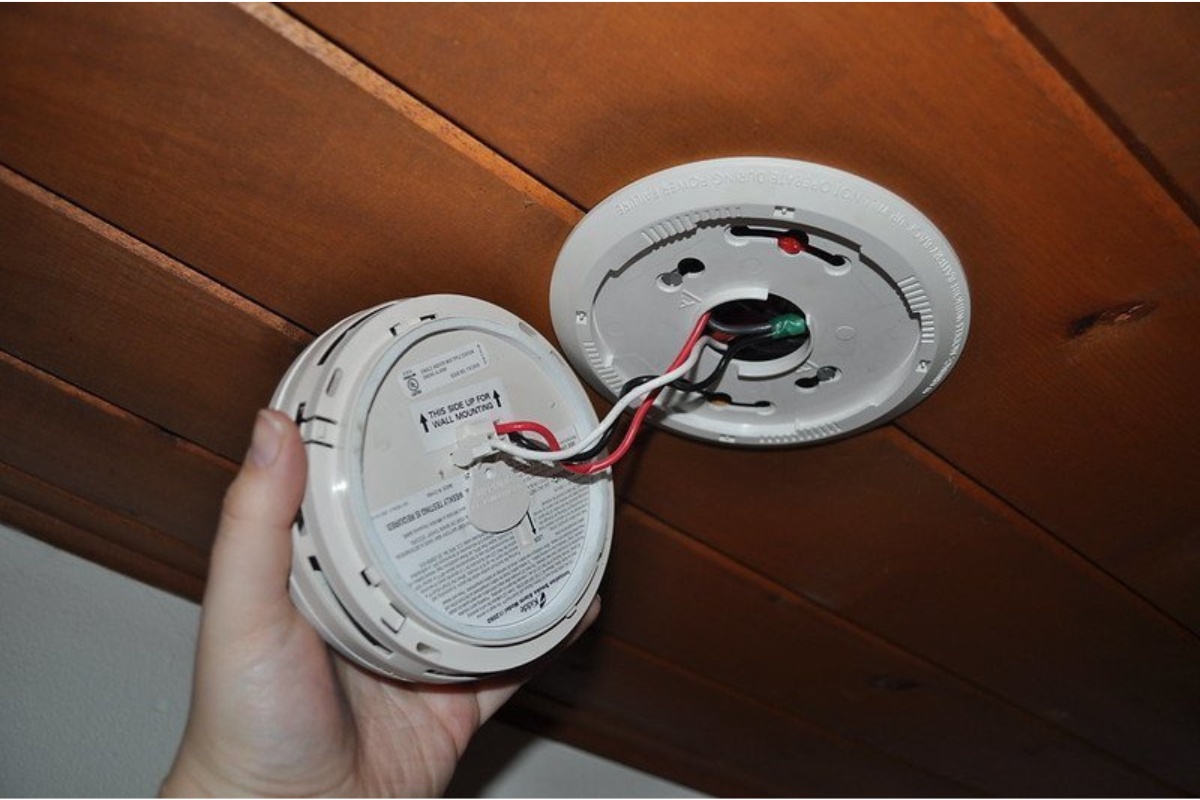
Step 6: Wiring the Smoke Detector
Wiring your Kidde wired smoke detector is an essential step in the installation process. Proper wiring ensures that the smoke detector is connected to the power supply and can function correctly. Follow these steps to wire your smoke detector:
1. Turn Off the Power: Before starting any electrical work, ensure that the power supply to the area is turned off. Refer to Step 3 for detailed instructions on how to safely turn off the power.
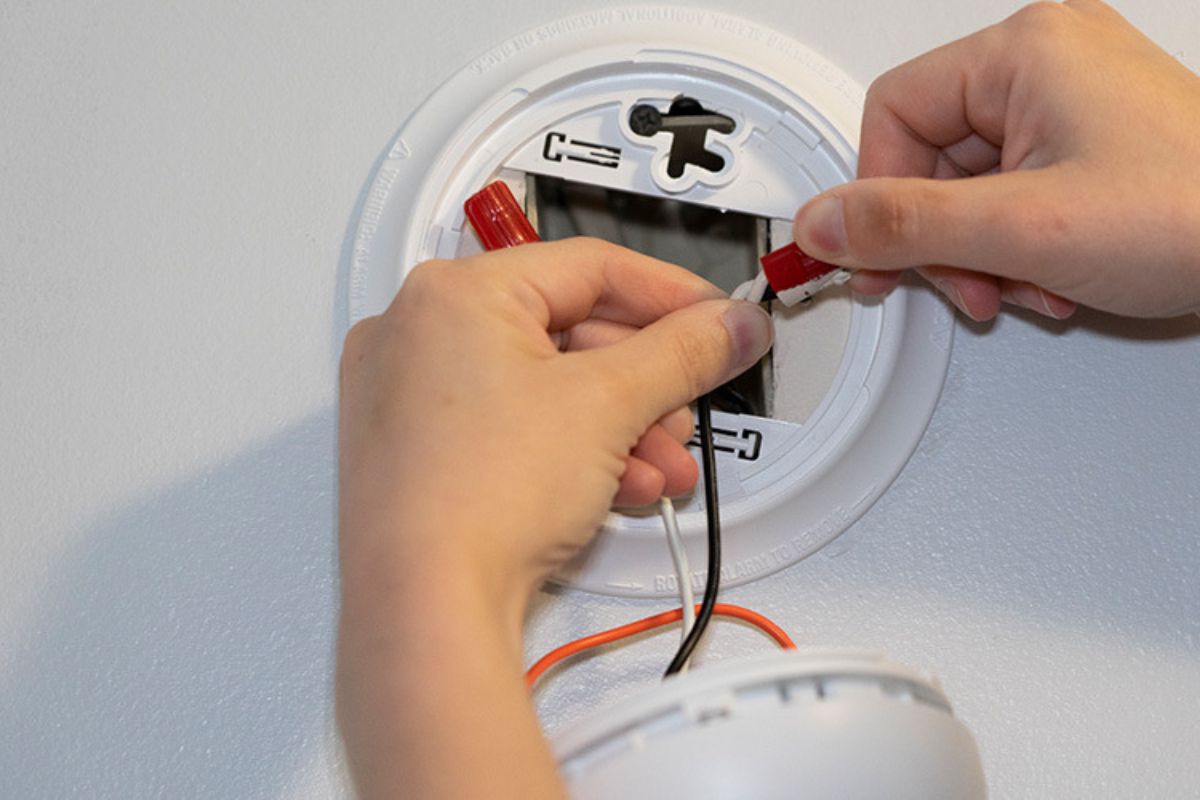
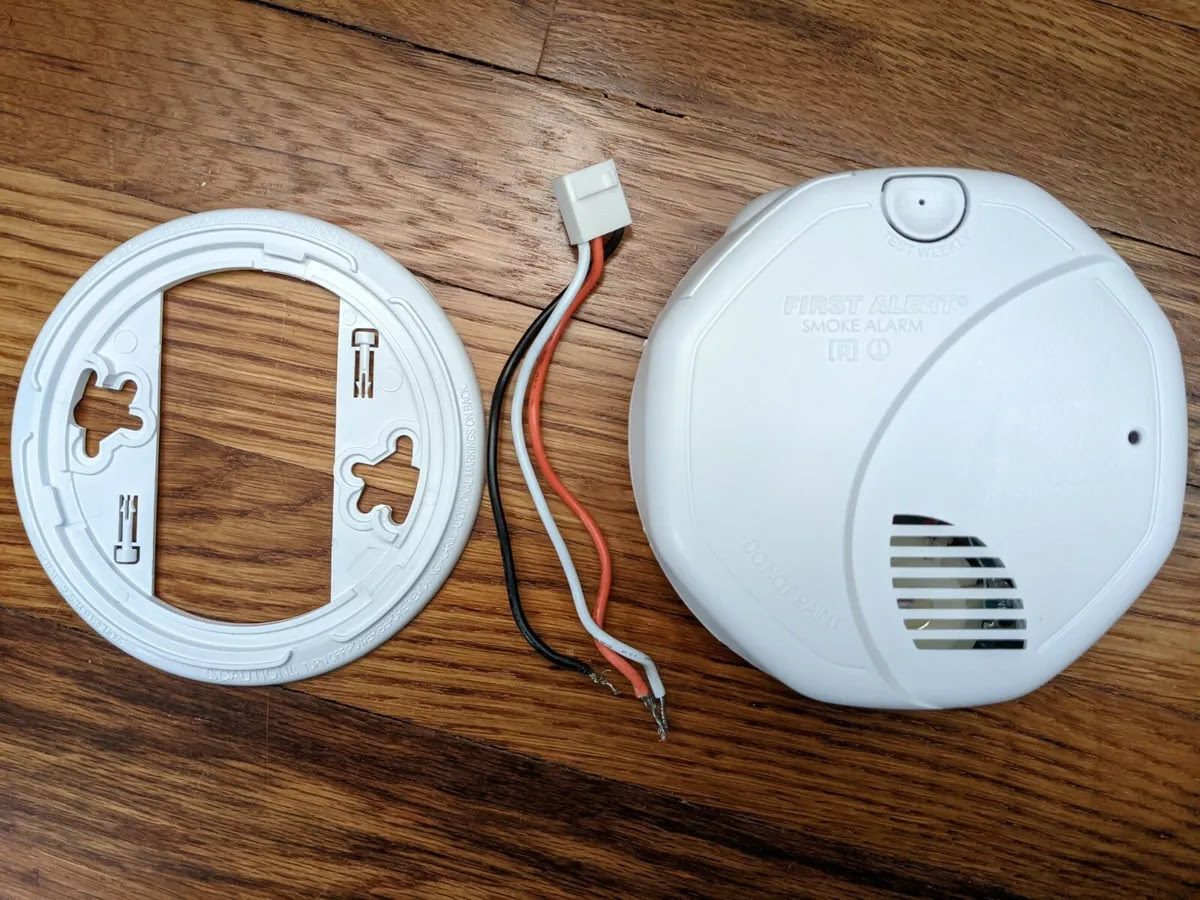
2. Remove the Cover Plate: Gently remove the cover plate from the back of the smoke detector to expose the wiring terminals. This may require unscrewing or unclipping the cover, depending on your specific model.
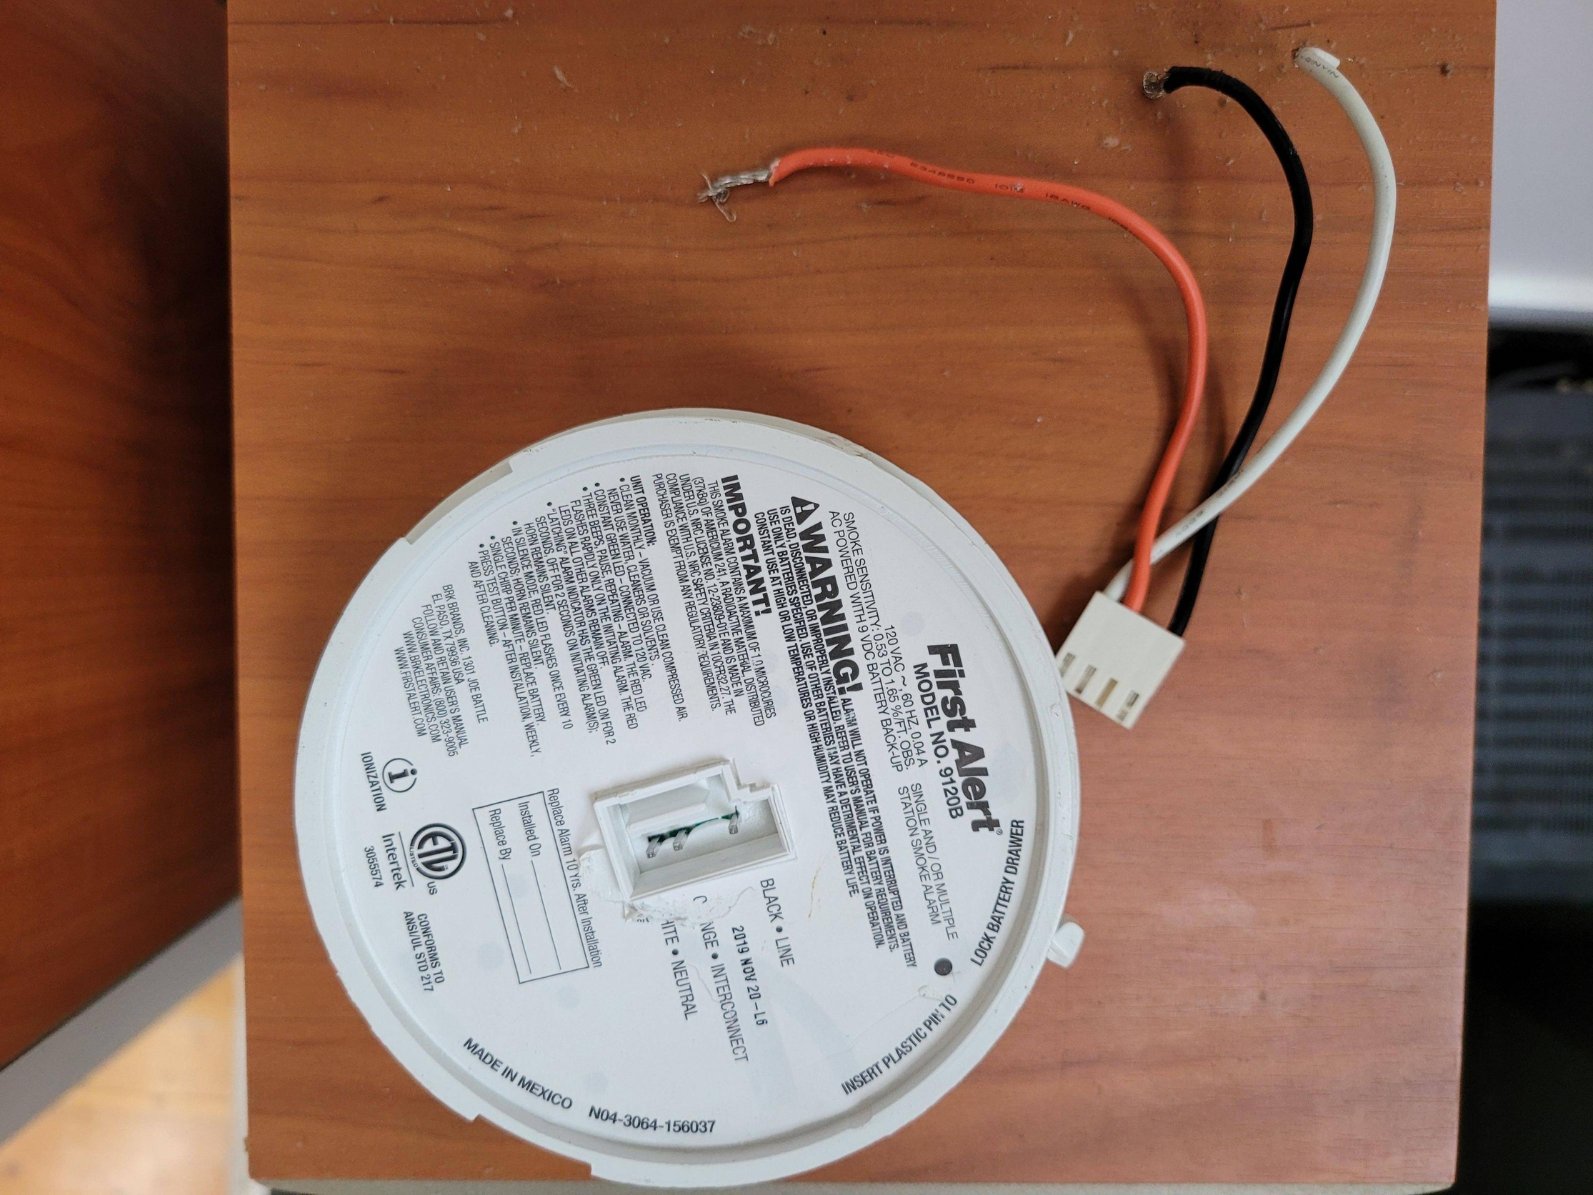
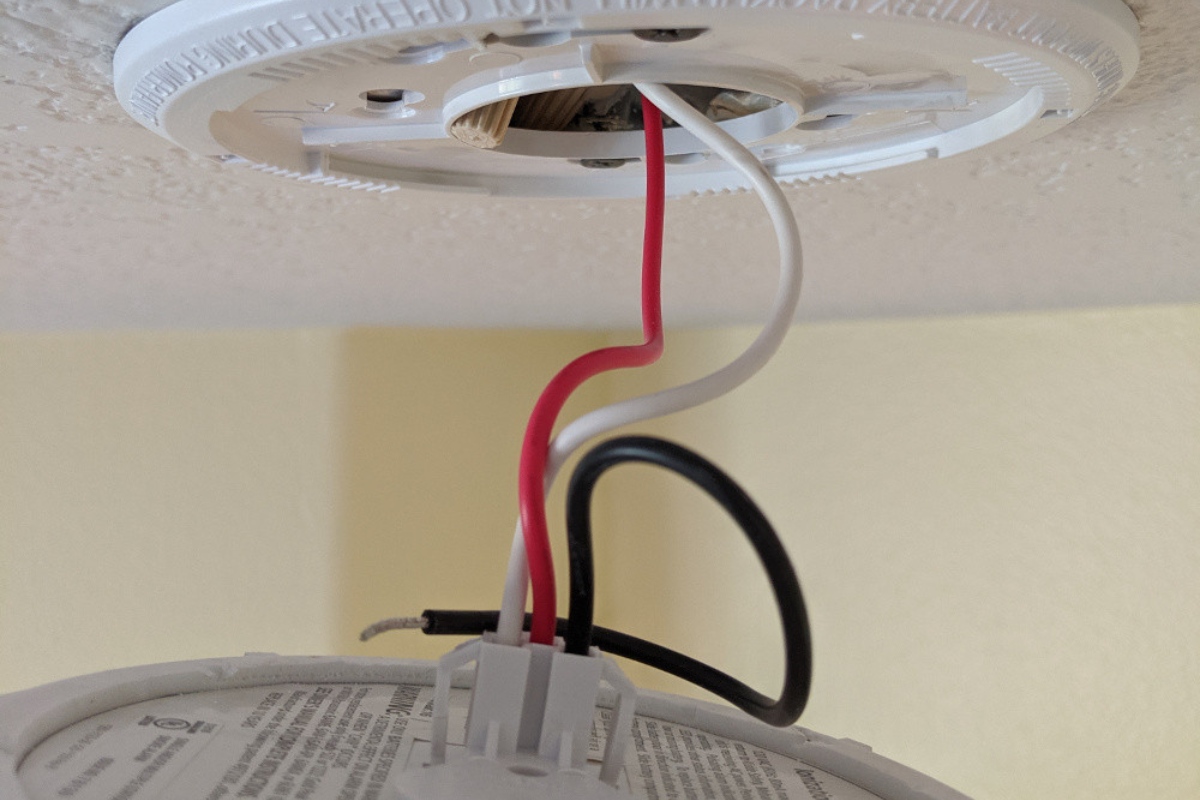
3. Identify the Wires: Inside the electrical box, you should see a group of wires, including a black (hot) wire, a white (neutral) wire, and a green or bare copper wire (ground). These wires may already be connected to other electrical fixtures.
4. Connect the Wires: Using a wire stripper, carefully strip about ½ inch of insulation from the ends of the black and white wires. If necessary, trim off any frayed or damaged portions of the wires. Once stripped, connect the black wire from the electrical box to the black wire on the smoke detector, and the white wire to the white wire. Twist the exposed ends of the wires together, ensuring a secure and tight connection.
5. Secure the Wiring Connections: To ensure the wiring connections are secure and protected, twist on a wire connector over each connection point. This helps to insulate the wires and prevents accidental electrical contact.
6. Insulate the Wiring: Wrap electrical tape around the wire connectors, covering the exposed wires and connectors completely. This adds an extra layer of insulation and helps protect against potential electrical hazards.
7. Mount the Detector: Once the wiring is properly connected and insulated, carefully place the smoke detector over the mounting bracket or attach it securely to the surface using screws or adhesive, following the instructions provided by the manufacturer.
8. Double-Check the Wiring: Before restoring the power, double-check the wiring connections to ensure they are secure and properly insulated. It’s essential to verify that there are no exposed wires or loose connections.
9. Restore the Power: Once you are confident that the wiring is done correctly, you can restore the power to the area. Refer to Step 3 for instructions on how to turn the power back on.
By following these steps, you can successfully wire your Kidde wired smoke detector. Always prioritize safety and ensure the power is turned off before starting any electrical work. Connect the black and white wires securely, insulate the connections with wire connectors and electrical tape, and double-check the wiring before restoring power. With the smoke detector properly wired, you can move on to the next step—testing the functionality of the device.
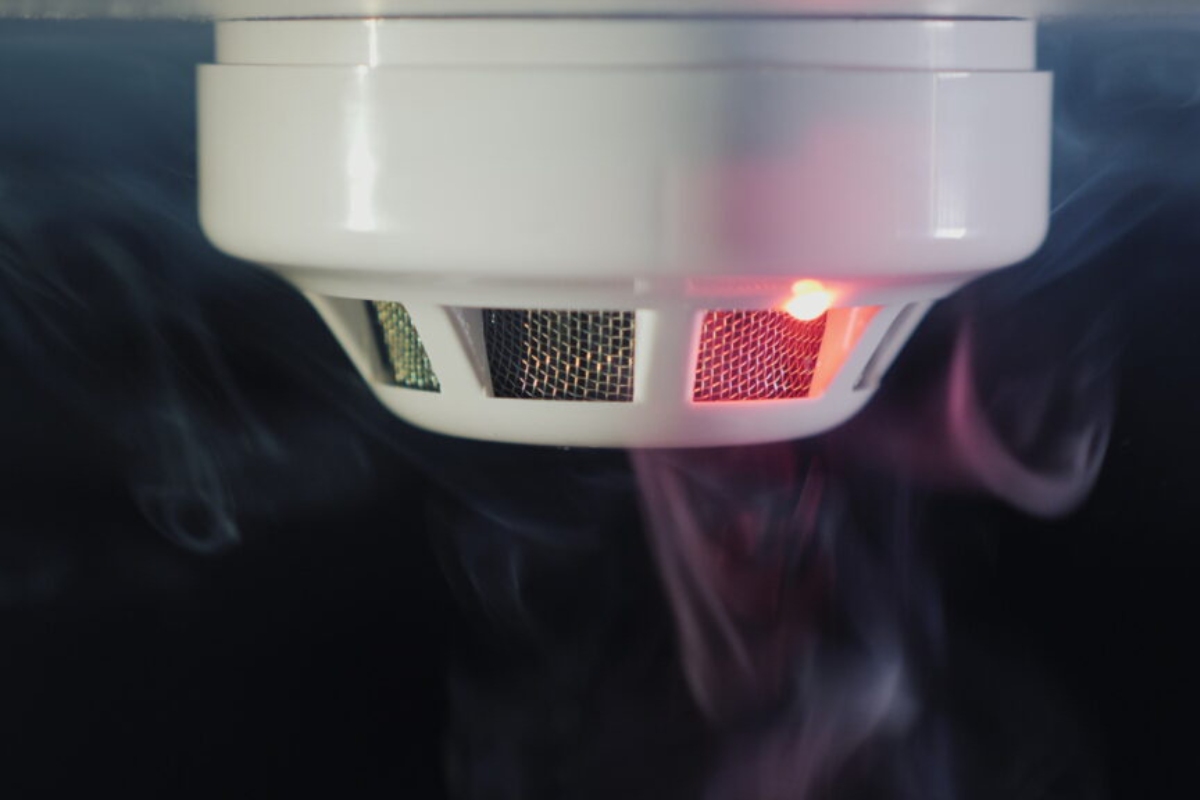
Step 7: Testing the Smoke Detector
After completing the installation and wiring of your Kidde wired smoke detector, it’s crucial to test its functionality to ensure it will effectively detect smoke and provide early warning in the event of a fire. Follow these steps to test your smoke detector:
1. Ensure Power is Restored: Double-check that the power supply to the area is restored. Refer to Step 3 for instructions on how to turn the power back on.
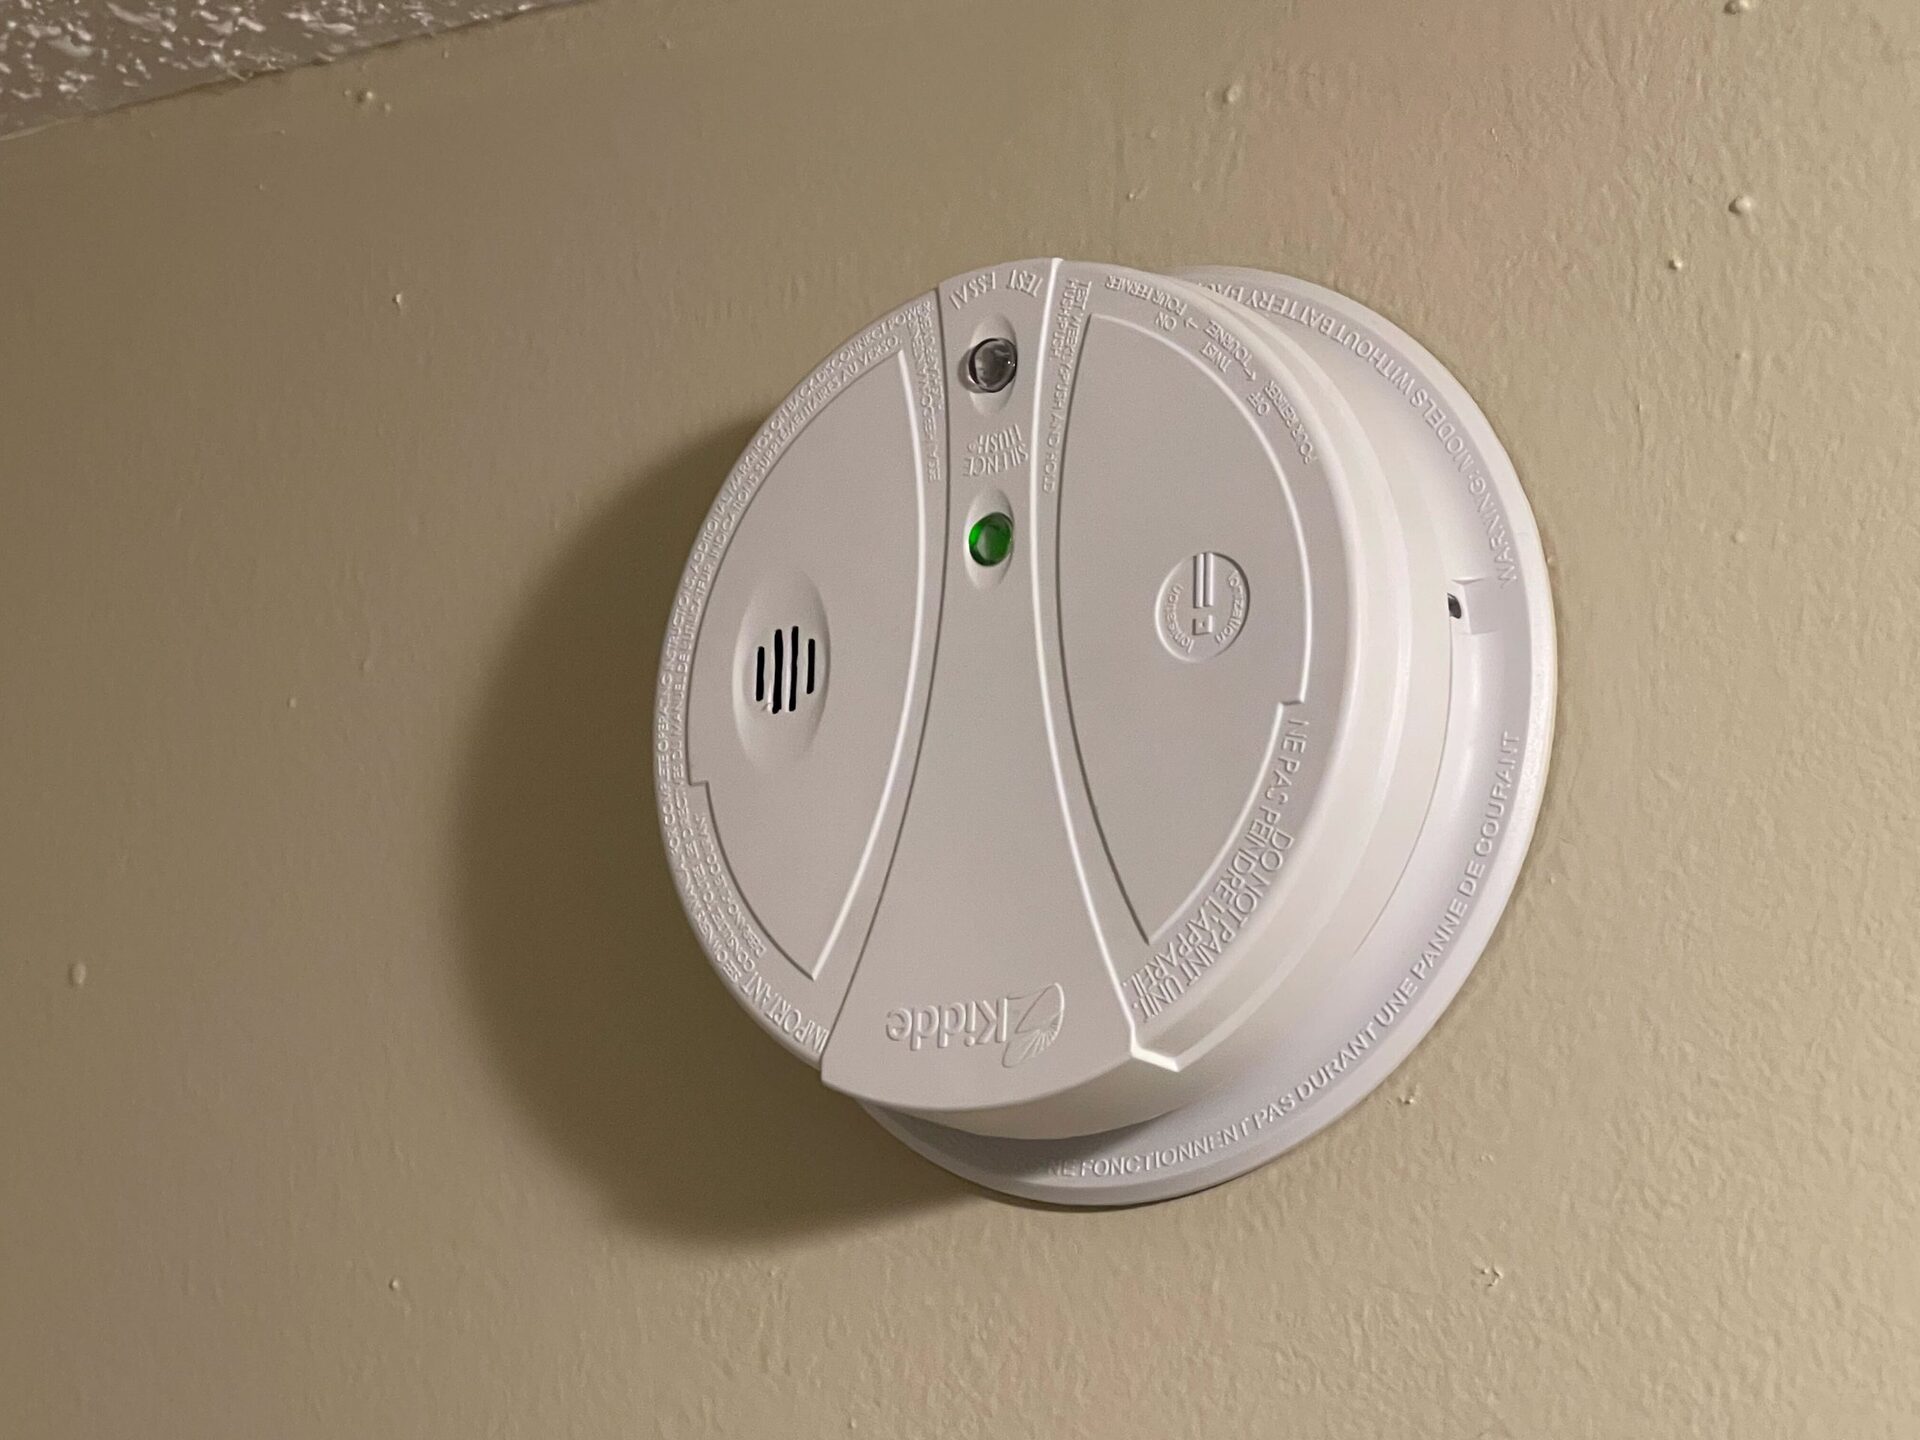
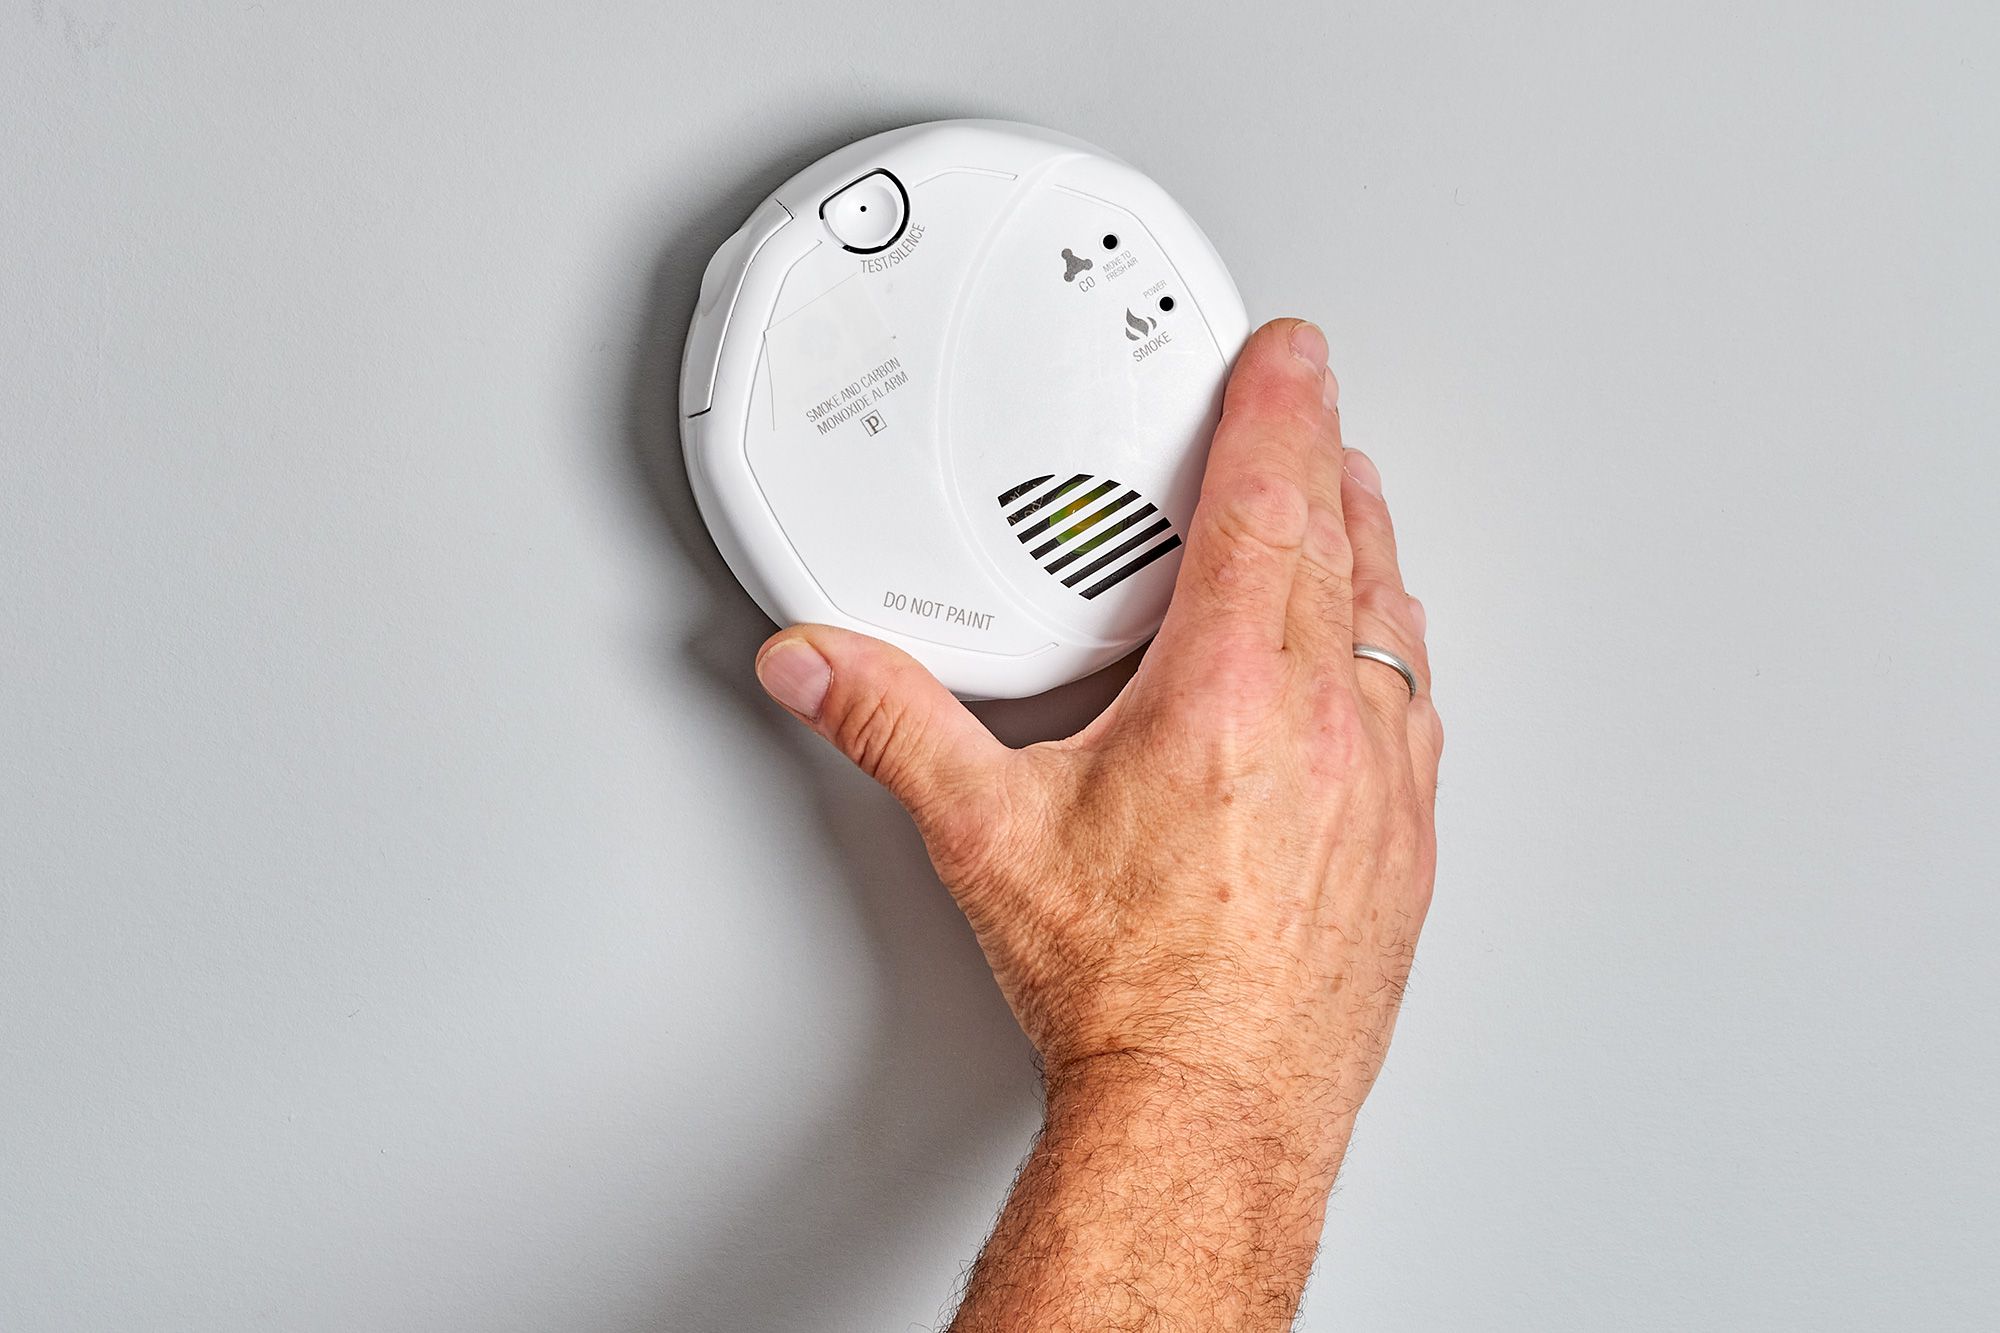
2. Locate the Test Button: Most Kidde smoke detectors have a test button located on the front or side of the unit. This button is usually labeled “TEST” and may be indicated by a symbolic representation of a bell or sound waves.
3. Press and Hold the Test Button: Press and hold the test button for a few seconds until you hear a loud, piercing sound. This sound indicates that the smoke detector is functioning correctly.
4. Listen for the Alarm: Pay attention to the sound of the alarm and ensure it is loud and clear. This verifies that the detector’s internal mechanisms are working properly. If the sound is weak or distorted, you may need to clean or replace the smoke detector.
5. Check the Indicator Lights (if applicable): Some Kidde smoke detectors have indicator lights that provide additional information about the status of the device. Look for any blinking or steady lights and refer to the user manual to interpret their meanings. A steady green light typically indicates normal operation.
6. Test Interconnected Detectors (if applicable): If you have interconnected smoke detectors installed in your home, trigger the test mode on one detector and ensure that all interconnected detectors sound the alarm simultaneously. This confirms that the interconnection feature is functioning correctly.
7. Reset the Smoke Detector: After testing, reset the smoke detector by pressing the test button again or following the instructions provided by the manufacturer. This will silence the alarm and return the detector to its normal operating mode.
8. Regularly Test the Smoke Detector: Testing your smoke detector should be done regularly, ideally once a month, to ensure its ongoing functionality. Additionally, replace the batteries in battery-operated smoke detectors at least once a year, or as recommended by the manufacturer.
By following these steps and regularly testing your Kidde wired smoke detector, you can have confidence in its ability to detect smoke and provide early warning in the event of a fire. Testing ensures that the smoke detector is functioning correctly and gives you peace of mind knowing that your home is protected. Remember, testing should be done in conjunction with other fire safety measures, such as regularly checking and maintaining your smoke detectors and having a fire escape plan in place.
Step 8: Restoring the Power
Once you have completed the installation, wiring, and testing of your Kidde wired smoke detector, it’s time to restore the power to the area. Follow these steps to safely restore the power:
1. Double-Check the Wiring: Before restoring the power, double-check the wiring connections to ensure they are secure and properly insulated. Verify that there are no exposed wires or loose connections.
2. Test the Smoke Detector (Optional): Take this opportunity to test the smoke detector one last time. Press and hold the “TEST” button on the smoke detector and ensure that it emits a loud and clear alarm sound. This provides a final verification of the detector’s functionality before restoring power.
3. Reset the Smoke Detector (Optional): If you have tested the smoke detector and it has sounded the alarm, reset it as per the manufacturer’s instructions. This will silence the alarm and return the detector to its normal operating mode.
4. Turn on the Electrical Breaker: Return to the electrical panel or circuit breaker box and locate the circuit breaker that controls the area where the smoke detector is installed. Flip the switch to the “On” position to restore power to the area.
5. Verify Power Restoration: Double-check that power has been restored by checking the lights or outlets in the area. If everything is functioning as expected, it indicates that the power is back on.
6. Monitor the Smoke Detector: Once power has been restored, observe the smoke detector for a few minutes to ensure that it is operating correctly. Look for any indicator lights or signs of normal operation, as specified by the manufacturer.
Restoring the power to the area is the final step in the installation process. Before doing so, ensure that the wiring is secure and properly insulated. Optionally, test the smoke detector one last time and reset it if necessary. After confirming that everything is in order, proceed to the electrical panel and flip the circuit breaker switch to restore power.
Remember to regularly check and maintain your smoke detector. Replace batteries as needed and test the detector at least once a month. By following these guidelines, you can ensure the continuous functionality of your Kidde wired smoke detector and the safety of your home and loved ones.
Conclusion
Installing a Kidde wired smoke detector is an important step towards ensuring the safety of your home and protecting your loved ones from the dangers of fire. By following the step-by-step process outlined in this article, you can confidently install and wire your smoke detector, while also testing its functionality.
Starting with the preparation phase, it’s important to familiarize yourself with the user manual, understand local building codes, and inspect the installation area. Gathering the necessary tools beforehand will make the installation process smoother and more efficient.
As you proceed with the installation, make sure to turn off the power, locate the ideal placement for the smoke detector, and securely mount it using the appropriate method. Accurately wiring the smoke detector is a crucial step in ensuring its proper functioning, so double-check the connections, insulate them, and test the detector for stability.
Once the smoke detector is installed and wired, testing its functionality is paramount. Familiarize yourself with the test button, listen for the alarm sound, and check for any indicator lights or interconnection capabilities. Regularly testing the smoke detector and replacing batteries according to the manufacturer’s recommendations are essential for ongoing safety.
Finally, after completing the installation and testing, restore the power and ensure that everything is functioning as expected. Keep in mind that regular maintenance and testing should be performed to ensure the smoke detector’s ongoing effectiveness.
By installing a Kidde wired smoke detector and following these steps, you are taking a proactive approach to fire safety and protecting your home and loved ones. Remember to review the user manual specific to your model and always prioritize safety throughout the installation process.
Don’t forget that fire safety extends beyond just installing a smoke detector. It’s important to have a comprehensive fire safety plan, including regularly reviewing and practicing escape routes, properly maintaining fire extinguishers, and educating everyone in the household about fire prevention measures.
By combining the installation of a Kidde wired smoke detector and a robust fire safety plan, you can significantly reduce the risk of fire and ensure the safety and well-being of everyone in your home. Stay vigilant, stay prepared, and prioritize fire safety at all times.
Frequently Asked Questions about How To Install A Kidde Wired Smoke Detector
Was this page helpful?
At Storables.com, we guarantee accurate and reliable information. Our content, validated by Expert Board Contributors, is crafted following stringent Editorial Policies. We're committed to providing you with well-researched, expert-backed insights for all your informational needs.


0 thoughts on “How To Install A Kidde Wired Smoke Detector”