Home>Articles>How To Change The Battery In A Kidde Smoke Detector
Articles
How To Change The Battery In A Kidde Smoke Detector
Modified: August 22, 2024
Learn how to change the battery in a Kidde smoke detector with step-by-step instructions and helpful tips. Read more articles on home maintenance and safety.
(Many of the links in this article redirect to a specific reviewed product. Your purchase of these products through affiliate links helps to generate commission for Storables.com, at no extra cost. Learn more)
Introduction
Welcome to this guide on how to change the battery in a Kidde smoke detector. Smoke detectors are crucial for home safety, alerting us to the presence of smoke and fire. It is important to regularly maintain and test your smoke detectors to ensure they are functioning properly. One crucial maintenance task is replacing the batteries. In this article, we will walk you through the step-by-step process of changing the battery in your Kidde smoke detector.
Before we dive into the details, it is essential to emphasize the importance of safety. Always exercise caution when working with electrical equipment and follow the manufacturer’s instructions. Additionally, make sure to inform all household members about the process to prevent any accidents during the battery change.
Now, let’s gather the necessary supplies and proceed with changing the battery in your Kidde smoke detector.
Key Takeaways:
- Regularly maintain and test your Kidde smoke detector by following safety precautions, gathering supplies, and replacing the battery to ensure optimal functionality and home safety.
- Prioritize safety, gather supplies, and follow step-by-step instructions to safely change the battery in your Kidde smoke detector, contributing to a secure living environment.
Safety Precautions
Before you start changing the battery in your Kidde smoke detector, it’s important to observe some safety precautions to ensure your well-being:
- Turn off the power: Before attempting any maintenance on a smoke detector, make sure to turn off the power to the device. This can usually be done by flipping the corresponding switch in the circuit breaker.
- Wear protective gear: Keep in mind that dust or debris may have accumulated inside the smoke detector. To protect yourself, it is recommended to wear gloves, safety glasses, and a mask to prevent inhalation of any particles.
- Keep a fire extinguisher nearby: Although rare, there is a small risk of fire when dealing with electrical equipment. Having a fire extinguisher nearby can provide an added layer of safety.
- Read the manufacturer’s instructions: Every smoke detector model may have specific instructions or precautions. Take the time to read and understand the manufacturer’s guidelines before proceeding with any maintenance.
- Work on a stable surface: Find a safe and stable surface to perform the battery change. This will prevent any accidental drops or damage to the smoke detector.
By following these safety precautions, you can ensure a smooth and safe battery replacement process for your Kidde smoke detector.
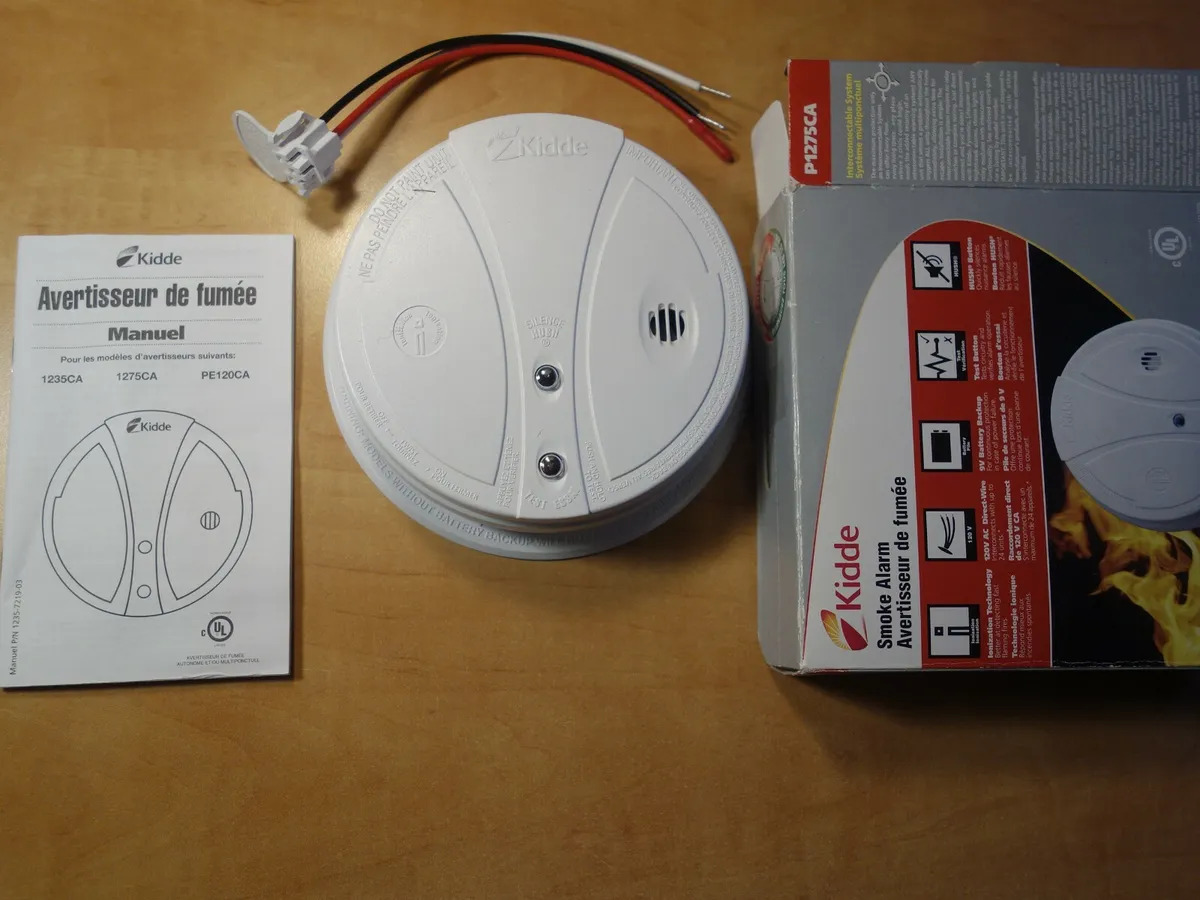
Gather Supplies
Before you begin changing the battery in your Kidde smoke detector, it’s important to gather all the necessary supplies. Here’s a list of items you’ll need:
- New battery: Make sure to have a fresh, compatible battery on hand. Check the Kidde smoke detector’s manual or the old battery for the correct battery type.
- Stepladder: Depending on the location of your smoke detector, you may need a stepladder to safely reach it. Ensure the ladder is stable and secure before use.
- Gloves: Wearing gloves will protect your hands during the battery replacement process and prevent any potential contact with dust or debris.
- Safety glasses: It’s always a good idea to wear safety glasses when working with electrical equipment to protect your eyes from any potential hazards.
- Nose mask or mask: A nose mask or mask can help reduce the risk of inhaling any dust or particles that may be present in the smoke detector.
By having these supplies readily available, you’ll be prepared and equipped to safely change the battery in your Kidde smoke detector.
Locate the Smoke Detector
The next step in changing the battery in your Kidde smoke detector is to locate the device. Smoke detectors are typically installed in key areas of the home, such as the hallway, bedrooms, or living room. Here’s how to find the smoke detector:
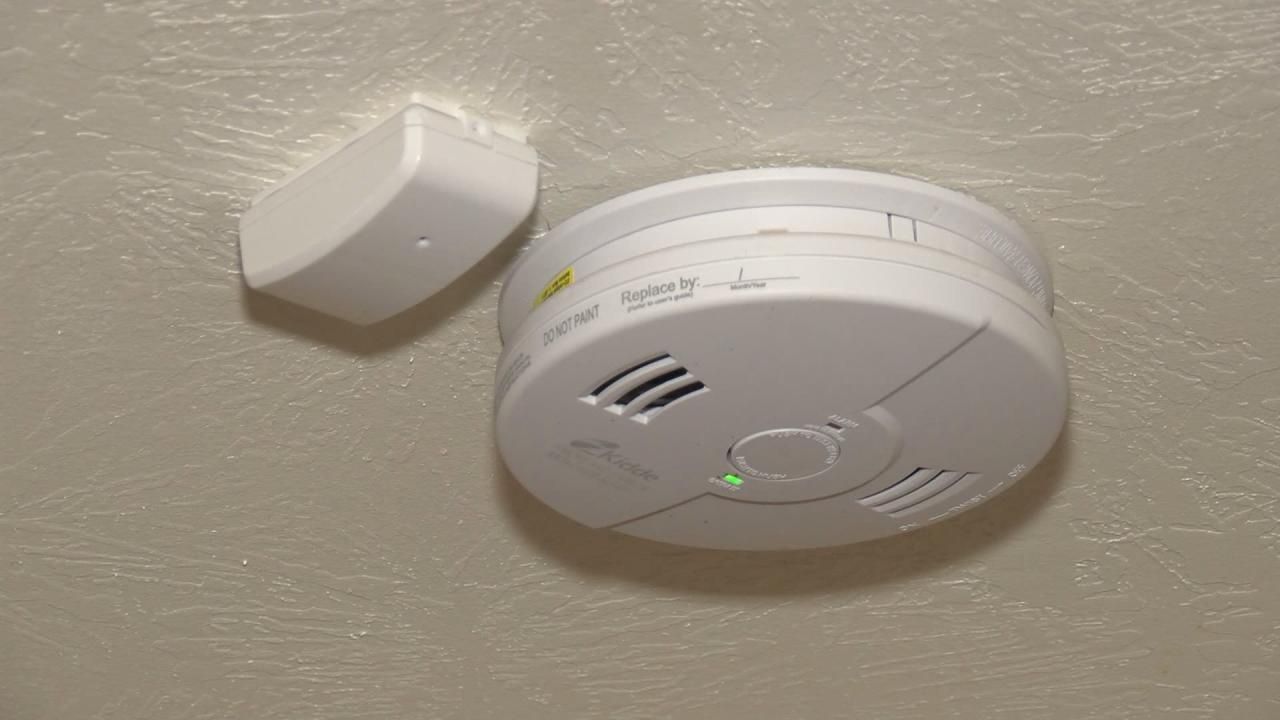
- Check the ceiling: Most smoke detectors are installed on the ceiling, centrally located for optimal coverage. Look up and visually scan the ceilings of different rooms in your house.
- Inspect the walls: In some cases, smoke detectors may be installed on the walls instead of the ceiling. Check the walls in each room, paying particular attention to areas near the ceiling.
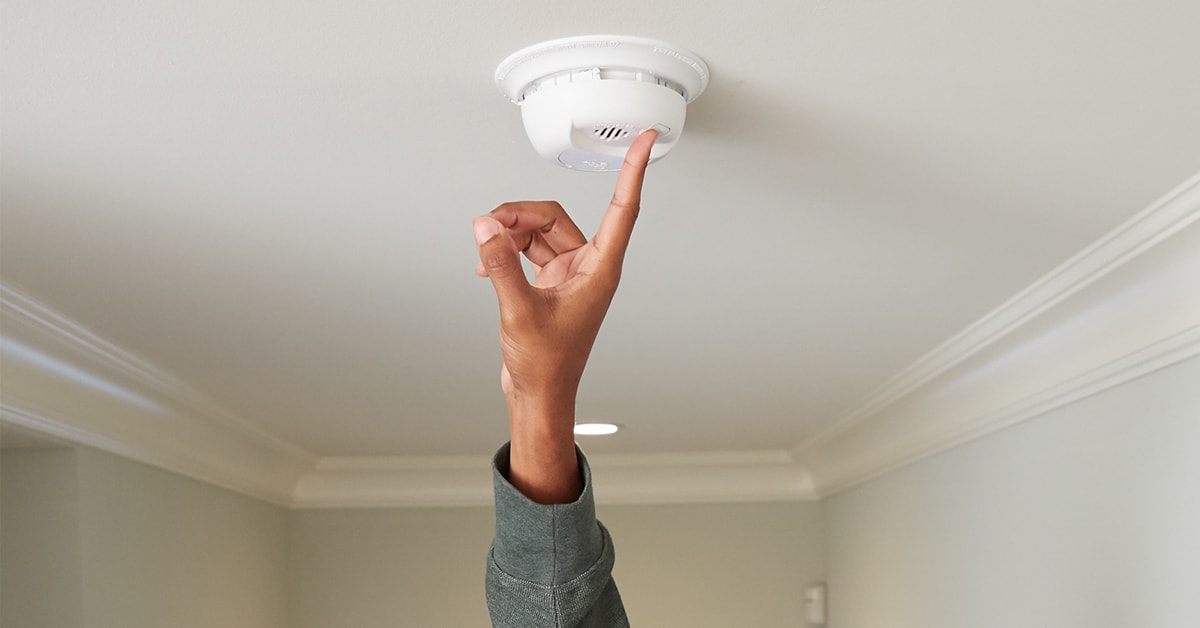
- Follow the sound: If you’re having trouble locating the smoke detector visually, activate it by pressing the test button. This will emit a loud sound that can help you pinpoint the detector’s location.
- Consult the floor plan: If you have a floor plan or blueprint of your home, refer to it to determine the exact location of the smoke detector in each room.
Once you’ve located the smoke detector, take note of its positioning and accessibility. This will make it easier for you to proceed with the battery replacement process.
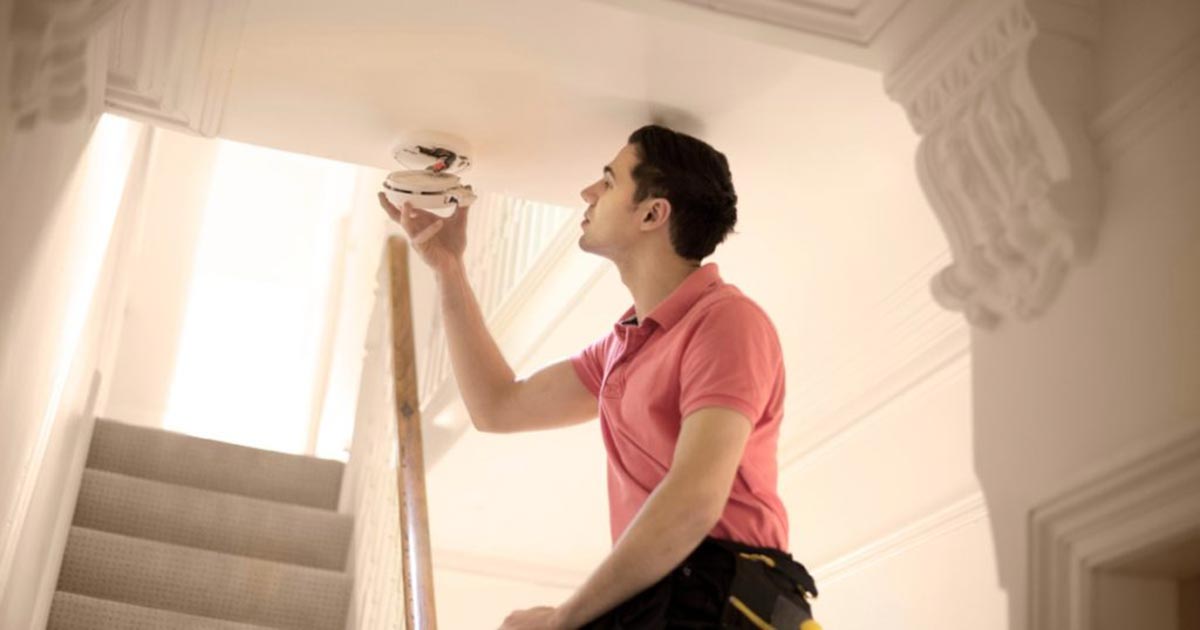
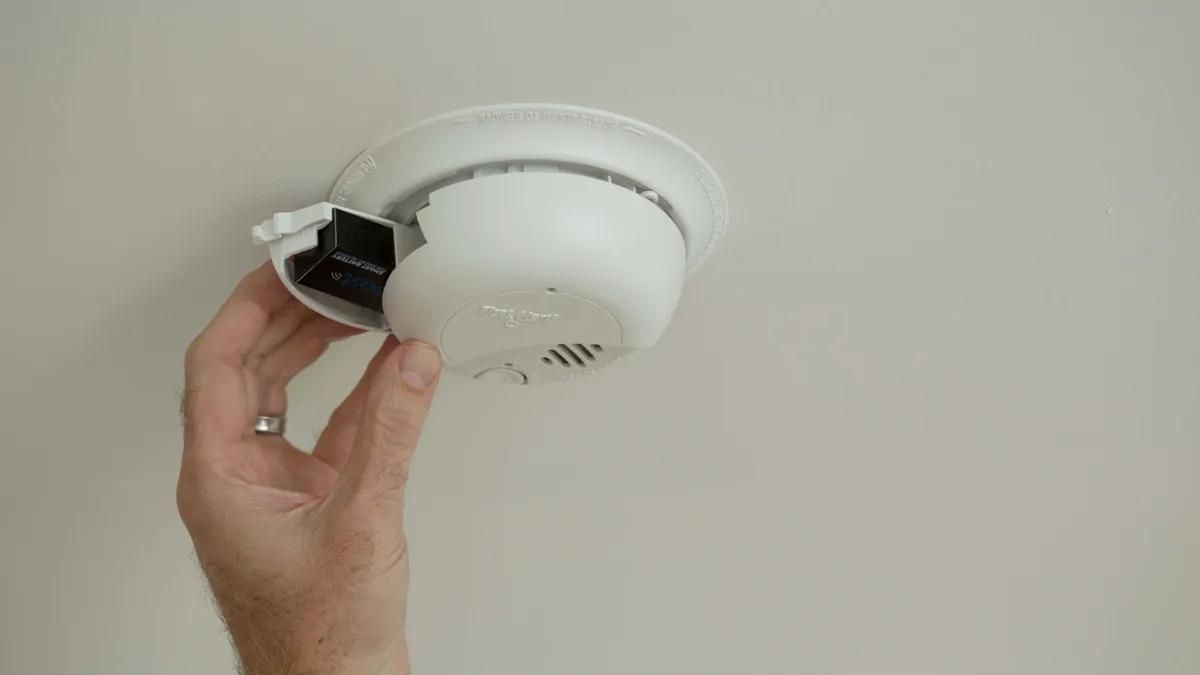
Remove the Smoke Detector
Now that you have located your Kidde smoke detector, it’s time to remove it from its mounting bracket. Follow these steps to safely remove the smoke detector:
- Ensure power is turned off: Before removing the smoke detector, ensure that the power to the device is turned off. This step is essential for your safety.
- Use a stepladder if necessary: If the smoke detector is mounted on the ceiling and is out of your reach, use a stepladder to safely access it. Ensure the ladder is stable and secure.
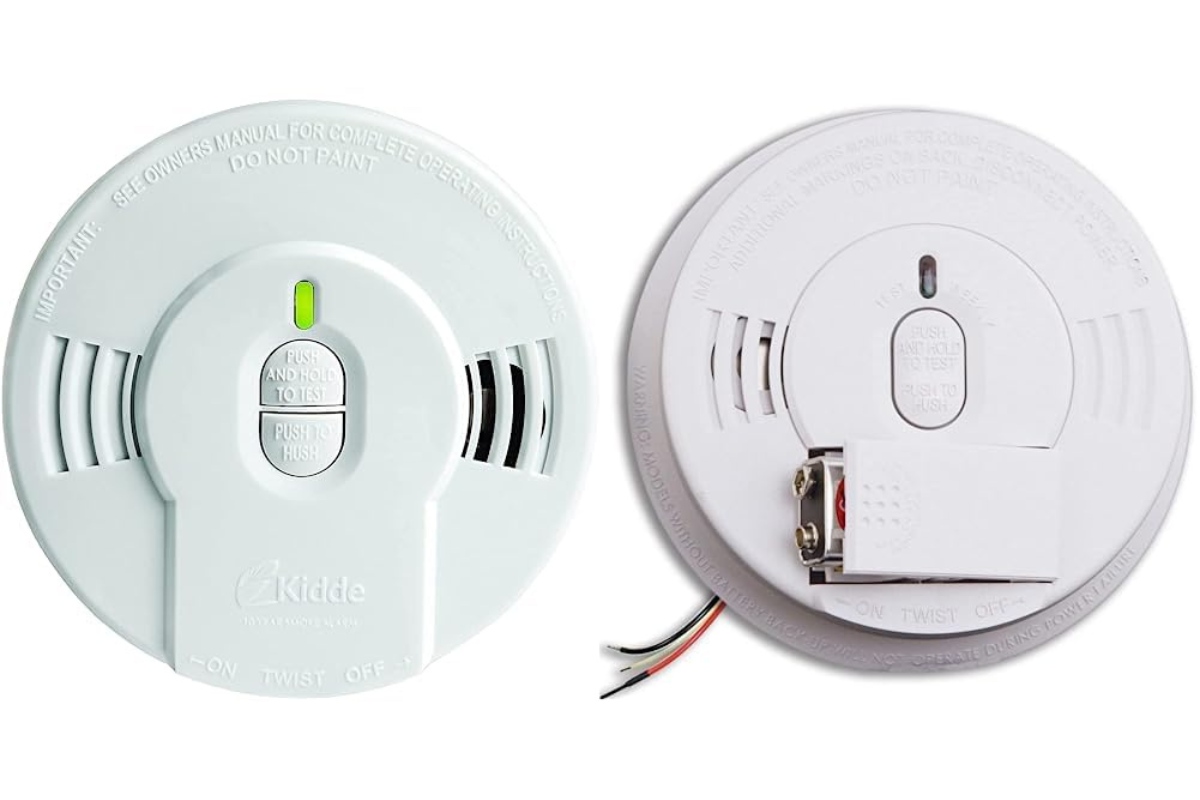
- Take note of the mounting mechanism: Kidde smoke detectors are typically held in place by a latch or a twisting mechanism. Identify the specific mounting mechanism used for your smoke detector.
- Release the latch or twist the detector: Depending on the mounting mechanism, release the latch or twist the smoke detector counterclockwise to detach it from the mounting bracket.
- Gently detach the smoke detector: Once the smoke detector is released, carefully lower it down from the mounting bracket, making sure to support it with your hand to prevent it from falling.
It’s important to handle the smoke detector with care during the removal process. Avoid pulling on wires or exerting excessive force that could damage the device. Now that you’ve removed the smoke detector, you can proceed to open the battery compartment.
When changing the battery in a Kidde smoke detector, always use a new, high-quality alkaline battery. Test the detector after replacing the battery to ensure it is functioning properly.
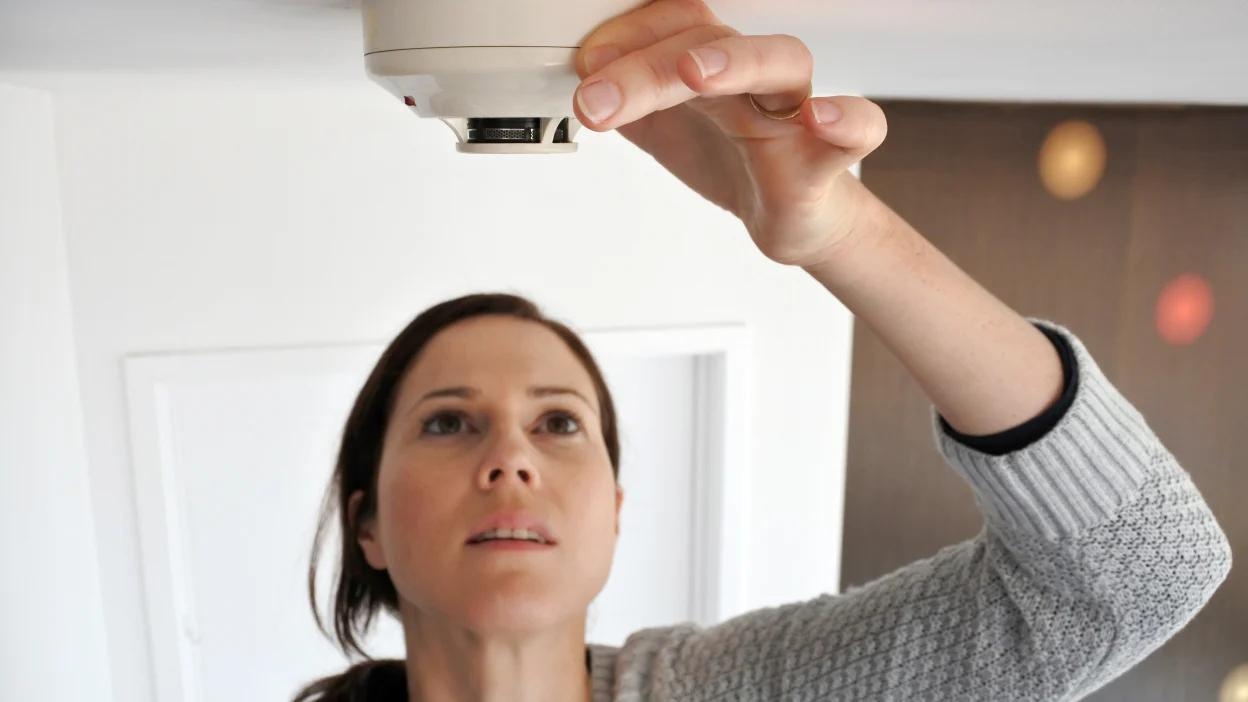
Open the Battery Compartment
Now that you have removed the Kidde smoke detector from its mounting bracket, it’s time to open the battery compartment. Follow these steps to access the battery:
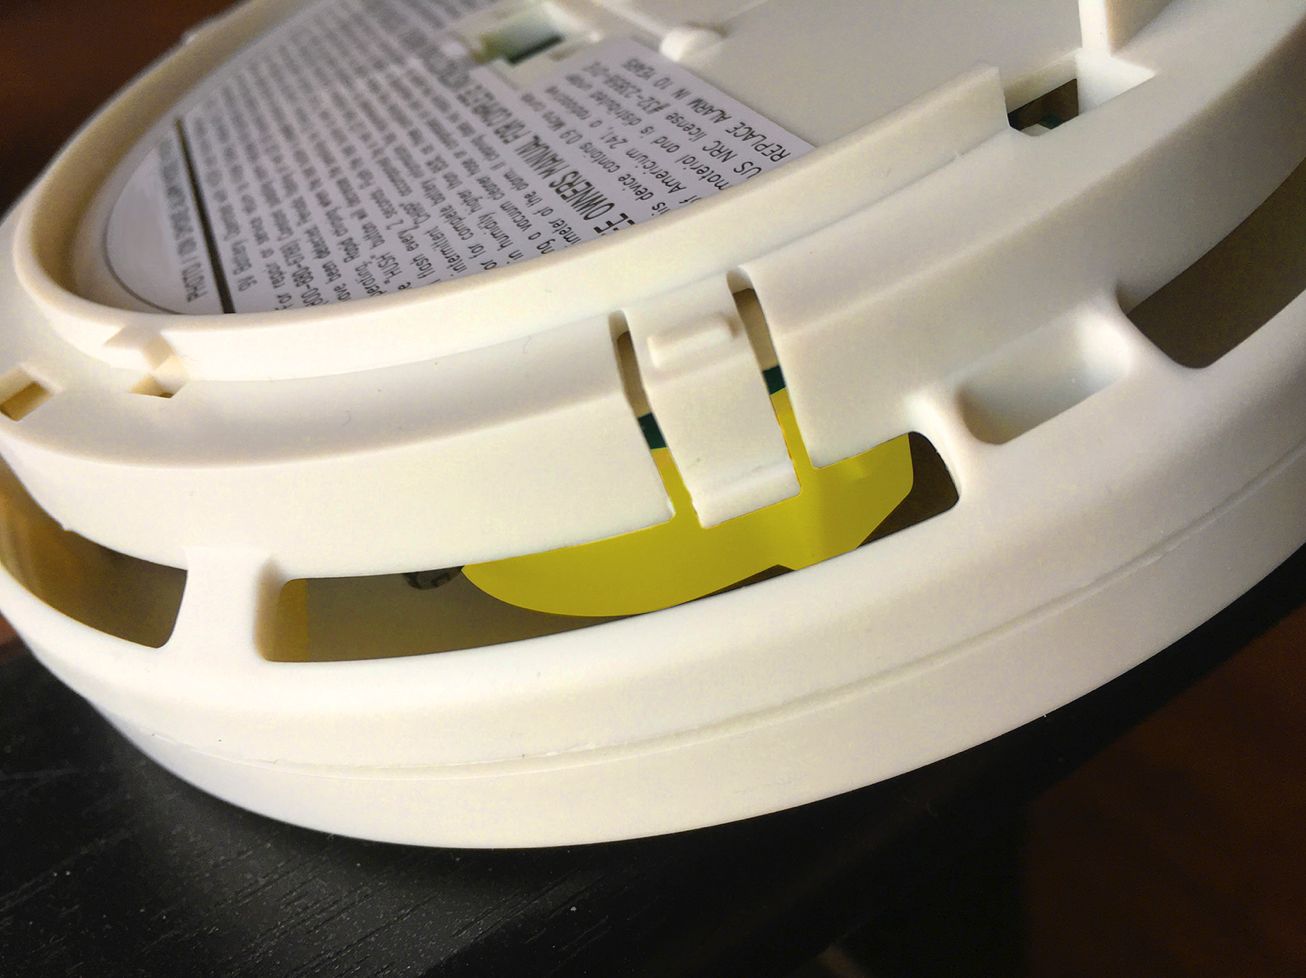
- Inspect the smoke detector: Take a moment to visually inspect the smoke detector and locate the battery compartment. The battery compartment is usually located on the underside of the detector.
- Identify the battery compartment door: Look for a small door or panel on the smoke detector that covers the battery compartment. It may be labeled or have an arrow indicating the direction to open it.
- Open the battery compartment door: Use your fingers or a small tool, such as a screwdriver, to gently pry open the battery compartment door. Apply gentle pressure to release any latches or tabs that hold it in place.
- Ensure full access: Once the battery compartment door is open, check if you have full access to the battery. In some cases, you may need to remove additional covers or panels to reach the battery.
Take your time and be cautious when opening the battery compartment. Avoid using excessive force or sharp objects that could damage the smoke detector. Once the battery compartment is open, you can proceed to remove the old battery and replace it with a new one.
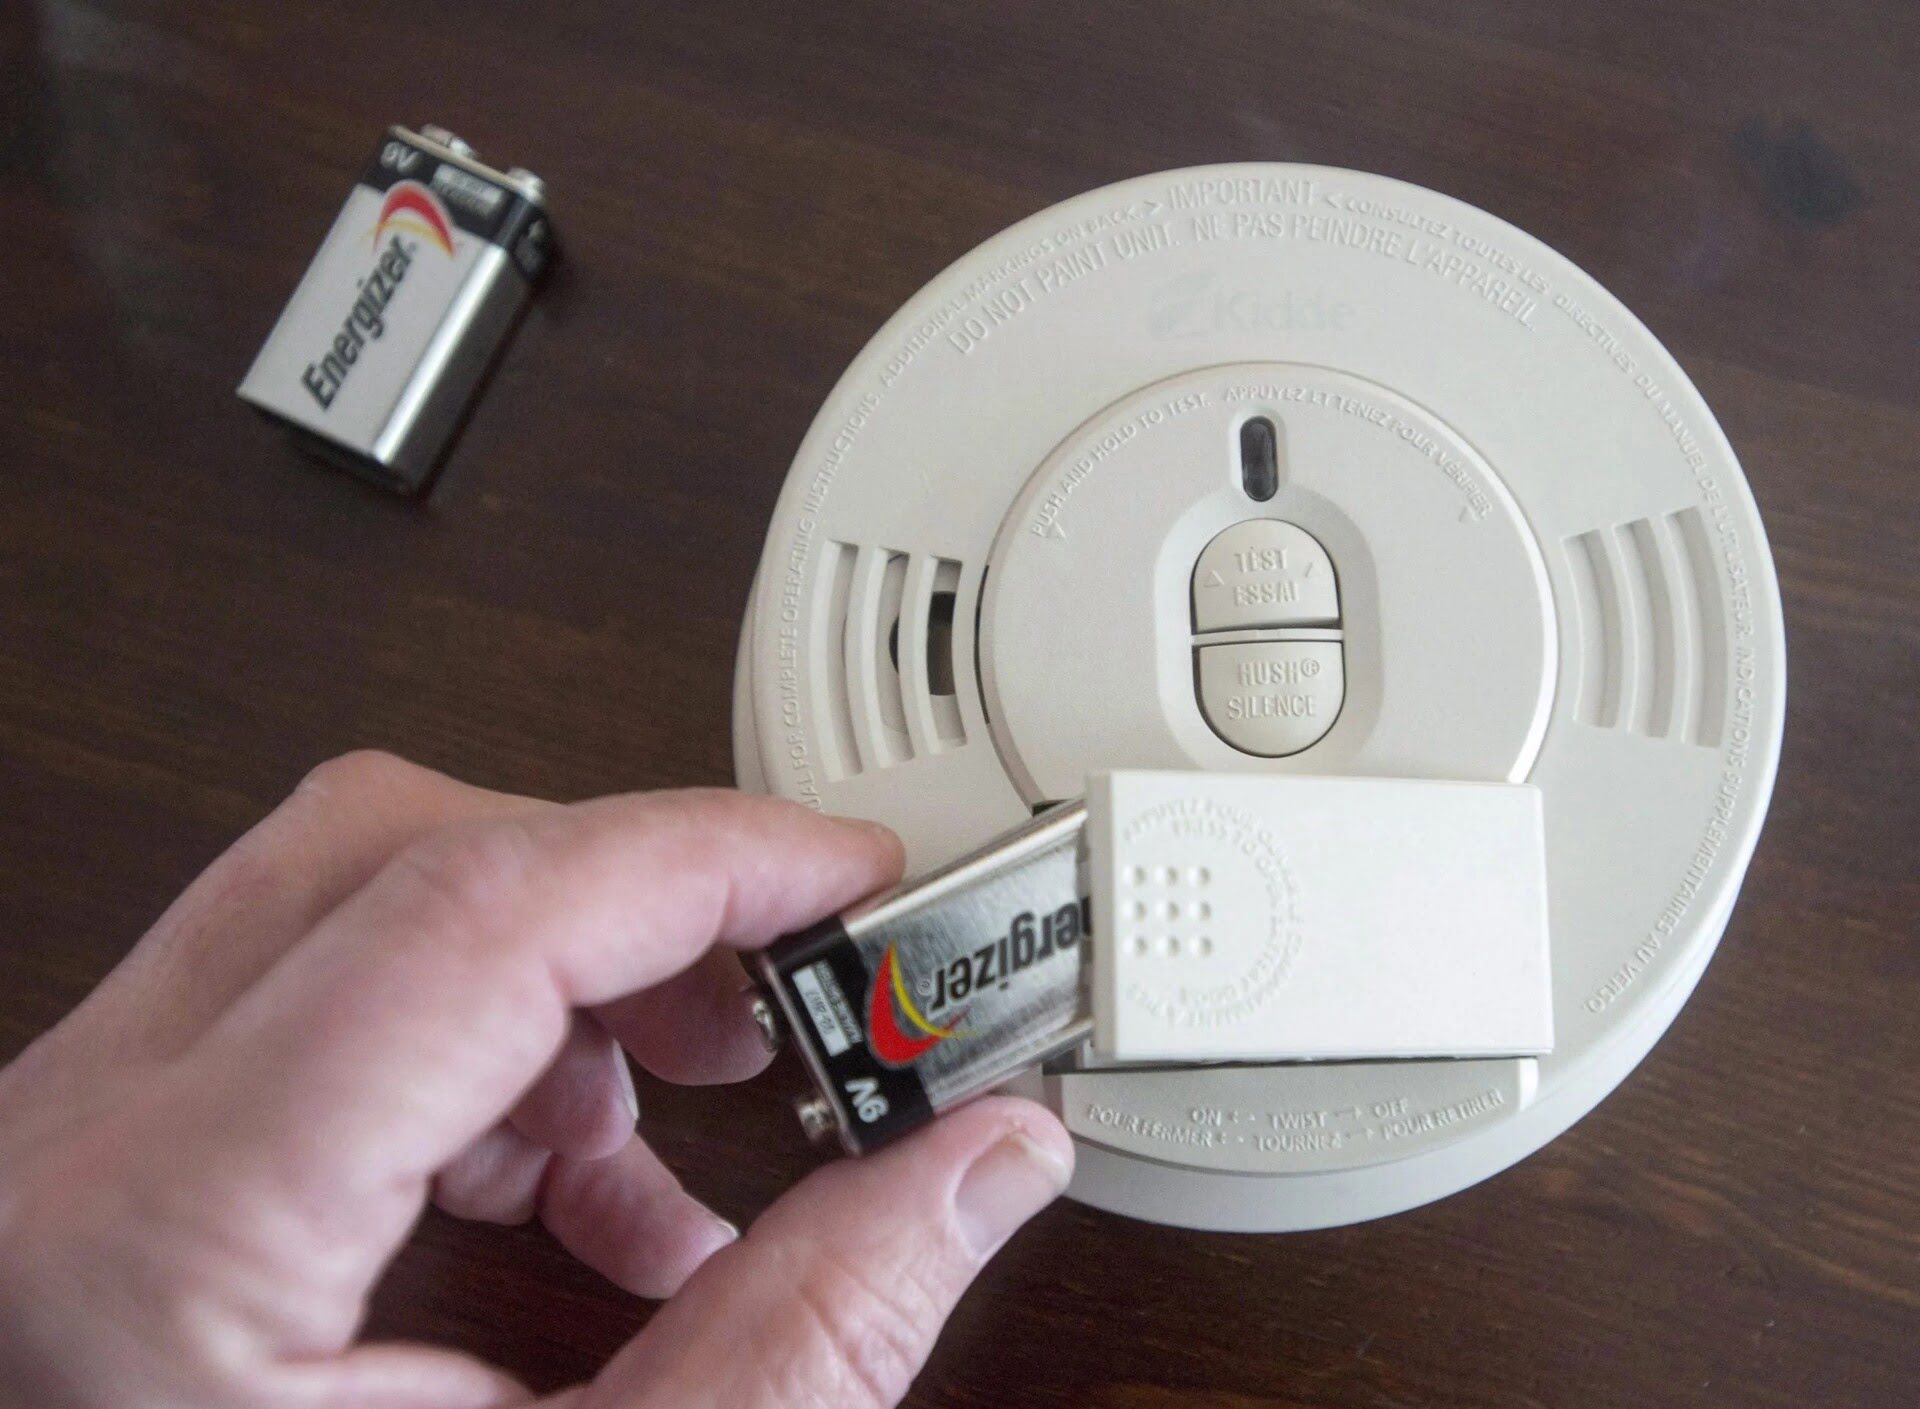
Replace the Battery
Now that you have opened the battery compartment of your Kidde smoke detector, it’s time to replace the old battery with a new one. Follow these steps to ensure a proper battery replacement:
- Remove the old battery: Carefully remove the old battery from the compartment, taking note of its orientation. Some smoke detectors may require you to press a release button or slide the battery out.
- Inspect the battery compartment: Before inserting the new battery, inspect the battery compartment for any signs of corrosion or damage. If you notice any issues, clean the compartment with a cloth or brush before proceeding.
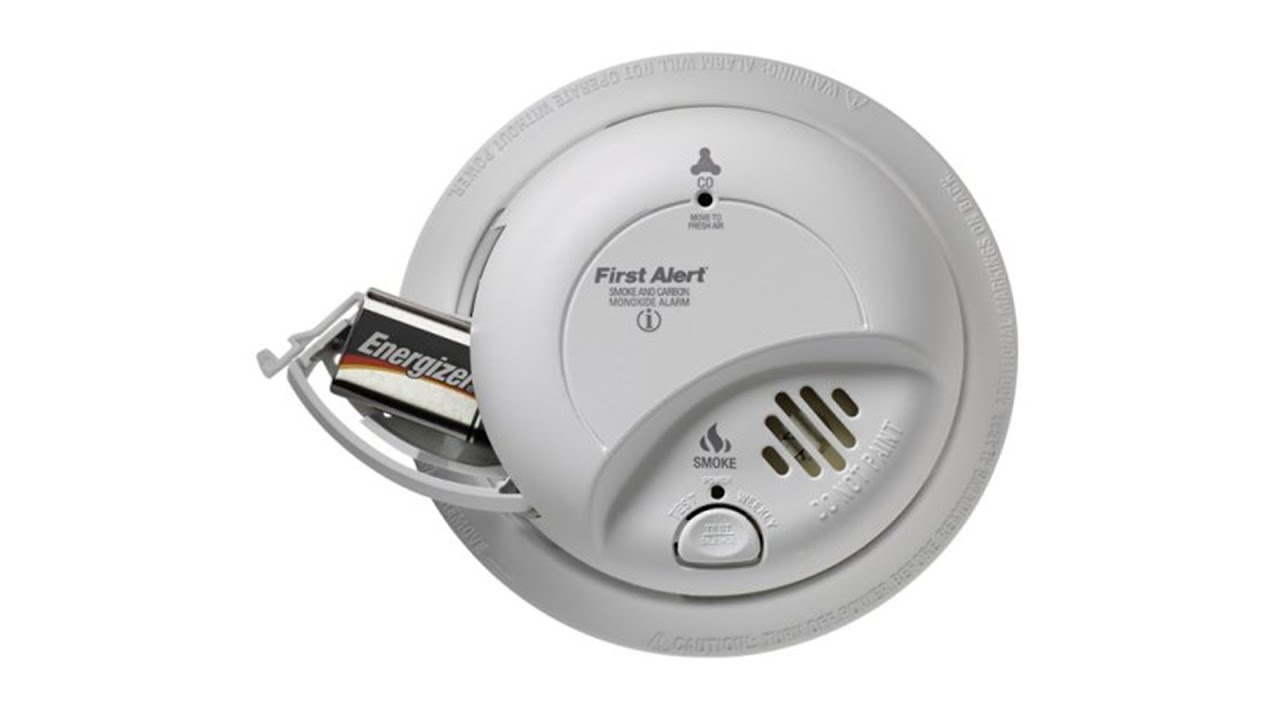
- Insert the new battery: Align the new battery with the correct orientation based on the markings or instructions provided by Kidde. Insert the battery into the compartment, ensuring it fits snugly and securely.
- Close the battery compartment door: Once the new battery is in place, close the battery compartment door securely. Make sure that it latches or locks properly to prevent the battery from dislodging.
It is crucial to use the correct type of battery recommended by Kidde for your specific smoke detector model. Using the wrong battery type can compromise the functionality of the device.
With the new battery successfully inserted and the battery compartment securely closed, it’s time to test the smoke detector to ensure it’s functioning correctly.
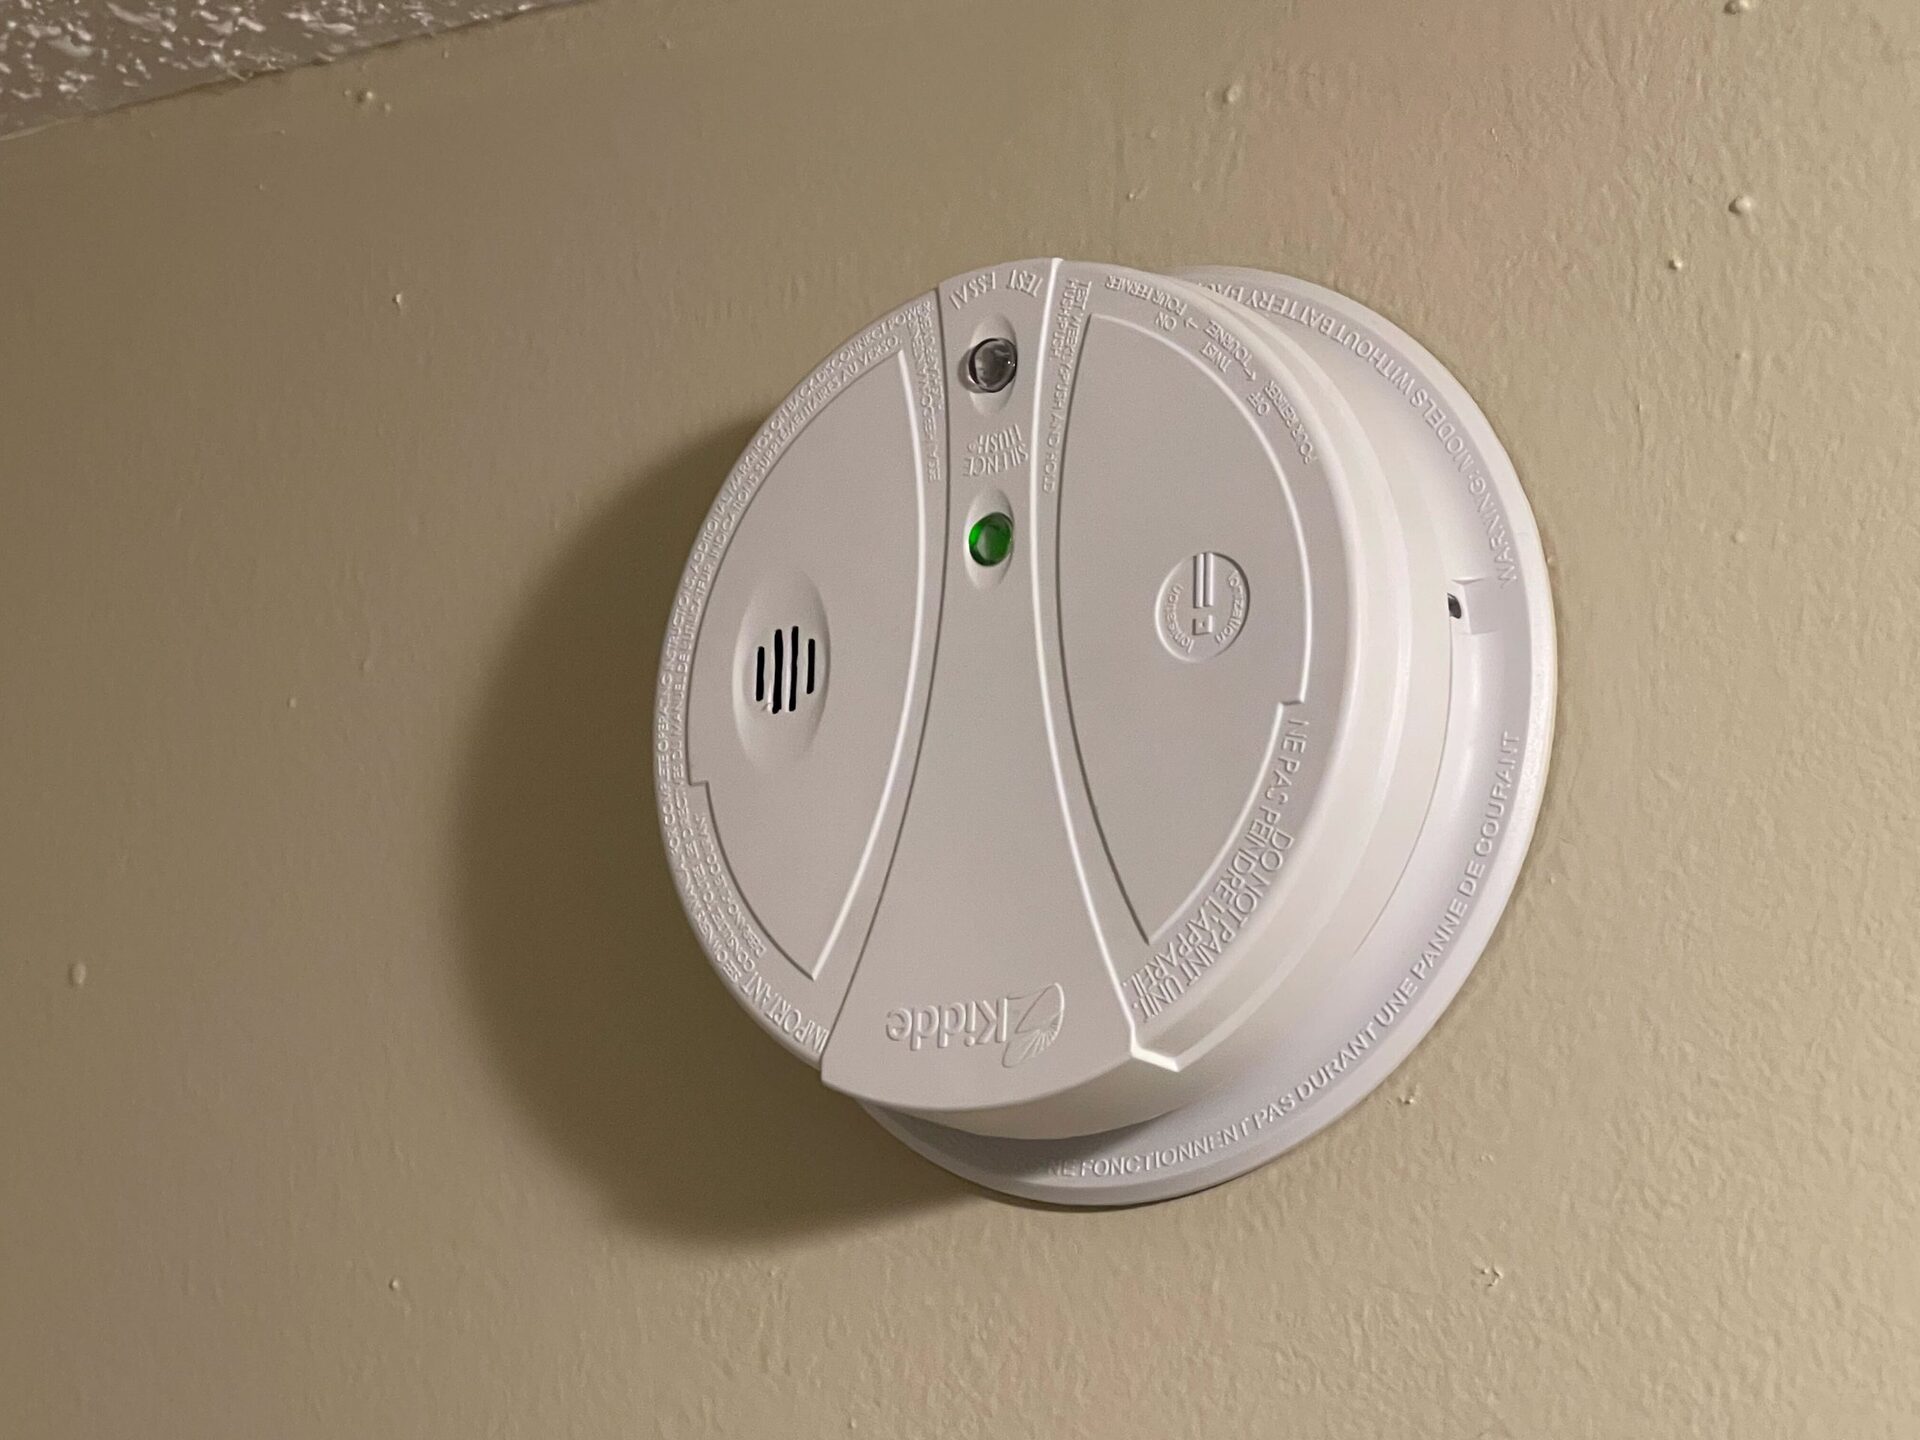
Test the Smoke Detector
After replacing the battery in your Kidde smoke detector, it is essential to test the device to ensure it’s working correctly. Follow these steps to perform a simple test:
- Ensure the battery is properly installed: Double-check that the new battery is securely inserted in the smoke detector and that the battery compartment is closed tightly.
- Turn on the power: If you had turned off the power to the smoke detector during the battery replacement, turn it back on now.
- Press the test button: Locate the test button on the smoke detector. It is usually labeled as “test” or a similar term. Press and hold the button for a few seconds.
- Listen for the alarm: Once you press the test button, the smoke detector should emit a loud alarm sound. Listen for the alarm sound to ensure that it is functioning correctly.
- Check the alarm indicators: Many smoke detectors have additional indicators, such as flashing lights or digital displays. Verify that these indicators are activated during the test.
- Reset the smoke detector: After the test, it’s important to reset the smoke detector. Refer to the manufacturer’s instructions on how to reset your specific Kidde smoke detector model.
If the smoke detector does not emit a sound or the indicators do not activate during the test, double-check that the battery is properly installed. If the issue persists, consult the manufacturer’s troubleshooting guide or contact customer support for further assistance.
Once you have confirmed that the smoke detector is functioning properly, it’s time to reinstall it back onto its mounting bracket.
Reinstall the Smoke Detector
Now that you have successfully replaced the battery in your Kidde smoke detector and tested its functionality, it’s time to reinstall the device back onto its mounting bracket. Follow these steps to reinstall the smoke detector:
- Position the smoke detector: Hold the smoke detector in the desired location, aligning it with the mounting bracket on the ceiling or wall.
- Engage the mounting mechanism: Depending on your Kidde smoke detector model, engage the mounting mechanism by either sliding it onto the bracket or twisting it clockwise.
- Ensure a secure fit: Gently press the smoke detector against the mounting bracket to ensure a secure fit. Verify that it is firmly in place and cannot be easily dislodged.
- Activate the power: If you had turned off the power to the smoke detector during the battery replacement, turn it back on now using the circuit breaker or the designated switch.
Take a moment to visually inspect the smoke detector and ensure that it is properly installed and aligned on the mounting bracket. It should be level and flush against the ceiling or wall.
With the smoke detector securely reinstalled, it will continue to monitor and alert you of any potential smoke or fire hazards in your home.
Remember to periodically test your smoke detector and replace the battery according to the manufacturer’s recommendations to ensure continuous functionality and optimal safety.
Congratulations! You have successfully changed the battery in your Kidde smoke detector and completed the reinstallation process.
Conclusion
Regular maintenance and battery replacement are essential for the proper functioning of your Kidde smoke detector. By following the step-by-step guide outlined in this article, you can safely and effectively change the battery in your smoke detector. Here’s a recap of the key steps:
- Gather the necessary supplies
- Locate the smoke detector in your home
- Remove the smoke detector from its mounting bracket
- Open the battery compartment
- Replace the old battery with a new one
- Test the smoke detector to ensure proper functionality
- Reinstall the smoke detector onto its mounting bracket
Remember to always prioritize safety when working with electrical equipment. Follow the manufacturer’s instructions and take necessary precautions such as turning off the power, wearing protective gear, and using a stable surface for your work.
Regularly test your smoke detector to ensure it is working correctly, and replace the battery as recommended by the manufacturer. This simple maintenance task will provide you with peace of mind, knowing that your home and loved ones are protected in the event of a fire.
By taking the time to properly maintain your Kidde smoke detector, you are taking an important step towards creating a safe living environment. Stay vigilant, stay protected, and prioritize the safety of your home and family.
Frequently Asked Questions about How To Change The Battery In A Kidde Smoke Detector
Was this page helpful?
At Storables.com, we guarantee accurate and reliable information. Our content, validated by Expert Board Contributors, is crafted following stringent Editorial Policies. We're committed to providing you with well-researched, expert-backed insights for all your informational needs.

0 thoughts on “How To Change The Battery In A Kidde Smoke Detector”