Articles
How To Install A Loft Ladder
Modified: August 21, 2024
Learn how to install a loft ladder in your home with our comprehensive articles. Easy step-by-step instructions for a hassle-free installation.
(Many of the links in this article redirect to a specific reviewed product. Your purchase of these products through affiliate links helps to generate commission for Storables.com, at no extra cost. Learn more)
Introduction:
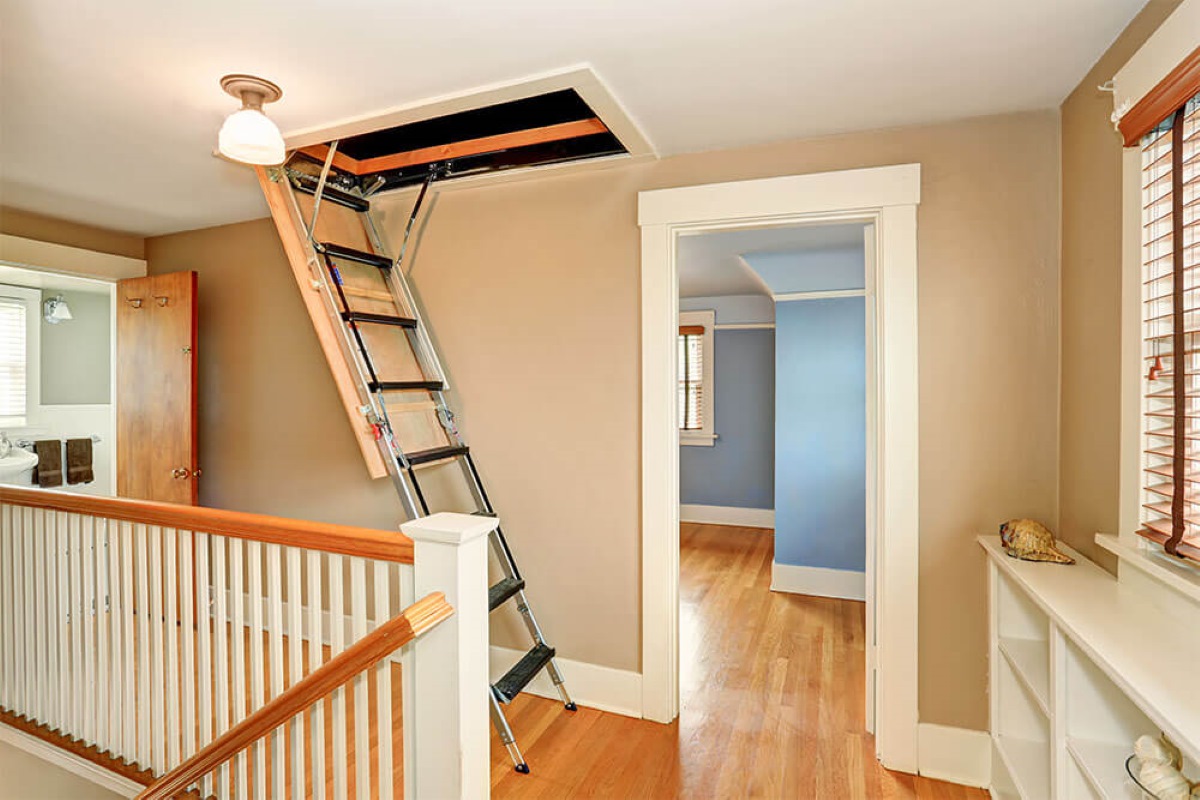
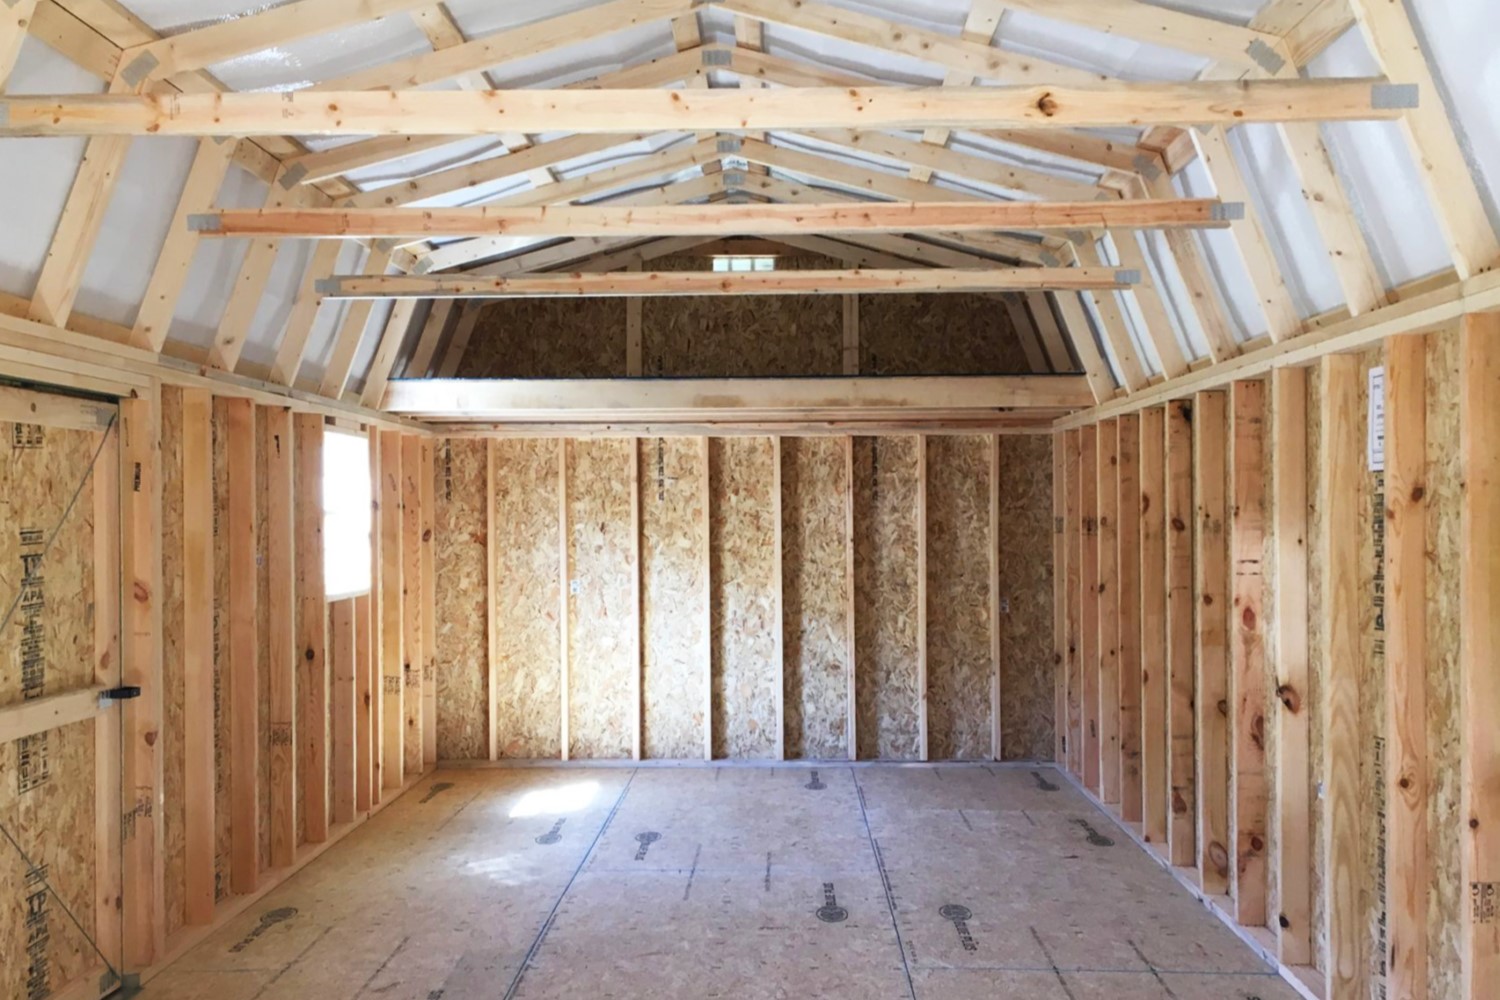
Installing a loft ladder is a great way to maximize the use of your attic space. Whether you need easy access to storage, or you want to create an additional living area, a loft ladder provides a safe and convenient solution. However, the process of installing a loft ladder may seem daunting, especially if you don’t have prior experience.
In this article, we will guide you through the step-by-step process of installing a loft ladder. We will provide you with the necessary measurements, materials, and tools you’ll need, as well as detailed instructions for each step. By the end of this article, you’ll have the confidence and knowledge to successfully install a loft ladder on your own.
Before we dive into the installation process, it’s essential to prioritize safety. Make sure you have a sturdy ladder, wear protective gear like gloves and safety goggles, and work in a well-ventilated area. If at any point you feel unsure or uncomfortable, consider seeking professional assistance.
Now that we have the safety precautions in mind, let’s begin the journey of installing your very own loft ladder.
Key Takeaways:
- Installing a loft ladder is a practical way to maximize attic space. Prioritize safety, gather materials, and follow step-by-step instructions for a successful installation.
- From measuring and cutting the opening to securing the ladder, each step is crucial. Thorough testing and safety checks ensure a reliable and functional loft ladder.
Read more: How To Childproof Loft Bed Ladder
Step 1: Measure and Prep:
The first step in installing a loft ladder is to measure the available space and prepare the area for installation. This will ensure that the ladder fits properly and functions safely. Here’s how to get started:
- Measure the floor-to-ceiling height: Start by measuring the distance from the floor to the ceiling where the ladder will be installed. This will determine the length of the ladder you will need. Measure from the floor to the highest point in the attic to ensure that there is enough clearance for the ladder when it’s folded up.
- Check the available space: Next, measure the width and depth of the area where the ladder will be positioned. Ensure there is enough clearance and room for the ladder to fully extend without any obstructions. Keep in mind factors such as nearby walls, beams, or furniture that could hinder the ladder’s functionality.
- Inspect the attic hatch: If you already have an existing attic hatch, inspect it to ensure it is in good condition. If it needs repair or replacement, address those issues before proceeding with the ladder installation.
- Clear the area: Before starting the installation process, remove any items or debris in the vicinity of the attic hatch. This will provide you with a clear and safe working space.
Once you have completed these steps, you will have a clear understanding of the available space and requirements for your loft ladder. This information will be crucial in selecting the right ladder and ensuring a successful installation.
Step 2: Gather Materials and Tools:
Before you begin the installation process, gather all the necessary materials and tools. Having everything prepared in advance will make the process smoother and more efficient. Here’s a list of the essential materials and tools you’ll need:
Materials:
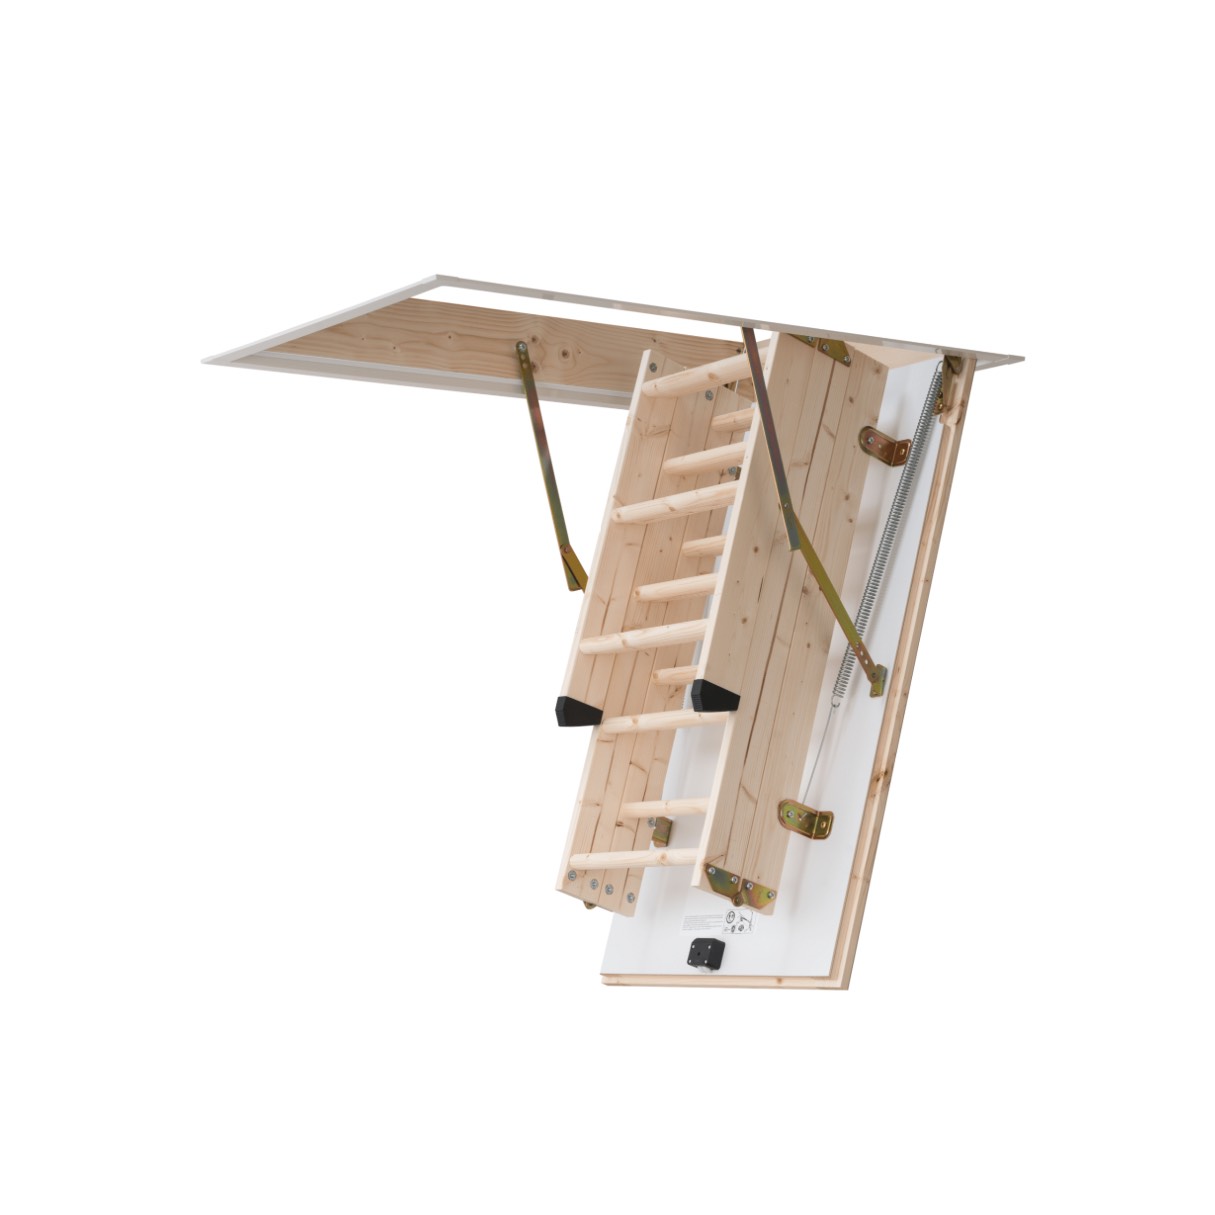
- Loft ladder kit: Purchase a loft ladder kit that is suitable for the measurements and specifications of your attic space. Ensure that it includes all the necessary components, such as ladder sections, hinges, brackets, and screws.
- Wood screws: Depending on the type of ladder kit, you may need wood screws to securely attach the ladder brackets and hinges to the attic structure.
- Measuring tape: A measuring tape is essential for accurately measuring the dimensions of the space and ensuring a proper fit for the ladder.
- Pencil or marker: Use a pencil or marker to mark the areas where you’ll be cutting or installing the ladder.
- Saw: Depending on the material of your attic hatch, you may need a saw to cut the opening for the ladder. Choose a saw appropriate for the material.
- Drill: A drill will be needed to attach the ladder brackets and hinges securely.
- Screwdriver: A screwdriver is needed to tighten screws and secure the ladder sections.
Tools:
- Ladder: It’s important to have a sturdy ladder that will allow you to safely reach the attic area. Make sure it is the appropriate height for your needs.
- Safety goggles: Protect your eyes from any potential debris during the installation process.
- Gloves: Wear gloves to protect your hands while handling materials and using tools.
- Mask: If necessary, wear a mask to protect yourself from dust or insulation particles in the attic.
By gathering all the necessary materials and tools before you begin, you’ll have everything within reach and can work efficiently without interruptions. Ensure that all tools and equipment are in good working condition before starting the installation process.
Read more: How To Build A Ladder For A Loft
Step 3: Mark the Opening:
Once you have measured the available space and gathered all the necessary materials and tools, it’s time to mark the opening for the loft ladder. This step is crucial to ensure accurate installation and a proper fit. Follow these steps to mark the opening:
- Locate the center: Determine the center point of the area where you want to install the loft ladder. Use a measuring tape to find the midpoint between the floor and the ceiling. Mark this point with a pencil or marker.
- Measure the dimensions: Measure the width and height of the ladder opening on the attic floor. Using the measurements provided by the ladder manufacturer, mark the position of the ladder brackets or hinges on the attic floor. Ensure that there is enough clearance and space for the ladder to extend and retract smoothly.
- Mark the cutting lines: Using the measurements provided by the ladder manufacturer, mark the cutting lines on the attic floor. These lines will indicate the area that needs to be cut to create the opening for the ladder. Use a straightedge or a carpenter’s square to ensure the lines are straight and accurate.
- Double-check the markings: Take a step back and double-check all the markings to ensure they are accurate and aligned with your desired position. This will help prevent any mistakes during the cutting process.
Take your time during this step to ensure precise markings. Remember to measure twice and cut once. The accuracy of your measurements and markings will contribute to the overall success of the installation process.
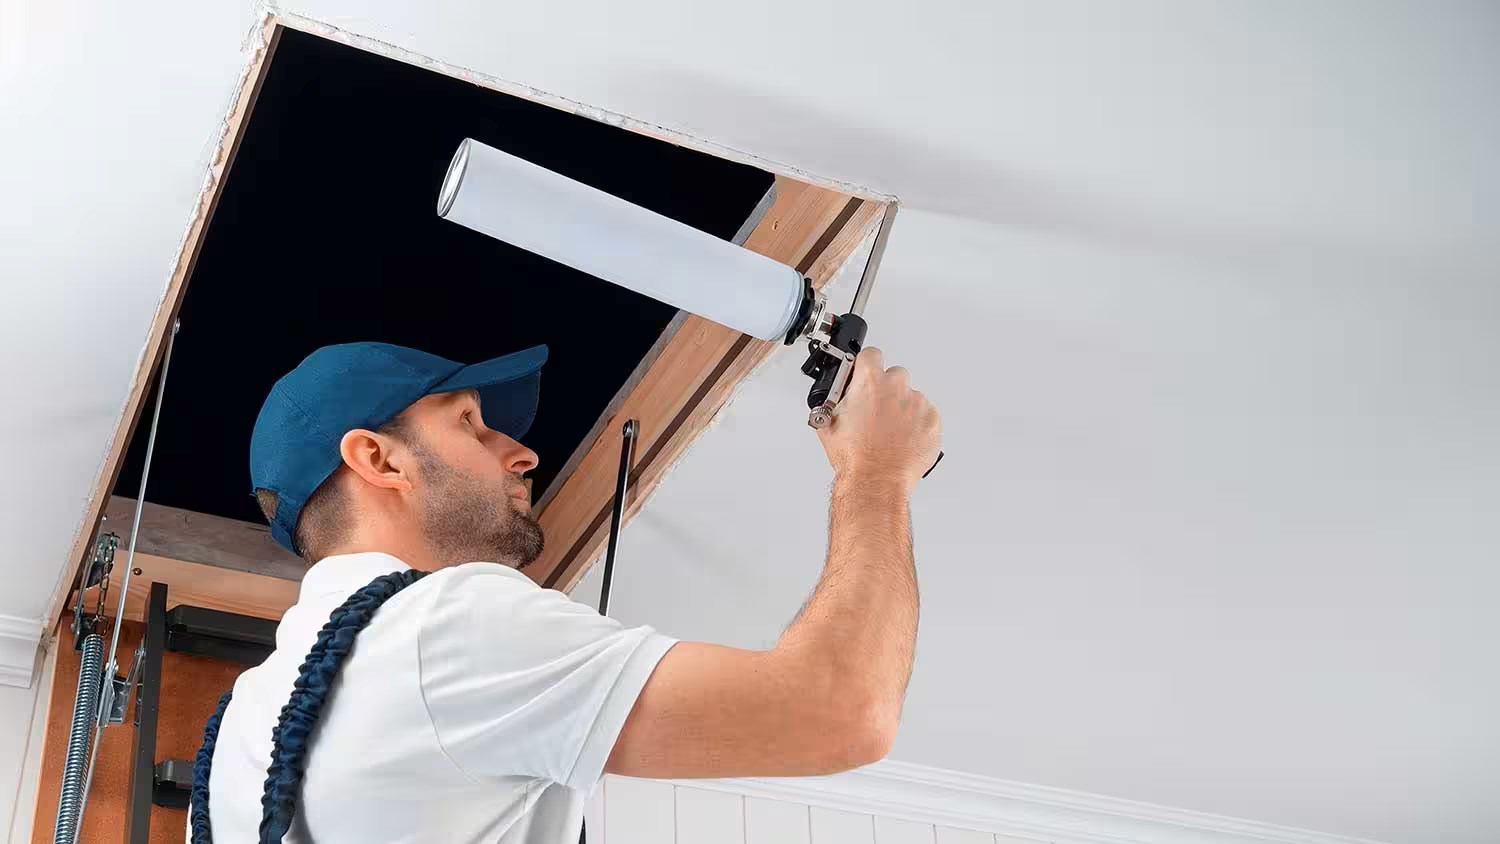
Step 4: Cut the Opening:
Once you have marked the opening for the loft ladder, it’s time to cut the opening in the attic floor. This step requires careful attention to detail and precision to ensure a clean and accurate cut. Follow these steps to cut the opening:
- Prepare the workspace: Clear the area around the marked lines to provide enough space for maneuvering. Remove any debris or objects that could obstruct your cutting process.
- Choose the appropriate tools: Depending on the material of your attic floor, select the appropriate saw. For wooden floors, a jigsaw or reciprocating saw will work well. For other materials like plywood or drywall, a circular saw or utility knife may be more suitable.
- Wear safety gear: Before you begin cutting, put on safety goggles and a mask to protect yourself from dust and debris. If necessary, wear gloves to protect your hands.
- Make the initial cut: Starting from one of the marked lines, carefully follow the line and make the initial cut. Take your time and allow the saw to do the work. If you’re using a jigsaw or reciprocating saw, make sure to follow the line accurately.
- Continue cutting: Once the initial cut is made, continue cutting along the marked lines until you have created the entire opening. Take frequent breaks to check your progress and ensure that the cuts are clean and accurate.
- Remove the cut-out section: Once the entire opening has been cut, carefully remove the cut-out section from the attic floor. Set it aside in a safe location, as you may need it later for repairs or reinstallation.
Remember to take your time and work carefully during the cutting process. It’s better to proceed slowly and ensure accurate cuts rather than rushing and making mistakes. Once you have completed the cutting process, you’ll have a clear opening ready for the installation of the loft ladder.
Step 5: Install Ladder Bracket:
Now that you have cut the opening for the loft ladder, it’s time to install the ladder bracket. This bracket will act as the support system for the ladder and ensure its stability. Follow these steps to install the ladder bracket:
- Position the bracket: Place the ladder bracket on the attic floor, aligning it with the markings you made earlier. Ensure that it is centered and parallel to the walls or adjacent structures. Use a pencil or marker to mark the screw hole locations on the attic floor.
- Pre-drill the screw holes: Using a drill bit that matches the diameter of the screws provided with the bracket, pre-drill the screw holes at the marked locations. Make sure to drill to the appropriate depth to ensure a secure fit.
- Attach the bracket: Place the ladder bracket back in position over the pre-drilled screw holes. Securely fasten the bracket to the attic floor by inserting the screws through the bracket holes and into the pre-drilled holes. Use a screwdriver or drill to tighten the screws, ensuring a secure and stable attachment.
- Check the bracket alignment: Confirm that the ladder bracket is firmly attached and level with the floor. Ensure that it is aligned properly and parallel to the walls or adjacent structures. Make any necessary adjustments before proceeding to the next step.
Installing the ladder bracket is an important step in ensuring the stability and safety of your loft ladder. Take your time to properly position and secure the bracket, as it serves as the foundation for the ladder’s operation. Once the ladder bracket is securely installed, you can move on to the next step of attaching the ladder sections.
When installing a loft ladder, make sure to measure the height and width of the opening accurately to ensure the ladder fits properly. It’s important to follow the manufacturer’s instructions carefully to ensure a safe and secure installation.
Step 6: Attach Ladder Sections:
With the ladder bracket in place, it’s time to attach the ladder sections. The ladder sections are usually provided as separate pieces that can be connected together. Follow these steps to properly attach the ladder sections:
- Position the first ladder section: Place the first ladder section on the ladder bracket, ensuring that it is aligned with the bracket and the opening. The ladder section should fit securely onto the bracket and rest flush against the attic floor.
- Secure the ladder section: Once the first ladder section is positioned correctly, use the screws provided with the ladder kit to secure the ladder section to the bracket. Insert the screws through the pre-drilled holes in the ladder section and into the bracket. Tighten the screws using a screwdriver or drill to ensure a sturdy and secure attachment.
- Attach the remaining ladder sections: Repeat the process of positioning and securing the remaining ladder sections. Connect each section to the previous one using the connectors or hinges provided with the ladder kit. Ensure that each section is securely attached before moving on to the next.
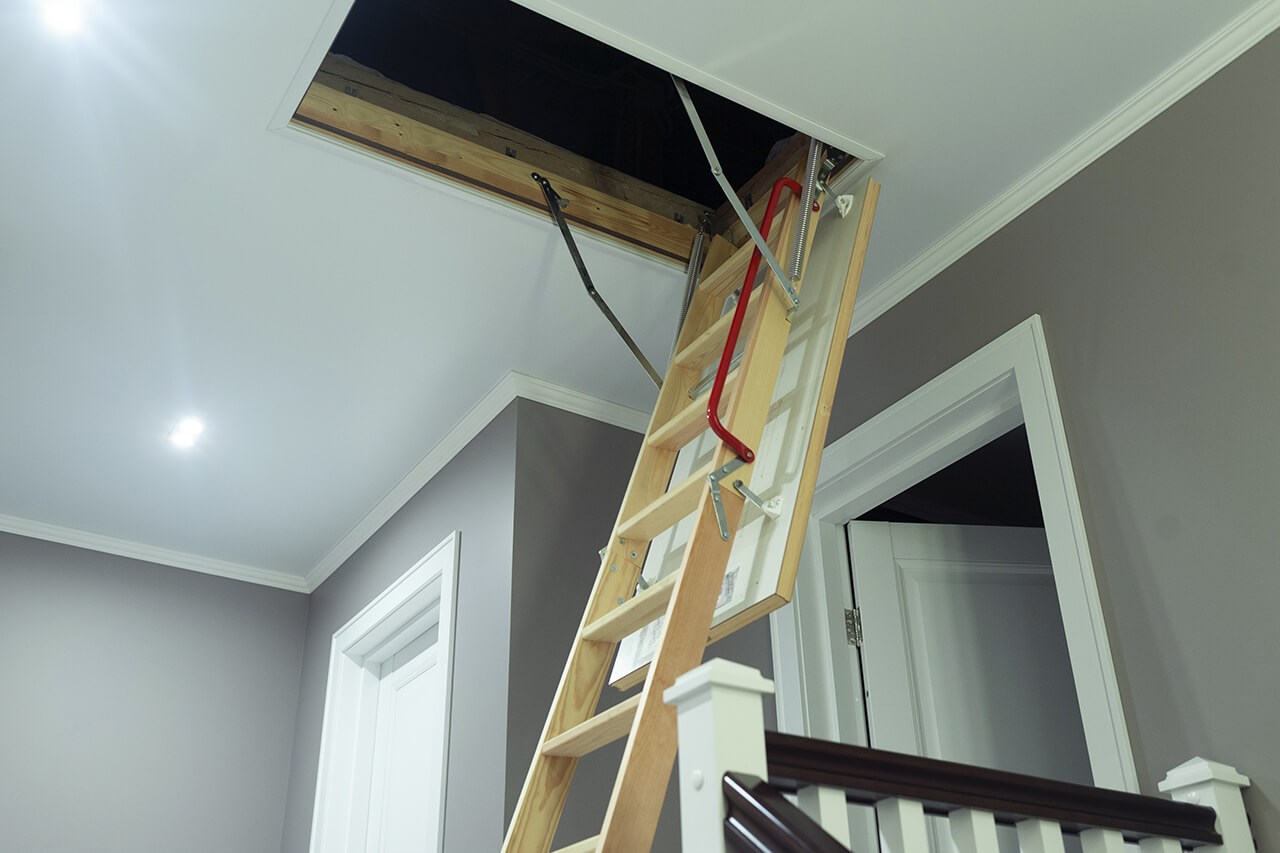
- Test the ladder sections: Once all the ladder sections are attached, test their functionality. Extend and retract the ladder to ensure smooth operation. Ensure that each section locks securely in place when extended and retracted. Make any necessary adjustments to the connections or hinges to ensure proper functionality.
Attaching the ladder sections is a critical step in the installation process, as it determines the overall stability and usability of the loft ladder. Take your time to properly secure each section and test their functionality to ensure a safe and reliable ladder system.
Read more: How To Install Ladder Rack
Step 7: Secure the Ladder:
After attaching all the ladder sections, it’s important to secure the ladder in place to ensure stability and safety. Follow these steps to properly secure the ladder:
- Check ladder positioning: Confirm that the ladder is centered and aligned properly within the opening. Make any necessary adjustments to ensure that it is straight and parallel to the walls or adjacent structures.
- Attach the ladder straps: Using the straps provided with the ladder kit, secure the ladder to the attic floor or the surrounding structure. Place the straps around the ladder and fasten them tightly with the screws or mounting hardware provided. Ensure that the ladder is securely held in place and does not move or shift when weight is applied.
- Check ladder stability: Test the ladder by applying gentle pressure to ensure that it is stable and does not wobble or move. If you notice any instability, recheck the ladder bracket, connections, and straps to ensure everything is secure. Make any necessary adjustments and retest until the ladder is stable.
- Inspect ladder safety features: Ensure that the ladder is equipped with safety features, such as non-slip treads and handrails. Check that these features are securely attached and functioning properly. These safety features are crucial for preventing slips and falls when using the ladder.
Securing the ladder is essential for the safety and longevity of your loft ladder system. Take the time to double-check the positioning, straps, and overall stability of the ladder before considering the installation process complete.
Step 8: Test and Safety Check:
Once you have completed the installation of your loft ladder, it’s important to thoroughly test and perform a safety check to ensure that everything is functioning as it should. Follow these steps to test and perform a safety check:
- Test the ladder’s operation: Extend and retract the ladder to ensure that it moves smoothly and effortlessly. Check that each section locks securely into place when extended and retracted. Pay attention to any unusual sounds or resistance during the operation, as these could indicate issues that need to be addressed.
- Step on each ladder rung: Step on each ladder rung to ensure that they can support your weight without any signs of bending or instability. This will help you assess the ladder’s overall strength and sturdiness. If you notice any issues with the rungs, contact the ladder manufacturer for further assistance.
- Inspect the ladder connections: Examine all the connections and fasteners to ensure that they are secure and tight. Check for any signs of loosening or movement. If necessary, tighten any screws or bolts that may have become loose during installation or during the testing process.
- Check for smooth operation: Test the ladder’s folding and unfolding mechanism to ensure smooth and controlled movement. Make sure no parts get stuck or obstructed during the operation. If you encounter any difficulties, investigate and resolve the issue before regular use.
- Inspect safety features: Verify that all safety features, such as non-slip treads, handrails, and locking mechanisms, are functioning correctly. These features are essential for ensuring the safety of the ladder users. Address any defects or issues with these safety features promptly.
- Perform a general safety check: Take a step back and evaluate the overall safety of the ladder installation. Ensure that there are no hazards, obstructions, or sharp edges in the surrounding area that could pose a risk to ladder users. Consider placing warning signs or barriers if necessary.
Testing and performing a safety check after installation is crucial to ensure that your loft ladder is safe and reliable for use. By thoroughly evaluating the ladder’s operation, connections, and safety features, you can identify and address any potential issues or concerns, providing you with peace of mind as you utilize your new loft ladder.
Conclusion:
Installing a loft ladder is a practical and efficient way to optimize the use of your attic space. By following the step-by-step process outlined in this article, you can successfully install a loft ladder and enjoy easy access to your attic for storage or additional living areas. Remember to prioritize safety throughout the installation process, use the appropriate tools and materials, and perform thorough testing and safety checks before regular use.
From measuring and prepping to cutting the opening, attaching ladder sections, and securing the ladder, each step plays an important role in ensuring a successful installation. Take your time, follow the instructions carefully, and seek professional assistance if needed.
Installing a loft ladder not only enhances the functionality of your attic but also adds value to your home. It provides a convenient and safe way to access your attic space while maximizing its usage. Whether you plan to utilize your attic for storage, create a home office, or transform it into a cozy living space, a loft ladder is a practical solution.
Now that you have the knowledge and guidance to install a loft ladder, it’s time to embark on this exciting home improvement project. Enjoy the benefits of increased storage space, convenience, and versatility that a loft ladder brings to your home. So, roll up your sleeves, gather your materials, and get ready to transform your attic with a loft ladder installation.
Frequently Asked Questions about How To Install A Loft Ladder
Was this page helpful?
At Storables.com, we guarantee accurate and reliable information. Our content, validated by Expert Board Contributors, is crafted following stringent Editorial Policies. We're committed to providing you with well-researched, expert-backed insights for all your informational needs.


0 thoughts on “How To Install A Loft Ladder”