Home>Furniture>Bedroom Furniture>14 Superior Loft Bed Frame for 2025
Bedroom Furniture
14 Superior Loft Bed Frame for 2025
Modified: June 10, 2025
Discover the top 14 loft bed frames for 2025. Enhance your bedroom with these superior loft bed frame options. Shop now for the perfect loft bed frame.
(Many of the links in this article redirect to a specific reviewed product. Your purchase of these products through affiliate links helps to generate commission for Storables.com, at no extra cost. Learn more)
If you're on the hunt for the perfect loft bed frame that combines superior design and functionality, look no further! In this article, we will share with you the top 14 loft bed frames that are set to make a splash in 2025. These bed frames have been carefully selected based on their exceptional quality, modern aesthetics, and innovative features. Whether you're looking for a spacious loft bed for your teenager's bedroom or a versatile solution for a compact living space, this comprehensive list will provide you with the top options for the upcoming year. Stay ahead of the trends and find the perfect loft bed frame to transform your living space into a stylish and functional oasis.

Overall Score: 8/10
The DHP Junior Loft Bed Frame with Ladder is a sturdy metal loft bed designed to free up bedroom space. It features a built-in ladder and full-length guardrails for safety. The shorter height and 36.5 inch clearance below the bed make it ideal for younger children. It accommodates a standard twin size mattress and offers a weight capacity of 200 lbs. This loft bed ships in one box and is easy to assemble. With its space-saving design and sturdy build, it is a great option for smaller bedrooms or shared spaces. The bed frame is available in silver color and measures 41.50Lx78.00Wx50.00H.
Key Features
- Sturdy metal frame with built-in ladder
- 36.5 inch clearance below the bed for study, lounge, play, and storage
- Shorter height with full-length guardrails for younger children
- Accommodates standard twin size mattress
- Ships in one box for easy assembly
Specifications
- Color: Silver
- Dimension: 41.50Lx78.00Wx50.00H
- Size: Twin
Pros
- Sturdy build
- Space-saving design
- Easy to assemble
- Great price for value
- Ideal for smaller bedrooms or shared spaces
Cons
- Thin ladder rungs can be uncomfortable
- Weight limit of 200 lbs
- Some alignment issues during assembly
- Limited customer service support
The DHP Junior Loft Bed Frame with Ladder is a reliable and practical choice for those looking to maximize space in smaller bedrooms or shared rooms. Its sturdy metal frame and built-in ladder offer convenience and safety for younger children. The bed’s shorter height and clearance below provide additional room for study, play, or storage. While there may be some minor issues with ladder comfort and alignment during assembly, overall, this loft bed offers great value for its price. It is an excellent choice for families with limited space and a need for a practical and space-saving solution.

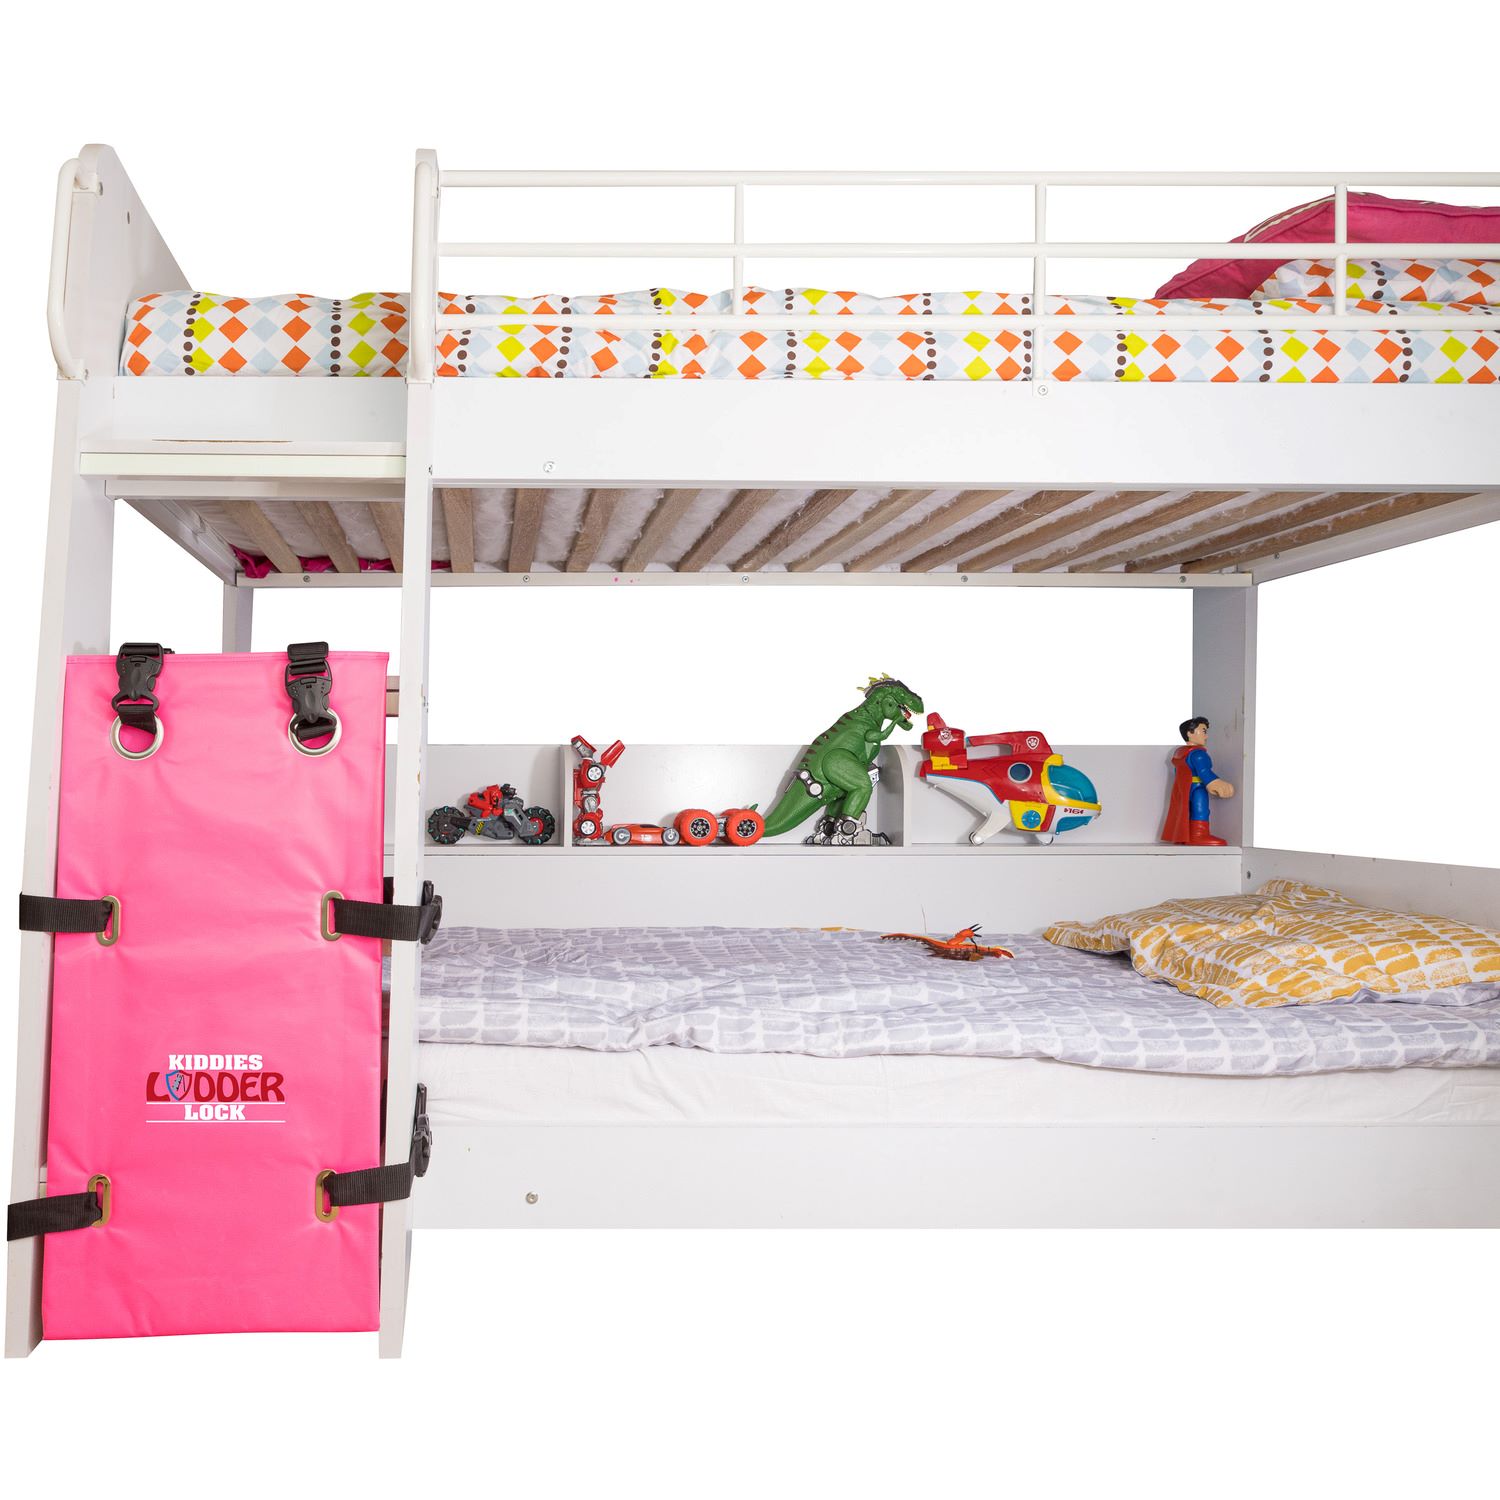
Overall Score: 8/10
The DHP Jett Junior Twin Metal Loft Bed in Pink is the perfect solution to free up space in your child's room. This sturdy metal bed comes with a built-in ladder and full-length guardrails for added safety. The area below the bed can be used for studying, lounging, playing, or storing belongings. With a weight limit of 200 lbs, it is recommended for children 6 years or older. The bed is easy to assemble and is compatible with memory or coil mattresses. It has dimensions of 51" W x 50" H x 78" L and is available in a stylish pink color.
Key Features
- Sturdy metal frame with built-in ladder
- Full-length guardrails for added safety
- Space-saving design with ample storage space beneath the bed
- Easy assembly
- Recommended for children 6 years or older
Specifications
- Color: Pink
- Dimension: 41.50Lx78.00Wx50.00H
- Size: Twin
Pros
- Sturdy and durable construction
- Provides ample space for storage and activities
- Easy to assemble
- Compatible with memory or coil mattresses
- Full-length guardrails for added safety
Cons
- Metal slats supporting the bed could be thicker
- Some customers experienced wobbling and squeaking
The DHP Jett Junior Twin Metal Loft Bed is a practical and stylish choice for creating extra space in your child’s room. It offers a sturdy and safe sleeping arrangement with the added benefit of ample storage or play area underneath. The ease of assembly and compatibility with various mattresses make it a convenient option for parents. While some customers expressed concern about the thickness of the metal slats and experienced slight wobbling, overall, it provides great value for the price. If you’re looking to optimize space and create a fun and functional environment for your child, the DHP Jett Junior Twin Metal Loft Bed is a worthy investment.

Overall Score: 7/10
For DIY Beginners, easy making, low cost.
Key Features
- Step-by-step manual for building a loft bed frame
- Designed for DIY beginners
- Provides easy-to-follow instructions and diagrams
- Cost-effective solution compared to ready-made beds
Specifications
- Dimension: 8.50Lx0.10Wx6.00H
Pros
- Well-explained and easy-to-follow instructions
- Comprehensive diagrams and measurements
- Great resource for making modifications
- Suitable for novice woodworkers
Cons
- Sexist remark in the assembly instructions
- Misleading title suggesting it's not for women
The Wooden Loft Bed Frame DIY Complete Manual is a valuable resource for DIY beginners looking to save money on a loft bed. With step-by-step instructions, comprehensive diagrams, and measurements, it provides all the necessary information to build your own bed. Despite a couple of drawbacks, such as a sexist remark in the assembly instructions and a misleading title, the manual overall offers a well-written and easy-to-understand guide for anyone interested in DIY woodworking projects. Whether you’re a novice or experienced woodworker, this manual can help you create a cost-effective loft bed that suits your needs and preferences.

Overall Score: 8.1/10
The DHP Moon Bay Kids Wooden Loft Bed is a traditional loft bed frame designed for kids. It features a sturdy pine wood construction with a ladder, full-length guardrails, and a panel design on both the headboard and footboard. The bed also provides a free under-bed space that can be used for storage, play, sitting area, or even as a workspace. It accommodates a standard twin size mattress and requires no box spring. With its attractive walnut color and dimensions of 79.75” W x 65.5” D x 72” H, this loft bed is a practical and stylish addition to any child's room. It has received positive reviews, earning a score of 4.1/5 from customers on Amazon.
Key Features
- Sturdy pine wood construction
- Ladder and full-length guardrails
- Free under-bed space for storage or play
- Accommodates standard twin size mattress
- No box spring required
- Available in several colors
- 1-year limited warranty
Specifications
- Color: Walnut
- Dimension: 65.50Lx79.75Wx72.00H
- Size: Twin
Pros
- Easy to assemble
- Sturdy and durable
- Maximizes space
- Attractive design
- Convenient under-bed storage
Cons
- Some missing pieces reported
- Wobbling on tile or hardwood floors
- Instructions could be improved
The DHP Moon Bay Kids Wooden Loft Bed offers a practical and stylish solution for maximizing space in a child’s room. With its sturdy construction and attractive design, it provides a safe and comfortable sleeping area while also offering additional storage or play space underneath. The bed is easy to assemble and has received positive reviews for its durability and functionality. However, some customers have reported missing pieces and stability issues on certain floor types. Overall, this loft bed is a great option for parents looking for an affordable and space-saving bed for their children.

Overall Score: 8.2/10
The KOMFOTT Twin Loft Bed with Desk is a solid wood loft bed frame that offers a space-saving solution for teenagers and adults. With a sturdy construction and a loading capacity of up to 463 lbs for the bed, this loft bed frame is designed to provide durability and comfort. The built-in desk underneath the bed provides additional working space, making it perfect for dorms or apartments with limited space. The bed also features a safety guardrail and two ladders for easy access in and out of the loft. With 10 sturdy wooden slats, the bed ensures a quiet and comfortable sleep. No box spring is needed and it is suitable for a twin-size mattress (not included). The KOMFOTT Twin Loft Bed with Desk is available in a stylish grey color. Overall, it is a practical and space-saving solution for anyone in need of a loft bed.
Key Features
- Sturdy Construction
- Space-saving Design
- Safe and Flexible to Use
- Sleep without Noise
Specifications
- Color: Grey
- Dimension: 81.00Lx61.00Wx69.00H
- Size: Twin
Pros
- Sturdy construction
- Space-saving design
- Built-in desk provides additional working space
- Safety guardrail and ladders for easy access
- Quiet and comfortable sleep with wooden slats
- No box spring needed
Cons
- May require additional anchoring for stability
- Instructions could be clearer
- Some holes and hardware may not align perfectly
- A few broken pieces reported on arrival
The KOMFOTT Twin Loft Bed with Desk is an excellent choice for anyone who needs a space-saving solution. With its sturdy construction and built-in desk, it offers both functionality and comfort. While there may be some minor issues with the instructions and hardware alignment, overall, this loft bed provides great value for its price. The additional safety features, such as the guardrail and ladders, ensure peace of mind. Additionally, the quiet sleep provided by the wooden slats is a bonus. Whether it’s for a teenager’s room or a small apartment, the KOMFOTT Twin Loft Bed with Desk is a practical and stylish choice.
")
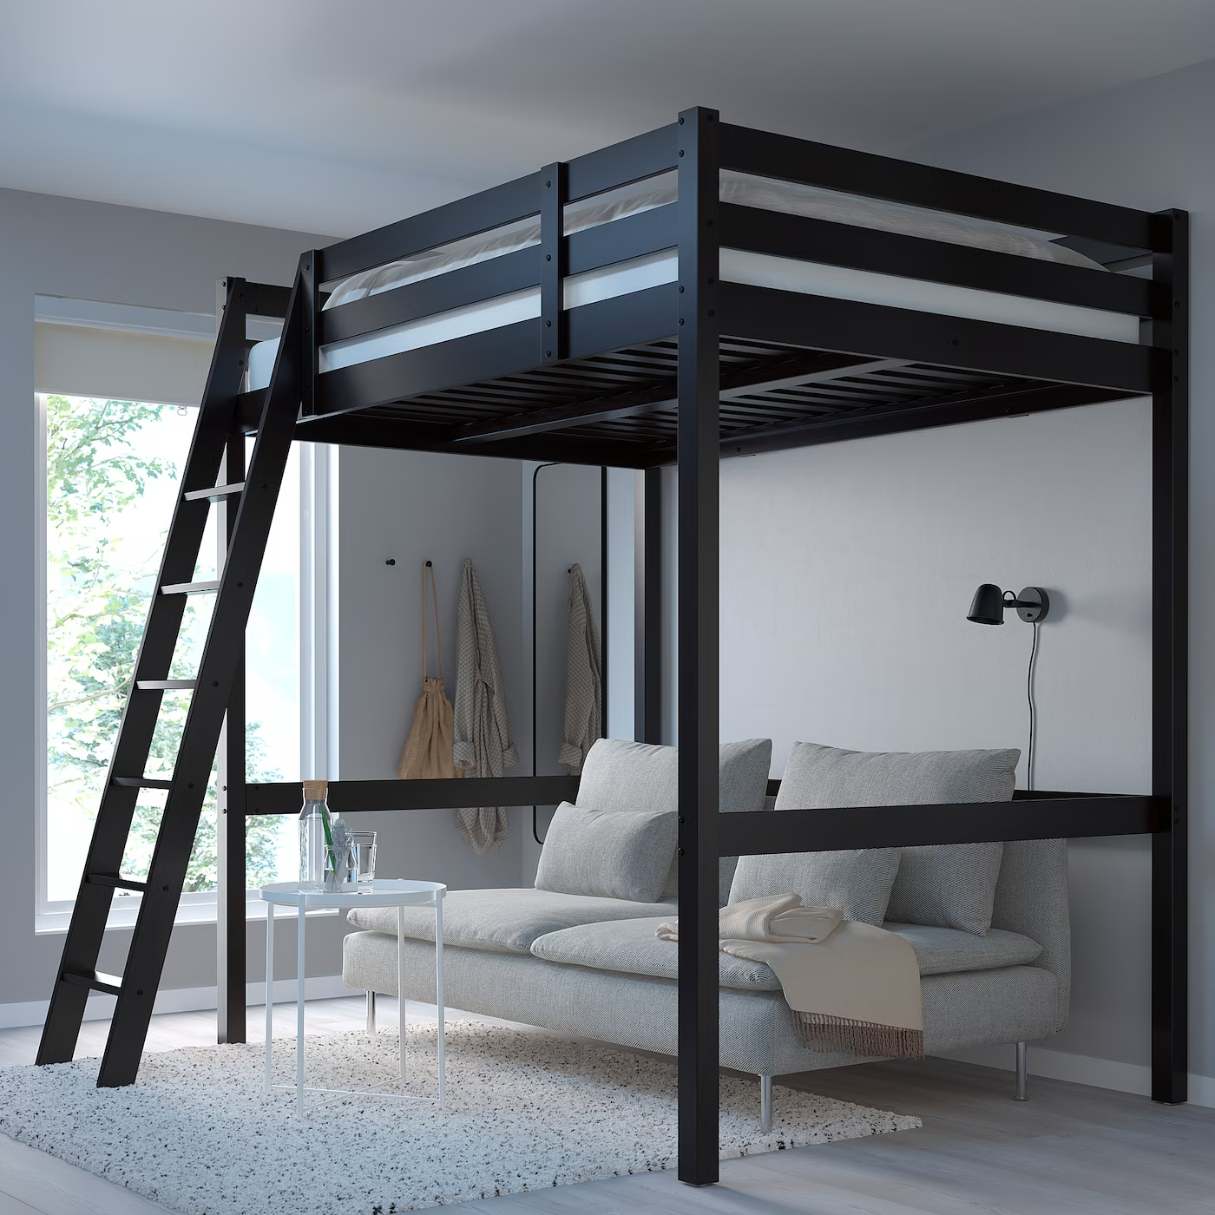
Overall Score: 8/10
The IMUsee Loft Bed Frame is a perfect space-saving solution for those seeking to optimize vertical space. Its sturdy square frame structure ensures stability with a maximum bearing capacity of 400 pounds. The bed features a safety guardrail that provides security, and the loft design frees up valuable space underneath. Use the extra space to set up a desk, a sofa, a TV, or even another bed. The noise-free design with plastic buckle-fixed slats promotes a peaceful sleep experience. The bed comes with all labeled pieces, tools, and instructions neatly packed in a single box, facilitating easy assembly by two people in just 40 minutes. While it may require wall attachment for optimal stability, the IMUsee Loft Bed Frame offers great value for its price.
Key Features
- Sturdy Frame: Adopt a square frame structure stronger to make the bed frame more stable, the maximum bearing capacity can reach 400 pounds.
- Safety Guardrail: Strong security guardrail to ensure your safety, the recommended use of 4”-6” mattress thickness. Make sure the top of the mattress is at least 5 inches from the edge of the guardrail.
- Small Space Friendly: The loft bed design effectively utilizes vertical space and frees up the space under the bed. You can set up a desk, sofa, TV, and even another bed under the bed.
- Noise Free: The plastic buckle design can fix the slats firmly to prevent the noise from moving slats, which can help you sleep overnight.
- Notice: All labeled pieces, tools, and instructions are smartly packed in 1 box. Recommended installed by two people in 40 min.
Specifications
- Color: Matte Black
- Dimension: 77.60Lx41.30Wx71.90H
- Size: Twin Loft
Pros
- Sturdy frame with a maximum bearing capacity of 400 pounds
- Safety guardrail ensures your safety
- Effective utilization of vertical space
- Noise-free design for a peaceful sleep
- All necessary pieces, tools, and instructions included in one box
Cons
- Slight movement when climbing up without wall attachment
- Creaking and shaking with movement
- Ladder design can be uncomfortable
- Limited mattress thickness
The IMUsee Loft Bed Frame is a great storage solution that maximizes vertical space while providing a sturdy and safe sleeping area. With its small-space-friendly design, it offers versatility in setting up additional furniture or bedding underneath. The noise-free feature ensures a peaceful sleep environment, allowing you to make the most of your space without disturbances. Although there are some minor drawbacks, such as the need for wall attachment and limited mattress thickness, the overall quality and value of this bed frame make it a worthwhile purchase. If you’re looking to optimize your space and create a functional living area, the IMUsee Loft Bed Frame is an excellent choice.

Overall Score: 8/10
The SHA CERLIN Metal Twin Loft Bed Frame with Stairs & Full-Length Guardrail is a space-saving solution suitable for both juniors and adults. It features full-length guardrails on the upper bunk for added safety and comes with extra strap and nails for secure fastening to the wall. The bed frame is designed to be noise-free with its plastic buckle design that fixes the slats firmly. It also offers a friendly space under the bed for storing items such as TV stations, desks, and chairs. The bed frame is strong and stable, with a weight capacity of up to 400 lbs. It comes in black color and has a twin loft size.
Key Features
- Full-length guardrails for safety
- Noise-free with plastic buckle design
- Space-saving with friendly under-bed space
- Strong frame with weight capacity of 400 lbs
Specifications
- Color: Black
- Size: Twin loft
Pros
- Full-length guardrails provide added safety
- Noise-free design prevents moving slats from making noise
- Ample space under the bed for storage
- Strong frame ensures stability and supports heavy weight
Cons
- Wobbling issue that may require additional support
- Metal ladder can be uncomfortable to climb
- No gap between ladder and bed for easy access
- Does not fit a twin XL mattress
The SHA CERLIN Metal Twin Loft Bed Frame offers a space-saving and stylish solution for both juniors and adults. With its full-length guardrails and noise-free design, it prioritizes safety and comfort. The bed frame’s strong structure ensures stability and can support heavy weight. However, there are some drawbacks to consider, such as the wobbling issue and the discomfort of the metal ladder. Additionally, it may not fit a twin XL mattress. Despite these drawbacks, this bed frame provides good value for the price and offers ample storage space underneath. Overall, it is a practical and functional choice for those looking for a loft bed.

Overall Score: 8/10
The Merax Twin Metal Loft Bed is a stylish and functional storage solution for any bedroom. Crafted of metal in a clean painted finish, this bed features a horizontal slatted headboard and footboard, as well as a raised base that creates a cozy loft space for storage or play. The bed is equipped with built-in ladders and 12.2” full-length guardrails for safety. It also includes a desk and two shelves integrated into the metal frame, offering a space-saving solution. The bed is easy to assemble, with clear instructions and all tools included. The bed comes in a sleek black color and has a twin loft bed size. Overall, it provides a sturdy and space-saving option for any bedroom.
Key Features
- Crafted of metal in a clean painted finish
- Rugged metal frame with bed slats, no box spring needed
- Includes a desk and two shelves for storage
- Easy to assemble with clear instructions and tools included
Specifications
- Color: Black
- Dimension: 79.50Lx42.10Wx71.60H
- Size: Twin loft bed
Pros
- Sturdy and functional bed
- Space-saving solution with integrated desk and shelves
- Easy to assemble with clear instructions and tools included
Cons
- One ladder rung may dent and bend inward
- Heavy and complicated to put together
- May wobble and need additional stabilization
The Merax Twin Metal Loft Bed is a stylish and space-saving storage solution for any bedroom. It features a sturdy metal frame, integrated desk, and shelves for storage. The bed is easy to assemble and comes with clear instructions and tools. While there may be some minor defects and stability issues, overall it provides good value for its price. It is particularly suitable for school age children or college students who need a functional and stylish bed with extra storage space. With its clean lines and sleek black finish, this loft bed is a practical and attractive addition to any bedroom.

Overall Score: 8/10
The VINGLI Loft Bed Twin is a space-saving bunk bed designed for kids. With 56.89 inches of underbed height, it offers enough room for play or storage. The upgraded ladder features wide flat ladder rungs and rubber covering for comfortable and safe climbing. The sturdy metal frame is constructed of durable steel and can hold up to 400 LBS, accommodating a standard twin size mattress. With its white powder coating, it adds a stylish touch to any room. Assembly may take around 2-3 hours with 3 people. The VINGLI Loft Bed Twin comes with a 100% satisfaction guarantee, offering free replacement for installation problems, damage, and missing parts within 1 year.
Key Features
- Space-saving bunk bed design
- Secured ladder with wide flat ladder rungs
- Sturdy metal frame with white powder coating
- Accommodates standard twin size mattress
Specifications
- Color: White
- Dimension: 77.50Lx39.37Wx70.98H
- Size: Twin Loft
Pros
- Space-saving design for limited floor space
- Comfortable and safe climbing with upgraded ladder
- Durable and sturdy construction
- 100% satisfaction guarantee
Cons
- Assembly may take some time
- May arrive with missing parts or damaged due to shipping
The VINGLI Loft Bed Twin is a stylish and practical solution for maximizing space in a kid’s room, dorm, or guest room. Its space-saving design and sturdy construction make it a great choice for those with limited floor space. The upgraded ladder ensures safe and comfortable climbing, while the steel frame with white powder coating adds durability and style. Although assembly may take some time, the 100% satisfaction guarantee provides peace of mind. However, there have been reports of missing parts or damage during shipping, so it’s advisable to check for any issues upon delivery. Overall, the VINGLI Loft Bed Twin offers a great combination of functionality, style, and value.

Overall Score: 7.5/10
The ikalido Metal Loft Bed Twin Size is a multifunctional twin bed that prioritizes safety. With a stable square frame design and a full-length guardrail, it ensures maximum safety. The loft bed features ample space underneath for storage or additional furniture, allowing you to make the most of your living space. Its modern design adds a playful touch to your bedroom decor. Assembly is easy and can be completed within one hour, even for non-professionals. The bed also provides an immersive sleep experience with noise-free slats. However, it's important to note that the mattress surface of the upper bed must be at least 5 inches below the top edge of the guardrail for safety purposes.
Key Features
- Stable square frame design and full-length guardrail
- Friendly space under the twin bed
- Modern and playful design
- Easy assembly
- Immersion sleep experience
- Important safety notice
Specifications
- Color: Matte Black
- Dimension: 77.60Lx41.30Wx71.90H
- Size: Twin Loft
Pros
- Sturdy and stable design
- Ample space-saving options
- Easy assembly process
- Noise-free sleep experience
Cons
- May require additional stabilization
- Taller than expected
- Ladder design can be uncomfortable
- Bed squeaks
The ikalido Metal Loft Bed Twin Size offers a practical solution for maximizing living space while ensuring safety. Its sturdy design and ample storage space make it a great choice for small bedrooms. While it may have some stability issues and height considerations, it provides a comfortable sleep experience and adds a modern touch to any bedroom. Overall, it’s a reliable and space-saving option for those in need of a twin loft bed.

Overall Score: 8.2/10
The Harper & Bright Designs Full Loft Bed is the perfect solution for homes with limited space. This wooden loft bed maximizes floor space while providing a cozy rest, extra work and play space for growing families. Crafted with high-quality solid pine wood and MDF, it offers durability and a high load capacity of up to 600 lbs. The storage staircase and hanger add functionality and allow for easy access to the bed. The full-length guardrail ensures safety for kids, making it a great addition to any bedroom. With clear assembly instructions, this loft bed is easy to put together. However, it can be challenging to assemble alone and may require guesswork due to the lack of labeling on some pieces.
Key Features
- Maximized Space Loft Bed Full
- High Quality Wood Loft Bed Frame
- Storage Staircase and Hanger
- Safety Design for Kids
- Easy to Assembly
Specifications
- Color: Grey With Stairs and Hanger
- Dimension: 80.60Lx72.50Wx66.80H
- Size: Full
Pros
- Maximizes space in small rooms
- Durable solid pine wood and MDF construction
- Convenient storage staircase and hanger
- Safe design with full-length guardrail
- Clear assembly instructions
Cons
- Challenging to assemble alone
- Difficult to identify some pieces
- Guesswork required due to lack of labeling
- Time-consuming assembly process
- May receive items in separate boxes on different dates
Overall, the Harper & Bright Designs Full Loft Bed offers a smart and efficient storage solution for small rooms. Its sturdy construction and safety features make it a reliable choice for kids. While the assembly process can be time-consuming and tricky, the end result is worth it. The storage staircase and hanger provide additional functionality, and the full-length guardrail ensures peace of mind. If you have limited space and are looking for a stylish and practical loft bed, this product is definitely worth considering.

Overall Score: 8/10
Maximize space with the MUTICOR Rustic Style Twin Size Loft Bed Frame. This versatile bed frame allows you to utilize the ample area beneath the bed for your various needs, such as a study/office area, entertainment hub, or storage solutions. With effortless assembly and a durable yet stylish design, this bed frame is built to last for years. Enjoy peaceful nights of sleep, thanks to its stable and noise-free structure. The package includes the bed frame only, without a desk. Safety precautions recommend using a 4-6" thick mattress and ensuring the top of the mattress is at least 5" from the edge of the guardrail.
Key Features
- Maximize Space
- Effortless Assembly
- Durable & Stylish
- Silent Comfort
Specifications
- Color: Black
- Dimension: 77.60Lx40.70Wx72.00H
- Size: Twin Loft
Pros
- Easy assembly with clear instructions
- Sturdy and well-designed
- Rust-proof and multi-layer metal construction
- Silent and stable structure
Cons
- May require additional hardware for wall securing
- Some issues with bowed wood panels and stripped screws
- Ladder may not be wide enough for easy access
The MUTICOR Rustic Style Twin Size Loft Bed Frame is a great space-saving solution for maximizing the area in your room. With its durable construction, easy assembly, and stylish design, it offers both functionality and aesthetics. While some users mentioned the need for extra hardware to secure it to the wall, overall, this bed frame provides sturdy support and a quiet sleeping experience. The only drawbacks include the possibility of receiving bowed wood panels and stripped screws, as well as the ladder not being wide enough for comfortable access. However, considering the positive customer ratings and its versatility, this loft bed frame is a worthwhile purchase.

Overall Score: 7.5/10
The LZ LEISURE ZONE Full Loft Bed with Desk is a versatile and space-saving solution for any bedroom. This metal full loft bed features a clean design with a horizontal slatted headboard and footboard, as well as a matching guard rail for added safety. The loft bed includes a desk and two shelves integrated into the metal frame, providing ample storage and workspace. With 58.3” of under-bed clearance, it creates a cozy loft space for storage or play. The sturdy metal frame is equipped with 21 bed slats for support and does not require a box spring. Overall, this full-size loft bed is easy to assemble with numbered parts and a clear manual. It has a weight limit of 250 pounds for the upper bed, 120 pounds for the desk, and 60 pounds for the shelves. The black color adds a sleek and modern touch to any bedroom decor.
Key Features
- Metal Full Loft Bed with Desk and Shelves
- Clean-lined silhouette with slatted headboard and footboard
- 58.3” of under-bed clearance
- Rugged metal frame with 21 sturdy bed slats
- 13.4” full-length guardrails for safety
- Overall dimensions: 71.6'' H x 57'' W x 79.5'' L
- Weight limit: 250 pounds for upper bed; 120 pounds for desk; 60 pounds for shelves
- Easy assembly with numbered parts and clear manual
- Black color for a sleek and modern look
Specifications
- Color: Black
- Dimension: 80.00Lx57.00Wx71.70H
- Size: Full
Pros
- Versatile and space-saving design
- Integrated desk and shelves for storage and workspace
- Sturdy and safe metal frame with guardrails
- Easy to assemble with included tools and manual
- Sleek black color
Cons
- Assembly instructions could be clearer
- Bed needs to be bolted to the wall for stability
- Some parts may be mislabeled
- May require additional padding for ladder
The LZ LEISURE ZONE Full Loft Bed with Desk offers a practical and stylish solution for maximizing space in a bedroom. It features a sturdy metal frame with integrated desk and shelves, providing ample storage and workspace. While the assembly instructions could be improved, the bed is relatively easy to put together with the included tools. The black color adds a modern touch to any decor. However, it is important to note that the bed should be bolted to the wall for added stability. Overall, this loft bed offers great value for its price and is perfect for anyone looking to optimize their bedroom space.
")
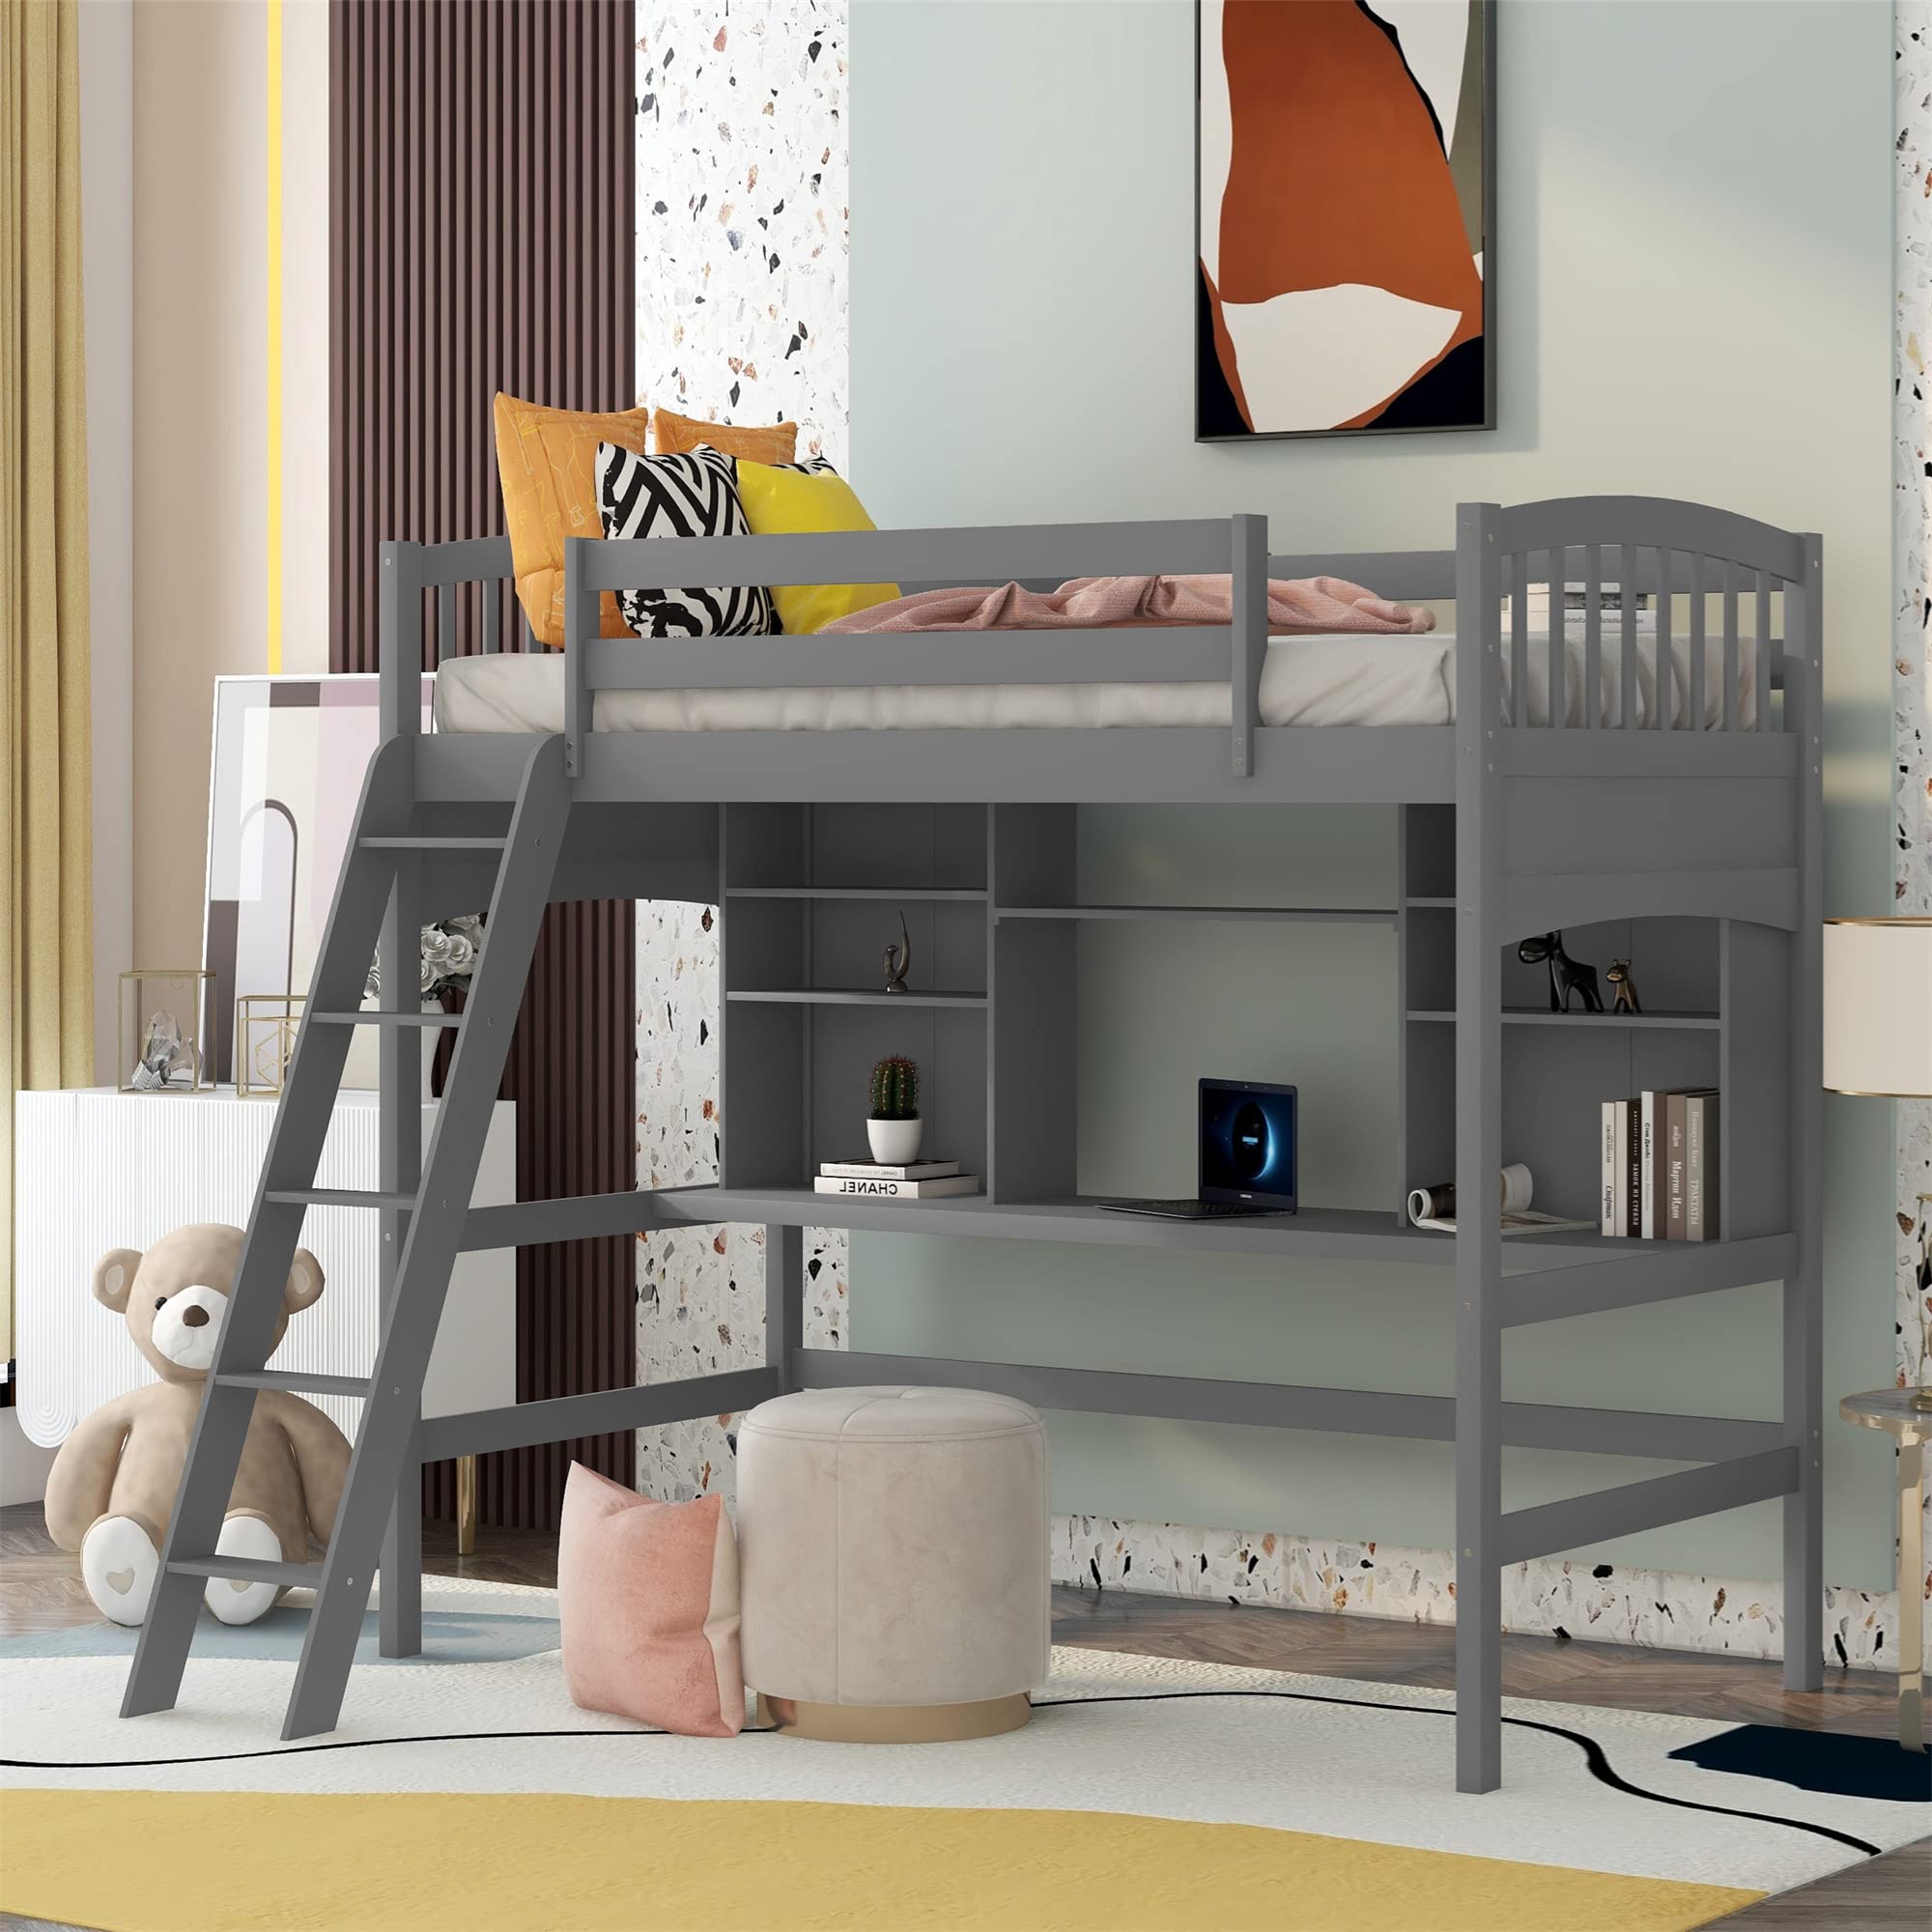
Overall Score: 8/10
The Harper & Bright Designs Full Size Loft Bed with Desk and Storage is a multifunctional storage solution. Made of solid pinewood and MDF, it is a sturdy and durable bed frame that can withstand a weight capacity of 400lb. The loft bed features a horizontal slatted headboard and footboard, as well as a raised base that creates a cozy loft space for storage, work or play. It includes a desk with 2 drawers, a bookcase with 6 shelves and 4 drawers integrated into the sturdy wooden frame. With its spacious and useful workstation underneath, this loft bed is perfect for storing books, displaying decorations, or using a laptop. The bed is designed with high security in mind, featuring sturdy guardrails, an integrated ladder, and sturdy wood slats. Assembly is required and a 12-month warranty is provided with purchase.
Key Features
- Solid construction wood frame
- Includes desk with 2 drawers and bookcase with 6 shelves
- 52.1'' of under-bed clearance
- Suitable for full size mattress (mattress not included)
- Sturdy guardrails and integrated ladder
- Assembly required with detailed instructions provided
- 12-month warranty
Specifications
- Color: White (desk+drawers)
- Dimension: 78.30Lx58.50Wx65.00H
- Size: Full
Pros
- Sturdy and durable construction
- Ample storage space with desk, drawers, and bookcase
- Secure and stable design
- Includes guardrails for added safety
- 12-month warranty for peace of mind
Cons
- Difficult and time-consuming assembly process
- Confusing instructions and hardware packaging
- Possible issues with structural stability
- Long delivery time
The Harper & Bright Designs Full Size Loft Bed with Desk and Storage offers a practical and space-saving solution for bedrooms. Its solid construction, ample storage features, and integrated workstation make it ideal for those in need of organization and functionality. However, the challenging assembly process and potential stability issues may be off-putting for some users. Overall, it is a versatile and well-designed storage product that can enhance any bedroom or living space.
Buyer's Guide: Loft Bed Frame
Read also: 14 Superior White Bed Frame for 2025
Why choose a loft bed frame?
- Maximize space: Loft bed frames are a smart choice for those who want to optimize space in their bedroom or dormitory. By elevating the bed, you create additional room underneath that can be used for a variety of purposes such as a workspace, storage, or even as a cozy seating area.
- Versatility: Loft bed frames come in various styles, sizes, and designs, making them adaptable to different room layouts and personal preferences. Whether you prefer a sleek modern frame or a rustic wooden one, there's a loft bed frame to match your style.
- Cost-effective: Since a loft bed frame combines both a bed and additional space-saving features, it can be a cost-effective solution compared to buying a separate bed and storage furniture.
Considerations before buying a loft bed frame
When choosing a loft bed frame, it's important to take certain factors into consideration to ensure you make the right choice. Keep the following in mind:
- Bed Size: Determine the appropriate bed size based on your needs and available space. Consider whether you prefer a twin, full, queen, or even a king-size loft bed frame. Measure the dimensions of your room to ensure the frame fits properly without making the room feel cramped.
- Weight Capacity: Check the weight capacity of the loft bed frame to ensure it can support your weight along with the weight of the mattress. Consider any potential weight additions if you plan to use the space underneath for storage or as a workspace.
- Height and Safety: Think about the height of the loft bed frame, especially if you have low ceilings. Ensure there is enough clearance between the top of the frame and the ceiling to avoid any discomfort. Additionally, prioritize safety features such as guardrails to prevent accidental falls, particularly if the bed is for a child or young adult.
- Material and Durability: Consider the material of the bed frame and its durability. Most loft bed frames are made from wood or metal. Wood provides a warm and classic look, while metal frames are often more modern and sturdy. Take into account the longevity and maintenance required for the chosen material.
- Assembly and Installation: Determine whether you have the necessary tools and skills to assemble the loft bed frame yourself or if professional installation is recommended. Some loft bed frames may be more complex to assemble than others, so opt for a frame that suits your comfort level with DIY projects.
Frequently Asked Questions about 14 Superior Loft Bed Frame For 2025
While it may be possible to convert a loft bed frame into a regular bed, it often requires additional modifications. It is advisable to consult the manufacturer’s instructions or seek professional assistance for such conversions.
Loft bed frames typically require specific mattress sizes depending on their dimensions. Check the frame’s specifications to ensure the mattress you choose fits correctly. Additionally, consider the mattress thickness and firmness to ensure comfort while sleeping or sitting on the loft bed.
Disassembling a loft bed frame for relocation is generally possible. However, the ease of disassembly may vary depending on the specific model. Always consult the manufacturer’s instructions when attempting to disassemble and reassemble the frame to avoid any damage.
Loft bed frames are suitable for various age groups, including children, teenagers, and adults. However, it is important to consider safety precautions, such as guardrails, especially when children or young adults will be using the loft bed.
Depending on the design and construction of the loft bed frame, customization options may be available. Some frames offer additional features like built-in desks, shelves, or drawers. Consider your specific needs and desired features when selecting a loft bed frame.
Was this page helpful?
Trust Storables.com for unbiased and honest product reviews. Our reviews are rigorously assessed by our Expert Board Contributors and adhere to strict Editorial Standards. We ensure that each review is transparent and trustworthy, helping you make informed purchasing decisions.
0 thoughts on “14 Superior Loft Bed Frame for 2025”