Home>Furniture>Bedroom Furniture>How To Build A Loft Bed With Stairs
Bedroom Furniture
How To Build A Loft Bed With Stairs
Modified: February 23, 2024
Learn how to build a loft bed with stairs for your bedroom furniture. Step-by-step instructions and creative design ideas. Make the most of your space!
(Many of the links in this article redirect to a specific reviewed product. Your purchase of these products through affiliate links helps to generate commission for Storables.com, at no extra cost. Learn more)
Introduction
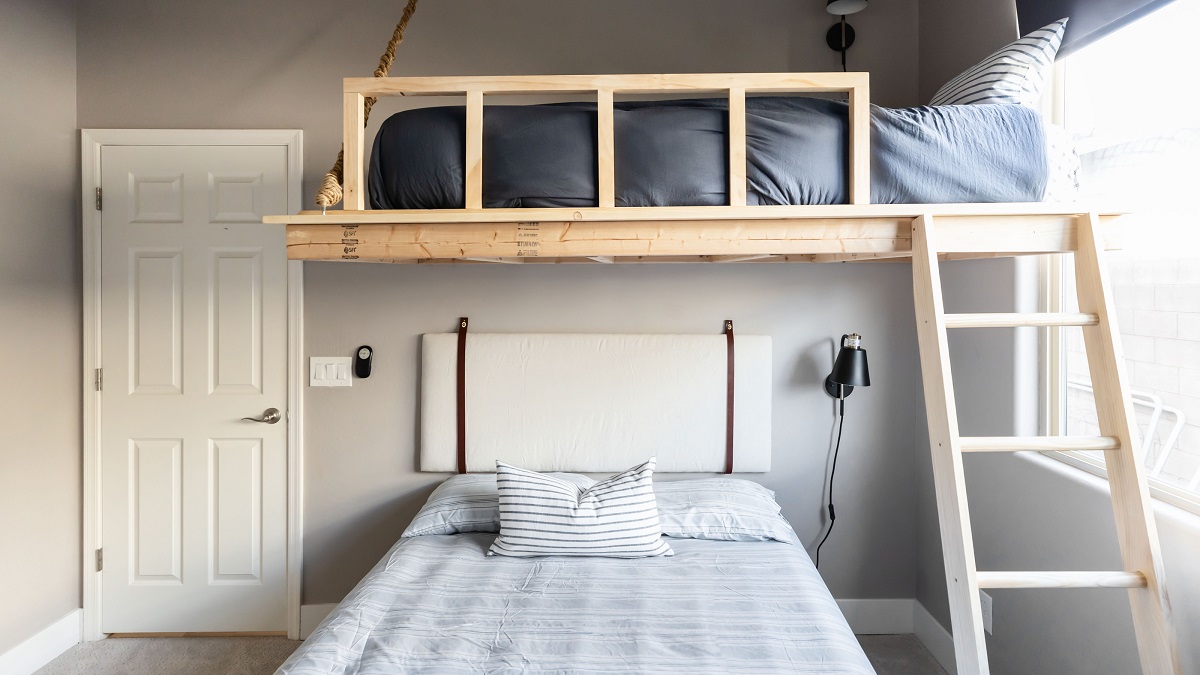
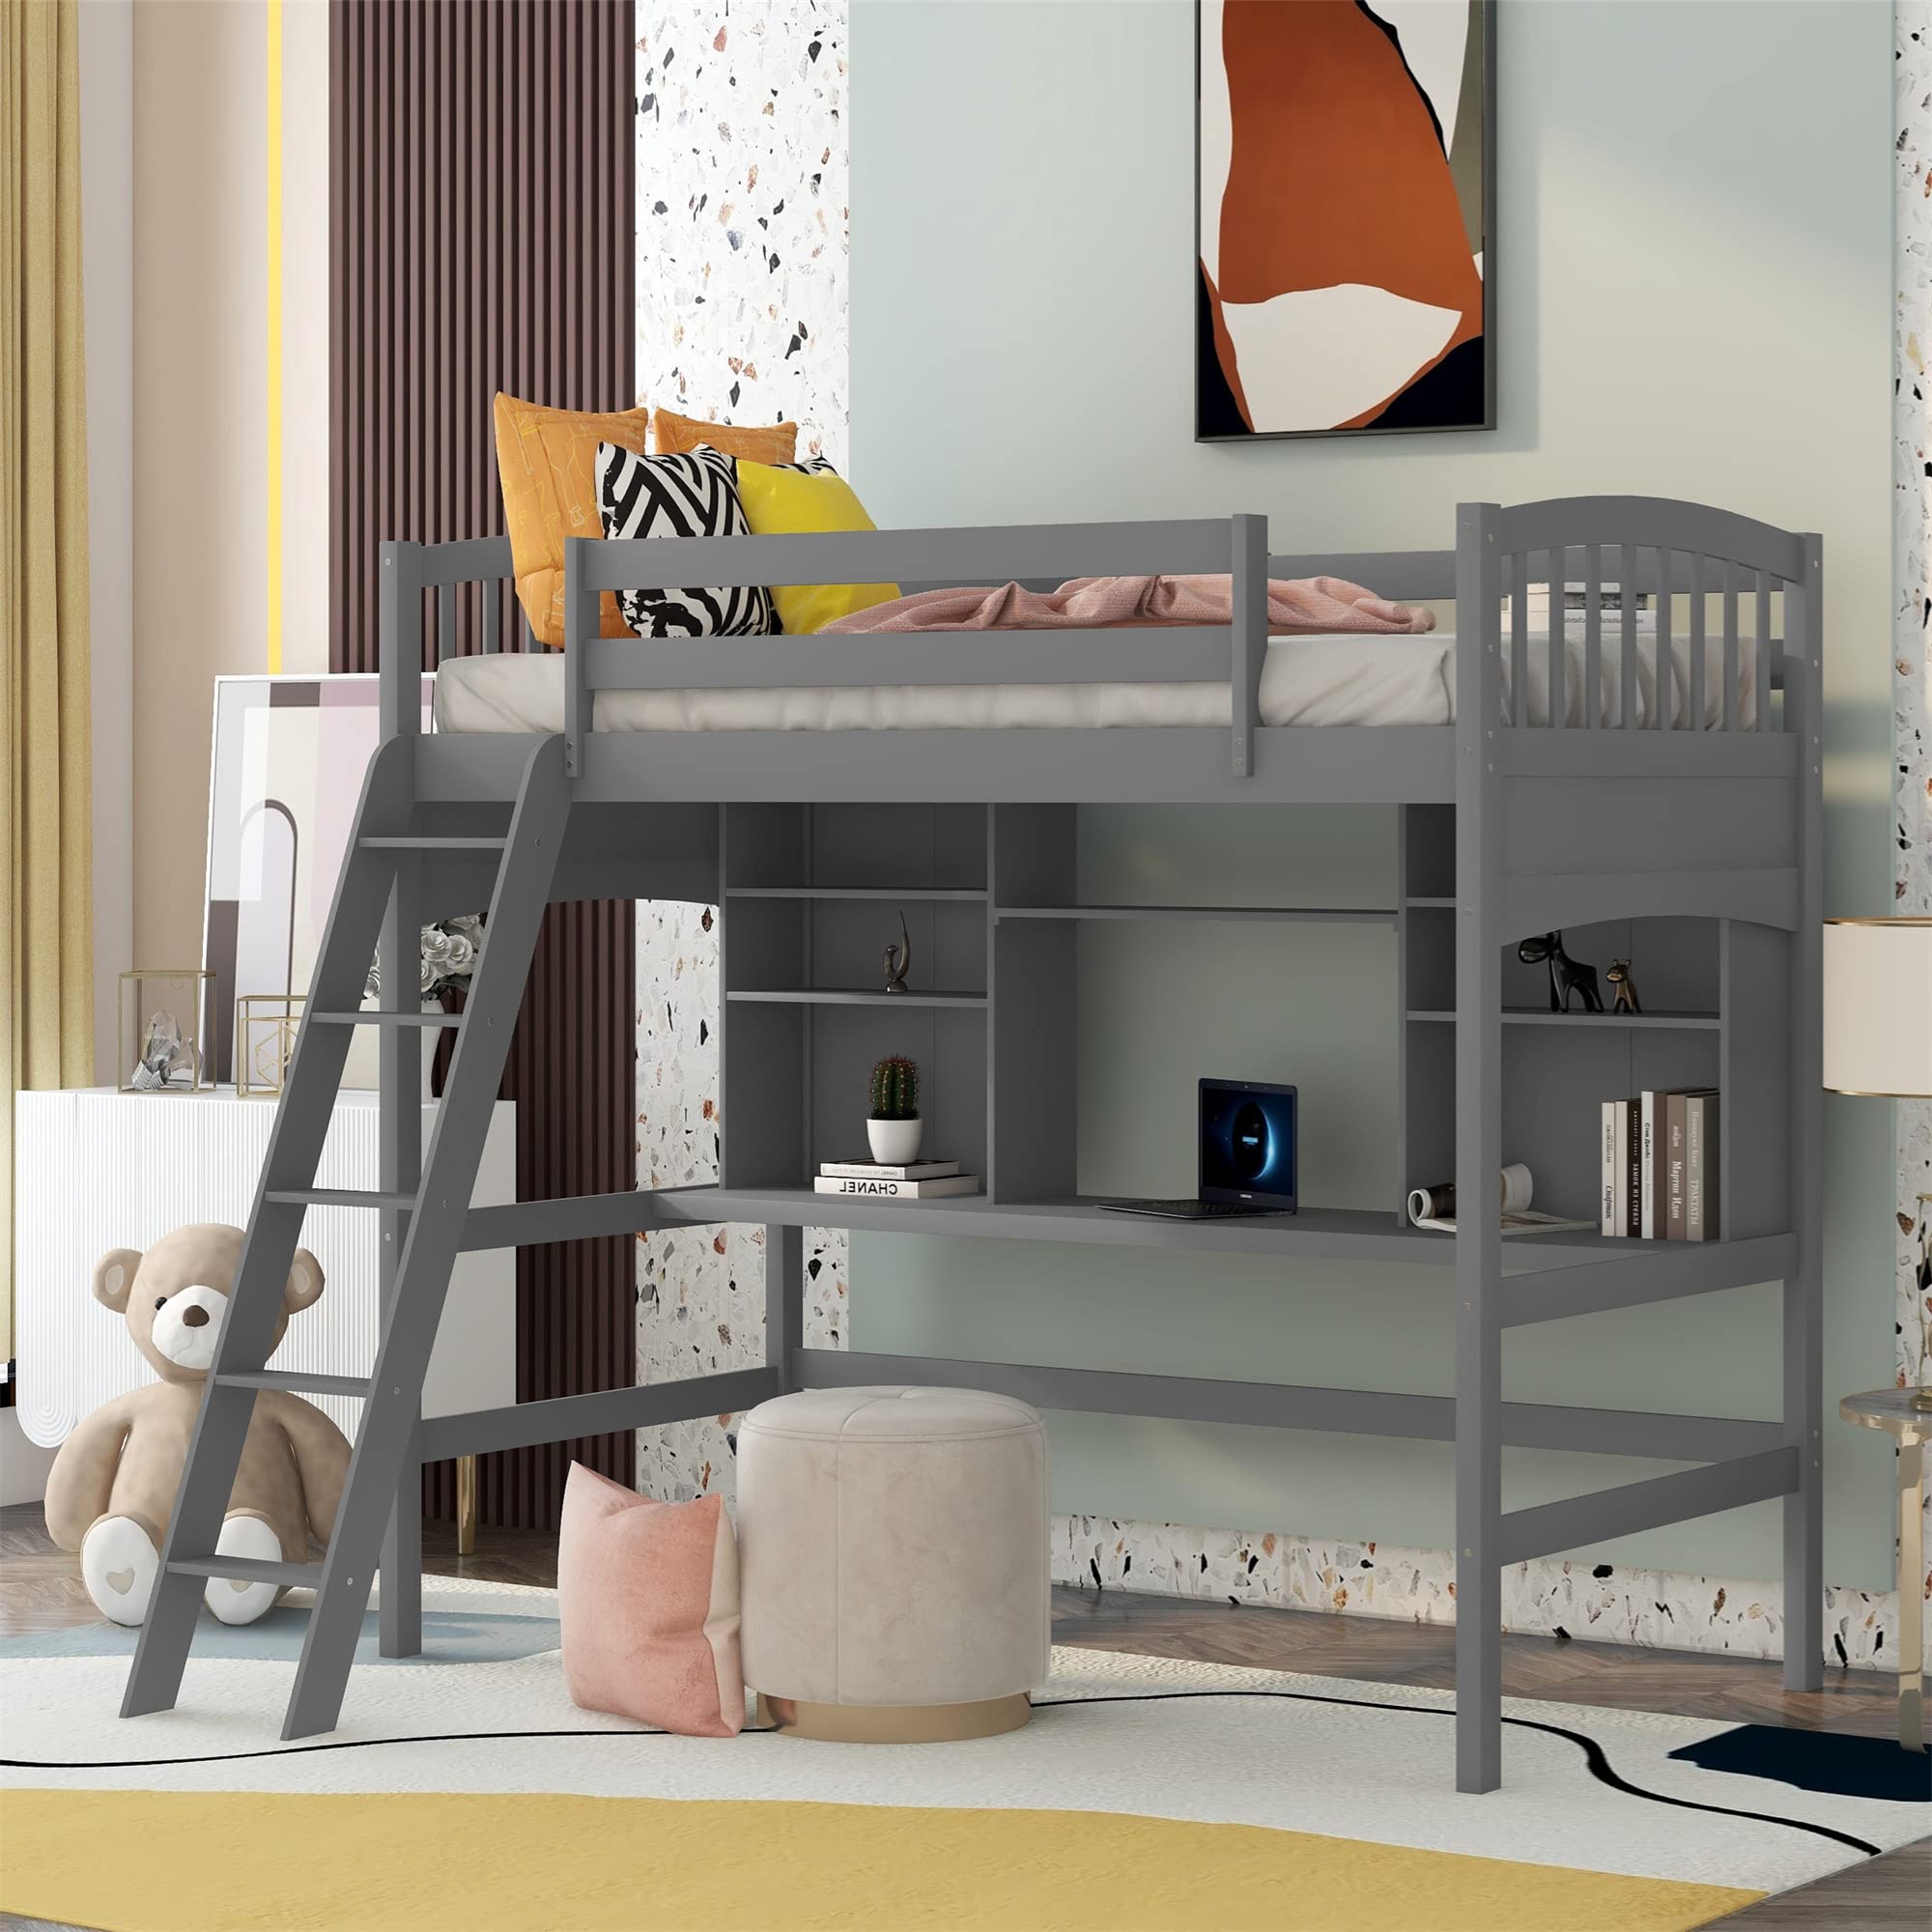
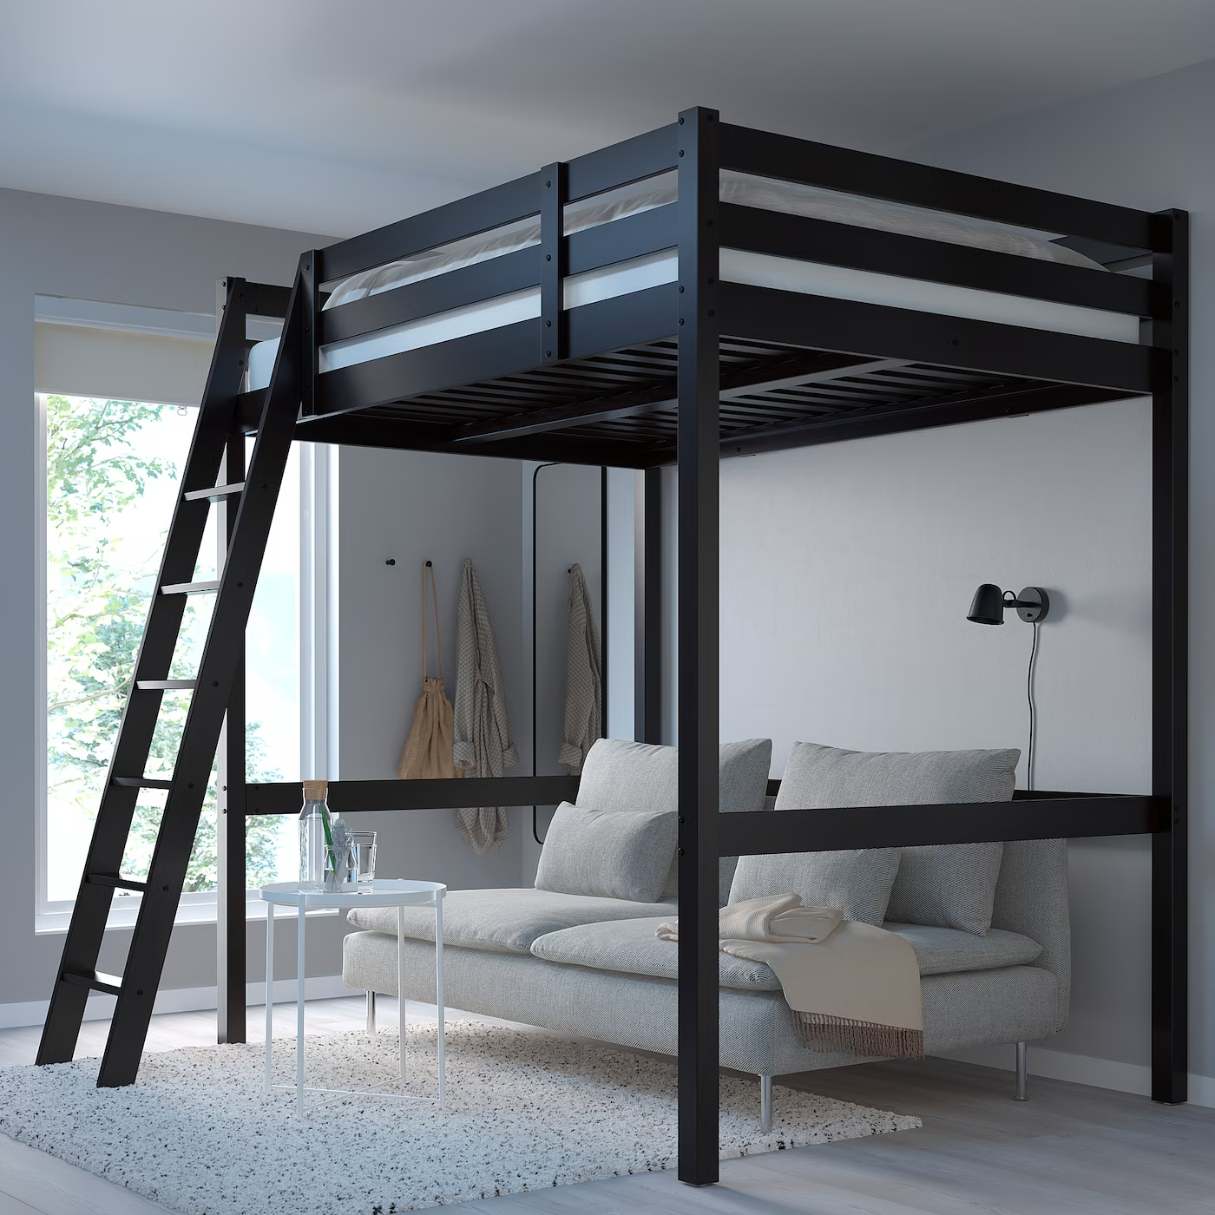
Building a loft bed with stairs can be a rewarding and practical DIY project. Not only does it optimize space in a bedroom, but it also adds a touch of style and functionality. A loft bed provides an elevated sleeping area, leaving ample space underneath for a desk, storage, or a cozy seating area. While there are various loft bed designs available, opting for one with stairs is the ideal choice for easy and safe access to the top bunk.
In this article, we will guide you through the step-by-step process of building a loft bed with stairs. We will cover everything from gathering the necessary materials and tools to assembling the final product. So, grab your measuring tape and let’s get started!
Key Takeaways:
- Building a loft bed with stairs is a rewarding DIY project that optimizes space and adds style to a bedroom. With careful measurements and sturdy construction, you can create a functional and cozy sleeping area with ample space underneath.
- Personalize your loft bed with creative touches and prioritize safety throughout the construction process. Enjoy the elevated sleeping space and make the most out of the area underneath for storage, study, or relaxation.
Read more: How To Build Loft Bed Stairs
Step 1: Gather Materials and Tools
Before you can embark on building your loft bed with stairs, it’s essential to gather all the necessary materials and tools. By having everything in place, you can ensure a smooth and efficient construction process. Here’s a list of what you’ll need:
- 4×4 lumber for the bed frame posts
- 2×4 lumber for the bed frame supports, stairs, and railing
- 2×6 or 2×8 lumber for the stair treads and bed slats
- Plywood for the bed platform, stairs, and safety rails
- Screws, preferably wood screws, in various sizes
- Wood glue for added stability
- Saw for cutting the lumber to the required lengths
- Power drill with drill bits for pre-drilling holes
- Screwdriver for driving screws into the wood
- Sanding tools for smoothing rough edges
- Measuring tape for accurate measurements
- Pencil for marking cut lines and measurements
- Level for ensuring a straight and balanced structure
- Paint or stain for finishing touches
- Safety goggles and work gloves for protection
Once you have assembled all the necessary materials and tools, you can proceed to the next step: measuring and cutting the lumber.
Step 2: Measure and Cut the Lumber
Accurate measurements and precise cuts are crucial for a sturdy loft bed with stairs. Take your time to measure the lengths needed for the different components of the bed frame and stairs. It’s always better to double-check your measurements to avoid any unnecessary mistakes. Here’s how to proceed:
- Start by measuring and marking the height for the bed frame posts. Consider both the space underneath the bed and the desired height of the top bunk. Cut four 4×4 lumber pieces according to your measurements.
- Next, measure and cut the 2×4 lumber pieces for the bed frame supports. Cut two long pieces for the sides and several shorter pieces to act as braces along the length of the frame.
- For the stairs, measure and cut the 2×4 lumber into several equal-sized pieces to serve as stringers. The number of stringers will depend on the width of the stairs you desire.
- Measure and cut the 2×6 or 2×8 lumber to the appropriate lengths for the stair treads. Ensure they are cut precisely to match the width of the stairs.
- Measure and cut the plywood to create the bed platform, stairs, and safety rails. Make sure to account for any additional support needed for stability.
Remember to use caution when cutting the lumber and always wear safety goggles and work gloves. Double-check your measurements before making any cuts to avoid wasting materials and time. Once you have completed this step, you are ready to move on to the construction of the base frame.
Step 3: Build the Base Frame
The base frame serves as the foundation for your loft bed with stairs. It provides stability and support for the entire structure. Follow these steps to build the base frame:
- Take the four cut 4×4 lumber pieces and arrange them in a rectangular shape on the floor. Make sure the corners are square and align with the measurements you took earlier.
- Using wood screws and a power drill, attach the 2×4 lumber pieces, cut for the bed frame supports, along the length of the 4×4 posts. Space them evenly and secure them tightly to create a sturdy frame.
- Add the shorter 2×4 lumber pieces as braces across the width of the frame. These braces will provide additional support and prevent the bed frame from wobbling.
- Double-check that the frame is level and adjusted as needed. Use a level to ensure all sides are even and straight.
- With the base frame complete, you can move on to constructing the stairs.
Building a solid base frame is essential for the overall stability and durability of your loft bed with stairs. Take your time to ensure that all connections are secure, and the frame is level before proceeding to the next step.
Step 4: Build the Stairs
The stairs are a crucial component of your loft bed, providing safe and easy access to the top bunk. Follow these steps to construct the stairs:
- Start by attaching the stringers, which are the cut 2×4 lumber pieces, vertically to the side of the base frame. Space them evenly and ensure they are securely fastened with wood screws.
- Measure and cut the 2×6 or 2×8 lumber to the desired width of each step. Attach these pieces horizontally between the stringers, using wood screws.
- Repeat this process for each step, ensuring that the height and depth of each rise and tread are consistent.
- If desired, you can add additional support by attaching plywood or additional 2×4 pieces underneath the treads.
- Once the stairs are assembled, sand any rough edges to create a smooth surface.
Building sturdy stairs is essential for the safety and functionality of your loft bed. Take extra care to ensure that each step is level, secure, and properly aligned with the stringers. Once the stairs are complete, you can proceed to attach them to the base frame in the next step.
Read more: How To Build A Loft Bed
Step 5: Attach the Stairs to the Base Frame
With the stairs constructed, it’s time to attach them securely to the base frame. Follow these steps to ensure a proper installation:
- Position the stairs against the base frame in the desired location. Make sure the stairs align with the height of the top bunk and are securely resting on the ground.
- Use wood screws to attach the stairs to the base frame. Drive the screws through the stringers into the corresponding areas of the base frame for a secure connection.
- Check that the stairs are level and properly aligned with the base frame. Make any necessary adjustments to ensure stability.
- Once the stairs are securely attached, give them a gentle shake to test their stability. They should be sturdy and not wobble.
Attaching the stairs to the base frame is a critical step to ensure the safety and functionality of your loft bed. Take your time to ensure a secure connection, as the stairs will be used frequently for access to the top bunk. Once the stairs are securely attached, you can move on to building the loft bed frame.
When building a loft bed with stairs, make sure to measure and cut all materials accurately to ensure a sturdy and safe structure. Use high-quality wood and hardware for long-lasting durability.
Step 6: Build the Loft Bed Frame
Now that the base frame and stairs are in place, it’s time to construct the loft bed frame. Follow these steps to build a sturdy and secure loft bed:
- Measure and cut the necessary lengths of 2×4 lumber to create the sides and ends of the loft bed frame.
- Attach the side pieces to the base frame using wood screws, ensuring a tight and secure connection.
- Measure and cut additional 2×4 lumber to create cross supports for added stability. Attach these cross supports between the side pieces using wood screws.
- Check that the loft bed frame is level and square. Use a level to ensure all sides are even and adjust as needed.
- To provide extra support for the mattress, cut pieces of 2×4 or plywood and attach them to the cross supports.
- Securely fasten the bed slats, which can be made from 2×4 or 2×6 lumber, across the frame to support the mattress.
Building a solid and stable loft bed frame is essential for guaranteeing the safety and comfort of the sleeping area. Take your time to ensure all connections are secure and the frame is level before proceeding to the next step.
Step 7: Install Safety Rails
Installing safety rails is a crucial step in ensuring the safety of the person sleeping in the loft bed. Follow these steps to properly install safety rails:
- Measure and cut the necessary lengths of 2×4 lumber or plywood for the safety rails.
- Attach the safety rails to the sides and ends of the loft bed frame using wood screws. Make sure the rails are securely fastened and are at a height that provides adequate protection.
- For added stability, consider adding diagonal bracing between the safety rails and the loft bed frame.
- Double-check that the safety rails are securely attached and cannot be easily moved or removed.
Installing sturdy and reliable safety rails is essential to prevent falls and accidents while using the loft bed. Take extra care to ensure the safety rails are properly attached and provide sufficient height and protection.
Step 8: Paint or Stain the Loft Bed
Once the construction of the loft bed is complete, you can add the finishing touches by painting or staining the wood. Not only does this enhance the appearance of the bed, but it also helps protect the wood from damage. Follow these steps to paint or stain the loft bed:
- Prepare the surface by sanding any rough edges or imperfections. This will create a smooth surface for the paint or stain to adhere to.
- If you choose to paint the loft bed, apply a primer to the wood surface before painting. This will help the paint adhere better and provide a more even finish.
- Select a paint color that matches your bedroom’s decor or personal preference. Use a high-quality paintbrush or roller to apply an even coat of paint to all visible surfaces of the loft bed. Allow the paint to dry completely before applying a second coat if needed.
- If you prefer the natural look of the wood, you can choose to stain it instead. Select a wood stain that complements the surrounding furniture or desired aesthetic. Apply the stain evenly using a brush or cloth, following the manufacturer’s instructions. Allow the stain to dry thoroughly, and apply a second coat if desired.
- After the paint or stain has dried completely, consider applying a protective sealant over the surface. This will help protect the finish and prolong the lifespan of the loft bed.
Painting or staining the loft bed not only adds a personal touch but also helps to preserve the wood and protect it from wear and tear. Choose a color or stain that suits your style and preferences, and take your time to ensure a meticulous and even application.
Read more: How To Build A Loft Bed Frame
Step 9: Assemble the Loft Bed with Stairs
With all the individual components complete, it’s time to assemble the loft bed with stairs. Follow these steps to ensure a proper and secure assembly:
- Start by positioning the loft bed frame in the desired location in the room. Make sure it is aligned with the stairs and the base frame.
- Attach the loft bed frame to the base frame and stairs using wood screws. Ensure that all connections are tight and secure.
- Double-check that the loft bed is level and stable. Use a level to ensure the frame is straight and adjust as necessary.
- Place the mattress on the bed slats, ensuring it fits properly and is centered on the frame.
- Test the stability of the loft bed by gently shaking and applying pressure to various parts. It should remain sturdy and wobble-free.
Assembling the loft bed with stairs is the final step in the construction process. Taking the time to properly align, secure, and test the stability of the bed ensures a safe and reliable sleeping space.
Conclusion
Congratulations! You have successfully built a loft bed with stairs, providing both comfort and practicality to your bedroom space. By following the step-by-step instructions outlined in this guide, you have created a sturdy and functional piece of furniture that optimizes vertical space and adds a touch of style to your room.
Building a loft bed with stairs may require some time, effort, and attention to detail, but the end result is well worth it. Not only does it provide a cozy sleeping area at an elevated level, but it also opens up valuable space underneath for various purposes such as a study area, storage, or a seating nook.
Remember to personalize your loft bed by adding your own creative touches. You can customize the paint color, add decorative elements, or even incorporate additional storage solutions to meet your specific needs.
Throughout the construction process, safety should always be a top priority. Ensure that all connections are secure, the bed frame is level, and the stairs are stable. Additionally, regularly check and maintain the loft bed to ensure ongoing safety and durability.
Now, step back and admire your handiwork. Your newly built loft bed with stairs is not only a functional and space-saving addition to your bedroom but also a testament to your DIY skills. Enjoy the cozy and elevated sleeping space and make the most out of the space underneath.
Thank you for following this guide, and we hope you enjoy your newly built loft bed with stairs for years to come!
Frequently Asked Questions about How To Build A Loft Bed With Stairs
Was this page helpful?
At Storables.com, we guarantee accurate and reliable information. Our content, validated by Expert Board Contributors, is crafted following stringent Editorial Policies. We're committed to providing you with well-researched, expert-backed insights for all your informational needs.


0 thoughts on “How To Build A Loft Bed With Stairs”