Articles
How To Build A Storage Loft In A Garage
Modified: October 20, 2024
Learn how to efficiently maximize garage storage space with our step-by-step guide on building a storage loft in your garage. Create the perfect solution for your GARAGE STORAGE needs!
(Many of the links in this article redirect to a specific reviewed product. Your purchase of these products through affiliate links helps to generate commission for Storables.com, at no extra cost. Learn more)
Introduction
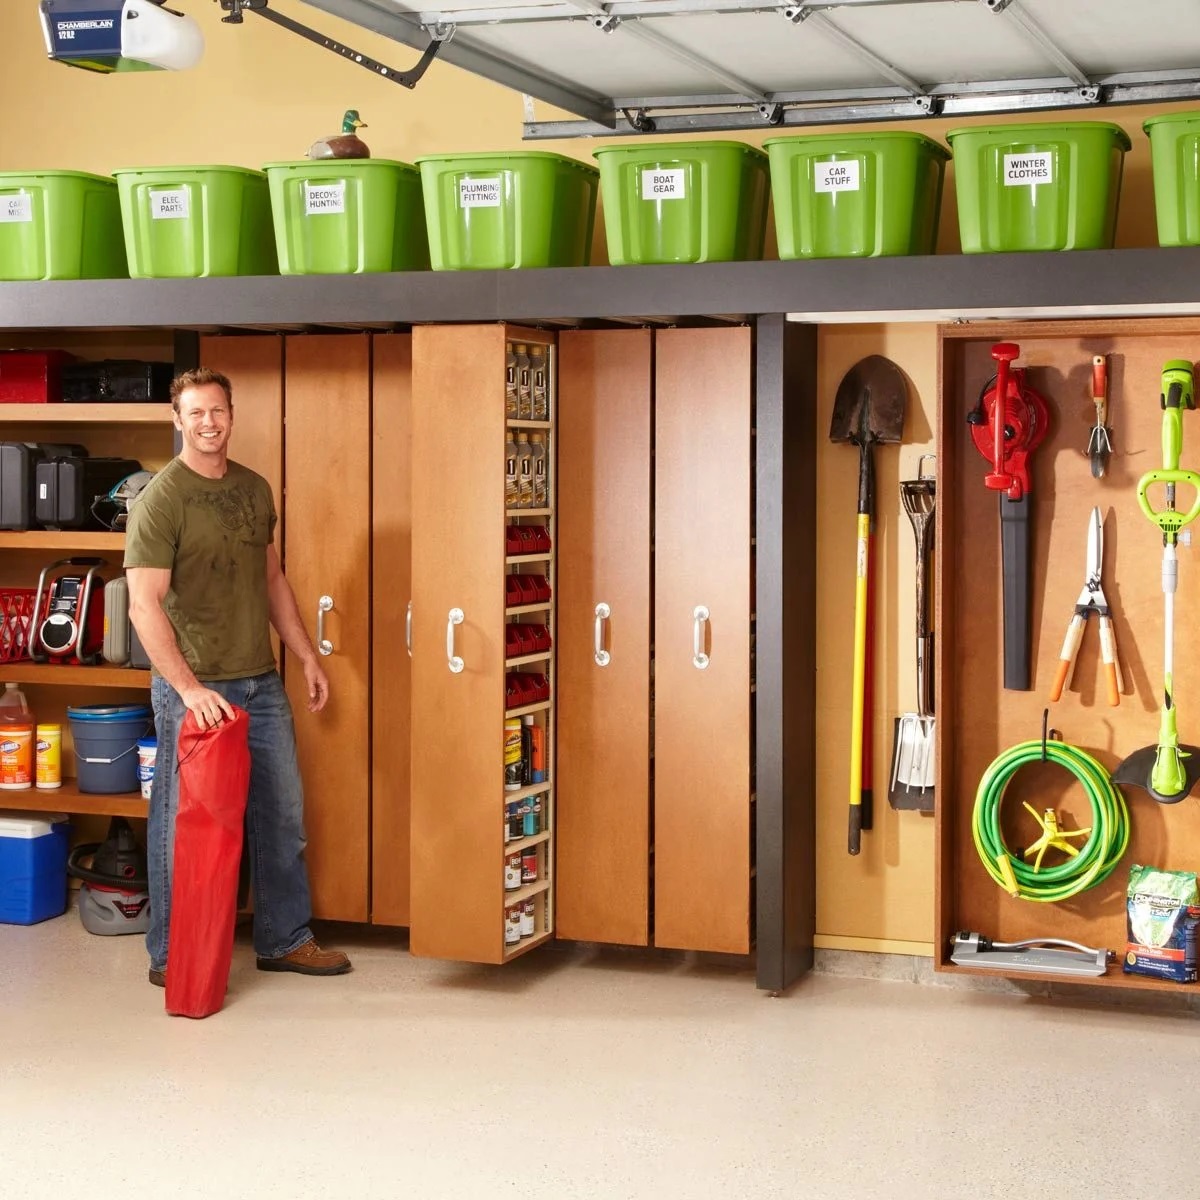
Having a storage loft in your garage can significantly increase the available space for storing items. Instead of cluttering your garage floor, you can utilize the vertical space by building a storage loft. This not only provides a convenient storage solution but also helps in organizing your garage and keeping it clean and tidy.
In this article, we will guide you through the step-by-step process of building a storage loft in your garage. We will cover the materials and tools required, safety precautions to observe, and detailed instructions for each stage of the construction process. Whether you’re a seasoned DIY enthusiast or a beginner, you’ll find this guide helpful in creating a functional storage solution.
Before you begin, it’s important to evaluate the available space in your garage and consider any limitations or building regulations in your area. Additionally, ensure that you have the necessary skills, time, and budget to complete the project. With proper planning and careful execution, you’ll be able to transform your garage into an efficient storage space.
So, let’s dive in and learn how to build a storage loft in your garage!
Key Takeaways:
- Building a storage loft in your garage requires careful planning, accurate measurements, and attention to safety. By following the step-by-step process and adding finishing touches, you can create a functional and organized storage solution.
- Prioritize safety at every stage of the construction process, from clearing the area to securing the loft. With the right materials, tools, and precautions, you can transform your garage into an efficient storage space while enjoying the benefits of additional organization and storage.
Read more: How To Build A Loft In A Shed
Materials and Tools Required
Before you start building your storage loft, gather all the necessary materials and tools. Here is a comprehensive list of what you’ll need:
Materials:
- 2×4 lumber for framing
- Plywood sheets for the loft floor
- Lag bolts and screws
- Joist hangers
- Plywood or MDF for the loft railing
- Nails or screws for securing the railing
- Wood glue
- Paint or stain for finishing (optional)
Tools:
- Tape measure
- Level
- Circular saw or miter saw
- Drill
- Screwdriver
- Hammer
- Speed square
- Chalk line
- Safety goggles
- Ear protection
- Dust mask
Make sure to have all the materials and tools ready before you begin the construction process. This will save you time and ensure a smoother workflow. Additionally, ensure that you’re using high-quality materials for durability and safety.
It’s also a good idea to have a first aid kit nearby and to wear protective gear, such as gloves and work boots, to minimize the risk of injuries during the construction process.
Safety Precautions
When working on any construction project, including building a storage loft in your garage, it’s crucial to prioritize safety. Here are some essential safety precautions to keep in mind:
- Wear appropriate safety gear, including safety goggles, ear protection, and a dust mask, to protect yourself from potential hazards.
- Ensure that your work area is well-lit and free of any obstacles or debris.
- Use caution when handling power tools and sharp objects. Read and follow the manufacturer’s instructions for safe operation.
- Secure the work area to prevent accidental falls or trips. Remove any items or clutter that may obstruct your movement or cause accidents.
- When working with heavy materials, use proper lifting techniques to avoid strain or injury. Get assistance if needed.
- Create a safe and stable work platform by using sturdy ladders or scaffolding, if necessary.
- Make sure all electrical equipment is properly grounded and meets safety standards.
- Keep children and pets away from the construction zone to prevent accidents.
- Take regular breaks to rest and rehydrate, especially when working in hot weather.
- Follow local building codes and regulations to ensure compliance and safety.
It’s essential to proceed with caution and prioritize safety at all times during the construction process. If you’re unsure about any aspect of the project, consult with a professional or seek guidance from experienced DIY enthusiasts.
Remember, safety should always be your top priority to ensure a successful and accident-free construction process.
Step 1: Measurements and Planning
Before you start building your storage loft, take accurate measurements of the available space in your garage. This will help you determine the dimensions and design of your loft. Here’s how to do it:
- Measure the width and length of the area where you plan to build the loft. Take into consideration any obstructions such as doors, windows, or pipes that may affect the dimensions.
- Decide on the height of the loft. Consider how much headroom you’ll need below the loft and make sure there’s enough clearance for comfortable movement.
- Sketch out a rough floor plan to visualize the layout of the loft. Indicate the dimensions, including the width, length, and height, for reference.
- Determine the load-bearing capacity of your garage walls and ceiling. This will help you decide how much weight the loft can support and influence the design and materials used.
- Take note of any electrical or HVAC components in the area that may need to be relocated or considered in your construction plan.
Once you have completed the measurements and planning phase, you’ll have a clear idea of the size and layout of your storage loft. This information will guide you in the subsequent stages of the construction process.
Remember to double-check your measurements and make any necessary adjustments before proceeding to the next step. Accurate planning and measurements are crucial for a successful storage loft build.
Step 2: Clearing the Area
Now that you have planned and measured the area for your storage loft, it’s time to clear the space and prepare it for construction. Follow these steps:
- Remove any items or debris from the designated area where the loft will be constructed. This includes tools, storage boxes, or any other objects that may obstruct the construction process.
- Ensure the floor is clean and free of any dust or dirt. Sweep or vacuum the area to create a clean workspace.
- If necessary, temporarily relocate any electrical wiring or HVAC components that may interfere with the construction process. Consult a professional if you’re unsure how to handle these systems safely.
- Inspect the walls and ceiling for any damage or structural issues. Address any repairs or reinforcements before proceeding with the construction of the loft.
- Ensure there is adequate lighting in the area. If needed, install additional light fixtures or use portable work lights to enhance visibility during construction.
By clearing the area and preparing it properly, you’ll have a clean and organized workspace for building your storage loft. This will make the construction process smoother and more efficient.
Remember to keep safety in mind during this stage. Be cautious of any potential hazards or obstacles in the area and take appropriate measures to minimize the risk of accidents.
Read more: How To Build A Ladder For A Loft
Step 3: Constructing the Support Frame
With the area cleared and prepped, it’s time to start building the support frame for your storage loft. The support frame will provide stability and structural integrity to the loft. Follow these steps:
- Measure and cut the 2×4 lumber to create the horizontal beams that will form the base of the support frame. Use a circular saw or miter saw for accurate cuts.
- Attach the horizontal beams to the garage walls, ensuring they are level and securely fastened. Use lag bolts and screws to secure the beams to the walls.
- Measure and cut additional 2×4 lumber to create vertical posts that will support the loft floor. Install the vertical posts at regular intervals along the horizontal beams. Use a level to ensure they are plumb.
- Secure the vertical posts to the horizontal beams using joist hangers or screws. Ensure that they are securely attached for stability.
- Continue adding vertical posts and horizontal beams, following your planned design and measurements, until the entire support frame is complete.
- Double-check the levelness and stability of the support frame before proceeding to the next step.
Building a solid and well-supported frame is crucial for the overall stability and safety of your storage loft. Take your time to ensure accurate cuts and proper attachment of the horizontal beams and vertical posts. Use a level to verify that everything is aligned correctly.
Once you have completed this step, you’ll have a sturdy support frame in place, ready for the next stage of building your storage loft.
When building a storage loft in a garage, be sure to carefully measure the space and consider the weight capacity of the loft. Use sturdy materials and secure the loft to the walls for added stability.
Step 4: Installing the Floorboards
With the support frame in place, it’s time to install the floorboards for your storage loft. Follow these steps:
- Measure and cut plywood sheets to fit the dimensions of your loft floor. Ensure that the plywood sheets are the correct thickness to support the intended load.
- Position the plywood sheets on top of the support frame, ensuring they are flush with the edges. Use a circular saw or jigsaw to make any necessary cuts to fit around obstructions such as posts or walls.
- Secure the plywood sheets to the support frame using screws. Place screws approximately every 6 inches along the edges and every 8 to 10 inches throughout the interior of each sheet.
- Double-check the alignment and stability of the floorboards, ensuring they are securely fastened to the support frame.
When installing the floorboards, it’s important to use proper safety precautions. Be careful when using power tools and handling large sheets of plywood. Ensure that you have a firm grip on the sheets and wear protective gloves to avoid splinters.
If desired, you can also consider adding a layer of insulation between the plywood sheets and the support frame to help regulate temperature and reduce noise.
Once the floorboards are securely in place, you’ll have a solid foundation for your storage loft. Proceed to the next step to continue building your loft.
Step 5: Adding Support Beams
After installing the floorboards, it’s time to add additional support beams to reinforce the structure of your storage loft. Follow these steps:
- Measure and cut 2×4 lumber to create cross beams that will run perpendicular to the floorboards.
- Position the cross beams evenly along the length of the loft, attaching them to the vertical posts of the support frame.
- Secure the cross beams to the vertical posts using screws or nails, ensuring a sturdy connection.
- Continue adding cross beams at regular intervals, depending on the size of your loft and the load-bearing requirements.
- Double-check the stability and alignment of the support beams to ensure they are properly installed and evenly distributed.
The additional support beams will provide extra strength and stability to your storage loft. They will help distribute the weight evenly and prevent any sagging or structural issues over time.
Take your time to accurately measure and cut the support beams, ensuring they fit snugly and securely in place. Verify the alignment and stability before moving on to the next step.
With the support beams in place, your storage loft is well on its way to becoming a functional and reliable storage solution. Continue to the next step to further secure and reinforce your loft.
Step 6: Securing the Loft
Once you have completed the construction of the support frame and added the necessary support beams, it’s time to secure the loft to ensure its stability. Follow these steps:
- Check for any gaps or loose connections in the support frame and beams. Tighten any screws or bolts that may have come loose during the construction process.
- Apply wood glue or construction adhesive to the joints and connections of the support frame. This will add extra strength and stability to the structure.
- Add corner braces or L-brackets to reinforce the corners of the loft and provide additional support. Secure these brackets using screws or nails.
- Use metal brackets or straps to attach the support frame to the walls of the garage. This will prevent any lateral movement or shifting of the loft.
- Double-check all connections and make any necessary adjustments to ensure the loft is securely fastened and stable.
Securing the loft is essential for its long-term durability and safety. The added measures of wood glue, brackets, and straps will reinforce the structure and prevent any potential issues caused by movement or shifting. Taking the time to properly secure the loft will provide peace of mind and ensure that your storage space is safe and reliable.
Once you have completed this step, your storage loft will be ready for the next stage of the construction process, which involves building access to the loft. Continue on to the next step to learn how to create a convenient and safe way to reach your storage space.
Read more: How To Build Loft Bed Stairs
Step 7: Building Access to the Loft
Now that your storage loft is securely in place, it’s time to build access to the loft so you can easily reach your stored items. Follow these steps:
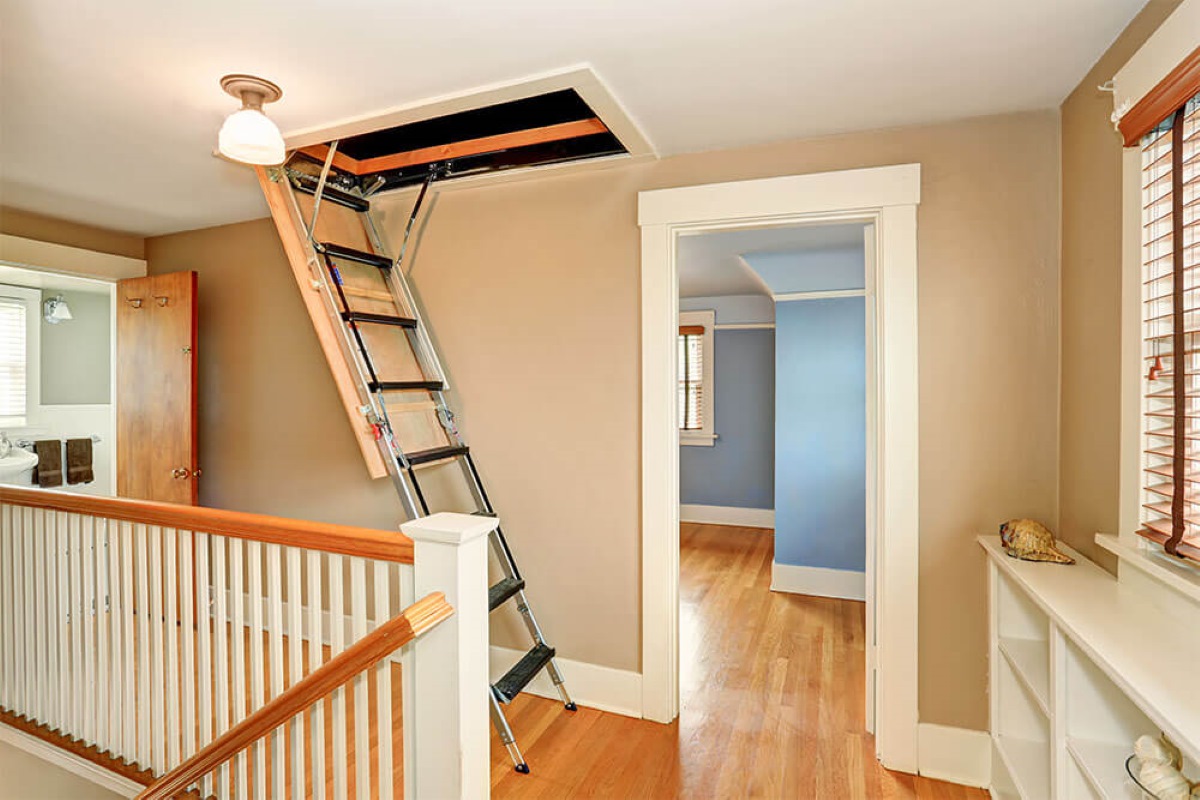
- Determine the location for the access point. This can be a ladder, staircase, or even a built-in loft ladder.
- Measure and cut the necessary materials to construct the access point. If using a ladder, ensure it is tall enough to reach the loft floor with ease. If building stairs, calculate the number of steps needed and consider the rise and run measurements for safety and comfort.
- Secure the ladder or stairs to the support frame, ensuring a strong and stable connection.
- Add handrails or guardrails for safety, especially if you’re using stairs. This will prevent accidents and provide support while climbing up or down.
- Test the access point for stability and ease of use. Ensure that the ladder or stairs can support your weight and that there’s enough clearance for comfortable movement.
Building a secure and accessible access point is crucial for the functionality and usability of your storage loft. Consider your personal preferences, as well as any space limitations, when choosing the type of access point.
As with all construction projects, prioritize safety. Use proper safety equipment and ensure the access point is stable and secure. If you’re uncertain about the construction of the access point, consult with a professional to ensure it meets building codes and safety standards.
Once you’ve completed this step, your storage loft will be fully functional, providing easy and convenient access to your items. Now it’s time to add some finishing touches to complete the project.
Step 8: Finishing Touches
With your storage loft built and functional, it’s time to add some finishing touches to enhance both the appearance and functionality. Follow these steps:
- Sand down any rough edges or surfaces to create a smooth finish. This will help prevent splinters and give the loft a polished look.
- If desired, apply a coat of paint or stain to the floorboards and support frame. Choose a color that complements your garage’s aesthetic and provides protection for the wood.
- Consider adding additional features to customize your storage loft. This might include hooks or shelves for hanging tools or storing smaller items.
- Install adequate lighting in the loft to ensure visibility when accessing stored items. This could be accomplished with overhead lights or task lighting, depending on your needs.
- Organize your items in a way that maximizes the storage space. Use labeled bins, shelves, or hooks to keep everything neat and easily accessible.
These finishing touches will not only improve the functionality of the storage loft but also enhance its overall appearance. Taking the time to add these final details will help you enjoy your newly created storage space for years to come.
Remember to clean up your work area and dispose of any material scraps or debris properly. Keep the space around the loft clear and free from clutter to maintain its functionality.
With the completion of this final step, you have successfully built a storage loft in your garage. Stand back and admire your hard work and enjoy the additional storage space that will help keep your garage organized and clutter-free.
Conclusion
Congratulations on successfully building a storage loft in your garage! By following the step-by-step process outlined in this guide, you have created a functional and organized storage solution that maximizes the vertical space in your garage.
Throughout the construction process, you learned how to take accurate measurements, plan the layout, and clear and prepare the area before building the support frame. You carefully installed the floorboards, added support beams, and secured the loft for stability and structural integrity. By building a safe and accessible access point, you created a convenient way to reach your stored items.
By adding the finishing touches, such as sanding, painting, and organizing the storage space, you have ensured that your storage loft is not only functional but also aesthetically pleasing.
Remember to observe safety precautions at all times, use the proper tools and materials, and follow local building codes and regulations. If at any point you feel unsure or uncomfortable with a particular aspect of the construction process, consider consulting with a professional to ensure the safety and integrity of your project.
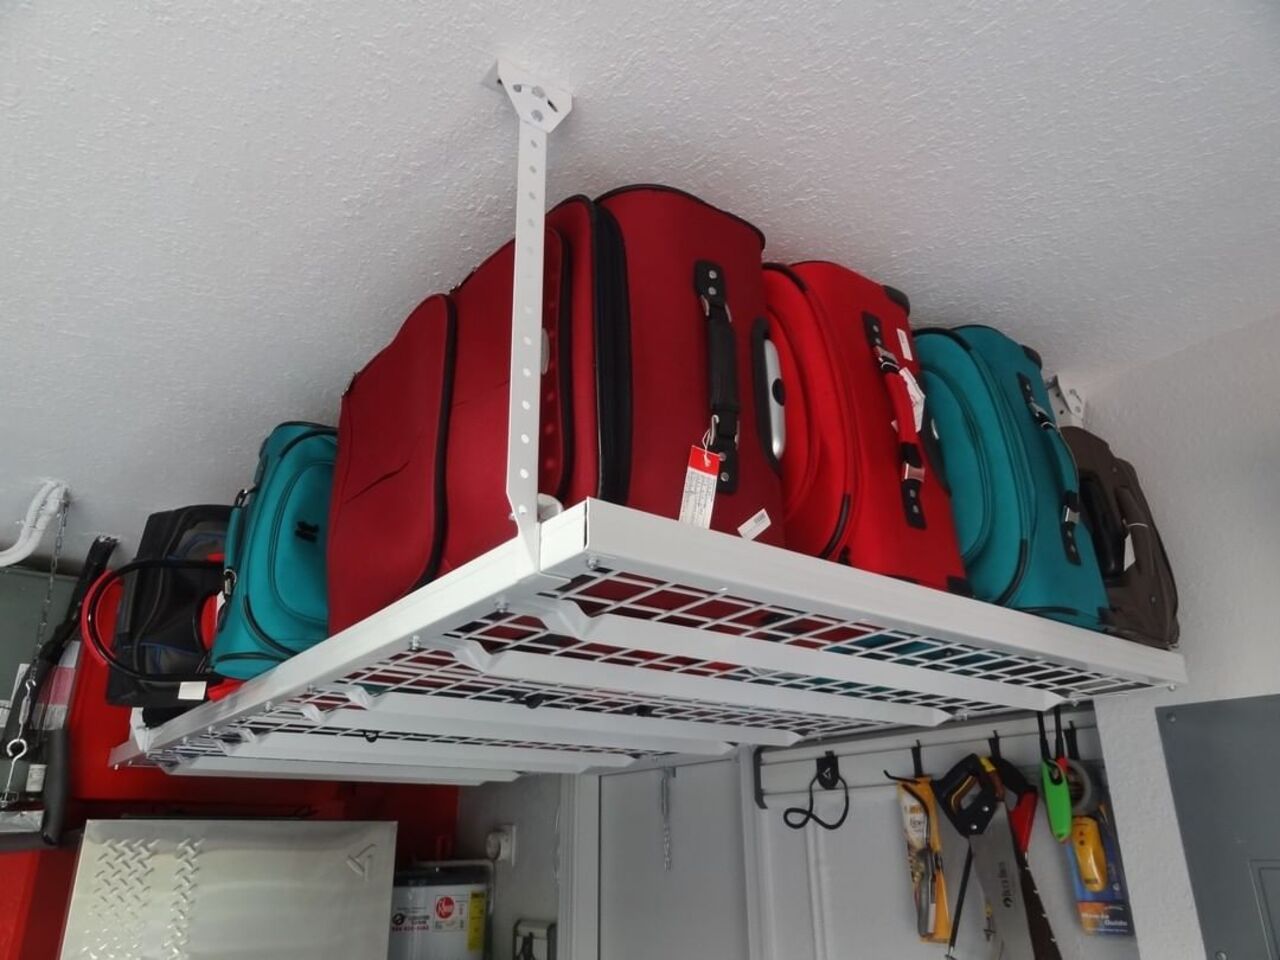
Now, you can enjoy the benefits of your storage loft. Utilize the additional space to keep your garage organized, store seasonal items, or create a workspace for your hobbies and projects. With careful planning and proper maintenance, your storage loft will continue to serve you for years to come.
Thank you for choosing our guide to help you build a storage loft in your garage. We hope this article has been informative and helpful, and we wish you success in all your DIY endeavors!
Feeling inspired by your new storage loft? Keep that DIY spirit alive with more creative ideas! If you're curious why tackling projects yourself can be so rewarding, our article on the wonders of DIY Projects has all the answers. Need more clever ways to organize your space? Check out our list of Garage Organization tips for innovative solutions. And for those who love unique twists, our guide on Garage Storage Ideas with vintage finds will certainly spark your imagination. Dive into these reads to transform your garage into an efficient and stylish space!
Frequently Asked Questions about How To Build A Storage Loft In A Garage
Was this page helpful?
At Storables.com, we guarantee accurate and reliable information. Our content, validated by Expert Board Contributors, is crafted following stringent Editorial Policies. We're committed to providing you with well-researched, expert-backed insights for all your informational needs.


0 thoughts on “How To Build A Storage Loft In A Garage”