Articles
How To Install Shower Faucet
Modified: January 6, 2024
Learn how to properly install a shower faucet in this detailed step-by-step guide. Our informative articles provide valuable insights for a successful installation.
(Many of the links in this article redirect to a specific reviewed product. Your purchase of these products through affiliate links helps to generate commission for Storables.com, at no extra cost. Learn more)
Introduction:
Welcome to our step-by-step guide on how to install a shower faucet. Upgrading your shower faucet is a great way to spruce up your bathroom and enhance your shower experience. Whether you’re replacing an old, worn-out faucet or simply want to upgrade to a more stylish and modern design, this article will walk you through the process, ensuring a successful installation.
Before we begin, it’s important to note that installing a shower faucet does require some basic plumbing knowledge and skills. If you’re not confident in your abilities, it’s always best to consult a professional plumber. However, if you’re a seasoned DIY enthusiast looking to tackle this project on your own, we’ve got you covered.
In this guide, we’ll provide you with a comprehensive overview of the installation process, including the tools and materials you’ll need, the steps to remove the existing faucet, and the process of installing the new shower faucet. So let’s get started and turn your ordinary shower into a practical and stylish oasis!
Key Takeaways:
- Upgrade your bathroom and enhance your shower experience by following our step-by-step guide to install a new shower faucet. Enjoy a stylish and practical oasis with the right tools and DIY enthusiasm.
- Prioritize safety, attention to detail, and regular maintenance after successfully installing your new shower faucet. Cherish the improved functionality and aesthetics it brings to your bathroom for a refreshing and rejuvenating shower experience.
Read more: How To Install Delta Shower Faucet
Step 1: Gather Necessary Tools and Materials:
Before you begin the installation process, it’s important to gather all the necessary tools and materials. Having everything at hand will streamline the installation process and prevent any interruptions. Here’s a list of tools and materials you’ll need:
- Adjustable wrench
- Plumber’s tape
- Screwdriver
- Pipe cutter or hacksaw
- Tongue and groove pliers
- Plumber’s putty
- New shower faucet kit
- Towels or rags
Make sure to gather all the tools and materials listed above before proceeding with the installation. Additionally, it’s a good idea to read through the manufacturer’s instructions that come with the new faucet kit. Familiarize yourself with the specific requirements and recommendations for your particular model.
Once you have all the necessary tools and materials ready, you’re one step closer to enjoying your new shower faucet. Let’s move on to the next step and turn off the water supply.
Step 2: Turn Off Water Supply:
Before you begin removing the existing shower faucet, it’s crucial to turn off the water supply to your shower. Turning off the water supply will prevent any leaks or flooding while you work on the installation.
To turn off the water supply, locate the main shut-off valve for your home’s water supply. This valve is typically located near the water meter or where the main water line enters your home. Once you’ve located the shut-off valve, turn it clockwise until it is fully closed. This will cut off the water supply to your entire house.
Next, you’ll need to drain any remaining water from the shower pipes. To do this, turn on the shower faucet and let the water run until it stops completely. This will empty the pipes and alleviate any pressure.
After you’ve turned off the main water supply and drained the pipes, it’s a good idea to test the water to ensure it’s completely shut off. Turn on any other faucets or fixtures in your home to see if any water continues to flow. If you notice any water flow, double-check the main shut-off valve and ensure it’s completely closed.
Once you’re certain that the water supply is turned off, you can move on to the next step of removing the existing shower faucet. It’s important to take necessary precautions to avoid any accidents or water damage during this process.
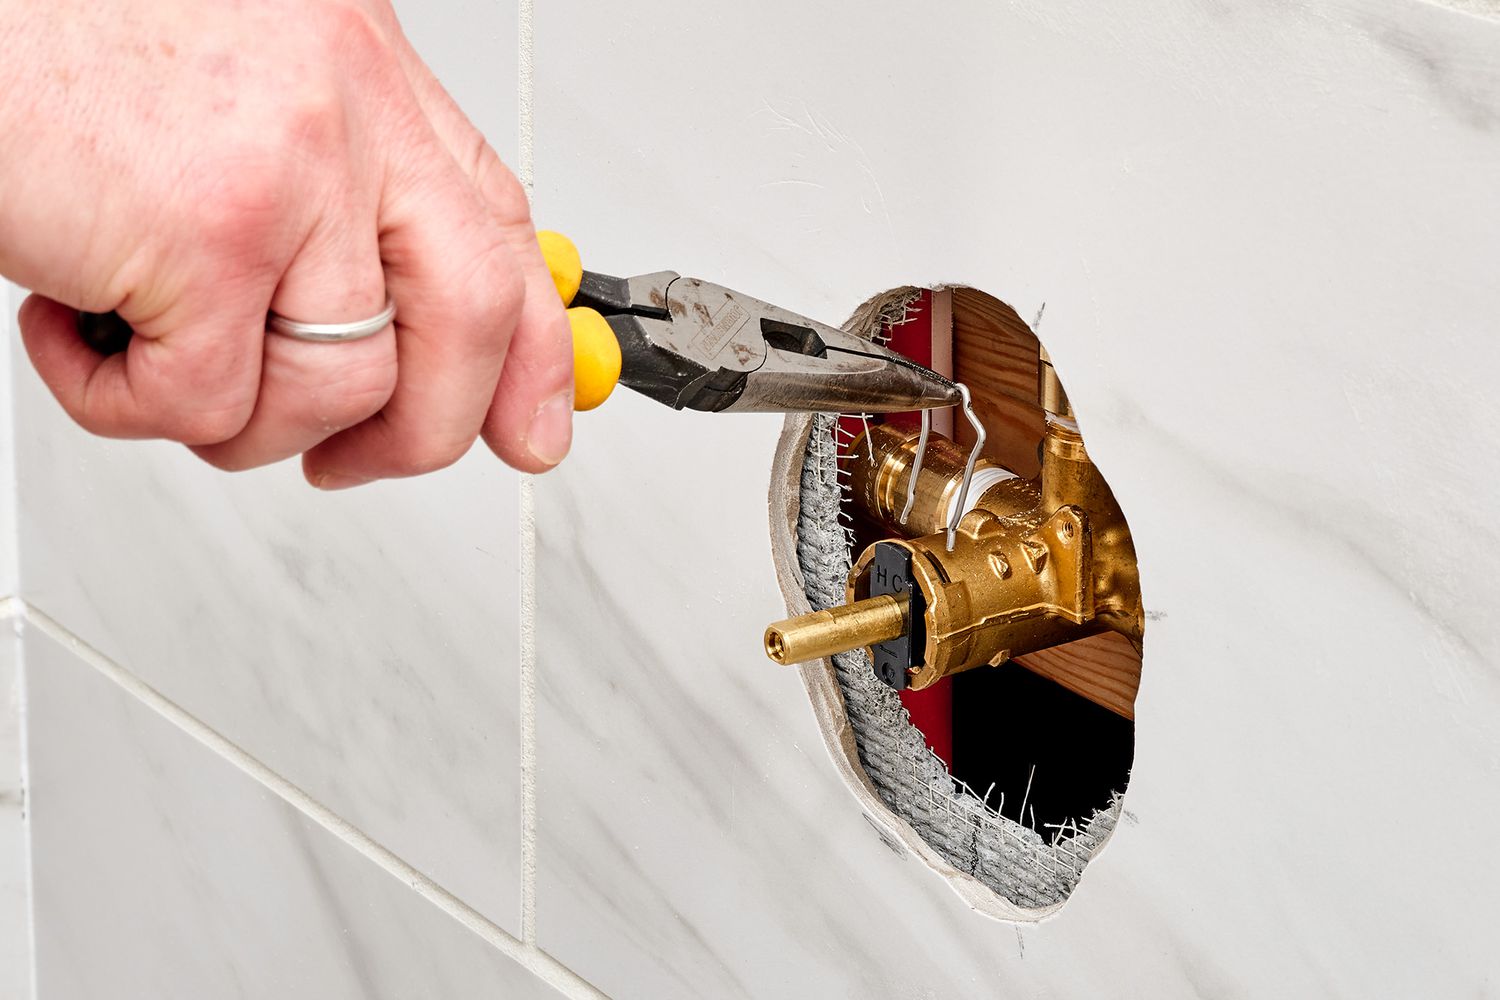
Step 3: Remove Existing Shower Faucet:
With the water supply turned off, it’s time to remove the existing shower faucet. Follow these steps to ensure a smooth removal process:
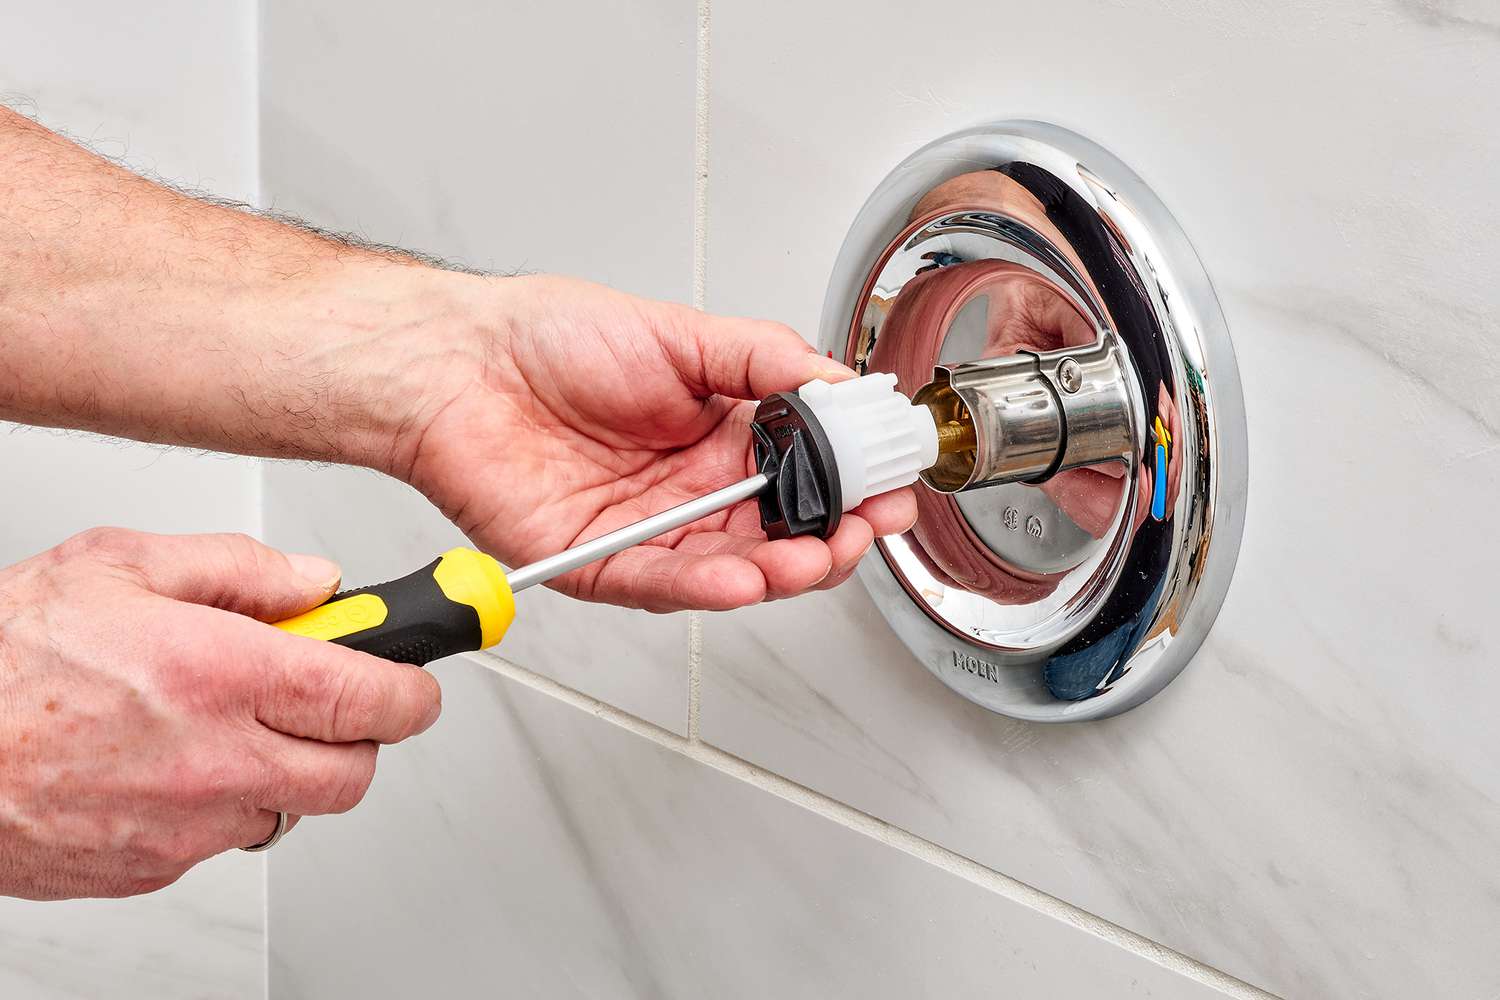
- Start by removing any decorative caps or covers from the handle knobs or escutcheons. These can usually be gently pried off with a flathead screwdriver or your fingers.
- Using an adjustable wrench, carefully unscrew the handle knobs in a counterclockwise direction. Be sure to hold the valve stem in place with your other hand to prevent any damage.
- Next, remove the escutcheon plate by unscrewing the mounting screws. These are usually located behind or underneath the plate. Use a screwdriver or a suitable tool to unscrew them.
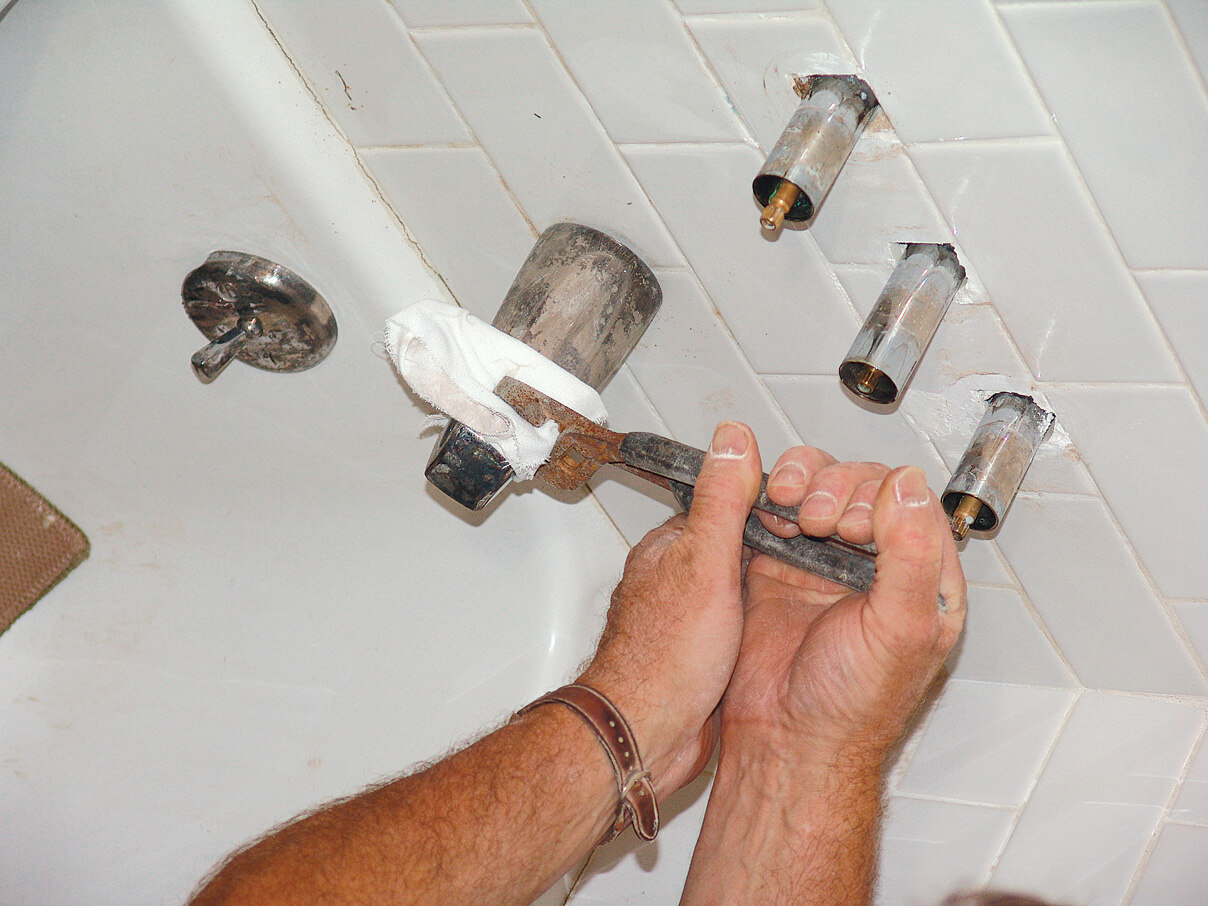
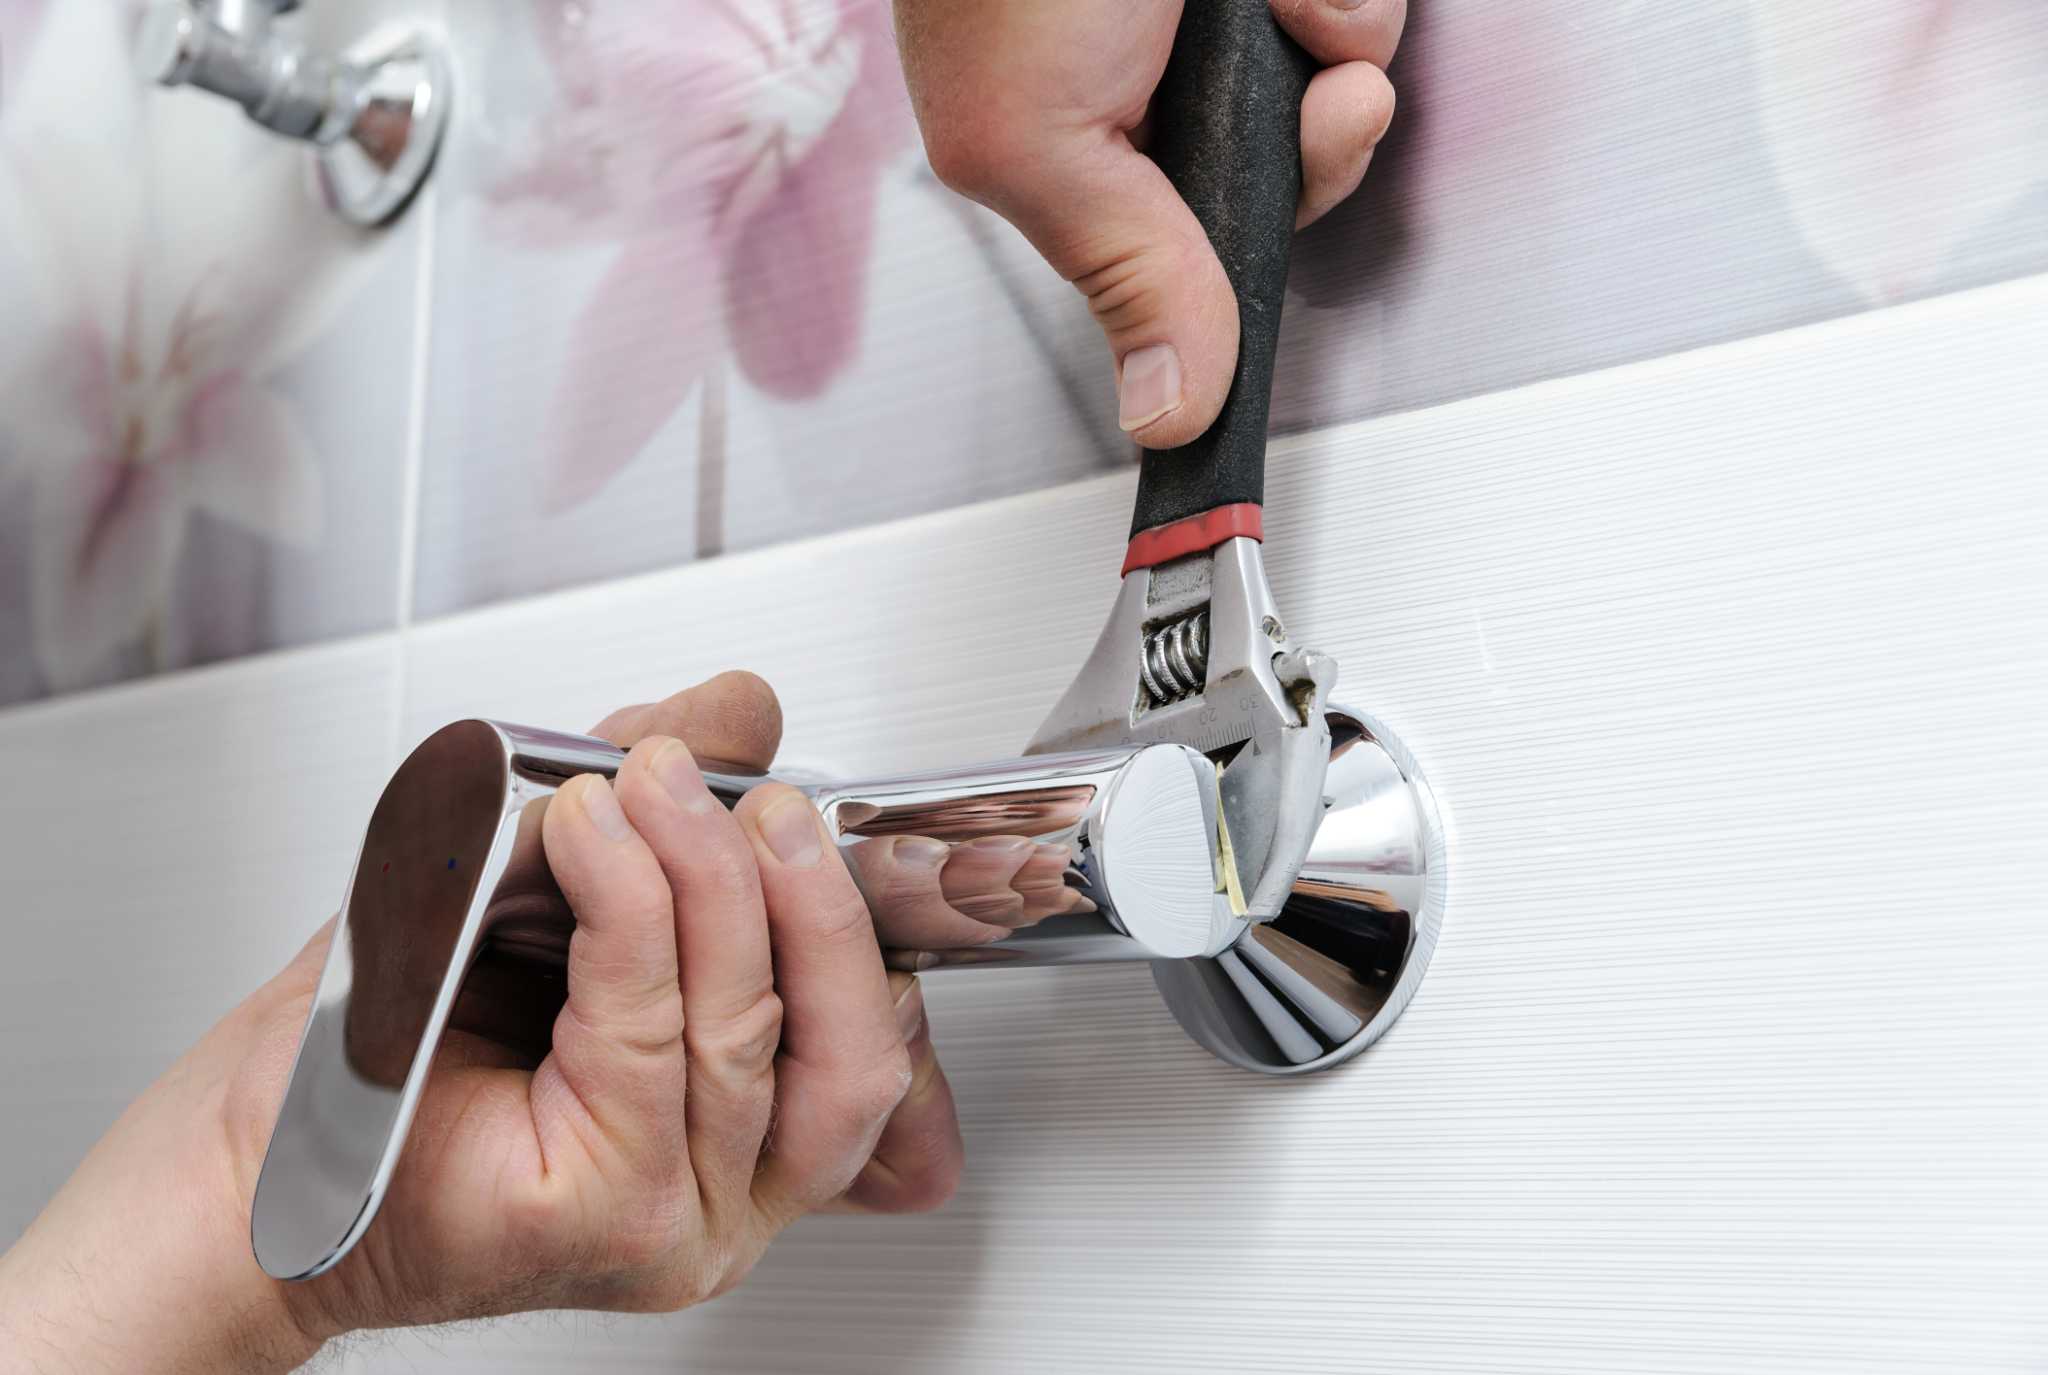
- Once the escutcheon plate is removed, you’ll have access to the valve body. Use an adjustable wrench or tongue and groove pliers to carefully loosen and remove the valve body. Turn the valve body counterclockwise until it is completely detached.
- If there is a tub spout, remove it by unscrewing the setscrew located underneath it. Use an Allen wrench or similar tool to loosen and remove the setscrew.
- Inspect the exposed pipes and fittings for any signs of damage or corrosion. This is a good opportunity to replace any worn-out or faulty components.
Once you’ve successfully removed the existing shower faucet, you can move on to the next step of preparing the area for the installation of the new faucet.
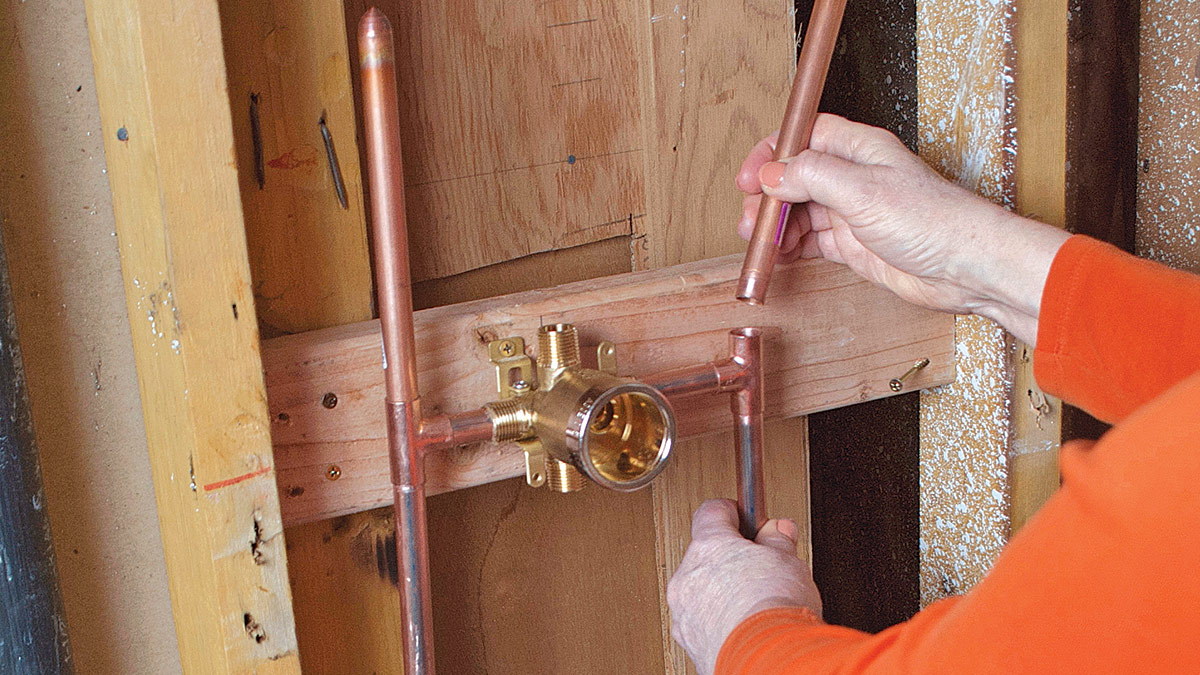
Step 4: Prepare the Area:
Now that you have removed the old shower faucet, it’s time to prepare the area for the installation of the new faucet. Follow these steps to ensure a clean and smooth installation:
- Inspect the exposed pipes and fittings for any signs of damage or corrosion. If you notice any issues, it’s a good idea to replace the damaged components before proceeding with the installation.
- Use a pipe cutter or hacksaw to cut the pipes to the appropriate length, if necessary. Make sure to measure carefully and wear protective gloves and eyewear during this process.
- Once the pipes are cut to the correct length, use a deburring tool or sandpaper to remove any burrs or rough edges from the cut ends. This will ensure a smooth and secure connection with the new faucet.
- Apply plumber’s tape to the threaded ends of the pipes. This will create a watertight seal and prevent any leaks when the new faucet is installed.
- If the new faucet requires the use of a gasket or plumber’s putty, apply the gasket or putty to the underside of the faucet. Make sure to follow the manufacturer’s instructions for the specific installation requirements.
- Before installing the new faucet, clean the area around the pipes and fittings to remove any debris or residue. This will ensure a clean and secure connection between the new faucet and the pipes.
By properly preparing the area, you’ll ensure a secure and leak-free installation of your new shower faucet. With the area ready, you can now proceed to the exciting step of installing the new faucet.
When installing a shower faucet, make sure to turn off the water supply to the shower before beginning. This will prevent any water from leaking out while you work on the installation.
Read more: How Does Shower Faucet Work
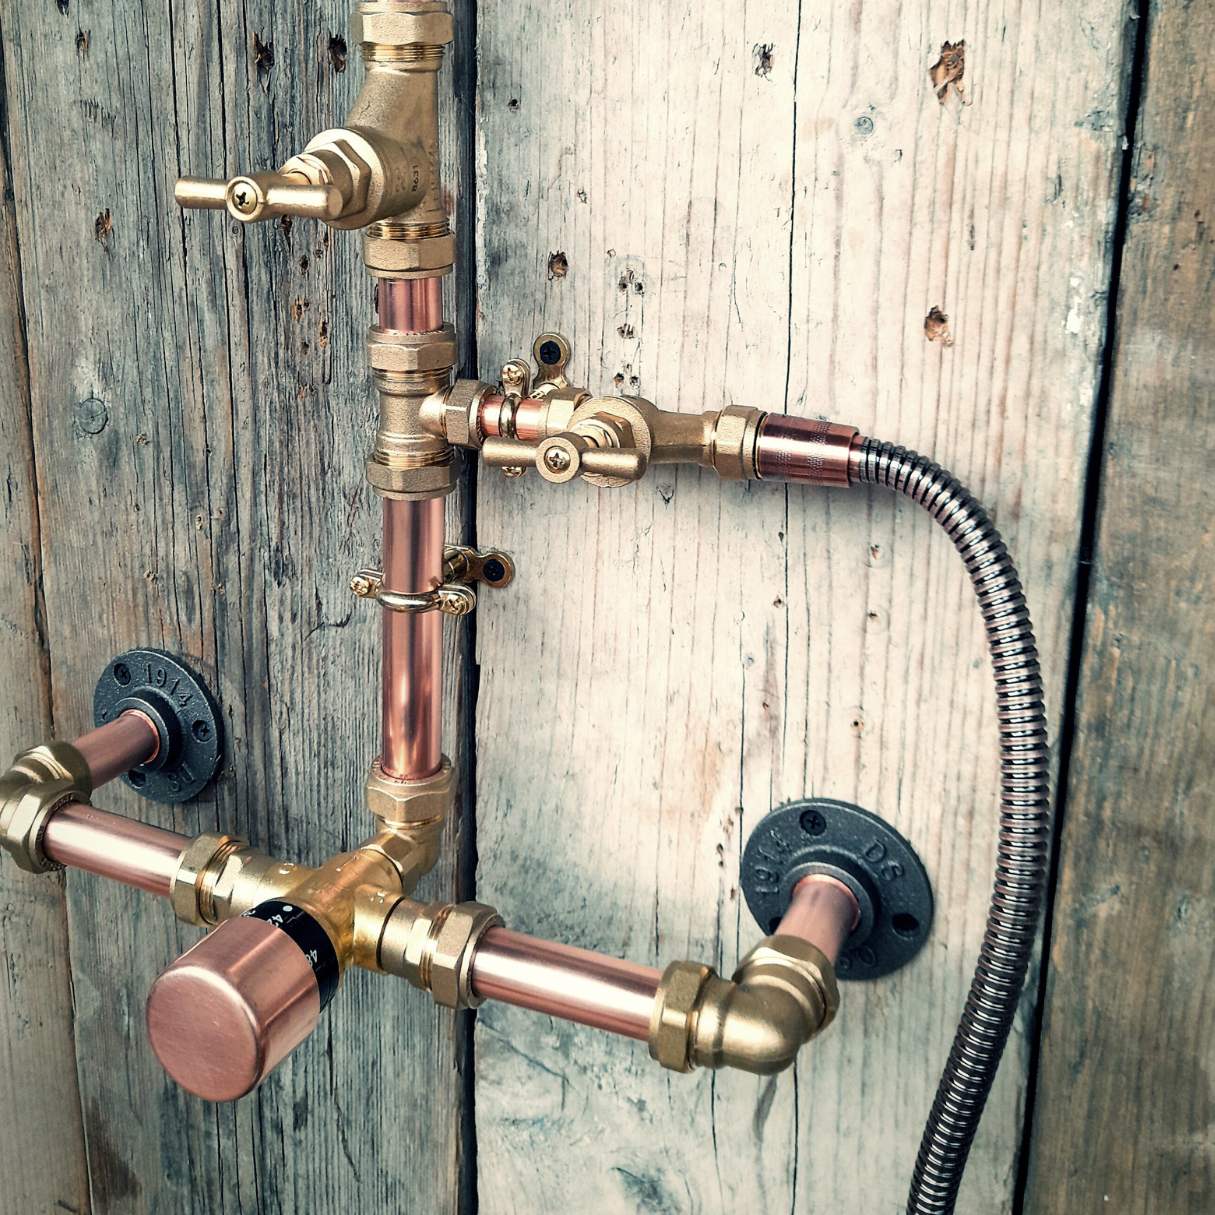
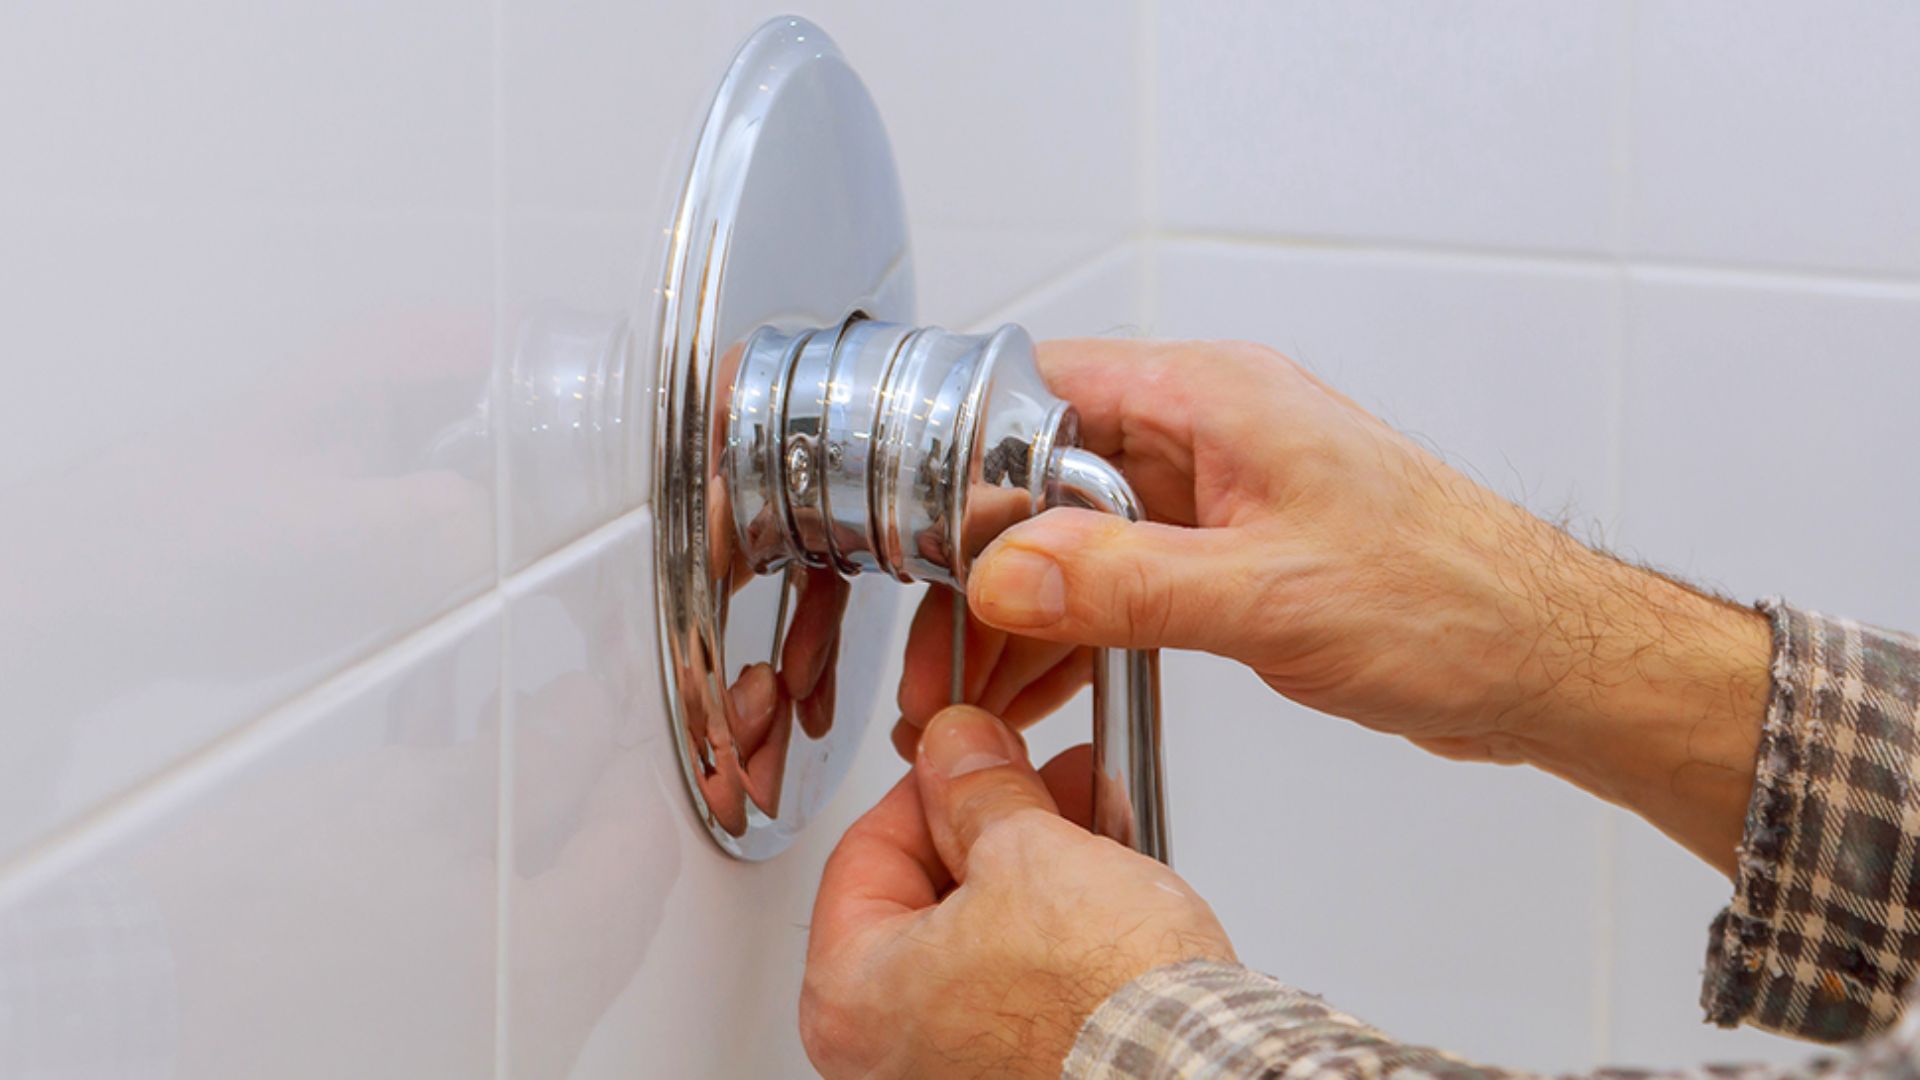
Step 5: Install New Shower Faucet:
With the area prepared, it’s time to install the new shower faucet. Follow these steps to ensure a successful installation:
- Take the new shower faucet and carefully position it over the exposed pipes. Make sure the connections align with the pipes.
- Thread the faucet onto the pipes by turning it clockwise. Use an adjustable wrench or tongue and groove pliers to secure the connection, but be cautious not to overtighten and damage the faucet.
- If the faucet requires additional securing, such as mounting screws or nuts, follow the manufacturer’s instructions and attach them accordingly.
- If there is a tub spout, thread it onto the pipe and tighten it securely. If necessary, use plumber’s putty or a gasket to create a watertight seal.
- Double-check all connections and ensure they are properly tightened. Take care not to cross-thread any connections, as this can lead to leaks.
- Turn on the main water supply to your home and test the new faucet. Check for any leaks or drips, and make any necessary adjustments to the connections.
It’s important to take your time during the installation process and ensure all connections are secure. If you encounter any difficulties or are unsure about any steps, it’s recommended to consult a professional plumber for assistance.
Once you are satisfied with the installation and there are no leaks or issues, you can move on to the next step of testing the faucet.
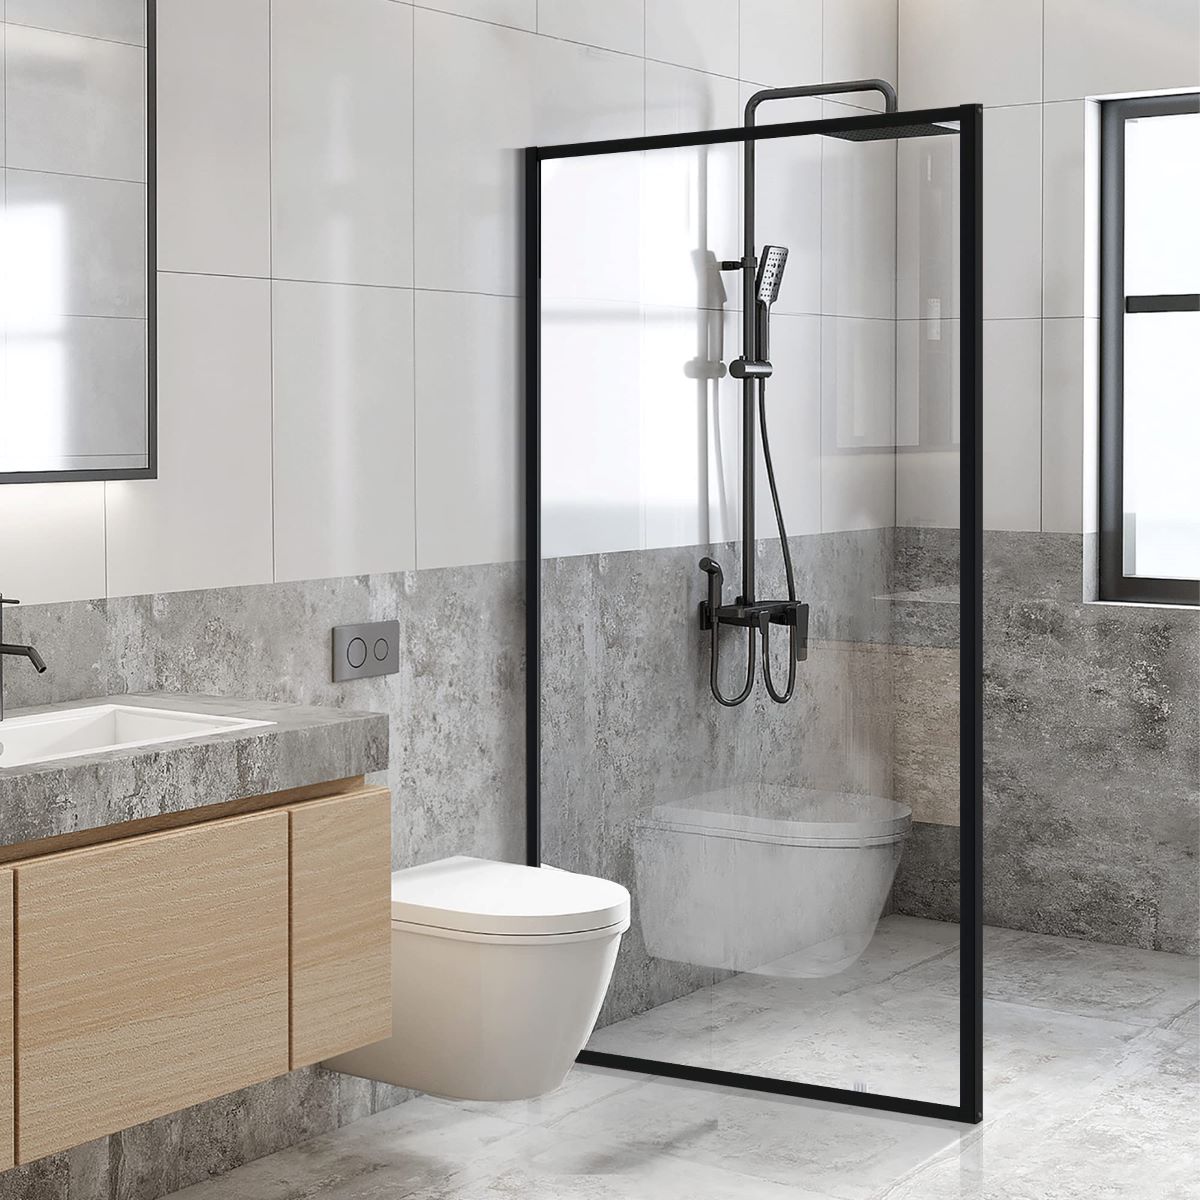
Step 6: Test the Faucet:
Now that you’ve installed the new shower faucet, it’s time to test it to ensure proper functionality. Follow these steps to test the faucet:
- Turn on the main water supply to your home, allowing water to flow to the faucet.
- Check for any leaks or drips around the connections. If you notice any leaks, turn off the water supply and tighten the connections as needed.
- Try turning on both the hot and cold water handles to ensure they are functioning correctly. Make sure the water flows smoothly and evenly from the faucet.
- Check the temperature control if your faucet has one. Adjust it to make sure the water temperature changes accordingly.
- Test the showerhead by turning it on and checking for proper water pressure and spray pattern.
- Listen for any unusual noises or vibrations that could indicate an issue with the installation.
- If everything is working correctly and there are no leaks or issues, congratulations! Your new shower faucet is successfully installed.
If you encounter any problems during the testing phase, make sure to double-check the installation and consult the manufacturer’s instructions. If the issues persist, it may be necessary to seek professional assistance to identify and resolve the problem.
Once you are satisfied with the functionality of the faucet and have confirmed that everything is working properly, you can proceed to the final step of cleaning up and completing the installation.
Step 7: Clean Up and Final Steps:
After successfully testing the new shower faucet, it’s time to clean up the work area and complete the final steps. Follow these steps to wrap up the installation:
- Turn off the main water supply to your home.
- Use a damp cloth or sponge to wipe away any excess debris or residue around the faucet and pipes.
- Inspect the area for any signs of water leakage. If you notice any leaks, double-check the connections and tighten them as necessary.
- Replace any decorative accents, such as escutcheon plates or cover caps, to give the installation a finished look.
- Dispose of any old faucet parts or packaging materials properly.
- Give your new shower faucet a final wipe down to remove any fingerprints and make it shine.
- Enjoy your newly installed shower faucet! Take a moment to appreciate the improved functionality and aesthetics it brings to your bathroom.
It’s important to periodically check the faucet for any signs of wear or leaks and perform any necessary maintenance or repairs. This will ensure its long-term performance and prevent any water damage to your bathroom.
Remember, if you ever feel unsure or encounter any difficulties during the installation process, it’s always best to consult a professional plumber for assistance. They have the expertise and knowledge to handle any challenges that may arise.
With the installation complete, your bathroom now has a refreshed and updated shower faucet that will enhance your showering experience. Enjoy your new faucet and the benefits it brings!
Conclusion:
Congratulations on successfully installing your new shower faucet! By following the step-by-step guide provided in this article, you have transformed your bathroom and improved your daily showering experience. Installing a shower faucet may seem like a daunting task, but with the right tools and knowledge, it can be accomplished by even the most novice DIY enthusiasts.
Remember, throughout the installation process, it’s important to prioritize safety and attention to detail. Take your time, double-check your work, and don’t hesitate to ask for professional assistance if needed. Plumbing tasks require precision to ensure a leak-free and properly functioning faucet.
Once your new shower faucet is installed, be sure to regularly inspect it for any signs of wear, leaks, or damage. Addressing any issues promptly will prolong the lifespan of your faucet and prevent potential water damage in your bathroom.
We hope this guide has provided you with valuable insights and instructions for installing a shower faucet. Remember, if you ever feel unsure or uncomfortable with any step, it’s always a wise decision to consult a professional plumber who can offer guidance and expertise.
Now, it’s time to enjoy the fruits of your labor and indulge in a refreshing and rejuvenating shower experience with your newly installed shower faucet. Cherish the improved functionality and aesthetics it brings to your bathroom, and appreciate the satisfaction of a job well done. Happy showering!
Frequently Asked Questions about How To Install Shower Faucet
Was this page helpful?
At Storables.com, we guarantee accurate and reliable information. Our content, validated by Expert Board Contributors, is crafted following stringent Editorial Policies. We're committed to providing you with well-researched, expert-backed insights for all your informational needs.


0 thoughts on “How To Install Shower Faucet”