
Articles
How To Install Sink In Basement
Modified: October 20, 2024
Learn how to install a sink in your basement with this comprehensive article. Get step-by-step instructions and expert tips to complete the project successfully.
(Many of the links in this article redirect to a specific reviewed product. Your purchase of these products through affiliate links helps to generate commission for Storables.com, at no extra cost. Learn more)
Introduction
Installing a sink in the basement can be a valuable addition to any home. Whether you want to create a utility area for laundry, a workshop with a sink for cleaning tools, or even a mini kitchenette for extra convenience, having a sink in the basement can provide a multitude of benefits.
While the idea of installing a sink in the basement may seem daunting, with the right knowledge and preparation, it can be a relatively straightforward task. In this article, we will guide you through the step-by-step process of how to install a sink in the basement, ensuring that you have all the necessary information to complete the project successfully.
Before you start the installation process, it is important to consider a few key factors. Firstly, you will need to think about the location of the sink. It is crucial to choose a suitable area that allows for proper drainage and access to plumbing lines. Additionally, you will need to determine the type of sink that best fits your needs and space available.
With these considerations in mind, let’s dive into the step-by-step instructions for installing a sink in the basement. By following these guidelines, you will be able to complete the project efficiently and enjoy the benefits of a functional sink in your basement.
Key Takeaways:
- Proper planning and preparation are essential for installing a sink in the basement. Consider measurements, location, and plumbing requirements to ensure a successful and functional installation.
- Thorough testing for leaks and proper sealing are crucial final steps. This ensures the longevity and efficiency of the basement sink, preventing potential water damage and maintaining a polished appearance.
Read more: How To Install Utility Sink In Basement
Step 1: Measure and Plan
The first step in installing a sink in the basement is to measure the space and create a detailed plan of the installation. This will help you determine the size and location of the sink, as well as the necessary modifications to the plumbing and electrical connections.
Start by measuring the area where you intend to install the sink. Consider the depth, width, and height available, as well as any obstructions such as pipes or utility lines. Take accurate measurements of these dimensions and note them down.
Next, determine the location where the sink will be most convenient and functional. Consider proximity to existing plumbing lines, accessibility, and any specific requirements for your intended use of the sink. For example, if you plan to use it for laundry purposes, it should be located near the washing machine.
Once you have chosen the location, mark it on the floor and walls to indicate where the sink will be installed. This will serve as a guide during the installation process and help ensure accurate placement.
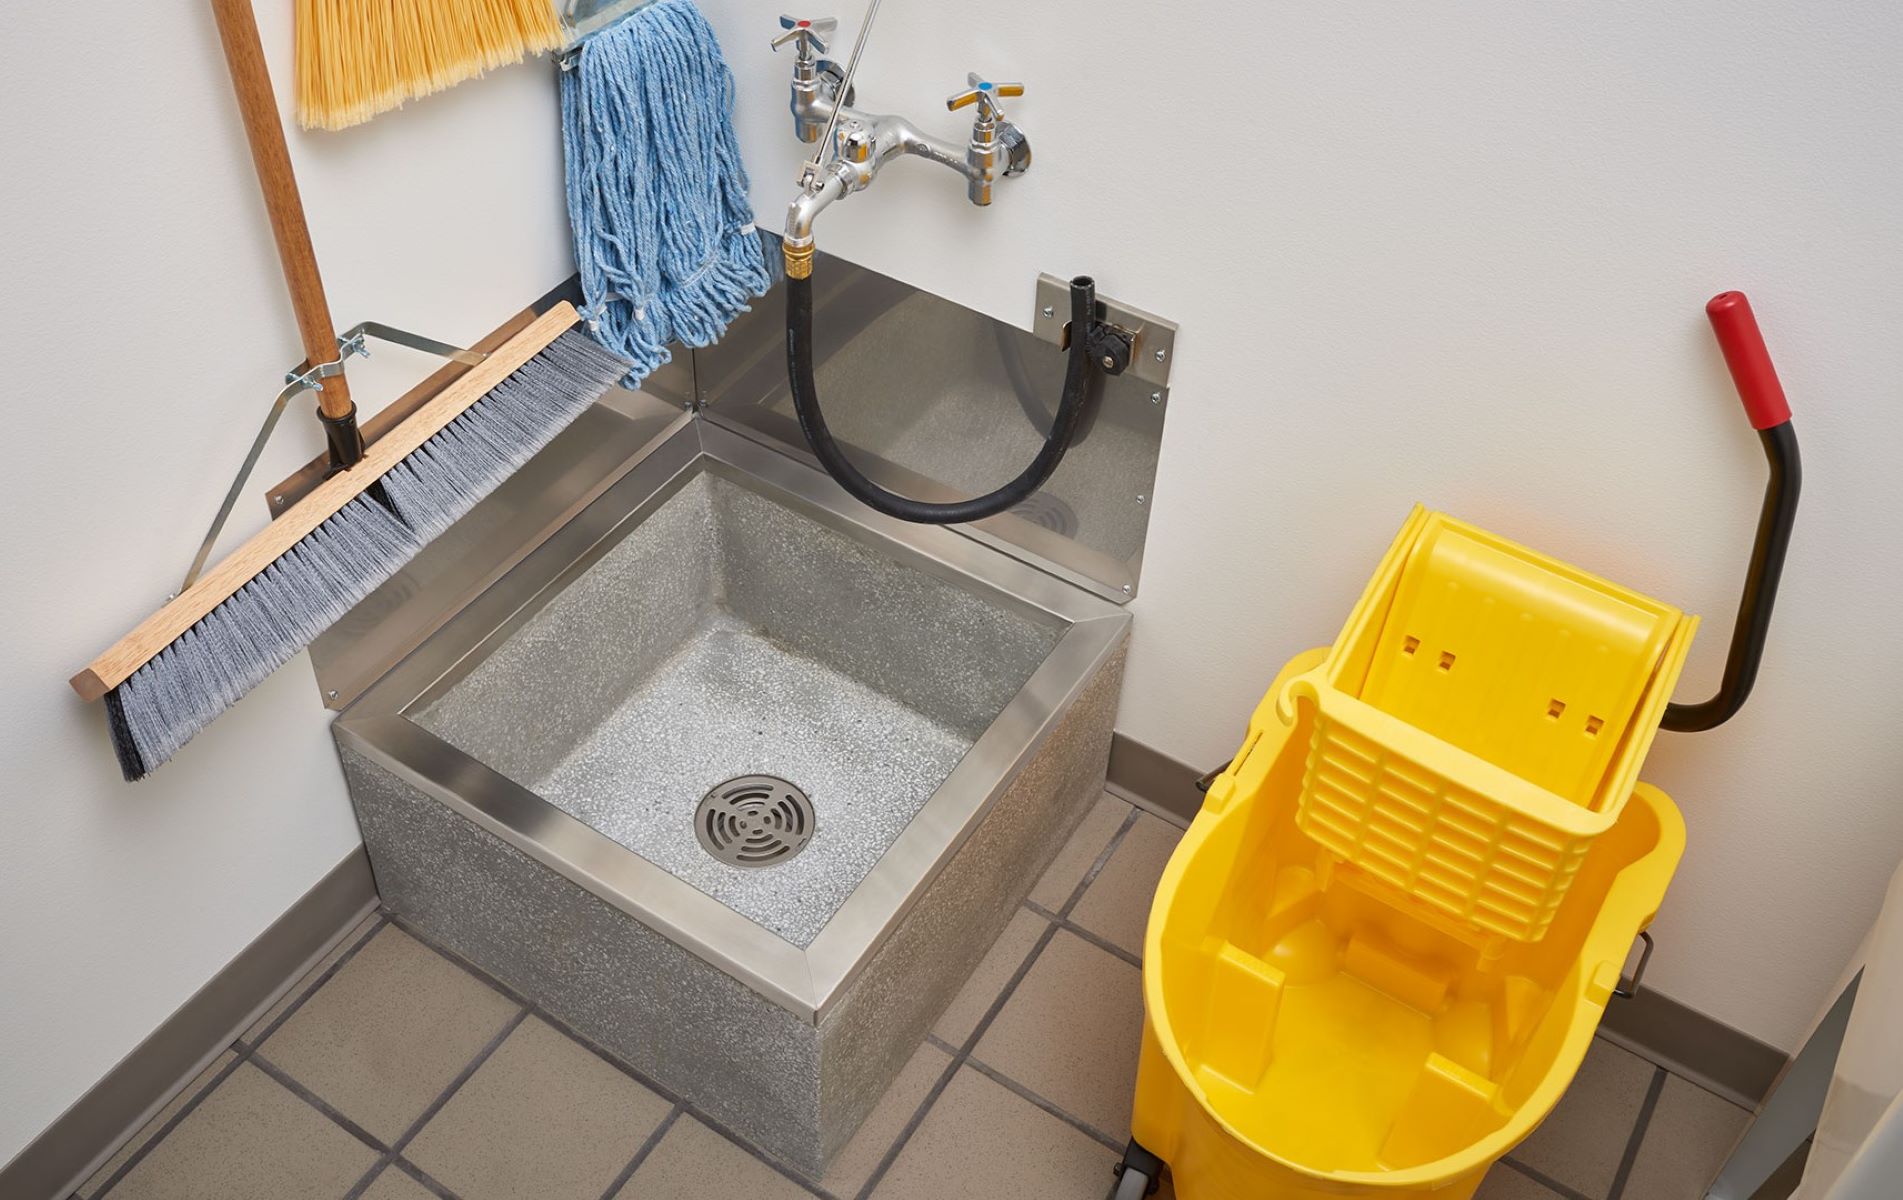
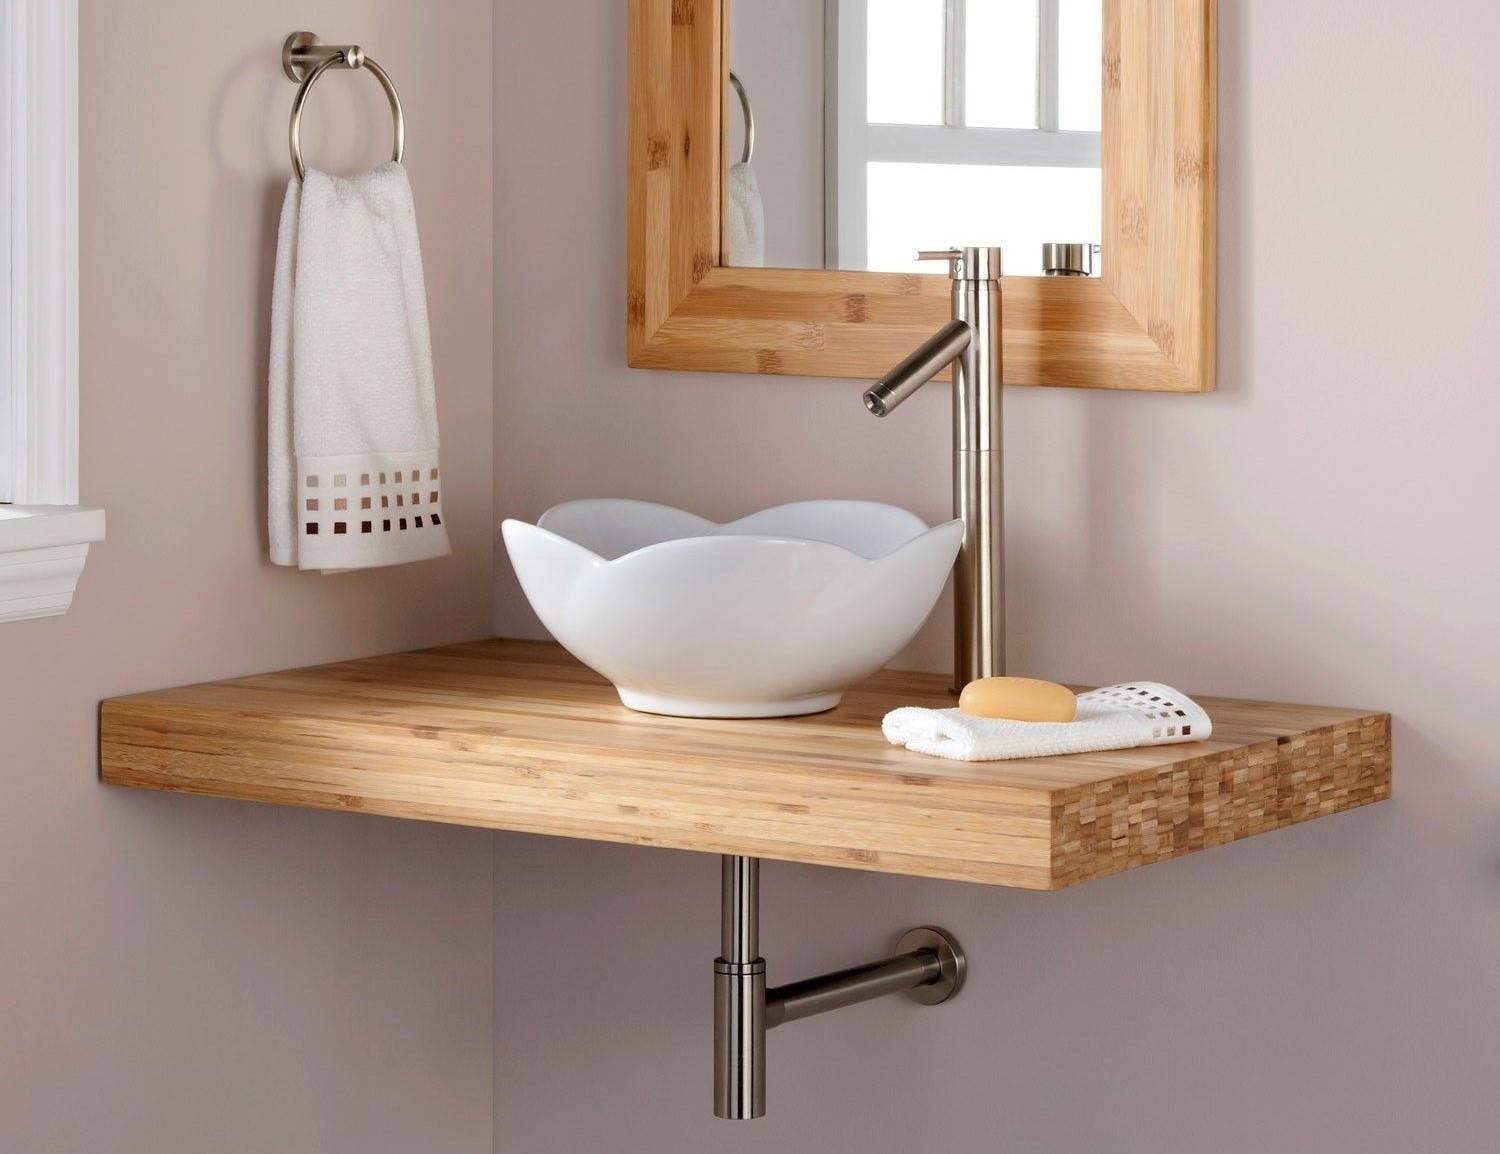
Now, it’s time to consider the type of sink that best suits your needs and the available space. There are various options to choose from, including drop-in sinks, undermount sinks, and wall-mounted sinks. Research different sink styles and select the one that fits your requirements and complements the aesthetics of your basement.
As part of the planning process, it’s important to take into account the necessary modifications to the plumbing and electrical connections. Determine whether you need to install new drain and water lines or if you can connect to existing ones. Consider the location of the main water supply and plan accordingly.
Additionally, check the electrical requirements if you plan to have any electrical components, such as a garbage disposal unit or a dishwasher, connected to the sink. Ensure that you have access to the necessary power source and consult a professional if needed to ensure compliance with electrical codes.
By taking the time to measure and plan out the installation, you will have a clear vision of the project and be well-prepared for the subsequent steps. This thoughtful approach will ultimately save you time and ensure a successful sink installation in your basement.
Step 2: Prepare the Area
Once you have measured and planned the installation of the sink in your basement, the next step is to prepare the area. This involves clearing the space, ensuring proper ventilation, and making any necessary modifications to the walls or floors.
Start by removing any obstacles or clutter from the designated area. This includes moving any furniture, boxes, or other items that may obstruct the installation process. Clearing the space will provide a clean and accessible area to work in.
Next, ensure that the area has proper ventilation. Basements can sometimes be prone to dampness and musty odors. Installing a sink can help mitigate these issues, but it’s still crucial to have good airflow. If the basement doesn’t have windows or sufficient natural ventilation, consider installing a ventilation fan to improve air circulation.
Before proceeding with the installation, it’s necessary to check the condition of the walls and floors. Inspect for any signs of moisture or damage, such as cracks or leaks. If there are any issues, address them before proceeding to prevent future problems. It may be necessary to patch and repair any damaged areas, or even consult a professional if there are structural concerns.
In addition, it’s essential to confirm that the walls and floors are suitable for mounting the sink. Depending on the type of sink you have chosen, you may need to install additional supports or reinforcement. Consult the manufacturer’s instructions for specific mounting requirements and follow them accordingly.
If you plan to install new drain and water lines, this is the time to prepare the area for their installation. Consider the path the plumbing lines will take and ensure that there is enough space for them to run smoothly. If necessary, create channels or access points in the walls or floors to accommodate the plumbing lines.
Lastly, it’s important to have all the necessary tools and materials ready before starting the installation. This includes plumbing supplies, such as pipes, connectors, and sealants, as well as any specific tools required for the type of sink you have chosen. Having everything prepared in advance will ensure a smooth and efficient installation process.
By properly preparing the area, you will create an ideal environment for installing the sink in your basement. Clearing the space, ensuring ventilation, and addressing any maintenance or structural concerns will lay the foundation for a successful installation. With this step complete, you are ready to move on to the next stage of the process.
Step 3: Install Drain and Water Lines
With the area prepared, it’s time to proceed with installing the drain and water lines for your basement sink. This step is crucial for proper functionality and efficient plumbing in your basement.
Start by determining the location of the main drain line. This is typically located in the floor or wall of the basement. If there isn’t an existing drain line nearby, you may need to install one. Consult a professional plumber or the local building codes to ensure compliance and proper installation.
Next, measure and cut the necessary PVC or ABS drain pipe to connect the sink’s drain to the main drain line. Use a hacksaw or pipe cutter to make clean, straight cuts. Ensure that the pipe is at the correct angle for optimal drainage.
Apply PVC or ABS adhesive to the ends of the pipe and fittings, following the manufacturer’s instructions. Join the pieces securely and allow the adhesive to dry completely. It’s essential to ensure a tight and leak-free connection for efficient drainage.
Once the drain line is connected, it’s time to install the water supply lines. Determine the location of the main water supply line in the basement and plan the routing of the pipes accordingly. Use a pipe cutter to cut the copper or PEX tubing to the required lengths.
If using copper tubing, use a pipe cutter to make clean, square cuts. Remove any burrs or rough edges with a file or deburring tool. Flare the ends of the tubing using a flare tool to ensure a secure connection with fittings.
If using PEX tubing, use a PEX cutter to make clean cuts. Insert a crimp ring onto the tubing, slide the fitting onto the tubing, and use a crimping tool to secure the fitting in place.
Connect the water supply lines to the sink’s faucet fixtures using the appropriate fittings, ensuring tight connections without over-tightening. Apply thread tape or pipe joint compound to prevent leaks.
Secure the drain and water lines to the walls or floor using pipe clamps or brackets. This will help prevent movement and ensure long-term stability.
Before moving on to the next step, test the drain and water lines for leaks. Run water through the system and inspect for any signs of leakage. Tighten connections or make necessary adjustments if leaks are detected.
By carefully installing the drain and water lines, you will ensure proper drainage and efficient plumbing for your basement sink. Taking the time to measure, cut, secure, and test the connections will contribute to a successful installation and help avoid potential issues in the future.
When installing a sink in the basement, make sure to check the local building codes and regulations. It’s important to have proper drainage and ventilation to prevent any issues with the plumbing system. Consider hiring a professional plumber for the installation to ensure it’s done correctly.
Step 4: Mount the Sink
Now that the drain and water lines are installed, it’s time to move on to mounting the sink in your basement. Properly mounting the sink is crucial for stability and functionality.
Start by carefully placing the sink into the designated area, aligning it with the marks you made during the planning phase. Ensure that the sink sits level and securely against the countertop or cabinet.
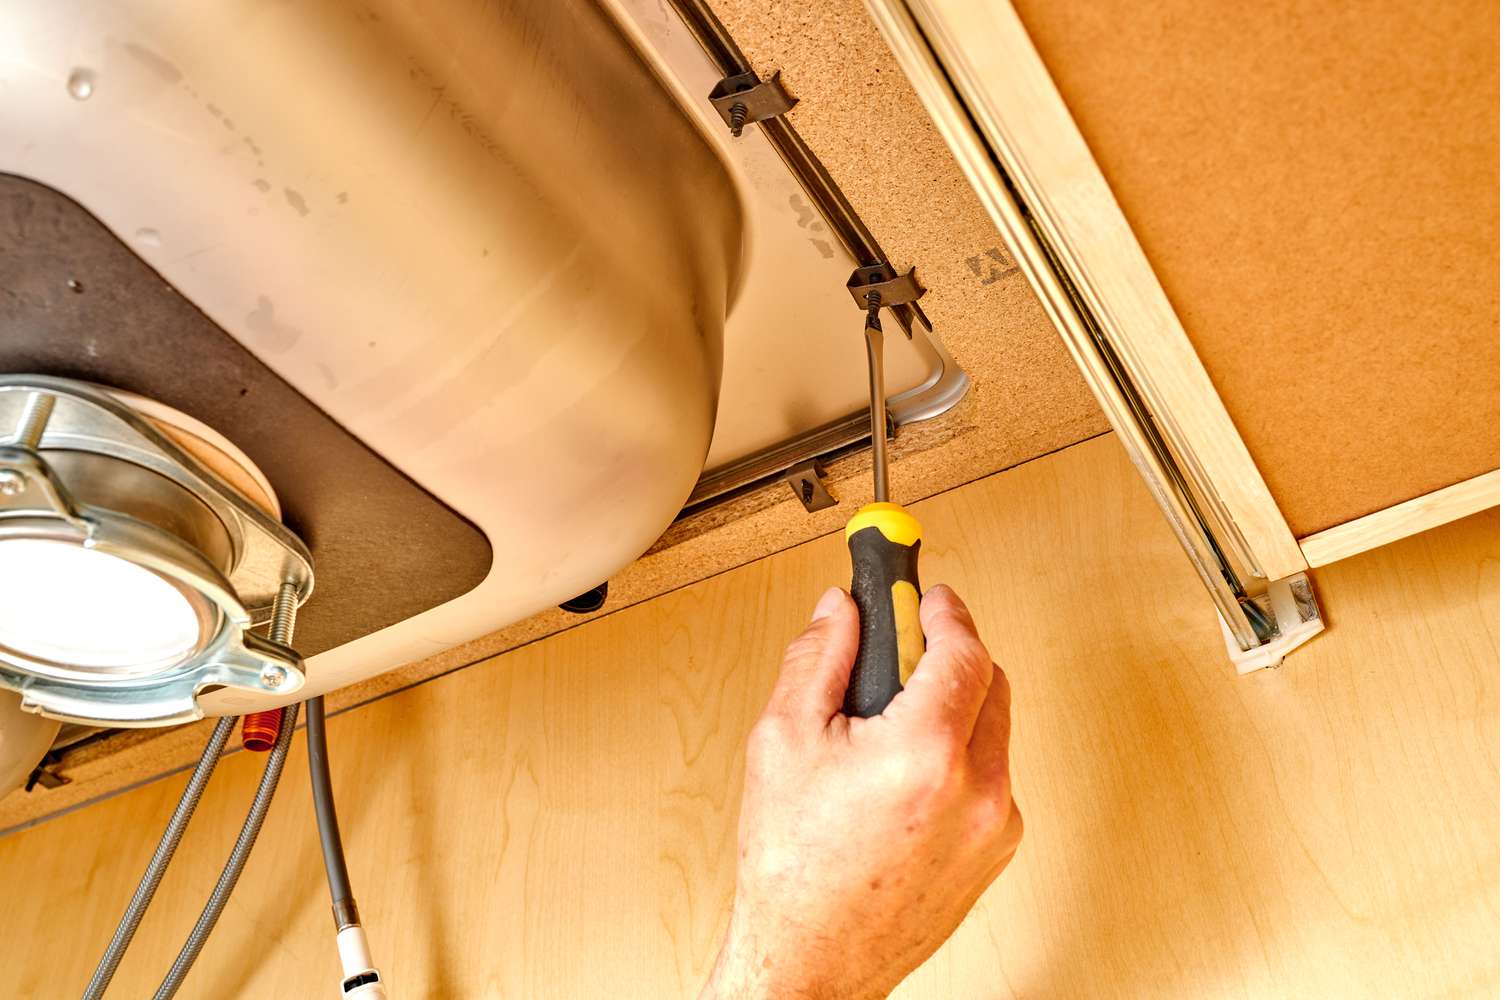
Next, locate the mounting brackets or clips provided with the sink. These are used to secure the sink to the countertop or cabinet surface. Follow the manufacturer’s instructions to determine the correct placement of the mounting brackets.
Using a drill, create pilot holes for the mounting brackets or clips. Make sure to choose the appropriate size drill bit to prevent splitting or damaging the countertop or cabinet surface.
Insert the mounting brackets or clips into the pilot holes. Tighten them securely to the countertop or cabinet using screws or the provided fasteners. Ensure that the sink is firmly attached and doesn’t wobble or move.
Depending on the type of sink you have chosen, additional supports or brackets may be required. Follow the manufacturer’s instructions to determine the specific mounting requirements. Install any additional supports or brackets as needed to ensure proper stability.
Inspect the sink to ensure that it is level and aligned correctly. Adjust the mounting brackets or supports if needed to achieve the desired position.
If your sink includes a separate backsplash or faucet, follow the manufacturer’s instructions to install these components. Connect the necessary water supply lines and securely tighten the fittings.
After mounting the sink, clean the area around the sink and remove any debris or excess caulking or adhesive. This will give your installation a neat and professional appearance.
Once the sink is mounted and all components are securely in place, let the adhesive or caulking dry completely before moving on to the next steps.
Mounting the sink properly is essential for stability and functionality. Taking the time to secure the sink using the appropriate brackets or supports will ensure a sturdy and reliable installation in your basement.
Read more: How To Install Carpet In A Basement
Step 5: Connect the Plumbing
With the sink mounted, it’s time to connect the plumbing to ensure proper water flow and drainage. Connecting the plumbing components correctly is crucial for the functionality and efficiency of your basement sink.
Start by connecting the water supply lines to the corresponding valves or shutoffs. Ensure that the hot water line is connected to the hot water valve, and the cold water line is connected to the cold water valve. Use the appropriate fittings and secure them tightly, but avoid over-tightening.
If using flexible supply lines, make sure they are properly aligned and attached to the valves. If using rigid copper or PEX tubing, ensure that the connections are secure and free from leaks.
Next, connect the sink’s drain pipe to the main drain line. Use the appropriate fittings and connectors based on your specific drain setup. Ensure that the connections are tight and leak-free.
Consider using a P-trap to prevent foul odors from coming back up through the drain pipe. Install the P-trap between the sink’s drain and the main drain line, following the manufacturer’s instructions.
Check the alignment and angulation of the drain pipe to ensure smooth water flow and prevent any potential clogs. Adjust the pipe if necessary to achieve the correct positioning.
If your sink includes a garbage disposal unit, follow the manufacturer’s instructions for proper installation. Connect the disposal unit to the sink’s drain pipe and secure the fittings tightly. Make sure to test the disposal unit to ensure it is functioning properly.
Once all the plumbing connections are made, turn on the water supply to check for leaks. Carefully inspect all connections and pipes for any signs of leakage. If any leaks are detected, tighten the fittings accordingly or make necessary adjustments.
Finally, test the functionality of the sink by running water and checking the drainage. Ensure that water flows smoothly down the drain without any backups or slow drains.
By connecting the plumbing components accurately, you will ensure the proper functioning of your basement sink. Taking the time to secure the water supply lines and drain pipes will help prevent leaks and potential plumbing issues in the future.
Step 6: Test for Leaks
After connecting the plumbing components in your basement sink, it’s essential to thoroughly test for any leaks. Testing for leaks is a crucial step to ensure the proper functioning and longevity of your plumbing system.
Start by running water through the faucet and checking all the connections for any signs of leakage. Inspect the water supply lines, connections, and valves. Look for any drips, water pooling, or moisture around the fittings. Ensure that all connections are tight and secure.
If you notice any leaks, tighten the fittings or connections as needed. Be careful not to overtighten and risk damaging the pipes or connectors. If the leaks persist, it may be necessary to replace faulty parts or seek professional assistance.
Once you have checked the water supply lines, turn off the faucet and proceed to check the drainage system. Fill the sink with water and let it drain completely while observing the drain pipe and connections.
Look for any water leaks or drips along the drain pipe or P-trap. Ensure that all the connections are tight and secure. If you notice any leaks, disassemble the affected connections, inspect the seals, and reassemble them, making sure they are properly aligned and tightened.
After checking the drain pipe, refill the sink with water and let it sit for some time to test for slow drainage or any backup issues. Monitor the sink closely and ensure that the water flows down the drain smoothly without any backups or unusual noises.
If you suspect a clog or any drainage issues, use a sink plunger or a drain snake to clear any blockages. If the problem persists, it may require further investigation or professional assistance.
It’s crucial to perform a thorough leak test to identify any issues and address them promptly. Properly functioning plumbing without leaks will prevent water damage, mold growth, and potential structural issues in your basement.
By diligently testing for leaks, you can ensure the reliability and efficiency of your basement sink’s plumbing system, providing peace of mind and avoiding potential future problems.
Step 7: Seal and Finish the Installation
The final step in installing a sink in your basement is to seal and finish the installation. Properly sealing the sink and other components will not only enhance the appearance but also ensure longevity and prevent water damage.
Begin by applying a bead of silicone caulk along the edges of the sink where it meets the countertop or cabinet. Use a caulk gun to apply an even and continuous line of caulk. This will create a watertight seal and prevent water from seeping into the space between the sink and the countertop or cabinet.
Smooth out the caulk using a caulk smoothing tool or your finger, making sure to remove any excess caulk for a clean and neat finish. Allow the caulk to dry completely according to the manufacturer’s instructions before using the sink.
If your sink includes a separate backsplash, seal the edges with silicone caulk as well to prevent water from penetrating behind it. Apply the caulk along the edges where the backsplash meets the wall and the countertop. Smooth it out for a professional finish.
Inspect the area around the sink and make any necessary touch-ups or adjustments. Clean off any caulk residue or fingerprints for a polished look. Wipe down the sink and surrounding surfaces to remove any dust or debris.
Finally, add any finishing touches to complete the installation. Install the sink’s faucet components according to the manufacturer’s instructions. Test the faucet to ensure proper functionality and check for any water leaks.
Consider adding accessories such as a soap dispenser or a sink tray to enhance the convenience and functionality of the sink. These additional features can provide added value and improve your experience while using the sink.
With the sink properly sealed and all components in place, take a step back to admire your finished installation. Enjoy the benefits of a functional sink in your basement, whether it’s for laundry, a workshop, or a mini kitchenette.
Regularly inspect the sink and its components for any signs of wear or damage. Address any issues promptly to maintain the functionality and longevity of your basement sink.
By sealing and finishing the installation properly, you will ensure that your basement sink not only functions efficiently but also looks great for years to come.
Now that you've mastered installing a sink in your basement, why not tackle the next step? Wondering how much time you'll need for a full basement makeover? Our detailed guide on basement renovations offers insights and timelines to plan efficiently. And if you're looking to update fixtures, learning to install a sink faucet will surely enhance your skills. Both guides provide practical advice to help you continue improving your space with confidence.
Frequently Asked Questions about How To Install Sink In Basement
Was this page helpful?
At Storables.com, we guarantee accurate and reliable information. Our content, validated by Expert Board Contributors, is crafted following stringent Editorial Policies. We're committed to providing you with well-researched, expert-backed insights for all your informational needs.


0 thoughts on “How To Install Sink In Basement”