
Articles
How To Install Insulation In Basement
Modified: October 31, 2024
Learn how to properly install insulation in your basement with these helpful articles. Find step-by-step guides and expert tips to make your basement more energy-efficient.
(Many of the links in this article redirect to a specific reviewed product. Your purchase of these products through affiliate links helps to generate commission for Storables.com, at no extra cost. Learn more)
Introduction
Insulating your basement is a crucial step in creating a comfortable and energy-efficient home. A properly insulated basement can help keep the space warm in winter, cool in summer, and reduce your overall energy consumption. Not only does insulation improve the comfort of your living environment, but it can also help prevent moisture issues and save you money on heating and cooling costs.
In this article, we will guide you through the process of installing insulation in your basement. Whether you are finishing your basement for additional living space or simply looking to improve the energy efficiency of your home, these steps will help you achieve your goal. From preparing the basement for insulation to choosing the right type of insulation and finally installing it, we will cover everything you need to know.
Before we dive into the installation process, there are a few things to keep in mind. First, ensure that your basement is dry and free from any water leaks or moisture issues. Addressing any potential water problems beforehand is essential to prevent future damage to your insulation and the overall integrity of your basement. Additionally, it is important to wear appropriate safety gear, such as gloves and a dust mask, when handling insulation materials.
Now, without further ado, let’s get started with step one: preparing your basement for insulation.
Key Takeaways:
- Properly insulating your basement can improve energy efficiency, prevent moisture issues, and enhance overall comfort. From preparation to installation, attention to detail is crucial for a successful insulation project.
- Choosing the right insulation type, measuring and cutting accurately, and sealing gaps are essential steps in creating a well-insulated basement. Consider optional vapor barriers for added moisture protection.
Step 1: Prepare the Basement for Insulation
Before beginning the installation process, it is important to prepare your basement to ensure a successful insulation project. Here are the key steps to follow:
- Clean and declutter: Start by removing any items, debris, or clutter from your basement. This will give you a clear and open space to work with.
- Inspect for moisture: Check for any signs of moisture or water leaks in your basement. Look for water stains on walls or floors, musty odors, or any visible signs of water damage. If you find any issues, address them before proceeding with the insulation installation.
- Repair cracks and gaps: Inspect the walls and floors for any cracks or gaps. Use a suitable filler or sealant to repair these areas, as they can allow air and moisture to penetrate your basement.
- Seal foundation walls: Apply a waterproofing sealer or paint to the foundation walls to prevent moisture from entering the basement. This will help protect your insulation and maintain a dry environment.
- Check for mold: Look for any signs of mold or mildew in your basement. If you discover mold growth, it is important to address the issue before proceeding with insulation. Consult with a professional for proper mold remediation.
By taking these steps to prepare your basement, you are ensuring a clean, dry, and secure environment for the insulation installation. This will maximize the effectiveness of your insulation and prevent any potential issues down the line.
Step 2: Choose the Right Type of Insulation
Choosing the right type of insulation for your basement is crucial to achieve optimal energy efficiency and comfort. There are several different insulation options available, each with its own pros and cons. Here are a few popular options to consider:
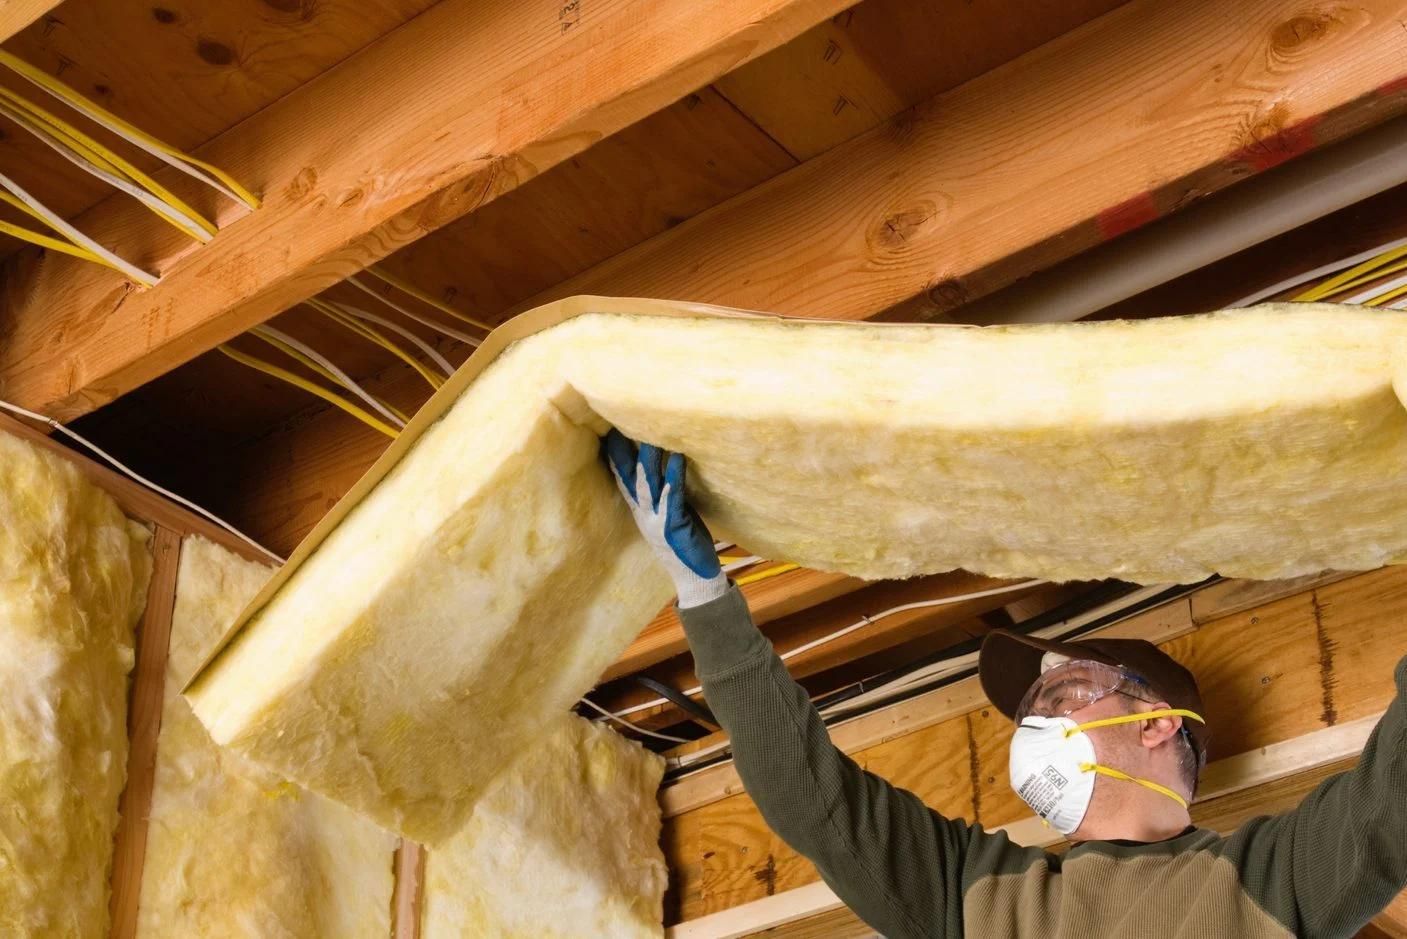
- Fiberglass batts: Fiberglass batts are a commonly used insulation material. They come in pre-cut sheets and are relatively easy to install. Fiberglass batts provide good thermal insulation and are cost-effective. However, they can be tricky to fit into tight or irregular spaces.
- Spray foam insulation: Spray foam insulation is a popular choice for basements. It provides excellent air sealing properties and can expand to fill gaps and cracks. Spray foam insulation offers high insulation value and helps reduce energy loss. However, it requires professional installation and can be more expensive than other options.
- Rigid foam insulation: Rigid foam insulation is a versatile option for basement insulation. It is moisture-resistant and provides good thermal resistance. Rigid foam insulation comes in large sheets or panels and can be easily cut to fit. It is also lightweight and easy to install. However, it may require additional framing to secure it in place.
- Mineral wool insulation: Mineral wool insulation is made from natural or synthetic fibers and provides good thermal and sound insulation. It is fire-resistant and can help improve the overall safety of your basement. Mineral wool insulation is available in batts or rigid panels and is relatively easy to install. However, it can be more expensive than other options.
When choosing the right type of insulation, consider factors such as the climate in your area, your budget, and any specific requirements of your basement. It is also important to check local building codes and regulations to ensure compliance.
Keep in mind that proper installation is essential for insulation effectiveness. If you are unsure about installing the insulation yourself, it is recommended to seek professional assistance. They can help you select the appropriate insulation type and ensure a proper installation for optimal performance.
Step 3: Measure and Cut the Insulation
Once you have chosen the right type of insulation for your basement, the next step is to measure and cut the insulation to fit the walls and ceiling. Proper measurements ensure a snug fit and maximum insulation effectiveness. Here are the steps to follow:
- Measure the walls: Start by measuring the height and width of each wall where you plan to install insulation. Use a measuring tape to get accurate measurements. Take note of any obstacles such as windows, doors, or electrical outlets.
- Cut the insulation: Using your measurements as a guide, cut the insulation material to the appropriate size using a sharp utility knife or insulation cutter. Make sure to wear gloves and follow safety guidelines when cutting insulation to avoid any injuries.
- Leave space for electrical outlets: If there are electrical outlets on the walls, cut openings in the insulation to fit around them. Ensure that the cutout matches the size and shape of the outlet box. This will allow the insulation to snugly fit against the wall while still providing access to the outlet.
- Mark for any obstructions: If there are any pipes, ducts, or other obstructions on the walls, mark their locations on the insulation. This will help you cut out the necessary openings to accommodate these obstructions while maintaining a continuous insulation barrier.
- Repeat for the ceiling: If you are insulating the basement ceiling, repeat the same measuring and cutting process for the ceiling insulation. Take into account any light fixtures or other ceiling fixtures that may require special accommodations.
It’s important to be precise with your measurements and cuts to ensure a proper fit. Remember to account for any irregularities or angles in the walls or ceiling and make appropriate adjustments when cutting the insulation.
By measuring and cutting the insulation accurately, you can create a seamless insulation barrier that effectively reduces heat transfer and improves energy efficiency in your basement.
Step 4: Install Insulation in the Basement Walls
With the insulation material properly measured and cut, it’s time to start installing it in the basement walls. Proper installation ensures a tight fit and maximum insulation effectiveness. Here are the steps to follow:
- Start from the corner: Begin installing the insulation in one corner of the basement. This will allow you to work your way around the walls systematically.
- Place the insulation: Take the cut insulation piece and firmly press it against the wall. Make sure it fits snugly and covers the entire wall surface. If needed, gently trim the edges to ensure a proper fit.
- Secure the insulation: Use adhesive or insulation hangers to secure the insulation in place. Adhesive can be applied to the back of the insulation to adhere it to the wall. Alternatively, insulation hangers can be inserted into the wall and used to hold the insulation in place.
- Seal the joints: If you have installed multiple pieces of insulation, make sure to seal the joints to create a continuous barrier. Use insulation tape or caulk to seal any gaps between the pieces.
- Repeat the process: Continue installing the insulation in a step-by-step manner, working your way around the basement walls. Take your time to ensure each piece is properly installed and secured.
When installing the insulation, be mindful of any electrical wires or plumbing lines on the walls. Avoid covering these areas with insulation to prevent any potential risks or hindrance to maintenance or repairs.
As you progress, periodically double-check the installed insulation for any gaps, loose sections, or areas that may need additional adhesion. Fix any issues immediately to maintain the integrity of the insulation barrier.
Remember, proper installation is crucial for insulation effectiveness and energy efficiency. Take your time, follow the manufacturer’s guidelines, and ensure a tight and secure installation.
When installing insulation in a basement, make sure to seal any gaps or cracks in the walls and floors to prevent air leakage. This will help improve the effectiveness of the insulation and reduce energy costs.
Read more: How To Insulate A Basement
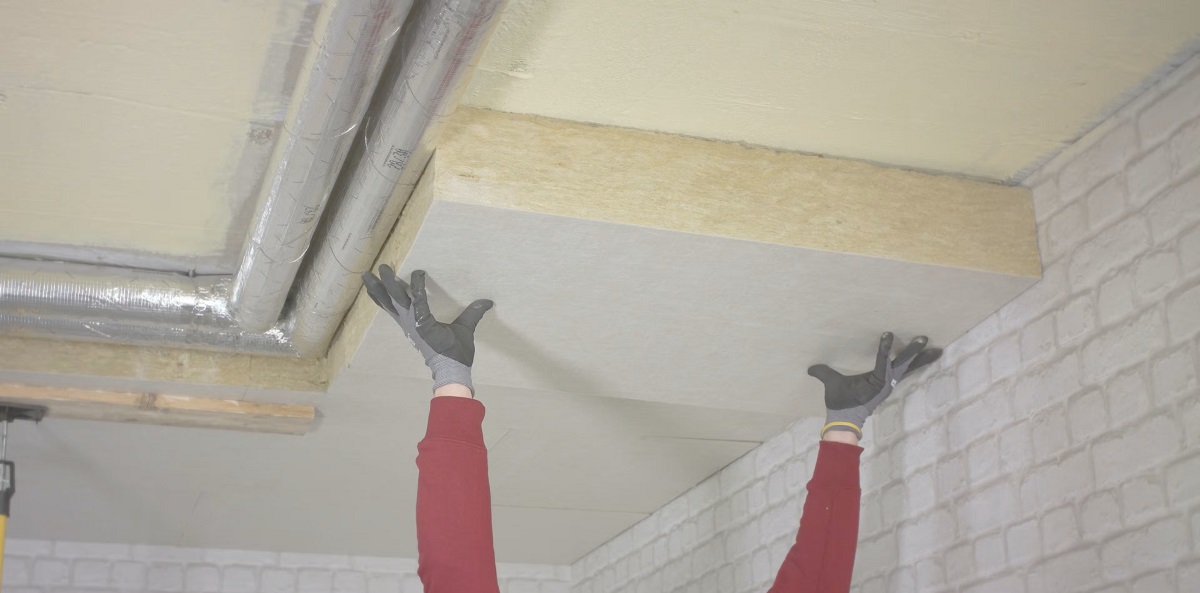
Step 5: Insulate the Basement Ceiling
Insulating the basement ceiling is an important step to enhance the energy efficiency and comfort of your basement. By insulating the ceiling, you can minimize heat loss and reduce noise transmission from the upper floors. Here’s how to insulate your basement ceiling:
- Prepare the ceiling: Before installing the insulation, clean the ceiling surface and ensure any electrical wires or fixtures are properly secured and not obstructed by the insulation. Remove any debris or objects that may hinder the insulation installation process.
- Cut the insulation: Measure and cut the insulation material to fit between the ceiling joists. Ensure the width of the insulation matches the distance between the joists, and the length spans the entire distance from one end of the joist to the other.
- Place the insulation: Insert the cut insulation pieces in between the ceiling joists. Press firmly to ensure a snug fit and make necessary adjustments to accommodate any obstructions such as light fixtures or vents.
- Secure the insulation: Use insulation supports or wire hangers to hold the insulation in place. These can be attached to the joists to prevent the insulation from sagging or falling down over time. Alternatively, rigid foam insulation can be used, as it can stay in place without additional support.
- Seal the gaps: Inspect the installed insulation and check for any gaps or spaces between the insulation and the joists. Use insulation tape or caulk to seal these gaps and create a proper thermal barrier.
Insulating the basement ceiling not only helps with temperature control but also improves sound insulation. It can help reduce noise transmission from footsteps and other activities happening in the upper floors, creating a quieter and more comfortable basement environment.
Remember to follow the manufacturer’s guidelines and recommendations for the specific insulation material you are using. Proper installation and sealing are key to ensuring the effectiveness of the basement ceiling insulation.
With the basement ceiling insulation complete, you are one step closer to achieving a well-insulated basement that provides both energy efficiency and soundproofing benefits.
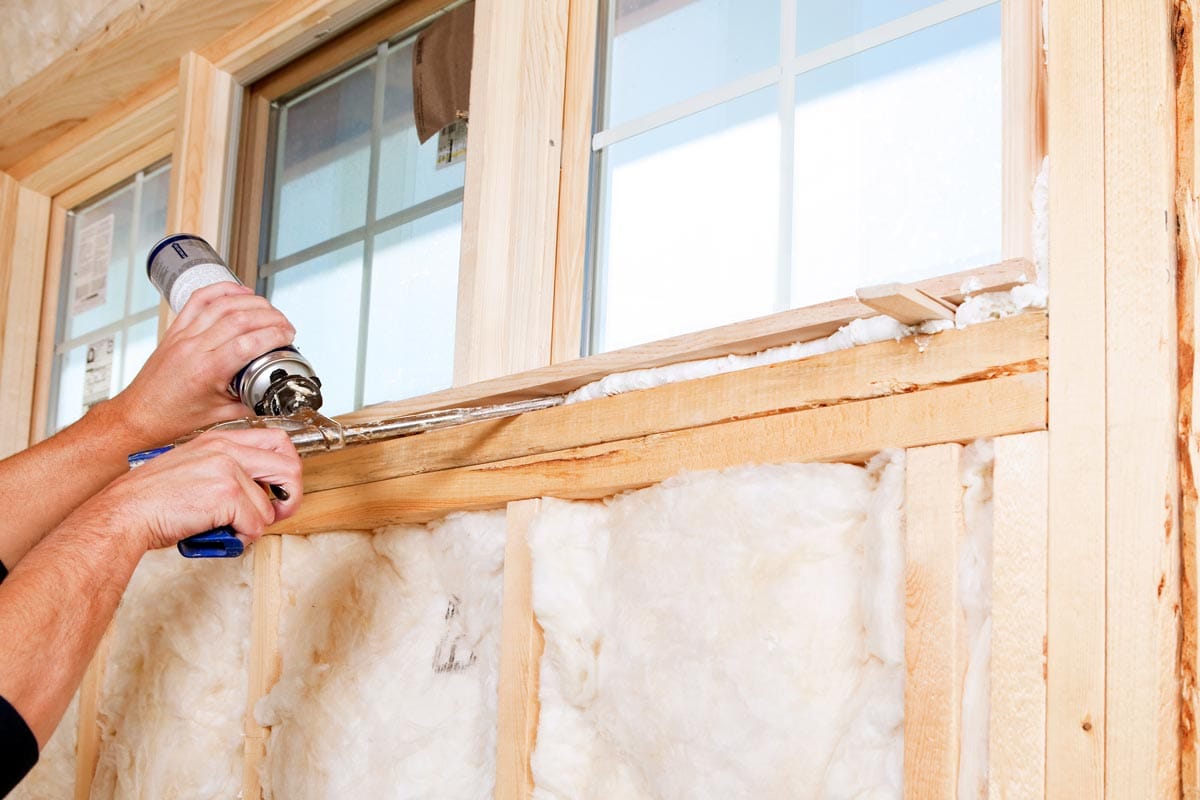
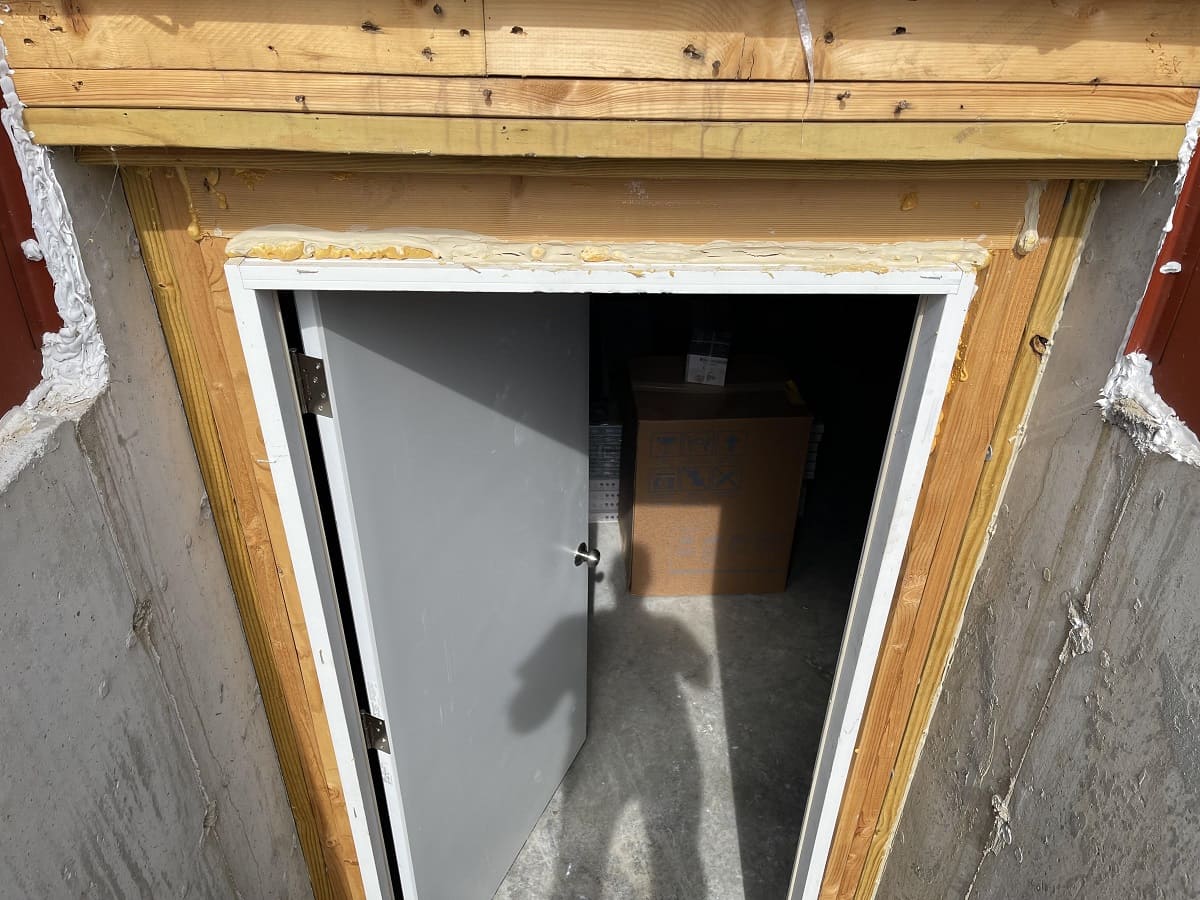
Step 6: Seal any Gaps or Air Leaks
One of the important steps in insulating your basement is to seal any gaps or air leaks that can compromise the effectiveness of your insulation. Proper sealing helps to prevent drafts, reduce energy loss, and improve overall energy efficiency. Here’s a guide on how to seal gaps and air leaks in your basement:
- Inspect for gaps or cracks: Carefully examine the walls, windows, doors, and any other areas where air leakage can occur. Look for gaps, cracks, and spaces where air can escape or enter.
- Seal electrical outlets and switches: Use foam gaskets or insulation pads to seal around electrical outlets and switches on the walls. Remove the cover plate, place the gasket or pad over the outlet or switch, and then reattach the cover plate.
- Weatherstrip windows and doors: Apply weatherstripping to windows and doors to create a tight seal. Use self-adhesive weatherstripping or door sweeps to seal gaps and prevent air infiltration.
- Caulk gaps and cracks: Use caulk to seal gaps and cracks around windows, doors, baseboards, and other areas where air can leak. Choose a caulk that is suitable for the material and ensure proper adhesion.
- Insulate pipes and ducts: Insulate exposed pipes and ducts using foam pipe insulation or HVAC duct insulation wrap. This will prevent heat loss and reduce the likelihood of condensation and moisture buildup on the surfaces.
- Fill gaps around plumbing penetrations: Use expanding foam or caulk to seal gaps around plumbing penetrations, such as pipes that pass through walls or floors. This will prevent air leakage and potential moisture issues.
Properly sealing gaps and air leaks in your basement not only improves insulation performance but also helps create a more comfortable and energy-efficient space. It prevents unnecessary heat loss or gain, enhances air quality, and reduces your overall energy consumption.
Be thorough in your inspection and sealing process, paying attention to even the smallest gaps or cracks. A comprehensive sealing strategy will ensure a well-insulated and airtight basement.
Step 7: Consider Vapor Barriers (Optional)
While not always necessary, incorporating a vapor barrier in your basement insulation can offer added protection against moisture and humidity. Vapor barriers help to prevent the passage of moisture from the ground or walls into the basement, reducing the risk of mold and water damage. Here’s what you need to know about installing a vapor barrier:
- Evaluate the need: Assess the moisture levels in your basement and the potential for moisture intrusion. If you have a history of dampness or high humidity, or if your basement is below ground level, a vapor barrier may be beneficial. However, if your basement is dry and well-sealed, a vapor barrier might not be necessary.
- Choose the right type: Select a vapor barrier material suitable for your basement. The most common options are plastic sheeting or vapor barrier paint. Plastic sheeting is typically installed as a continuous barrier on the walls or ceiling, while vapor barrier paint is applied like regular paint but offers moisture resistance.
- Install the vapor barrier: If using plastic sheeting, cut it to fit the dimensions of the walls or ceiling. Affix the plastic sheeting to the walls using adhesive, staples, or a combination of both. Overlap the seams and seal them using vapor barrier tape. If using vapor barrier paint, follow the manufacturer’s instructions for proper application.
- Consider ventilation: Proper ventilation is crucial in preventing moisture buildup. Ensure that your basement has good air circulation and consider installing a dehumidifier if necessary.
- Consult with professionals: If you are uncertain about the need for a vapor barrier or the installation process, it is advisable to consult with professionals who specialize in basement insulation. They can assess your specific situation and provide expert guidance.
It is important to note that vapor barriers can be controversial, as improper installation or the use of a barrier in certain situations can trap moisture and lead to additional problems. Consulting with professionals or conducting thorough research before deciding on a vapor barrier is highly recommended.
Remember that the decision to install a vapor barrier may differ depending on your specific circumstances. Assess the moisture levels in your basement and consult relevant experts to determine if a vapor barrier is necessary for your insulation project.
Step 8: Finishing Touches and Conclusion
Congratulations, you’re almost done with insulating your basement! Now, it’s time to focus on the finishing touches and wrap up the project. Here’s what you need to do:
- Check for any missed spots: Take a final look around your basement to ensure that all areas are properly insulated. Double-check corners, edges, and any hard-to-reach spots that may have been overlooked during the installation process.
- Install wall coverings: If desired, you can further enhance the appearance and functionality of your basement by installing wall coverings. This could include drywall, paneling, or other finishes that complement your basement decor.
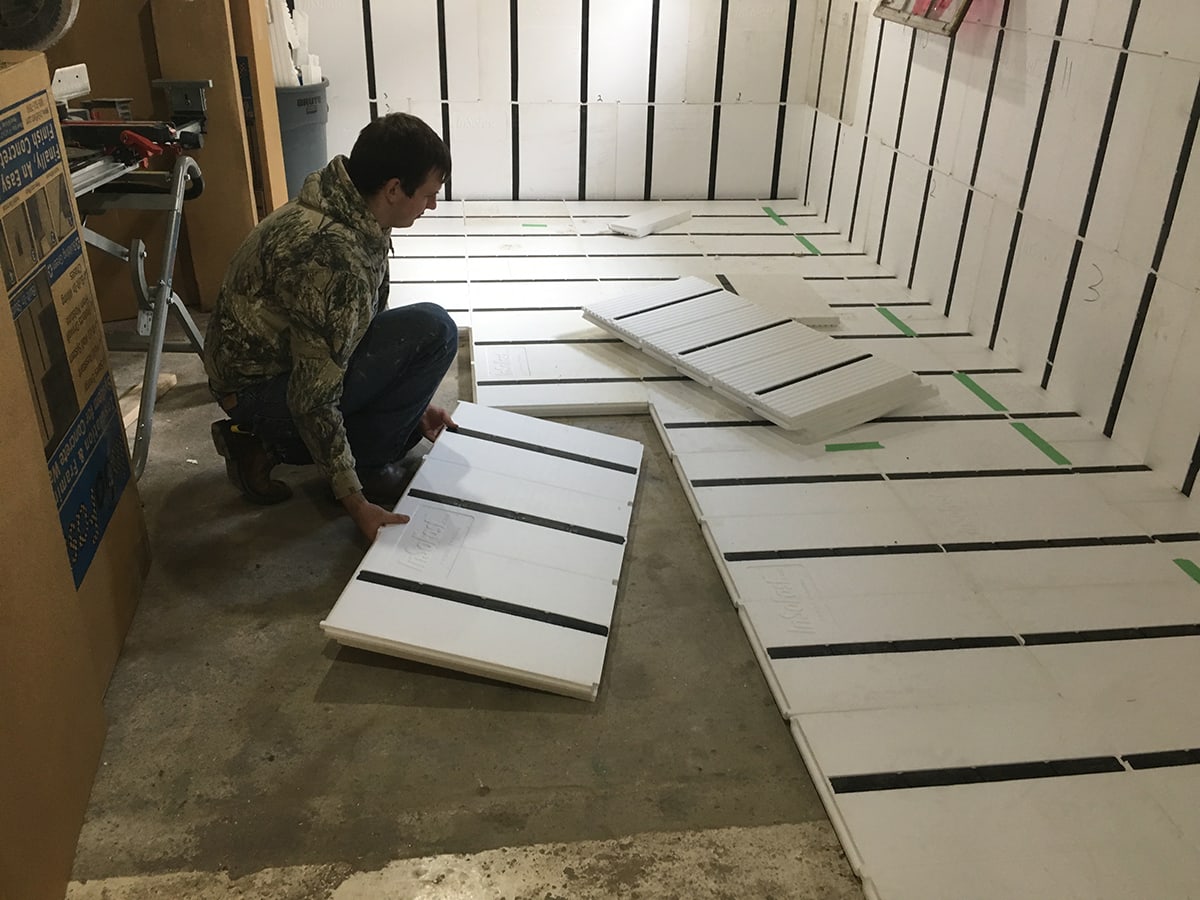
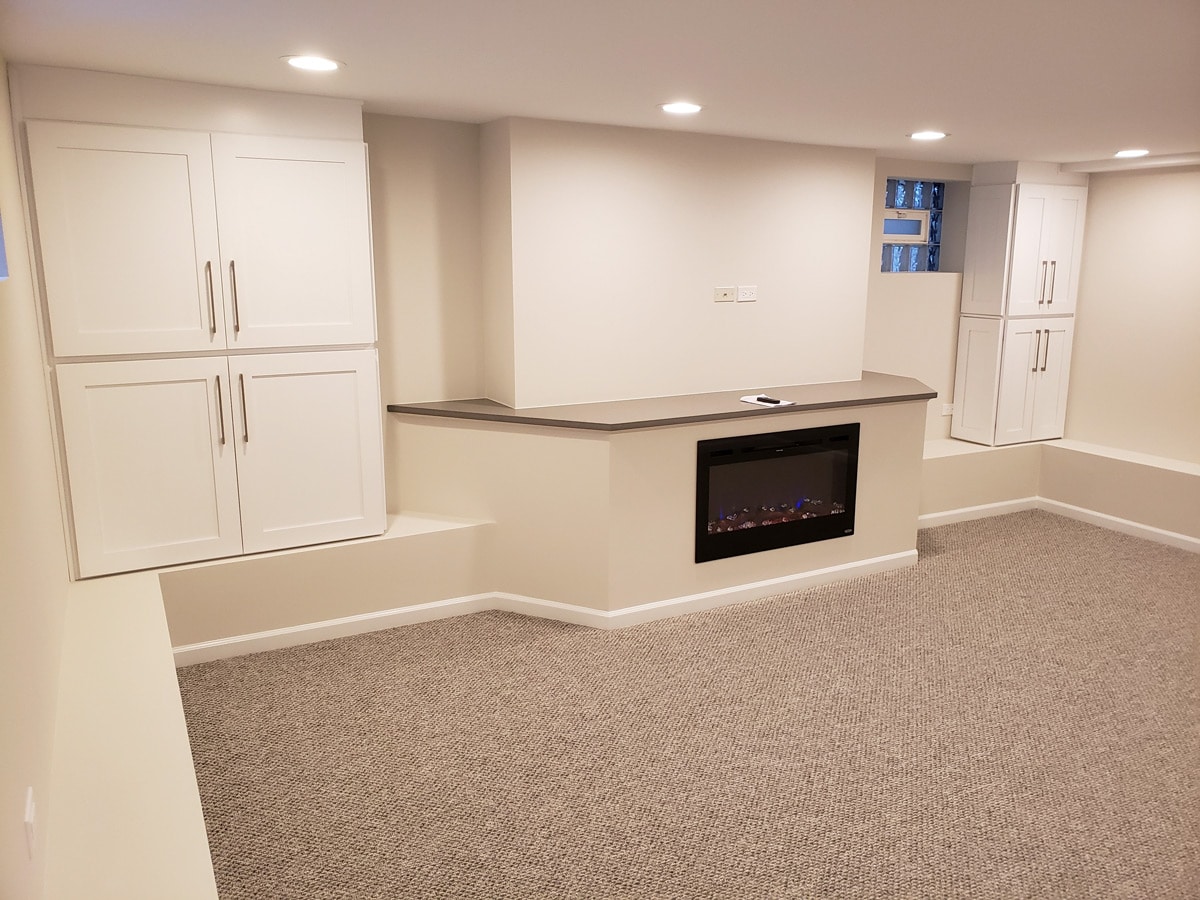
- Finish the basement floor: Consider finishing the basement floor with flooring materials such as carpet, laminate, or tile. This not only adds to the overall aesthetic appeal but also provides additional insulation and comfort.
- Monitor insulation performance: Regularly monitor the performance of your basement insulation. Pay attention to any changes in temperature, moisture levels, or signs of mold or water damage. Address any issues promptly to maintain the integrity and effectiveness of your insulation.
- Maintain good ventilation: Proper airflow and ventilation are essential for a well-insulated basement. Ensure that vents are not obstructed and consider installing a ventilation system if necessary.
By taking these finishing touches into consideration, you can complete your basement insulation project and enjoy a more comfortable and energy-efficient living space.
In conclusion, insulating your basement is a worthwhile investment that offers numerous benefits. It improves energy efficiency, reduces heating and cooling costs, prevents moisture issues, and enhances overall comfort. Through proper preparation, choosing the right insulation, measuring and cutting accurately, installing carefully, sealing gaps, considering optional vapor barriers, and adding the finishing touches, you can create an insulated basement that ensures a comfortable living environment and maximizes energy savings.
Remember, if you are unsure about any steps or facing specific challenges during the insulation process, don’t hesitate to seek professional assistance. They can provide guidance and ensure that your basement insulation project is a success.
Frequently Asked Questions about How To Install Insulation In Basement
Was this page helpful?
At Storables.com, we guarantee accurate and reliable information. Our content, validated by Expert Board Contributors, is crafted following stringent Editorial Policies. We're committed to providing you with well-researched, expert-backed insights for all your informational needs.


0 thoughts on “How To Install Insulation In Basement”