Home>Renovation & DIY>Home Renovation Guides>How To Install An Attic Gable Fan
Home Renovation Guides
How To Install An Attic Gable Fan
Modified: October 19, 2024
Learn how to install an attic gable fan with our comprehensive home renovation guide. Improve ventilation and energy efficiency in your home today!
(Many of the links in this article redirect to a specific reviewed product. Your purchase of these products through affiliate links helps to generate commission for Storables.com, at no extra cost. Learn more)
Introduction
Installing an attic gable fan is a smart and practical way to improve the ventilation in your home. During the hot summer months, attics can become extremely hot, leading to increased energy costs and potential damage to the roof and other structural components. By installing a gable fan, you can effectively expel the hot air from the attic, reducing the strain on your air conditioning system and prolonging the lifespan of your roof.
Proper attic ventilation is crucial for maintaining a comfortable indoor environment and preventing moisture buildup, which can lead to mold and mildew. A gable fan works by drawing in fresh air from the outside and pushing out the hot, stagnant air from the attic. This continuous airflow helps regulate the temperature in the attic, preventing it from reaching excessive levels that can impact the rest of the house.
In this comprehensive guide, we will walk you through the step-by-step process of installing an attic gable fan. Whether you're a seasoned DIY enthusiast or a homeowner looking to take on a new project, this guide will provide you with the knowledge and confidence to tackle this home improvement task.
By following the instructions outlined in this guide, you can enhance the overall comfort of your home, improve energy efficiency, and contribute to the longevity of your roofing system. So, gather your tools and let's get started on transforming your attic into a well-ventilated space that benefits your entire home.
Key Takeaways:
- Installing an attic gable fan improves home ventilation, reduces energy costs, and protects the roof. It involves gathering tools, cutting a hole in the gable vent, and connecting electrical wiring.
- Choosing the right location for the gable fan is crucial for efficient airflow and aesthetic appeal. Testing the fan ensures proper functionality, contributing to a well-ventilated and energy-efficient home.
Read more: How to Install an Attic Fan
Step 1: Gather the Necessary Tools and Materials
Before embarking on the installation of an attic gable fan, it's essential to gather all the required tools and materials. Having the right equipment at hand will streamline the installation process and ensure a successful outcome. Here's a comprehensive list of the necessary items:
Tools:
- Safety Gear: Prioritize safety by wearing protective gear, including gloves, safety goggles, and a dust mask to shield yourself from debris and insulation particles.
- Measuring Tape: Accurate measurements are crucial for cutting the hole in the gable vent, so a reliable measuring tape is indispensable.
- Pencil and Marking Tools: These will be used for marking the cutting lines on the gable vent.
- Power Drill: A drill will be necessary for creating pilot holes and securing the gable fan in place.
- Reciprocating Saw or Jigsaw: This tool will facilitate the precise cutting of the opening for the gable fan.
- Screwdriver: Ensure you have the appropriate screwdriver for the screws included with the gable fan.
- Ladder: A sturdy ladder is essential for accessing the gable vent from the exterior of the house.
- Utility Knife: This will be useful for cutting through any existing caulk or sealant around the gable vent.
Materials:
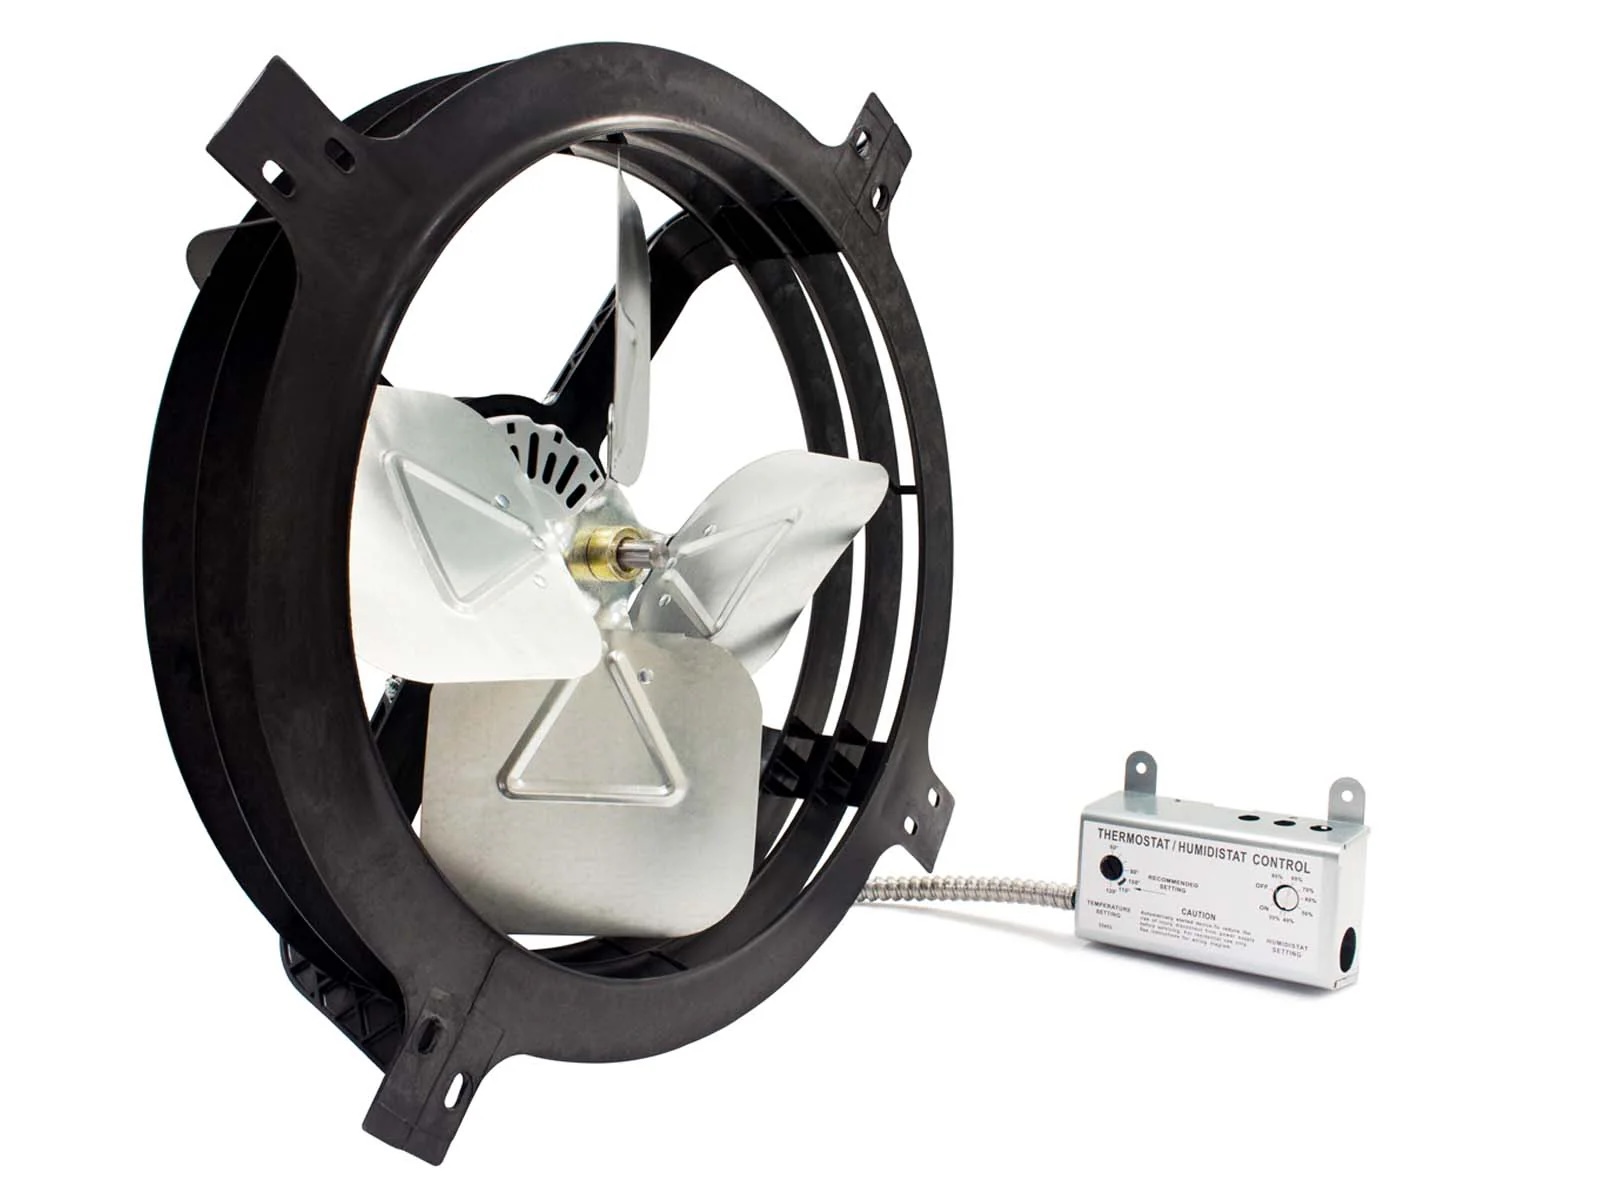
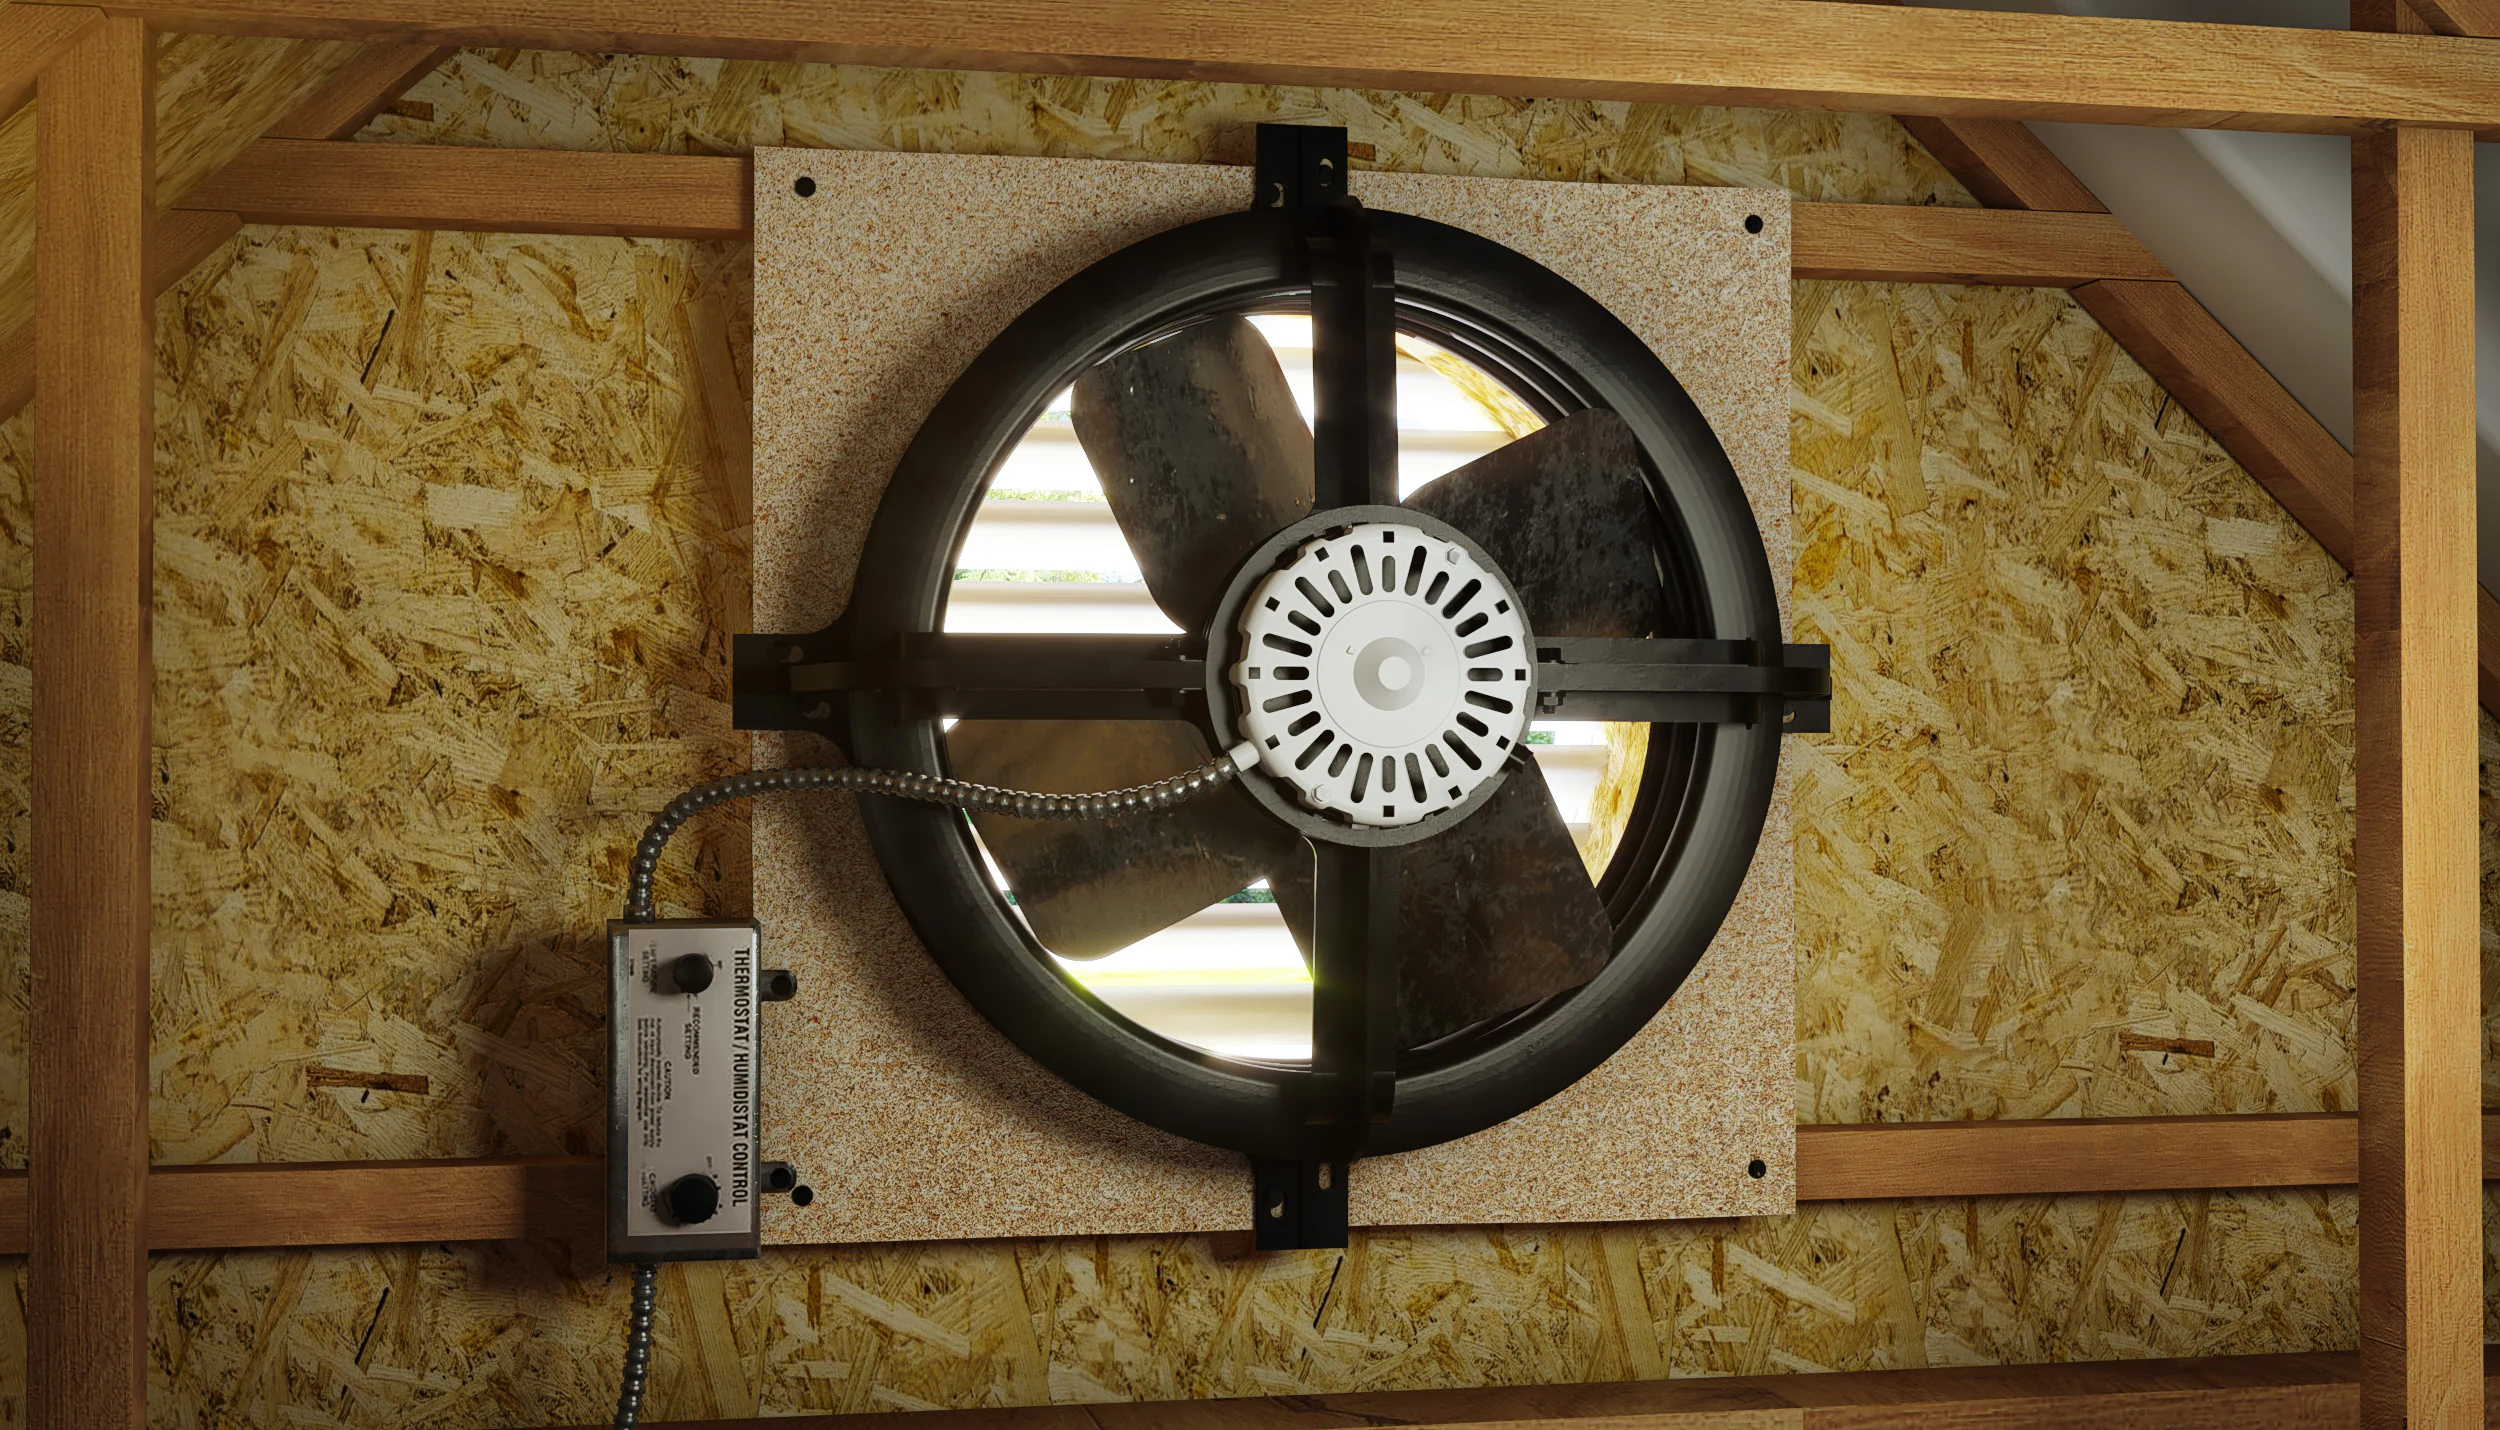
- Attic Gable Fan: Select a high-quality gable fan that is suitable for the size of your attic space. Ensure it comes with a thermostat and humidistat for optimal functionality.
- Ventilation Ducts: If the gable fan requires additional ventilation ducts, make sure to have these on hand.
- Screws and Fasteners: Check the gable fan's installation instructions to determine the specific screws and fasteners required for securing it in place.
- Caulk or Sealant: To ensure a weatherproof seal around the gable fan, have a tube of caulk or sealant ready for application.
- Electrical Wiring and Connectors: If the gable fan does not come with a pre-wired cord, you will need electrical wiring and connectors to complete the installation.
- Safety Brackets: Depending on the gable fan model, safety brackets may be necessary for securing the fan in the gable vent.
By gathering these tools and materials, you'll be well-prepared to proceed with the subsequent steps of installing the attic gable fan. This proactive approach will help streamline the installation process and minimize interruptions, allowing you to achieve optimal results in a timely manner.
Step 2: Choose the Right Location for the Gable Fan
Selecting the optimal location for installing the gable fan is a critical decision that directly impacts its effectiveness in ventilating the attic space. The placement of the gable fan should facilitate efficient air circulation while complementing the overall aesthetics of the home's exterior. Here's a detailed exploration of the factors to consider when determining the right location for the gable fan:
Read more: How To Install An Attic Exhaust Fan
Consider Attic Layout and Airflow
Begin by assessing the attic's layout and identifying the areas where heat tends to accumulate. Look for regions with limited natural ventilation, such as corners or sections obstructed by stored items. Additionally, consider the direction of prevailing winds in your area to leverage natural airflow patterns. By strategically placing the gable fan in an area prone to heat buildup, you can maximize its impact on regulating the attic's temperature.
Evaluate Exterior Aesthetics
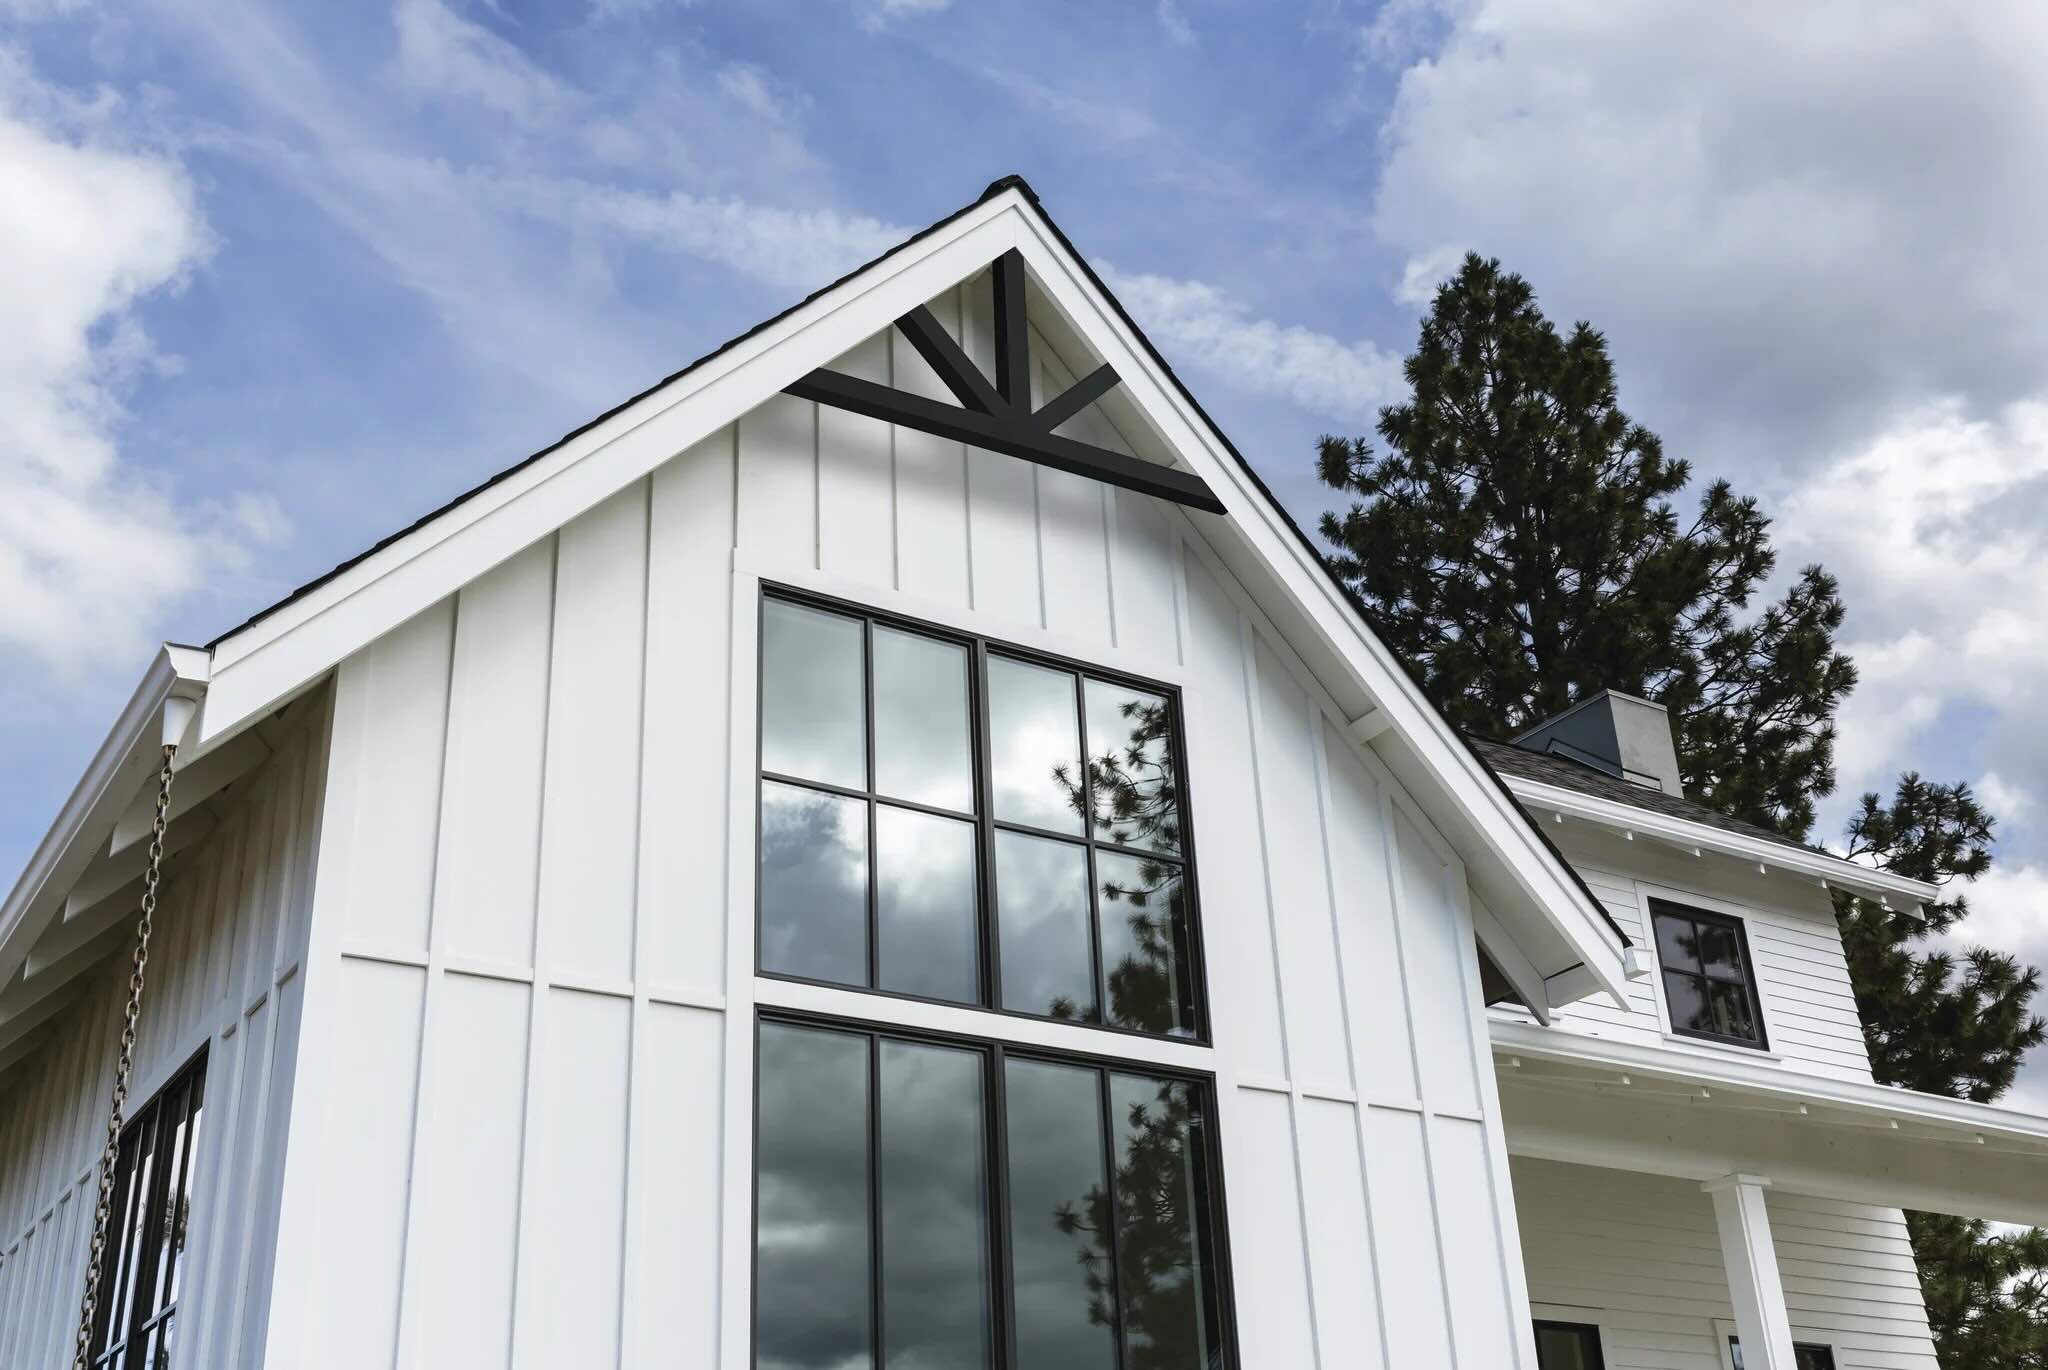
While functionality is paramount, it's also essential to consider the visual impact of the gable fan on the exterior of your home. Choose a location that integrates seamlessly with the existing architectural features and maintains a balanced appearance. The gable fan should enhance the overall aesthetic appeal of the house, complementing the design without appearing obtrusive.
Ensure Proper Clearance
When selecting the location, ensure that there is sufficient clearance around the gable vent to accommodate the fan's installation and operation. Clear any obstructions, such as overhanging branches or nearby structures, to prevent airflow restrictions and potential safety hazards. Adequate clearance will facilitate unobstructed airflow, allowing the gable fan to function optimally.
Account for Electrical Accessibility
Consider the proximity to an electrical power source when choosing the location for the gable fan. Select a placement that allows for convenient electrical wiring without the need for extensive modifications or wiring extensions. Prioritize safety by ensuring that the electrical connections can be established in compliance with local building codes and regulations.
Read more: How Much To Install An Attic Fan
Seek Professional Input if Necessary
If you encounter challenges in determining the ideal location for the gable fan, consider consulting with a professional contractor or an experienced installer. Their expertise can provide valuable insights and recommendations tailored to your specific attic configuration and home design.
By carefully evaluating these factors and considerations, you can confidently identify the optimal location for installing the gable fan, ensuring its seamless integration into the attic space and the exterior of your home. This thoughtful approach sets the stage for a successful installation that maximizes the gable fan's functionality and visual appeal.
Step 3: Cut a Hole in the Gable Vent
Cutting a hole in the gable vent is a crucial step in the installation process of an attic gable fan. This task requires precision and careful execution to ensure that the gable fan fits securely and functions effectively. Here's a detailed breakdown of the procedure for cutting the hole in the gable vent:
Measure and Mark the Cutting Area
Begin by measuring the dimensions of the gable fan to determine the appropriate size for the opening in the gable vent. Use a measuring tape to mark the cutting lines on the gable vent, ensuring that the dimensions align with the specifications provided in the gable fan's installation instructions. Precision is key at this stage, as accurate measurements will facilitate a seamless fit for the gable fan.
Prepare the Cutting Tools
Once the cutting area is marked, prepare the necessary cutting tools for the task. A reciprocating saw or jigsaw is commonly used to cut through the gable vent material. Ensure that the selected tool is equipped with a sharp, fine-toothed blade suitable for cutting through the vent material cleanly and efficiently.
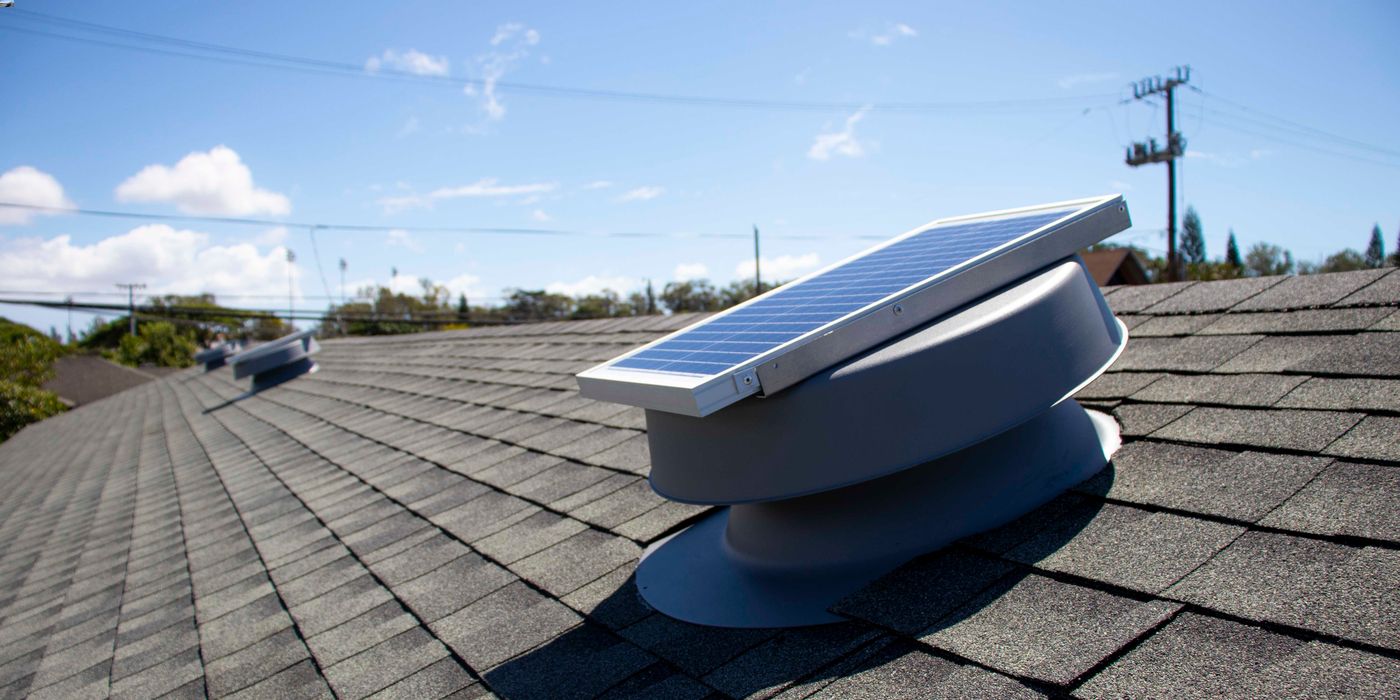
Read more: How To Install Solar Attic Fan
Safety Precautions
Prioritize safety by wearing appropriate protective gear, including safety goggles, gloves, and a dust mask. These precautions are essential to shield yourself from debris and ensure a safe working environment during the cutting process. Additionally, exercise caution when using power tools and follow the manufacturer's safety guidelines.
Cut the Opening
Carefully position the cutting tool along the marked cutting lines on the gable vent. Start by creating pilot holes at the corners of the marked area to establish precise cutting points. Once the pilot holes are in place, proceed to cut along the marked lines, maintaining a steady and controlled motion to achieve clean and accurate edges.
Remove the Cut Material
After completing the cutting process, carefully remove the cut portion of the gable vent to create the opening for the gable fan. Clear any residual debris or rough edges to ensure a smooth and even surface for installing the gable fan. Thoroughly inspect the newly cut opening to verify that it aligns with the specified dimensions and is free from any obstructions.
By following these detailed steps, you can effectively cut a hole in the gable vent, preparing the space for the seamless installation of the attic gable fan. This meticulous approach sets the stage for the subsequent steps of installing and securing the gable fan, bringing you closer to the enhanced ventilation and energy efficiency benefits it offers.
Step 4: Install the Gable Fan
With the hole in the gable vent prepared, it's time to proceed with the installation of the attic gable fan. This step involves securing the fan in place and ensuring proper alignment for optimal functionality. Here's a comprehensive guide to installing the gable fan with precision and efficiency:
-
Positioning the Gable Fan: Carefully place the gable fan into the newly cut opening in the gable vent. Ensure that the fan is aligned correctly and sits securely within the designated space. Take note of any specific orientation requirements outlined in the fan's installation instructions to guarantee proper airflow direction.
-
Securing the Fan: Once the gable fan is positioned correctly, use the provided screws and fasteners to secure it in place. Ensure that the fan is firmly anchored to prevent any movement or instability. If the gable fan includes safety brackets for additional support, attach them according to the manufacturer's guidelines to reinforce the fan's stability within the gable vent.
-
Weatherproofing the Installation: Apply a bead of caulk or sealant around the edges of the gable fan where it meets the gable vent. This weatherproofing step is crucial for creating a tight seal that prevents water infiltration and maintains the integrity of the installation. Pay close attention to sealing any gaps or seams to safeguard the attic space from external elements.
-
Inspecting the Installation: Thoroughly inspect the installed gable fan to ensure that it is securely fastened and properly sealed. Check for any signs of misalignment or gaps that may compromise the fan's performance. Address any discrepancies promptly to guarantee a well-executed installation that promotes efficient attic ventilation.
-
Adhering to Manufacturer's Guidelines: Throughout the installation process, adhere to the manufacturer's specific instructions and recommendations provided with the gable fan. Following these guidelines meticulously ensures that the fan is installed in accordance with the manufacturer's specifications, optimizing its performance and longevity.
By following these detailed steps, you can successfully install the attic gable fan, enhancing the ventilation and temperature regulation within your home's attic space. This installation marks a significant stride toward improving energy efficiency and maintaining a comfortable indoor environment. With the gable fan securely in place, you're one step closer to reaping the benefits of enhanced attic ventilation and contributing to the overall well-being of your home.
Read more: How To Install Gable Vent
Step 5: Connect the Electrical Wiring
Connecting the electrical wiring is a pivotal phase in the installation of an attic gable fan, as it ensures the fan's functionality and integration with the home's electrical system. This step demands meticulous attention to detail and adherence to electrical safety protocols. Here's a comprehensive guide to effectively connecting the electrical wiring for the attic gable fan:
-
Prepare the Electrical Components: Before initiating the wiring process, gather the necessary electrical components, including insulated electrical wiring, wire connectors, and a junction box. Ensure that the wiring is of the appropriate gauge and complies with local electrical codes to guarantee safe and reliable operation.
-
Turn Off the Power: Prioritize safety by switching off the power supply to the gable fan's designated electrical circuit at the main electrical panel. Use a voltage tester to confirm that the circuit is indeed de-energized before proceeding with the wiring. This precautionary measure mitigates the risk of electrical hazards during the installation process.
-
Route the Electrical Wiring: Carefully route the electrical wiring from the gable fan to the nearest electrical junction box or power source. Maintain a secure and organized pathway for the wiring, ensuring that it is protected from potential damage and interference. Adhere to recommended wiring practices to minimize exposure to environmental elements and mechanical abrasion.
-
Establish Electrical Connections: Strip the insulation from the ends of the electrical wiring to expose the conductors. Use wire connectors to establish secure and insulated connections between the gable fan's wiring and the corresponding electrical supply. Follow the manufacturer's wiring diagram and instructions to ensure correct polarity and proper termination of the electrical connections.
-
Secure the Junction Box: If a junction box is required for housing the electrical connections, mount it in a readily accessible location near the gable fan. Secure the junction box firmly to the structural framework, ensuring that it is positioned in compliance with electrical code regulations. This step is essential for safeguarding the electrical connections and facilitating future maintenance or inspections.
-
Test the Electrical Circuit: Once the electrical connections are established, restore the power supply to the gable fan's circuit and conduct a thorough test to verify the fan's operational functionality. Confirm that the fan responds to the thermostat and humidistat settings, and ensure that the electrical connections remain secure and free from any signs of overheating or abnormal behavior.
By meticulously following these steps and prioritizing electrical safety, you can effectively connect the electrical wiring for the attic gable fan, culminating in a well-integrated and functional ventilation system for your home. This phase represents a critical aspect of the installation process, contributing to the overall performance and reliability of the gable fan in regulating attic temperature and enhancing indoor air quality.
Step 6: Test the Gable Fan
After completing the installation and electrical wiring of the attic gable fan, it is crucial to conduct comprehensive testing to ensure its proper functionality and integration with the attic ventilation system. Testing the gable fan allows you to verify its performance, responsiveness to environmental conditions, and adherence to the preset thermostat and humidistat settings. Here's a detailed exploration of the testing process to validate the effectiveness of the gable fan:
-
Power Activation: Begin by activating the power supply to the gable fan, allowing it to initiate the ventilation process. Confirm that the electrical connections are secure and that the fan receives the necessary power to commence operation. Observe the fan to ensure that it starts up smoothly without any unusual sounds or vibrations, indicating a stable and functional motor.
-
Airflow Assessment: Once the gable fan is operational, assess the airflow within the attic space to gauge the fan's ventilation capacity. Feel for the movement of air around the attic, particularly near the gable fan's location. Verify that the fan effectively expels hot air from the attic, promoting the influx of fresh outdoor air to facilitate temperature regulation.
-
Thermostat and Humidistat Functionality: Test the thermostat and humidistat features of the gable fan by adjusting the settings to simulate varying environmental conditions. Observe how the fan responds to changes in temperature and humidity, activating or deactivating as needed to maintain optimal attic conditions. This assessment ensures that the gable fan operates in accordance with the preset parameters, contributing to energy efficiency and moisture control.
-
Noise and Vibration Inspection: Pay close attention to any noise or vibration produced by the gable fan during operation. A well-installed and balanced fan should operate quietly and smoothly, without generating excessive noise or noticeable vibrations. Any irregularities in noise or vibration warrant further inspection to identify and address potential issues that may compromise the fan's performance.
-
Performance Validation: Evaluate the overall performance of the gable fan by monitoring its impact on attic temperature and air quality over a designated period. Measure the temperature reduction achieved by the fan and assess the attic's overall comfort level. Additionally, observe any improvements in indoor temperature regulation and energy efficiency resulting from the enhanced attic ventilation facilitated by the gable fan.
By meticulously conducting these tests, you can ascertain the gable fan's operational reliability and its contribution to maintaining a well-ventilated and controlled attic environment. Thorough testing validates the successful installation and integration of the gable fan, affirming its pivotal role in enhancing the overall comfort and energy efficiency of your home.
Conclusion
In conclusion, the installation of an attic gable fan represents a significant investment in the overall comfort, energy efficiency, and structural integrity of your home. By following the comprehensive steps outlined in this guide, you have embarked on a journey to transform your attic into a well-ventilated space that contributes to the well-being of your entire household.
The process began with gathering the necessary tools and materials, emphasizing the importance of preparedness and attention to detail. Selecting the right location for the gable fan involved a thoughtful assessment of attic layout, exterior aesthetics, clearance considerations, and electrical accessibility. By carefully considering these factors, you ensured that the gable fan's placement optimally facilitates efficient airflow while harmonizing with the architectural aesthetics of your home.
The meticulous task of cutting a hole in the gable vent demanded precision and careful execution to create a seamless opening for the gable fan. This step set the stage for the subsequent installation, where the fan was securely positioned, fastened, and weatherproofed to ensure its stability and protection against external elements.
Connecting the electrical wiring was a pivotal phase, requiring adherence to safety protocols and meticulous attention to establishing secure and reliable electrical connections. This step culminated in the successful integration of the gable fan with the home's electrical system, setting the foundation for its operational functionality.
The final step involved comprehensive testing of the gable fan to validate its performance, responsiveness to environmental conditions, and adherence to preset settings. Through this testing, you confirmed the fan's ability to regulate attic temperature, promote energy efficiency, and contribute to a well-ventilated indoor environment.
As a result of your dedication to this installation process, your home now benefits from improved attic ventilation, reduced energy costs, and enhanced structural protection. The attic gable fan serves as a proactive solution to combat heat buildup, moisture accumulation, and the associated challenges that can impact the overall well-being of your home.
By embracing this home improvement endeavor, you have not only enhanced the functionality of your attic space but also made a tangible contribution to the long-term sustainability and comfort of your home. The successful installation of the attic gable fan signifies a proactive investment in the well-being of your household, reflecting your commitment to creating a healthier and more efficient living environment.
Frequently Asked Questions about How To Install An Attic Gable Fan
Was this page helpful?
At Storables.com, we guarantee accurate and reliable information. Our content, validated by Expert Board Contributors, is crafted following stringent Editorial Policies. We're committed to providing you with well-researched, expert-backed insights for all your informational needs.


0 thoughts on “How To Install An Attic Gable Fan”