Home>Furniture>Kitchen Furniture>How To Install A Fan Inside A Kegerator
Kitchen Furniture
How To Install A Fan Inside A Kegerator
Modified: August 27, 2024
Learn how to install a fan inside your kegerator with this helpful article. Improve the efficiency and performance of your kegerator with our step-by-step guide.
(Many of the links in this article redirect to a specific reviewed product. Your purchase of these products through affiliate links helps to generate commission for Storables.com, at no extra cost. Learn more)
Introduction
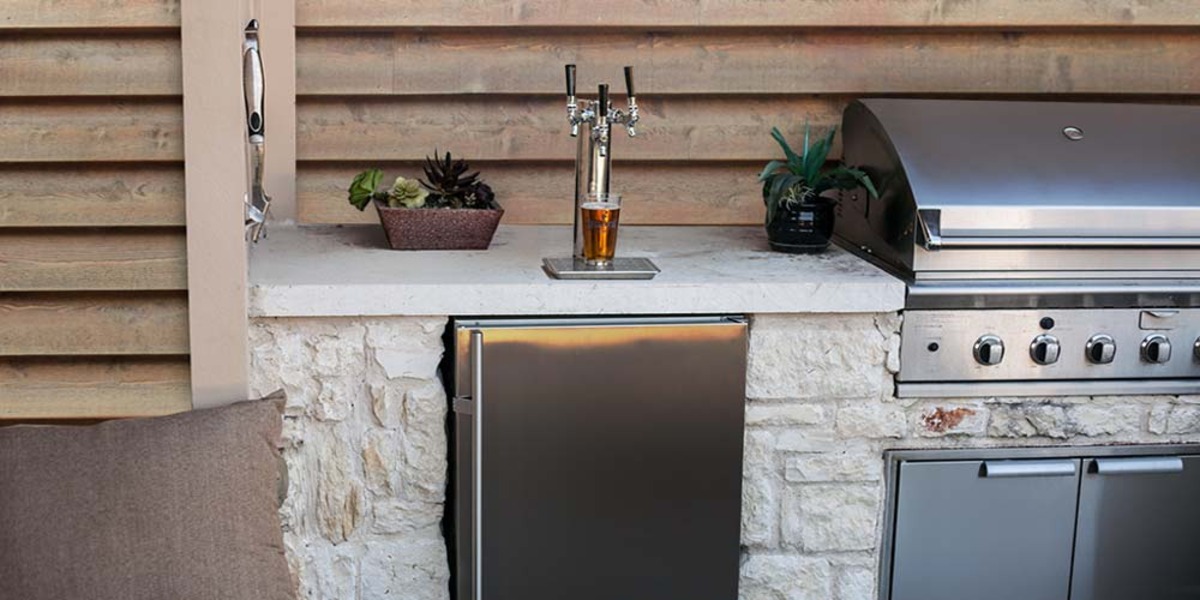
Welcome to the world of kegerators, where cold draft beer flows freely and the joy of homebrewing is taken to a whole new level. If you’re an avid beer enthusiast and you want to take your kegerator setup to the next level, installing a fan inside your kegerator can greatly improve its performance and functionality.
A fan inside the kegerator helps to circulate the cold air, ensuring that the temperature is evenly distributed throughout the unit. This not only keeps your beer consistently chilled, but it also helps prevent hot spots and condensation build-up. Additionally, the airflow created by the fan can help eliminate odors and maintain a fresh and clean environment for your kegs.
Installing a fan inside your kegerator is a relatively simple and cost-effective modification that can greatly enhance your beer-drinking experience. In this article, we will guide you through the step-by-step process of installing a fan inside your kegerator, from preparing the unit to wiring the fan. So, grab a cold brew and let’s get started!
Key Takeaways:
- Enhance Your Kegerator Experience
Installing a fan inside your kegerator ensures consistent, chilled beer, eliminates hot spots, and maintains a fresh, clean environment for your kegs. Enjoy optimal cooling performance and improved airflow for a more enjoyable beer-drinking experience. - Simple, Cost-Effective Modification
With the right tools and materials, installing a fan inside your kegerator is a straightforward and budget-friendly upgrade. Enjoy the benefits of improved functionality, even temperature distribution, and a touch of personalization to your setup.
Read more: How To Install Kegerator In Bar
Tools and Materials Needed
Before we dive into the process of installing a fan inside your kegerator, let’s first gather the necessary tools and materials. Here’s a list of what you’ll need:
- Small fan – Choose a fan that is compact and suitable for the size of your kegerator. Look for a fan that has a low noise level and appropriate airflow.
- Drill – You’ll need a drill to create the hole for the fan. Make sure you have the appropriate drill bit size for your fan.
- Tape measure – Use a tape measure to accurately measure and mark the placement of the fan inside the kegerator.
- Pencil or marker – A pencil or marker will be used to mark the spot where you’ll cut the hole for the fan.
- Jigsaw or hole saw – Depending on the material of your kegerator, you’ll need a jigsaw or hole saw to cut the hole for the fan. Make sure you have the correct blade or saw size.
- Screws or adhesive – To mount the fan inside the kegerator, you’ll need either screws or adhesive, depending on the design of your fan and kegerator.
- Wire cutter/stripper – If your fan doesn’t come with a pre-wired connector, you’ll need a wire cutter/stripper to prepare the wires for the connection.
- Electrical tape – Use electrical tape to insulate and secure the wiring connections.
- Wire connectors – Wire connectors are used to join the fan wires with the power source. Make sure you have connectors that are suitable for the wire gauge of your fan.
With these tools and materials on hand, you’ll be well-prepared to start the installation process. Now that we have everything we need, let’s move on to the next step: preparing the kegerator!
Step 1: Preparing the Kegerator
Before you begin installing a fan inside your kegerator, you’ll need to prepare the unit for the modification. Follow these steps to get started:
- Empty the kegerator – Start by removing all kegs, bottles, and any other items from the kegerator. This will ensure that you have enough space to work and prevent any damage or spills.
- Unplug the kegerator – Disconnect the power source to ensure your safety during the installation process.
- Clean the kegerator – Take this opportunity to clean the inside of the kegerator thoroughly. Remove any spills, debris, or mold that may have accumulated. Use a mild cleaning solution and a soft cloth to clean all surfaces.
- Locate a suitable spot – Look for a suitable location inside the kegerator where you can install the fan. Ideally, you want to place it in an area that will allow for optimal airflow and even temperature distribution.
When choosing the placement, consider factors such as the size of the fan, the available space inside the kegerator, and the position of the cooling element. You want to make sure that the fan doesn’t interfere with the keg or cooling system, and that it can effectively circulate the cold air.
Once you’ve identified a suitable spot, use a tape measure and a pencil or marker to mark the placement of the fan. This will serve as a guide when it comes time to cut the hole for the fan.
Now that you’ve prepared the kegerator, it’s time to move on to the next step: choosing the right fan for your setup. This is an important decision, as the fan will play a crucial role in maintaining the temperature and airflow inside the kegerator.
Step 2: Choosing the Right Fan
Choosing the right fan for your kegerator is vital to ensure efficient airflow and optimal temperature control. Here are some factors to consider when selecting a fan:
- Size – The size of the fan should be appropriate for the dimensions of your kegerator. A fan that is too large may obstruct space for kegs, while a fan that is too small may not provide adequate airflow. Measure the available space and choose a fan that fits comfortably.
- Noise level – Look for a fan that operates at a low noise level. Since the fan will be inside the kegerator, you want to minimize any unnecessary noise that could detract from your beer-drinking experience.
- Airflow – Consider the airflow capacity of the fan. Look for a fan that can circulate the air efficiently and evenly throughout the kegerator, ensuring that every corner is reached.
- Power source – Decide whether you want a fan that runs on batteries or one that requires a power source. Battery-operated fans offer more flexibility in terms of placement, but you’ll need to regularly replace the batteries. On the other hand, using a fan that connects to a power source requires wiring but ensures continuous operation.
- Design – Opt for a fan with a design that complements your kegerator. While aesthetics may not be the primary concern, having a fan that blends well with your setup can be visually pleasing.
Do some research and read reviews to find a fan that matches your requirements. Look for reputable brands known for their quality and performance in cooling applications. Once you’ve chosen a fan, make sure to check the manufacturer’s specifications and recommendations for installation.
Now that you’ve selected the right fan for your kegerator, it’s time to move on to the next step: measuring and marking the fan placement.
Step 3: Measuring and Marking the Fan Placement
With the fan chosen, it’s time to measure and mark the precise location for its installation inside your kegerator. Follow these steps to ensure accurate placement:
- Refer to the measurements provided by the fan’s manufacturer – The manufacturer’s specifications should include recommendations for the optimal placement of the fan. Take note of these measurements to ensure proper positioning.
- Measure the available space inside the kegerator – Use a tape measure to measure the available space where the fan will be installed. Consider any obstructions, such as cooling elements, kegs, or shelves, and make sure there is enough room for the fan to fit comfortably.
- Mark the location – Once you have determined the appropriate spot for the fan, use a pencil or marker to mark the center point of the desired location. This mark will serve as a guide when cutting the hole.
- Double-check the placement – Take a step back and review the marked location. Ensure that it aligns with your desired airflow and temperature distribution goals. If you’re satisfied with the placement, you can proceed to the next step.
Accurate measurement and marking are critical to ensure the fan is installed in the optimal position for effective cooling. By taking the time to measure properly, you can minimize the risk of errors during the installation process.
Now that you have marked the placement of the fan, it’s time to move on to the next step: cutting the hole in the kegerator to accommodate the fan.
When installing a fan inside a kegerator, make sure to position it near the top to circulate cold air evenly. This will help maintain consistent temperatures throughout the kegerator.
Step 4: Cutting the Hole
Now that you have marked the precise location for the fan, it’s time to cut the hole in the kegerator to accommodate it. Follow these steps carefully to ensure a clean and precise cut:
- Gather the necessary tools – Before you begin cutting, gather the appropriate tools for the job. Depending on the material of your kegerator, you may need a jigsaw or a hole saw. Make sure to use a blade or saw size that matches the diameter of the fan.
- Wear safety gear – Put on safety goggles and gloves to protect yourself during the cutting process. This will help prevent any injuries from flying debris or sharp edges.
- Begin cutting – Align the blade or saw with the marked center point on the kegerator. Start cutting slowly, following the outline of the hole. Take your time and be careful not to cut beyond the marked line.
- Create a clean hole – Ensure that the edges of the hole are smooth and free from any sharp burrs or rough edges. Use sandpaper or a file to smooth out any imperfections.
- Clean up the debris – Once the hole is cut, remove any debris or shavings from both the inside and outside of the kegerator. This will prevent any interference with the fan’s operation and maintain a clean environment.
It’s important to work with caution and precision when cutting the hole. Take your time and make sure you have a steady hand. If you’re unsure about your cutting skills, consider enlisting the help of a professional to ensure a clean and accurate hole.
With the hole cut, you’re now ready to move on to the next step: mounting the fan inside the kegerator.
Step 5: Mounting the Fan
Now that you have cut the hole for the fan, it’s time to mount it inside your kegerator. Follow these steps to securely install the fan:
- Prepare the fan – If your fan comes with mounting brackets or screws, attach them to the fan according to the manufacturer’s instructions. If adhesive is recommended for mounting, ensure that the fan is clean and free from any debris before applying the adhesive.
- Position the fan – Carefully place the fan into the hole you cut, ensuring that it is centered and aligned properly. Check that the fan is level and straight to achieve optimal airflow.
- Secure the fan – Depending on the design of your fan and kegerator, you can use screws or adhesive to secure the fan in place. If using screws, make sure they are appropriate for the material of your kegerator and do not protrude into the interior where they could interfere with kegs or other components. If using adhesive, follow the manufacturer’s instructions for the best results.
- Test the stability – Gently shake the kegerator to ensure the fan is securely mounted. If there is any looseness or movement, adjust the mounting or re-secure it as necessary.
It’s important to ensure that the fan is firmly mounted inside the kegerator to prevent any vibrations or movements that could affect its performance or cause damage. By securely mounting the fan, you’ll be able to enjoy consistent airflow for optimal temperature control.
With the fan mounted, we can now move on to the next step: wiring the fan for power.
Step 6: Wiring the Fan
Now that you have successfully mounted the fan inside your kegerator, it’s time to wire it for power. Follow these steps to ensure a safe and effective electrical connection:
- Prepare the wires – If your fan comes with pre-wired connectors, you can skip this step. However, if your fan requires wiring, use a wire cutter/stripper to prepare the wires. Strip off a small portion of the insulation from the ends of the wires.
- Connect the wires – Identify the positive (+) and negative (-) terminals on both the fan and the power source. Connect the corresponding wires using wire connectors that match the wire gauge of your fan. Secure the connections by twisting the connectors and using electrical tape to insulate and protect the exposed wires.
- Double-check the connections – Once the wires are connected, double-check that the connections are secure and properly insulated. Ensure that there are no loose wires or exposed conductors that could cause a short circuit or electrical hazard.
- Plug in the power source – If your fan requires a direct power source, plug it into a suitable electrical outlet, ensuring that the voltage matches the specifications of the fan. If your fan operates on batteries, insert the appropriate batteries into the fan according to the manufacturer’s instructions.
- Test the fan – Switch on the fan or turn it on using the provided controls. Listen for the hum of the fan and observe the airflow inside the kegerator to ensure that it is functioning correctly. If the fan does not turn on or there are any issues, double-check the wiring connections and troubleshoot as necessary.
Proper wiring is essential to ensure the fan operates safely and effectively. Take your time and follow the manufacturer’s instructions to ensure a successful electrical connection.
Now that the fan is wired and operational, we can move on to the final step: testing and troubleshooting to ensure everything is working as intended.
Step 7: Testing and Troubleshooting
After completing the installation and wiring of the fan inside your kegerator, it’s important to thoroughly test the system and troubleshoot any issues that may arise. Follow these steps to ensure everything is working as intended:
- Power on the kegerator – Plug in the kegerator and power it on. Allow it to run for a sufficient amount of time to ensure that the fan is operating consistently and the temperature is adequately regulated.
- Observe the airflow – Carefully observe the airflow inside the kegerator. Check if the fan is providing even circulation throughout the unit. Look for any areas where temperature variations or condensation may occur.
- Monitor the temperature – Use a reliable thermometer to monitor the temperature inside the kegerator over a period of time. Ensure that the fan is effectively maintaining a consistent and desired temperature. Make any necessary adjustments to the fan placement or settings if temperature variations are detected.
- Listen for any unusual sounds – While the fan is running, listen for any unusual or excessive noise. A properly installed fan should operate quietly without any grinding, rattling, or other disturbing sounds. If you notice any unusual sounds, inspect the fan and connections to identify and resolve the issue.
- Check for interference with kegs or other components – Make sure the fan is not interfering with the kegs or any other components inside the kegerator. Ensure that the fan is securely mounted and there is sufficient clearance for kegs, CO2 tanks, and other items.
- Troubleshoot any issues – If you encounter any issues with the fan or temperature control, refer to the manufacturer’s instructions or seek assistance from their customer support. They can provide guidance on troubleshooting specific problems and offer potential solutions.
- Regular maintenance and monitoring- Once the fan is installed and functioning correctly, it’s important to regularly maintain and monitor its performance. Clean the fan periodically to remove dust and debris, and continue to monitor the temperature and airflow to ensure optimal operation.
By thoroughly testing and troubleshooting your fan installation, you can identify and address any issues early on, ensuring that your kegerator operates efficiently and keeps your beer consistently chilled and refreshing.
Congratulations! You have successfully installed a fan inside your kegerator, enhancing its performance and providing a more enjoyable beer-drinking experience.
With this final step completed, you can now sit back, relax, and enjoy your perfectly chilled draft beer from your upgraded kegerator.
Read more: How To Install Zebra Blinds Inside Mount
Conclusion
Congratulations on successfully installing a fan inside your kegerator! By following the step-by-step process outlined in this article, you have taken your kegerator setup to the next level, ensuring efficient airflow, even temperature distribution, and optimal cooling performance.
With the fan installed, you can now enjoy the benefits of a well-maintained kegerator. Your beer will stay consistently chilled, eliminating hot spots and reducing the risk of condensation buildup. Additionally, the improved airflow will help eliminate odors and maintain a fresh and clean environment for your kegs.
Remember to regularly monitor the temperature inside your kegerator and clean the fan to maintain its effectiveness. Keep an eye out for any signs of malfunction or performance issues. If needed, consult the manufacturer’s instructions or reach out to their customer support for troubleshooting assistance.
Installing a fan inside your kegerator is a relatively simple and cost-effective modification that can greatly enhance your beer-drinking experience. Not only does it improve the functionality of your kegerator, but it also brings a touch of customization and personalization to your setup.
So, sit back, relax, and enjoy your perfectly chilled draft beer from your upgraded kegerator. Cheers to a job well done!
Frequently Asked Questions about How To Install A Fan Inside A Kegerator
Was this page helpful?
At Storables.com, we guarantee accurate and reliable information. Our content, validated by Expert Board Contributors, is crafted following stringent Editorial Policies. We're committed to providing you with well-researched, expert-backed insights for all your informational needs.


0 thoughts on “How To Install A Fan Inside A Kegerator”