Articles
How To Install A Wall Mount Toilet
Modified: October 18, 2024
Learn how to install a wall mount toilet with step-by-step instructions and helpful articles. Improve your bathroom renovation skills today!
(Many of the links in this article redirect to a specific reviewed product. Your purchase of these products through affiliate links helps to generate commission for Storables.com, at no extra cost. Learn more)
Introduction
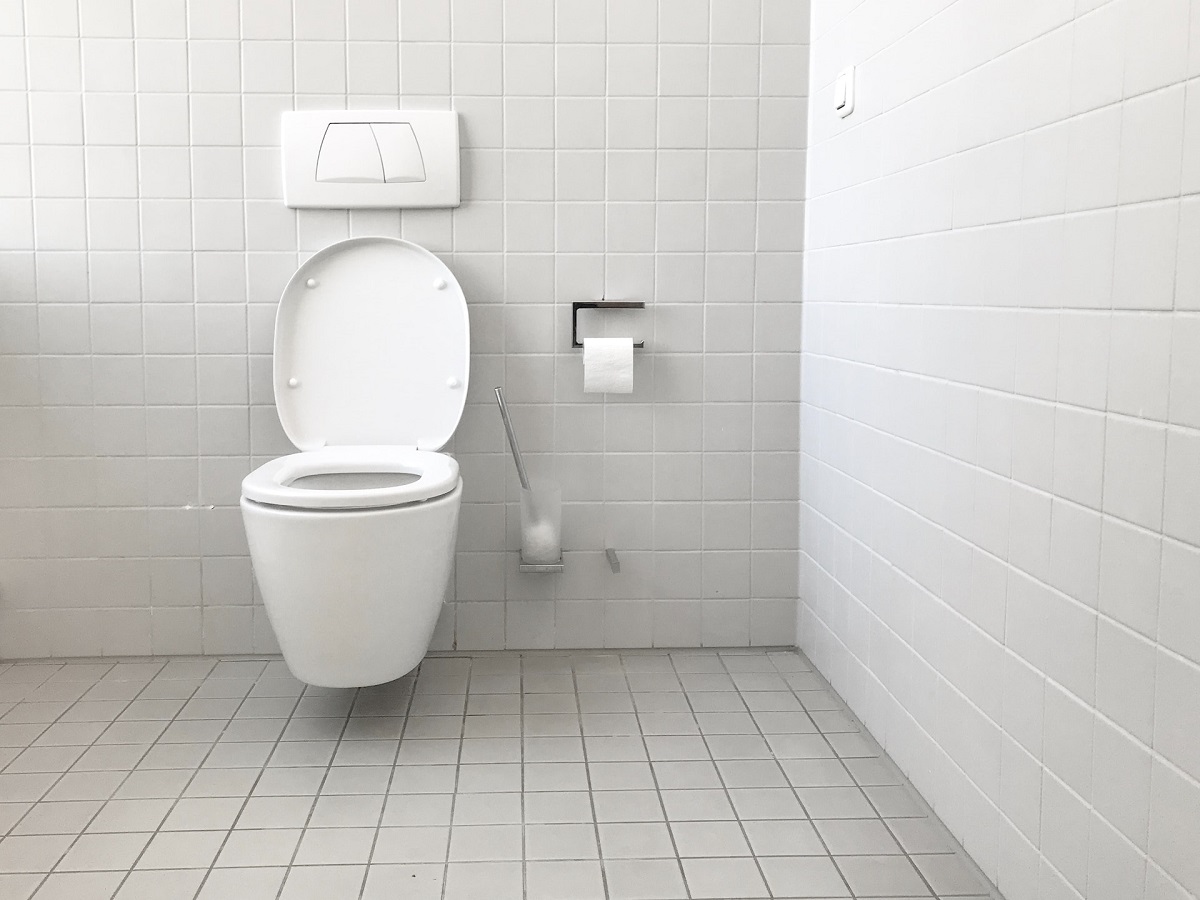
Installing a wall mount toilet is a great way to maximize space in your bathroom and create a sleek and modern look. Unlike traditional floor-mounted toilets, wall mount toilets are mounted directly to the wall, which means there is no need for a visible tank or base. This not only saves space but also makes cleaning and maintenance easier. Whether you are renovating your bathroom or simply looking to upgrade your toilet, installing a wall mount toilet can be done with a few simple steps.
In this article, we will guide you through the process of installing a wall mount toilet. We will cover everything from measuring and marking the installation area to securely attaching the toilet to the wall and connecting the water supply. By following the steps outlined in this guide, you will be able to successfully install a wall mount toilet and enjoy the benefits it brings to your bathroom.
Before we get started, it’s essential to gather all the necessary tools and materials for this project. You will need a measuring tape, a pencil or marker, a level, a drill with the appropriate drill bits, a wrench or pliers, a screwdriver, a mounting bracket (included with the toilet), screws, bolts, a wax ring, and a flexible water supply line. Always refer to the manufacturer’s instructions specific to your toilet for any additional materials or tools required.
Now that we have the basics covered, let’s move on to the first step: measuring and marking the installation area for your wall mount toilet.
Key Takeaways:
- Maximize bathroom space and create a modern look by installing a wall mount toilet. Follow the step-by-step guide for a smooth installation process and enjoy the benefits of a sleek and functional fixture.
- Ensure a successful installation by measuring accurately, removing the existing toilet, and testing for leaks. Embrace the space-saving design and stylish appeal of a wall mount toilet for a transformed bathroom experience.
Step 1: Measure and Mark
Before installing a wall mount toilet, it is crucial to measure and mark the installation area accurately. This step ensures that the toilet is positioned correctly on the wall and maintains proper clearance from surrounding fixtures. Here’s how to do it:
- Start by finding the ideal height for your wall mount toilet. Measure the distance from the finished floor to the desired height of the toilet. The standard height for most wall mount toilets is around 15 to 19 inches, but you can adjust it according to your preference and comfort.
- Using a measuring tape, make a mark on the wall at the desired height. Use a level to ensure that the mark is perfectly horizontal.
- Next, you need to determine the centerline of the toilet. Measure the distance from the wall to the center of the drainpipe on the floor. Mark this measurement on the wall at the same height as your previous mark.
- Use a level to draw a vertical line from the centerline mark down to the floor. This line will serve as a guide for the installation of the mounting bracket.
- If you have a wall-mounted bidet or other fixtures nearby, take measurements to ensure that there will be enough clearance between the toilet and the neighboring fixtures.
- Double-check all your measurements and marks to ensure their accuracy.
By taking the time to measure and mark the installation area correctly, you can avoid placement mistakes and ensure that your wall mount toilet is positioned in the desired location. With the measurements and marks in place, you are now ready to proceed to the next steps of the installation process.
Step 2: Remove Existing Toilet
Before you can install a wall mount toilet, you must first remove the existing toilet. Here’s a step-by-step guide on how to remove your old toilet:
- Start by turning off the water supply. Locate the shut-off valve behind the toilet and turn it clockwise to shut off the water flow.
- Flush the toilet to empty the tank and remove as much water as possible. You can also use a sponge or towel to soak up any remaining water in the tank and bowl.
- Disconnect the water supply line from the bottom of the toilet tank. Use a wrench or pliers to loosen the nut connecting the supply line and then carefully unscrew it from the tank.
- Next, remove the nuts that secure the toilet to the floor. These nuts are usually located on either side of the base. Use a wrench to loosen and remove the nuts.
- With the nuts removed, gently rock the toilet back and forth to break the seal between the toilet and the wax ring. Once the seal is broken, carefully lift the toilet away from the floor and place it on a drop cloth or old towel.
- You may need to scrape off any remaining wax residue or old caulk from the flange on the floor. Ensure that the flange is clean and free of debris before proceeding.
- Inspect the wax ring and replace it if it is worn or damaged. A new wax ring will ensure a proper seal between the toilet and the floor.
Removing the existing toilet is an essential step in the installation process. It allows you to prepare the space for the new wall mount toilet and ensures a clean and secure installation. Once the old toilet is removed, you can move on to the next step: installing the mounting bracket.
Step 3: Install Mounting Bracket
Once the existing toilet has been removed, it’s time to install the mounting bracket for your wall mount toilet. The mounting bracket is the key component that securely attaches the toilet to the wall. Here’s how to install it:
- Start by positioning the mounting bracket on the wall, aligning it with the vertical line you marked in Step 1.
- Use a level to ensure that the bracket is perfectly vertical. Make any necessary adjustments to ensure it is level and straight.
- With the bracket in the correct position, mark the screw holes on the wall with a pencil or marker.
- Set the bracket aside and use a drill with the appropriate drill bit to create pilot holes at the marked locations. The size of the drill bit should correspond to the size of the screws that came with the mounting bracket.
- Once the pilot holes are drilled, align the mounting bracket with the holes and secure it to the wall using screws. Use a screwdriver or drill to tighten the screws securely.
- Double-check the bracket’s alignment and stability to ensure it is securely attached to the wall.
The mounting bracket is now installed, providing a sturdy base for your wall mount toilet. With the bracket in place, you are ready to move on to the next step: securing the wall mount toilet to the bracket.
When installing a wall mount toilet, make sure to use a mounting frame that is compatible with the toilet model. This will ensure a secure and stable installation.
Step 4: Secure Wall Mount Toilet to Bracket
With the mounting bracket securely installed, it’s time to attach and secure the wall mount toilet to the bracket. Follow these steps to ensure a proper and secure installation:
- Position the wall mount toilet onto the mounting bracket, aligning the mounting holes on the toilet with the corresponding holes on the bracket.
- Insert the screws or bolts provided with the toilet into the mounting holes and tighten them using a wrench or screwdriver. Make sure the toilet is firmly attached to the bracket.
- Double-check the alignment of the toilet to ensure it is level and centered on the bracket. Adjust as necessary.
- Once the toilet is securely attached to the bracket, check for any wobbling or instability. If needed, tighten the screws or bolts further to eliminate any movement.
- Ensure that the toilet is level by placing a level across the rim of the bowl. Adjust the positioning if necessary.
- Inspect the toilet for any gaps between the toilet and the wall. If there are gaps, you can use spacers or shims to fill them and provide additional support.
By following these steps, you can ensure that your wall mount toilet is securely attached to the mounting bracket. This step is crucial for the stability and functionality of the toilet. Once the toilet is properly secured, you can proceed to the next step: connecting the water supply.
Step 5: Connect Water Supply
With the wall mount toilet securely attached to the bracket, it’s time to connect the water supply to ensure proper functionality. Follow these steps to connect the water supply:
- Locate the water inlet valve on the wall behind the toilet. This valve controls the water flow to the toilet.
- Attach one end of a flexible water supply line to the water inlet valve. Make sure to hand-tighten the connection, and then use a wrench or pliers to give it an extra quarter turn for added security.
- Next, attach the other end of the water supply line to the corresponding water inlet on the bottom of the toilet tank. Again, hand-tighten the connection and give it an extra quarter turn with a wrench or pliers.
- Once the water supply line is securely attached, ensure that all connections are tight and properly aligned.
- Turn on the water supply by slowly opening the shut-off valve. This will allow water to flow into the toilet tank.
- Check for any leaks around the connections. If you notice any leaks, tighten the connections further or consider replacing the faulty part.
- Allow the toilet tank to fill with water. This may take a few minutes.
By carefully connecting the water supply, you ensure that the wall mount toilet has access to water for proper flushing and operation. Once you have checked for leaks and the tank is filled, you are ready to move on to the final step: testing for leaks.
Step 6: Test for Leaks
After installing a wall mount toilet and connecting the water supply, it’s essential to test for leaks to ensure a successful installation. Follow these steps to test for leaks:
- Once the toilet tank is filled with water, flush the toilet to initiate a flush cycle.
- Observe the flushing action and check for any signs of water leakage around the base of the toilet, the water supply line connections, or any other potential areas.
- If you notice any leaks, identify the source and take appropriate action to address them. Tighten loose connections or replace faulty parts as necessary.
- After resolving any leaks, flush the toilet a few more times to ensure that the problem has been completely resolved.
- Inspect the area around the toilet for any residual water or moisture. Wipe away any excess water to keep the area clean and prevent slips or accidents.
- Double-check all the connections, especially the water supply line and the mounting bracket, to ensure they are secure and free from any leaks.
Testing for leaks is a critical step in the installation process, as it helps identify and address any potential issues with the installation. By taking the time to thoroughly test for leaks, you can ensure that your wall mount toilet is functioning correctly and prevent further problems down the line.
Congratulations! You have successfully installed a wall mount toilet in your bathroom. Enjoy the space-saving design and modern look that a wall mount toilet brings to your space.
Conclusion
Installing a wall mount toilet can be a rewarding project that enhances both the functionality and aesthetic appeal of your bathroom. By following the step-by-step guide outlined in this article, you can successfully install a wall mount toilet and enjoy the benefits of its space-saving design and sleek appearance.
From measuring and marking the installation area to securely attaching the toilet to the wall mount bracket, each step is crucial for a successful installation. By taking the time to accurately measure, remove the existing toilet, install the mounting bracket, secure the toilet, connect the water supply, and test for leaks, you can ensure a smooth and trouble-free installation process.
Remember to always refer to the manufacturer’s instructions specific to your wall mount toilet for any additional guidance or recommendations. Additionally, consult a professional plumber if you’re unsure about any aspect of the installation process.
By opting for a wall mount toilet, you not only create a more spacious and visually appealing bathroom but also make cleaning and maintenance more straightforward. This modern and innovative fixture can transform your bathroom into a stylish and functional space.
Now that you have the knowledge and confidence to install a wall mount toilet, go ahead and bring a touch of elegance and practicality to your bathroom. Enjoy the benefits and the streamlined look that a wall mount toilet brings to your space!
Frequently Asked Questions about How To Install A Wall Mount Toilet
Was this page helpful?
At Storables.com, we guarantee accurate and reliable information. Our content, validated by Expert Board Contributors, is crafted following stringent Editorial Policies. We're committed to providing you with well-researched, expert-backed insights for all your informational needs.


0 thoughts on “How To Install A Wall Mount Toilet”