Articles
How To Install Kegerator In Bar
Modified: October 20, 2024
Learn how to install a kegerator in your bar with our step-by-step guide. Find expert articles and tips to create the ultimate beer dispensing setup.
(Many of the links in this article redirect to a specific reviewed product. Your purchase of these products through affiliate links helps to generate commission for Storables.com, at no extra cost. Learn more)
Introduction
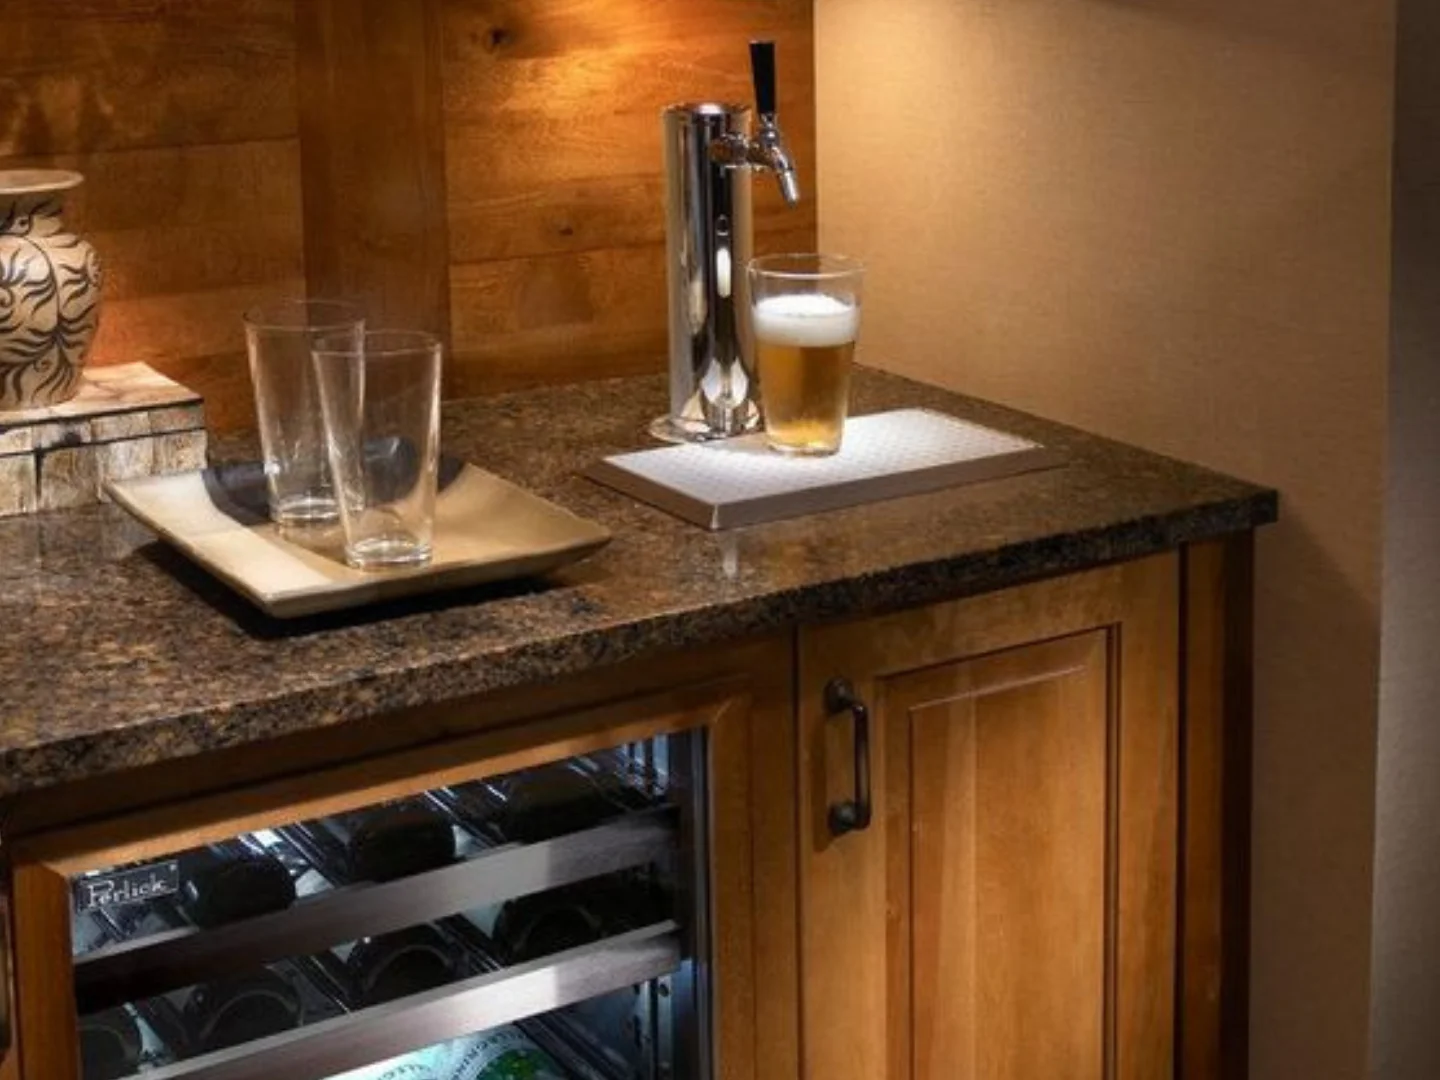
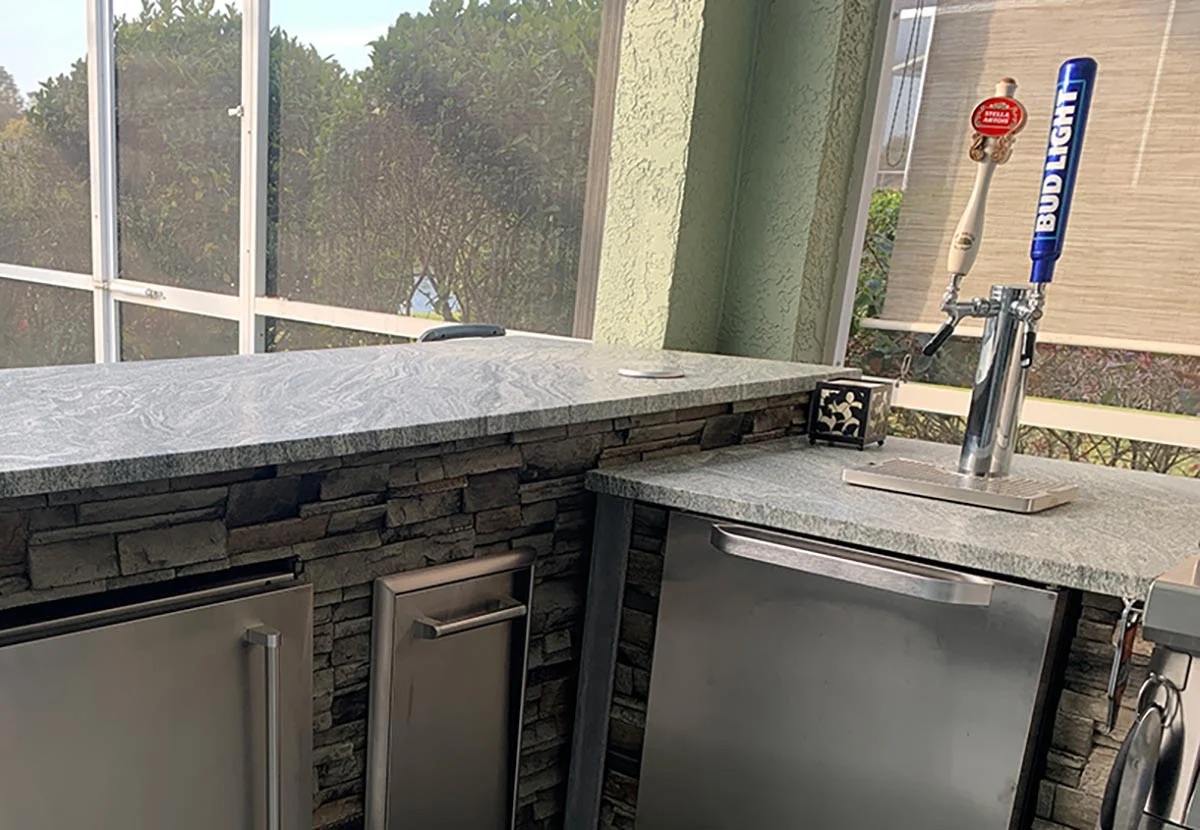
Installing a kegerator in your bar can be an excellent way to enhance the drinking experience for your customers and streamline your beverage service. A kegerator, which is essentially a refrigerator with a built-in beer dispensing system, allows you to serve draft beer straight from the keg, ensuring freshness and consistent quality.
In this article, we will guide you through the step-by-step process of installing a kegerator in your bar. From choosing the right location to connecting the beer lines, we’ll cover everything you need to know to get your kegerator up and running smoothly.
Before we dive into the installation process, it’s important to note that the specific requirements may vary depending on the model of kegerator you have and the layout of your bar. It’s always a good idea to refer to the manufacturer’s instructions for your specific kegerator model.
Now let’s get started with step one: choosing the right location for your kegerator.
Key Takeaways:
- Choosing the right location, preparing the space, and assembling the kegerator are crucial steps in ensuring a smooth and efficient installation process. Attention to detail and proper setup contribute to a functional and visually appealing kegerator in your bar.
- Testing, adjusting, and implementing maintenance practices are essential for maintaining the quality and performance of your kegerator. Regular cleaning, temperature monitoring, and staff training contribute to a seamless beer dispensing experience and customer satisfaction.
Step 1: Choosing the Right Location
The first step in installing a kegerator in your bar is to determine the best location for it. This decision is crucial, as it will impact the accessibility, functionality, and overall aesthetic of your bar.
Here are a few factors to consider when choosing the right location:
- Visibility: You’ll want your kegerator to be visible to customers so they can easily see the available beer options. Placing it near the bar counter or in a prominent area will make it a focal point of your establishment.
- Space: Ensure that you have enough space to accommodate the kegerator and the kegs. Measure the dimensions of the kegerator and allocate ample space around it for maintenance and ventilation.
- Accessibility: Consider the flow of traffic in your bar and choose a location that allows easy access for both staff and customers. This will make it convenient to change kegs, clean the lines, and serve beer.
- Temperature: Take into account the temperature variations in different areas of your bar. It’s important to place the kegerator in a spot where it can maintain a consistent temperature to keep the beer fresh and carbonated.
- Electricity: Ensure that there is an electrical outlet nearby to power the kegerator. It’s also a good idea to have a dedicated outlet to avoid overloading the circuit.
Once you’ve considered these factors, you can select a suitable location for your kegerator. Make sure to take measurements and mark the spot to ensure accurate positioning during the installation process.
Now that you’ve chosen the right location for your kegerator, it’s time to move on to step two: preparing the space for installation.
Step 2: Preparing the Space
Now that you’ve chosen the right location for your kegerator, it’s time to prepare the space for installation. This step involves making sure the area is clean, clear, and ready to accommodate the kegerator and its components.
Here’s what you need to do to prepare the space:
- Clean the area: Clear out any debris or dust from the chosen location. Wipe down surfaces to ensure a clean and sanitary environment for the kegerator.
- Clear obstructions: Remove any items or obstacles that could hinder the installation or accessibility of the kegerator. This includes nearby furniture, decor, or other equipment that may interfere with the proper functioning of the kegerator.
- Level the surface: Check if the surface where the kegerator will be placed is level. Use a spirit level to ensure that it is flat and balanced. If it’s not level, you may need to make adjustments by using shims or other leveling tools.
- Consider ventilation: Adequate ventilation is important to ensure the proper functioning of the kegerator and prevent overheating. If the space is enclosed or lacks sufficient airflow, you may need to install additional ventilation options such as fans or vents.
- Install drip tray: To catch any spills or excess foam from the beer dispensing process, it’s recommended to install a drip tray under the taps. This will help keep your bar area clean and prevent slip hazards.
By preparing the space for installation, you’re setting the foundation for a smooth and hassle-free kegerator setup. Once the area is clean and cleared, and the surface is level, you’re ready to move on to the next step.
Next up is step three: assembling the kegerator. Stay tuned!
Step 3: Assembling the Kegerator
With the space prepared, it’s time to move on to the exciting step of assembling the kegerator. This involves unpacking the components and putting them together to create a functional beer dispensing system.
Here are the key steps to follow when assembling the kegerator:
- Unpack the kegerator: Carefully unpack the kegerator and remove any packaging materials. Ensure that all the parts and accessories are present and in good condition.
- Read the user manual: Before starting the assembly, read the user manual thoroughly. Familiarize yourself with the different components and their functions. Follow the manufacturer’s instructions for the specific model you have to ensure a proper and safe installation.
- Attach the tap tower: The tap tower is the part from which the beer will be dispensed. Follow the manufacturer’s instructions to securely attach the tap tower to the top of the kegerator. This may involve tightening screws or using a mounting plate.
- Install the faucets: Attach the faucets to the tap tower. Make sure they are properly aligned and tightened. This step may require an adjustable wrench or a faucet wrench.
- Attach the beer lines: Connect the beer lines to the back of the tap tower. Ensure that they are securely fastened and properly positioned to avoid any leaks or kinks in the lines.
- Install the keg coupler: The keg coupler is the device that connects the keg to the beer lines. Follow the manufacturer’s instructions to install the keg coupler securely. This may involve twisting or locking it into place.
- Place the kegs: Once all the components are assembled, you can place the kegs inside the kegerator. Ensure that they are positioned correctly and are easily accessible for tapping and changing.
Remember to refer to the user manual and follow the manufacturer’s instructions throughout the assembly process. This will help you avoid any mistakes and ensure that your kegerator is set up correctly.
Now that you’ve successfully assembled the kegerator, it’s time to move on to step four: installing the CO2 tank and regulator. Keep reading to learn more!
Step 4: Installing CO2 Tank and Regulator
Now that you’ve assembled the kegerator, it’s time to install the CO2 tank and regulator. This step is crucial for carbonating and pressurizing the beer, ensuring a perfect pour every time.
Here’s how you can install the CO2 tank and regulator:
- Ensure safety: Before starting the installation process, make sure you understand the safety guidelines associated with working with CO2. Follow proper precautions, such as wearing gloves and goggles, and handling the tank with care.
- Locate the CO2 tank holder: Most kegerators have a designated spot or holder for the CO2 tank. Locate this area inside the kegerator and make sure it is clean and ready for installation.
- Secure the CO2 tank: Place the CO2 tank into the designated holder and secure it tightly. Some kegerators have straps or brackets to hold the tank in place. Use these mechanisms to ensure the tank is stable and won’t move during operation.
- Attach the regulator: The regulator is responsible for controlling the pressure of the CO2 that flows into the keg. Attach the regulator to the top of the CO2 tank by screwing it in firmly. Make sure it is aligned and securely attached.
- Connect the gas line: The gas line connects the regulator to the keg coupler. Attach one end of the gas line to the output valve on the regulator and the other end to the gas inlet on the keg coupler. Ensure that the connections are tight to prevent any gas leaks.
- Adjust the pressure: Use the pressure adjustment knob on the regulator to set the desired level of carbonation for your beer. Consult the instructions provided by the brewery or use a reference guide to determine the appropriate pressure for the beer style you are serving.
- Test for leaks: Once everything is connected, check for any gas leaks. Apply a soapy water solution to all the connection points and look for any bubbles. If you see bubbles forming, there may be a leak. Tighten the connections until the bubbles disappear.
By following these steps, you’ll be able to safely and effectively install the CO2 tank and regulator for your kegerator. This will ensure proper carbonation and pressure for serving fresh and flavorful beer.
Now that the CO2 tank and regulator are installed, it’s time to move on to step five: connecting the beer lines. Keep reading!
When installing a kegerator in a bar, make sure to measure the space carefully to ensure it fits. Also, consider the location of the CO2 tank and access to power outlets for the best setup.
Read more: How To Build A Bar With Built In Kegerator
Step 5: Connecting Beer Lines
With the CO2 tank and regulator installed, the next step is to connect the beer lines. The beer lines are responsible for carrying the beer from the keg to the faucet so it can be dispensed smoothly and efficiently.
Here’s how you can connect the beer lines:
- Prepare the beer lines: Before connecting the beer lines, it’s important to ensure they are clean and free from any debris or contaminants. Rinse the lines with warm water and sanitize them according to the manufacturer’s instructions.
- Identify the correct lines: Most kegerator systems have two lines: one for the beer and one for the gas. Identify the beer line, which is usually longer and may have markings or labeling to distinguish it from the gas line.
- Connect the beer line to the keg coupler: Attach one end of the beer line to the liquid-out port of the keg coupler. Ensure it is securely fastened by using a clamp or similar mechanism provided by the manufacturer.
- Thread the beer line through the tower: If your kegerator has a tower, carefully thread the beer line through it. Make sure it is not twisted or tangled to ensure proper beer flow.
- Connect the beer line to the faucet: Attach the other end of the beer line to the connector on the back of the faucet. Ensure it is securely fastened and aligned properly.
- Check for leaks: Once the beer lines are connected, it’s important to check for any leaks. Look for any signs of beer seeping out or leaking around the connections. Adjust and tighten the connections if necessary.
- Flush the lines: Before serving beer, it’s recommended to flush the beer lines to remove any air or impurities. Run some beer through the lines until the beer is flowing smoothly and all air bubbles are eliminated.
By following these steps, you’ll successfully connect the beer lines and ensure a proper flow of beer from the keg to the faucet. This will help maintain the quality and integrity of your draft beer.
Now that the beer lines are connected, it’s time to move on to step six: testing and adjusting. Keep reading to learn more!
Step 6: Testing and Adjusting
After connecting the beer lines, it’s important to test and adjust the kegerator to ensure optimal performance and the perfect pour. This step involves checking for any issues, making necessary adjustments, and fine-tuning the settings for a smooth and enjoyable beer-drinking experience.
Here’s what you need to do in this step:
- Check for proper temperature: Ensure that the kegerator is maintaining the correct temperature for serving beer, typically between 36°F and 40°F (2°C and 4°C). Use a thermometer to verify the temperature inside the kegerator and adjust the temperature control if needed.
- Perform a test pour: Begin by pouring a small sample of beer to check for any issues. Observe the flow and consistency of the beer, making sure it’s not too foamy or flat. Adjust the pressure if necessary by turning the adjustment knob on the regulator.
- Check for proper carbonation: Evaluate the carbonation level of the beer as it is being poured. If the beer appears flat, adjust the pressure slightly to increase carbonation. If it’s too fizzy or foamy, decrease the pressure to reduce carbonation.
- Adjust the faucet: If the beer is pouring too fast or too slow, you may need to adjust the faucet. Some faucets have flow control mechanisms that can be adjusted to control the speed of pouring. Refer to the manufacturer’s instructions for your specific faucet model.
- Taste test: Take a moment to taste the beer and ensure it is pouring correctly. If you notice any off-flavors or inconsistencies, check all the connections and lines for leaks or contamination. It may be necessary to clean or replace any components that are affecting the quality of the beer.
- Make adjustments as needed: Depending on the test pour and taste test, make any necessary adjustments to the pressure, temperature, or faucet settings. Fine-tune these settings until you achieve the desired pour and flavor of the beer.
- Repeat the testing process: After making adjustments, repeat the test pour and taste test to ensure that the changes have improved the beer pouring experience. Continue to make small adjustments until you are satisfied with the results.
Testing and adjusting your kegerator is crucial to ensure the beer is pouring correctly and meeting the desired quality standards. By following these steps and taking the time to fine-tune the settings, you’ll be able to provide your customers with a perfectly poured pint every time.
Now that you’ve tested and adjusted the kegerator, it’s time to move on to step seven: final touches and maintenance tips. Keep reading for more information!
Step 7: Final Touches and Maintenance Tips
After completing the installation and testing process, it’s time to add the final touches to your kegerator setup and learn some essential maintenance tips to keep it running smoothly. These final steps will help ensure the longevity and optimal performance of your kegerator.
Here are some final touches and maintenance tips to consider:
- Add tap handles and labels: Attach tap handles to the faucets to provide a professional and aesthetic touch. You can customize the tap handles with labels indicating the type of beer being served.
- Organize beer lines: Ensure that the beer lines are neatly organized and secured inside the kegerator. This will help prevent any tangling or kinks, ensuring a smooth flow of beer.
- Clean beer lines regularly: Regularly clean the beer lines to remove any residue, bacteria, or yeast buildup that can affect the taste and quality of the beer. Follow the manufacturer’s instructions for the recommended cleaning solution and frequency.
- Check for leaks: Regularly inspect all the connections, hoses, and fittings for any signs of leaks. Make sure to tighten any loose connections or replace any damaged components to prevent wastage of beer and maintain the integrity of your setup.
- Maintain proper temperature: Continuously monitor and adjust the temperature of the kegerator to ensure it remains within the recommended range for serving beer. This will help maintain the freshness and quality of the beer.
- Rotate kegs: Rotate the kegs regularly to ensure that you are serving beer that is fresh and at its peak flavor. This also helps distribute the wear and tear on the kegerator components more evenly.
- Keep the kegerator clean: Regularly clean and sanitize the interior of the kegerator to prevent any buildup of bacteria or mold. Wipe down surfaces, remove any spills, and follow the manufacturer’s guidelines for proper maintenance.
- Perform regular maintenance: Follow any maintenance schedules or guidelines provided by the kegerator manufacturer. This may include checking and replacing worn-out parts, lubricating moving components, and performing routine inspections.
- Train staff: If you have staff members operating the kegerator, ensure they are properly trained on its usage, maintenance, and troubleshooting. This will help prevent any mishaps and ensure a consistent and enjoyable beer-drinking experience for customers.
By paying attention to these final touches and implementing proper maintenance practices, you’ll be able to enjoy the benefits of your kegerator for years to come. Remember, a well-maintained kegerator means better beer and happier customers!
With step seven completed, you’ve successfully installed and set up your kegerator in your bar. Cheers to a seamless beer dispensing experience and an enhanced drinking environment!
If you have any other questions or need further assistance, feel free to ask. Enjoy your kegerator!
Conclusion
Installing a kegerator in your bar is a fantastic way to elevate your beverage service and provide an enhanced drinking experience for your customers. By following the step-by-step process outlined in this article, you can successfully install and set up a kegerator in your bar, ensuring fresh and perfectly poured draft beer.
From choosing the right location to connecting the beer lines, each step of the installation process is critical for creating a functional and efficient kegerator setup. It’s important to consider factors such as visibility, space, accessibility, temperature, and electricity when selecting the location for your kegerator.
Preparing the space by cleaning, clearing obstructions, leveling the surface, and installing a drip tray helps ensure a clean and organized environment for your kegerator. Assembling the kegerator involves carefully unpacking the components, attaching the tap tower and faucets, and connecting the beer lines and keg coupler.
With the kegerator assembled, installing the CO2 tank and regulator is the next step. Securing the CO2 tank, attaching the regulator, and connecting the gas line are crucial for carbonating and pressurizing the beer.
Connecting the beer lines allows for a smooth flow of beer from the keg to the faucet. It’s important to properly prepare the beer lines, connect them to the keg coupler and faucet, and check for any leaks.
After the installation, it’s essential to test and adjust the kegerator to ensure proper temperature, carbonation levels, and pouring consistency. Regular maintenance, such as cleaning beer lines, checking for leaks, and maintaining proper temperature, ensures the kegerator stays in optimal condition.
By following these steps and implementing the provided maintenance tips, you can enjoy the benefits of a well-functioning kegerator that consistently delivers fresh and flavorful draft beer to your customers.
So, go ahead and transform your bar into a hub of high-quality draft beer with the installation of a kegerator. Cheers to a successful installation and a fantastic beer-drinking experience!
If you have any further questions or need assistance, don’t hesitate to reach out. Enjoy your kegerator and the enhanced bar atmosphere it brings!
Frequently Asked Questions about How To Install Kegerator In Bar
Was this page helpful?
At Storables.com, we guarantee accurate and reliable information. Our content, validated by Expert Board Contributors, is crafted following stringent Editorial Policies. We're committed to providing you with well-researched, expert-backed insights for all your informational needs.

0 thoughts on “How To Install Kegerator In Bar”