Home>Renovation & DIY>Home Renovation Guides>How To Install Cedar Shingles On A Gable End

Home Renovation Guides
How To Install Cedar Shingles On A Gable End
Modified: August 27, 2024
Learn how to install cedar shingles on a gable end with our comprehensive home renovation guide. Follow our step-by-step instructions for a successful DIY project.
(Many of the links in this article redirect to a specific reviewed product. Your purchase of these products through affiliate links helps to generate commission for Storables.com, at no extra cost. Learn more)
Introduction
Installing cedar shingles on a gable end is a rewarding home renovation project that can enhance the aesthetic appeal and durability of your property. Cedar shingles are renowned for their natural beauty, resilience, and ability to withstand the elements, making them a popular choice for homeowners seeking a timeless and sustainable roofing solution. Whether you're a seasoned DIY enthusiast or a homeowner eager to embark on a new project, this comprehensive guide will walk you through the step-by-step process of installing cedar shingles on a gable end, ensuring that you achieve professional-quality results while adding value to your home.
By following the detailed instructions and tips provided in this guide, you'll gain the knowledge and confidence needed to tackle this project with precision and efficiency. From gathering the necessary materials and tools to mastering the techniques for seamless shingle installation, each step is designed to empower you with the skills and insights required to transform your gable end into a stunning showcase of craftsmanship.
As you delve into the intricacies of this installation process, you'll discover the artistry and precision involved in working with cedar shingles. From the initial preparation of the gable end to the final trimming of the shingles, each stage presents an opportunity to engage with the natural beauty of cedar and create a lasting impact on your home's exterior. Whether you're drawn to the rustic charm of cedar or the eco-friendly benefits of this sustainable material, the installation of cedar shingles on your gable end is a testament to your commitment to quality and aesthetics.
Throughout this guide, you'll find practical insights, expert tips, and a wealth of knowledge that will equip you with the tools to execute this project with finesse. As you embark on this journey, envision the transformation that awaits your gable end and the sense of accomplishment that comes with mastering a timeless craft. So, roll up your sleeves, gather your materials, and let's embark on this enriching journey of installing cedar shingles on a gable end.
Key Takeaways:
- Transform Your Gable End with Timeless Cedar Shingles
Discover the rewarding journey of installing cedar shingles, enhancing your home’s beauty and durability. Embrace craftsmanship and precision for a visually captivating and enduring gable end transformation. - Embrace the Artistry of Cedar Shingle Installation
From meticulous preparation to seamless integration, each shingle embodies enduring beauty and sustainable elegance. Infuse your gable end with organic charm and authenticity, creating a visual masterpiece of craftsmanship.
Read more: How To Shingle A Gable Roof
Step 1: Gather the Necessary Materials and Tools
Before embarking on the installation of cedar shingles on a gable end, it's essential to gather all the required materials and tools to ensure a smooth and efficient process. By assembling the necessary items beforehand, you can streamline the installation and minimize interruptions, allowing you to focus on the craftsmanship and precision required for this project.
Materials:
-
Cedar Shingles: Select high-quality cedar shingles that are durable and resistant to weathering. Ensure that the shingles are of uniform thickness and free from defects to achieve a professional finish.
-
Starter Strip: Acquire a starter strip designed specifically for cedar shingle installation. The starter strip provides a secure base for the first course of shingles and promotes proper water drainage.
-
Underlayment: Choose a suitable underlayment material, such as roofing felt, to provide an additional layer of protection against moisture and ensure a weather-tight seal.
-
Nails: Opt for corrosion-resistant nails, such as stainless steel or hot-dipped galvanized nails, to secure the cedar shingles effectively. The length of the nails should be compatible with the thickness of the shingles.
-
Trim Boards: Prepare trim boards to finish the edges and corners of the gable end, enhancing the overall appearance and structural integrity of the installation.
-
Drip Edge: Obtain a drip edge to facilitate proper water runoff and protect the edges of the roof from moisture infiltration.
-
Sealant: Select a high-quality sealant or caulk to seal any gaps or joints, ensuring a watertight and durable finish.
Tools:
-
Hammer: A reliable hammer will be essential for driving nails securely into the cedar shingles and trim boards.
-
Utility Knife: A sharp utility knife is indispensable for cutting and shaping the cedar shingles to fit the gable end accurately.
-
Roofing Nailer: Consider using a roofing nailer for efficient and consistent nail placement, reducing installation time and effort.
-
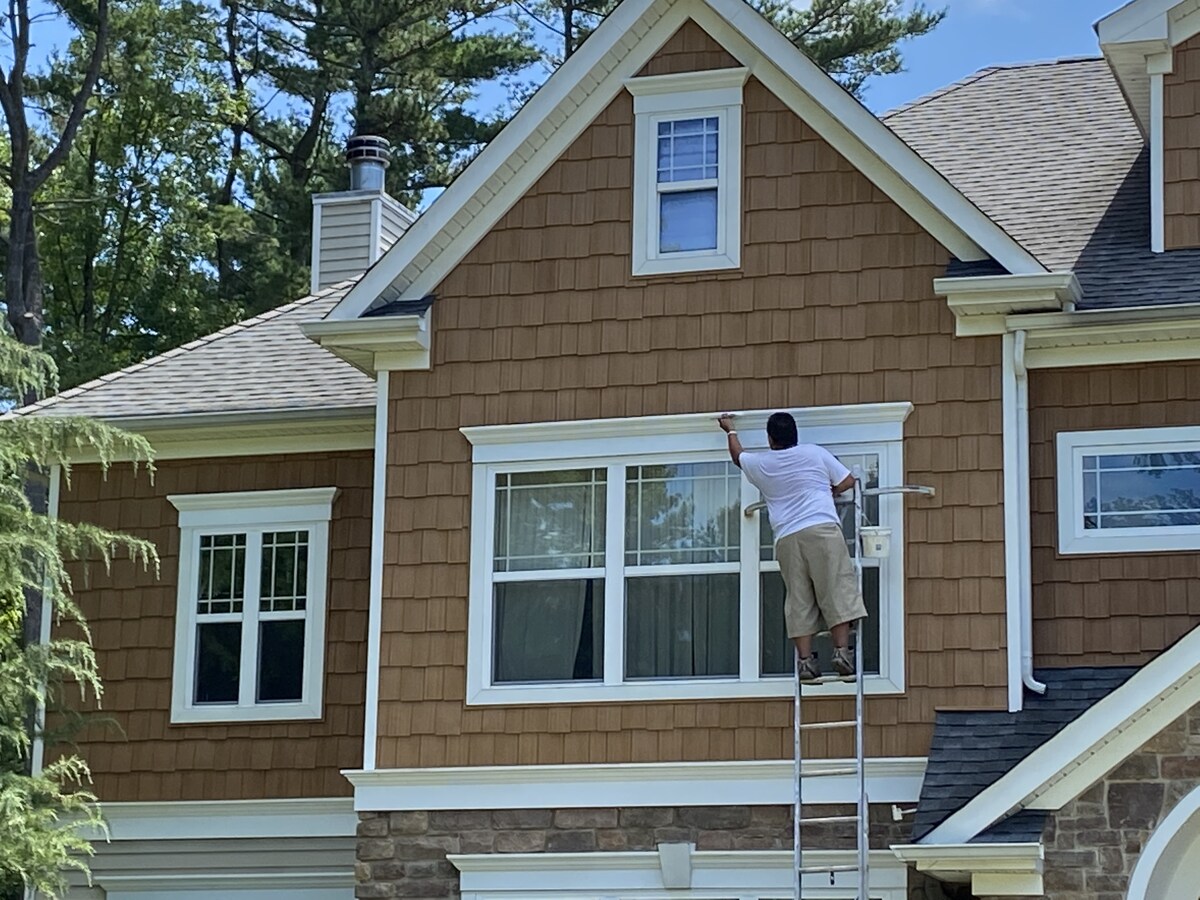
Ladder: Ensure that a sturdy ladder is available to access the gable end safely and comfortably during the installation process.
-
Measuring Tape: Precision is key in cedar shingle installation, and a measuring tape will aid in achieving accurate dimensions and alignment.
-
Safety Gear: Prioritize safety by wearing appropriate gear, including gloves, eye protection, and footwear with good traction.
By meticulously gathering the specified materials and tools, you'll set the stage for a successful and gratifying installation of cedar shingles on your gable end. This thoughtful preparation will pave the way for a seamless and enjoyable renovation experience, allowing you to focus on the artistry and craftsmanship inherent in working with cedar shingles.
Step 2: Prepare the Gable End
Preparing the gable end is a crucial preliminary step that sets the foundation for a successful installation of cedar shingles. This phase involves assessing the existing condition of the gable end, making necessary repairs, and implementing measures to ensure a stable and level surface for the shingle application.
Read more: How To Cap A Cedar Shingle Roof
Assess the Condition
Begin by carefully examining the gable end to identify any signs of damage, decay, or structural issues. Look for areas of rot, moisture damage, or loose boards that may compromise the integrity of the shingle installation. Addressing these issues at the outset will prevent future complications and preserve the longevity of the cedar shingles.
Repair and Reinforce
If any sections of the gable end exhibit damage or deterioration, take the time to repair and reinforce these areas before proceeding with the installation. Replace rotted or compromised boards, reinforce the framing if necessary, and ensure that the entire surface is sound and capable of supporting the weight of the cedar shingles.
Install Underlayment
Next, apply the chosen underlayment material, such as roofing felt, to the gable end. The underlayment serves as a protective barrier against moisture infiltration and provides an additional layer of insulation. Secure the underlayment evenly across the surface, ensuring complete coverage and a smooth, wrinkle-free application.
Establish a Starter Course
Create a sturdy foundation for the cedar shingles by installing a starter strip along the bottom edge of the gable end. The starter strip acts as a secure anchor for the initial row of shingles and promotes proper water drainage. Position the starter strip with precision, ensuring that it aligns evenly and securely along the entire length of the gable end.
Read more: When To Replace Cedar Shingle Siding
Trim and Alignment
Lastly, trim any protruding edges or irregularities on the gable end to achieve a uniform and level surface for the shingle installation. Use a combination of precision cutting tools and techniques to ensure that the gable end is impeccably prepared to receive the cedar shingles. Pay close attention to alignment and symmetry, as these factors will contribute to the overall visual appeal and structural integrity of the installation.
By meticulously preparing the gable end, you establish a solid groundwork for the seamless and enduring installation of cedar shingles. This preparatory phase not only ensures the structural stability of the gable end but also sets the stage for a visually striking and professionally executed shingle application. With the gable end meticulously prepared, you are now ready to embark on the next phase of the installation process, bringing you one step closer to transforming your home with the timeless beauty of cedar shingles.
Step 3: Install the Starter Strip
The installation of the starter strip is a pivotal step in the process of applying cedar shingles to a gable end. This foundational element serves as the anchor for the initial row of shingles, ensuring a secure and level base for the entire installation. By meticulously executing this phase, you set the stage for a visually appealing, weather-resistant, and enduring cedar shingle application.
Selecting the Starter Strip
Before commencing the installation, carefully select a high-quality starter strip designed specifically for cedar shingle applications. The starter strip should be crafted from durable and weather-resistant material, capable of withstanding the elements and providing long-term support for the cedar shingles. Ensure that the dimensions and profile of the starter strip align with the specifications recommended for cedar shingle installations, guaranteeing a seamless integration with the shingle courses.
Positioning and Alignment
Begin by positioning the starter strip along the bottom edge of the gable end, ensuring a precise and uniform alignment throughout its length. The starter strip should be securely fastened to the gable end, creating a stable foundation for the first course of cedar shingles. Pay meticulous attention to the horizontal alignment and vertical orientation of the starter strip, as these factors will influence the overall symmetry and visual appeal of the shingle installation.
Read more: How To Install Gable Vent
Securing the Starter Strip
Using corrosion-resistant nails, such as stainless steel or hot-dipped galvanized nails, securely fasten the starter strip to the gable end. Place the nails at regular intervals along the length of the starter strip, ensuring that each nail penetrates the underlying structure to provide robust anchorage. The secure attachment of the starter strip is essential for maintaining the integrity of the shingle courses and facilitating proper water drainage along the gable end.
Overlapping and Sealing
As you progress with the installation, ensure that each subsequent piece of the starter strip overlaps the preceding piece with precision. This overlapping arrangement creates a continuous barrier against moisture infiltration and reinforces the stability of the starter strip. Additionally, apply a high-quality sealant or caulk to the joints and seams of the starter strip, enhancing its weather resistance and contributing to a watertight seal along the bottom edge of the gable end.
By meticulously installing the starter strip, you establish a solid foundation for the subsequent application of cedar shingles, ensuring a professional finish and long-lasting performance. This critical phase sets the tone for the visual appeal and structural integrity of the entire shingle installation, underscoring the importance of precision, durability, and meticulous craftsmanship. With the starter strip securely in place, you are poised to advance to the next stage of the cedar shingle installation, bringing you closer to realizing the timeless beauty and enduring quality of this remarkable roofing solution.
Step 4: Install the First Course of Shingles
With the gable end meticulously prepared and the starter strip securely in place, you are now poised to embark on the transformative process of installing the first course of cedar shingles. This pivotal phase sets the stage for the visual impact and weather-resistant performance of the entire shingle application, requiring precision, attention to detail, and a keen eye for symmetry.
Begin by selecting high-quality cedar shingles that exhibit uniform thickness, straight edges, and a smooth surface. Carefully inspect each shingle to ensure that it is free from defects and possesses the natural beauty characteristic of cedar. With the shingles at the ready, position the first shingle at the bottom corner of the gable end, aligning it evenly with the edge and the starter strip. Secure the shingle in place using corrosion-resistant nails, driving the nails through the shingle and into the underlying structure with precision and care.
As you progress along the gable end, continue to position and secure the cedar shingles, ensuring a consistent overlap and alignment between each shingle. Utilize a level to verify the horizontal orientation of the shingles, maintaining a straight and uniform appearance across the entire first course. Pay close attention to the exposure of each shingle, ensuring that the desired portion is visible and that the overlap adheres to the specified guidelines for cedar shingle installations.
Throughout the installation of the first course, maintain a meticulous approach to nail placement, ensuring that the nails penetrate the shingles and underlying structure at the designated locations. Consistent and secure nail placement is essential for anchoring the shingles effectively and promoting long-term stability and weather resistance. As you approach the end of the first course, carefully measure and cut the final shingle to fit the remaining space, ensuring a seamless and professional finish.
By methodically installing the first course of cedar shingles, you lay the groundwork for a visually striking, weather-resistant, and enduring gable end transformation. This phase exemplifies the artistry and precision inherent in working with cedar shingles, underscoring the timeless appeal and sustainable benefits of this remarkable roofing material. With the first course seamlessly in place, you are poised to continue the installation, bringing you one step closer to realizing the full potential of your gable end renovation.
Step 5: Continue Installing Shingles
With the first course of cedar shingles securely in place, the continuation of the installation process unfolds as a seamless progression toward the completion of the gable end transformation. This pivotal phase encompasses the meticulous alignment, overlapping, and fastening of successive shingle courses, culminating in a visually captivating and weather-resistant exterior enhancement.
As you transition to the successive courses of cedar shingles, maintain a steadfast commitment to precision and symmetry, ensuring that each shingle aligns uniformly with the preceding course. The consistent overlap between shingles serves as a safeguard against moisture infiltration and reinforces the structural integrity of the entire installation. Adhering to the specified exposure and alignment guidelines for cedar shingle applications is paramount, as it contributes to the overall aesthetic appeal and performance of the gable end renovation.
Throughout the installation of successive shingle courses, leverage the natural variations in cedar shingles to create a visually dynamic and textured facade. Embrace the inherent character of cedar, allowing the unique grain patterns and hues to impart a sense of organic beauty to the gable end. By thoughtfully arranging the shingles and embracing their natural variations, you infuse the installation with a timeless charm and an authentic expression of craftsmanship.
As each course of cedar shingles takes shape, prioritize the secure fastening of the shingles using corrosion-resistant nails, ensuring that they penetrate the underlying structure with precision and reliability. Consistent nail placement and anchorage are essential for fortifying the shingle installation against the elements and promoting long-term durability. Embrace the rhythmic cadence of the installation process, allowing each securely fastened shingle to contribute to the cohesive and enduring appeal of the gable end.
As the successive courses of cedar shingles unfold, maintain a keen eye for detail and alignment, verifying the horizontal and vertical orientation of the shingles to achieve a uniform and visually striking presentation. Embrace the artistry and craftsmanship inherent in working with cedar shingles, recognizing that each meticulously installed shingle contributes to the enduring beauty and resilience of the gable end.
With each course seamlessly integrated into the installation, the gable end undergoes a remarkable transformation, embodying the timeless allure and sustainable benefits of cedar shingles. As you continue to install the shingles with precision and artistry, you draw closer to the realization of a visually captivating, weather-resistant, and enduring enhancement to your home's exterior.
Read more: How To Build A Gable End Roof Overhang
Step 6: Finish the Top Row
As the installation of cedar shingles on the gable end nears completion, the focus shifts to the meticulous execution of the top row, a critical element that crowns the entire installation with precision and finesse. The top row serves as the defining edge of the shingle application, framing the gable end with a seamless and visually striking finish that embodies the artistry and enduring appeal of cedar shingles.
To commence the finishing of the top row, carefully measure and cut the cedar shingles to fit the remaining space at the peak of the gable end. Precision is paramount in this phase, as the accurate alignment and seamless integration of the shingles contribute to the overall symmetry and visual impact of the installation. Utilize a sharp utility knife to achieve clean and precise cuts, ensuring that each shingle aligns uniformly with the edge of the gable end.
As the shingles are positioned and secured along the top row, pay meticulous attention to the alignment and overlap, maintaining a consistent and visually appealing presentation. The top row serves as the culmination of the entire installation, encapsulating the craftsmanship and attention to detail that define the enduring beauty of cedar shingles. Embrace the natural variations and textures of the shingles, allowing their inherent character to enrich the top row with a sense of organic charm and authenticity.
Securely fasten the shingles of the top row using corrosion-resistant nails, driving the nails with precision and care to ensure robust anchorage and long-term stability. Each securely fastened shingle contributes to the cohesive and enduring appeal of the gable end, underscoring the meticulous craftsmanship and dedication to quality inherent in the installation process.
As the top row seamlessly takes shape, the gable end undergoes a remarkable transformation, embodying the timeless allure and sustainable benefits of cedar shingles. The finishing of the top row represents the culmination of the installation process, marking the achievement of a visually captivating, weather-resistant, and enduring enhancement to your home's exterior.
With the top row impeccably finished, the installation of cedar shingles on the gable end stands as a testament to your commitment to quality, aesthetics, and enduring craftsmanship.
Step 7: Trim the Shingles
Trimming the shingles is the final step in the installation process, where precision and attention to detail are paramount to achieving a polished and professional finish. This phase involves refining the edges and corners of the cedar shingles, ensuring that they seamlessly integrate with the architectural contours of the gable end while upholding the visual harmony and structural integrity of the entire installation.
Begin by carefully assessing the edges and corners of the installed cedar shingles, identifying areas that require trimming to achieve a uniform and visually appealing presentation. Utilize a sharp utility knife to delicately trim the shingles, following the natural lines and angles of the gable end to create clean and precise cuts. Pay meticulous attention to the alignment and symmetry of the trimmed shingles, ensuring that they seamlessly blend with the architectural nuances of the gable end.
As you progress with the trimming process, maintain a keen eye for consistency and precision, striving to achieve a seamless transition between the shingles and the surrounding elements of the gable end. Embrace the natural variations and textures of the cedar shingles, allowing their organic beauty to shine through the meticulously trimmed edges and corners. By harmonizing the shingles with the architectural features of the gable end, you elevate the overall aesthetic appeal and cohesiveness of the installation.
In areas where the shingles meet the trim boards or intersect with other structural elements, exercise finesse and patience in achieving seamless transitions and clean intersections. The careful trimming of the shingles in these critical areas contributes to the overall visual impact and structural integrity of the gable end, underscoring the meticulous craftsmanship and attention to detail inherent in the installation process.
Throughout the trimming phase, prioritize the preservation of the natural beauty and character of the cedar shingles, ensuring that the trimmed edges and corners reflect the timeless allure and organic charm of this remarkable roofing material. By infusing the trimmed shingles with a sense of authenticity and craftsmanship, you impart a lasting impression of quality and artistry to the gable end, elevating its visual appeal and enduring allure.
As the trimming of the shingles culminates, step back and admire the seamless integration and refined presentation of the entire installation. The meticulously trimmed shingles harmonize with the architectural contours of the gable end, embodying the artistry and enduring beauty of cedar shingles. With the completion of this final step, the gable end stands as a testament to the meticulous craftsmanship, timeless allure, and enduring quality of cedar shingles.
Conclusion
In conclusion, the installation of cedar shingles on a gable end represents a transformative journey that intertwines craftsmanship, precision, and the timeless allure of natural materials. Throughout each step of this enriching process, from the meticulous preparation of the gable end to the seamless integration and trimming of the shingles, a narrative of enduring beauty and sustainable elegance unfolds.
As the final shingle is meticulously trimmed and seamlessly integrated with the architectural contours of the gable end, a sense of accomplishment and pride permeates the air. The gable end stands as a testament to the dedication to quality, aesthetics, and enduring craftsmanship, embodying the timeless allure and sustainable benefits of cedar shingles.
The visual impact of the completed installation is nothing short of captivating, with the natural variations and textures of the cedar shingles infusing the gable end with a sense of organic charm and authenticity. Each shingle, securely fastened and harmoniously aligned, contributes to the enduring beauty and resilience of the gable end, creating a lasting impression of quality and artistry.
As the sun casts its warm glow upon the newly adorned gable end, the cedar shingles exude a timeless charm, their natural hues and grain patterns captivating the eye and evoking a sense of harmony with the surrounding landscape. The gable end, once a blank canvas, now stands as a testament to the transformative power of craftsmanship and the enduring allure of natural materials.
With the completion of this remarkable journey, the gable end emerges as a visual masterpiece, a showcase of enduring beauty and sustainable elegance. The installation of cedar shingles has not only enhanced the aesthetic appeal of the home's exterior but has also fortified it with a weather-resistant and enduring roofing solution.
As the gable end proudly displays the culmination of this installation, it serves as an enduring reminder of the artistry and dedication woven into every shingle, every nail, and every precise cut. The timeless allure and sustainable benefits of cedar shingles are now embodied in the gable end, a testament to the enduring craftsmanship and the transformative power of natural materials.
In the end, the installation of cedar shingles on a gable end transcends the realm of home renovation; it is a testament to the enduring allure of craftsmanship, the timeless beauty of natural materials, and the transformative power of dedication and precision.
Frequently Asked Questions about How To Install Cedar Shingles On A Gable End
Was this page helpful?
At Storables.com, we guarantee accurate and reliable information. Our content, validated by Expert Board Contributors, is crafted following stringent Editorial Policies. We're committed to providing you with well-researched, expert-backed insights for all your informational needs.


0 thoughts on “How To Install Cedar Shingles On A Gable End”