Articles
How To Install Bicycle Bar End Mirrors
Modified: December 7, 2023
Learn how to install bicycle bar end mirrors with our step-by-step guide. Discover the benefits of using bar end mirrors for a safer riding experience. Find out more now.
(Many of the links in this article redirect to a specific reviewed product. Your purchase of these products through affiliate links helps to generate commission for Storables.com, at no extra cost. Learn more)
Introduction
When it comes to cycling, safety should always be a top priority. One of the essential accessories for any cyclist is a good set of mirrors. Mirrors help provide visibility of what’s happening behind you, allowing you to stay aware of your surroundings and make safer decisions on the road.
In this article, we will guide you through the process of installing bar end mirrors on your bicycle. Bar end mirrors are a popular choice among cyclists as they offer improved visibility and are easy to install. Whether you’re an experienced cyclist or a beginner, adding bar end mirrors to your bike can enhance your riding experience and provide an added layer of safety.
Before we dive into the step-by-step installation process, let’s take a moment to go over the tools and materials you’ll need:
- Bar end mirrors: Choose mirrors that are compatible with your handlebars and provide a wide field of view.
- Hex key or Allen wrench: This tool will be necessary for removing and tightening the handlebar end caps.
- Clean cloth: You’ll need this to wipe down the handlebars and ensure a clean surface for the installation.
Now that you have all the necessary tools and materials ready, let’s move on to the installation process. By following the steps below, you’ll soon have your bar end mirrors securely and conveniently attached to your bicycle.
Key Takeaways:
- Enhance your cycling safety and visibility by installing bar end mirrors on your bicycle. Follow our step-by-step guide for a secure and functional setup, and enjoy the peace of mind they provide on the road.
- Prioritize safety while cycling and regularly test the stability and visibility of your bar end mirrors. With proper installation and adjustments, these mirrors can be your extra set of eyes on the road behind you.
Read more: How To Install Bar End Mirrors
Step 1: Gather necessary tools and materials
Before you begin the installation process, it’s crucial to gather all the required tools and materials. Having everything on hand will make the process smoother and more efficient. Here’s the list of items you’ll need:
- Bar end mirrors: Choose mirrors that are compatible with your handlebars and provide a wide field of view.
- Hex key or Allen wrench: This tool will be necessary for removing and tightening the handlebar end caps.
- Clean cloth: You’ll need this to wipe down the handlebars and ensure a clean surface for the installation.
Once you have gathered all the necessary tools and materials, find a well-lit and comfortable workspace. Make sure the area is clean and free of any obstructions that could interfere with the installation process.
Take a moment to inspect the bar end mirrors and familiarize yourself with their construction. Check if they come with any additional mounting hardware or adapters. It’s important to understand how the mirrors will attach to your handlebars to ensure a successful installation.
Additionally, make sure the mirrors provide a wide and clear field of view. This will be crucial for your safety on the road, allowing you to easily monitor any approaching vehicles or cyclists behind you.
By getting all the necessary tools and materials ready, you’re taking an important step towards a successful installation. With everything in place, you’ll be able to proceed with confidence and efficiency. Let’s move on to the next step of the installation process.
Step 2: Remove the end caps from handlebars
Before you can install the bar end mirrors, you’ll need to remove the end caps from your handlebars. These end caps are usually inserted to provide a finished look and protect the handlebars from dirt and moisture. Here’s how you can remove them:
- Locate the end caps at the ends of your handlebars. They are usually made of plastic or rubber.
- Using your hex key or Allen wrench, locate the screw or bolt that secures the end caps in place.
- Insert the hex key or Allen wrench into the screw or bolt, and gently turn counterclockwise to loosen and remove the end cap.
- Repeat the process for the other end of the handlebars to remove the second end cap.
Once you have removed the end caps, take a moment to clean the handlebars with a clean cloth. This will ensure a clean surface for the installation and help the bar end mirrors adhere properly.
It’s worth noting that some bicycles may have different types of handlebars or end caps. If you encounter any difficulty in removing the end caps, refer to your bicycle’s user manual or consult a professional bike mechanic for assistance.
With the end caps successfully removed, you’re one step closer to installing the bar end mirrors. In the next step, we’ll prepare the mirrors for installation. Let’s move on!
Step 3: Prepare the mirrors for installation
With the end caps removed, it’s time to prepare the bar end mirrors for installation. This step involves ensuring the mirrors are ready to be securely attached to your handlebars. Follow these steps to prepare the mirrors:
- Inspect the mirrors: Carefully examine the mirrors for any signs of damage or defects. Check if there are any loose parts or screws that need to be tightened.
- Apply adhesive if necessary: Some bar end mirrors may require adhesive for a secure attachment. If your mirrors come with adhesive pads or glue, follow the manufacturer’s instructions to apply them to the mirror’s mounting surface.
- Adjust the mirror angles: Most bar end mirrors can be adjusted to your desired angle. Take some time to experiment with the mirror’s adjustment mechanism and find the optimal position that provides a clear view of what’s behind you.
- Check compatibility: Ensure that the bar end mirrors you have chosen are compatible with your handlebars and can be safely installed without obstructing your grip or any important components on your bike.
Preparing the mirrors for installation is an important step to ensure a stable and functional setup. By carefully inspecting and adjusting the mirrors, you’ll be able to enjoy a clear and unobstructed view of your surroundings while riding.
Once you have prepared the mirrors, it’s time to move on to the installation process. In the next step, we’ll guide you through inserting the mirrors into your handlebars. Let’s get started!
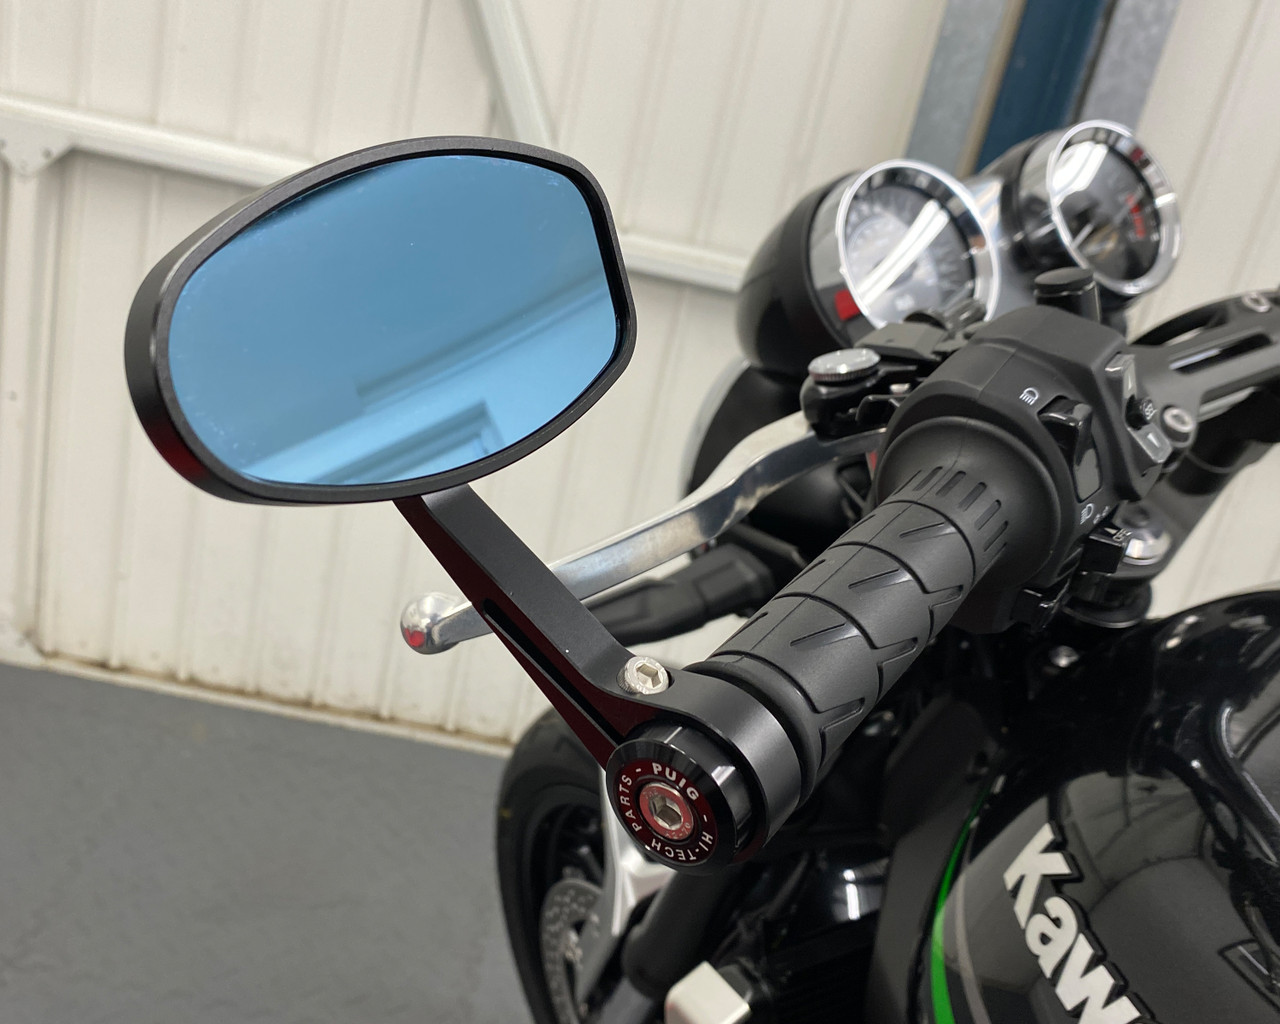
Step 4: Insert the mirrors into handlebars
Now that you have prepared the bar end mirrors, it’s time to insert them into your handlebars. Follow these steps to securely install the mirrors:
- Hold the mirror in one hand, with the mounting surface facing outward.
- Locate the opening at the end of your handlebar where the mirror will be inserted.
- Gently insert the mirror into the handlebar opening until it fits snugly. Apply steady pressure, but be careful not to force or jam the mirror.
- Ensure that the mirror is aligned straight and level with the handlebar. Take a step back and visually confirm that the mirror is not at an odd angle or obstructing your grip.
- Repeat the process for the other handlebar, inserting the second mirror into its respective opening.
It’s important to note that some bar end mirrors may have different installation mechanisms. Refer to the manufacturer’s instructions if you encounter any difficulties during the installation process.
Once both mirrors are securely inserted into the handlebars, give them a gentle shake to ensure they are stable and won’t easily come loose. If you notice any wobbling or instability, double-check the installation and make any necessary adjustments.
Now that the bar end mirrors are successfully inserted into the handlebars, it’s time to move on to the next step: adjusting the mirrors to the desired position. Let’s proceed!
When installing bicycle bar end mirrors, make sure to tighten the mounting bolt securely to prevent the mirror from moving or vibrating while riding.
Read also: 13 Best Bar End Mirrors for 2024
Step 5: Adjust the mirrors to desired position
Now that you have installed the bar end mirrors onto your handlebars, it’s time to adjust them to your desired position. Proper mirror alignment is crucial for optimal visibility and safety while riding. Follow these steps to adjust the mirrors:
- Mount your bicycle or place it in a stable position where you can comfortably reach the handlebars.
- Take a moment to assess your riding position and posture. Ensure that you are in the natural and comfortable riding position you typically use.
- Look into each mirror and adjust them until you achieve a clear and unobstructed view of the road behind you.
- Pay attention to the mirror angles and make sure they provide a wide field of view without causing any distortion or blind spots.
- Experiment with slight adjustments to find the optimal mirror position that allows you to see approaching vehicles, cyclists, or pedestrians with ease.
Keep in mind that mirror adjustment is a personal preference, and what works for one rider may not work for another. Take your time to find the positioning that provides you with the best visibility and suits your riding style.
Once you are satisfied with the mirror positioning, it’s time to move on to the next step: tightening the mirrors securely. Let’s proceed!
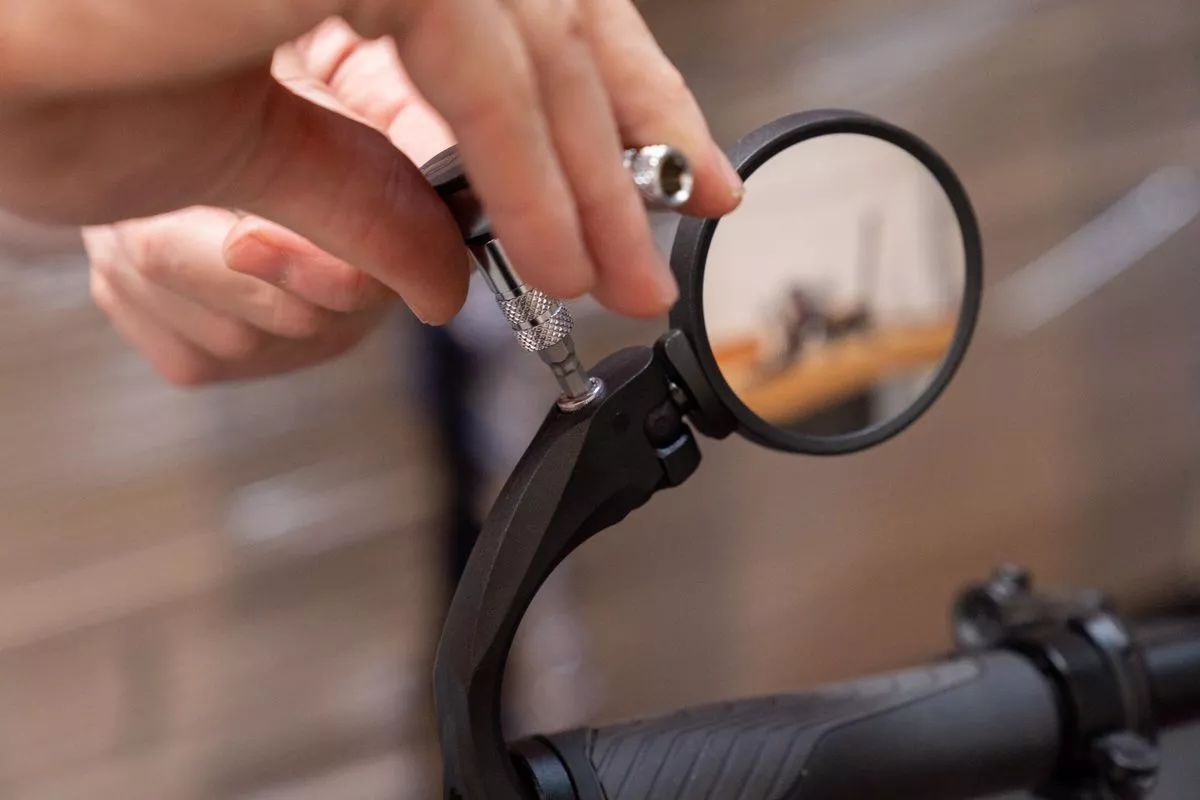
Step 6: Tighten the mirrors securely
After adjusting the bar end mirrors to your desired position, it’s essential to ensure they are securely tightened. A loose mirror can shift during rides, compromising your visibility and potentially causing accidents. Follow these steps to tighten the mirrors securely:
- Locate the tightening mechanism on each mirror. It may be a screw, bolt, or clamp.
- Using the appropriate tool (e.g., a hex key or wrench), tighten the mirror mounting screws or bolts. Apply firm but gentle pressure, making sure not to overtighten and risk damaging the mirror or handlebars.
- Check the stability of each mirror by giving them a gentle shake. If you notice any wobbling or movement, retighten the mounting screws until the mirrors are firmly in place.
- Double-check the alignment of the mirrors to ensure they are still straight and level with the handlebars.
It’s essential to strike a balance when tightening the mirrors. They should be secure enough to withstand vibrations and bumps during rides while still allowing for easy adjustment if needed. Regularly inspect the mirrors for any signs of loosening and tighten as necessary.
With the mirrors now securely tightened, it’s time to move on to the final step: testing the mirrors for stability and visibility. Let’s proceed!
Step 7: Test the mirrors for stability and visibility
After installing and securing the bar end mirrors, it’s essential to test them for stability and visibility. Testing ensures that the mirrors function properly and provide you with a clear view of the road behind you. Follow these steps to test the mirrors:
- Mount your bicycle or position it in a stable manner.
- Ensure that you are in the natural riding position you typically use.
- Take a moment to observe the mirrors and verify that they remain stable and firmly in place as you shift your weight or adjust your grip on the handlebars.
- Perform a few practice rides or maneuvers in a safe area while periodically checking the mirrors.
- Verify that the mirrors provide you with a wide field of view and allow you to see approaching vehicles, cyclists, or pedestrians without obstruction or distortion.
- If you notice any issues with stability or visibility, make any necessary adjustments or check the mirror installation to ensure they are securely attached.
During the testing phase, pay attention to any vibrations or movements that could affect the mirror’s stability. If you encounter persistent instability or poor visibility, consider seeking professional assistance or consulting the mirror’s manufacturer for advice.
By thoroughly testing the mirrors, you can have confidence in their reliability and functionality during your rides.
Congratulations! You have successfully installed, adjusted, and tested the bar end mirrors on your bicycle. Enjoy the enhanced safety and visibility that these mirrors provide as you embark on your cycling adventures.
Remember, always prioritize safety while cycling and regularly check your mirrors to ensure they are in good working condition. Happy riding!
Conclusion
Installing bar end mirrors on your bicycle is a simple yet effective way to enhance your safety and visibility on the road. These mirrors provide you with a clear view of the road behind you, allowing you to stay aware of your surroundings and make informed decisions while cycling.
In this article, we have outlined a step-by-step guide to help you install bar end mirrors on your bicycle. From gathering the necessary tools and materials to adjusting and securing the mirrors, each step is crucial for a successful installation.
By following the steps outlined in this guide, you can ensure a secure and functional setup. Take the time to adjust the mirrors to your desired position and regularly test their stability and visibility to ensure they remain in optimal working condition.
Remember, safety should always be your top priority while cycling. Bar end mirrors are just one of the many accessories that can contribute to a safer and more enjoyable riding experience. Make sure to also wear a helmet, follow traffic rules, and stay alert on the road.
So go ahead, install those bar end mirrors and hit the road with confidence. Enjoy the enhanced visibility and peace of mind they provide, knowing that you have an extra set of eyes on the road behind you.
Happy cycling!
Frequently Asked Questions about How To Install Bicycle Bar End Mirrors
Was this page helpful?
At Storables.com, we guarantee accurate and reliable information. Our content, validated by Expert Board Contributors, is crafted following stringent Editorial Policies. We're committed to providing you with well-researched, expert-backed insights for all your informational needs.


0 thoughts on “How To Install Bicycle Bar End Mirrors”