Home>Articles>How To Install Blade On Ryobi Reciprocating Saw
Articles
How To Install Blade On Ryobi Reciprocating Saw
Modified: May 6, 2024
Learn how to easily install a blade on your Ryobi reciprocating saw with our step-by-step guide. Read our informative articles for expert tips and techniques.
(Many of the links in this article redirect to a specific reviewed product. Your purchase of these products through affiliate links helps to generate commission for Storables.com, at no extra cost. Learn more)
Introduction
When it comes to tackling heavy-duty cutting tasks, a reciprocating saw is an essential tool in any DIY enthusiast or professional’s arsenal. A reciprocating saw, also known as a sabre saw or sawzall, is a versatile power tool that can effortlessly cut through a variety of materials, including wood, metal, and PVC pipes.
While a reciprocating saw can handle the toughest cutting jobs, the effectiveness of the tool greatly depends on the blade. Over time, blades wear out or become dull, necessitating their replacement. Installing a new blade on your Ryobi reciprocating saw is a straightforward process that can be accomplished with a few simple steps.
In this article, we will guide you through the process of installing a new blade on your Ryobi reciprocating saw. Whether you’re a seasoned handyman or a novice DIY enthusiast, this step-by-step guide will help you replace the blade effectively, ensuring your saw is ready to tackle any cutting task that comes your way.
Before we dive into the installation process, let’s take a look at the materials you will need to complete the job.
Key Takeaways:
- Replacing the blade on your Ryobi reciprocating saw is a straightforward process that requires gathering the right materials, preparing the saw, and securely installing and testing the new blade. Prioritize safety and follow the user manual for specific instructions.
- By following the step-by-step guide and conducting a thorough blade test, you can confidently ensure that your Ryobi reciprocating saw is ready for any cutting task. Remember to dispose of the old blade properly and prioritize safety throughout the process.
Read more: How To Install Ryobi Table Saw Blade Guard
Step 1: Gather Needed Materials
Before you begin the blade installation process, it’s essential to gather all the necessary materials and tools. Having everything prepared beforehand will help streamline the process and ensure a smooth blade replacement. Here are the materials you’ll need:
- Ryobi Reciprocating Saw: Make sure you have your Ryobi reciprocating saw on hand. Different models may have slightly different mechanisms for blade installation, so it’s important to consult your user manual for specific instructions.
- New Blade: Select a compatible reciprocating saw blade for your desired cutting application. There are different types of blades available, including wood-cutting blades, metal-cutting blades, and general-purpose blades. Choose the appropriate blade based on the material you’ll be cutting.
- Safety Gear: Working with power tools requires taking safety precautions. Wear safety goggles to protect your eyes from any debris or particles that may be released during the installation process. It’s also a good idea to wear gloves to protect your hands.
- Hex or Allen Wrench: Some Ryobi reciprocating saws have a blade clamp that requires a hex or Allen wrench to loosen and tighten. Check if your model requires any specific wrench size and ensure you have it readily available.
Once you have all the necessary materials gathered, you’re ready to move on to the next step: preparing the saw for blade installation.
Step 2: Prepare the Saw
Before you start replacing the blade on your Ryobi reciprocating saw, it’s important to ensure that the tool is turned off and unplugged from the power source. Safety should always be a top priority when working with power tools.
Once the saw is powered down, take a moment to inspect the area around the blade. Make sure there are no obstructions or debris that could potentially interfere with the blade replacement process.
Next, locate the blade release or clamp mechanism on your Ryobi reciprocating saw. This mechanism may vary depending on the model but is typically located near the blade area. Refer to your user manual for specific instructions on where to find the mechanism and how it operates.
If your saw has a blade clamp that requires a hex or Allen wrench, make sure you have the appropriate size wrench ready to loosen and tighten the clamp.
Before proceeding, double-check that you have all the necessary tools and materials nearby. This way, you won’t have to interrupt the blade replacement process to search for any missing items.
Once you have prepared the saw and ensured everything is in order, you’re now ready to move on to the next step: removing the old blade.
Step 3: Remove the Old Blade
Now that you have prepared your Ryobi reciprocating saw, it’s time to remove the old blade. Follow these steps to safely and effectively remove the old blade:
- Locate the blade release or clamp mechanism. This is the mechanism that holds the blade in place. Depending on your model, it may be a lever, button, or thumb screw.
- Engage the blade release or loosen the clamp by following the instructions in your user manual. This step may require you to use a hex or Allen wrench to loosen the clamp.
- Once the release is engaged or the clamp is loosened, carefully remove the old blade from the saw. Be cautious of any sharp edges and handle the blade with care. It’s a good idea to wear gloves during this step for added protection.
- Inspect the blade slot and surrounding area for any buildup or debris. Use a clean cloth or brush to remove any dirt or residue that may have accumulated.
With the old blade successfully removed, take a moment to dispose of it safely. Check your local regulations for proper disposal methods for used reciprocating saw blades. Now that the old blade is out of the way, it’s time to proceed to the next step: inserting the new blade.
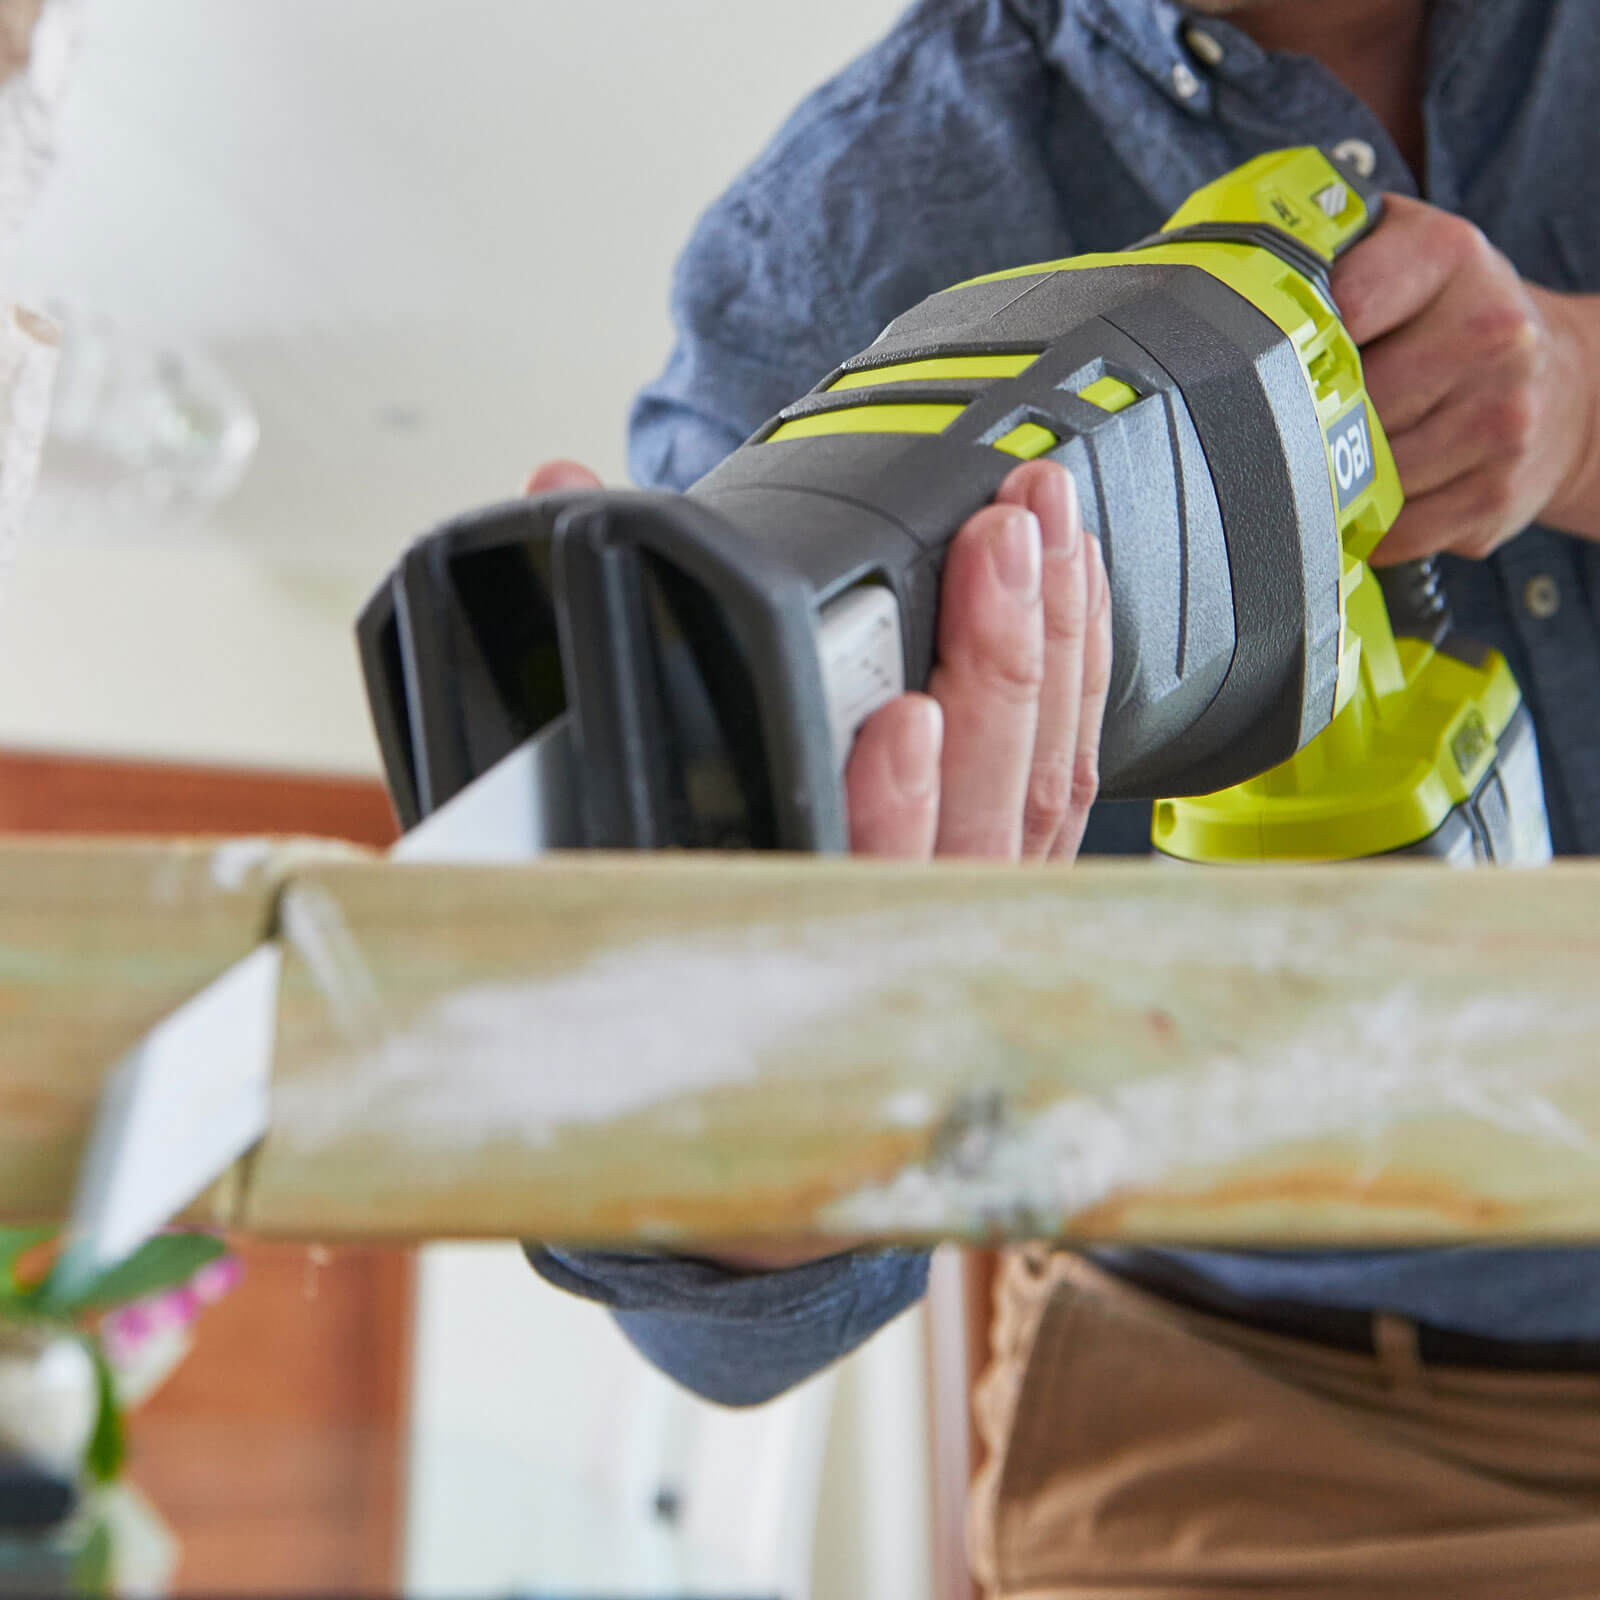
When installing a blade on a Ryobi reciprocating saw, make sure the saw is unplugged or the battery is removed. Loosen the blade clamp, insert the blade with the teeth facing forward, and tighten the clamp securely. Always wear protective gloves when handling the blade.
Step 4: Insert the New Blade
With the old blade removed, it’s time to insert the new blade into your Ryobi reciprocating saw. Follow these steps to properly insert the new blade:
- Take your new blade and ensure that it is compatible with your saw and the specific cutting task you have in mind.
- Align the shank of the new blade with the blade slot on the saw, ensuring that it is fully inserted into the slot. The shank should slide in smoothly and securely.
- If your saw has a blade release, disengage it by following the instructions in your user manual. If it has a blade clamp, begin tightening it using a hex or Allen wrench. Make sure to tighten it securely to prevent the blade from slipping or coming loose during operation.
- Gently pull on the blade to ensure that it is securely locked in place. There should be no movement or play in the blade once it is properly inserted.
It’s important to note that different Ryobi reciprocating saw models may have slight variations in the blade insertion process. Always refer to your user manual for specific instructions related to your particular model.
With the new blade securely inserted, you’re one step closer to getting your Ryobi reciprocating saw back in action. The next step is to properly secure the blade in place.
Read more: How To Change The Blade On A Ryobi Table Saw
Step 5: Secure the Blade
After inserting the new blade into your Ryobi reciprocating saw, it’s crucial to properly secure it in place. This step ensures the blade remains stable during operation and minimizes the risk of accidents or blade slippage. Follow these steps to securely fasten the blade:
- If your saw has a blade release, engage it by following the instructions in your user manual. If it has a blade clamp, make sure it is tightened securely using a suitable hex or Allen wrench. This step ensures that the blade is held firmly in place and prevents any movement or wobbling.
- Inspect the blade and surrounding area once again to check for proper alignment and ensure that there are no obstructions or debris present.
- Double-check that the blade is securely locked in place by gently pulling on it. It should not move or come loose at this stage. If there is any looseness or movement, repeat the blade insertion process and ensure that the blade is properly seated and tightened.
- Ensure that all safety features or guards on your Ryobi reciprocating saw are in place and properly functioning. These safety features help protect you from potential accidents during operation.
By taking the time to secure the blade properly, you ensure not only your own safety but also the efficiency and effectiveness of your cutting tasks. Now that the blade is securely in place, it’s time to move on to the final step: testing the blade.
Step 6: Test the Blade
After successfully installing and securing the new blade on your Ryobi reciprocating saw, it’s essential to test the blade before commencing any cutting tasks. By conducting a simple test, you can ensure that the blade is working correctly and properly aligned. Follow these steps to test the blade:
- Ensure that the area around the saw is clear of any obstructions or potential hazards.
- Plug in your Ryobi reciprocating saw and turn it on according to the manufacturer’s instructions.
- Hold the saw securely and activate the trigger to engage the blade’s reciprocating motion.
- Observe the blade’s movement carefully. It should move smoothly and without any noticeable vibrations or wobbling.
- Listen for any unusual or unfamiliar sounds that may indicate a problem with the blade. A properly installed and aligned blade should produce a consistent cutting sound without excessive noise or grinding.
- If you notice any issues or abnormalities during the test, immediately turn off the saw and check the blade’s installation and alignment. Ensure that it is securely fastened and properly aligned. If necessary, repeat the installation process or seek professional assistance if the problem persists.
By performing a thorough blade test, you ensure that your Ryobi reciprocating saw is ready for use and operating optimally. Now that you have tested the blade and confirmed its functionality, you can confidently proceed with your cutting tasks.
Conclusion
Installing a new blade on your Ryobi reciprocating saw is a relatively simple process that can be completed with a few easy steps. By following the steps outlined in this guide and referring to your user manual, you can confidently replace the blade and ensure your saw is ready for any cutting task.
Remember to gather all the necessary materials before starting, including a compatible new blade, safety gear, and any required tools such as a hex or Allen wrench. Prepare the saw by turning it off, inspecting the area, and locating the blade release or clamp mechanism.
Remove the old blade carefully, ensuring to dispose of it properly. Then, insert the new blade and secure it by engaging the blade release or tightening the clamp securely. Double-check the alignment and inspect for any obstructions or debris.
Before using the saw, conduct a thorough blade test to ensure it is functioning correctly and aligned properly. Pay attention to any abnormal sounds or movements during the test to address any potential issues promptly.
By following these steps, you can confidently install a new blade on your Ryobi reciprocating saw and ensure optimal performance for all your cutting tasks. Remember to prioritize safety throughout the process and always consult your specific model’s user manual for detailed instructions.
Now that you’re equipped with the knowledge to replace the blade, you can continue tackling your DIY projects with ease and precision. Happy cutting!
Now that you've mastered installing a blade on your Ryobi reciprocating saw, you might be wondering about other tools that could make DIY projects easier. Our next article covers various power tools, helping you decide which ones are optimal for your toolbox. From drills to sanders, we break down what makes each tool indispensable for both novices and seasoned builders. Don't miss out on enhancing your tool collection with some handy insights!
Frequently Asked Questions about How To Install Blade On Ryobi Reciprocating Saw
Was this page helpful?
At Storables.com, we guarantee accurate and reliable information. Our content, validated by Expert Board Contributors, is crafted following stringent Editorial Policies. We're committed to providing you with well-researched, expert-backed insights for all your informational needs.


0 thoughts on “How To Install Blade On Ryobi Reciprocating Saw”