Articles
How To Install Chimney Liner
Modified: February 24, 2024
Learn how to install a chimney liner with our helpful articles. Get step-by-step instructions and expert tips for a successful installation.
(Many of the links in this article redirect to a specific reviewed product. Your purchase of these products through affiliate links helps to generate commission for Storables.com, at no extra cost. Learn more)
Introduction
Welcome to our comprehensive guide on how to install a chimney liner. If you’re planning to add a wood-burning stove or fireplace to your home, installing a chimney liner is a crucial step to ensure the safe and efficient operation of your heating system. A chimney liner acts as a protective barrier between the hot flue gases and the structure of your chimney, preventing heat transfer and reducing the risk of chimney fires.
In this article, we will take you through a step-by-step process to help you properly install a chimney liner. Whether you’re a seasoned DIY enthusiast or a homeowner looking to tackle this project for the first time, we’ve got you covered.
Before we dive into the installation process, there are a few important points to consider. Firstly, it’s important to check the local building codes and regulations in your area regarding chimney installations. These regulations may dictate the type and size of chimney liner required, as well as any specific guidelines for installation.
Secondly, it’s crucial to ensure the safety and stability of your chimney structure. If you have any concerns about the condition of your chimney, it’s recommended to consult with a professional chimney sweep or a licensed contractor before proceeding with the installation.
Lastly, it’s worth mentioning that installing a chimney liner can be a complex and technical task. If you don’t feel confident in your abilities or have limited experience with home improvement projects, it’s always best to hire a professional chimney installer who has the expertise and knowledge to do the job safely and efficiently.
With that being said, let’s get started with step 1: measuring the chimney.
Key Takeaways:
- Properly measuring the chimney and selecting the right liner are crucial for a successful installation. Always consult with professionals if unsure about the process or liner selection.
- Testing the chimney liner installation is essential to ensure safe and efficient operation. Regular maintenance and inspections by professionals are key to maintaining the system’s integrity.
Step 1: Measure the Chimney
The first step in installing a chimney liner is to accurately measure the dimensions of your chimney. This will ensure that you select the right size liner for your installation. Here’s how to do it:
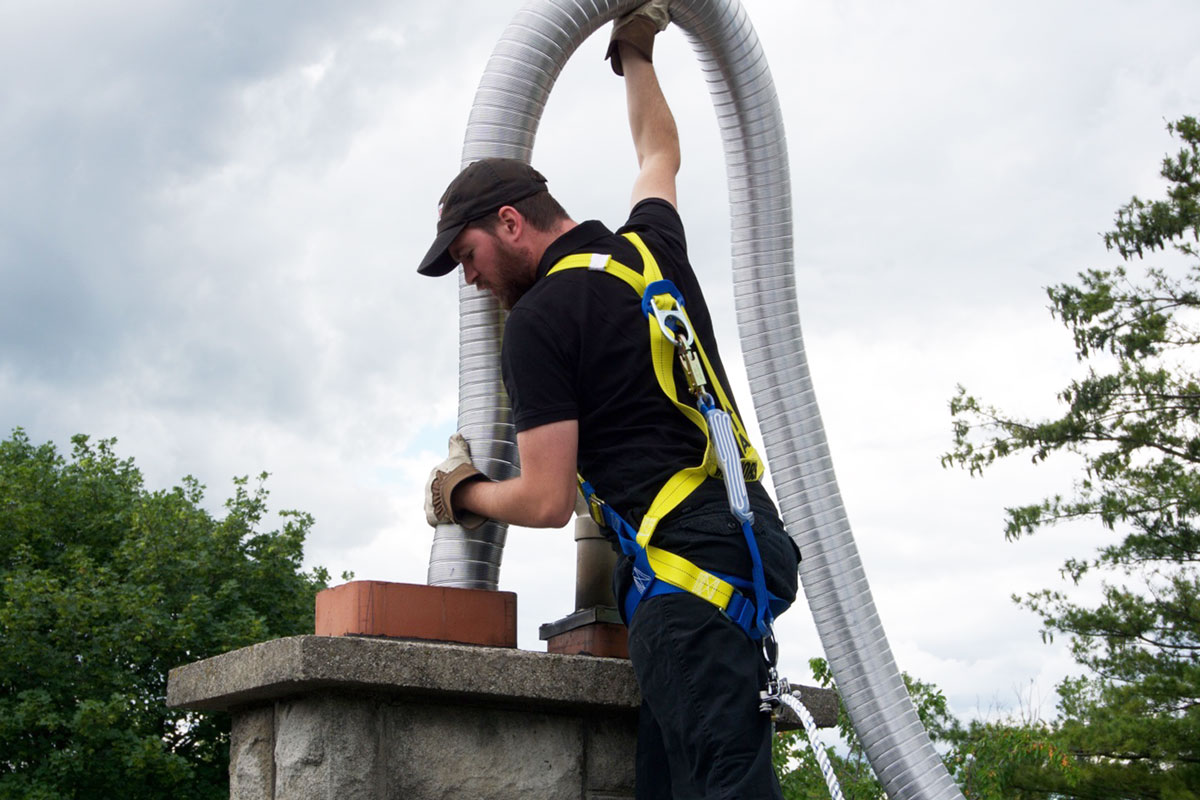
- Start by accessing the top of your chimney. This can usually be done by using a ladder and climbing onto the roof. Ensure that you take all necessary safety precautions, such as wearing proper footwear and using a safety harness if required.
- Once you’re on the roof, measure the inner dimensions of the chimney flue. This can be done by using a measuring tape or a chimney liner sizing kit. Measure the width and height of the flue, as well as the length from the top to the bottom.
- It’s important to note that the liner should be slightly smaller than the inner dimensions of the flue. This allows for proper clearance and ensures a snug fit. Refer to the manufacturer’s guidelines or consult with a professional to determine the appropriate liner size for your chimney.
- After taking the measurements, jot them down and keep them handy for the next step.
Measuring the chimney accurately is crucial to ensure that you select a chimney liner that fits properly. A liner that is too small may not provide adequate protection, while a liner that is too large may be difficult to install or cause drafting issues. If you’re unsure about the measurements or the appropriate liner size, it’s always best to seek advice from a professional.
Now that you have measured your chimney, it’s time to move on to step 2: selecting the right chimney liner.
Step 2: Select the Right Chimney Liner
Choosing the correct chimney liner is essential for the proper functioning and safety of your chimney system. There are several factors to consider when selecting a liner, including the type of fuel you will be using, the size and shape of your chimney, and any specific local building codes or regulations. Here are the key points to keep in mind:
- Fuel Type: The first consideration is the type of fuel you plan to use. Different fuels produce different levels of heat and byproducts, which can affect the type of liner you need. Common fuel types include wood, gas, oil, and pellet.
- Liner Material: Chimney liners are available in various materials such as stainless steel, aluminum, cast-in-place, and clay tile. Each material has its advantages and suitability for different applications. Stainless steel liners, for example, are highly durable and corrosion-resistant, making them a popular choice for most chimney installations.
- Liner Size: Refer to the measurements you took in step 1 and choose a liner that matches the dimensions of your chimney flue. It’s crucial to select the correct diameter and length to ensure a proper fit.
- Building Codes: Familiarize yourself with local building codes and regulations regarding chimney liners. Some areas might have specific requirements for liner materials, insulation, clearances, and other installation details. Ensure that the liner you choose meets these requirements.
- Professional Advice: If you’re unsure about the appropriate liner for your chimney, it’s always advisable to consult with a professional chimney installer or a knowledgeable salesperson. They can assess your specific needs and provide expert guidance on selecting the right liner.
Remember, the selection of the chimney liner is a critical step in the installation process. Choosing the wrong liner can lead to inefficient operation, safety hazards, and potential damage to your chimney. Take the time to research and consult with experts to ensure you make the right choice.
With the correct liner selected, we can now proceed to step 3: preparing the chimney for installation.
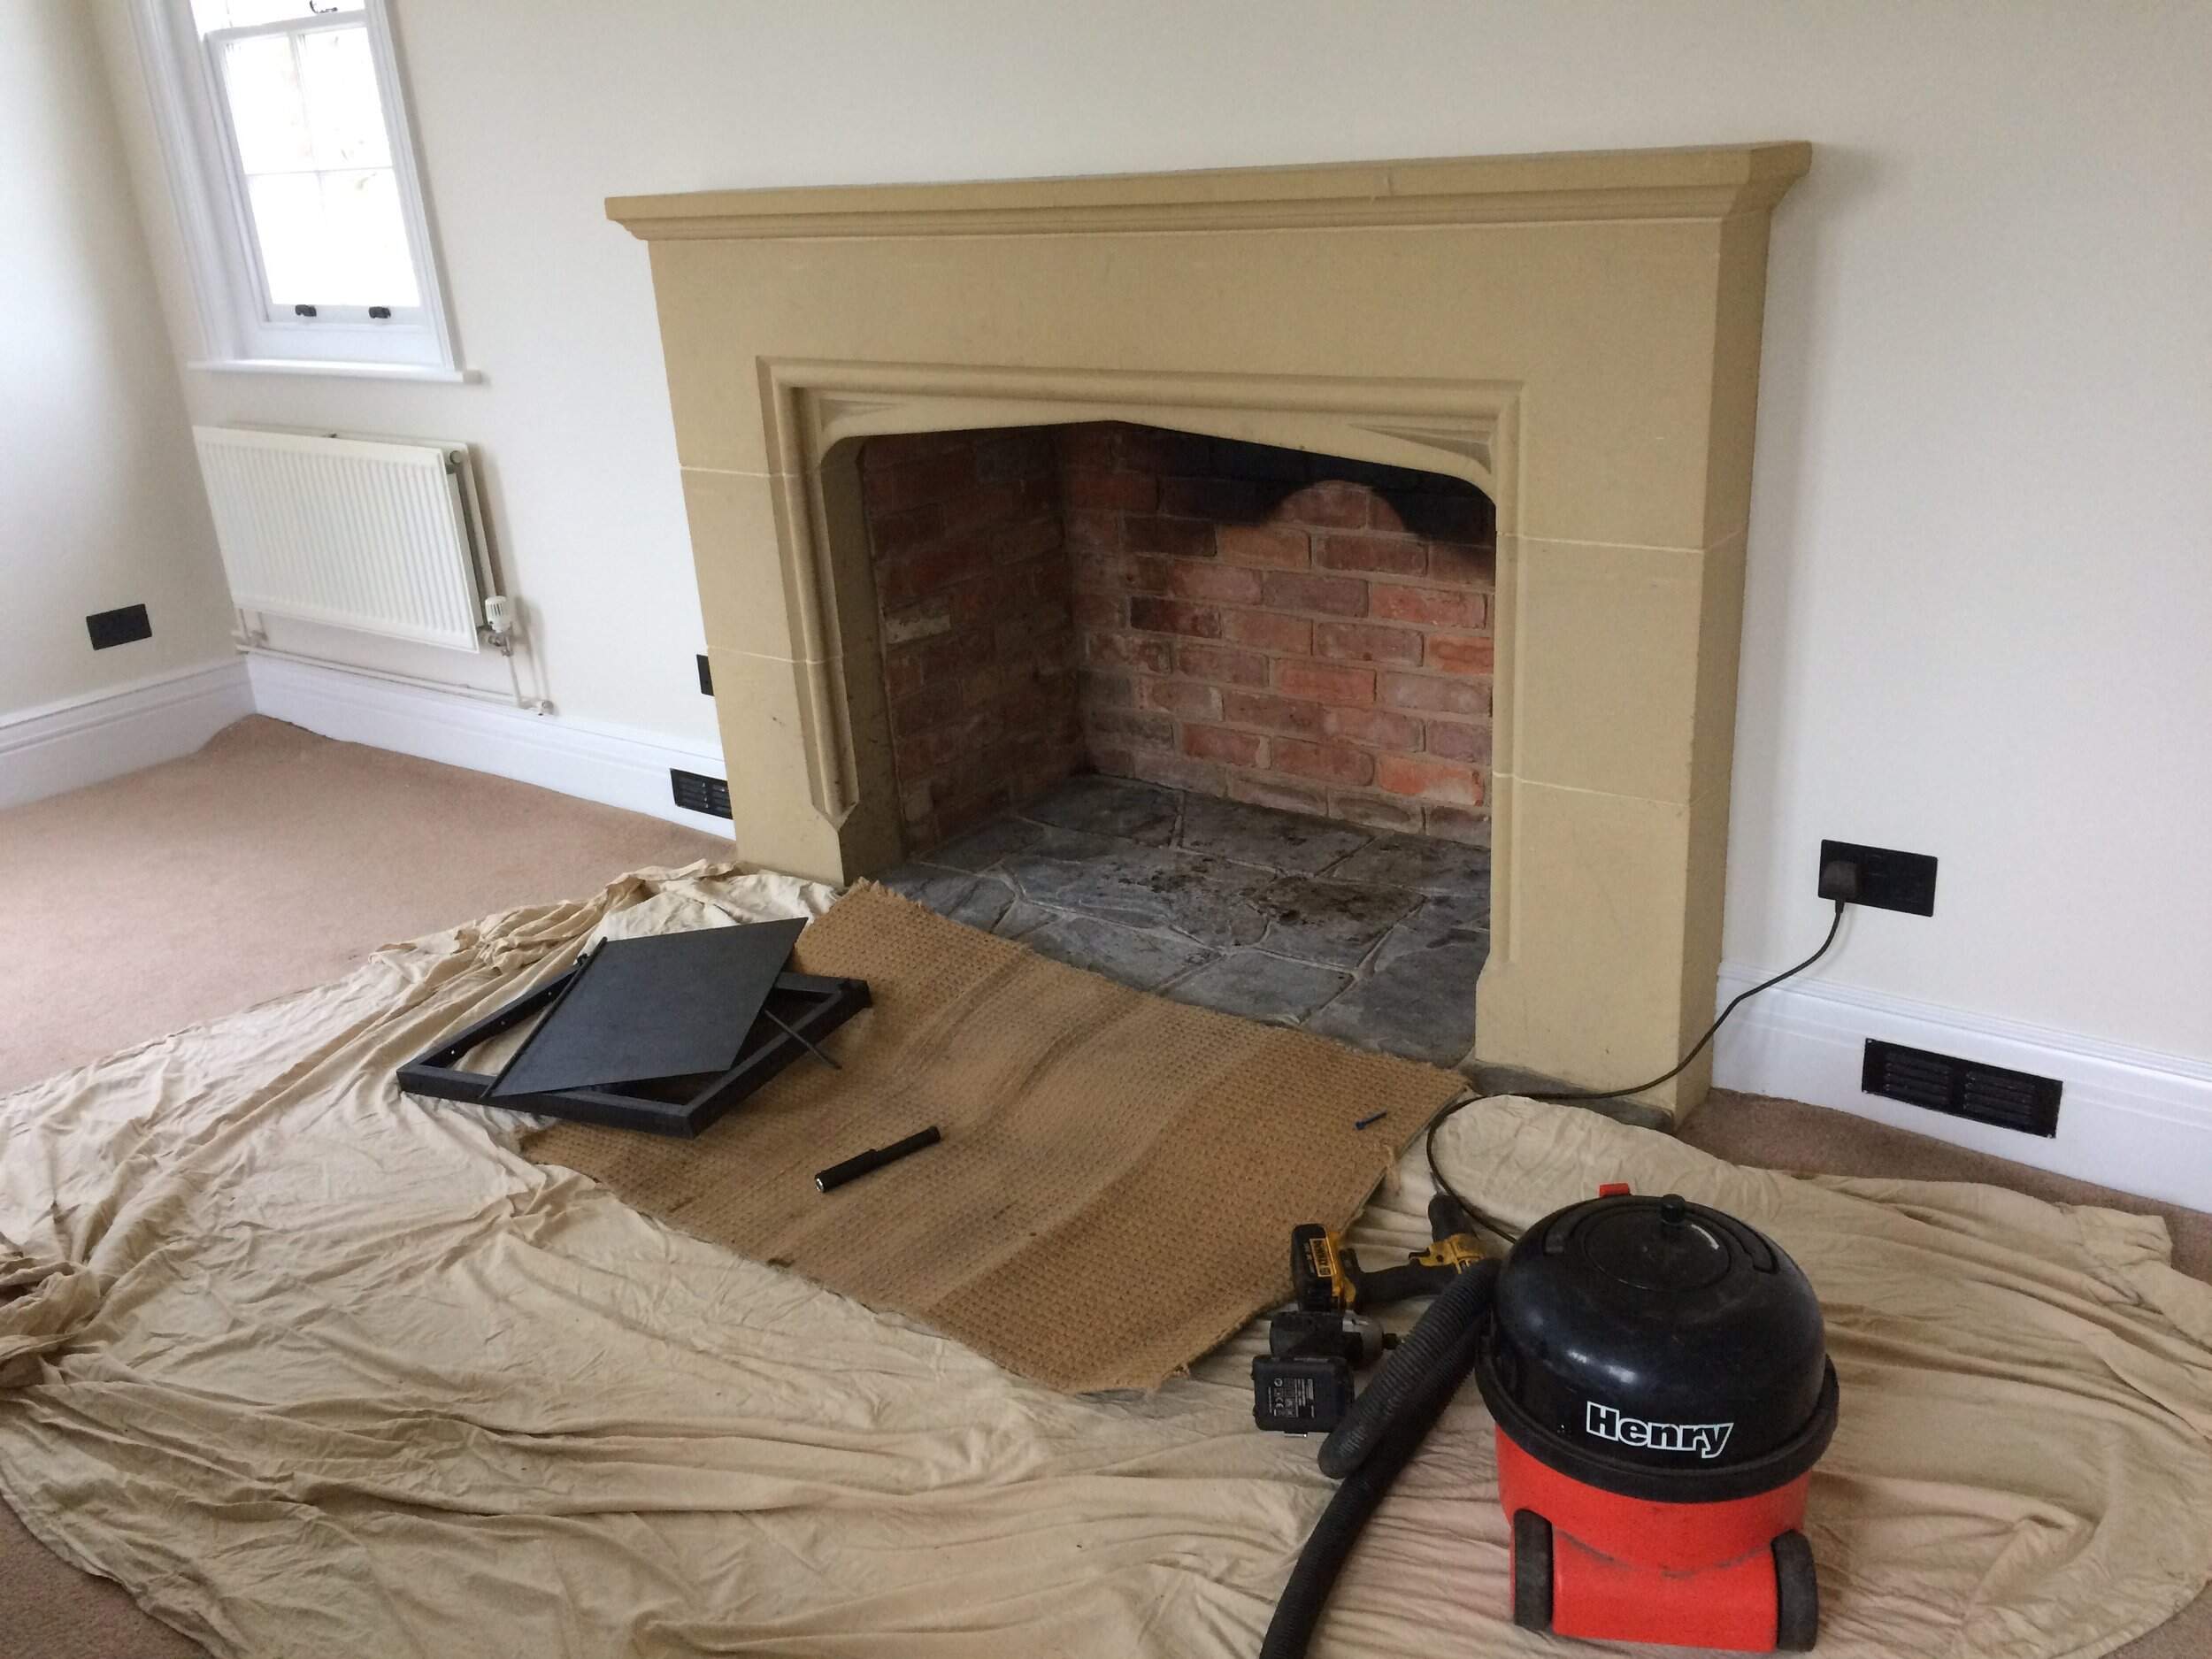
Step 3: Prepare the Chimney
Before installing the chimney liner, it’s crucial to prepare the chimney to ensure a smooth and secure installation. Here are the necessary steps to follow:
- Clean the Chimney: Begin by thoroughly cleaning the chimney. Remove any debris, soot, or creosote buildup using a chimney brush. This will help improve the efficiency of the chimney and ensure proper ventilation.
- Inspect the Chimney: Inspect the chimney for any signs of damage or deterioration, such as cracks, loose bricks, or mortar joints. Address any necessary repairs before proceeding with the installation. If you’re unsure about the condition of your chimney, it’s best to consult with a professional chimney sweep.
- Clear Obstructions: Ensure that the chimney is free of any obstructions, such as bird nests or debris. These obstructions can hinder the proper flow of exhaust gases and compromise the performance of the chimney.
- Install a Chimney Cap: Consider installing a chimney cap if you don’t already have one. A chimney cap helps prevent rain, snow, debris, and animals from entering the chimney and causing damage or blockages.
- Check for Proper Ventilation: Adequate ventilation is crucial for the safe operation of the chimney. Ensure that the chimney has proper air intake and that there are no obstructions around the chimney opening.
By preparing the chimney properly, you lay the foundation for a successful chimney liner installation. This step ensures that your chimney is in optimal condition and ready to accommodate the liner’s installation.
Once you have prepared the chimney, it’s time to move on to step 4: installing the chimney liner.
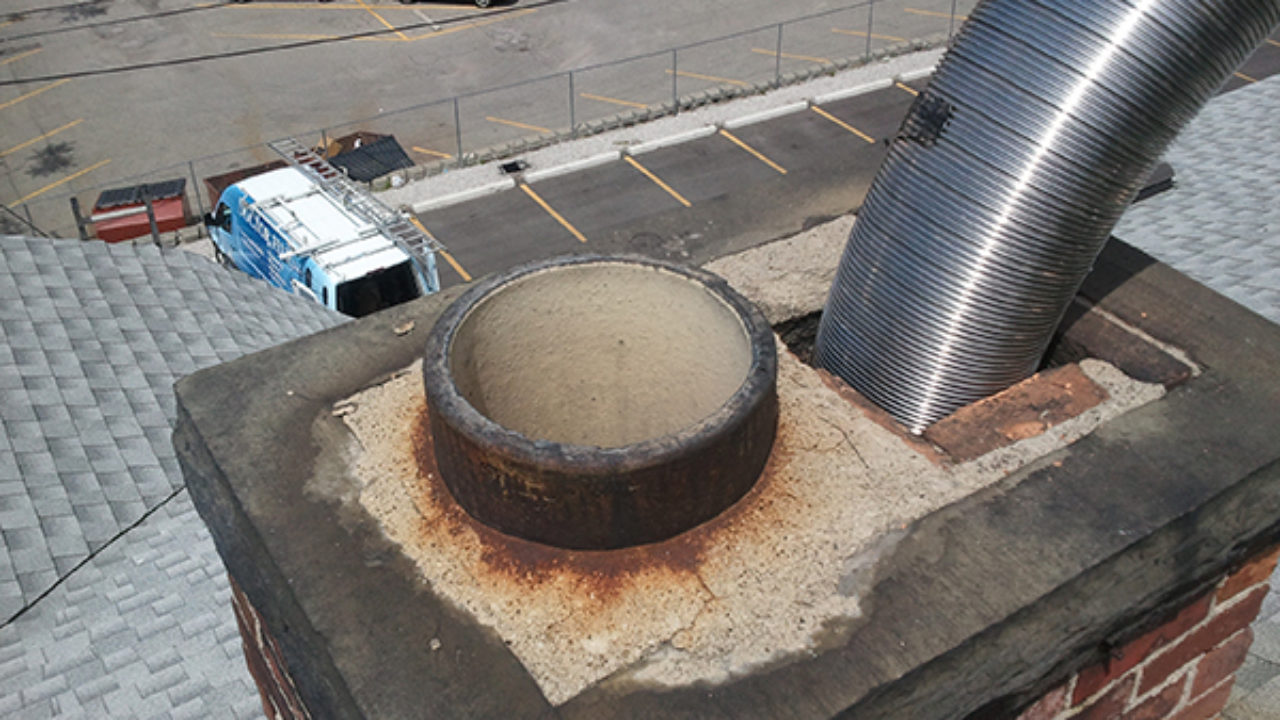
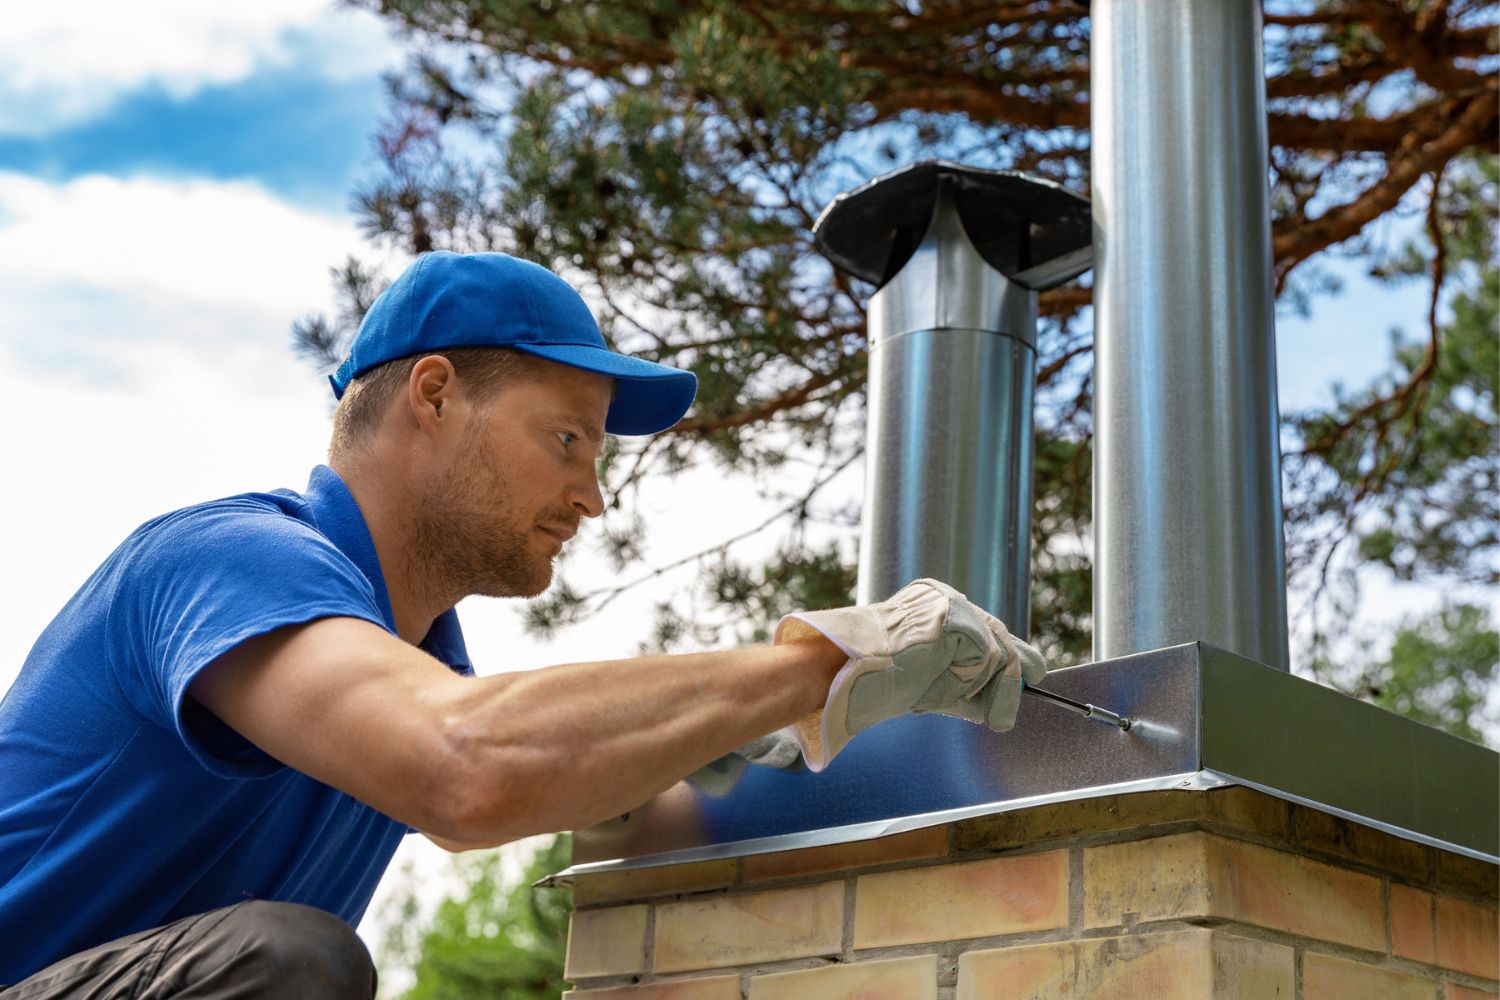
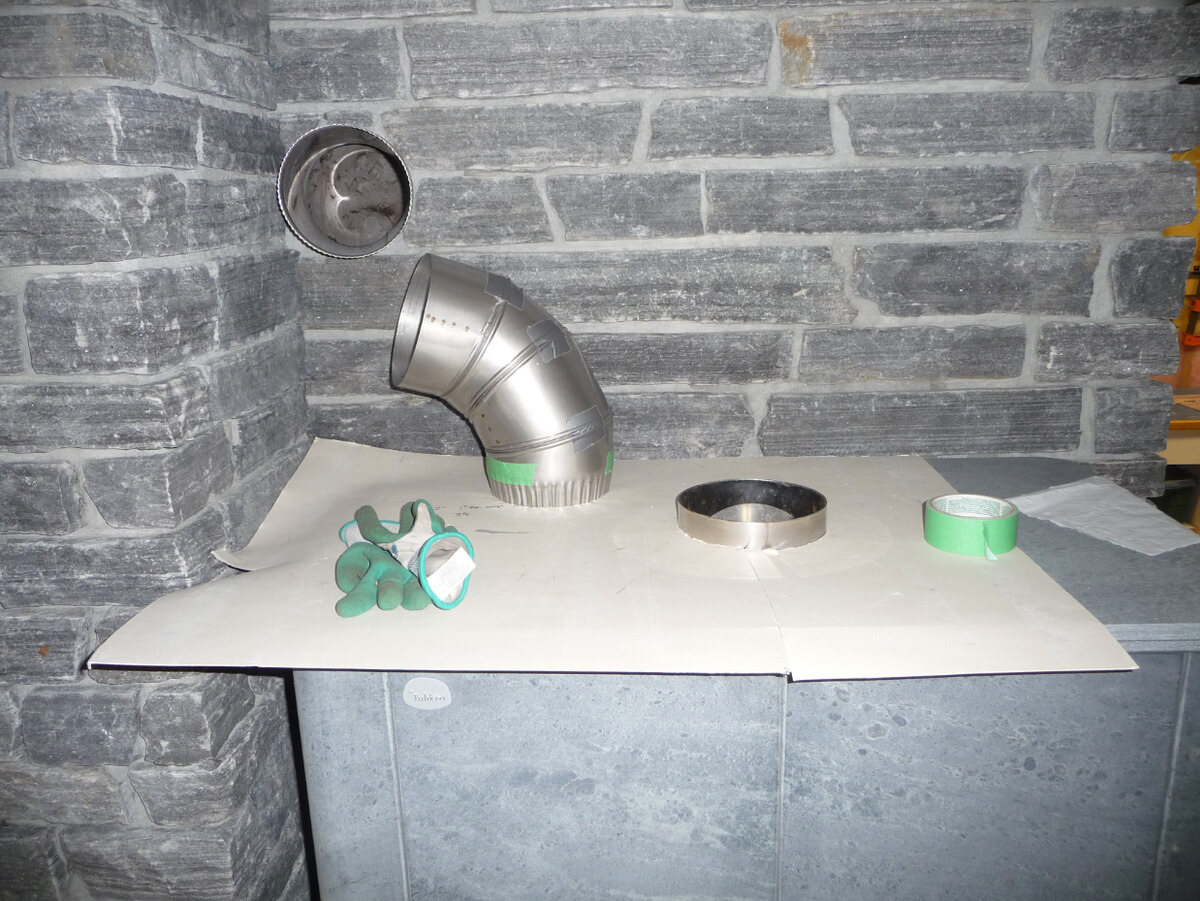
Step 4: Install the Chimney Liner
Now that you have measured the chimney, selected the right chimney liner, and prepared the chimney, it’s time to move on to the installation process. Installing a chimney liner requires careful attention to detail and adherence to safety guidelines. Here’s how to install the chimney liner:
- Begin by attaching a pulling rope or cable to the top of the chimney liner. This will help guide the liner down the chimney during installation.
- Lower the liner down into the chimney slowly and steadily, ensuring that it remains centered within the flue. If necessary, have a helper assist you in feeding the liner into the chimney from the top.
- As the liner reaches the bottom, have another person at the bottom of the chimney guide it into place and ensure that it sits snugly against the chimney walls.
- Next, using a clamp or other suitable connector, secure the liner to the top of the chimney or the chimney cap to prevent it from moving or dislodging.
- Once the liner is securely in place, carefully trim any excess liner material with tin snips or a similar tool. Be sure to leave enough liner protruding from the top of the chimney to connect it to the stove or fireplace.
- Inspect the liner for any kinks or bends along its length. Straighten any imperfections to ensure optimal performance.
It’s important to note that the installation process may vary depending on the type of liner and the manufacturer’s instructions. Always refer to the manufacturer’s guidelines and follow their recommended installation procedures.
Remember to work slowly and carefully during the chimney liner installation process. This will help ensure a proper fit and minimize the risk of damaging the liner or the chimney structure. If you’re unsure about any aspect of the installation, it’s best to seek guidance from a professional chimney installer.
With the chimney liner installed, we can now move on to step 5: connecting the liner to the stove or fireplace.
When installing a chimney liner, make sure to carefully measure the dimensions of your chimney to ensure you purchase the correct size liner. It’s also important to follow the manufacturer’s instructions for installation to ensure proper ventilation and safety.
Read more: How To Insulate A Chimney Liner
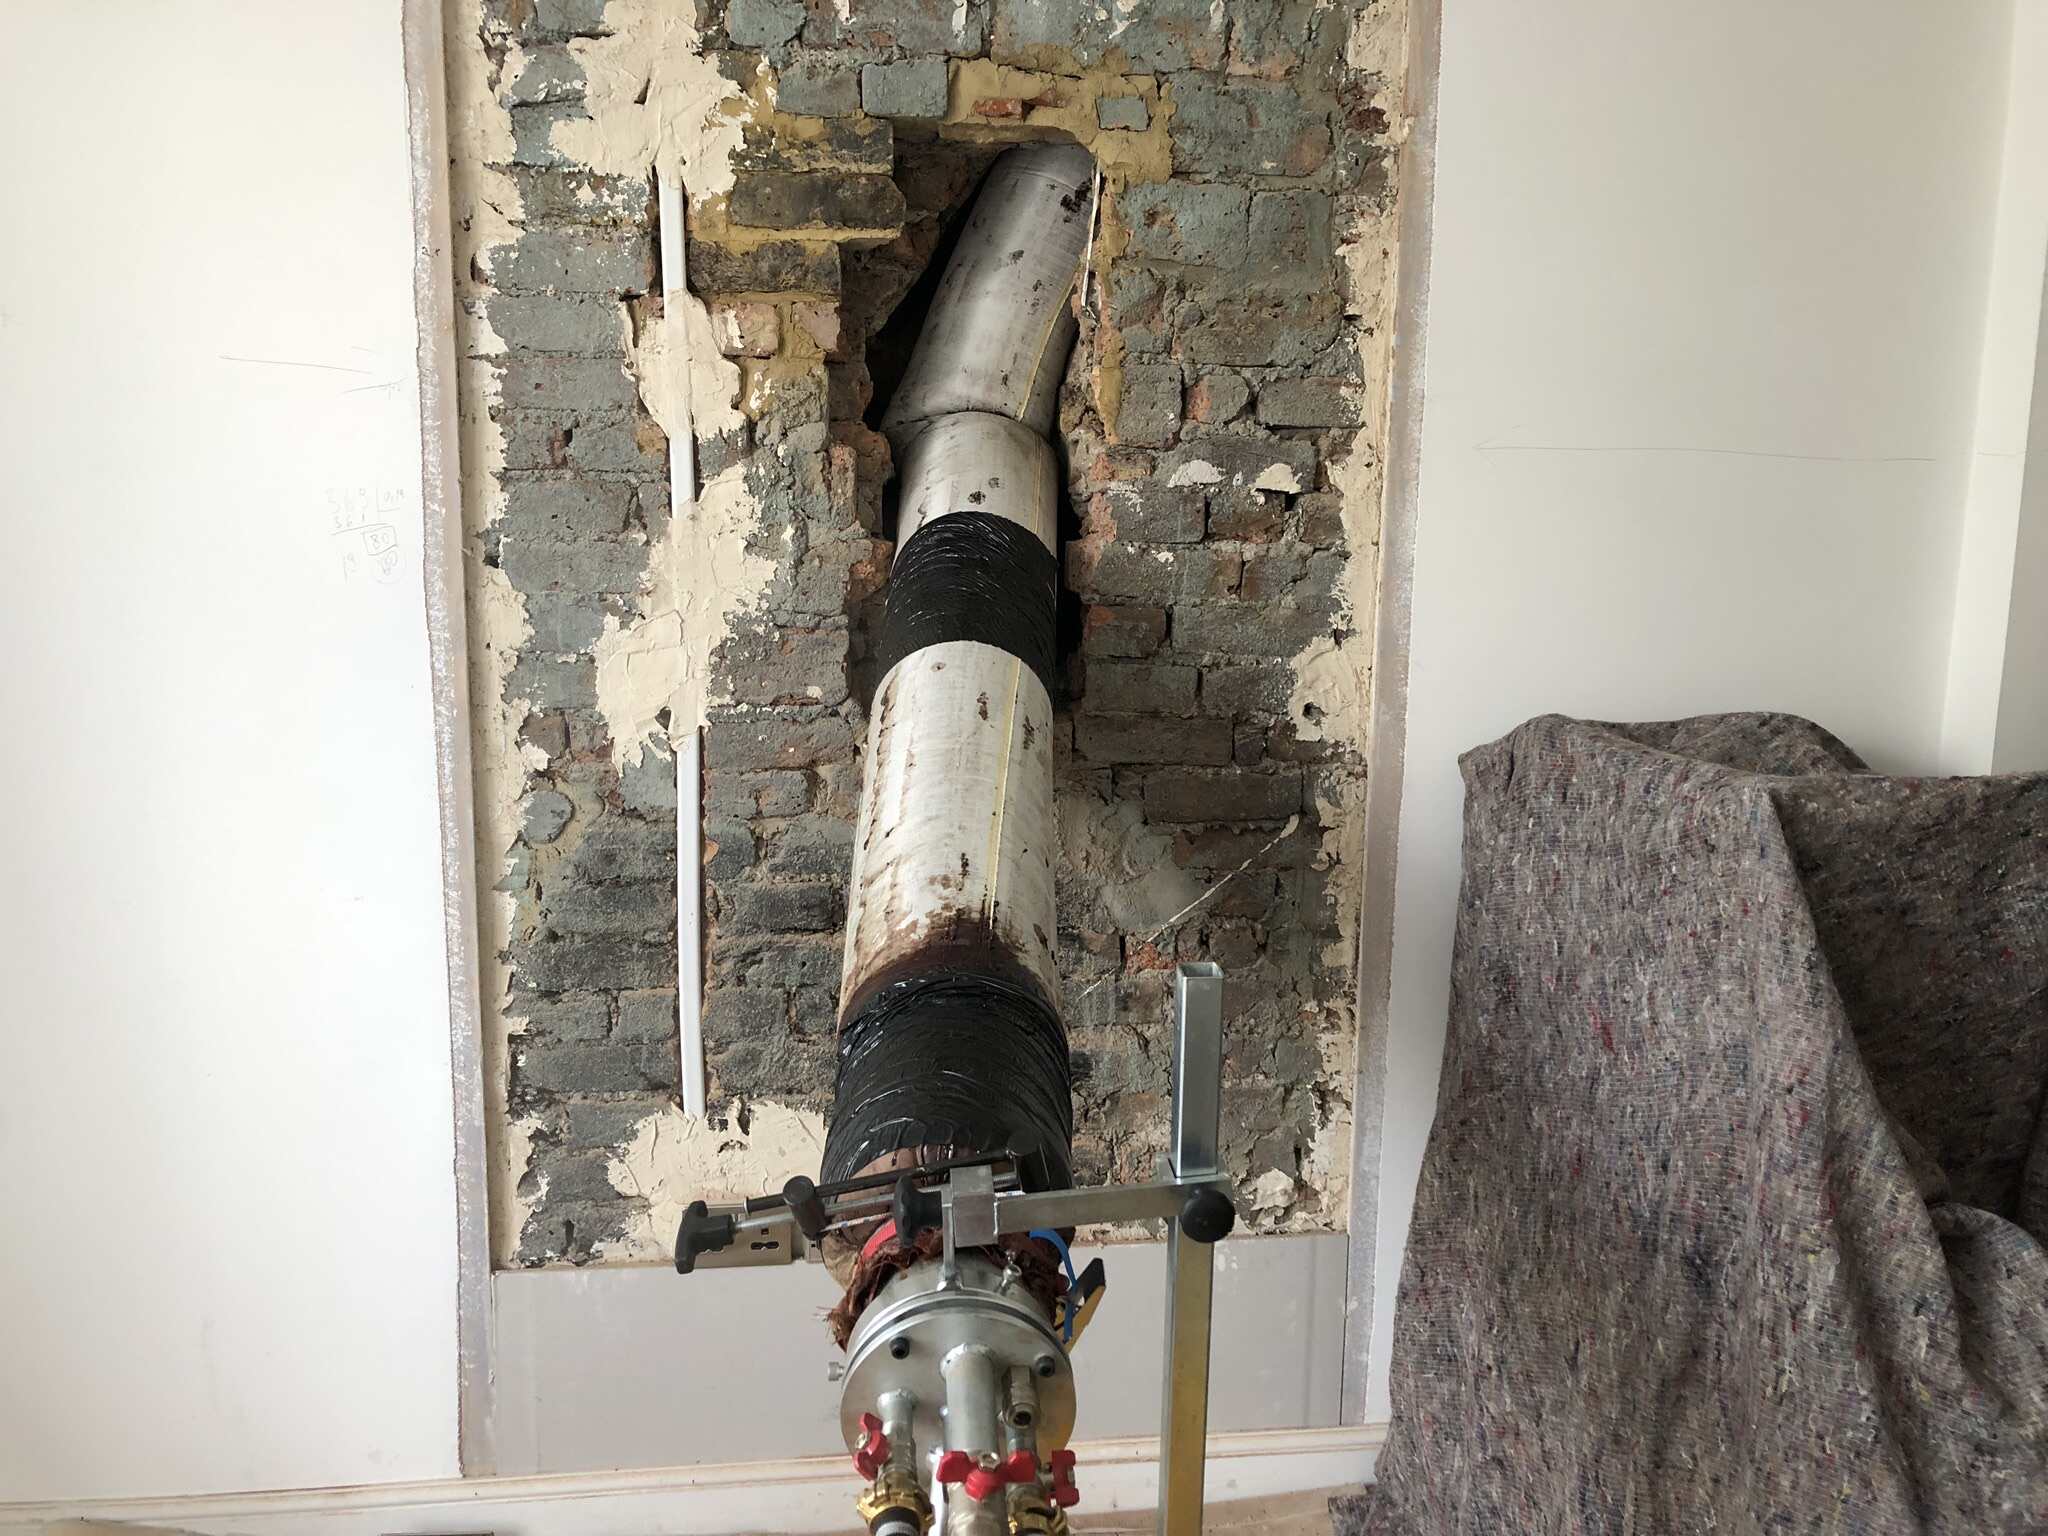
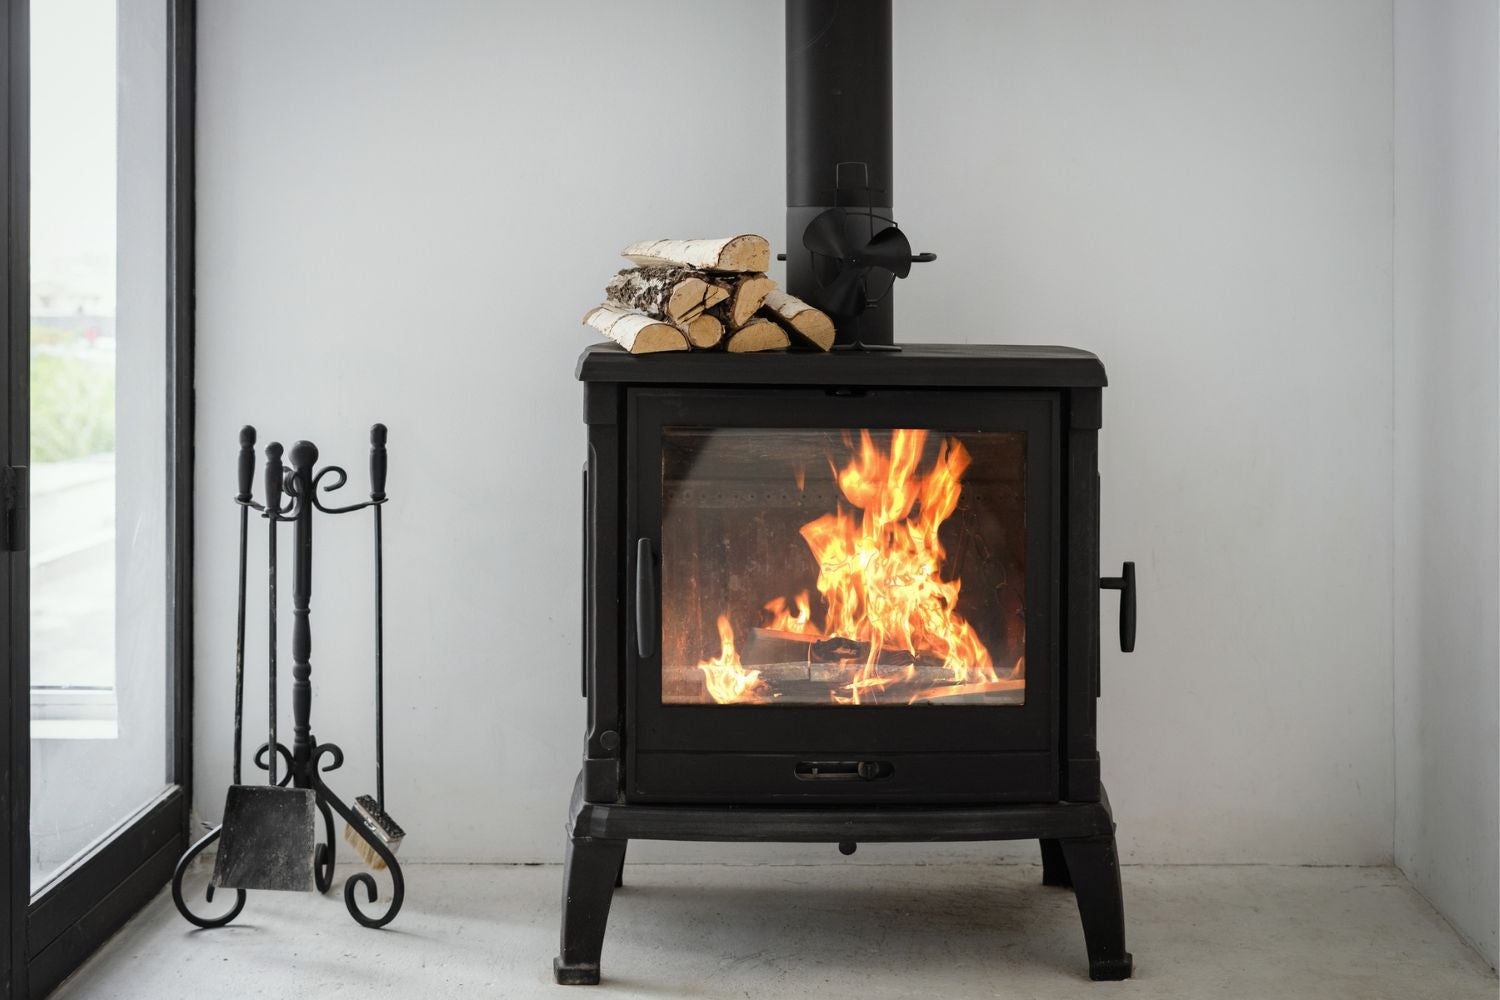
Step 5: Connect the Liner to the Stove or Fireplace
Once the chimney liner is securely installed within the chimney, the next step is to connect it to your stove or fireplace. This connection ensures proper ventilation and allows for the safe operation of your heating appliance. Here’s how to connect the liner:
- If you’re installing a liner for a wood-burning stove, locate the stovepipe collar on the back of the stove. This is where the liner will connect to the stove. If you’re installing a liner for a fireplace, the connection point will be at the top of the firebox.
- Attach an adapter or connector piece to the end of the chimney liner that will fit securely into the stovepipe collar or fireplace opening. This adapter should match the diameter of the liner and be compatible with your stove or fireplace model. Follow the manufacturer’s instructions for proper installation of the adapter.
- Slide the adapter into the stovepipe collar or fireplace opening and ensure a snug fit. Depending on the type of connector used, you may need to secure it with screws or clamps.
- If necessary, use a high-temperature sealant or gasket material to create an airtight seal between the liner and the stovepipe collar or fireplace opening. This helps prevent any leakage of exhaust gases.
- Check and double-check the connection to ensure that it is secure and tight. Any gaps or loose connections can compromise the efficiency and safety of the chimney system.
It’s crucial to follow the manufacturer’s guidelines and local building codes when connecting the chimney liner to your heating appliance. These instructions will provide specific details on the type of adapter or connector to use, as well as any additional requirements for a proper connection.
Properly connecting the liner to the stove or fireplace is essential for the efficient functioning of your heating system. It ensures a secure and airtight connection, minimizing the risk of leaks or backdrafts.
With the liner connected to the stove or fireplace, we can now move on to step 6: sealing the joints.
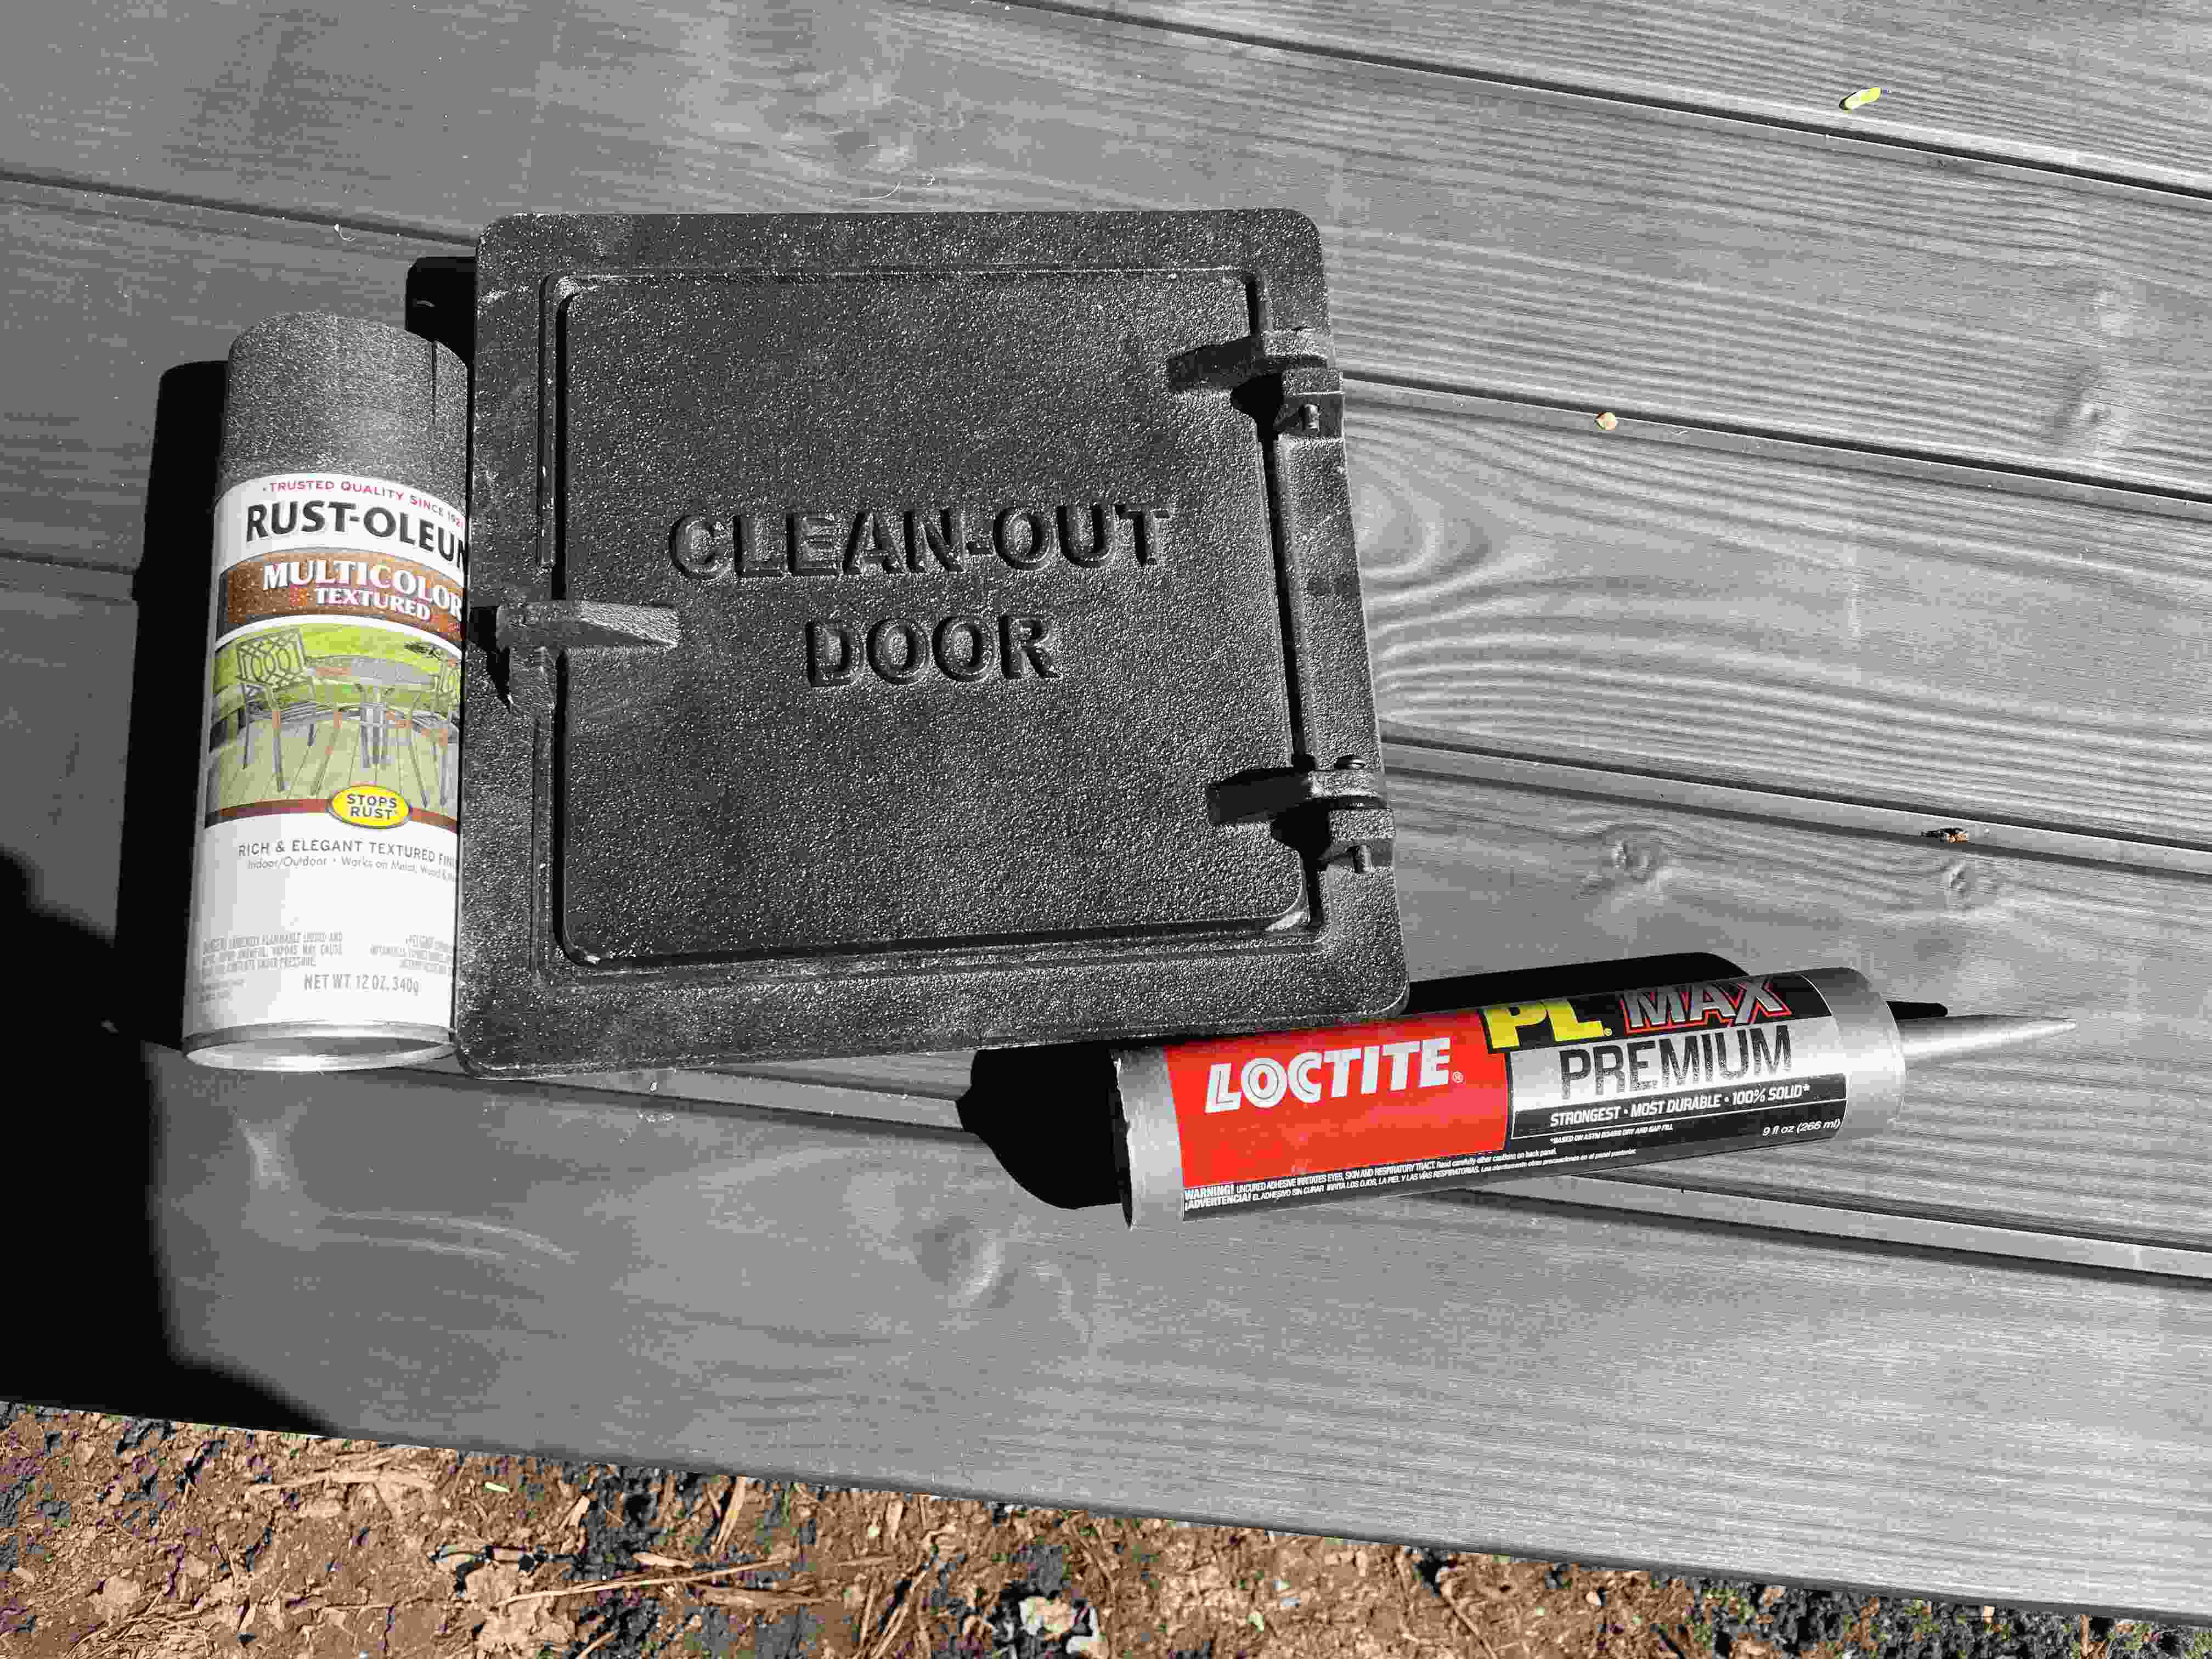
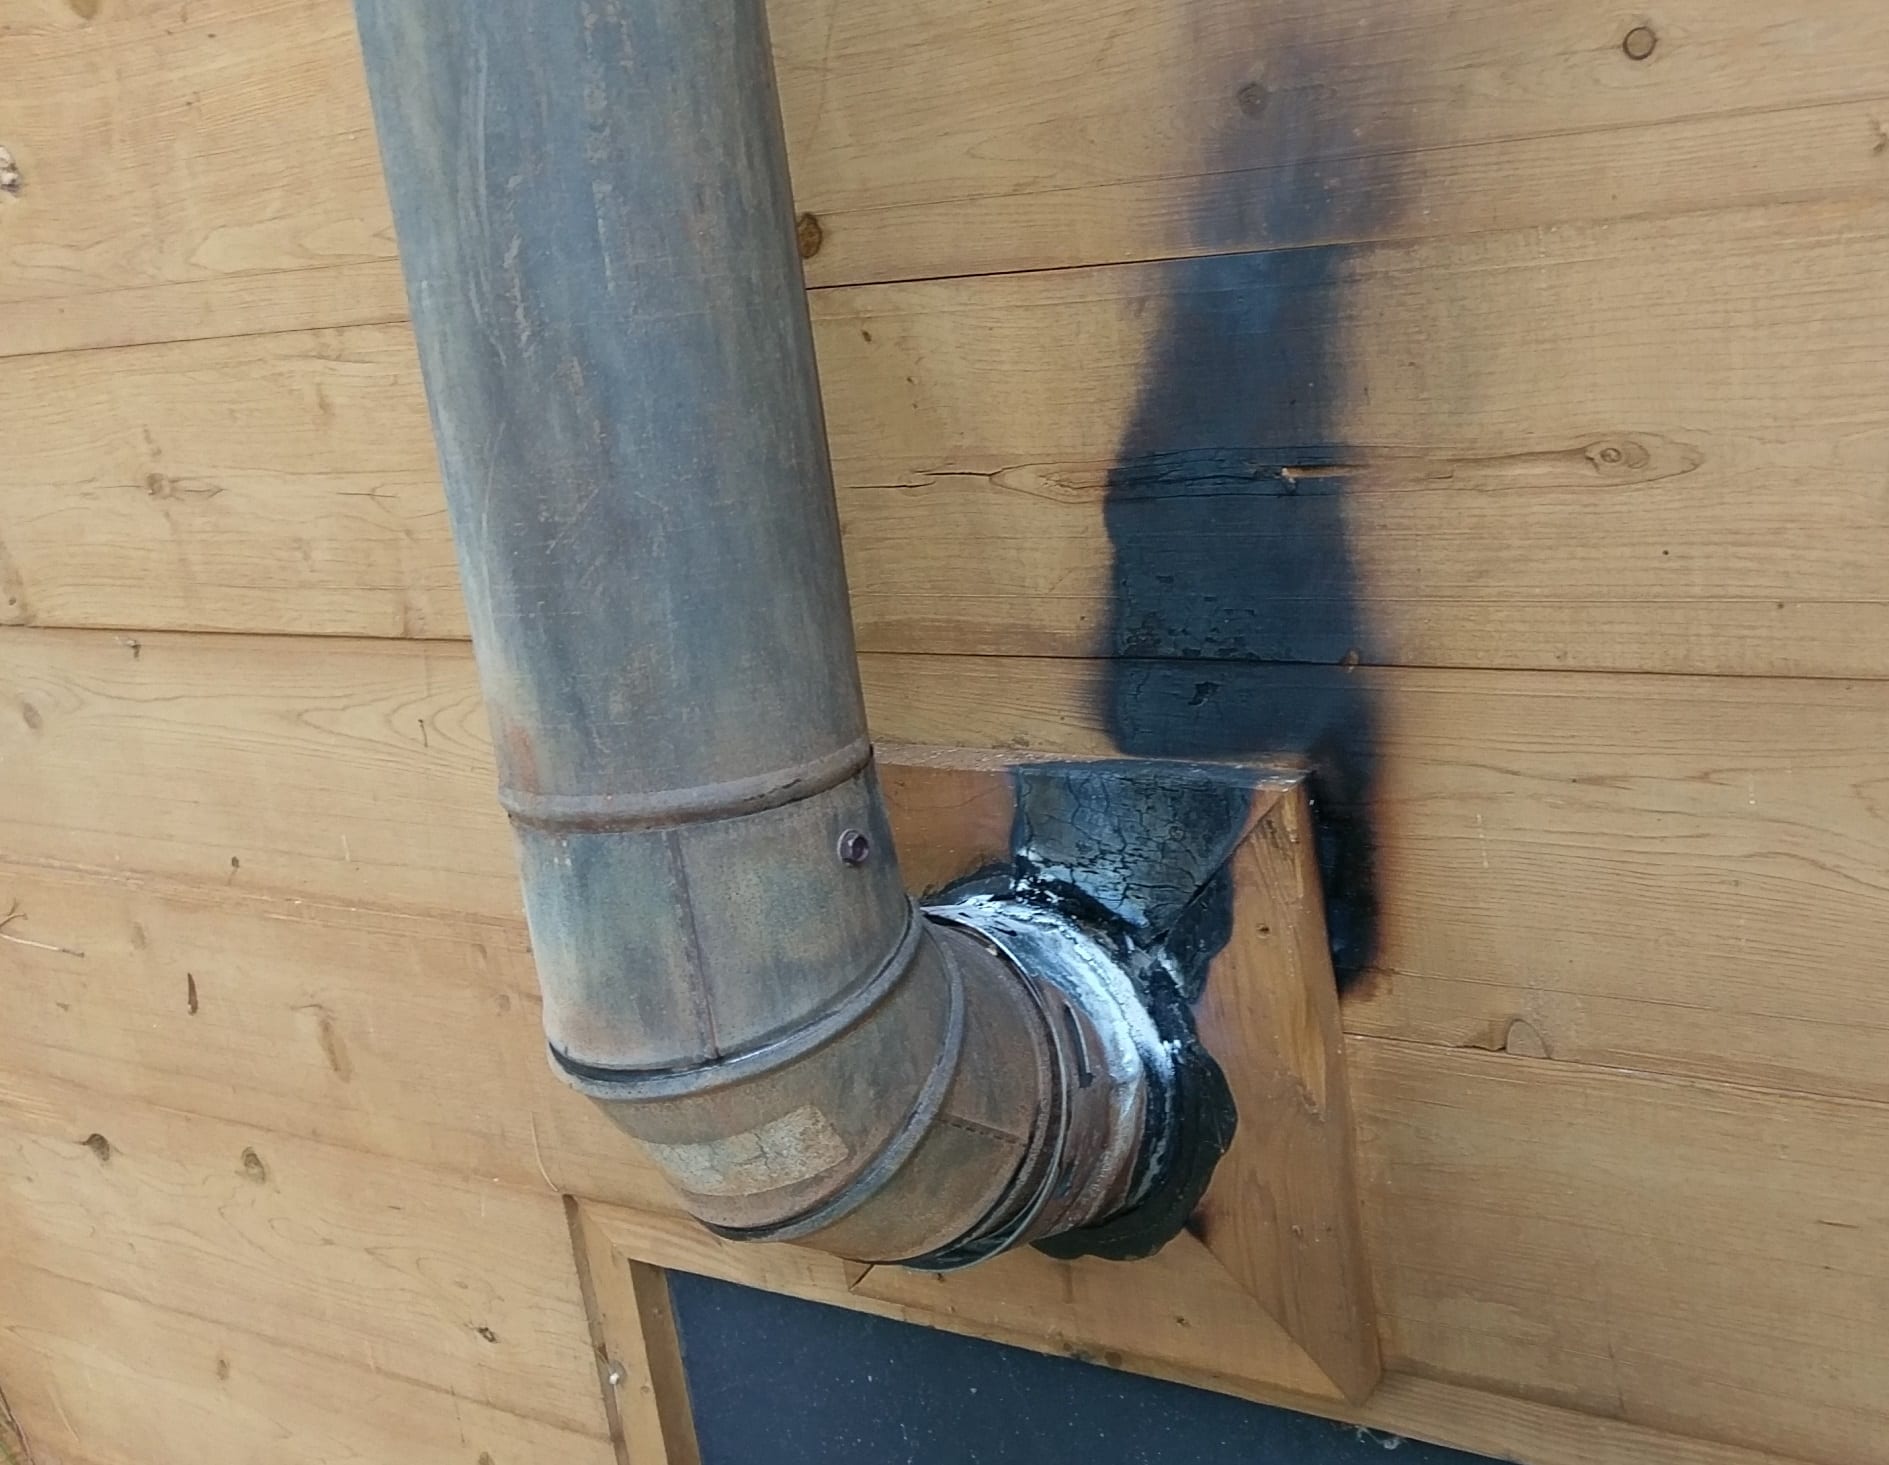
Step 6: Seal the Joints
Ensuring proper sealing of the joints is an important step in the chimney liner installation process. Sealing the joints helps prevent any leakage of exhaust gases and maintains the efficiency and safety of the chimney system. Here’s how to seal the joints:
- Inspect the joints between the liner sections or between the liner and the stovepipe collar or fireplace opening. Look for any gaps or openings that could allow exhaust gases to escape.
- Use a high-temperature sealant that is specifically designed for chimney applications. Silicone or refractory cement are commonly used sealants for this purpose.
- Apply a generous amount of sealant around the joints to create a tight and secure seal. Use a caulking gun or a small brush to apply the sealant evenly.
- Ensure that the sealant covers the entire joint area and fills any gaps or cracks. Smooth out the sealant using a finger or a tool to create a neat and uniform finish.
- Allow the sealant to dry and cure as per the manufacturer’s instructions. This will ensure that it forms a strong and durable seal.
- Once the sealant is fully cured, inspect the joints again to ensure that they are properly sealed.
It’s important to note that the type of sealant used may vary based on the liner material and the manufacturer’s recommendations. Always follow the manufacturer’s guidelines and use a sealant that is suitable for your specific chimney liner installation.
Properly sealing the joints is essential to maintain the integrity and efficiency of the chimney liner system. It helps prevent any leakage or escape of harmful gases, ensuring a safe and healthy environment for you and your family.
With the joints sealed, we can now move on to step 7, which covers the optional step of insulating the liner.
Step 7: Insulate the Liner (Optional)
Insulating the chimney liner is an optional step in the installation process, but it can offer several benefits. Insulation helps improve the performance and efficiency of the chimney system by minimizing heat loss and enhancing draft. If you choose to insulate the liner, here’s how to do it:
- Choose the Right Insulation: Select an insulation material that is compatible with your chimney liner and meets the local building codes and regulations. Commonly used insulation materials include ceramic fiber, vermiculite, or high-density foam insulation.
- Prepare the Liner: Clean the chimney liner to ensure there is no dust, debris, or moisture on its surface before applying insulation. This will help the insulation adhere properly.
- Apply the Insulation: Follow the manufacturer’s instructions for applying the insulation material. This may involve wrapping the liner with insulation blankets or applying a spray-on insulation coating. Ensure that the insulation is evenly distributed and covers the entire length of the liner.
- Secure the Insulation: Use insulation retaining bands or wire mesh to secure the insulation to the liner. This will prevent it from shifting or sagging over time.
- Inspect and Test: Once the insulation is applied, inspect it for any gaps or areas that may need additional insulation. Ensure that the insulation is properly sealed and there are no exposed areas.
Insulating the chimney liner can help improve the overall efficiency of your heating system by reducing heat loss and enhancing the chimney’s draft. It can also help increase safety by reducing the risk of condensation within the chimney structure.
It’s important to note that insulating the chimney liner is not always necessary or recommended for every installation. Factors such as the type of fuel, the location of the chimney, and the specific requirements of your local building codes should be taken into consideration before deciding to insulate the liner.
With the optional step of insulating the liner covered, we can now proceed to step 8: testing the installation.
Step 8: Test the Installation
After completing the installation of the chimney liner, it’s essential to test its functionality and ensure that everything is working correctly. Testing the installation will give you peace of mind that the chimney system is operating efficiently and safely. Here’s how to test the installation:
- Light a small fire in your stove or fireplace and monitor the performance of the chimney. Pay attention to the draft and the flow of exhaust gases.
- Observe the smoke and gases exiting the chimney. There should be a steady and consistent flow without any backdraft or smoke coming back into the room. If you notice any issues, such as poor draft or smoke entering the room, it could indicate a problem with the installation that needs to be addressed.
- Monitor the temperature of the chimney liner during operation. The liner should remain at a safe temperature and not exceed the recommended limits provided by the liner manufacturer.
- Check for any signs of leaks or odor. Inspect the joints, connections, and sealants for any signs of gas leakage or unusual odors. If you detect any issues, it’s crucial to address them promptly to maintain the safety of your chimney system.
- If you have any doubts or concerns about the performance of the chimney system, it’s recommended to consult with a professional chimney sweep or a licensed contractor. They can perform a thorough inspection and resolve any issues that may arise during the testing process.
Testing the installation is a crucial step to ensure the proper functioning and safety of your chimney liner. It allows you to identify and address any potential issues or deficiencies before they escalate into more significant problems.
By following the steps outlined in this guide and conducting a thorough testing process, you can have confidence in the successful installation of your chimney liner. Remember, if you have any uncertainties or are not experienced in chimney installations, it’s always best to seek professional assistance.
Congratulations on successfully completing the installation of your chimney liner! With proper maintenance and regular inspections, your chimney system will provide years of safe and efficient heating for your home.
If you need further assistance or have any questions, don’t hesitate to reach out. Stay warm and enjoy the comfort of a well-functioning chimney system!
Remember, the safety and efficiency of your chimney system are of utmost importance. Regular maintenance and inspections are necessary to ensure its proper functioning. If you’re unsure about any aspect of the chimney liner installation or encounter any issues during testing, it’s always advisable to consult with a professional chimney sweep or a licensed contractor.
Read also: 11 Incredible Chimney Liner Kit For 2025
Conclusion
Installing a chimney liner is an important step to ensure the safe and efficient operation of your heating system. By following the step-by-step guide provided in this article, you have gained the knowledge and understanding necessary to successfully install a chimney liner in your home.
Remember, before embarking on this project, it’s essential to familiarize yourself with local building codes and regulations regarding chimney installations. Ensuring compliance with these guidelines is crucial for the safety and legality of your chimney liner installation.
Throughout the installation process, accurate measurement, proper selection of the chimney liner, careful preparation of the chimney, precise installation of the liner, and thorough testing are key factors to consider. Additionally, sealing the joints and insulating the liner, while optional, can provide added benefits such as improved efficiency and performance.
If at any point you feel unsure or lack the necessary experience, it’s always recommended to seek professional assistance. Professional chimney installers have the expertise and knowledge to ensure a safe and successful installation.
Remember to prioritize regular maintenance and inspections of your chimney system to prolong its lifespan and ensure its continued efficiency. Routine cleaning and inspections by a professional chimney sweep will help keep your chimney liner in optimal condition and prevent potential hazards.
With a properly installed chimney liner, you can enjoy the warmth and comfort of your wood-burning stove or fireplace while having peace of mind knowing that your chimney system is safe and efficient.
We hope that this comprehensive guide has provided you with the necessary information and confidence to undertake the installation of a chimney liner. Stay warm and cozy!
Frequently Asked Questions about How To Install Chimney Liner
Was this page helpful?
At Storables.com, we guarantee accurate and reliable information. Our content, validated by Expert Board Contributors, is crafted following stringent Editorial Policies. We're committed to providing you with well-researched, expert-backed insights for all your informational needs.


0 thoughts on “How To Install Chimney Liner”