Articles
How To Install A Wood Stove Without A Chimney
Modified: August 20, 2024
Learn how to install a wood stove without a chimney with our informative articles. Discover alternative options for safe and efficient heating in your home.
(Many of the links in this article redirect to a specific reviewed product. Your purchase of these products through affiliate links helps to generate commission for Storables.com, at no extra cost. Learn more)
Introduction
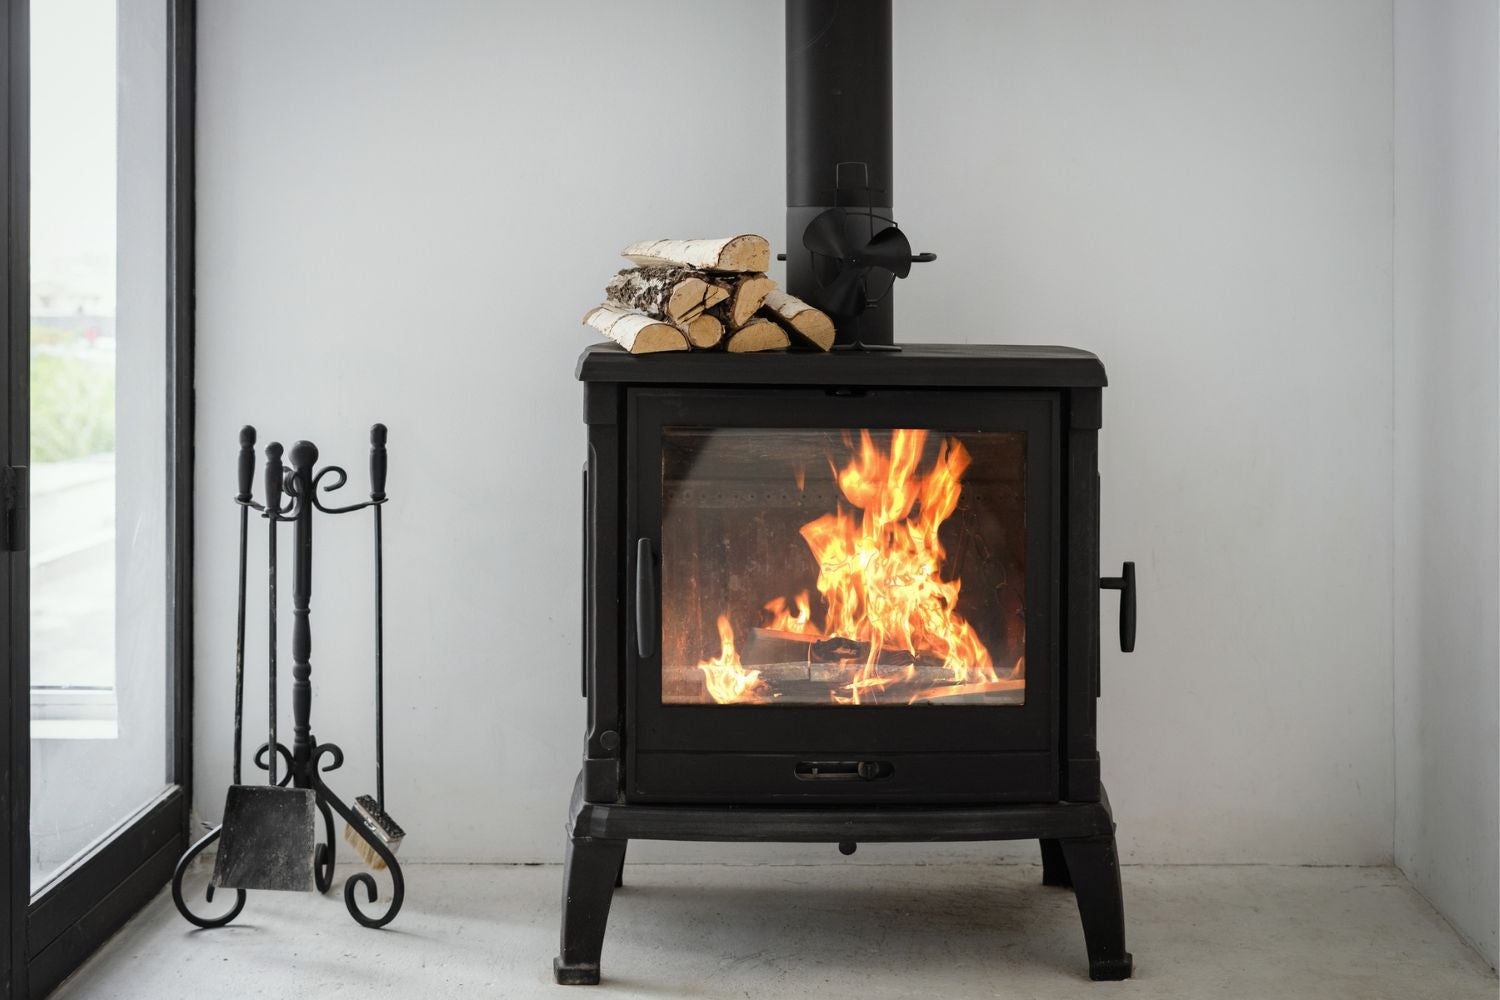
Installing a wood stove in your home can provide a cozy and efficient heat source, but what do you do if you don’t have a chimney? Fortunately, there are alternative venting options available that can allow you to enjoy the benefits of a wood stove without the need for a traditional chimney. In this article, we will explore the steps and considerations involved in installing a wood stove without a chimney.
Before diving into the installation process, it’s important to note that safety should always be a top priority. If you’re not experienced with wood stove installations, it’s highly recommended to consult with a professional to ensure everything is done correctly. Additionally, check your local building codes and regulations to ensure compliance with any requirements specific to your area.
Now let’s delve into the steps involved in installing a wood stove without a chimney. We’ll cover everything from assessing the suitable location to venting options and necessary safety measures to ensure a successful installation.
Key Takeaways:
- Installing a wood stove without a chimney is feasible by assessing suitable locations, preparing the area, and selecting the right venting option. Prioritize safety, adhere to clearance requirements, and consult professionals for a cozy and hazard-free wood stove experience.
- Venting options such as through the wall, ceiling, or roof provide efficient ways to expel smoke and gases. Regular maintenance, carbon monoxide detectors, and fire safety education are crucial for a secure and warm wood stove installation.
Assessing the Suitable Location
The first step in installing a wood stove without a chimney is to assess the suitable location within your home. This involves considering factors such as the size of the room, proximity to combustible materials, and accessibility for venting.
Start by selecting a room that is spacious enough to accommodate the wood stove while maintaining proper clearances. The National Fire Protection Association (NFPA) provides guidelines for the minimum clearance distances between the stove and combustible materials, such as walls, furniture, and flooring. Make sure to adhere to these guidelines to prevent any potential fire hazards.
Additionally, it’s important to ensure proper ventilation in the room. Wood stoves require a sufficient amount of fresh air for combustion, so consider the availability of nearby windows or vents to provide adequate airflow.
Moreover, consider the proximity to an exterior wall or the roof for venting purposes. The location should allow for a direct and efficient path for venting the smoke and gases generated by the wood stove to the outside of your home.
If you’re unsure about the suitability of a specific location, consulting with a professional can provide valuable insights and help you make an informed decision.
Once you have assessed and selected the suitable location for your wood stove, you can move on to preparing the area for installation.
Preparing the Area
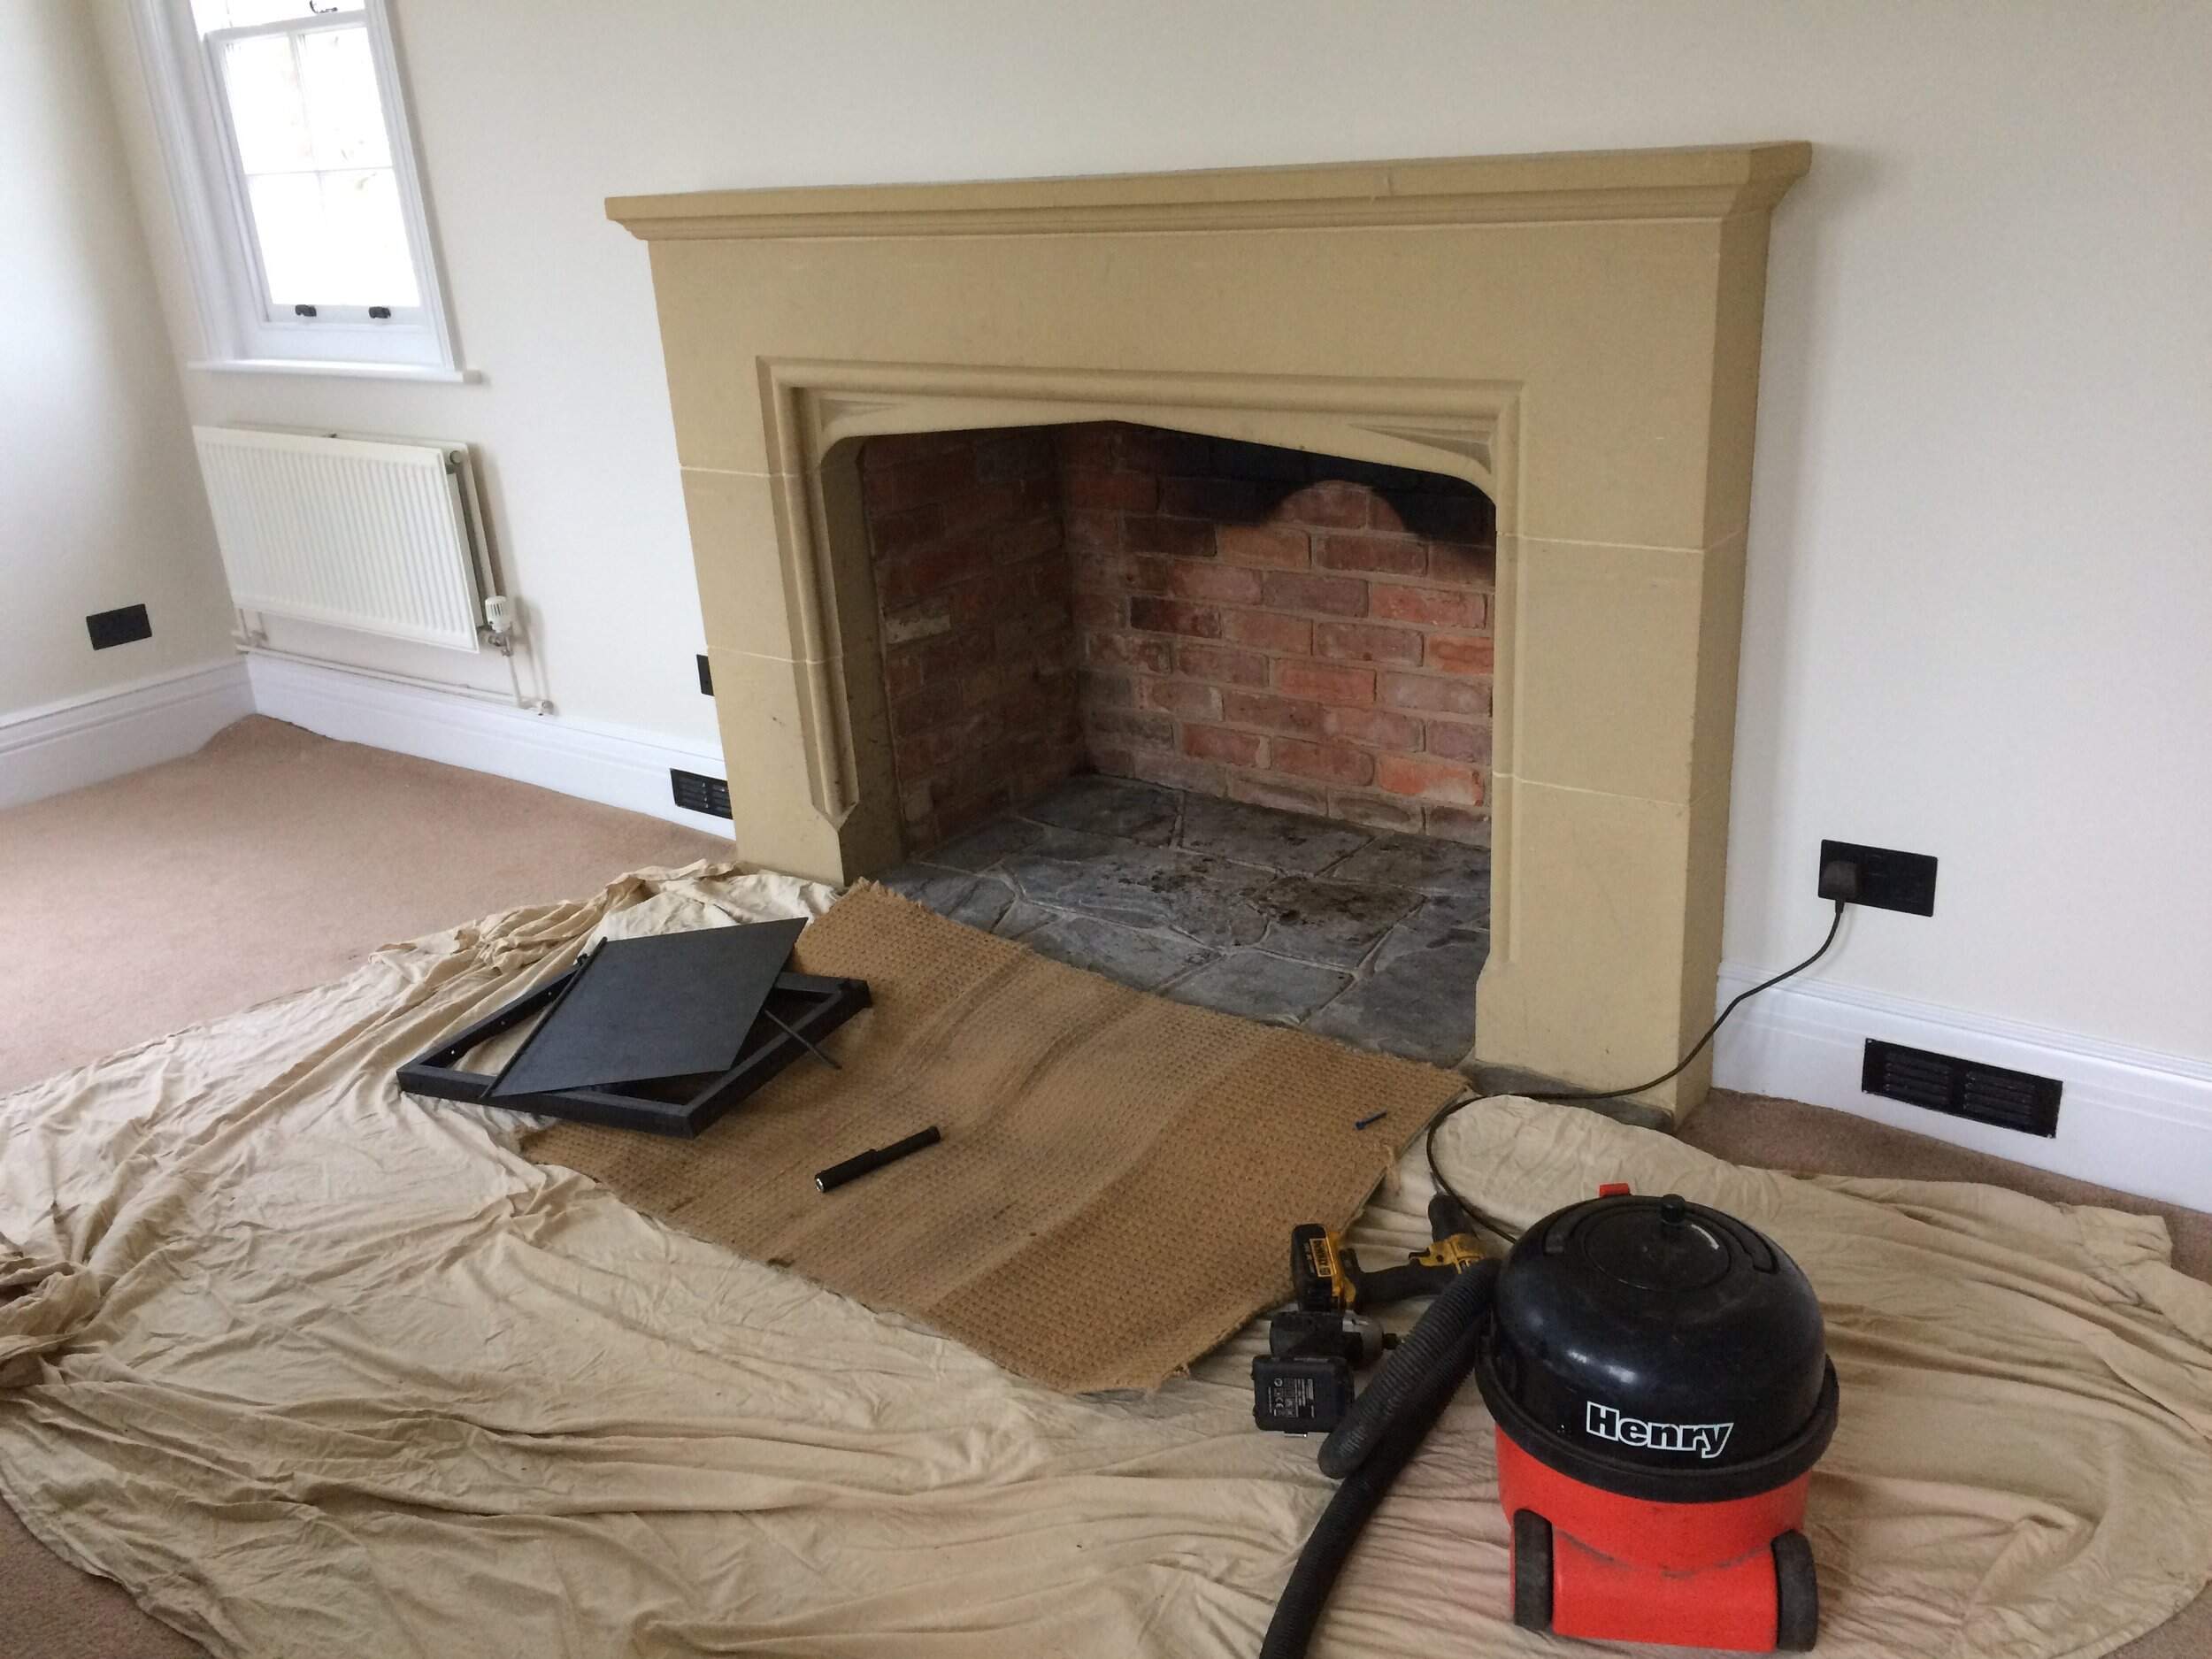
Before installing a wood stove without a chimney, it’s essential to properly prepare the area where the stove will be placed. This involves ensuring a safe and non-combustible surface, as well as taking necessary measures to protect the surrounding area.
Start by clearing the area around the selected location. Remove any flammable materials, such as rugs, curtains, or furniture, that may come into contact with the heat generated by the wood stove.
If the floor beneath the stove is combustible, such as carpeting or wooden flooring, it’s crucial to install a non-combustible hearth pad or base. This can be made of materials like ceramic tile, stone, or brick, and should extend beyond the dimensions of the wood stove to create a sufficient buffer zone.
Ensure that the hearth pad or base is properly installed and level to provide a stable and safe surface for the wood stove. It should also meet the clearance requirements specified by the manufacturer of your specific wood stove model.
Furthermore, it’s recommended to install a heat-resistant wall protection shield behind the wood stove. This shield, made of non-combustible materials such as sheet metal or fire-resistant tile, helps protect the wall from heat and potential fire hazards.
Once you have prepared the area and ensured the necessary safety measures are in place, you can begin the installation process for your wood stove.
Installing the Wood Stove
Once you have assessed the suitable location and prepared the area, it’s time to proceed with the installation of your wood stove. It is important to follow these steps carefully to ensure a safe and effective installation.
First, position the wood stove on the hearth pad or base, ensuring that it is centered and level. Use a level to check for proper alignment and make any necessary adjustments.
Next, secure the wood stove to the floor or hearth pad according to the manufacturer’s instructions. This may involve using anchors, brackets, or other securing mechanisms provided with your wood stove to ensure stability.
Once the wood stove is securely in place, you can proceed with connecting it to the venting system. The type of venting system you choose will depend on the specific requirements of your wood stove and the layout of your home.
Common venting options for wood stoves without a chimney include venting directly through the wall, venting through the ceiling, or venting through the roof.
If you choose to vent through the wall, make sure to select an appropriate location that allows for a clear path to the outside. Use insulated stove pipe or a venting kit specifically designed for wood stoves to ensure proper venting and to maintain the required clearances from combustible materials.
If you opt for venting through the ceiling, you will need to install a ceiling support box or attic transition to provide a safe passage for the vent pipe from the wood stove to the outside. Ensure that all joints are properly sealed and insulated to prevent any leaks or heat loss.
For venting through the roof, you will need to install a roof flashing and a chimney pipe that extends above the roofline. It is crucial to follow the manufacturer’s instructions and local building codes to ensure a watertight and secure installation.
Once the venting system is installed, make sure to inspect all connections and seams to ensure they are tight and secure. Don’t forget to check for any potential gaps or leaks that may affect the efficiency and safety of your wood stove.
With the wood stove installed and properly vented, it’s essential to take the necessary safety measures to ensure a hazard-free operation.
Venting Options Without a Chimney
When installing a wood stove without a chimney, it’s crucial to choose the right venting option to safely and efficiently route the smoke and gases outdoors. Here are the main venting options available for wood stoves without a chimney.
1. Venting Directly Through the Wall: This option involves installing a horizontal stovepipe that passes through an external wall. It’s essential to select a location that allows for a clear and direct path to the outside. Use insulated stovepipe and maintain the required clearances from combustible materials.
2. Venting Through the Ceiling: With this option, the stovepipe routes vertically through the ceiling and into the attic, then connects to a vent that extends through the roof. Proper sealing and insulation are crucial to prevent any leaks or heat loss.
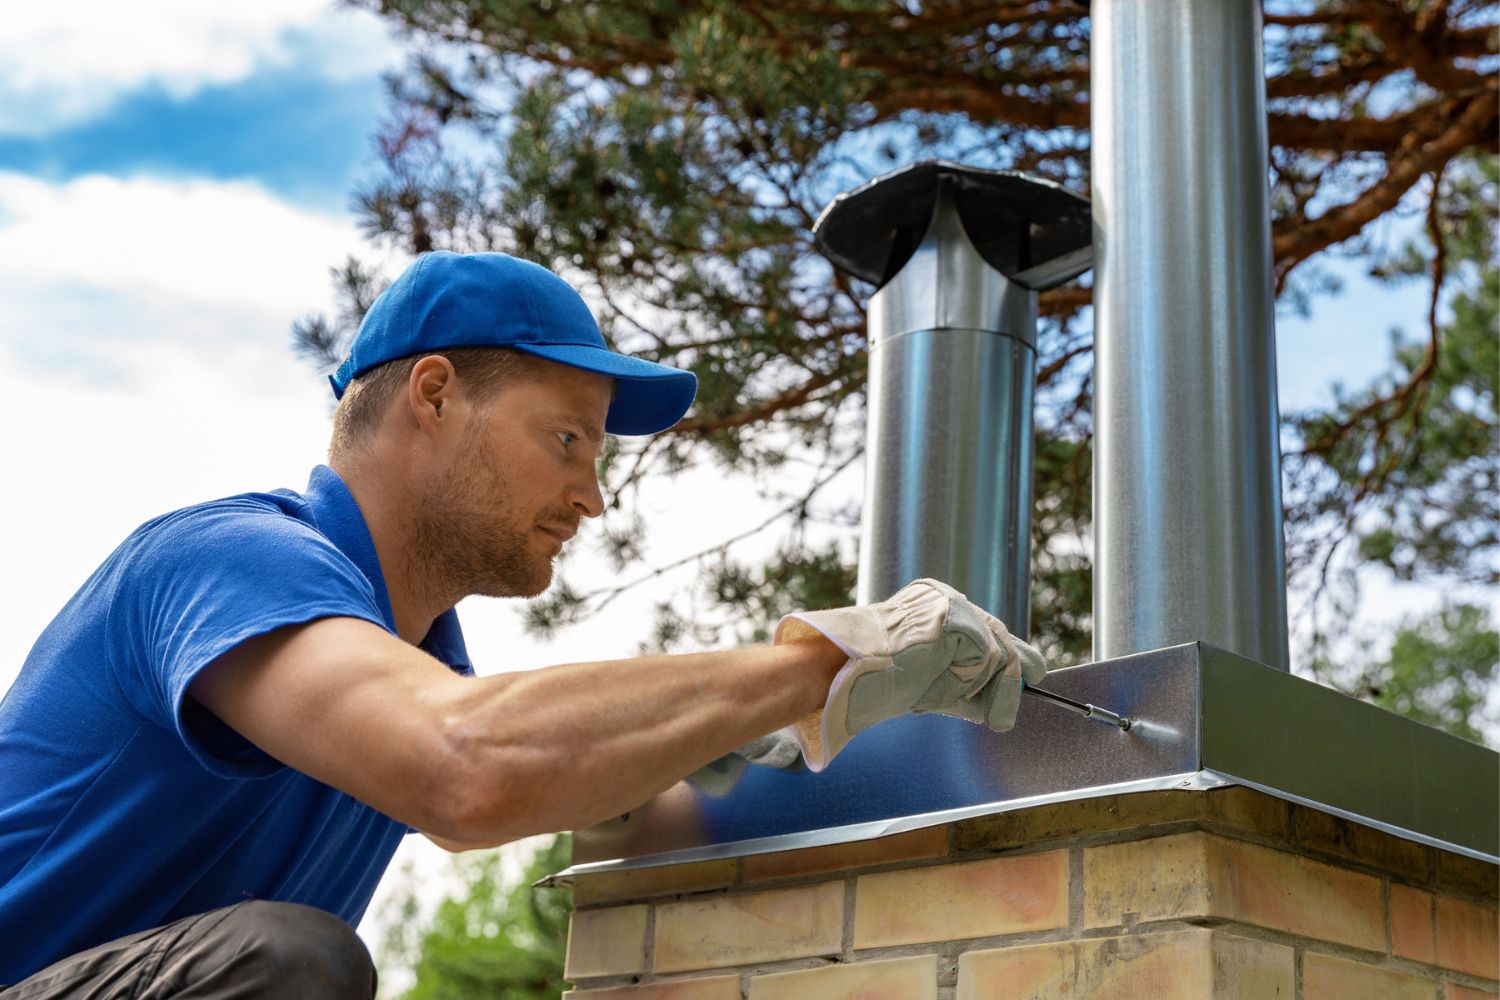
3. Venting Through the Roof: This option involves installing a chimney pipe that extends above the roofline. It requires a roof flashing to ensure a watertight seal. Follow the manufacturer’s instructions and local building codes to ensure a safe and secure installation.
When selecting a venting option, consider factors such as the layout of your home, the desired location of the wood stove, and the available clearance requirements. Consulting with a professional can provide valuable guidance and ensure the choice of the most suitable venting option for your specific circumstances.
It’s important to note that regardless of the venting option chosen, regular maintenance and cleaning of the stovepipe and chimney are essential to prevent the buildup of creosote and ensure proper ventilation.
Remember, the primary objective of venting is to safely remove the byproducts of combustion from your home and reduce the risk of fire or carbon monoxide poisoning. Make sure to follow all safety guidelines and local building codes to ensure the safe and effective operation of your wood stove.
Now that you’re familiar with the venting options available, let’s explore some important safety measures to take when installing a wood stove without a chimney.
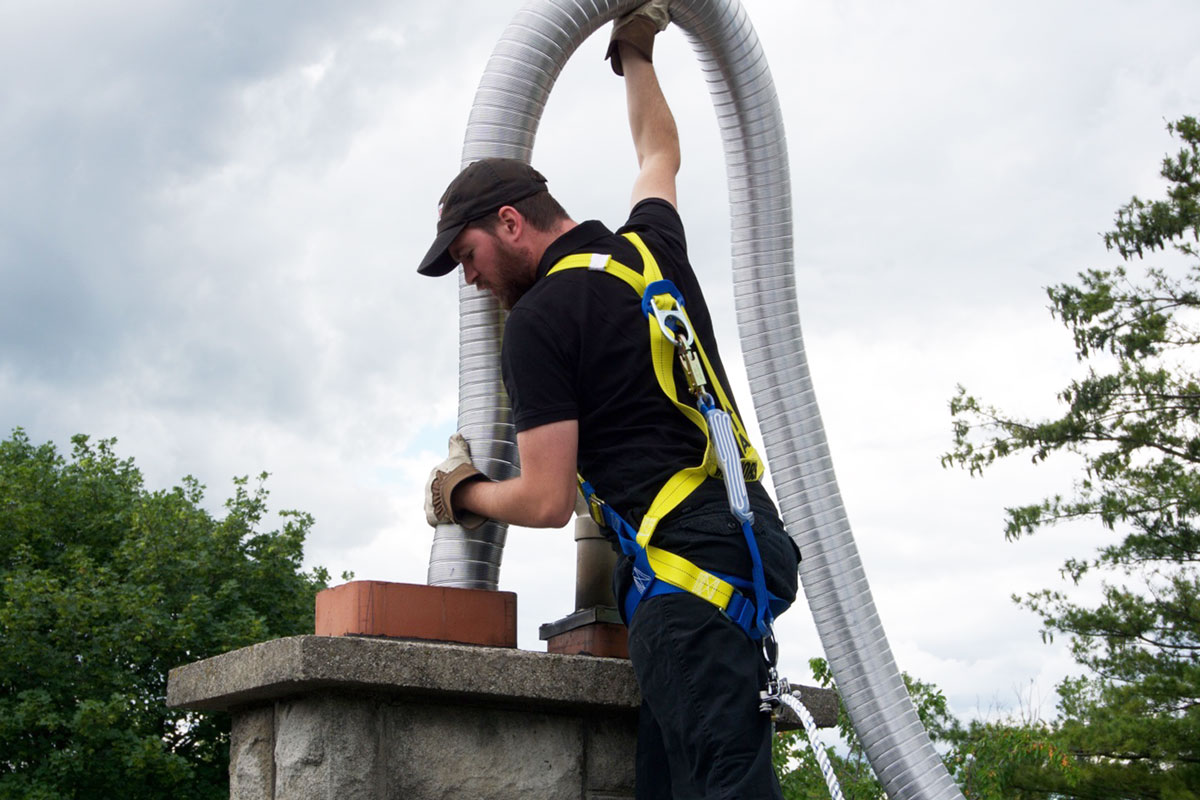
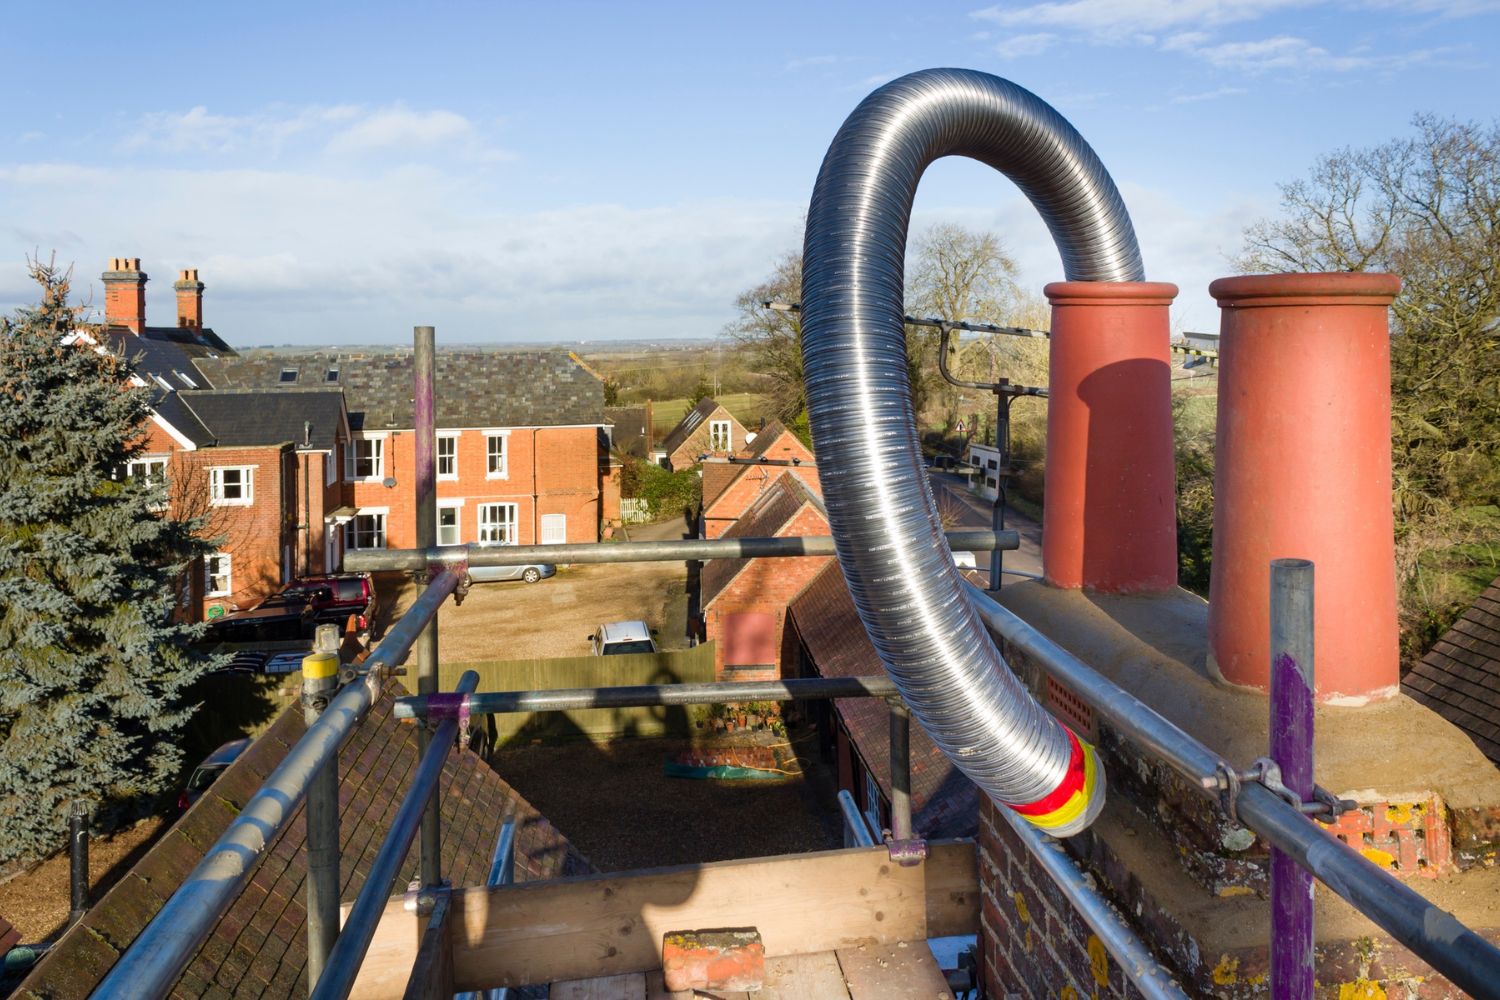
Consider installing a stainless steel chimney liner to connect the wood stove to the existing chimney. This will ensure proper ventilation and safety.
Read more: How To Have A Fireplace Without A Chimney
Venting Directly Through the Wall
One common venting option for installing a wood stove without a chimney is to vent directly through the wall. This method allows for a convenient and efficient way to route the smoke and gases outdoors. Here’s a step-by-step guide on how to vent directly through the wall:
1. Select a Suitable Location: Choose a location on an exterior wall that allows for a clear and direct path for the vent pipe. Ensure that there are no obstructions, such as windows or doors, that may interfere with the installation.
2. Measure and Mark: Measure the distance from the center of the wood stove to the marked location on the wall. Use these measurements to mark the exact position where the vent pipe will pass through the wall.
3. Prepare the Wall: Use a stud finder to locate any studs in the wall. Make sure to avoid drilling into or cutting through any structural components of your home. Clear the area of any obstacles or coverings, such as drywall or siding, that may hamper the installation process.
4. Install Wall Thimble: A wall thimble acts as a protective barrier between the vent pipe and the combustible materials of the wall. Install the wall thimble according to the manufacturer’s instructions, ensuring that it is centered over the marked location.
5. Connect the Vent Pipe: Attach the stovepipe to the collar of the wood stove, making sure it is securely fastened. Extend the vent pipe through the wall thimble and into the wall cavity. Use insulated stovepipe specifically designed for wood stoves, as it helps maintain proper temperature and prevents heat loss.
6. Seal and Insulate: Inspect all connections and joints in the vent pipe to ensure they are tight and secure. Seal any gaps or leaks using high-temperature silicone or metal foil tape. Insulate the vent pipe and any exposed sections in the wall cavity using non-combustible insulation, such as mineral wool.
7. External Finishing: Once the vent pipe is properly installed and sealed, complete the exterior finishing of the installation. This might involve installing a weather cap or termination kit to divert rainwater away from the vent pipe and prevent the entry of debris or animals.
8. Maintain Regular Inspections and Cleaning: It’s important to regularly inspect and clean the vent pipe to remove any accumulated creosote or obstructions. This helps maintain proper airflow and prevents any potential fire hazards.
By following these steps, you can effectively vent a wood stove directly through the wall, providing a safe and efficient way to expel smoke and gases from your home. However, it’s essential to consult with a professional or local authorities to ensure compliance with any specific regulations or building codes in your area.
Next, let’s explore the process of venting the wood stove through the ceiling.
Venting Through the Ceiling
If venting directly through the wall is not a viable option for your wood stove installation, venting through the ceiling can provide an alternative solution. Venting through the ceiling allows for the proper expulsion of smoke and gases from the wood stove, ensuring a safe and efficient operation. Here’s a step-by-step guide on how to vent through the ceiling:
1. Determine the Route: Assess the layout of your home and determine the most direct path for the vent pipe to travel from the wood stove to the ceiling. Consider the location of any obstacles, such as joists or electrical wiring, and plan a clear route.
2. Mark the Location: Measure and mark the location where the vent pipe will pass through the ceiling. This mark should align with the centerline of the wood stove and allow for the necessary clearance from combustible materials.
3. Cut a Hole: Use a hole saw or reciprocating saw to cut a hole in the ceiling at the marked location. Take care to follow any specific guidelines or clearance requirements provided by the manufacturer of your wood stove.
4. Install a Ceiling Support Box: A ceiling support box provides a stable base for the vent pipe as it passes through the ceiling. Install the support box according to the manufacturer’s instructions, ensuring that it is securely fastened to the ceiling joists or support structure.
5. Connect and Secure the Vent Pipe: Attach the stovepipe to the collar of the wood stove. Extend the vent pipe through the ceiling support box and into the attic space. Use insulated stovepipe to maintain proper temperature and prevent heat loss. Secure the vent pipe to the support box using appropriate brackets or fasteners.
6. Seal and Insulate: Inspect the connections and joints in the vent pipe to ensure they are tight and secure. Seal any gaps or leaks using high-temperature silicone or metal foil tape. Insulate the exposed section of vent pipe in the attic space using non-combustible insulation, such as mineral wool, to prevent any heat transfer to combustible materials.
7. Route the Vent Pipe: Once the vent pipe has passed through the ceiling, route it through the attic space to the exterior of the home. Depending on your home’s design, you may need to add additional components, such as attic transitions, elbows, or support braces, to guide the vent pipe to the desired location.
8. Install a Roof Flashing: To ensure a watertight seal, install a roof flashing where the vent pipe exits the roof. The flashing prevents water intrusion and directs it away from the vent pipe. Follow the manufacturer’s instructions and local building codes to ensure a proper installation.
9. Weatherproof and Secure: Complete the external finishing of the vent pipe by installing a weather cap or termination kit. These components protect the vent pipe from the elements, prevent debris or animals from entering, and promote proper airflow. Secure the vent pipe to the roof or siding using appropriate fasteners or brackets.
It’s important to note that the specific venting requirements may vary depending on the type and model of your wood stove, as well as local building codes. Consulting with a professional or local authorities is recommended to ensure compliance and safety.
Now that you’re familiar with venting through the ceiling, let’s explore the process of venting the wood stove through the roof.
Venting Through the Roof
Venting a wood stove through the roof is a common method for safely expelling smoke and gases from your home. This method ensures that the combustion byproducts are directed upwards and away from the living space. Follow these steps to properly vent your wood stove through the roof:
1. Choose an Ideal Location: Assess your roof and select the most suitable location for the vent pipe to pass through. It should be a spot that minimizes interference with other elements, such as roof trusses or vents, and allows for a clear path to the outside.
2. Install a Roof Flashing: Install a roof flashing around the area where the vent pipe will exit the roof. The flashing acts as a protective barrier to prevent water penetration and potential leaks. Follow the manufacturer’s instructions and local building codes to ensure a proper installation.
3. Cut a Hole: Use a reciprocating saw or hole saw to cut a hole in the roof at the marked location. Ensure that the hole is slightly larger than the diameter of the vent pipe to allow for proper clearance.
4. Install a Roof Support: Install a roof support or a support collar in the attic space to help secure the vent pipe in place. This support will prevent the pipe from sagging or shifting over time. Make sure the support is positioned directly beneath the hole in the roof.
5. Attach the Vent Pipe: Connect the vent pipe to the collar on the wood stove and extend it through the roof support and the roof flashing. Use a compatible vent pipe that meets the requirements of your wood stove’s manufacturer and local building codes.
6. Secure the Vent Pipe: Secure the vent pipe to the roof support using appropriate brackets or fasteners. This will ensure the stability and proper alignment of the pipe. Double-check that all connections are secure and sealed, using high-temperature silicone or metal foil tape to prevent any leaks.
7. Weatherproof the Roof Penetration: Apply roofing cement or sealant around the roof flashing to provide additional weatherproofing. This will help seal any gaps and prevent water from penetrating the roof at the penetration point. Ensure that it is applied evenly and according to the manufacturer’s instructions.
8. Inspect for Proper Clearance and Leaks: Once the vent pipe is securely installed, inspect the entire system for proper clearance from combustible materials. Ensure that there are no gaps or leaks in the connections or roof flashing. Regularly inspect and maintain the vent pipe to prevent any issues that may compromise the efficiency or safety of your wood stove.
It’s important to note that venting a wood stove through the roof requires careful attention to detail and adherence to local building codes. Consider consulting with a professional or local authorities to ensure compliance and safety throughout the installation process.
Now that you’re familiar with venting through the roof, let’s move on to discussing some important safety measures to keep in mind.
Safety Measures
When it comes to installing a wood stove without a chimney, ensuring safety should be your top priority. By taking the following safety measures, you can minimize the risk of fire hazards and carbon monoxide exposure:
1. Proper Clearances: Adhere to the minimum clearance requirements specified by the manufacturer and local building codes. Maintain adequate space between the wood stove and any combustible materials, such as walls, furniture, or flooring. This helps prevent heat transfer and reduces the risk of accidental fires.
2. Non-Combustible Flooring: Install a non-combustible hearth pad or base beneath the wood stove to provide a safe surface and protect the floor from excessive heat. Ensure that the hearth pad or base extends beyond the dimensions of the stove as specified by the manufacturer.
3. Secure Installation: Ensure that the wood stove is securely fastened to the floor or hearth pad as per the manufacturer’s instructions. A stable installation prevents any accidental toppling or movement of the stove, reducing the risk of injury or damage.
4. Quality Venting: It is crucial to use proper venting materials, such as insulated stovepipe, and ensure that all connections are secure and sealed. Regularly inspect the venting system for any signs of corrosion, damage, or leaks. Proper venting ensures the safe removal of smoke, gases, and byproducts of combustion from your home.
5. Carbon Monoxide Detectors: Install carbon monoxide detectors near the wood stove and in sleeping areas to detect any potential carbon monoxide leaks. Ensure that the detectors are properly maintained and have working batteries. Carbon monoxide is a colorless and odorless gas that can be lethal if inhaled in high concentrations.
6. Fire Extinguishers and Fire Safety: Keep a fire extinguisher in close proximity to the wood stove, and ensure that all household members know how to operate it. Familiarize yourself with fire safety procedures, such as having an escape plan and practicing it regularly with your family.
7. Regular Maintenance: Schedule regular maintenance and cleaning of your wood stove and venting system. This includes removing ashes and creosote buildup from the stove and inspecting and cleaning the vent pipe. Regular maintenance helps ensure proper airflow, efficient operation, and minimizes the risk of chimney fires.
8. Fire Safety Education: Educate yourself and your family members about fire safety practices, such as proper wood stove operation, handling of flammable materials, and emergency procedures. Promote a fire-safe environment by creating awareness and responsible behavior around the wood stove.
Remember, these safety measures are essential to prevent accidents, fires, and potential health hazards. It’s always advisable to consult with a professional or local authorities to ensure that your wood stove installation meets all safety regulations and guidelines in your specific area.
Now, with the proper safety measures in mind, you can enjoy the warmth and comfort that a wood stove brings to your home.
Read more: How To Install Stove Pipe Into Chimney
Conclusion
Installing a wood stove without a chimney is not only possible but also provides a cozy and efficient heating solution for your home. By assessing the suitable location, preparing the area, and selecting the appropriate venting option, you can enjoy the warmth and ambiance of a wood stove without the need for a traditional chimney.
Whether you choose to vent directly through the wall, ceiling, or roof, it’s crucial to prioritize safety throughout the installation process. Adhering to clearance requirements, using proper venting materials, and following local building codes will ensure a secure and hazard-free operation.
Remember to regularly inspect and clean your wood stove and venting system to maintain optimal performance and prevent the buildup of dangerous creosote or other obstructions. Install carbon monoxide detectors and have a fire safety plan in place to protect your family from potential hazards.
Consulting with a professional or local authorities is highly recommended to ensure that your installation complies with all regulations and guidelines specific to your area.
By following these steps and implementing the necessary safety measures, you can enjoy the comfort, warmth, and ambiance of a wood stove without a chimney, creating a cozy home environment for you and your loved ones.
So go ahead, embrace the charm of a wood stove in your home and experience the unique benefits it brings during the colder months. Stay warm, stay safe, and enjoy the comforting embrace of a crackling fire!
Frequently Asked Questions about How To Install A Wood Stove Without A Chimney
Was this page helpful?
At Storables.com, we guarantee accurate and reliable information. Our content, validated by Expert Board Contributors, is crafted following stringent Editorial Policies. We're committed to providing you with well-researched, expert-backed insights for all your informational needs.


0 thoughts on “How To Install A Wood Stove Without A Chimney”