Home>Articles>How To Remove Ice Maker In Samsung Refrigerator
Articles
How To Remove Ice Maker In Samsung Refrigerator
Modified: May 6, 2024
Learn how to remove the ice maker in your Samsung refrigerator with our helpful articles. Simplify your maintenance with our step-by-step instructions and troubleshoot common issues.
(Many of the links in this article redirect to a specific reviewed product. Your purchase of these products through affiliate links helps to generate commission for Storables.com, at no extra cost. Learn more)
Introduction
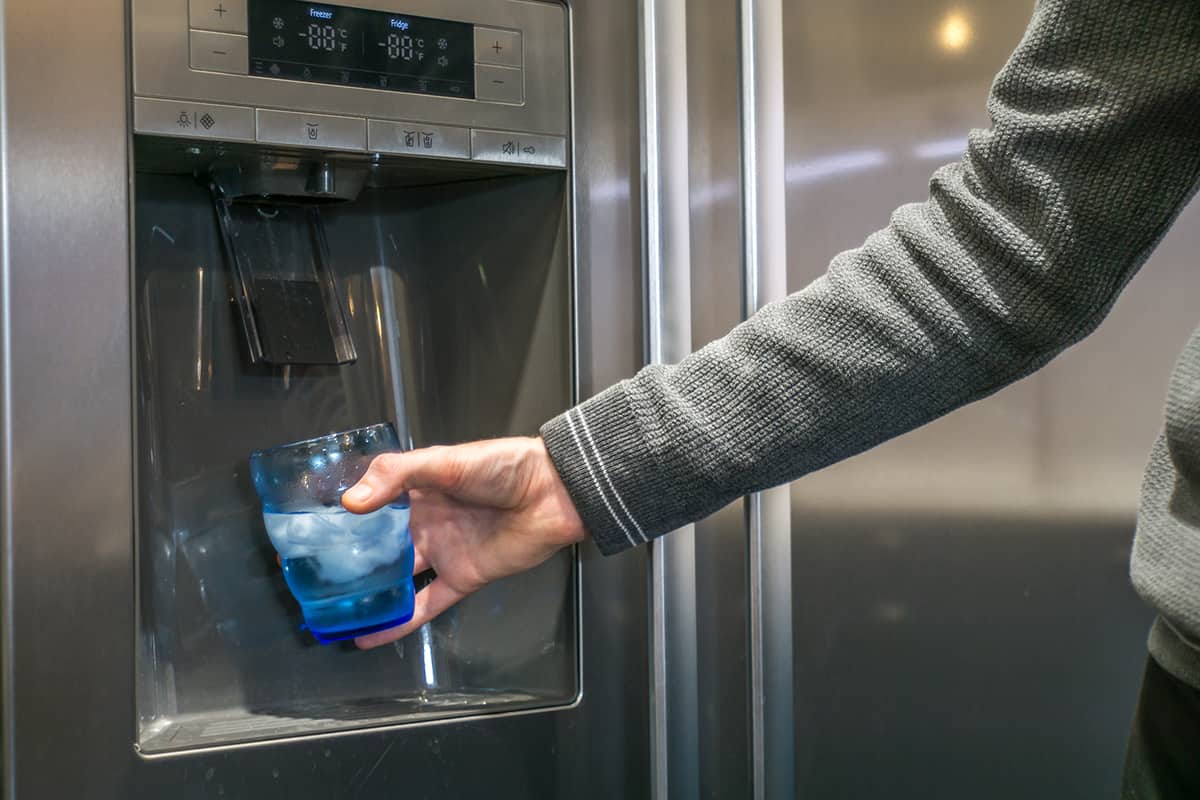
The ice maker in a Samsung refrigerator can be a convenient feature, providing you with a constant supply of ice for your drinks and other cooling needs. However, there may come a time when you need to remove the ice maker for maintenance or replacement. Knowing the steps to take can help you tackle this task with ease.
In this article, we will guide you through the process of removing the ice maker in a Samsung refrigerator. Whether you need to clean the ice maker, replace a faulty unit, or simply want to make some adjustments, following these steps will help you accomplish the task successfully.
Before we begin, it’s important to note that different Samsung refrigerator models may have slight variations in terms of design and component placement. Therefore, it is always recommended to refer to your specific refrigerator’s user manual for model-specific instructions. With that said, let’s get started with the basic steps for removing an ice maker in a Samsung refrigerator.
Key Takeaways:
- Safely removing the ice maker from a Samsung refrigerator involves unplugging the appliance, locating the ice maker assembly, disconnecting the wiring harness, and carefully taking out the assembly to ensure a smooth and efficient process.
- Whether installing a replacement ice maker or reattaching the existing assembly, following the step-by-step instructions and safety precautions ensures a successful outcome, allowing you to enjoy the benefits of a fully functioning ice maker in your Samsung refrigerator.
Step 1: Unplug the refrigerator
The first step in removing the ice maker from your Samsung refrigerator is to unplug the appliance from the power source. This is a crucial safety measure that will protect you from any potential electrical hazards during the removal process.
Locate the power cord at the back of the refrigerator and gently pull it out from the electrical outlet. Ensure that the refrigerator is completely disconnected from the power supply before proceeding to the next steps.
If your refrigerator is built-in or not easily accessible, you may need to turn off the power supply from the circuit breaker. Find the appropriate circuit breaker in your home’s electrical panel and switch it off to shut off power to the refrigerator.
Remember, safety should always be your top priority when handling electrical appliances. Always make sure to follow proper procedures and precautions to avoid any accidents or injuries.
Once you have unplugged the refrigerator or turned off the power supply, you can proceed with the next steps to remove the ice maker from your Samsung refrigerator.
Step 2: Locate the ice maker assembly
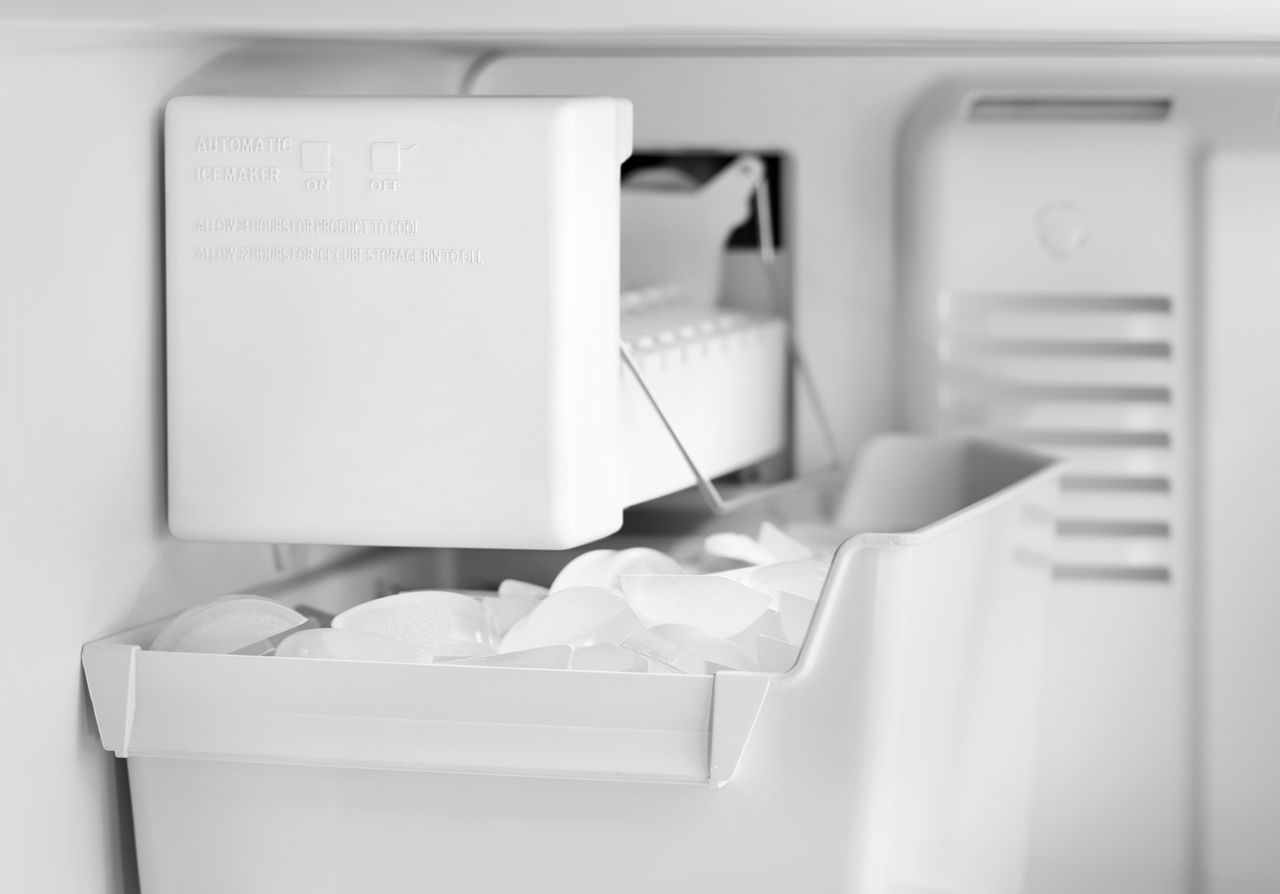
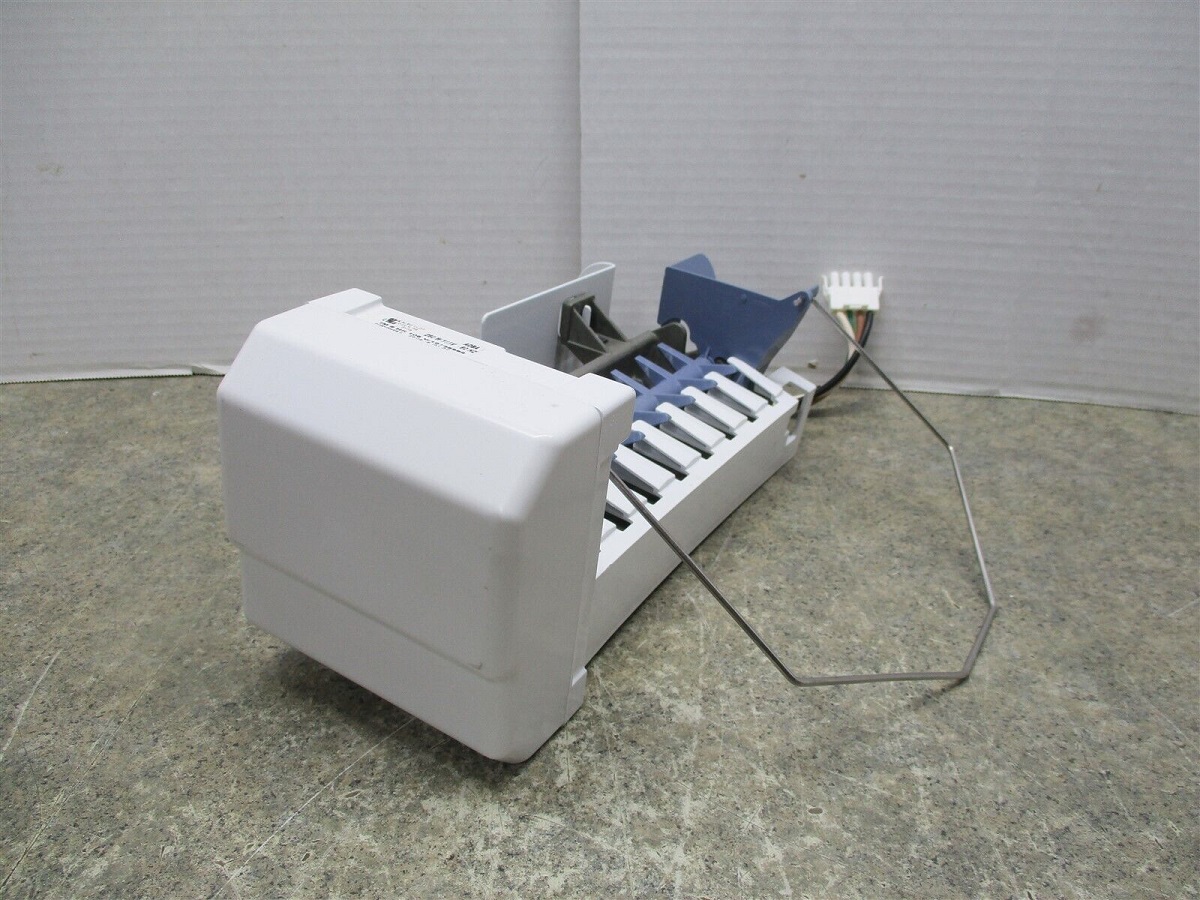
After you have safely unplugged the refrigerator, the next step is to locate the ice maker assembly. The ice maker assembly is typically located in the freezer compartment of the refrigerator, either on the back wall or attached to the sidewall.
In most Samsung refrigerators, the ice maker assembly can be found near the top of the freezer compartment. Open the freezer door and look for a plastic covering or a metal panel that houses the ice maker unit.
If there is a plastic covering, gently remove it by unscrewing the screws or unclipping the tabs holding it in place. If there is a metal panel, use a screwdriver to remove the screws securing it. This will give you access to the ice maker assembly.
Before proceeding further, it’s a good idea to take a moment to examine the ice maker assembly and familiarize yourself with its components. This will help you better understand the steps involved in removing it and make the process smoother.
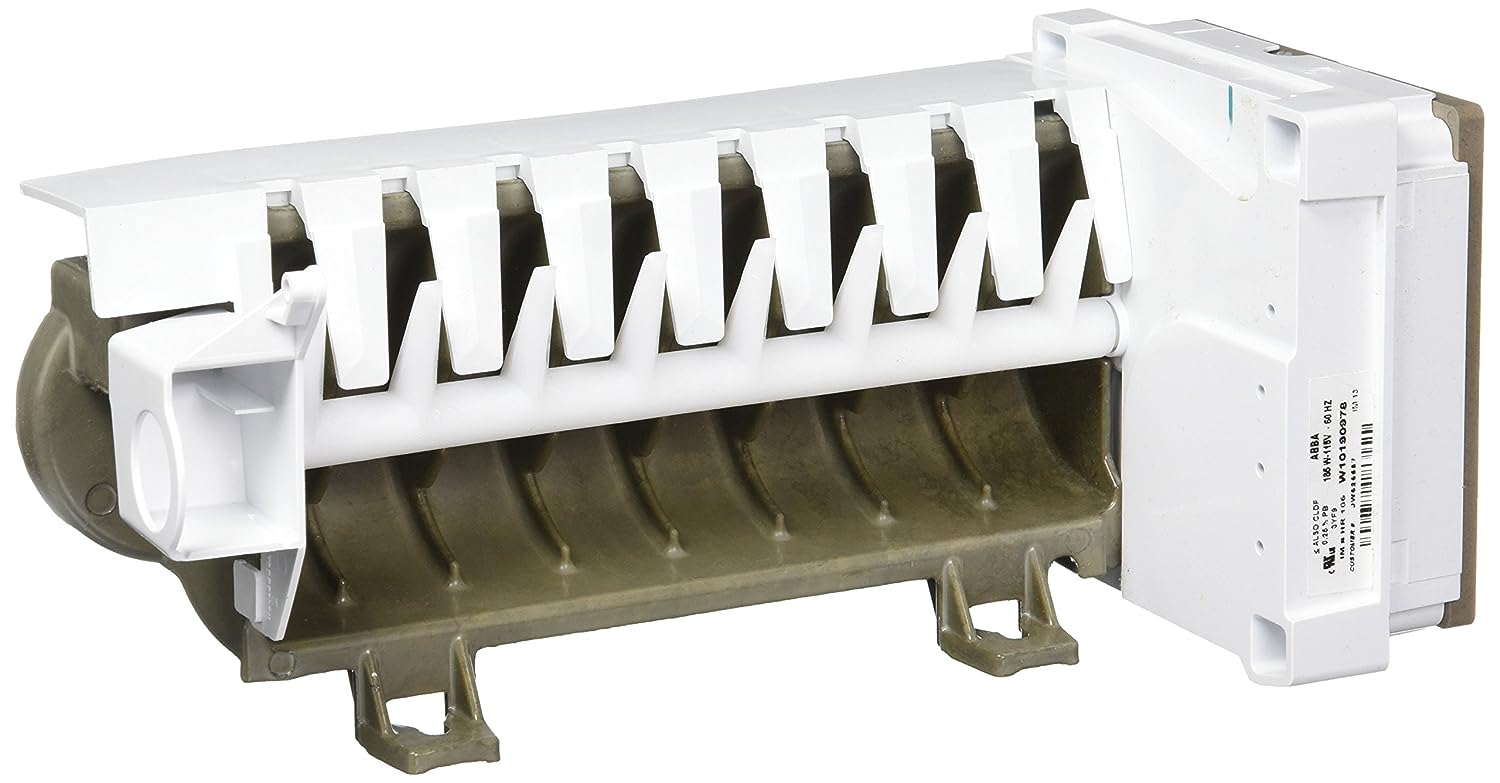
Samsung refrigerators typically have a modular ice maker assembly, which consists of the ice tray, the motor, the water inlet valve, and the wiring harness. Take note of how these components are connected and positioned within the assembly.
Once you have located the ice maker assembly and have a good understanding of its components, you can move on to the next step of removing the ice maker from your Samsung refrigerator.
Step 3: Remove the ice tray
Now that you have located the ice maker assembly, the next step is to remove the ice tray. The ice tray is the part of the assembly that holds the ice cubes and slides in and out of the freezer.
To remove the ice tray, gently lift it up and towards you. Be careful not to spill any remaining ice inside the tray. If the ice tray is frozen in place and difficult to remove, you can use a hairdryer to gently thaw any ice buildup.
Once the ice tray is removed, set it aside in a safe location. You may want to empty any remaining ice cubes into a separate container or discard them, depending on your preferences.
Removing the ice tray will give you better access to the other components of the ice maker assembly, making it easier to disconnect and remove them in the next steps.
Before proceeding, take a moment to inspect the ice tray for any signs of damage or wear. If you notice any cracks, dents, or other issues, it may be a good idea to replace the ice tray along with the ice maker assembly.
Once you have removed the ice tray, you’re ready to move on to the next steps in removing the ice maker from your Samsung refrigerator.
Step 4: Disconnect the wiring harness
With the ice tray removed, the next step in removing the ice maker from your Samsung refrigerator is to disconnect the wiring harness. The wiring harness is responsible for connecting the ice maker to the electrical system of the refrigerator.
Locate the wiring harness that is connected to the ice maker assembly. Depending on your refrigerator model, it may be a single cable with a connector or multiple cables connected to different components of the ice maker.
To disconnect the wiring harness, gently squeeze the sides of the connector or connectors and pull them apart. Be careful not to pull on the wires directly, as this can damage the connections. If needed, you can use a pair of needle-nose pliers to assist in disconnecting the harness.
Take note of the arrangement and positions of the wires within the harness. This will help you in reconnecting the wiring correctly when you install a new ice maker or reassemble the existing one.
Once the wiring harness is disconnected, set it aside or secure it out of the way to prevent it from interfering with the remaining steps of removing the ice maker.
Disconnecting the wiring harness effectively separates the electrical connection of the ice maker from the refrigerator. With this step completed, you can now proceed to the next step of loosening the mounting screws of the ice maker assembly.
Read more: How To Fix Ice Maker On Samsung Refrigerator
Step 5: Loosen the mounting screws
After disconnecting the wiring harness, the next step in removing the ice maker from your Samsung refrigerator is to loosen the mounting screws that secure the assembly in place. These screws keep the ice maker attached to the freezer compartment.
Using a screwdriver appropriate for the type of screws used, locate the mounting screws that hold the ice maker assembly. The number and arrangement of screws may vary depending on your refrigerator model.
Start by loosening the screws, but avoid removing them completely just yet. Loosening the screws will allow you to easily remove the ice maker assembly once all the screws are loose.
Ensure that you keep track of the screws and store them in a safe place, as you will need them later for reattaching the ice maker or installing a replacement unit.
As you loosen the screws, be cautious not to damage the surrounding parts or the freezer compartment. Gently apply pressure to loosen the screws without excessive force.
Once all the mounting screws are loose, you’re ready to proceed to the next step of actually taking out the ice maker assembly from your Samsung refrigerator.
Removing the ice maker assembly takes a bit of finesse and careful handling to prevent any damage. With the mounting screws loosened, move on to the next step to take out the ice maker assembly.
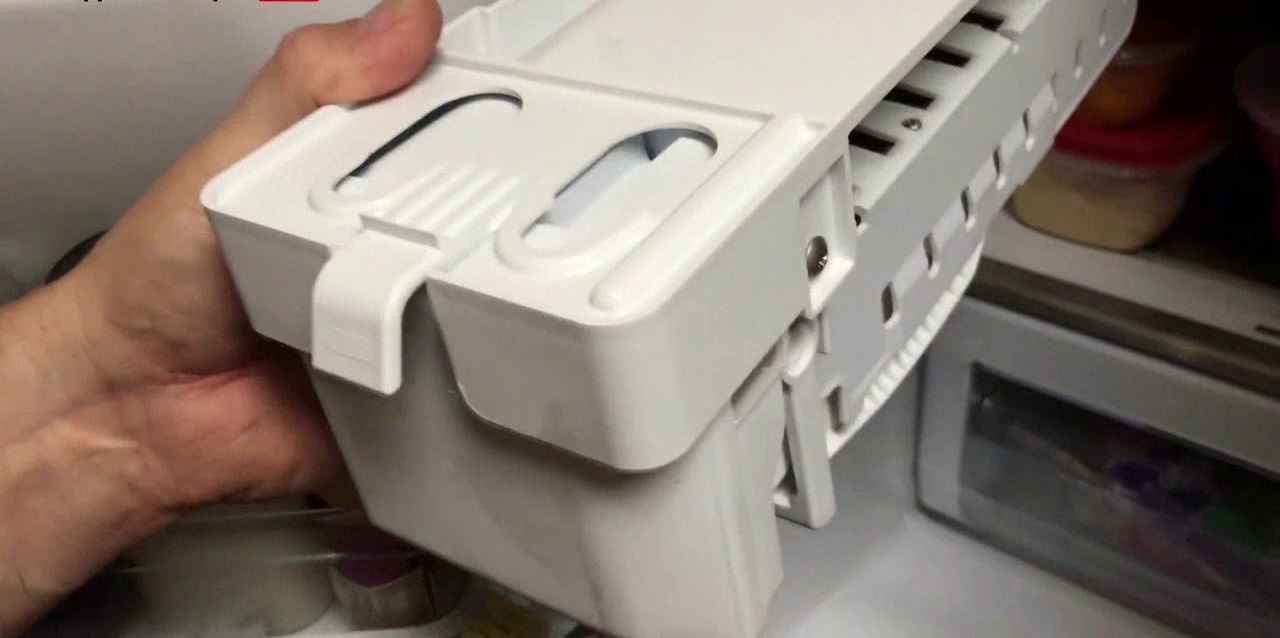
Step 6: Take out the ice maker assembly
Now that the mounting screws are loosened, it’s time to take out the ice maker assembly from your Samsung refrigerator. This step involves carefully removing the assembly from its position within the freezer compartment.
Make sure you have a firm grip on the ice maker assembly before lifting it out. Support the bottom of the assembly with one hand and use the other hand to hold and guide it out of the freezer compartment.
Gently tilt the ice maker assembly towards you as you lift it to disengage it from any remaining hooks or brackets. Be cautious not to bend or twist any of the components while removing the assembly.
Set the ice maker assembly aside in a safe place where it won’t be damaged or obstruct your workspace. You can place it on a clean towel or a flat surface away from the refrigerator.
With the ice maker assembly removed, you now have full access to the freezer compartment and can proceed with any necessary cleaning, repairs, or replacement. Take this opportunity to inspect the assembly for any signs of damage or wear that may indicate the need for a new ice maker.
If you plan to install a replacement ice maker, ensure that you have the new unit ready and compatible with your Samsung refrigerator model. If you need assistance in finding the right replacement ice maker, refer to the manufacturer’s guidelines or seek professional advice.
After taking out the ice maker assembly, you’re one step closer to completing the removal process. In the following steps, you will learn how to install a replacement ice maker or reattach the existing assembly if needed.
Before removing the ice maker in a Samsung refrigerator, make sure to unplug the refrigerator and turn off the water supply to prevent any accidents. Follow the manufacturer’s instructions for removing the ice maker to avoid damaging the unit.
Step 7: Install a replacement ice maker (optional)
If you have chosen to install a replacement ice maker in your Samsung refrigerator, this step will guide you through the installation process. Installing a new ice maker can provide you with a fresh and fully functioning unit for producing ice.
Before you begin, ensure that you have the correct replacement ice maker that is compatible with your specific Samsung refrigerator model. Consult the user manual or reach out to the manufacturer or a professional technician for guidance if needed.
To install a replacement ice maker, follow these steps:
- Position the new ice maker in the freezer compartment in the same location where the previous ice maker was located.
- Gently tilt the ice maker and align it with the mounting holes in the freezer compartment.
- Secure the ice maker in place by tightening the mounting screws. Use the screws that you removed earlier, or refer to the manufacturer’s instructions for any specific screws provided with the replacement ice maker.
- Make sure the ice maker is securely attached to the freezer compartment without any wobbling or loose connections.
- Reconnect the wiring harness, ensuring that each wire is properly aligned and securely connected to its corresponding slot or connector.
- Once the wiring harness is connected, double-check all the connections to ensure they are secure and properly seated.
After following these steps, your replacement ice maker should be installed and ready to use. Remember to refer to the user manual or any additional instructions provided by the manufacturer for any specific details or considerations regarding the installation process.
If you have chosen not to install a replacement ice maker and are simply removing the existing one for maintenance or other purposes, you can proceed to the next step, which involves reattaching the mounting screws.
Step 8: Reattach the mounting screws
After removing the ice maker assembly or completing the installation of a replacement unit, it’s time to reattach the mounting screws to secure the ice maker in place. The mounting screws ensure that the ice maker assembly remains stable and properly positioned within the freezer compartment.
To reattach the mounting screws, follow these steps:
- Align the ice maker assembly with the mounting holes in the freezer compartment.
- Insert the mounting screws into the designated holes, making sure they are properly aligned.
- Tighten the mounting screws using a screwdriver, but avoid overtightening them to prevent damaging the plastic or other parts of the ice maker assembly.
- Ensure that each screw is secure, maintaining a snug fit without being too tight or too loose.
As you reattach the mounting screws, it’s important to use the same screws that were removed during the earlier steps. If any of the screws were damaged or lost, it’s recommended to obtain replacement screws that are compatible with your Samsung refrigerator model.
Double-check the positioning and stability of the ice maker assembly once the mounting screws are reattached. Ensure that it is firmly secured and does not wobble or move excessively when lightly touched.
With the mounting screws properly reattached, the ice maker assembly should be securely in place within the freezer compartment. Proceed to the next step to reconnect the wiring harness for the ice maker.
Step 9: Reconnect the wiring harness
After reattaching the mounting screws, the next step in the process of removing or installing an ice maker in your Samsung refrigerator is to reconnect the wiring harness. The wiring harness is responsible for providing the necessary electrical connections to power the ice maker assembly.
To reconnect the wiring harness, follow these steps:
- Locate the wiring harness connector on the ice maker assembly. It is typically found near the mounting area or attached to one of the ice maker components.
- Align the wiring harness connector with the corresponding socket or connector on the ice maker assembly.
- Gently push the connector into the socket, ensuring a secure and snug fit. You may need to exert some pressure, but be careful not to force or bend any of the wires.
- Once the wiring harness is fully connected, check that the connection is secure and there are no loose or dangling wires.
- If you have a multiple-wire harness, ensure that each wire is connected to its designated slot or connector accurately.
Take a moment to inspect the wiring harness connections to make sure that they are properly seated and aligned. Any loose or poorly connected wires can lead to issues with the ice maker’s functionality or potential electrical hazards.
Once you have verified that the wiring harness is securely connected, you can proceed to the final step of inserting the ice tray back into the freezer compartment.
Reconnecting the wiring harness is a crucial step in ensuring that the ice maker assembly receives the necessary power supply to operate effectively. With the wiring harness reconnected, you are almost done with the process of removing or installing an ice maker in your Samsung refrigerator.
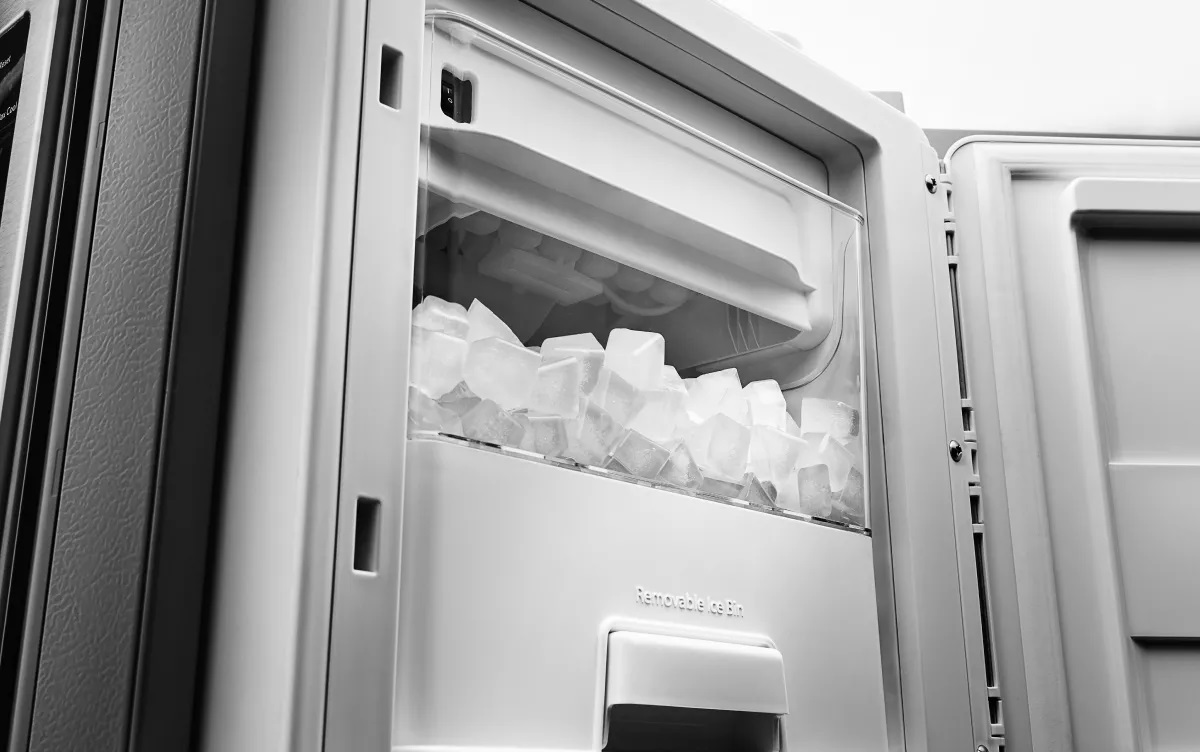
Step 10: Insert the ice tray back in place
After completing the previous steps of removing or installing an ice maker in your Samsung refrigerator, it’s time to insert the ice tray back into its position. The ice tray is where the ice cubes are formed and stored, allowing you to conveniently access them when needed.
To insert the ice tray back in place, follow these steps:
- Hold the ice tray in both hands and position it in front of the opening where it will slide into the freezer compartment.
- Align the corresponding grooves or rails on the bottom of the ice tray with the tracks located on the freezer’s interior walls.
- Gently push the ice tray back into the freezer compartment, ensuring that it slides smoothly and fully engages with the tracks.
- Make sure the ice tray is securely in place and does not wobble or lean to either side.
Take a moment to inspect the ice tray’s position and ensure that it is properly aligned and seated within the freezer compartment. Proper placement of the ice tray is essential for the ice maker to function optimally and produce ice cubes effectively.
Once the ice tray is securely inserted, you can proceed to the final steps of reconnecting the power supply and preparing the refrigerator for use again.
By following these steps, you have successfully completed the process of removing or installing an ice maker in your Samsung refrigerator. The ice maker should now be ready to produce ice or undergo any necessary maintenance or repairs.
Step 11: Plug in the refrigerator
After completing all the necessary steps to remove or install an ice maker in your Samsung refrigerator, the final step is to plug the refrigerator back into the power source. This will restore the electrical connection and allow the refrigerator to function properly.
To plug in the refrigerator, follow these steps:
- Locate the power cord at the back of the refrigerator.
- Gently insert the power cord into the electrical outlet.
- Push the plug all the way into the outlet to ensure a secure connection.
- Once the refrigerator is plugged in, ensure that the power is restored by checking if the refrigerator lights turn on and the cooling system starts running.
It’s important to ensure that the refrigerator is properly connected to a reliable power source to avoid any electrical issues or malfunctions. Double-check that the power cord is securely inserted into the outlet and that there are no loose connections.
After plugging in the refrigerator, give it a few moments to start up and stabilize. You may hear the sound of the compressor running or the refrigerator fans operating as it begins to cool down.
With the refrigerator successfully plugged in, you can now enjoy the benefits of your ice maker or carry out any necessary maintenance routines to ensure its optimal performance.
Following these steps and plugging in the refrigerator marks the completion of the process of removing or installing an ice maker in your Samsung refrigerator. Congratulations on successfully carrying out this task!
Conclusion
Removing or installing an ice maker in a Samsung refrigerator may seem like a daunting task, but by following the step-by-step instructions provided in this guide, you can successfully complete the process with ease. Whether you are removing the ice maker for maintenance, repairs, or upgrading to a new unit, understanding the necessary steps ensures a smooth and efficient process.
Starting with the important safety step of unplugging the refrigerator, you learned how to locate and remove the ice maker assembly. Disconnecting the wiring harness and loosening the mounting screws allowed you to take out the ice maker assembly from the freezer compartment. If you opted for a replacement ice maker, you were guided through the installation process as well.
Reattaching the mounting screws, reconnecting the wiring harness, and inserting the ice tray back in place ensured that everything was properly aligned and securely in position. Finally, plugging in the refrigerator restored the power connection, bringing your Samsung refrigerator back to full functionality.
By following these steps and using the recommended safety precautions, you can confidently remove or install an ice maker in your Samsung refrigerator and enjoy the benefits of a fully functioning ice maker or carry out any necessary maintenance tasks. Remember to consult your specific refrigerator model’s user manual for any additional instructions or cautionary notes.
With a little patience and attention to detail, you can successfully navigate this process and have your ice maker up and running smoothly in no time. So go ahead and confidently tackle the task of removing or installing an ice maker in your Samsung refrigerator!
Just tackled your Samsung refrigerator's ice maker removal? Keep the momentum going with our guide on how to efficiently open your ice maker for routine checks and cleanups. Next, widen your DIY skills by diving into essential home maintenance practices. These step-by-step guides will not only save you a trip to the technician but also keep your space in top-notch condition year-round.
Frequently Asked Questions about How To Remove Ice Maker In Samsung Refrigerator
Was this page helpful?
At Storables.com, we guarantee accurate and reliable information. Our content, validated by Expert Board Contributors, is crafted following stringent Editorial Policies. We're committed to providing you with well-researched, expert-backed insights for all your informational needs.

0 thoughts on “How To Remove Ice Maker In Samsung Refrigerator”