Articles
How To Install Laminate Flooring In Basement
Modified: March 24, 2024
Learn how to install laminate flooring in your basement with our helpful articles. Transform your space with easy-to-follow instructions and expert tips.
(Many of the links in this article redirect to a specific reviewed product. Your purchase of these products through affiliate links helps to generate commission for Storables.com, at no extra cost. Learn more)
Introduction
When it comes to transforming a basement into a functional and beautiful space, installing laminate flooring can make a world of difference. Laminate flooring is not only affordable and easy to install, but it also provides a durable and stylish option for basement floors. Whether you’re creating a cozy living area, a home gym, or a playroom for the kids, laminate flooring can be the perfect choice.
In this guide, we will walk you through the step-by-step process of installing laminate flooring in your basement. From preparing the space to selecting the right materials and tackling common challenges, we’ve got you covered. By following these instructions, you’ll be able to achieve professional-looking results while saving time and money.
Before diving into the installation process, it’s important to understand the benefits of laminate flooring in a basement. Unlike traditional hardwood, laminate flooring is designed to withstand moisture and humidity, making it an ideal choice for below-grade spaces. It offers excellent resistance to water damage and is less prone to warping or buckling.
Another advantage of laminate flooring is its versatility in terms of design. With a wide range of colors, patterns, and textures available, you can find laminate flooring that perfectly matches your basement’s aesthetic. Whether you want a rustic look, a sleek modern design, or something in between, there’s a laminate flooring option to suit your taste.
Before starting the installation process, gather all the necessary tools and materials. These may include:
- Laminate flooring planks
- Underlayment
- Vapor barrier
- Tape measure
- Saw
- Pry bar
- Hammer
- Spacers
- Tapping block
- Utility knife
- Protective eyewear
- Gloves
Now that you’re aware of the benefits of laminate flooring and have gathered the necessary materials, let’s dive into the step-by-step process of installing laminate flooring in your basement. Follow along as we guide you through each stage of the installation, ensuring a successful and long-lasting outcome.
Key Takeaways:
- Transform your basement with durable and stylish laminate flooring. Follow our step-by-step guide to prepare, install, and complete the process, creating a functional and beautiful space while saving time and money.
- Ensure a successful and long-lasting outcome by acclimating the laminate flooring, laying down a vapor barrier, installing the underlayment, and addressing obstacles with precision. Enjoy the beauty, comfort, and durability of your newly transformed basement.
Read more: How To Install Laminate Flooring
Step 1: Preparing the Basement for Installation
Before you begin installing laminate flooring in your basement, it’s crucial to properly prepare the space. This involves clearing the area, inspecting the subfloor, and addressing any potential issues that may affect the installation process.
The first step is to remove any existing flooring or carpeting that may be present. Use a pry bar and hammer to gently remove baseboards, being careful not to damage them if you plan on reusing them. Sweep or vacuum the floor to remove any dust or debris.
Next, inspect the subfloor to ensure it is level, dry, and free from any damage. Uneven or damaged subfloors can cause issues with the installation and may require additional preparation. If you notice any dips or bumps, use a self-leveling compound to even out the surface.
Moisture is a common concern in basements, so it’s important to check for any signs of water intrusion. Look for damp spots, water stains, or musty odors. If you suspect moisture issues, it’s crucial to address them before installing the laminate flooring. Consider installing a basement waterproofing system or consulting a professional to ensure a dry and stable environment.
Once you have addressed any moisture concerns and ensured a level and dry subfloor, it’s time to install a moisture barrier. A moisture barrier, also known as a vapor barrier, helps to protect the laminate flooring from moisture that may seep through the concrete slab.
Roll out the moisture barrier in rows, ensuring that each row overlaps by at least 8 inches. Use a utility knife to trim any excess material. Secure the barrier to the walls using tape, making sure to create a tight seal. This will provide an additional layer of protection for your laminate flooring.
By taking the time to properly prepare your basement for installation, you’ll create a solid foundation for your laminate flooring. This will ensure a smooth and successful installation process, as well as prolong the lifespan of your new basement floor. With the preparation complete, you’re now ready to move on to the next step: choosing and preparing the laminate flooring.
Step 2: Choosing and Preparing the Laminate FlooringSelecting the right laminate flooring is crucial for achieving the desired look and durability in your basement. Consider factors such as color, design, thickness, and the AC rating (Abrasion Class) to ensure you choose a product that suits your needs.
When it comes to color and design, think about the overall aesthetic you want to achieve in your basement. Consider the existing décor, wall colors, and furniture to create a cohesive and visually appealing space. Additionally, keep in mind that lighter colors can make the room appear larger, while darker shades can create a cozy and intimate ambiance.
In terms of thickness, a thicker laminate flooring generally provides better durability and sound absorption. Aim for a thickness of at least 8mm or more for basement installations. Thicker planks also make it easier to install and reduce the chance of accidents or damage during the process.
The AC rating of a laminate flooring indicates its durability and suitability for various levels of foot traffic. For residential basements, it is generally recommended to choose a laminate flooring with an AC3 or AC4 rating, which are designed to withstand moderate to heavy use.
Before installing the laminate flooring, make sure to acclimate the planks to the basement environment. This step is crucial to prevent any potential warping or expansion/contraction issues later on. Stack the planks in the room where they will be installed and let them sit for at least 48 hours. This allows the laminate flooring to adjust to the temperature and humidity of the basement.
While the planks are acclimating, it’s important to prepare the space for installation. Ensure that the temperature and humidity levels in the basement are within the manufacturer’s recommended range. Clear the area of any furniture, debris, or obstacles that may hinder the installation process. This will create a clean and open space for easy maneuvering during installation.
By carefully selecting and preparing the laminate flooring for your basement, you’ll ensure not only a visually appealing look but also long-lasting durability. With the laminate flooring ready, it’s time to move on to the next step: acclimating the laminate flooring in the basement.
Step 3: Acclimating the Laminate Flooring
Acclimating the laminate flooring to the basement environment is a crucial step to ensure a successful and problem-free installation. Acclimation allows the flooring to adjust to the temperature and humidity of the basement, reducing the risk of warping, buckling, or other issues down the line.
Before you start, ensure that the basement is at a stable temperature and humidity level. Ideally, the temperature should be between 60-80°F (15-27°C), and the humidity should be within the manufacturer’s recommended range (usually around 30-50%).
Begin by unboxing the laminate flooring and removing any plastic wrapping. Lay the planks flat on the floor in the room where they will be installed. It’s important to leave sufficient space between the planks and walls for air circulation.
Allow the laminate flooring to acclimate for at least 48 hours. During this time, avoid exposing it to excessive moisture or temperature changes. It’s important to maintain a stable environment to ensure accurate acclimation.
If your basement has a concrete subfloor, it’s essential to include a moisture barrier to prevent moisture from seeping through and affecting the laminate flooring. This step is particularly important if the basement has a higher moisture level. Be sure to follow the manufacturer’s recommendations for the moisture barrier installation.
While the laminate flooring is acclimating, take this time to inspect the planks for any visible defects or damage. If you notice any issues, contact the manufacturer or supplier immediately to resolve the problem before installation.
Remember, proper acclimation is key to a successful laminate flooring installation. Skipping this step or rushing through it can lead to problems such as buckling, gaps, or warping. Take the time to allow the planks to adjust to the basement environment, and ensure that the basement conditions are suitable for installation.
Once the laminate flooring has acclimated and the basement conditions are stable, you’re ready to move on to the next step: laying down the vapor barrier.
Step 4: Laying Down the Vapor Barrier
Installing a vapor barrier is an essential step in protecting your laminate flooring from moisture and preventing damage in your basement. A vapor barrier acts as a barrier between the concrete subfloor and the laminate flooring, preventing moisture from seeping through and causing issues such as warping, mold, or mildew.
Before laying down the vapor barrier, ensure that the basement floor is clean and free from any debris or dust. Sweep or vacuum the area to remove any loose particles. It’s important to have a smooth and even surface to ensure proper installation.
Start by rolling out the vapor barrier across the basement floor. The vapor barrier should have an overlap of at least 8 inches between each row. This overlap will create a tight seal and prevent moisture from seeping between the layers.
Use a utility knife to cut the vapor barrier to the appropriate size, ensuring it fits the dimensions of the basement accurately. Take extra care when trimming around obstacles such as pillars or cabinets to create a precise fit.
Once the vapor barrier is in place, secure it to the floor using adhesive tape. Make sure the tape adheres firmly to the concrete surface, creating a tight seal and preventing any moisture from penetrating through. Pay attention to the edges and corners of the vapor barrier to ensure complete coverage.
As you lay down the vapor barrier, take care not to leave any gaps or holes that could compromise its effectiveness. Inspect the entire surface to ensure there are no areas where the vapor barrier is torn or damaged. Address any issues immediately before moving on to the next step.
By properly laying down the vapor barrier, you’re creating a protective layer that will safeguard your laminate flooring from moisture-related problems. The vapor barrier acts as an important barrier, ensuring that your laminate flooring remains stable, durable, and free from moisture damage over time.
With the vapor barrier securely in place, you’re now ready to move on to the next step: installing the underlayment.
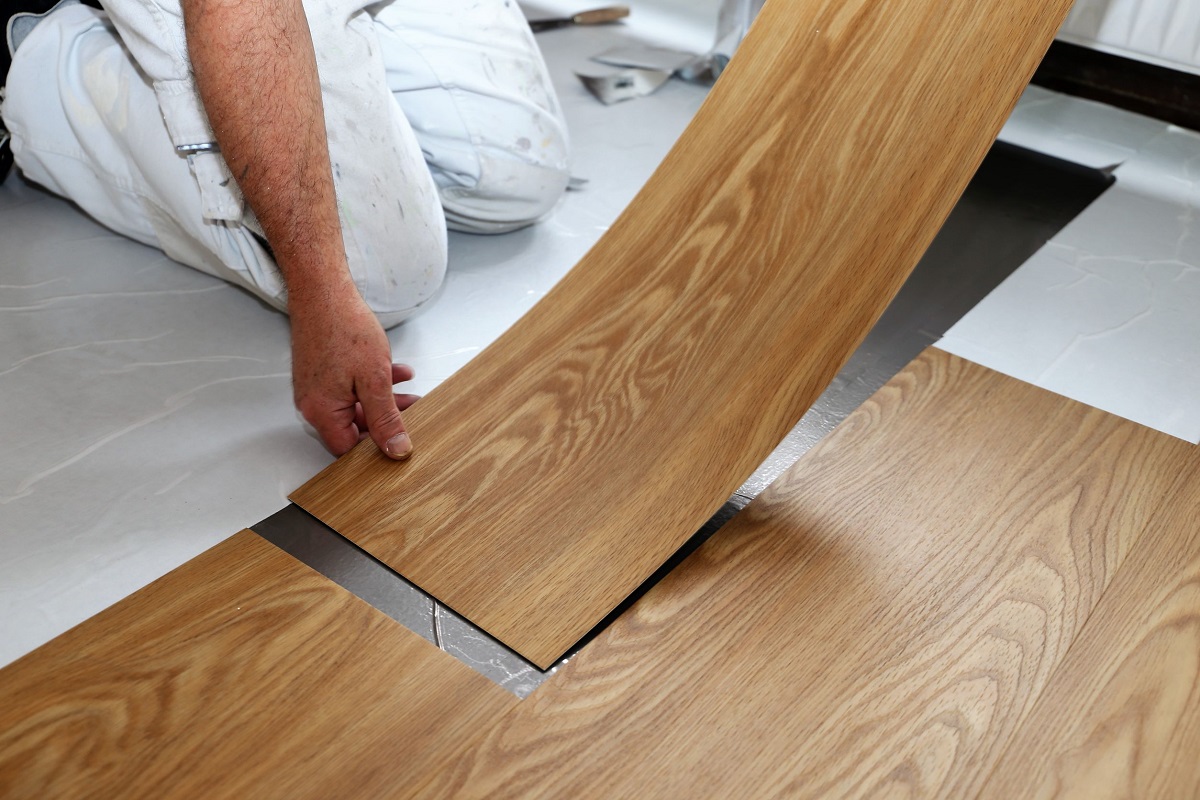
Step 5: Installing the Underlayment
Installing the underlayment is an essential step in the laminate flooring installation process. The underlayment provides several benefits, including noise reduction, moisture protection, and added cushioning to enhance the comfort and durability of the laminate flooring.
Before installing the underlayment, ensure that the vapor barrier is in place and properly sealed. The underlayment should be installed directly over the vapor barrier to provide an additional layer of protection against moisture.
Start by unrolling the underlayment parallel to the longest wall of the basement. Leave a small gap of about 1/4 inch between the edges of the underlayment and the walls to allow for expansion of the laminate flooring. Trim the excess underlayment using a utility knife.
Secure the underlayment together using adhesive strips or tape. Ensure that the seams are tightly sealed to prevent any moisture from seeping through. Additionally, make sure that the underlayment is flat and smooth, without any wrinkles or folds that could affect the installation process.
If you have a concrete subfloor, it’s advisable to choose an underlayment with a built-in moisture barrier. This will provide an extra layer of protection against potential moisture issues in the basement. However, if you have a wooden subfloor, you can opt for a standard underlayment without a moisture barrier.
When choosing the type of underlayment, consider factors such as noise reduction, insulation, and compatibility with your specific laminate flooring. Consult the manufacturer’s guidelines to ensure that you select the appropriate underlayment for your basement.
Installing the underlayment is an important step in the laminate flooring installation process. It provides an extra layer of protection, insulation, and comfort, ensuring a pleasant and long-lasting floor in your basement. With the underlayment securely in place, you’re now ready to move on to the next step: measuring and cutting the laminate flooring.
Before installing laminate flooring in your basement, make sure to check for any moisture issues and address them before laying down the underlayment and laminate planks. This will help prevent any damage to the flooring in the future.
Step 6: Measuring and Cutting the Laminate Flooring
Accurate measurements and precise cuts are crucial for a successful laminate flooring installation. In this step, you will measure the dimensions of the basement and determine the layout of the laminate flooring, ensuring a proper fit and minimizing waste.
Start by measuring the length and width of the basement using a tape measure. It’s important to account for any irregularities or odd shapes in the room. Take note of any obstacles such as support columns, doorways, or other architectural features that may require special attention when cutting the laminate flooring.
When planning the layout, consider the direction in which you want the laminate flooring to be installed. Most commonly, the planks are laid parallel to the longest wall in the room to create a visually appealing and balanced look. However, you can experiment with different layouts to suit your preferences and the shape of the basement.
Using the measurements, calculate how many planks you will need to cover the entire basement floor. It’s recommended to add an extra 10% to your total square footage to account for any mistakes, waste, or future replacements. This buffer will ensure that you have enough material to complete the installation without any delays.
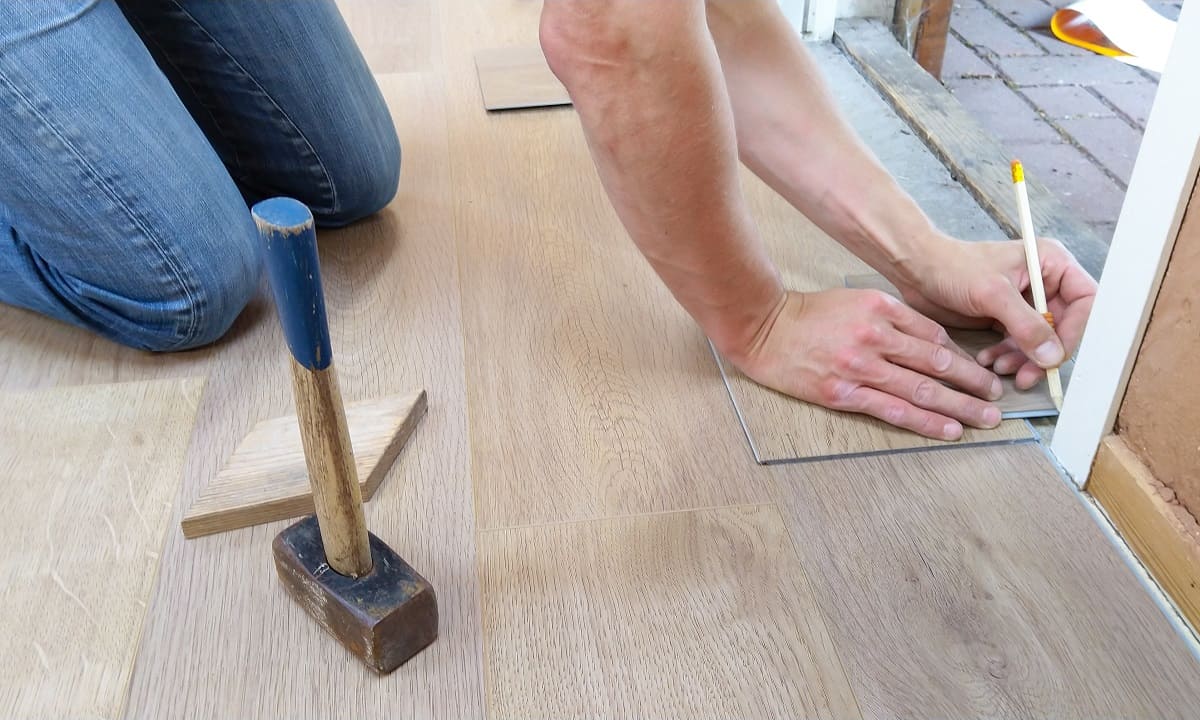
Once you have determined the number of planks needed, it’s time to cut the laminate flooring to the appropriate size. Measure and mark the planks using a pencil or marker before making any cuts. Use a saw, such as a circular saw or jigsaw, to carefully cut the planks along the marked lines.
Remember to wear protective eyewear and gloves when cutting the laminate flooring to ensure your safety. Make smooth and clean cuts to achieve a professional and seamless look. A well-cut piece will fit snugly against the walls or obstacles, providing a neat and polished appearance.
As you measure and cut the laminate flooring, take care to label each piece to indicate its placement in the basement. This will help you easily identify where each plank belongs during the installation process, streamlining the workflow and reducing confusion.
With the laminate flooring accurately measured and cut, you’re now ready to move on to the next step: installing the first row of laminate flooring.
Step 7: Installing the First Row of Laminate Flooring
Now that you have measured and cut the laminate flooring to size, it’s time to start the installation process. In this step, you will begin by installing the first row of laminate flooring along one of the walls of the basement.
Start by placing spacers along the wall, maintaining a gap of approximately 1/4 inch between the spacers and the wall. This gap allows for expansion of the laminate flooring and helps prevent buckling or warping.
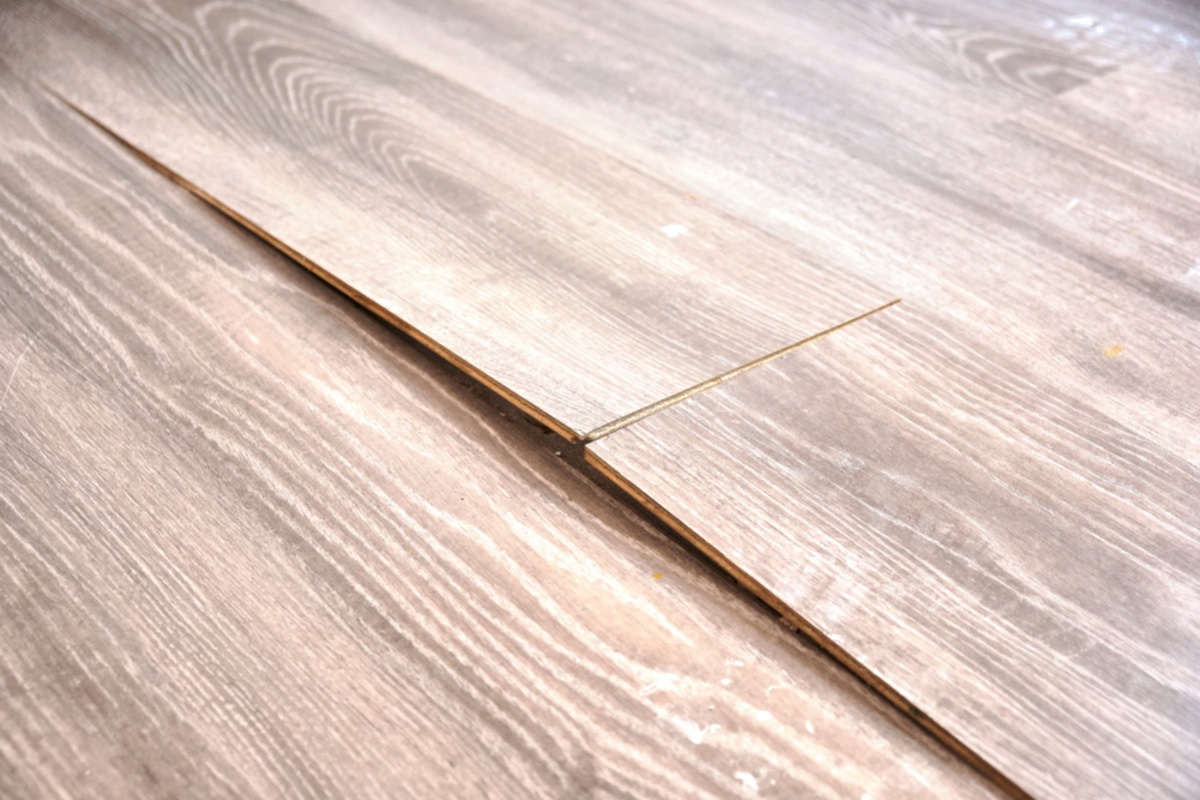
Place the first plank of laminate flooring in the corner of the wall, aligning it with the spacers. Ensure that the tongue side of the plank is facing the wall. Gently push the plank against the spacers, making sure it is flush against both the wall and the spacer on the side.
For the next plank, connect the tongue side of the plank to the groove side of the first plank at a slight angle. Use a tapping block and a hammer to gently tap the second plank into place. Continue connecting the planks in the same manner, tapping them together until you reach the end of the first row.
Measure and cut the last plank in the row to fit, leaving a 1/4 inch gap between the plank and the wall. Use a pry bar to gently push the last piece into place, ensuring a snug fit. Remember to use spacers along the opposite wall to maintain the proper expansion gap.
Once the first row is complete, check for any gaps or loose connections between the planks. If needed, use the tapping block and hammer to make adjustments and ensure a tight and seamless fit.
Throughout the installation process, periodically check that the laminate flooring is level and aligned. Adjust the planks as necessary to maintain a uniform appearance. Pay attention to the joints between the planks to ensure they are tight and secure.
As you progress with the installation, continue installing subsequent rows of laminate flooring, connecting the planks using the tongue and groove system. Remember to stagger the joints between the rows, aiming for a random pattern to create a natural and visually appealing look.
With the first row of laminate flooring installed, you’ve set the foundation for the rest of the installation. Take your time, ensuring each plank is securely connected and aligned, to achieve a professional and polished final result.
Now that the first row is in place, you’re ready to move on to the next step: continuing the installation of the laminate flooring.
Step 8: Continuing the Installation of Laminate Flooring
With the first row of laminate flooring installed, you can now continue with the rest of the installation process. In this step, you will learn how to seamlessly connect and install the subsequent rows of laminate flooring, ensuring a smooth and professional-looking finish.
Start by placing spacers between the previously installed row and the wall to maintain the necessary expansion gap. This gap allows the laminate flooring to expand and contract with changes in temperature and humidity, preventing buckling or warping.
Begin the second row by connecting the tongue side of the first plank to the groove side of the first row. Carefully slide the new plank into place, aligning it parallel to the first row. Use a tapping block and a hammer to gently tap the plank into place, ensuring a secure and tight connection.
Continue installing the planks in the second row, following the same process of tongue and groove connections. As you work your way across the basement, ensure that the end joints of the planks are staggered, creating a random pattern. This will enhance the overall visual appeal of the laminate flooring.
As you install each row, remember to periodically check that the joints are snug and level. Use a pry bar and tapping block to make any necessary adjustments. Take your time to ensure proper alignment and a seamless transition between the rows.
When you reach the final row of laminate flooring, you may need to measure and cut the planks to fit. Measure the space between the previous row and the wall, accounting for the expansion gap. Use a saw to carefully cut the planks to the appropriate size, leaving the necessary gap.
Once all the planks have been installed, remove the spacers and check the entire floor for any gaps or loose connections. Inspect the joints between the planks and ensure they are tight and secure. Make any final adjustments before moving on to the next step.
Continuing the installation of the laminate flooring requires precision and attention to detail. Take your time to connect each plank securely and align them properly for a seamless and professional finish. With each row installed, you’re one step closer to completing your basement transformation.
Now that you’ve learned how to continue the installation process, let’s move on to the next step: dealing with obstacles and cutting around them.
Read more: How To Level Floor For Laminate
Step 9: Dealing with Obstacles and Cutting Around Them
During the laminate flooring installation process, you may encounter various obstacles such as doorways, support columns, or fixed objects that require special attention. In this step, we’ll guide you through the process of dealing with these obstacles and cutting the laminate flooring to fit around them seamlessly.
Start by measuring and marking the obstacle on the laminate plank. Use a tape measure to determine the dimensions of the obstacle and transfer those measurements onto the plank.
If you need to cut the laminate flooring to fit around a doorway, consider using a door jamb saw or a multi-tool with a flush-cutting blade. Carefully cut the bottom portion of the door casing to create a space for the laminate flooring to slide under. This will ensure a clean and professional-looking transition between the flooring and the door frame.
For support columns, measure the circumference of the column and transfer those measurements onto the laminate plank. Use a jigsaw or a coping saw to cut along the marked lines, creating a triangular or curved shape that fits around the column. Take your time to ensure smooth and precise cuts to achieve a seamless fit.
If you encounter fixed objects such as pipes or vents, measure their width and transfer the measurements onto the plank. Use a jigsaw or a hole saw to cut out the necessary area to accommodate the object. Be careful when cutting around these objects to ensure a snug and secure fit without compromising the functionality of the object.
Throughout the process of cutting around obstacles, remember to wear protective eyewear and gloves, and take the necessary precautions to ensure your safety. Make precise and clean cuts to achieve a professional and seamless transition between the laminate flooring and the obstacles.
Once you have cut the laminate flooring to fit around the obstacles, continue with the installation process by connecting the cut planks to the existing flooring. Ensure that the joints are secure and the transitions are seamless.
By addressing obstacles and cutting the laminate flooring to fit around them, you’ll achieve a polished and professional finish. Take the time to measure accurately and make clean cuts to ensure a seamless integration of the laminate flooring with the surrounding elements in your basement.
With obstacles successfully dealt with, you’re ready to move on to the final step: completing the laminate flooring installation.
Step 10: Completing the Laminate Flooring Installation
Congratulations! You’re in the final step of the laminate flooring installation process. In this step, we’ll guide you through the finishing touches to complete the installation and ensure a flawless and long-lasting laminate floor in your basement.
Start by checking the entire flooring for any loose connections or gaps between the planks. Use a pry bar and a tapping block to make any necessary adjustments and ensure a snug fit. This step is crucial to achieving a seamless and professional finish.
Once you’re satisfied with the alignment and overall appearance of the laminate flooring, it’s time to reinstall the baseboards. Use a hammer and finishing nails or a brad nailer to secure the baseboards to the walls. Make sure the baseboards are flush against the laminate flooring for a clean and polished look.
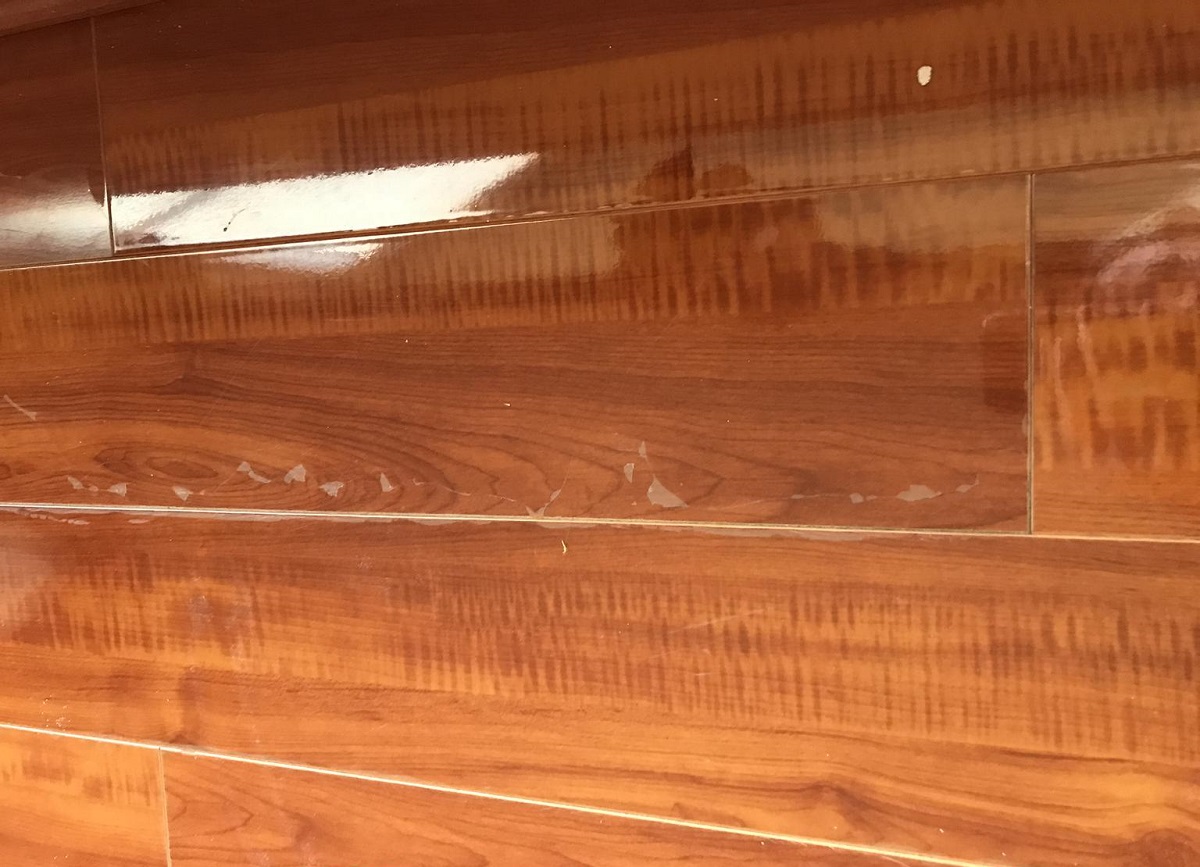
Inspect the entire floor for any gaps, visible seams, or uneven areas. If you notice any issues, use a laminate floor repair kit or putty to fill in the gaps or cover imperfections. Follow the manufacturer’s instructions for applying and blending the repair material to match the surrounding laminate.
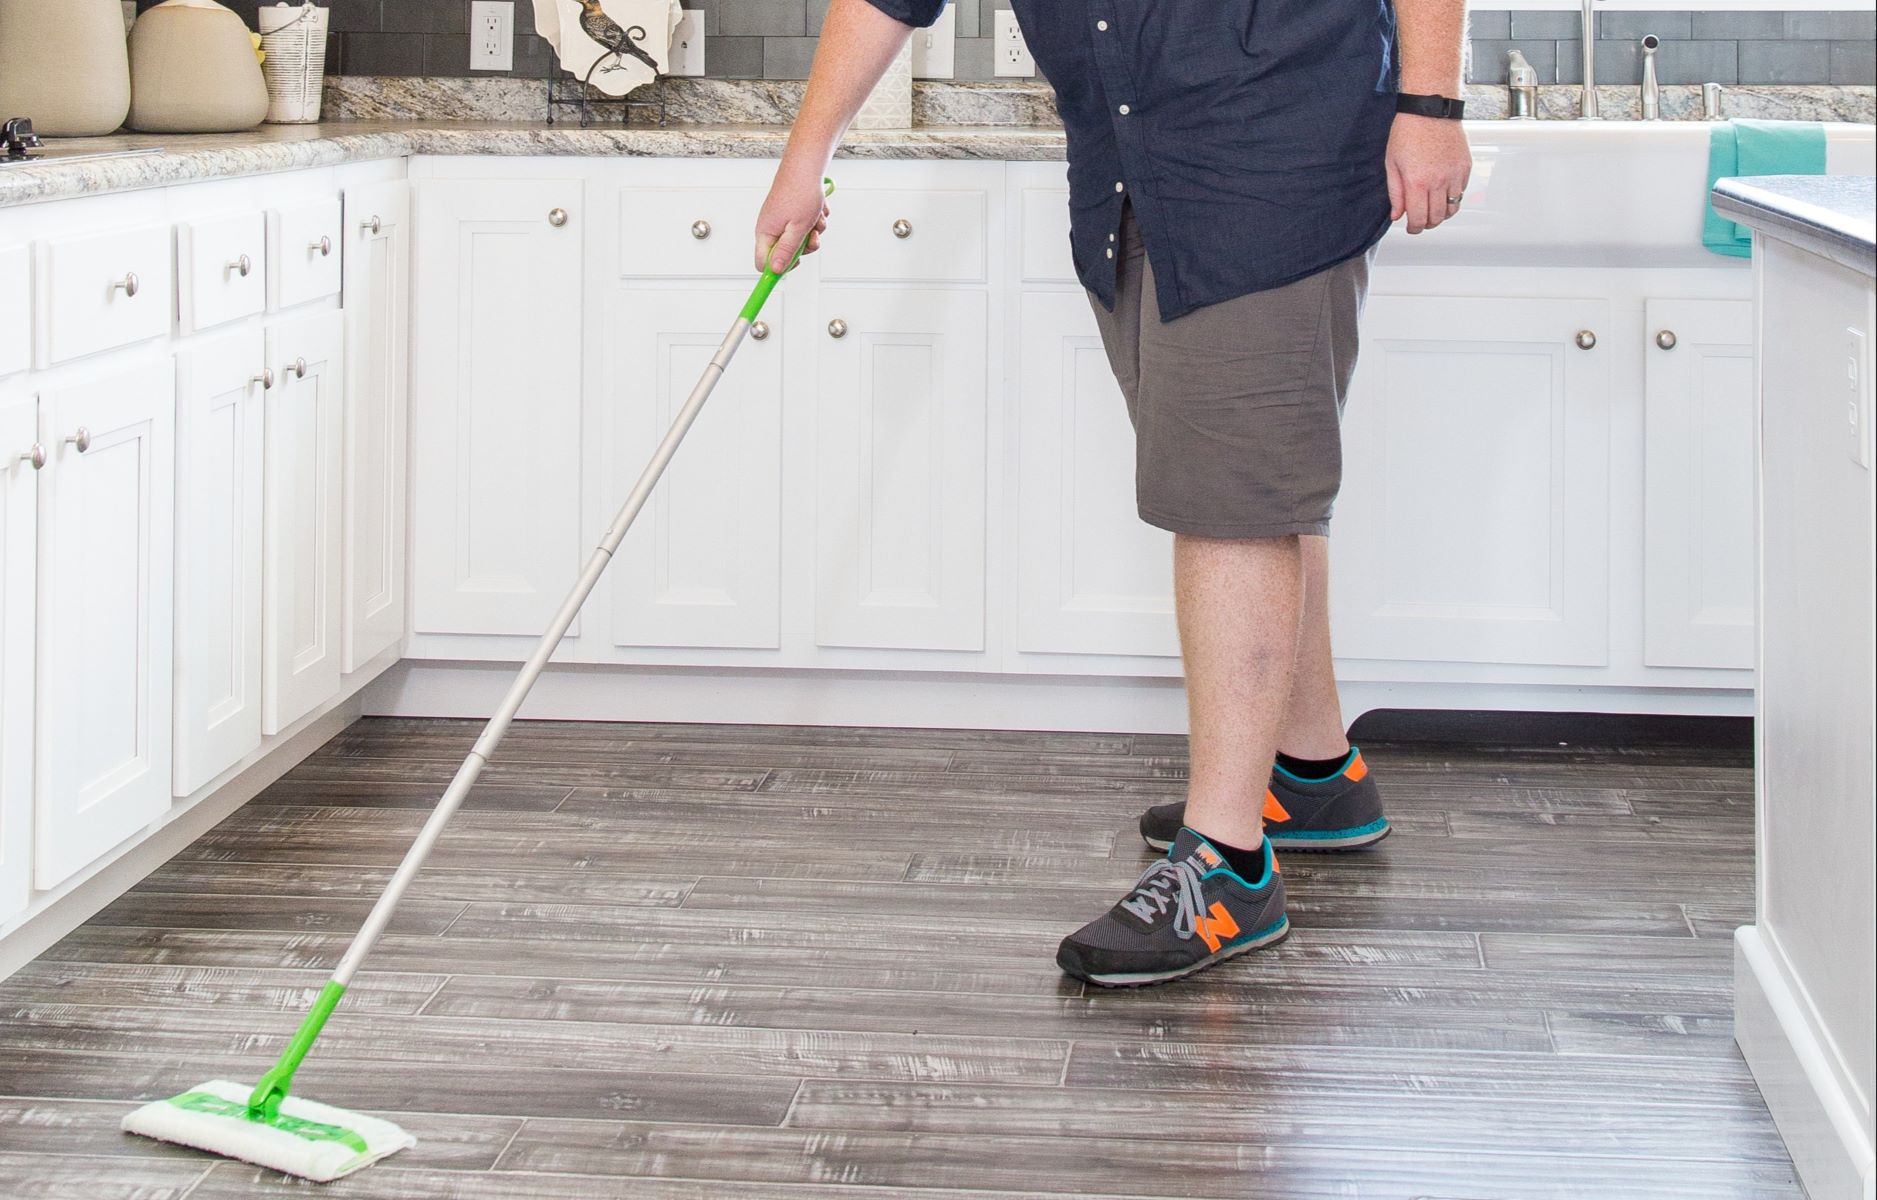
Clean the laminate flooring with a microfiber mop or a soft broom to remove any dust or debris. Avoid using excessive water or harsh cleaning agents, as these can damage the laminate. Instead, opt for a damp mop or a laminate flooring cleaner specifically designed for this type of flooring.
Consider adding flooring transitions or thresholds to areas where the laminate flooring meets other types of flooring, such as carpet or tile. These transitions provide a smooth and seamless transition between different floor coverings, enhancing the overall aesthetics and functionality of your basement.
Finally, take a moment to admire your newly installed laminate flooring. Step back and appreciate the transformation you’ve achieved in your basement. Enjoy the durability, beauty, and comfort that laminate flooring brings to your space.
Remember to follow the manufacturer’s guidelines for maintenance and care to prolong the lifespan and appearance of your laminate flooring. Regularly clean and protect the surface from heavy furniture or sharp objects to prevent scratches or damage.
Completing the laminate flooring installation is an exciting milestone in your basement improvement project. Take pride in your accomplishment, and enjoy the transformation and enhanced functionality of your space.
With the installation complete, you’ve reached the end of this guide. We hope this step-by-step process has been helpful in guiding you through the laminate flooring installation in your basement. Happy decorating and enjoy your new laminate floor!
Conclusion
Installing laminate flooring in your basement can be a rewarding and transformative project. It not only enhances the overall aesthetics of your space but also provides a durable and versatile option for basement floors. Throughout this guide, we have provided a comprehensive step-by-step process to help you successfully install laminate flooring in your basement.
We started by emphasizing the importance of preparing the basement for installation, including clearing the space, inspecting the subfloor, and addressing any potential moisture issues. Then, we explored how to choose and prepare the laminate flooring, considering factors such as color, design, thickness, and AC rating.
Acclimating the laminate flooring to the basement environment was highlighted as a vital step in ensuring its stability and preventing future issues. We also discussed the significance of laying down a vapor barrier and installing the underlayment for moisture protection and added comfort.
Measurements, precise cuts, and properly aligning the laminate planks were emphasized in the sections on measuring and cutting the laminate flooring, installing the first row, and continuing the installation. We also offered guidance on how to overcome obstacles and cut the laminate flooring around them seamlessly.
Lastly, we covered the essential final steps, including checking for loose connections, reinstalling baseboards, addressing any gaps or imperfections, cleaning the laminate flooring, and considering the addition of transitions or thresholds.
By following this step-by-step guide, you have gained the knowledge and confidence to successfully install laminate flooring in your basement. Remember to always refer to the manufacturer’s instructions for specific guidelines and recommendations for your chosen laminate flooring brand.
Now, it’s time to step back and admire your hard work. Enjoy the beauty, comfort, and durability of your newly installed laminate flooring in your basement. Sit back, relax, and make the most of your transformed space.
Thank you for choosing this guide as your resource for installing laminate flooring in your basement. We hope it has been informative and helpful throughout your journey. Happy decorating!
Frequently Asked Questions about How To Install Laminate Flooring In Basement
Was this page helpful?
At Storables.com, we guarantee accurate and reliable information. Our content, validated by Expert Board Contributors, is crafted following stringent Editorial Policies. We're committed to providing you with well-researched, expert-backed insights for all your informational needs.


0 thoughts on “How To Install Laminate Flooring In Basement”