Articles
How To Install Privacy Fence
Modified: October 18, 2024
Learn how to install a privacy fence with our informative articles. Find step-by-step guides and tips for a successful installation.
(Many of the links in this article redirect to a specific reviewed product. Your purchase of these products through affiliate links helps to generate commission for Storables.com, at no extra cost. Learn more)
Introduction
Installing a privacy fence is an excellent way to enhance your property’s appearance, increase security, and create a secluded outdoor space. A well-built privacy fence can protect your yard from prying eyes, minimize noise from the surrounding area, and provide a barrier for pets and children to play safely. Whether you want to enjoy a peaceful backyard retreat or add value to your property, installing a privacy fence is a worthwhile investment.
Before embarking on this project, it is crucial to have a clear plan in mind and gather all the necessary tools and materials. By following a step-by-step approach, you can ensure that your privacy fence installation is successful and meets your desired specifications. In this article, we will guide you through the process of installing a privacy fence, from determining the layout to applying the finishing touches.
Remember, installing a privacy fence requires some physical labor and basic knowledge of tools, so be prepared to put in the effort and possibly seek assistance if needed. Without further ado, let’s dive into the first step of installing a privacy fence: determining the fence layout.
Key Takeaways:
- Proper planning, ground preparation, and secure installation of fence posts are crucial for a successful privacy fence. Attention to detail and regular maintenance ensure a long-lasting and visually appealing outdoor sanctuary.
- Personalizing your privacy fence with finishing touches such as staining, landscaping, and lighting adds character and functionality. Enjoy the benefits of privacy, security, and beauty in your transformed outdoor space.
Read more: How To Decorate A Privacy Fence
Step 1: Determine the Fence Layout
The first step in installing a privacy fence is to determine the layout of the fence. This involves carefully planning where the fence will go, how many panels or sections will be needed, and any additional features such as gates or entrances.
Start by examining your property and identifying the boundary lines. It is essential to know where your property begins and ends to ensure that you are not encroaching on your neighbor’s land. Check with your local zoning or homeowner’s association to determine any specific regulations or restrictions on fence height, materials, or placement.
Take measurements of the area where you want to install the fence. Use a tape measure or a measuring wheel to determine the length of each side of the fence. Make note of any obstacles such as trees, rocks, or changes in elevation that may affect the fence installation.
Consider the purpose of the fence. Are you looking for complete privacy or just a partial barrier? If privacy is your main concern, you will want to choose taller fence panels and ensure they have no gaps between them. If you want a more open feel, you can opt for a shorter fence or one with decorative elements.
Think about the style and aesthetics of the fence. Are you aiming for a modern, sleek look, or do you prefer a more rustic or traditional design? Take into account the overall aesthetic of your property and choose a fence style that complements it.
Consult with a professional if needed. If you are unsure about the best layout for your fence or need assistance in determining the appropriate materials, consider reaching out to a fencing contractor. They can provide valuable insights and help you make informed decisions.
Once you have a clear vision for the fence layout, mark the boundaries with stakes or paint. Use a long string or twine to connect the stakes, creating a visual representation of where the fence will be installed. This will serve as a guide throughout the installation process.
By taking the time to carefully plan and determine the fence layout, you can ensure a more efficient and successful installation. In the next step, we will discuss gathering the necessary tools and materials for the project.
Step 2: Gather the Necessary Tools and Materials
Before you begin the installation process, it is crucial to gather all the necessary tools and materials. Having everything on hand will save you time and frustration during the installation process. Here is a list of commonly used tools and materials for installing a privacy fence:
Tools:
- Measuring tape
- Level
- Post hole digger or auger
- Shovel
- String and stakes
- Sledgehammer or mallet
- Saw (for cutting fence panels if needed)
- Screwdriver or drill
- Nail gun or hammer
- Wrench
- Safety goggles
- Gloves
- Ear protection
Materials:
- Fence panels
- Fence posts
- Concrete mix
- Gravel
- Wood screws or nails
- Gate(s) and hardware (if applicable)
- Post caps
- Stain or paint (optional)
When selecting materials, consider durability, longevity, and your personal preferences. For privacy fence panels, wood, vinyl, or composite materials are common choices. Each has its own advantages and disadvantages, so research and choose the option that best suits your needs and budget.
Be sure to purchase the correct number of fence panels and posts based on your fence layout. It is recommended to buy an extra panel or two in case of any errors or damage during installation.
Additionally, if you plan to install a gate, make sure to select one that matches the style and size of your fence panels. Don’t forget to include the necessary hardware such as hinges, latches, and handles.
It’s a good idea to gather all the tools and materials before starting the installation process. This ensures that you have everything you need within easy reach and minimizes interruptions in your workflow.
Once you have all the tools and materials ready, you’re prepared to move on to the next step: preparing the ground for fence installation.
Read more: How To Cover A Fence For Privacy
Step 3: Prepare the Ground for Fence Installation
Preparing the ground is a crucial step in ensuring a stable and long-lasting privacy fence. Proper preparation helps to create a level surface, improves the fence’s stability, and prevents issues such as shifting or sinking over time. Here’s how to prepare the ground for fence installation:
1. Clear the Area:
Start by removing any obstacles in the path of the fence, such as rocks, debris, or vegetation. Clearing the area provides a clean slate for the fence installation and ensures that the fence panels will sit flush against the ground.
2. Mark the Post Locations:
Using your fence layout as a guide, mark the locations for the fence posts. Measure and mark the spots where each post will be placed, ensuring they are evenly spaced and aligned. Remember to account for any gates or corners in your fence design.
3. Dig the Post Holes:
Using a post hole digger or auger, dig holes at each marked post location. The depth and diameter of the holes will depend on the height and type of fence you are installing. As a general guideline, aim for holes that are about one-third the height of the fence panels and wide enough to accommodate the fence posts.
Read more: What To Put On Fence For Privacy
4. Add Gravel:
To improve drainage and create a sturdy base for the fence posts, add a layer of gravel at the bottom of each post hole. This helps prevent water accumulation, which can lead to rotting of the posts over time.
5. Set the Posts:
Place the fence posts in the prepared holes, ensuring they are plumb and level. Use a level to check both the vertical and horizontal alignment of each post. Make any necessary adjustments by adding or removing gravel under the post until it is perfectly level. For added stability, consider using quick-setting concrete mix to secure the posts in place.
6. Backfill the Holes:
Once the posts are set and secure, backfill the holes with soil, tamping it down firmly to eliminate any gaps or air pockets around the posts. This will provide additional stability and support for the fence.
By properly preparing the ground, you are laying the foundation for a strong and durable privacy fence. With the ground prepared, you are now ready to move on to the next step of the installation process: setting the fence posts.
Step 4: Set the Fence Posts
Setting the fence posts is a critical step in the privacy fence installation process. The stability and integrity of your fence depend on how well the posts are installed. Here’s a step-by-step guide on setting the fence posts:
Read more: How To Build Wood Privacy Fence
1. Check Alignment:
Before proceeding, double-check the alignment of the fence posts to ensure they are properly positioned according to your fence layout. Use a level or a plumb line to verify that the posts are vertical and straight.
2. Secure the Posts:
If you are using quick-setting concrete mix, follow the manufacturer’s instructions for mixing and pouring. Fill the post holes with the concrete mix, making sure it completely surrounds the base of each post. Use a shovel or a trowel to smooth the surface of the concrete.
If you are not using concrete, you can opt for a gravel or soil backfill method. Fill the hole with soil, tamping it down firmly around the post. Add gravel in layers, compacting it as you go, until the hole is filled to about six inches below ground level. Finish with a layer of soil on top.
3. Check Plumb and Level:
While the concrete is still wet or the soil is freshly tamped, check the plumb and level of each post. Use a level to ensure that the posts are perfectly vertical and aligned with each other. Adjust the position of the posts if necessary by tapping them gently with a mallet or sledgehammer.
4. Allow Time to Cure:
If you have used concrete to secure the posts, allow the concrete to cure according to the manufacturer’s instructions. This typically takes around 24 to 48 hours. Avoid placing any stress or weight on the posts during this curing period.
Read more: How Tall Should A Privacy Fence Be
5. Add Post Caps:
Once the posts are set and cured, you can add post caps for a finished look. Post caps not only enhance the aesthetics of your fence but also provide additional protection against moisture and prolong the lifespan of the posts.
Setting the fence posts correctly is essential for the stability and longevity of your privacy fence. Take the time to ensure that each post is plumb and securely anchored in either concrete or an alternative method. Once the posts are set, you’re ready to move on to the next step: attaching the fence panels.
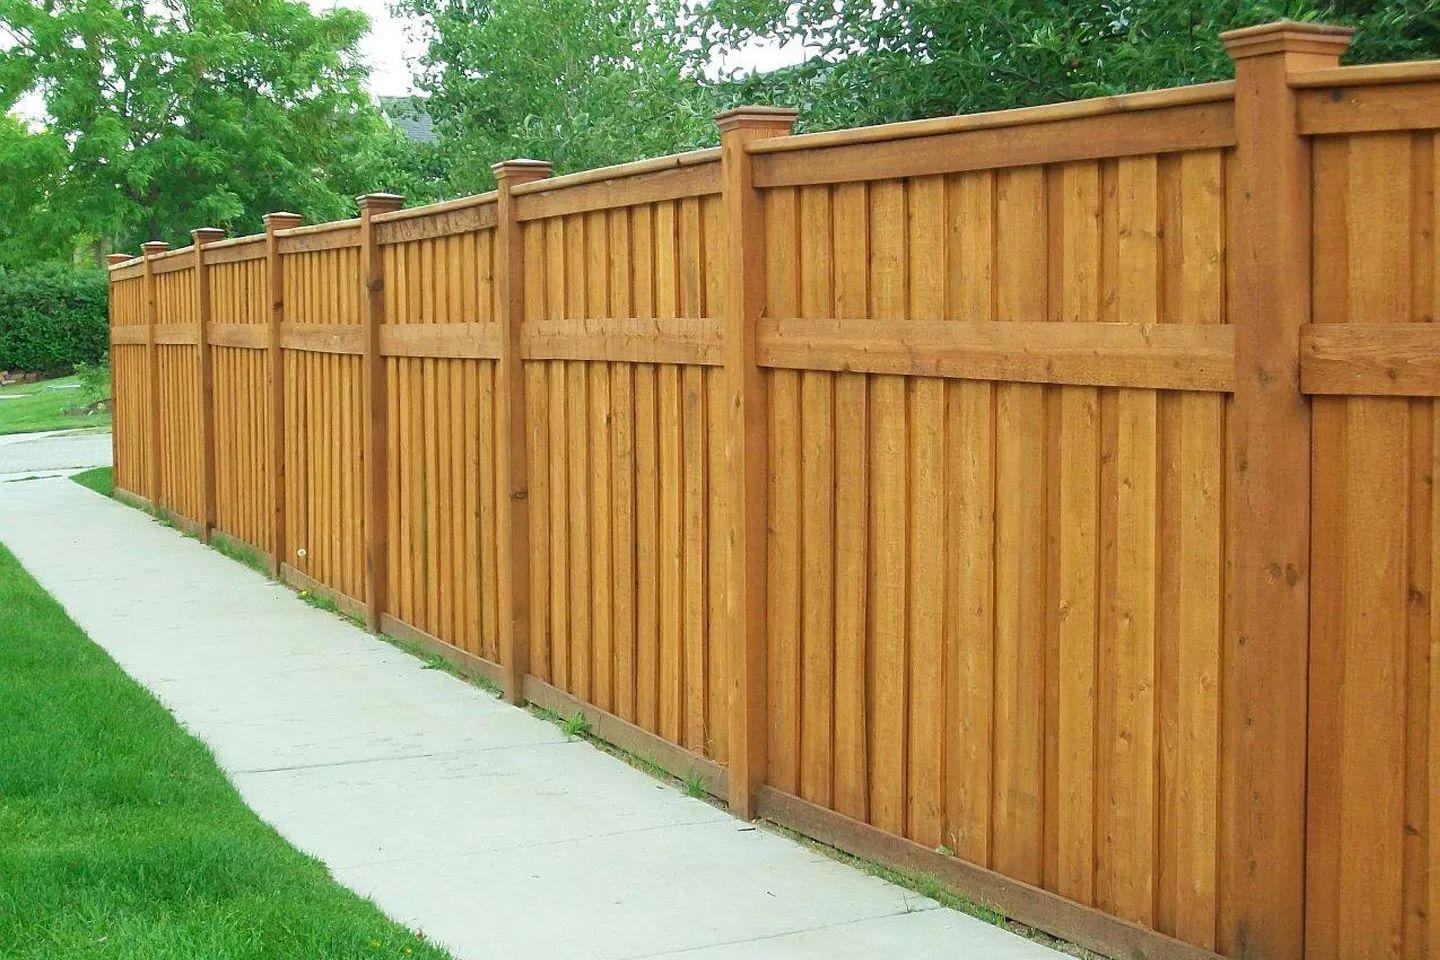
Step 5: Attach the Fence Panels
Attaching the fence panels is an exciting step in the privacy fence installation process. This is when you start to see the physical transformation of your space. Properly attaching the fence panels ensures a secure and visually appealing privacy fence. Here’s how to attach the fence panels:
1. Start at a Corner:
Begin by attaching the first fence panel at a corner post. Position the panel so that it is flush against the post and level horizontally. Use a level to ensure accuracy.
2. Secure the Panel:
Once the first panel is aligned, secure it to the post using screws or nails. The method will depend on the type of fence panels you are installing. Follow the manufacturer’s instructions for the appropriate fastening method. Be sure to place screws or nails at the top and bottom of the panel, as well as at regular intervals along the rails for added stability.
Read more: How To Attach Privacy Screen To Fence
3. Continue with Additional Panels:
Move on to the next fence panel, aligning it with the previous one. Ensure that there is no gap between the panels. Use a level to confirm that the panels are straight and level horizontally.
4. Secure the Panels:
As you work your way along the fence line, continue securing each panel to the posts with screws or nails. Maintain consistent spacing between the panels for a cohesive look.
5. Trim Panels if Needed:
Depending on the layout of your fence and any obstacles you may encounter, you may find it necessary to trim the width of some fence panels. Use a saw or appropriate cutting tool to carefully trim the panels to fit the space while maintaining a uniform look.
6. Check for Stability:
After attaching all the fence panels, step back and inspect the overall stability of the fence. Gently push on the panels to ensure they are firmly attached to the posts and do not wobble or shift. Make any necessary adjustments or reinforce weak spots.
Attaching the fence panels correctly is essential for a sturdy and visually appealing privacy fence. Take your time to properly align each panel and securely fasten it to the posts. Once the fence panels are attached, you can move on to the next step: installing the gate (if applicable).
Read more: How To Make A Privacy Fence Taller
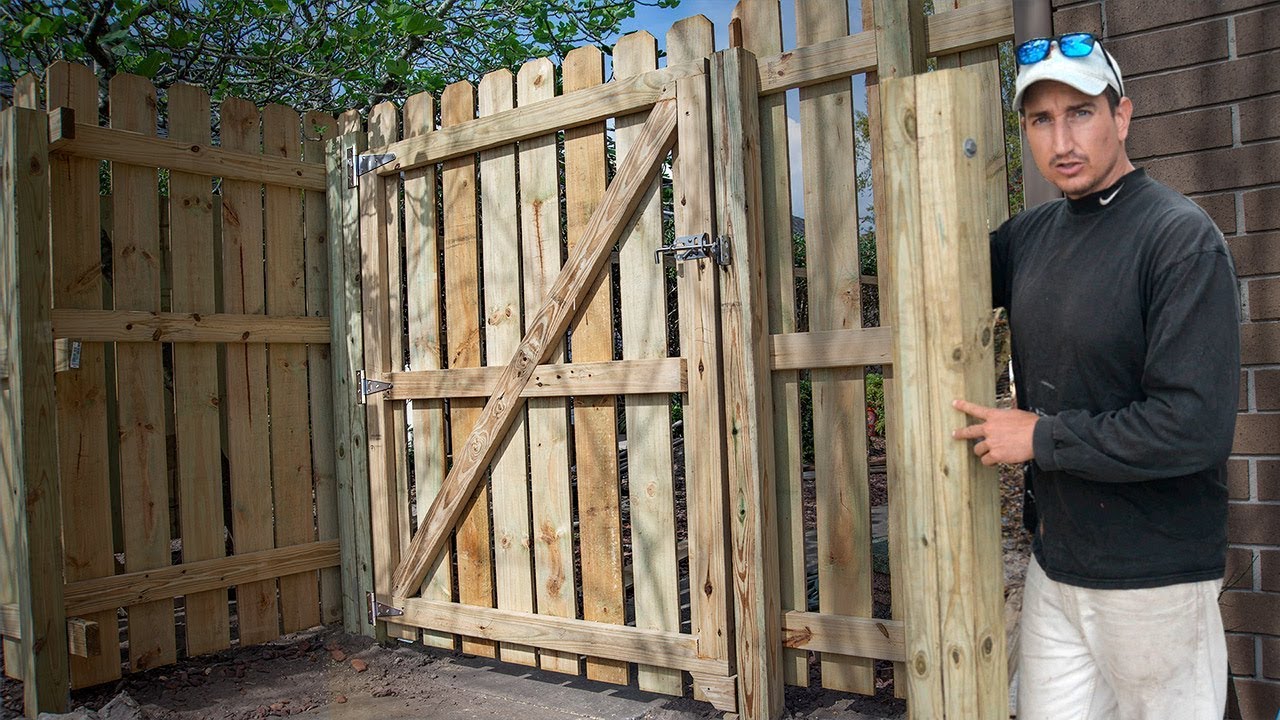
Step 6: Install the Gate (if applicable)
If you plan to have an entry or access point in your privacy fence, it is important to install a gate. A gate not only provides convenience but also adds functionality to your fence. Here’s a step-by-step guide on installing a gate:
1. Measure and Mark:
Determine the location and width of the gate opening. Measure and mark the spots where the gate posts will be installed. Ensure that the gate opening is wide enough to accommodate the desired size of the gate.
2. Dig Gate Post Holes:
Using a post hole digger or auger, dig holes at each marked post location for the gate posts. The depth and diameter of the holes should be similar to the ones used for the fence posts.
3. Set the Gate Posts:
Place the gate posts in the prepared holes, making sure they are plumb and level. Use a level to check the vertical and horizontal alignment. Adjust the posts as necessary by adding or removing soil or gravel.
Read more: How Much Does Privacy Fence Cost
4. Secure the Gate Posts:
If you’ve been using concrete to secure the fence posts, follow the same process for the gate posts. Fill the holes with the concrete mix, ensuring it completely surrounds the base of each post. If you’re not using concrete, use a gravel or soil backfill method as mentioned in the previous steps.
5. Attach Hinges:
Once the gate posts are set and secure, attach the gate hinges to one of the gate posts. Follow the manufacturer’s instructions for proper installation. Use a level to ensure that the gate is plumb and aligned with the adjacent fence panels.
6. Hang the Gate:
With the hinges attached to the gate post, carefully hang the gate on the hinges. Ensure that it swings freely and smoothly and that there is an even gap between the gate and the fence panels when closed.
7. Install Gate Hardware:
Install the necessary gate hardware, such as a latch, handle, or lock, according to the manufacturer’s instructions. Test the functionality of the hardware to ensure that it securely closes and latches.
Read more: How To Install Fence On A Slope
8. Adjust and Fine-tune:
Make any necessary adjustments to the gate’s alignment or hardware to ensure a proper fit and smooth operation. Check that the gate opens and closes easily without scraping or dragging on the ground.
Installing a gate completes the functionality of your privacy fence, allowing for easy access and entry. Follow these steps to ensure a secure and well-aligned gate. Once the gate is installed, move on to the next step: securing the fence and checking for stability.
Step 7: Secure the Fence and Check for Stability
Once you have installed the privacy fence panels and the gate (if applicable), it’s time to secure the fence and check for stability. This step is crucial to ensure that your fence will withstand various weather conditions and maintain its integrity over time. Here’s how to secure the fence and check for stability:
1. Secure Fence Panels:
Check each fence panel to ensure that they are securely attached to the posts. Tighten any loose screws or nails and reinforce any weak spots. Pay special attention to the top and bottom of the panels, as these areas are more prone to movement or damage.
2. Add Support Braces (if needed):
If you notice any panels that are slightly wobbly or unstable, consider adding support braces. These can be angle brackets or diagonal braces that connect the fence panels to the adjacent posts. This extra reinforcement will strengthen the fence and prevent sagging or shifting.
Read more: How To Install An Aluminum Fence
3. Check Gate Operation:
If you installed a gate, test its operation to ensure smooth opening and closing. Check that the latch securely engages and that the gate aligns properly with the surrounding fence panels. Make any necessary adjustments to ensure functionality.
4. Inspect Post Stability:
Examine each fence post to ensure stability and eliminate any wobbling. Wiggle the posts to check for any movement or signs of weakness. If you detect any instability, consider adding additional support, such as concrete footers or braces, to secure the posts firmly in the ground.
5. Trim Excess Material:
If there are any protruding screws, nails, or sharp edges on the fence panels, trim them to create a smooth and safe surface. This step helps prevent injuries and gives your fence a clean and polished appearance.
6. Check for Gaps or Misalignment:
Walk along the fence line and inspect for any gaps or misalignment between the fence panels. Make any necessary adjustments to ensure a consistent and uniform appearance. This step not only improves the aesthetics but also enhances the functionality of the fence.
Read more: How To Install Pool Fence
7. Test Fence Stability:
To check the overall stability of the fence, gently push or lean against it at various points along the fence line. The fence should remain sturdy and not sway or bend significantly. If you notice any weak areas, reinforce them by adding additional support or securing materials.
Securing the privacy fence and checking for stability ensures that your fence will withstand the test of time and provide the desired privacy and security for your property. Taking the time to address any issues and reinforce the fence’s structure will help maintain its integrity for years to come.
Now that the fence is secured and stable, you’re ready to move on to the final step: applying the finishing touches.
Step 8: Apply Finishing Touches
The last step in the privacy fence installation process is to apply the finishing touches. These final touches add a polished and personal touch to your fence, enhancing its overall appearance and functionality. Here are some finishing touches to consider:
1. Stain or Paint:
If you have chosen a wood fence, consider applying a stain or paint to protect the wood from weathering and add a pop of color. Choose a high-quality outdoor stain or paint that is designed for use on fences. Follow the manufacturer’s instructions for application techniques and drying times for the best results.
2. Sealant or Waterproof Coating:
If you are using materials such as vinyl or composite for your fence panels, consider applying a sealant or waterproof coating to protect against fading, cracking, or discoloration caused by UV rays or moisture. This step will help prolong the lifespan of your fence and keep it looking new for years to come.
Read more: How To Install A Backyard Fence
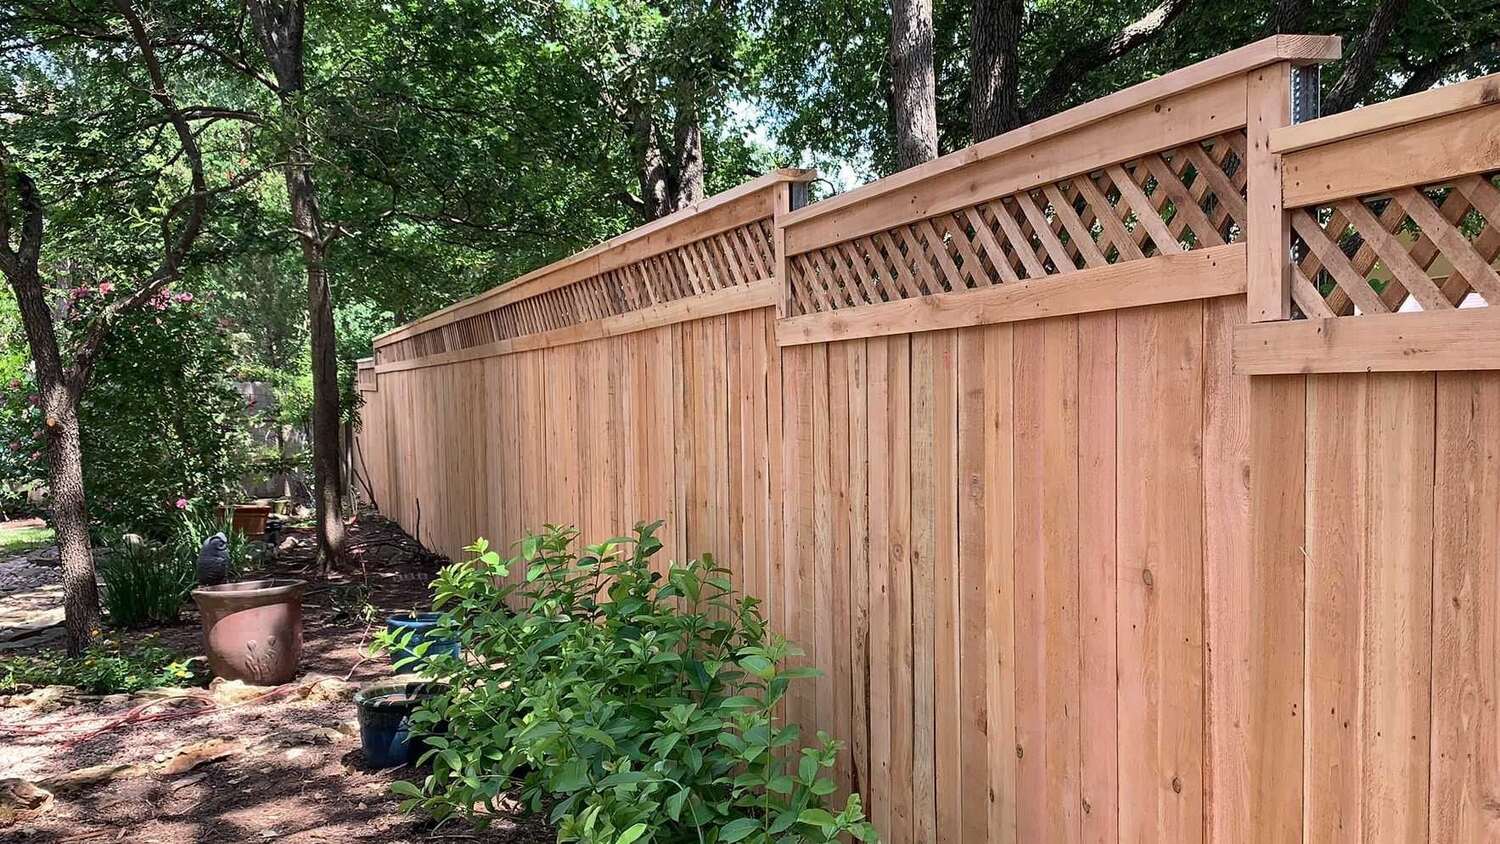
3. Decorative Elements:
Add decorative elements to personalize your privacy fence. Consider incorporating lattice panels, decorative post caps, or trim pieces to elevate the aesthetic appeal of the fence. These additions can add character and style to the overall design.
4. Landscaping:
Enhance the visual appeal of your privacy fence by landscaping around it. Planting shrubs, flowers, or climbing vines alongside the fence can soften its appearance and create a more inviting and cohesive outdoor space. Choose plants that suit your climate and require minimal maintenance.
5. Lighting:
Consider installing outdoor lighting along the fence line. This not only adds an aesthetic element but also improves visibility and enhances security. Solar-powered or low-voltage LED lights are popular options that are energy-efficient and easy to install.
6. Regular Maintenance:
Make a commitment to regular maintenance to keep your fence in optimal condition. This includes cleaning the fence periodically, inspecting for any damage or loose components, and repairing or replacing any worn-out parts as needed. Regular maintenance will help extend the lifespan of your fence and keep it looking its best.
Applying these finishing touches will not only enhance the overall look of your privacy fence but also contribute to its functionality and longevity. Take the time to personalize and maintain your fence to enjoy the beauty and privacy it provides for years to come.
Congratulations! You have successfully completed the installation of your privacy fence. Now, sit back and enjoy the privacy, security, and beauty that your new fence brings to your outdoor space.
Read more: How To Install A Fence On Concrete
Conclusion
Installing a privacy fence is a rewarding endeavor that can transform your outdoor space into a private sanctuary. By following a step-by-step approach and paying attention to detail, you can successfully install a fence that enhances your property’s aesthetics, provides security, and creates a peaceful environment.
From determining the fence layout to applying the finishing touches, each step in the installation process plays a crucial role in the overall success of your privacy fence. Taking the time to plan and gather the necessary tools and materials ensures a smooth and efficient installation. Preparing the ground properly and setting the fence posts securely lay the foundation for a stable fence. Attaching the fence panels and installing a gate, if applicable, are important steps that contribute to the functionality and visual appeal of your fence.
Securing the fence, checking for stability, and adding finishing touches such as staining, landscaping, and lighting give your privacy fence the final touches it needs. Regular maintenance and care will help prolong its lifespan and keep it looking its best for years to come.
Remember to consult local regulations and consider your specific needs and preferences when planning and installing your privacy fence. Whether you’re seeking solitude, a secure space for children and pets, or simply enhancing the appearance of your property, a well-installed privacy fence provides numerous benefits.
Now that you have completed the installation process, take a moment to appreciate the effort and dedication that went into creating your new outdoor oasis. Enjoy the privacy, security, and beauty that your privacy fence brings, and make lasting memories in your transformed space.
Frequently Asked Questions about How To Install Privacy Fence
Was this page helpful?
At Storables.com, we guarantee accurate and reliable information. Our content, validated by Expert Board Contributors, is crafted following stringent Editorial Policies. We're committed to providing you with well-researched, expert-backed insights for all your informational needs.
0 thoughts on “How To Install Privacy Fence”