Articles
How To Install A Stockade Fence
Modified: October 18, 2024
Step-by-step guide on installing a stockade fence. Get expert advice, tips, and articles on how to successfully complete your fence installation project.
(Many of the links in this article redirect to a specific reviewed product. Your purchase of these products through affiliate links helps to generate commission for Storables.com, at no extra cost. Learn more)
Introduction
Installing a stockade fence is a great way to improve the security and privacy of your property. It not only defines the boundaries of your land but also adds aesthetic appeal to your outdoor space. Whether you’re a passionate DIY enthusiast or a homeowner looking to enhance your property, installing a stockade fence can be a rewarding project.
Before you embark on this endeavor, it’s important to understand the process involved in installing a stockade fence. This article will guide you through the step-by-step process, from gathering materials to adding the finishing touches. By following these instructions, you’ll be able to install a sturdy and attractive stockade fence that will last for years to come.
Before we dive into the details, let’s first explore the benefits of installing a stockade fence. Firstly, a stockade fence provides a high level of privacy, effectively blocking the view from the outside world. If you have nosy neighbors or live in a busy area, a stockade fence can create a barrier that keeps prying eyes at bay. Additionally, stockade fences are known for their durability. Made from wood panels attached to sturdy posts, these fences can withstand the elements and provide a long-lasting solution for your property’s security needs.
Furthermore, a stockade fence can add visual appeal to your outdoor space. With their classic design and natural materials, stockade fences complement a variety of architectural styles. They can enhance the overall aesthetics of your property and create a cohesive look. Whether you have a traditional or modern home, a stockade fence can be a versatile choice.
Now that we’ve covered the benefits, let’s proceed to the first step of installing a stockade fence: gathering materials.
Key Takeaways:
- Installing a stockade fence provides privacy, security, and aesthetic appeal to your property. From gathering materials to adding finishing touches, each step is crucial for a successful and long-lasting installation.
- Properly aligning and securing fence panels, adding protective finishes, and maintaining the fence are essential for enhancing its appearance and ensuring longevity. Enjoy the benefits of your new stockade fence with regular inspections and maintenance.
Read more: What Is Stockade Fence
Step 1: Gathering Materials
Before you start the installation process, it’s essential to gather all the necessary materials. Here’s a list of items you will need:
- Stockade fence panels: These panels are the main components of your stockade fence. Measure your desired fence line to determine the number of panels needed. Choose panels that are made from high-quality wood and treated to withstand the elements.
- Fence posts: Fence posts provide support and stability for your stockade fence. They should be made from pressure-treated wood to prevent rot and decay. The number of posts needed depends on the length of your fence and the spacing between each post.
- Concrete mix: Concrete is used to secure the fence posts in the ground. Opt for quick-setting concrete mix, which ensures a strong foundation for your fence. Follow the instructions on the package for the correct mixing ratio and curing time.
- Gravel: Gravel is essential for drainage purposes. Place a layer of gravel at the bottom of each fence post hole to prevent water buildup and prolong the life of your fence.
- Level: A level is necessary to ensure that your fence panels and posts are installed straight and level. Choose a long level that can span the height of your fence panels.
- Measuring tape: Accurate measurements are crucial for a properly installed stockade fence. Use a measuring tape to measure the length of your fence line and determine the spacing between each fence post.
- Post hole digger: A post hole digger is a specialized tool used to dig holes for the fence posts. It provides a more efficient and precise way to dig the holes compared to manual digging.
- Screws or nails: You’ll need screws or nails to attach the stockade fence panels to the fence posts. Opt for exterior-grade screws or galvanized nails to prevent rusting and ensure a secure connection.
- Hammer: A hammer will be required to drive nails into the fence posts. Choose a hammer with a comfortable grip and a sturdy head for effective installation.
- Safety gear: Installing a stockade fence involves physical labor and potential hazards. Wear safety goggles, gloves, and sturdy footwear to protect yourself during the installation process.
Once you have gathered all the necessary materials, you’re ready to move on to the next step: marking out the fence line.
Step 2: Marking Out the Fence Line
Once you have all the materials prepared, the next step is to mark out the fence line. This involves determining the exact placement and alignment of your stockade fence. Follow these steps to mark out the fence line:
- Start by identifying the boundaries of your property. If you’re unsure, refer to your property survey or consult with a professional surveyor.
- Using a measuring tape, measure the desired length of your fence line. Ensure that the measurements are accurate to avoid any encroachments or setbacks.
- Mark the starting point of your fence line using a stake or a spray paint. This will serve as the reference point for the rest of the installation process.
- Measure and mark the spacing between each fence post along the fence line. Typically, fence posts are spaced 6-8 feet apart, but this can vary depending on your specific needs and local regulations.
- Using a string line or a chalk line, connect the marked points to create a straight and level line. This will act as a guide for properly aligning the fence posts.
- Double-check the alignment and measurements of the marked fence line. Ensure that it aligns with your property boundaries and any existing structures, such as buildings or driveways.
Once you have marked out the fence line, take a step back to visually inspect the alignment. Make any necessary adjustments to ensure that the fence line is straight and visually appealing. It’s important to have a clear and well-defined fence line before moving on to the next step.
Now that the fence line is marked, it’s time to dig the fence post holes. This will be covered in the next step of the installation process.
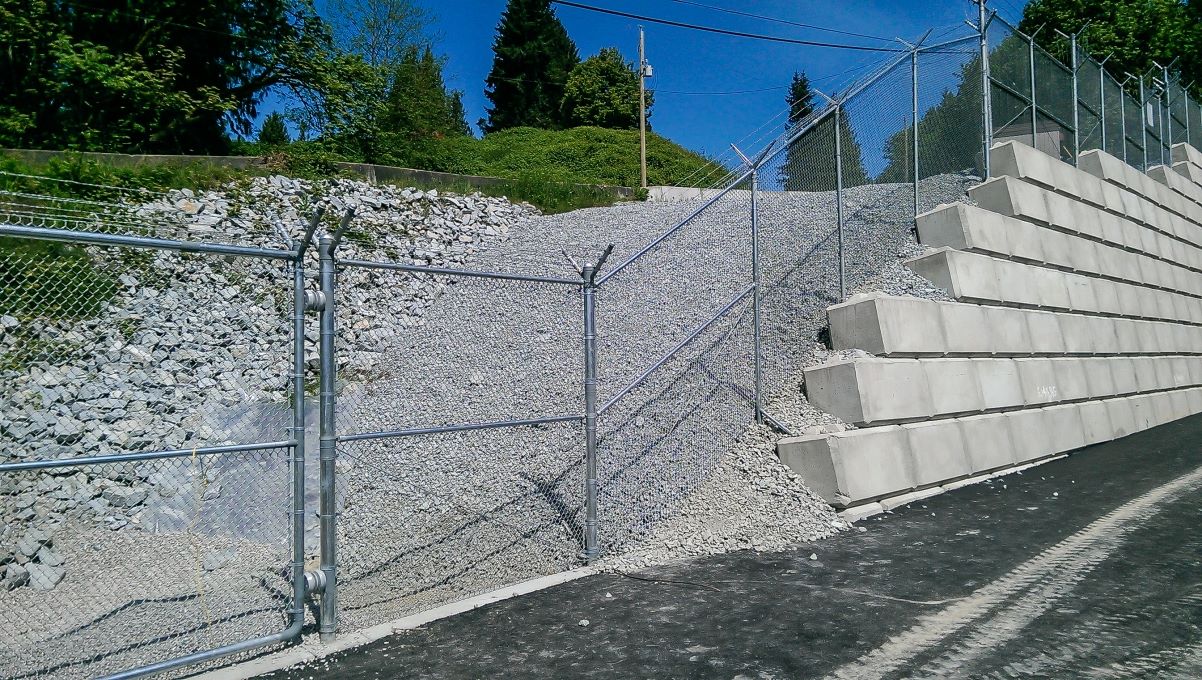
Step 3: Digging the Fence Post Holes
With the fence line marked out, the next step is to dig the fence post holes. This is a vital step as it ensures the stability and longevity of your stockade fence. Follow these steps to properly dig the fence post holes:
- Using a post hole digger, start digging the first hole at the starting point of your marked fence line. The hole should be deep enough to accommodate approximately one-third of the length of the fence post.
- Continue digging the remaining fence post holes along the marked fence line, adhering to the spacing you determined in the previous step. Take care to dig each hole to the same depth to ensure a uniform installation.
- Remove any rocks, roots, or debris from the bottom of the fence post holes. It’s crucial to have a clean and level base for the fence posts.
- Place a few inches of gravel at the bottom of each hole. This will help with drainage and prevent the fence posts from sitting in pooled water, which can cause premature rotting.
- Position a fence post in the first hole, ensuring that it is centered and straight. Use a level to check for plumb on each side of the post. Adjust the post as needed to achieve a vertical position.
- Fill the hole around the fence post with quick-setting concrete mix, following the manufacturer’s instructions. Ensure that the concrete mix fills the hole evenly and completely, providing a solid and stable foundation for the post.
- Repeat the process for each fence post hole, making sure that each post is level and plumb. Use the string line or a level to ensure that the fence posts are aligned along the marked fence line.
Take your time to properly dig and set each fence post. The stability and alignment of your stockade fence depend on these steps. Once all the fence posts are securely in place, you’re ready to move on to the next step: installing the fence panels.
Before proceeding, allow the concrete to fully cure as per the manufacturer’s instructions. This will ensure that the fence posts are firmly set and ready to support the weight of the fence panels.
Before installing a stockade fence, make sure to check local zoning laws and obtain any necessary permits. This will ensure that your fence is installed in compliance with regulations.
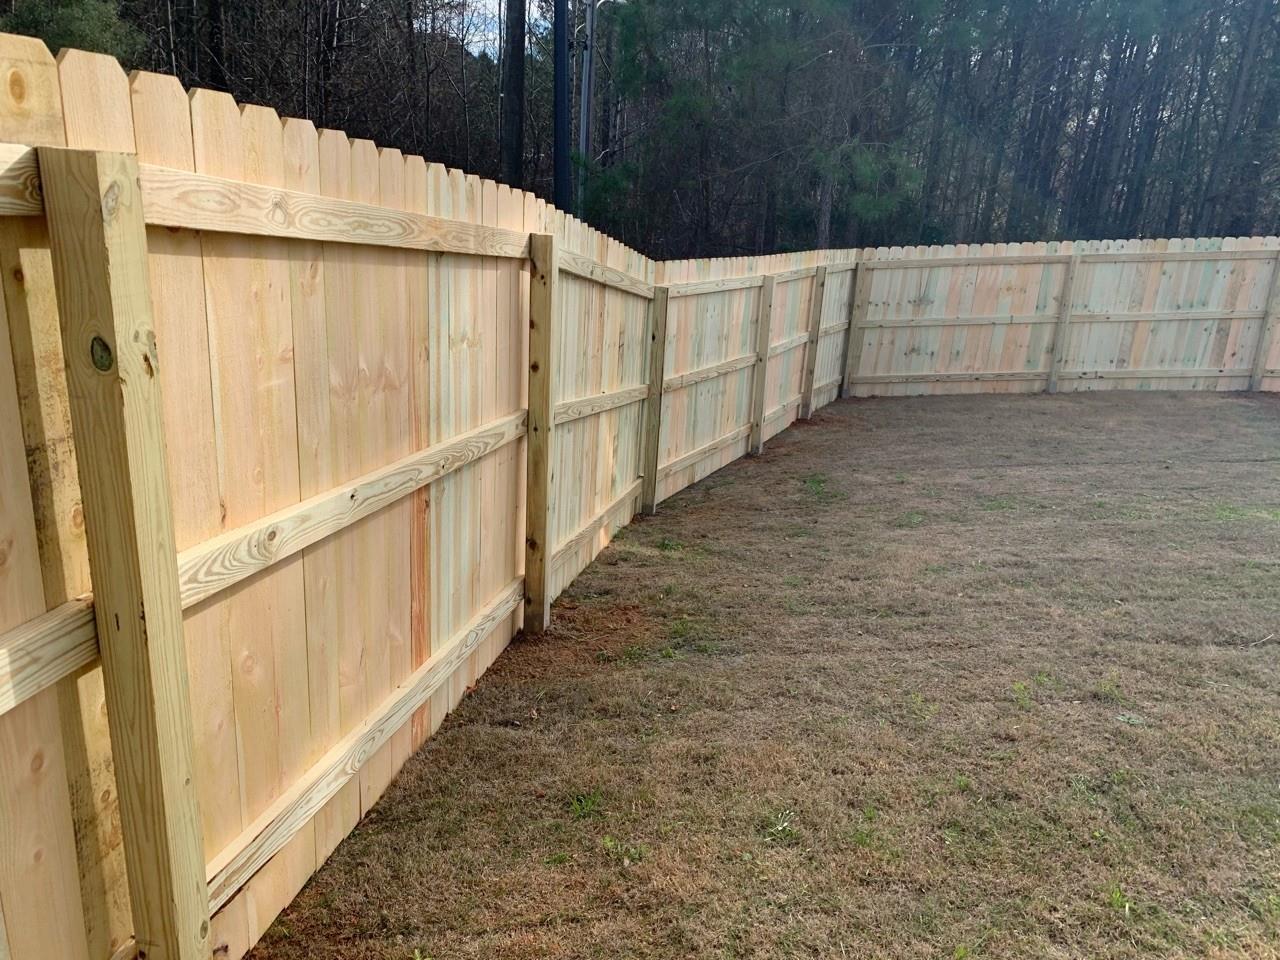
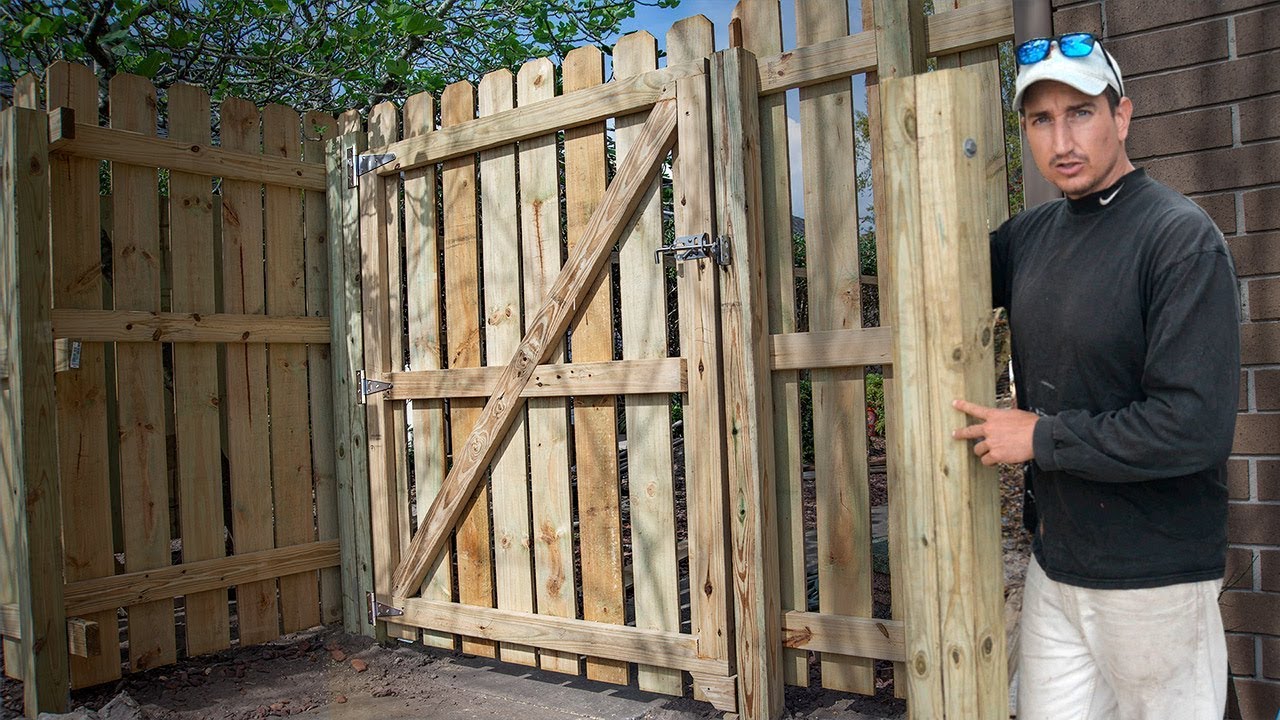
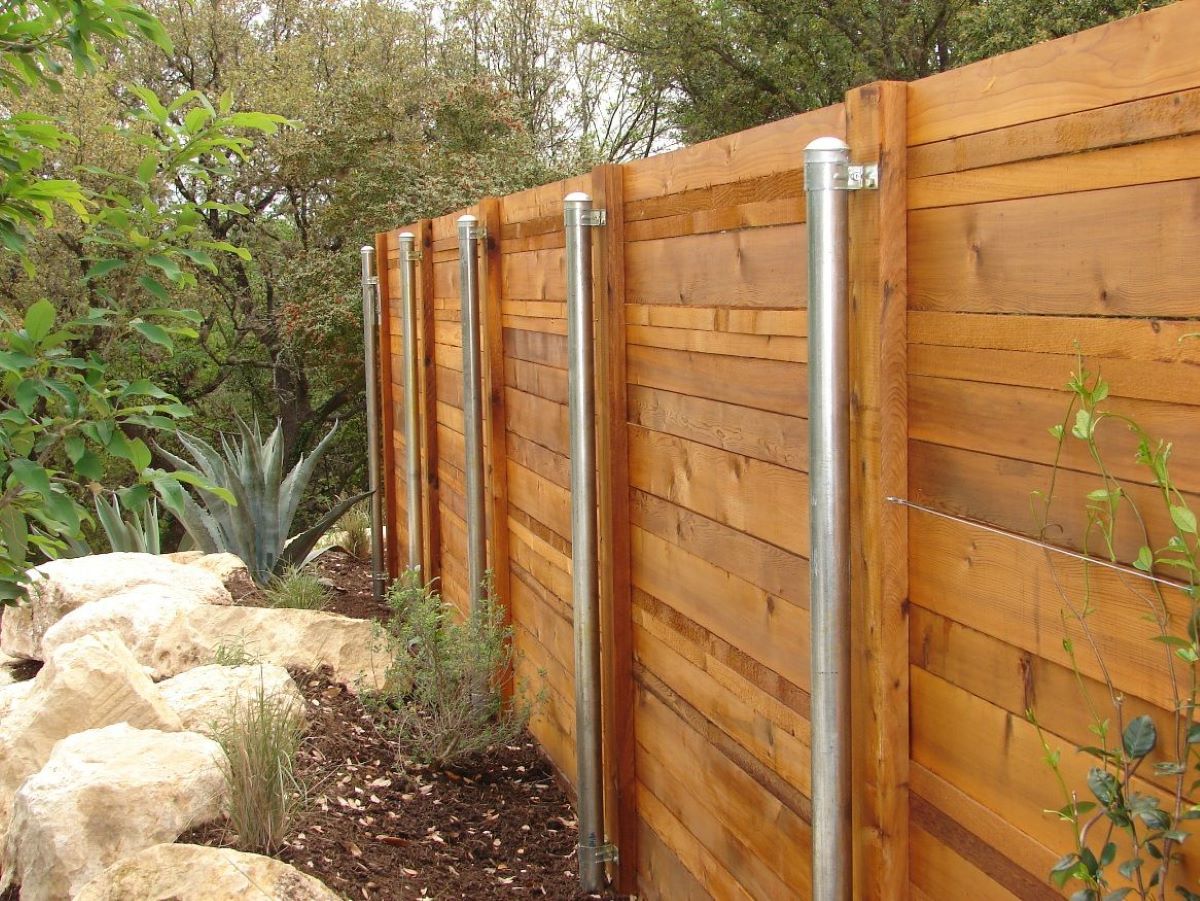
Step 4: Installing the Fence Panels
Now that the fence posts are securely set in the ground, it’s time to install the fence panels. This step will bring your stockade fence to life and create a barrier around your property. Follow these steps to properly install the fence panels:
- Start at one end of the fence line and align the first fence panel with the first two fence posts. Make sure the panel is centered between the posts and sits flush against them.
- Using exterior-grade screws or nails, attach the fence panel to the posts. Place the fasteners through the panel into the horizontal rails of the fence posts, ensuring a secure and sturdy connection.
- Continue installing the remaining fence panels along the fence line, following the same process. Check each panel for alignment and adjust as needed to maintain a consistent and attractive appearance.
- Use a level to ensure that each fence panel is straight and level. Adjust the panel and the fasteners if necessary to maintain a uniform and visually pleasing fence line.
- If your fence line requires a gate, install the gate following the manufacturer’s instructions. Ensure that the gate is properly aligned and securely attached to the fence posts. This will provide convenient access to your property while maintaining the security of your stockade fence.
- Once all the fence panels are installed, inspect the entire fence line for any loose fasteners or panels. Tighten any screws or nails and make sure all panels are securely attached to the fence posts.
By following these steps, you will have successfully installed the fence panels and created the main structure of your stockade fence. Now, it’s time to add the finishing touches.
Continue to the next step to learn how to enhance the appearance of your stockade fence and ensure its long-term durability.
Read more: How To Install Fence On A Slope
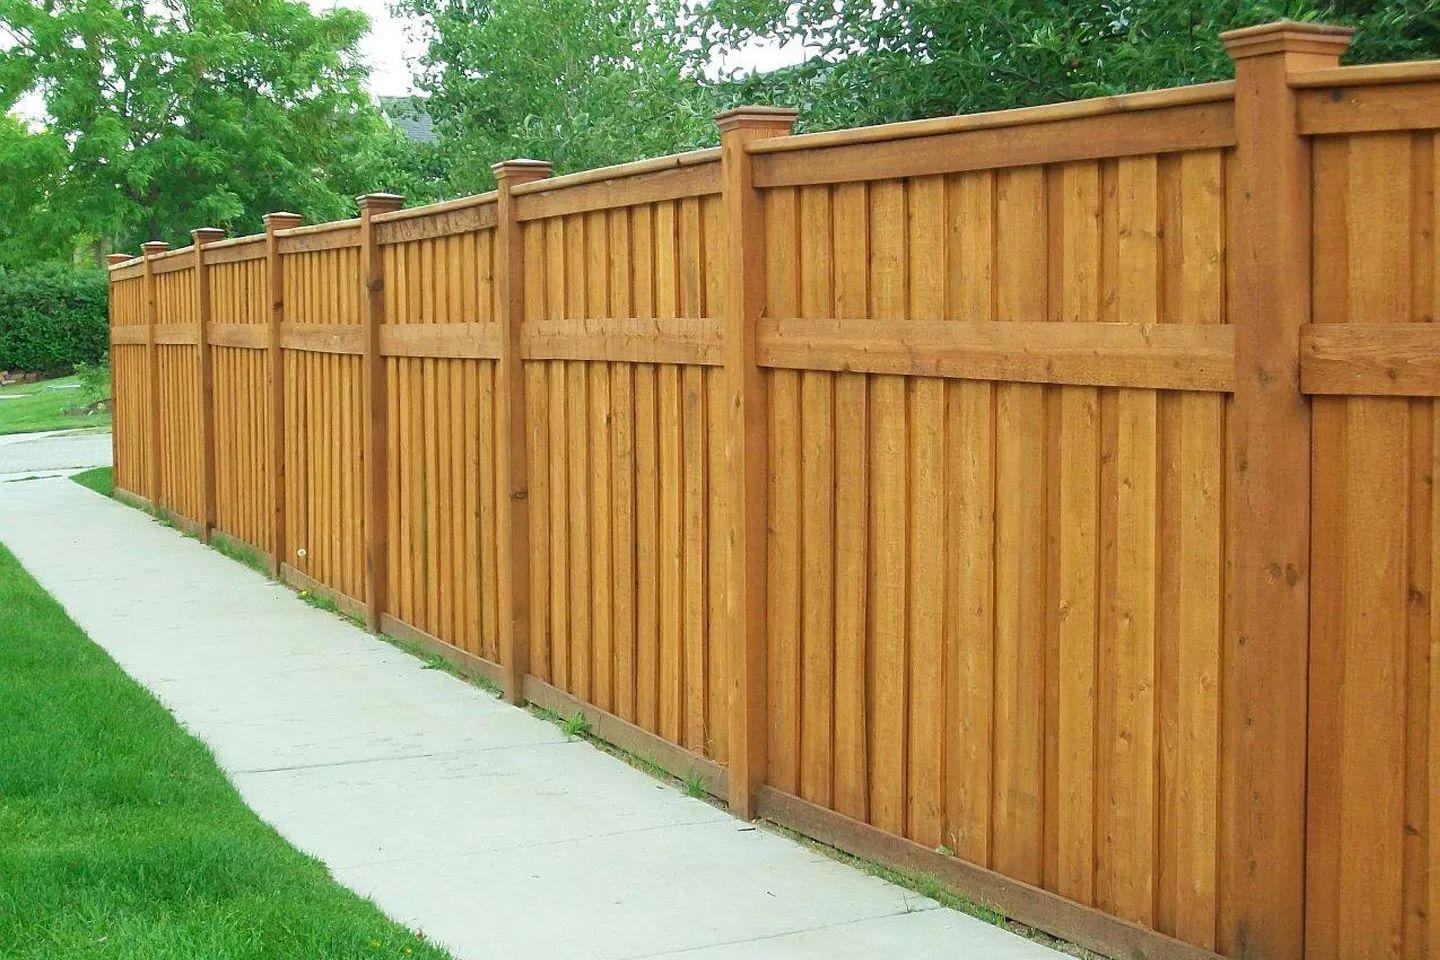
Step 5: Attaching the Fence Panels
Now that the fence posts are securely set in the ground, it’s time to attach the fence panels. This step will bring your stockade fence to life and create a barrier around your property. Follow these steps to properly attach the fence panels:
- Start at one end of the fence line and align the first fence panel with the first two fence posts. Make sure the panel is centered between the posts and sits flush against them.
- Using either screws or nails, attach the fence panel to the posts. Place the fasteners through the panel into the horizontal rails of the fence posts, ensuring a secure and sturdy connection.
- Continue attaching the remaining fence panels along the fence line, following the same process. Ensure each panel is properly aligned and securely attached to the posts.
- Check the levelness of each panel using a level. Adjust the panel and the fasteners if necessary to maintain a straight and level fence line.
- If your fence line requires a gate, install the gate following the manufacturer’s instructions. Ensure that the gate is properly aligned and securely attached to the fence posts.
- Once all the fence panels are attached, inspect the entire fence line for any loose fasteners or panels. Tighten any screws or nails and make sure all panels are securely attached to the fence posts.
By following these steps, you will have successfully attached the fence panels and created the main structure of your stockade fence. This will provide added security and privacy for your property. Keep in mind that regular maintenance, such as staining or sealing the wood, can prolong the life of your stockade fence and keep it looking its best.
Now that the fence panels are installed, it’s time to move on to the final step: adding the finishing touches.
Step 6: Adding Finishing Touches
With the fence panels securely attached, it’s time to add the finishing touches to complete your stockade fence installation. These final steps will enhance the appearance and functionality of your fence. Follow these steps to add the finishing touches:
- If desired, apply a protective finish to your stockade fence. Depending on the type of wood used, you may choose to stain, seal, or paint the fence. This will not only improve its appearance but also protect the wood from weather elements, extending its lifespan.
- Inspect the fence for any gaps or loose components. Ensure that all the fence panels are securely attached and free from any damage. Tighten any loose screws or nails and make any necessary repairs.
- Consider adding decorative elements to your fence. This can include attaching decorative post caps or finials to the top of each fence post. These decorative accents can add a touch of style and uniqueness to your stockade fence.
- Clear the area around the fence line. Remove any debris, plants, or obstacles that may obstruct the fence or its aesthetic appearance. This will give your fence a clean and polished look.
- Add landscaping around the fence. Planting shrubs, flowers, or adding a border of decorative rocks can enhance the overall appeal of your stockade fence and create a beautiful backdrop for your outdoor space.
- Regularly maintain your fence. Regular inspections, cleaning, and minor repairs can help extend the lifespan of your stockade fence. Check for any signs of rot, pests, or damage, and address them promptly.
By following these steps, your stockade fence installation will be complete, and you’ll have a functional and visually appealing addition to your property. The finishing touches will not only enhance the aesthetics but also ensure the longevity of your fence.
Remember to check and comply with any local building codes or regulations before installing your stockade fence. It’s also a good idea to consult with professionals or seek guidance if you’re unsure about any aspect of the installation process.
Enjoy the security and privacy that your new stockade fence provides, and take pride in the accomplishment of installing it yourself.
With these steps, you have successfully installed your stockade fence. Now you can sit back and enjoy the benefits of privacy, security, and improved aesthetics that your new fence provides. Remember to regularly inspect and maintain your fence to ensure its longevity. Happy fencing!
Conclusion
Installing a stockade fence is a rewarding project that can greatly enhance the security and privacy of your property. By following the step-by-step process outlined in this article, you can successfully install a sturdy and attractive stockade fence that will last for years to come.
From gathering materials to adding the finishing touches, each step is crucial in ensuring the stability and functionality of your fence. Starting with the gathering of materials, it’s important to choose high-quality fence panels, sturdy fence posts, and the necessary tools and accessories.
Marking out the fence line accurately and digging the fence post holes to the appropriate depth are essential for creating a straight and level fence. Taking the time to properly align and secure the fence panels further ensures the fence’s durability.
Adding the finishing touches, such as protective finishes, decorative elements, and well-maintained landscaping, not only enhances the appearance of your stockade fence but also contributes to its longevity.
Remember to regularly inspect and maintain your fence, addressing any issues promptly to prevent further damage. By doing so, you can enjoy the security, privacy, and aesthetic appeal that your stockade fence brings to your outdoor space.
Whether you’re a seasoned DIY enthusiast or a homeowner looking to enhance your property, installing a stockade fence is a rewarding project that allows you to define your space and improve its functionality.
Now that you have the knowledge and guidelines to install your own stockade fence, it’s time to get started! Plan carefully, gather your materials, and follow each step diligently. Before you know it, you’ll have a beautiful and functional stockade fence to enjoy for years to come.
Best of luck with your stockade fence installation!
Now that you've mastered stockade fence installation, why stop there? Dive into our collection of creative ideas for sprucing up your outdoor space. From simple setups to elaborate designs, our article on outdoor projects offers endless inspiration for your next DIY endeavor. If you're particularly keen on boosting your garden's charm, our curated list of garden fence ideas provides plenty of stylish options to enhance your landscape's appeal and functionality.
Frequently Asked Questions about How To Install A Stockade Fence
Was this page helpful?
At Storables.com, we guarantee accurate and reliable information. Our content, validated by Expert Board Contributors, is crafted following stringent Editorial Policies. We're committed to providing you with well-researched, expert-backed insights for all your informational needs.


0 thoughts on “How To Install A Stockade Fence”