Articles
How To Install Under Counter Kegerator
Modified: October 19, 2024
Learn how to install an under counter kegerator with this step-by-step guide. Find articles and resources to help you complete the installation process easily and efficiently.
(Many of the links in this article redirect to a specific reviewed product. Your purchase of these products through affiliate links helps to generate commission for Storables.com, at no extra cost. Learn more)
Introduction
Welcome to our guide on how to install an under counter kegerator. If you’re a beer enthusiast or someone who loves hosting parties, having a kegerator at home can be a fantastic addition to your entertainment space. Not only does it add a touch of sophistication, but it also allows you to serve fresh and cold draft beer to your guests.
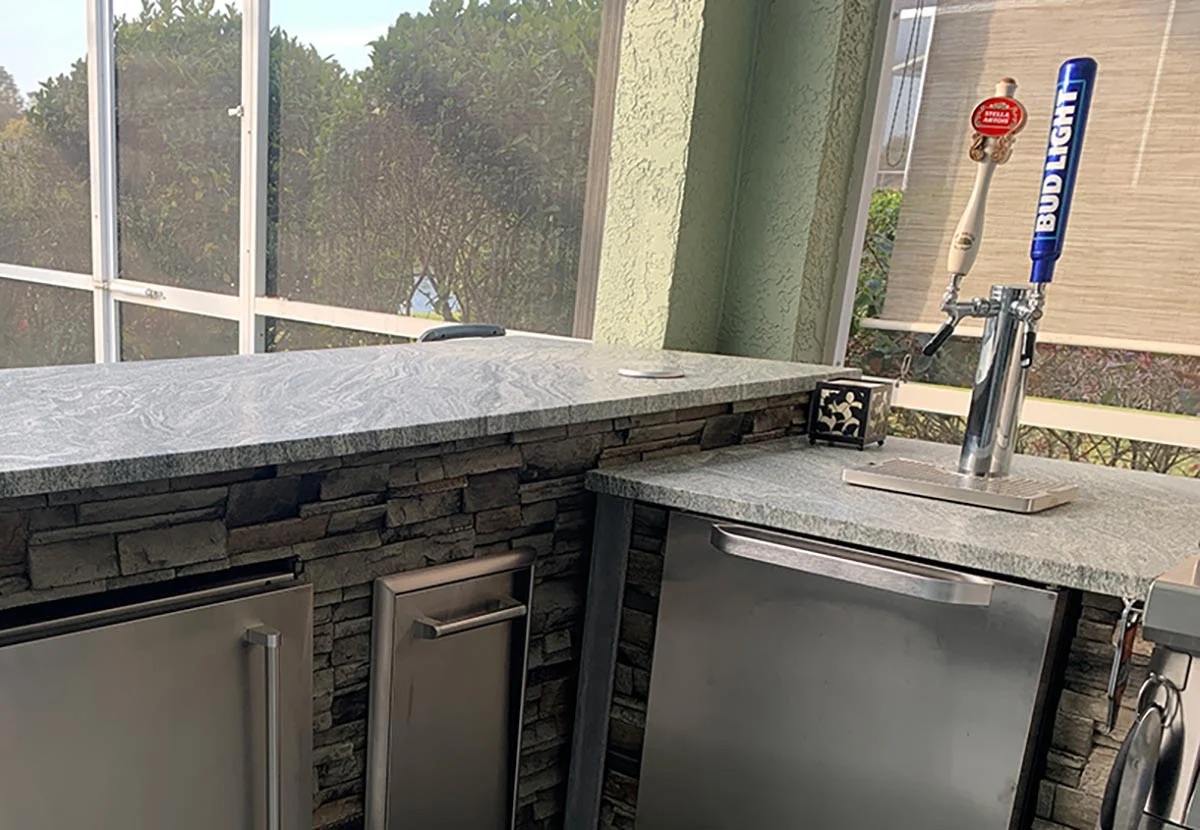
Unlike traditional kegerators which are freestanding units, under counter kegerators are designed to be installed directly into a cabinet or counter, making them seamlessly blend into your kitchen or bar area. In this article, we will take you through a step-by-step process on how to install an under counter kegerator, ensuring that you achieve a professional and functional setup.
Before we dive into the installation process, it’s essential to emphasize the importance of measuring and preparing the space before purchasing your under counter kegerator. This will ensure that you select the right size and model that will fit perfectly into your designated area. Let’s move on to our first step.
Key Takeaways:
- Installing an under counter kegerator involves measuring and preparing the space, choosing the right unit, gathering tools, and installing components like the draft tower, CO2 tank, and beer lines. Proper maintenance is essential for optimal performance and beer quality.
- The installation process for an under counter kegerator requires attention to detail, from adjusting temperature settings to regular cleaning and maintenance. Following the step-by-step guide ensures a professional setup and a continuous supply of fresh draft beer.
Read also: 10 Superior Under Counter Kegerator For 2025
Step 1: Measure and Prepare the Space
The first step in installing an under counter kegerator is to measure and prepare the space where you plan to install it. This is crucial to ensure that your kegerator fits perfectly and functions optimally. Here are the key things to consider:
1. Measure the Available Space:
It’s essential to measure the dimensions of the cabinet or counter where you intend to install the kegerator. Measure the width, height, and depth of the space to determine the appropriate size of the kegerator that will fit.
2. Consider Ventilation:
Under counter kegerators require proper ventilation to prevent overheating and ensure the efficient cooling of your beer. Check if the space has enough ventilation openings or consider making adjustments to ensure sufficient airflow.
3. Check Power Outlet:
Ensure that there is a nearby power outlet to plug in the kegerator. You may need to hire an electrician to install an outlet if there isn’t one in close proximity to the installation area.
4. Clear the Area:
Remove any items or obstacles in the space where you plan to install the kegerator. Make sure there is enough clearance for the keg and any additional accessories that may come with your kegerator.
5. Consider Drainage:
Under counter kegerators typically have a drip tray to catch any condensation or spills. Make sure there is a proper drainage system in place, such as a nearby sink or access to a drainpipe.
Once you have measured and prepared the space, you’re ready to move on to the next step – choosing and purchasing the right under counter kegerator for your needs. Let’s explore this in detail.
Step 2: Choose and Purchase the Under Counter Kegerator
Now that you have prepared the space for your under counter kegerator, it’s time to select and purchase the right unit. Here are the key points to consider in this step:
1. Capacity and Size:
Determine how many kegs you plan to store and serve simultaneously. Different kegerators come with varying capacities, so choose one that can accommodate your needs. Additionally, ensure that the kegerator fits within the allocated space.
2. Cooling System:
Look for a kegerator with a reliable and efficient cooling system. Options include compressor-based coolers or thermoelectric coolers. Compressor-based coolers are known for their powerful cooling capacity but may require more energy. Thermoelectric coolers are more energy-efficient but may have a slightly lower cooling capacity.
3. Draft System Compatibility:
Check if the kegerator is compatible with the type of draft system you plan to use. It should have the necessary fittings and connections for your preferred setup, whether it’s a single tap or multiple taps.
4. Energy Efficiency:
Consider the energy efficiency of the kegerator to minimize energy consumption and operating costs in the long run. Look for models with energy-saving features such as LED lighting and adjustable temperature settings.
5. Brand and Reviews:
Research different brands and read customer reviews to gauge the reliability, performance, and durability of the kegerator. Choose a reputable brand known for manufacturing high-quality units.
6. Accessories and Warranty:
Consider what additional accessories come with the kegerator, such as CO2 tanks, regulators, and draft towers. Also, check the warranty provided by the manufacturer to ensure you have proper coverage in case of any issues.
Once you have chosen the right under counter kegerator for your needs, make the purchase from a reliable retailer or directly from the manufacturer. With your kegerator in hand, it’s time to move on to the next step – gathering the necessary tools and equipment for installation.
Step 3: Gather the Necessary Tools and Equipment
Before you can proceed with the installation of your under counter kegerator, it’s important to gather all the necessary tools and equipment. Having the right tools at your disposal will make the installation process smoother and more efficient. Here are the essential tools and equipment you will need:
1. Tape Measure:
A tape measure is crucial for accurately measuring the dimensions of your cabinet or counter. It will ensure that the kegerator fits perfectly into the designated space.
2. Drill and Drill Bits:
You may need to drill holes for mounting the draft tower or securing other components. Make sure you have a drill and appropriate drill bits to accommodate the materials you are working with.
3. Screwdriver:
A screwdriver will come in handy for tightening screws and securing various parts during the installation process. Consider having different types of screwdrivers, such as Phillips and flathead, for versatility.
4. Wrench:
Depending on the specific kegerator model, you may need a wrench to tighten or loosen certain fittings. Ensure you have the appropriate wrench sizes for your kegerator.
5. Level:
A level will help you ensure that the kegerator is installed straight and evenly. This is important for both the visual aesthetics and the proper functioning of the unit.
6. Plumber’s Tape:
Plumber’s tape, also known as Teflon tape, helps create a watertight seal when connecting components such as the beer lines and faucets. It prevents leaks and ensures a smooth flow of beer.
7. Wire Strippers:
If your kegerator requires electrical connections, such as a power cord or temperature control wiring, wire strippers will be necessary to safely strip and connect the wires.
8. Safety Equipment:
Don’t forget to prioritize safety during the installation process. Have safety glasses, work gloves, and a dust mask available, especially when drilling or working with electrical connections.
Once you have gathered all the necessary tools and equipment, you are ready to begin the installation process. In the next step, we will cover how to install the draft tower for your under counter kegerator.
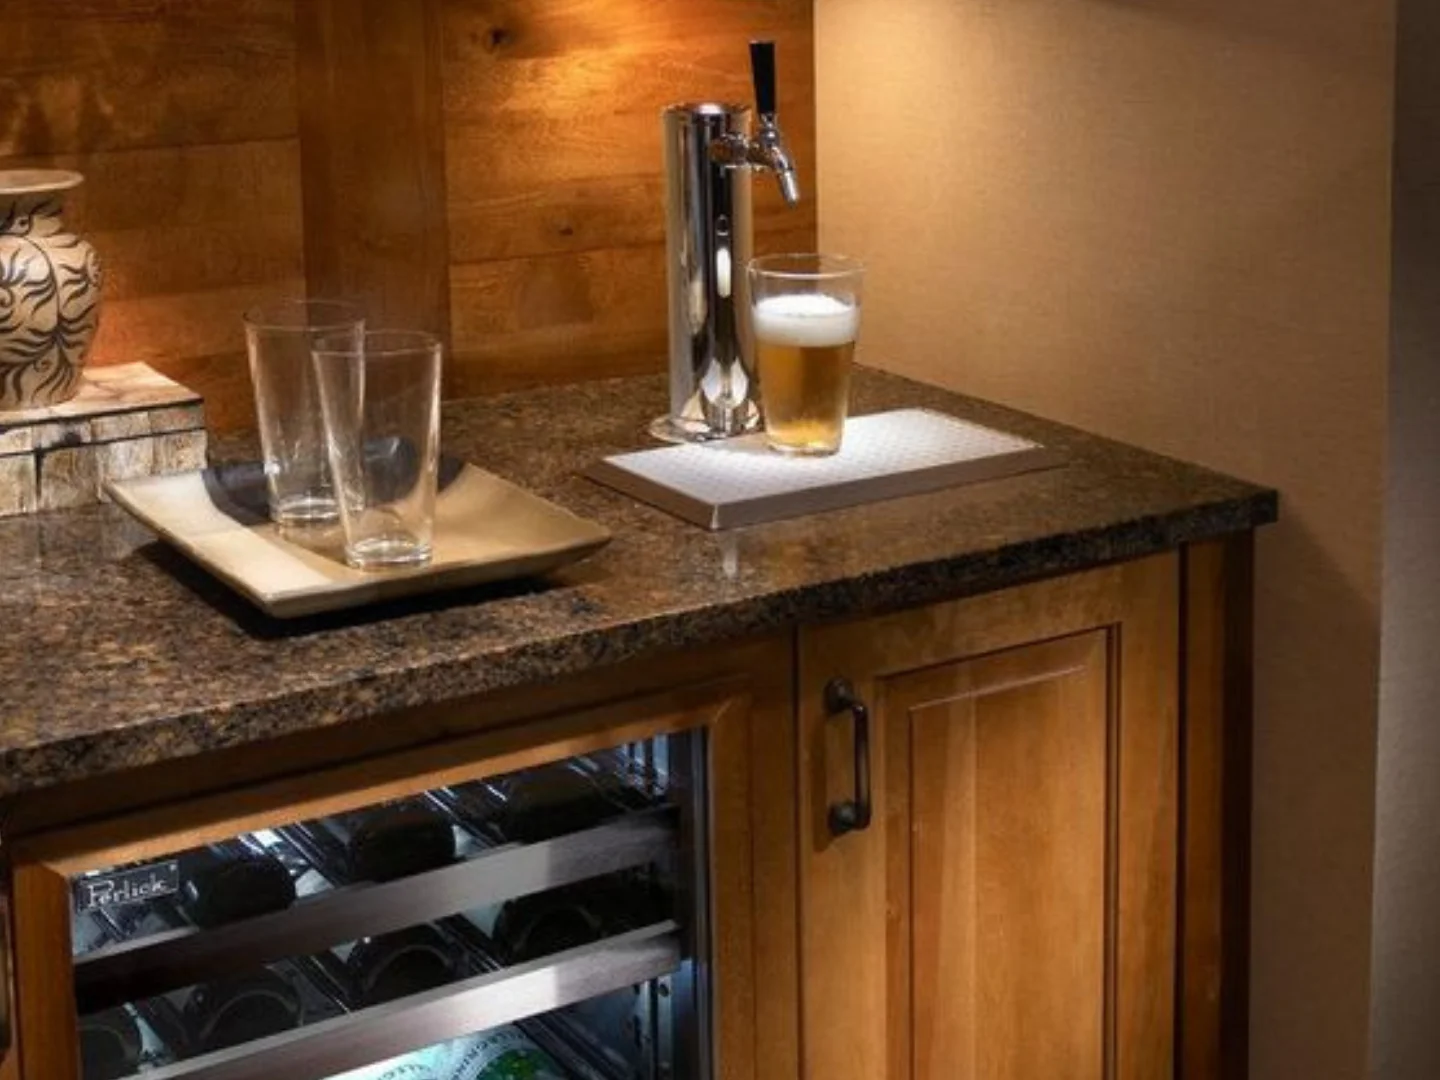
Step 4: Install the Draft Tower
Now that you have gathered your tools and equipment, it’s time to install the draft tower for your under counter kegerator. The draft tower is the vertical structure that houses the beer faucet and connects to the keg inside the kegerator. Here’s how to install it:
1. Choose the Installation Location:
Determine the ideal location for your draft tower on your countertop or bar surface. Ensure it’s easily accessible and at a comfortable height for pouring beer.
2. Mark the Mounting Holes:
Place the draft tower on the chosen location and use a pencil or marker to mark the spots where you will drill the mounting holes. Make sure the tower is level before marking.
3. Drill the Mounting Holes:
Use a drill with an appropriate drill bit to carefully drill the marked mounting holes on the countertop or bar surface. Take care to avoid drilling too deep or damaging the surface material.
4. Insert the Draft Tower:
Once the holes are drilled, align the draft tower with the mounting holes and insert the screws through the holes. Use a screwdriver or wrench to tighten the screws, securing the tower in place.
5. Connect Beer Lines:
Depending on the specific model of your kegerator, there may be pre-attached beer lines or separate lines that need to be connected. Follow the manufacturer’s instructions to properly connect the beer lines to the faucet and the keg coupler inside the kegerator.
6. Test for Leaks:
After connecting the beer lines, it’s important to test for any potential leaks. Fill a spray bottle with a mixture of soap and water and spray it on the connections. If you see bubbles forming, it indicates a leak that needs to be addressed. Tighten the connections or replace any faulty parts if necessary.
7. Secure the Drip Tray:
Mount the drip tray, typically included with the draft tower, below the faucet to catch any spills or condensation. Secure it using the provided screws or adhesive backing, depending on the design.
With the draft tower successfully installed, you’re one step closer to enjoying fresh draft beer. In the next step, we will cover how to connect the CO2 tank and regulator for proper beer carbonation and dispensing.
When installing an under counter kegerator, make sure to measure the space accurately to ensure a proper fit. Also, consider the location of the CO2 tank and ensure there is easy access for maintenance.
Read also: 12 Best Under Counter Storage For 2025
Step 5: Connect the CO2 Tank and Regulator
Connecting the CO2 tank and regulator is an essential step in the installation process of your under counter kegerator. The CO2 tank provides the necessary pressure to carbonate the beer and dispense it properly. Here’s how to connect the CO2 tank and regulator:
1. Locate the CO2 Tank:
Find a suitable location to place the CO2 tank near the kegerator. It should be easily accessible for monitoring and refilling.
2. Attach the Regulator:
The regulator connects the CO2 tank to the kegerator and regulates the pressure of the gas. Attach the regulator to the CO2 tank by screwing it onto the valve at the top of the tank. Ensure it is firmly secured.
3. Adjust the Regulator Pressure:
Before connecting the regulator to the kegerator, adjust the pressure according to the beer style and carbonation level you desire. Consult the specific recommendations for your beer or use a carbonation calculator to determine the appropriate pressure setting.
4. Connect the Gas Line:
The gas line connects the regulator to the kegerator to deliver the CO2 gas. Attach one end of the gas line to the output port on the regulator. Use a wrench or adjustable pliers to ensure a secure connection.
5. Connect the Gas Line to the Kegerator:
Locate the gas inlet on the kegerator and attach the other end of the gas line to it. Use a wrench or adjustable pliers to tighten the connection to prevent any leaks.
6. Test for Leaks:
Once the CO2 tank and regulator are connected, it’s important to check for leaks. Apply a mixture of soap and water to all the connections and look for any bubbles indicating a leak. If you notice any leaks, tighten the connections or replace any faulty parts.
7. Check Pressure and Adjust:
Turn on the CO2 tank valve to release the gas. Monitor the pressure gauge on the regulator to ensure that it is maintaining the desired pressure. Adjust the pressure as needed using the regulator adjustment knob.
With the CO2 tank and regulator properly connected, you have set the stage for carbonating and dispensing your beer. In the next step, we will cover how to install the beer lines and faucet for an optimal pouring experience.
Step 6: Install the Beer Lines and Faucet
Installing the beer lines and faucet is a crucial step in the installation process of your under counter kegerator. These components ensure a smooth and reliable flow of beer from the keg to the glass. Here’s how to install the beer lines and faucet:
1. Prepare the Beer Lines:
Start by measuring and cutting the beer lines to the appropriate length. Ensure they are long enough to reach from the keg to the draft tower, but not so long that they become tangled or cause excess foam.
2. Attach the Beer Lines to the Keg Coupler:
The keg coupler connects the beer lines to the keg. Identify the gas and liquid posts on the keg coupler. Attach the appropriate beer line to the liquid post, ensuring a tight connection. Use a wrench to securely tighten the connection.
3. Run the Beer Lines:
Carefully route the beer lines from the keg coupler to the draft tower. Avoid any kinks or sharp bends that could restrict the flow of beer. Use zip ties or adhesive clips to secure the lines along the way and keep them tidy.
4. Connect the Beer Lines to the Faucet:
Reach inside the draft tower and connect the beer lines to the faucet. Ensure a secure connection by pushing the beer lines onto the barbed fittings on the back of the faucet. Give them a gentle tug to make sure they are properly attached.
5. Check for Leaks:
Turn on the CO2 tank and allow the pressure to build up. While the system is pressurized, check all the connections for any signs of leaks. Apply a mixture of soap and water to the connections and look for bubbles indicating a leak. Tighten any loose connections or replace faulty parts if necessary.
6. Purge and Flush Lines:
Before pouring the first beer, it’s important to purge and flush the beer lines. This removes any air and residue from the lines, ensuring a clean and clear flow of beer. Follow the manufacturer’s instructions for your specific kegerator on how to purge and flush the lines.
7. Test the Pour:
Finally, with everything properly installed, give the faucet a gentle pull to pour a small sample of beer. Check for any issues like excessive foam or improper flow. Adjust the pressure or temperature settings if needed to achieve the desired pour.
With the beer lines and faucet successfully installed, you’re now ready to pour and enjoy fresh draft beer from your under counter kegerator. In the next step, we will cover how to test and adjust the temperature settings for optimal beer storage and serving conditions.
Step 7: Test and Adjust the Temperature Settings
Now that you have installed the beer lines and faucet, it’s time to ensure that your under counter kegerator is set at the optimal temperature for storing and serving beer. Proper temperature control is crucial for maintaining the integrity and flavor of your draft beer. Here’s how to test and adjust the temperature settings:
1. Allow the Kegerator to Stabilize:
After the installation process, give your kegerator some time to stabilize and reach a consistent temperature. This usually takes a few hours or as indicated in the manufacturer’s instructions.
2. Use a Thermometer:
Place a thermometer inside the kegerator to accurately measure the temperature. Ensure that the thermometer is placed away from the cooling vents and close to where the beer keg will be positioned.
3. Check the Ideal Temperature Range:
Most draft beers are best served at temperatures between 36°F and 40°F (2°C and 4°C). However, certain beer styles may have specific temperature recommendations. Refer to the recommendations provided by the brewery or use a beer style guide as a reference.
4. Adjust the Temperature Dial:
If the temperature reading is outside the desired range, locate the temperature control dial or digital panel on your kegerator. Adjust it accordingly by turning it clockwise to decrease the temperature or counterclockwise to increase it. Make small adjustments and allow time for the temperature to stabilize before rechecking.
5. Monitor and Fine-tune:
Leave the kegerator running at the adjusted temperature for a few hours or overnight. Monitor the temperature using the thermometer and make any necessary fine-tune adjustments to achieve the desired temperature range.
6. Consider External Factors:
Keep in mind that external factors such as room temperature and usage frequency can affect the internal temperature of the kegerator. Adjustments may be needed seasonally or based on changes in your environment.
7. Maintain Consistent Temperature:
Regularly monitor the temperature of your kegerator to ensure it stays within the desired range. Adjust as necessary to maintain optimal conditions for storing and serving your draft beer.
By testing and adjusting the temperature settings, you’ll ensure that your under counter kegerator provides the perfect environment for your beer. In the final step, we will cover how to properly clean and maintain your kegerator to ensure its longevity and optimal performance.
Step 8: Properly Clean and Maintain the Under Counter Kegerator
To keep your under counter kegerator functioning properly and your beer tasting its best, it’s essential to establish a routine cleaning and maintenance schedule. Regular cleaning and maintenance will help prevent the buildup of bacteria, mold, and other contaminants that could affect the quality of your beer. Here’s how to properly clean and maintain your kegerator:
1. Follow Manufacturer’s Instructions:
Start by reviewing the manufacturer’s instructions and recommendations for cleaning and maintenance. They may provide specific guidelines and cleaning products to use for your particular kegerator model.
2. Disconnect and Empty the System:
Before starting the cleaning process, disconnect the keg coupler and faucet from the beer lines. Empty any remaining beer from the lines and keg. Follow proper keg disposal or recycling procedures when necessary.
3. Clean the Interior:
Remove any shelves, keg racks, or other removable components from the kegerator. Clean the interior walls, shelves, and surfaces with a mild detergent or brewery-approved cleaning solution. Rinse thoroughly and allow it to dry completely.
4. Clean the Beer Lines and Faucet:
To clean the beer lines and faucet, use a cleaning kit specifically designed for beer dispensing systems. Follow the instructions provided with the cleaning kit to properly flush the lines and remove any residue or buildup. Rinse thoroughly.
5. Sanitize the System:
After cleaning, sanitize the entire system, including the keg coupler, beer lines, faucet, and any other components that come into contact with the beer. Follow the manufacturer’s instructions for the recommended sanitizing solution and duration.
6. Check Seals and Gaskets:
Inspect all seals, gaskets, and O-rings for signs of wear or damage. Replace any faulty or deteriorated seals to ensure a proper seal and prevent leaks or contamination.
7. Regular Maintenance:
Incorporate routine maintenance into your kegerator care. This includes inspecting and cleaning the condenser coils, checking and replacing air filters if applicable, and ensuring proper ventilation around the kegerator.
8. Check CO2 Levels and Regulator:
Periodically check the CO2 tank level to ensure it is not running low. Inspect the regulator for any signs of damage or leaks. Make any necessary adjustments or replacements.
9. Keep It Dry:
Moisture can lead to mold and other issues. Wipe down any condensation inside the kegerator and empty the drip tray regularly. Maintain proper ventilation to reduce moisture build-up.
10. Regularly Rotate and Clean Beer Lines:
Rotate your beer lines regularly to prevent the formation of beer stones and ensure a fresh pour. Clean the lines at least every two weeks, or more frequently if you change kegs often.
By following these cleaning and maintenance practices, you’ll keep your under counter kegerator in optimal condition and continue to enjoy great-tasting beer. Regular maintenance will also extend the lifespan of your kegerator. With proper care, your kegerator will be the centerpiece of countless enjoyable gatherings with friends and family.
Conclusion
Congratulations! You have successfully learned how to install an under counter kegerator. By following the step-by-step guide provided in this article, you can now enjoy the convenience of having a kegerator at home, providing you and your guests with fresh and cold draft beer on tap.
From measuring and preparing the space to choosing the right kegerator, gathering the necessary tools, installing the draft tower, connecting the CO2 tank and regulator, installing the beer lines and faucet, testing and adjusting the temperature settings, and finally, properly cleaning and maintaining the kegerator – you have acquired the knowledge and skills to achieve a professional and functional setup.
Remember, maintaining the cleanliness and proper functioning of your kegerator is crucial for optimal beer quality. Make sure to establish a regular cleaning and maintenance routine to prevent contamination and ensure a great beer-drinking experience.
Additionally, be sure to store your kegerator in a well-ventilated area and monitor the temperature settings to keep your beer at the ideal serving temperature for maximum enjoyment.
Now, it’s time to invite your friends over, raise a glass, and savor the satisfaction of having your very own under counter kegerator. Cheers!
Frequently Asked Questions about How To Install Under Counter Kegerator
Was this page helpful?
At Storables.com, we guarantee accurate and reliable information. Our content, validated by Expert Board Contributors, is crafted following stringent Editorial Policies. We're committed to providing you with well-researched, expert-backed insights for all your informational needs.
0 thoughts on “How To Install Under Counter Kegerator”