Articles
How To Install Insulation Under Floor
Modified: October 31, 2024
Learn how to install insulation under your floor with our informative articles. Discover the benefits and step-by-step process for efficient insulation installation.
(Many of the links in this article redirect to a specific reviewed product. Your purchase of these products through affiliate links helps to generate commission for Storables.com, at no extra cost. Learn more)
Introduction
Installing insulation under the floor can greatly improve the energy efficiency and comfort of your home. Whether you have a crawl space or a raised floor, insulating the area beneath it can help to prevent heat loss, reduce energy consumption, and create a more comfortable living environment.
In this article, we will guide you through the steps of installing insulation under your floor. From measuring the floor area to securing the insulation, we will cover everything you need to know to successfully complete the project.
Before we dive into the details, it’s important to understand why insulating the underfloor area is so beneficial. Floors are a significant source of heat loss, especially in older homes or those with inadequate insulation. By properly insulating under your floor, you can prevent cold drafts in the winter and keep your home cooler in the summer.
Insulating the underfloor area also helps to reduce energy consumption and lower your heating and cooling bills. When your heating or cooling system doesn’t have to work as hard to maintain a comfortable temperature, you can save money and reduce your environmental impact.
Furthermore, proper insulation can improve the overall comfort of your home. It helps to regulate the temperature, reducing temperature fluctuations and creating a more pleasant indoor environment.
Now that you understand the benefits, let’s get started with the step-by-step process of installing insulation under your floor.
Key Takeaways:
- Properly insulating the underfloor area can significantly improve energy efficiency, reduce heating and cooling costs, and create a more comfortable living environment by preventing heat loss and regulating temperature.
- Accurate measurement, high-quality materials, proper subfloor preparation, and effective insulation installation are key to maximizing the benefits of underfloor insulation, leading to long-term energy savings and a more sustainable home.
Step 1: Measure the Floor Area
The first step in installing insulation under your floor is to accurately measure the floor area. This will help you determine the amount of insulation material you will need for the project.
Start by measuring the length and width of the floor using a tape measure. If your floor has irregular shapes or angles, it may be helpful to divide it into smaller sections and measure each section separately.
Once you have the measurements, multiply the length and width to calculate the total square footage of the floor. It’s a good idea to add a bit of extra square footage to account for any wastage or errors.
Keep in mind that different types of insulation have different coverage areas. Check the manufacturer’s instructions or packaging to determine how much insulation is needed per square foot.
Additionally, consider the thickness of the insulation material. The higher the R-value of the insulation, the thicker it will be. Take this into account when measuring the floor area and determining the amount of insulation needed.
By accurately measuring the floor area, you can ensure that you have the right amount of insulation material for the project and avoid any unnecessary trips to the store.
Step 2: Gather the Necessary Materials
Now that you have measured the floor area, it’s time to gather all the necessary materials for the insulation installation. Having everything you need on hand before you begin will help streamline the process and prevent any delays or interruptions.
The specific materials you will need may vary depending on the type of insulation you choose and the condition of your floor. However, here are some common materials that are typically required:
- Insulation material: There are various types of insulation materials available, such as fiberglass batts, foam boards, or spray foam. Choose the one that best suits your needs and budget.
- Vapor barrier: A vapor barrier is a moisture-resistant material that helps to prevent condensation and moisture build-up. Not all insulation installations require a vapor barrier, but if your floor is in a damp or humid area, it can be beneficial.
- Tape or adhesive: Depending on the type of insulation, you might need adhesive or tape to secure it in place.
- Utility knife: A sharp utility knife will be handy for cutting the insulation material to fit your floor dimensions.
- Measuring tape: You will need a measuring tape to accurately measure and cut the insulation material.
- Protective gear: Insulation materials can be irritating to the skin and lungs, so it’s important to wear proper protective gear such as gloves, goggles, and a mask.
- Sealant or caulk: To seal any gaps or cracks in the floor, you may need a sealant or caulk.
- Plastic sheeting (if applicable): If you are installing a vapor barrier, you may also need plastic sheeting to cover the floor area.
Make sure to purchase high-quality materials from reliable suppliers to ensure the effectiveness and durability of your insulation installation.
Having all the necessary materials ready will make the insulation installation process smoother and more efficient, allowing you to complete the project with ease.
Step 3: Prepare the Subfloor
Before you can start installing insulation under the floor, it’s important to properly prepare the subfloor. This involves ensuring that the subfloor is clean, free from any obstructions or debris, and in good condition.
Here are the steps to prepare the subfloor:
- Clean the subfloor: Remove any dirt, dust, or debris from the subfloor. Sweep or vacuum the area to ensure a clean surface.
- Repair any damages: Check for any damages on the subfloor, such as cracks, holes, or rot. Repair or replace any damaged areas to create a stable and secure foundation for the insulation.
- Remove obstacles: Ensure that the subfloor is clear of any obstacles that could interfere with the installation of insulation. This includes removing any furniture, appliances, or other items that may be present.
- Inspect for leaks: Check for any leaks or moisture issues in the subfloor. Address any leaks or moisture problems before proceeding with the insulation installation to prevent future damage.
- Level the subfloor: If the subfloor is uneven or has low or high spots, it’s important to level it. This can be done using a self-leveling compound or by adding shims to raise or lower certain areas.
By properly preparing the subfloor, you create a solid foundation for the insulation and ensure that it can be installed effectively. This step is crucial for the long-term performance and effectiveness of your insulation installation.
Step 4: Install Vapor Barrier (Optional)
Installing a vapor barrier is an optional step in the process of insulating the underfloor area. A vapor barrier is a moisture-resistant material that helps prevent condensation and moisture buildup, particularly in areas with high humidity or damp conditions.
Here’s how to install a vapor barrier:
- Measure and cut the vapor barrier: Measure the dimensions of the floor area and use those measurements to cut the vapor barrier material. Leave a few extra inches on each side to ensure proper coverage.
- Position the vapor barrier: Unroll the vapor barrier and position it over the subfloor. Make sure it covers the entire floor area and overlaps any joints or edges by a few inches.
- Secure the vapor barrier: Use adhesive or tape to secure the vapor barrier in place. Ensure that it is taut and properly sealed to prevent any air or moisture leaks.
- Seal the seams: If the vapor barrier has seams, use tape or adhesive to seal them tightly. This will help create a continuous barrier and prevent moisture from penetrating through.
- Trim excess material: Use a utility knife to trim any excess vapor barrier material along the edges of the floor to ensure a neat and clean installation.
Installing a vapor barrier can help protect the insulation and subfloor from moisture damage, enhance the effectiveness of the insulation, and improve the overall energy efficiency of your home.
However, it’s important to note that not all insulation installations require a vapor barrier. In certain cases, such as in well-ventilated crawl spaces or in areas with low humidity, a vapor barrier may not be necessary. Consult with a professional or refer to the insulation manufacturer’s recommendations to determine if a vapor barrier is required for your specific situation.
Read more: How To Install Heated Floor Under Tile
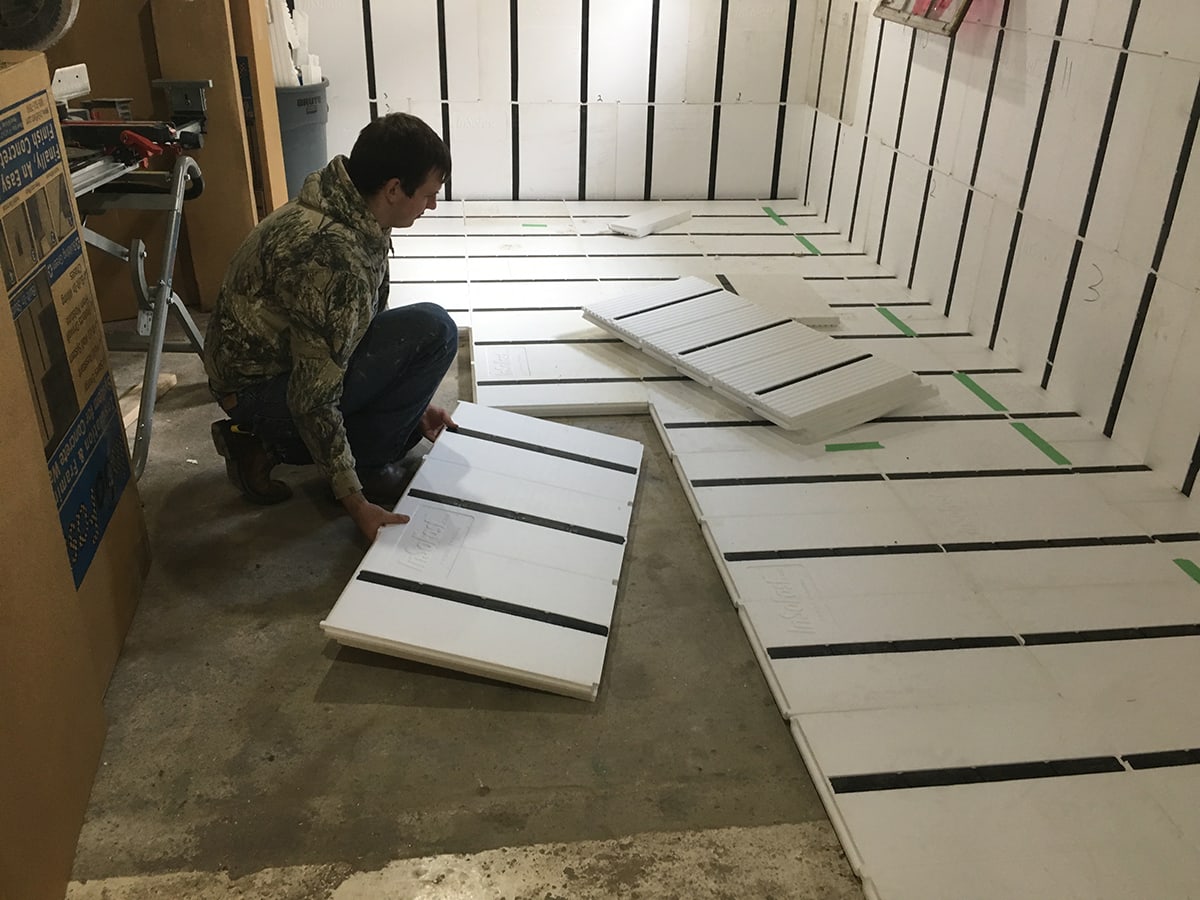
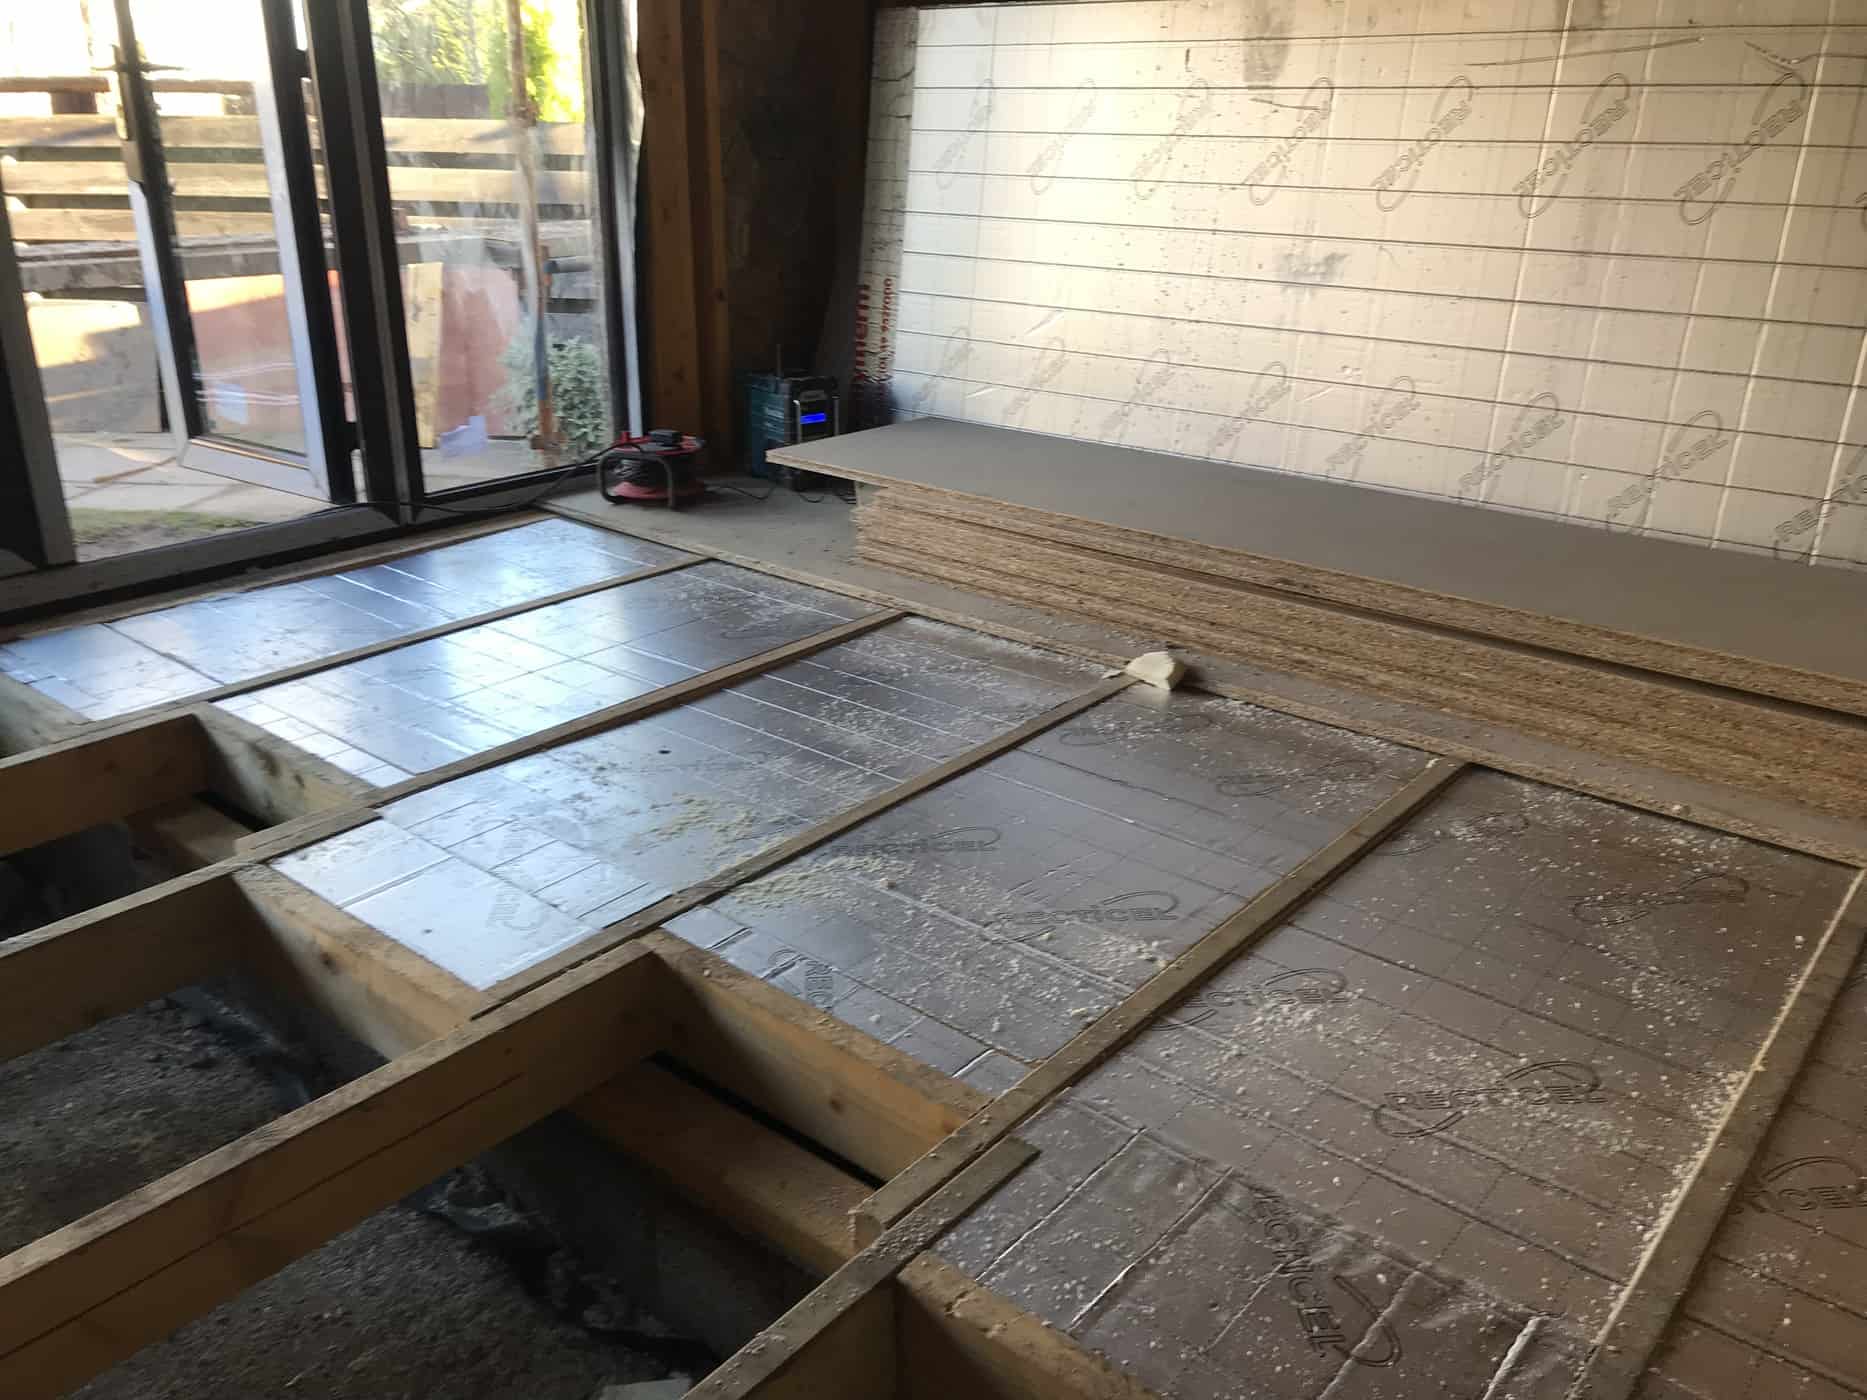
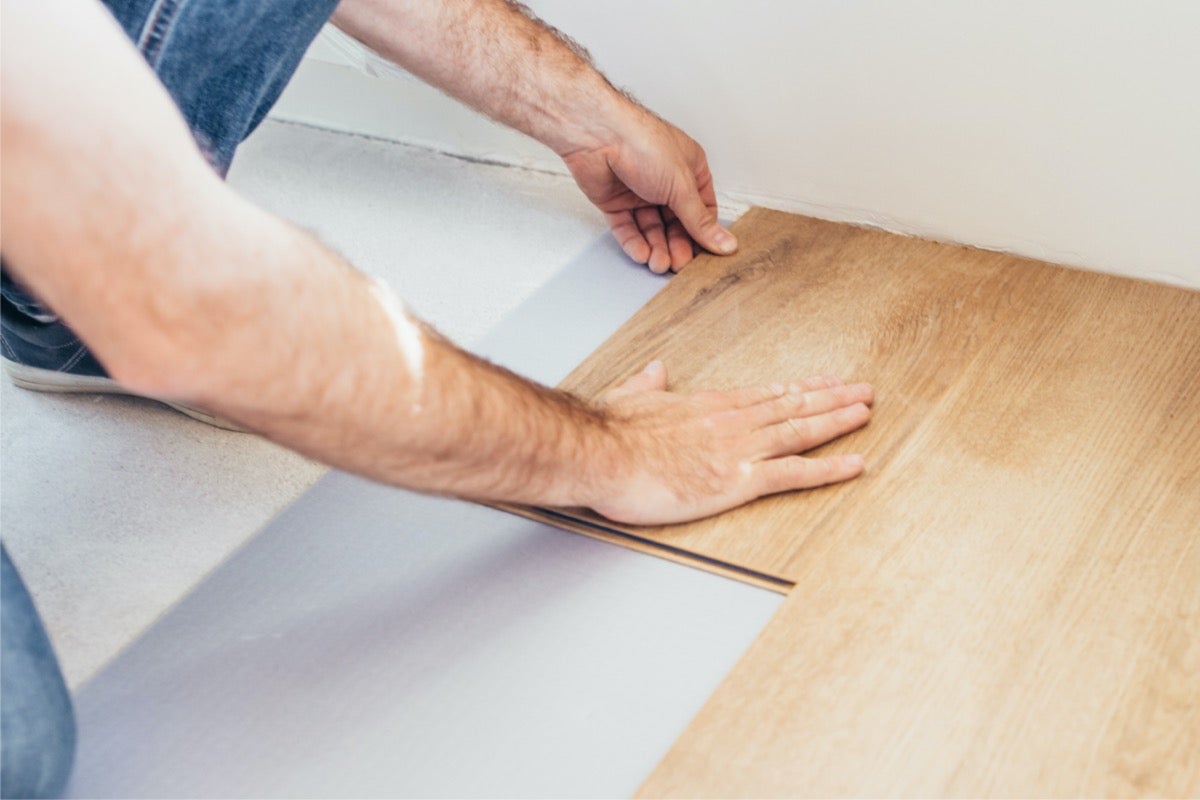
Step 5: Cut Insulation to Fit
Now that the subfloor is prepared and, if applicable, the vapor barrier is installed, it’s time to cut the insulation to fit the underfloor area. Cutting the insulation to the proper dimensions ensures a snug and effective fit, maximizing its insulating properties.
Here’s how to cut the insulation to fit:
- Measure the underfloor area: Use a measuring tape to measure the length and width of the underfloor space. Take accurate measurements of each section if the floor area has irregular shapes or angles.
- Transfer measurements to the insulation: Transfer the measurements onto the insulation material using a pencil or marker. Make sure to account for any protrusions or obstructions like pipes or HVAC vents.
- Cut the insulation: Using a sharp utility knife, carefully cut the insulation along the marked lines. Apply firm, even pressure while cutting to ensure clean and straight edges.
- Trim as needed: Once the insulation is cut to size, assess if any further trimming is required to achieve a precise fit. Make any necessary adjustments to ensure a snug installation.
It’s important to handle insulation with caution, as some materials can be irritating to the skin and lungs. Wear appropriate protective gear like gloves, goggles, and a mask while cutting and handling the insulation.
Remember, accuracy is key when cutting the insulation. A well-fitted insulation layer will effectively cover the underfloor area, preventing heat loss and improving energy efficiency.
Once you have cut the insulation to fit, you are ready to move on to the next step of the installation process.
<
When installing insulation under the floor, make sure to wear protective gear such as gloves, a mask, and goggles to protect yourself from any irritants. Additionally, measure and cut the insulation carefully to ensure a proper fit.
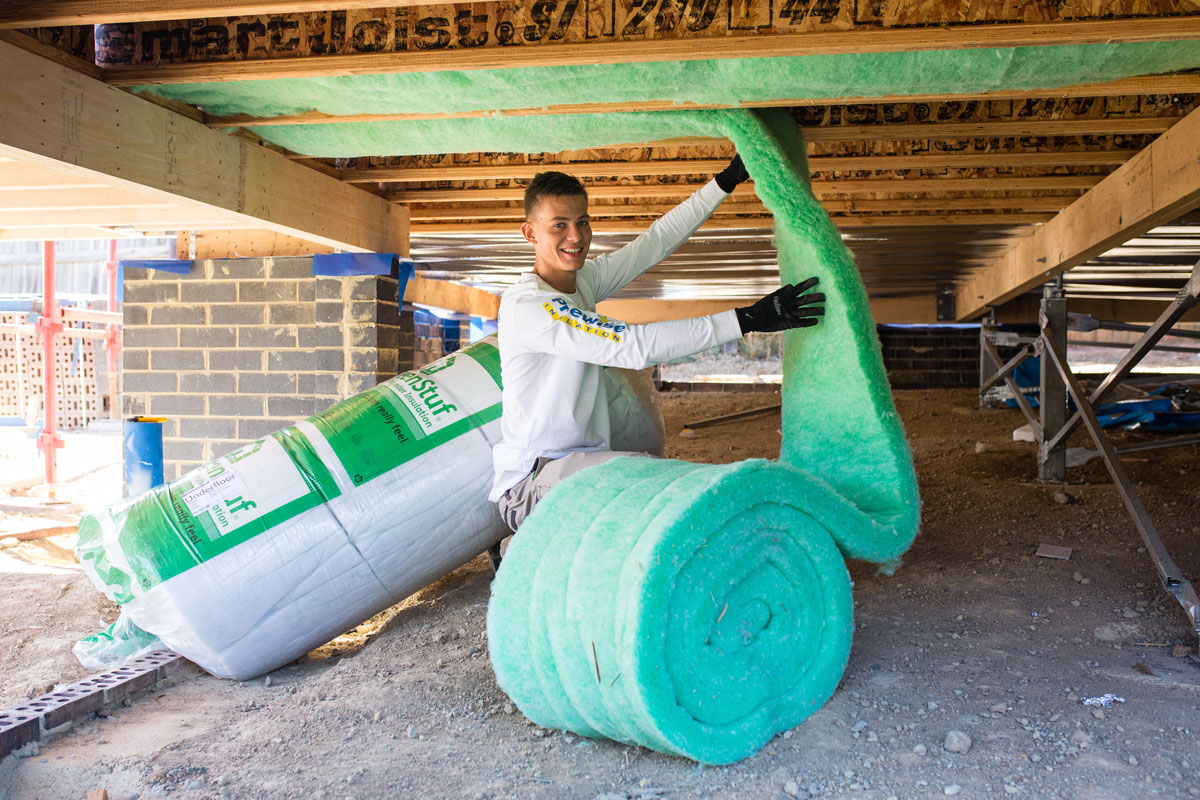
>Step 6: Lay the Insulation<
>
<
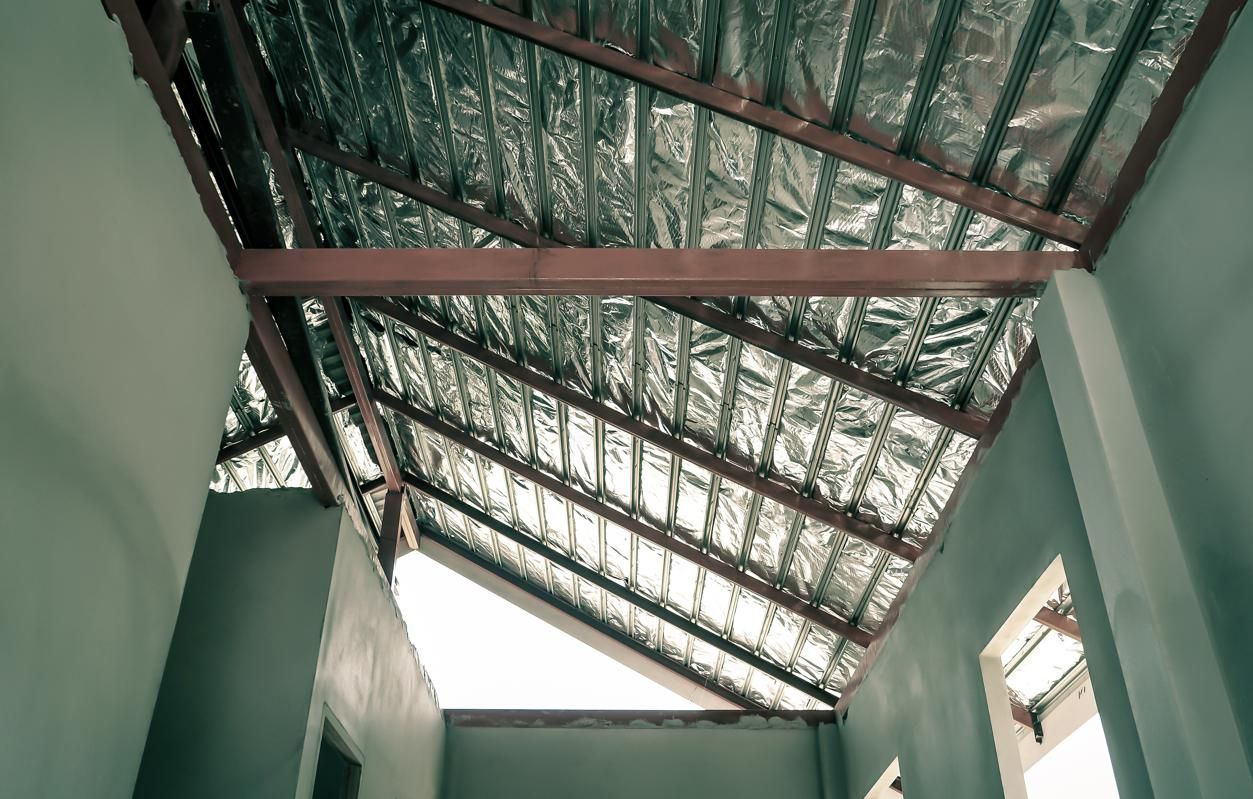
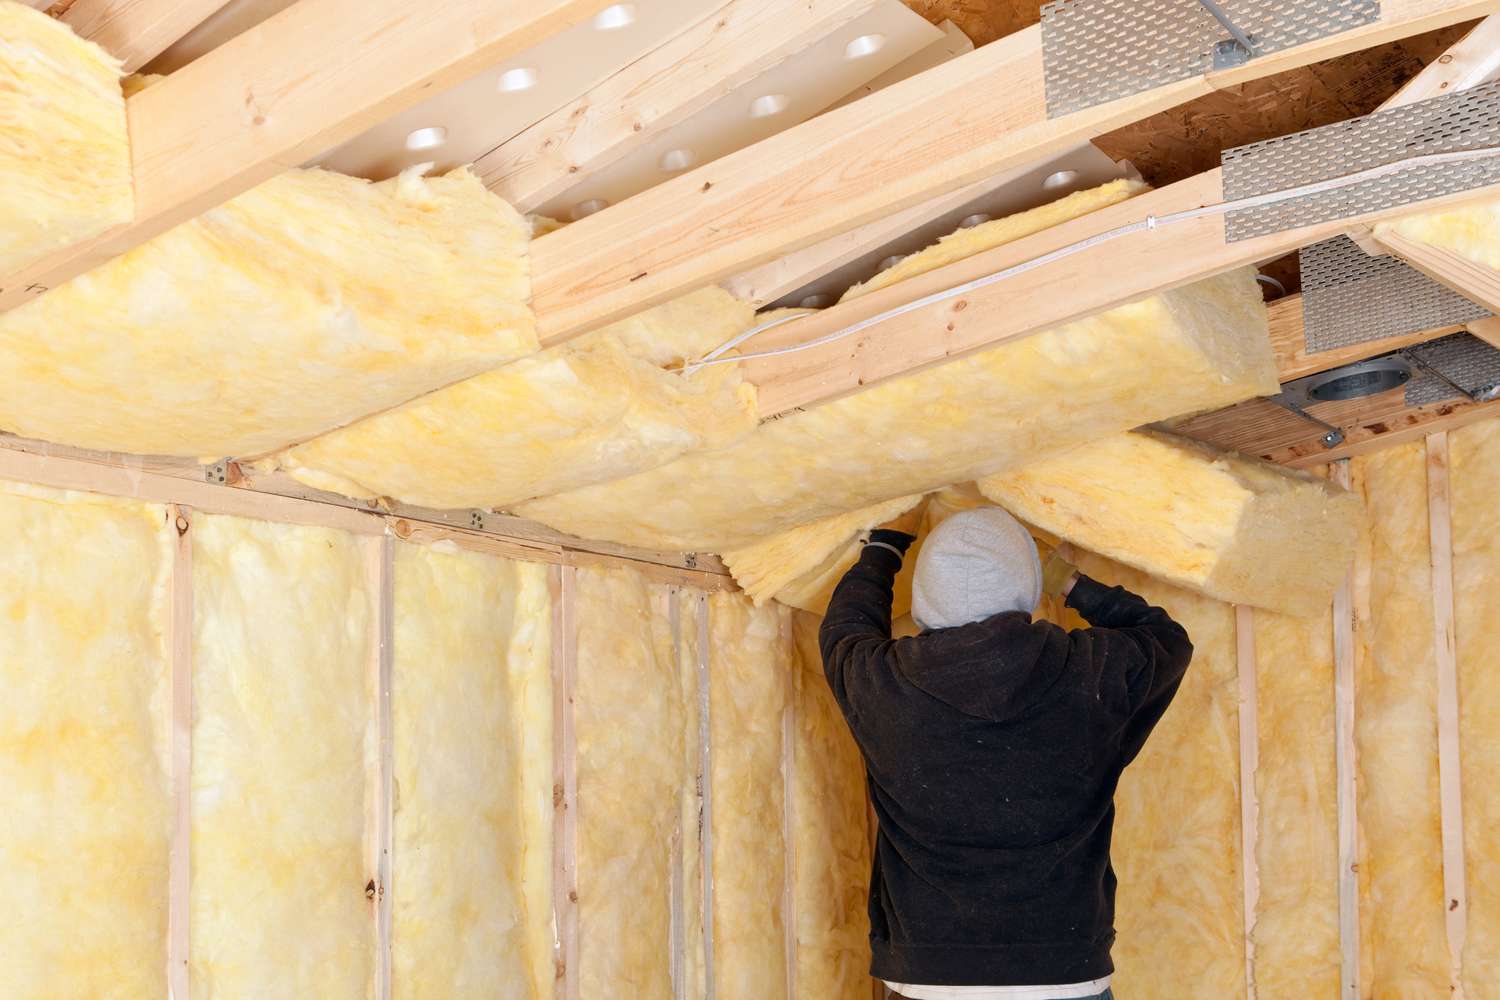
>Now that the insulation is cut to fit the underfloor area, it’s time to lay it down. Properly positioning and arranging the insulation ensures maximum coverage and effectiveness in reducing heat loss. Here’s how to lay the insulation under the floor:
- Start at one end: Begin by positioning the insulation at one end of the underfloor area. Make sure it fits snugly against the edges and walls.
- Work in sections: If the underfloor area is large, it may be more manageable to work in sections. Lay one piece of insulation at a time, making sure each piece is properly aligned and secured.
- Overlap the insulation: If you have multiple pieces of insulation, overlap the edges by a few inches. This helps create a continuous barrier and prevents heat from escaping through any gaps.
- Avoid compressing the insulation: Be careful not to compress the insulation too tightly. It should have a slight “fluffiness” to allow for proper airflow and insulation performance. However, ensure that it is firmly in place and doesn’t shift or move around.
- Adjust as needed: During the installation, periodically step back and assess the overall coverage and alignment. Make any necessary adjustments to ensure a consistent and even layer of insulation.
>
When laying insulation, it’s important to follow any specific manufacturer’s instructions or recommendations. Different types of insulation may have specific requirements or considerations for installation.
The goal is to create a uniform and continuous layer of insulation that covers the entire underfloor area. This layer acts as a barrier, minimizing heat loss and improving energy efficiency.
Once the insulation is laid down, you can move on to securing it in place in the next step.
Step 7: Secure the Insulation
After laying the insulation under the floor, it’s important to secure it in place to prevent shifting or movement over time. This ensures that the insulation maintains its effectiveness and continues to provide maximum energy savings. Here’s how to secure the insulation:
- Use insulation supports: Insulation supports, also known as insulation hangers or wire fasteners, can be used to secure the insulation to the subfloor or joists. These supports are typically made of metal and are inserted through the insulation and into the subfloor or joists to hold it in place.
- Staple or tape the insulation: In some cases, you can use a staple gun or insulation tape to secure the insulation. This method is commonly used for insulation materials like fiberglass batts. Simply staple or tape the edges or corners to the subfloor or joists.
- Ensure proper coverage and alignment: As you secure the insulation, double-check that it is properly aligned and covers the entire underfloor area. Ensure there are no gaps or areas where the insulation is loose or hanging down.
- Be mindful of safety: When securing the insulation, be mindful of any electrical wiring or other potential hazards. Avoid stapling or fastening the insulation near electrical components to prevent damage or safety risks.
Properly securing the insulation helps maintain its integrity and effectiveness over time. It prevents sagging, shifting, or air gaps, ensuring that the insulation performs optimally in reducing heat loss and improving energy efficiency.
Remember, the specific method of securing the insulation may vary depending on the insulation material used and the recommendations provided by the manufacturer. Always refer to the manufacturer’s instructions for the best practices in securing your chosen type of insulation.
Once the insulation is secure, you are one step closer to a well-insulated underfloor space that will contribute to a more comfortable and energy-efficient home.
Step 8: Seal Any Gaps or Cracks
Sealing any gaps or cracks in the underfloor area is a crucial step to ensure the insulation works effectively in reducing heat loss and maintaining energy efficiency. Gaps or cracks can allow air infiltration, which can compromise the insulation’s performance. Here’s how to seal any gaps or cracks:
- Inspect the underfloor area: Carefully examine the underfloor area for any visible gaps, cracks, or openings. Look for areas around pipes, ducts, utility penetrations, or any other openings where air or moisture can enter.
- Use caulk or foam sealant: Depending on the size and location of the gaps or cracks, choose an appropriate caulk or foam sealant. Apply the sealant along the gaps or cracks, ensuring a tight seal. Use a caulk gun or a can of foam sealant for easy application.
- Pay attention to hidden gaps: Some gaps or cracks may not be easily visible, such as gaps between floorboards or holes in the subfloor. In these cases, consider using expanding foam sealant that can reach and fill any hidden gaps.
- Seal around pipes and penetrations: Pay special attention to areas where pipes or utility penetrations go through the underfloor. Use appropriate materials, such as sealing collars or insulation wrap, to seal around these penetrations.
- Allow the sealant to dry or cure: Follow the manufacturer’s instructions regarding drying or curing time for the sealant you have applied. Make sure to allow sufficient time for it to fully set and provide a durable seal.
By sealing gaps and cracks, you can enhance the overall effectiveness of the insulation and prevent air leakage. This will ultimately improve the energy efficiency of your home and prevent any drafts or temperature fluctuations.
Remember to work with caution when using sealants and ensure proper ventilation when applying them. Follow the recommended safety guidelines provided by the sealant manufacturer.
With all gaps and cracks sealed, your underfloor insulation will provide better thermal performance and contribute to a more comfortable and energy-efficient living space.
Read more: How To Insulate A Floor
Step 9: Replace the Subfloor (If Necessary)
In some cases, it may be necessary to replace the subfloor before proceeding with the insulation installation. This step ensures a solid and stable foundation for the insulation and helps maintain the structural integrity of the floor. Here’s how to determine if subfloor replacement is needed and how to proceed:
- Inspect the subfloor: Carefully examine the subfloor for signs of damage, rot, or deterioration. Common issues include water damage, termite infestation, or weakened structural integrity.
- Assess the severity of the damage: Determine the extent of the damage and whether it can be repaired or if a complete subfloor replacement is necessary. Superficial damage or small areas of rot may be repairable with patching and reinforcement.
- Hire a professional, if needed: If the damage is significant or you are unsure about the condition of the subfloor, it’s wise to consult with a professional contractor or a structural engineer. They can assess the situation and provide expert advice on whether subfloor replacement is necessary.
- Replace the subfloor: If a subfloor replacement is required, it involves removing the damaged subfloor material and replacing it with new plywood or oriented strand board (OSB) sheets. Make sure to follow proper construction practices and adhere to local building codes during the replacement process.
- Ensure subfloor alignment: Ensure that the new subfloor is properly aligned and level. Use shims or self-leveling compounds to correct any unevenness in the subfloor surface.
Replacing the subfloor is an involved process and may require professional expertise, especially for larger or more complex projects. It’s important to prioritize safety and ensure that the subfloor is structurally sound and suitable for the insulation installation.
By addressing any subfloor issues before installing the insulation, you create a stable and durable foundation for the underfloor space. This ensures the long-term effectiveness of the insulation and helps maintain the integrity of your home’s flooring structure.
<
>Step 10: Clean up and Finalize Installation<
>
<
>Congratulations, you’re almost done with the insulation installation under your floor! The final step is to clean up the work area and ensure that everything is in order. Here’s how to complete the process and finalize the installation:
- Remove any debris: Clean up any debris, packaging materials, or leftover insulation from the work area. Dispose of them properly according to local regulations.
- Inspect the installation: Take a moment to inspect the underfloor area and ensure that the insulation is properly installed and secured. Check for any loose edges, gaps, or areas that may need additional attention.
- Replace any removed items: If you had to remove any furniture, appliances, or other items during the installation, place them back in their original positions.
- Test for energy efficiency: After the installation is complete, monitor your home’s energy usage and comfort levels to see the impact of the insulation. You should notice a difference in the temperature stability and potentially lower energy bills.
- Maintain the underfloor area: Regularly inspect the underfloor area and address any signs of damage or issues that may arise. Ensuring the proper maintenance of the underfloor space will help maximize the longevity and effectiveness of the insulation.
>
By taking the time to clean up and finalize the installation, you are ensuring that the underfloor insulation is in optimal condition and ready to provide long-term benefits. A well-maintained underfloor insulation will contribute to improved energy efficiency, lower heating and cooling costs, and increased comfort in your home.
Now that you have completed all the steps, you can enjoy the benefits of a properly insulated underfloor area. Sit back, relax, and enjoy your more comfortable and energy-efficient living space!
Conclusion
Installing insulation under the floor is a valuable project that can greatly improve the energy efficiency and comfort of your home. By following the step-by-step guide provided in this article, you can successfully insulate the underfloor area and reap the benefits of reduced heat loss and lower energy consumption.
Throughout the process, you have learned how to measure the floor area, gather the necessary materials, prepare the subfloor, install a vapor barrier (if needed), cut the insulation to fit, lay it down, secure it in place, seal any gaps or cracks, and even replace the subfloor if necessary. Each step is crucial to ensure proper insulation and maximize the effectiveness of the installation.
Remember to take the time to gather high-quality materials, accurately measure and cut the insulation, properly secure it in place, and seal any gaps or cracks. Pay attention to safety precautions and follow the manufacturer’s instructions for the specific type of insulation you are using.
Once the installation is complete, take pride in your efforts and enjoy the benefits of your well-insulated underfloor area. You can expect improved energy efficiency, reduced heating and cooling costs, and a more comfortable living environment.
Regular maintenance and inspections of the underfloor area are essential to ensure that the insulation remains in good condition and performs optimally. Stay vigilant for any signs of damage or issues and address them promptly to maintain the integrity of your insulation and prolong its lifespan.
With proper insulation under the floor, you are making a positive impact on your home’s energy efficiency and contributing to a more sustainable future. Not only will you enjoy the benefits of a comfortable living space, but you will also be reducing your carbon footprint and saving money on utility bills.
So go ahead, take on this project with confidence, and enjoy the many advantages of a well-insulated underfloor area in your home!
Frequently Asked Questions about How To Install Insulation Under Floor
Was this page helpful?
At Storables.com, we guarantee accurate and reliable information. Our content, validated by Expert Board Contributors, is crafted following stringent Editorial Policies. We're committed to providing you with well-researched, expert-backed insights for all your informational needs.


0 thoughts on “How To Install Insulation Under Floor”