Home>Renovation & DIY>Home Renovation Guides>How To Install Soffit Under Eaves
Home Renovation Guides
How To Install Soffit Under Eaves
Modified: August 28, 2024
Learn how to install soffit under eaves with our comprehensive home renovation guide. Follow our step-by-step instructions for a successful project.
(Many of the links in this article redirect to a specific reviewed product. Your purchase of these products through affiliate links helps to generate commission for Storables.com, at no extra cost. Learn more)
Introduction
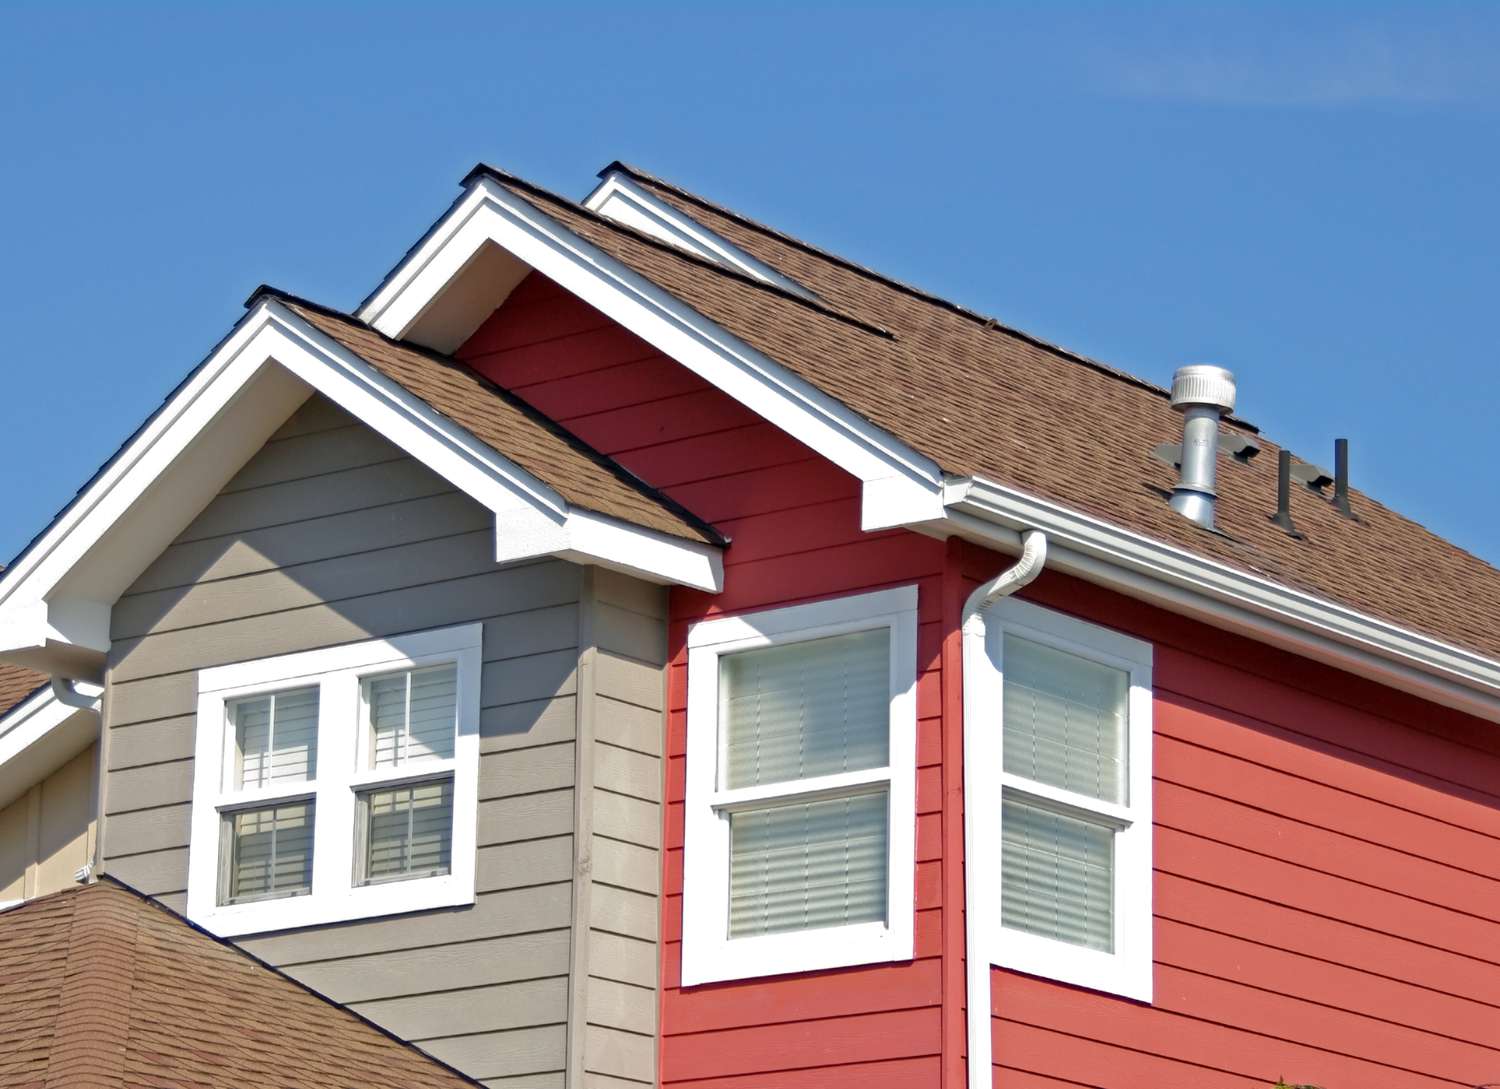
Installing soffit under eaves is an essential aspect of home renovation that not only enhances the aesthetic appeal of your property but also plays a crucial role in maintaining proper ventilation and protecting the eaves from moisture and weather damage. Soffit, typically made from vinyl or aluminum, is installed on the underside of the eaves, providing a clean and finished look to the overhangs of your roof.
Proper installation of soffit panels requires attention to detail and a systematic approach to ensure a seamless and durable finish. Whether you are a seasoned DIY enthusiast or a homeowner looking to embark on your first home improvement project, understanding the step-by-step process of installing soffit under eaves is essential for achieving professional results.
In this comprehensive guide, we will walk you through the essential steps and techniques required to successfully install soffit under eaves. From gathering the necessary tools and materials to measuring, cutting, and securing the soffit panels in place, we will cover each stage of the installation process in detail. Additionally, we will provide valuable insights into finishing touches and maintenance tips to help you prolong the lifespan of your newly installed soffit.
By following this guide, you will gain the knowledge and confidence needed to tackle this home renovation project with precision and efficiency. Whether you are looking to revitalize the appearance of your home or address underlying ventilation and protection concerns, installing soffit under eaves is a rewarding endeavor that can significantly enhance the overall functionality and curb appeal of your property. Let's dive into the step-by-step process and embark on this transformative journey of enhancing your home's exterior with professionally installed soffit panels.
Key Takeaways:
- Installing soffit under eaves enhances your home’s appearance and protects it from weather damage. Follow the step-by-step guide to achieve professional results and improve your property’s curb appeal.
- Properly maintaining soffit panels is crucial for long-term durability. Add finishing touches like trim and sealant, and implement regular cleaning and ventilation maintenance to preserve the soffit’s functionality and visual appeal.
Read more: How To Install Soffit Under A Porch
Step 1: Gather Necessary Tools and Materials
Before embarking on the installation of soffit under eaves, it is essential to gather all the necessary tools and materials to ensure a smooth and efficient process. Here's a comprehensive list of items you will need:
Tools:
- Measuring Tape: Accurate measurements are crucial for cutting soffit panels to the correct size.
- Utility Knife: Used for cutting and trimming soffit panels to fit the dimensions of the eaves.
- Caulking Gun: Essential for applying sealant to ensure a watertight installation.
- Ladder: A sturdy ladder is necessary for accessing the eaves and working at elevated heights safely.
- Safety Goggles and Gloves: Personal protective equipment to safeguard against debris and sharp edges during the installation process.
- Screwdriver or Nail Gun: Depending on the chosen fastening method, a screwdriver or nail gun will be required for securing the soffit panels in place.
- Soffit Ventilation Covers: If incorporating ventilation into the soffit design, ventilation covers are essential for maintaining proper airflow.
Materials:
- Soffit Panels: Available in various materials such as vinyl, aluminum, or wood, soffit panels form the primary surface of the underside of the eaves.
- Soffit Trim: Necessary for finishing the edges and creating a polished look where the soffit meets the walls or fascia.
- Soffit Nails or Screws: Depending on the type of soffit panels, appropriate fasteners will be required to secure the panels in place.
- Sealant: Weather-resistant sealant is essential for sealing joints and edges to prevent water infiltration.
- Ventilation Strips: If incorporating ventilation, ventilation strips are necessary to maintain proper airflow and prevent moisture buildup in the attic space.
By ensuring that you have all the required tools and materials at your disposal, you can streamline the installation process and minimize interruptions. Additionally, having the necessary items on hand allows for greater precision and attention to detail, ultimately contributing to a professional and long-lasting installation of soffit under eaves.
Step 2: Measure and Cut Soffit Panels
Accurate measurements and precise cuts are fundamental to the successful installation of soffit panels under eaves. Before cutting the soffit panels, it is crucial to measure the dimensions of the eaves meticulously. Begin by using a measuring tape to determine the length and width of the areas where the soffit will be installed. Take multiple measurements to ensure consistency and account for any variations in the dimensions of the eaves.
Once the measurements are recorded, transfer the dimensions to the soffit panels, marking the cutting lines with a pencil or marker. When marking the panels, it is essential to consider any necessary allowances for expansion and contraction, especially when working with vinyl or aluminum soffit materials. These allowances will prevent the panels from buckling or warping due to temperature changes.
After marking the cutting lines, use a sharp utility knife to carefully cut the soffit panels to the required dimensions. When cutting the panels, ensure that the blade is sharp to achieve clean and precise cuts without causing damage to the material. Additionally, support the panels adequately to prevent bending or flexing during the cutting process, which can result in uneven or jagged edges.
In cases where intricate cuts or angles are required to fit the soffit panels around architectural features or corners, consider using a miter saw or snips designed for cutting metal panels. These specialized tools enable precise and angled cuts, allowing the soffit panels to seamlessly conform to the unique contours of the eaves.
Throughout the cutting process, prioritize safety by wearing protective gloves and ensuring a stable work surface. By meticulously measuring and cutting the soffit panels to fit the dimensions of the eaves, you lay the foundation for a seamless and visually appealing installation. The precision and attention to detail during this stage contribute to the overall professional finish of the soffit under eaves, enhancing both the aesthetic and functional aspects of your home's exterior.
By following these steps, you can ensure that the soffit panels are tailored to the specific dimensions of the eaves, setting the stage for a successful and visually appealing installation.
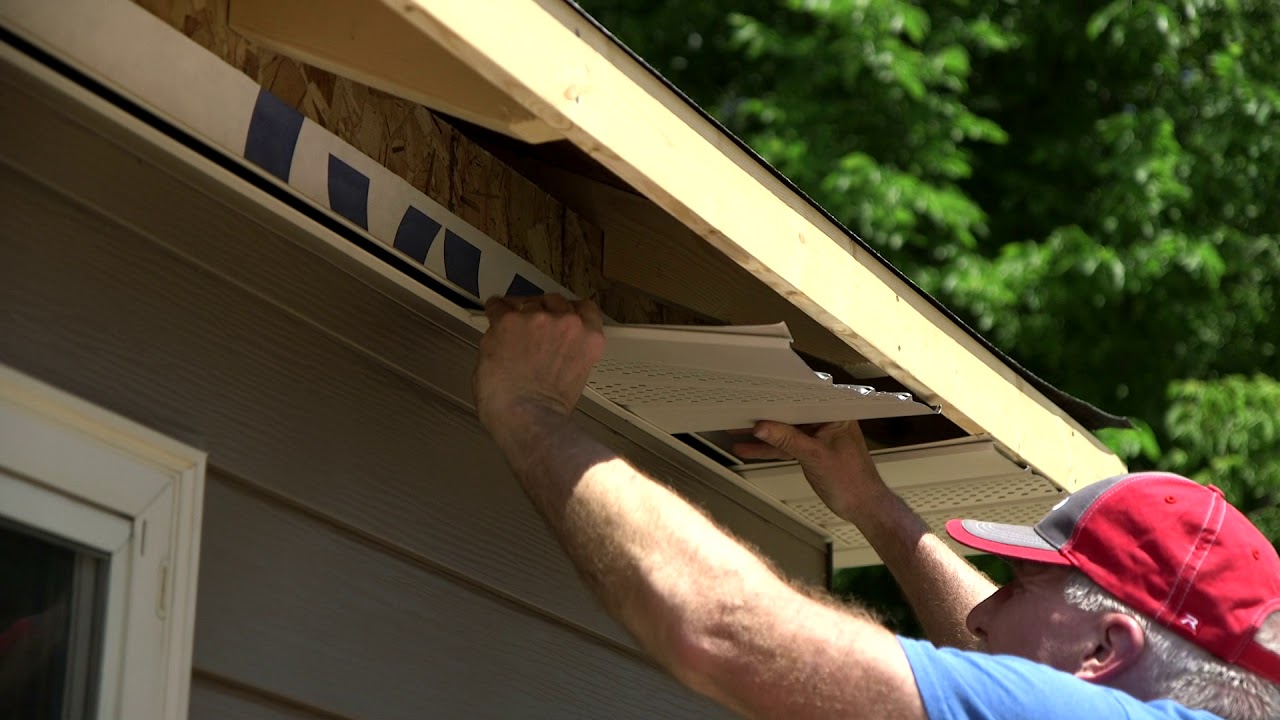
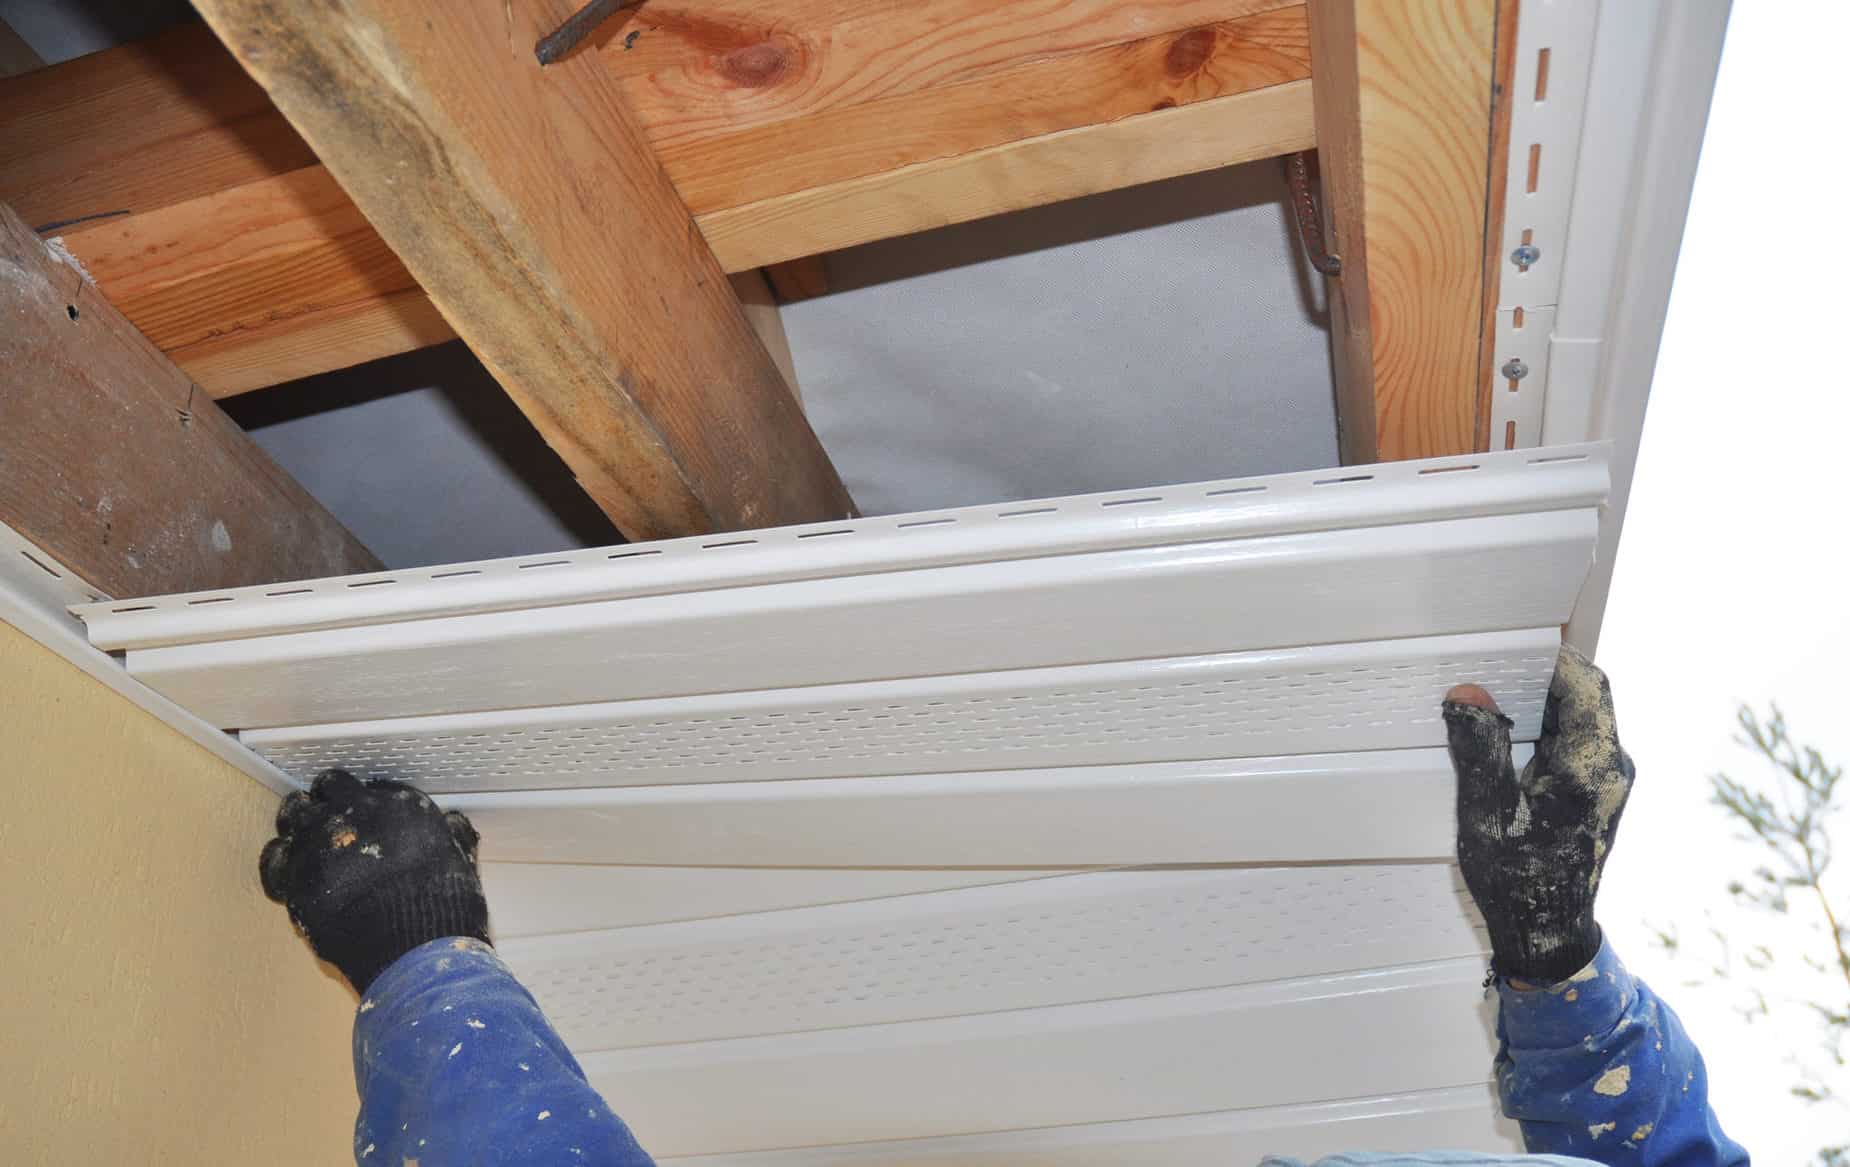
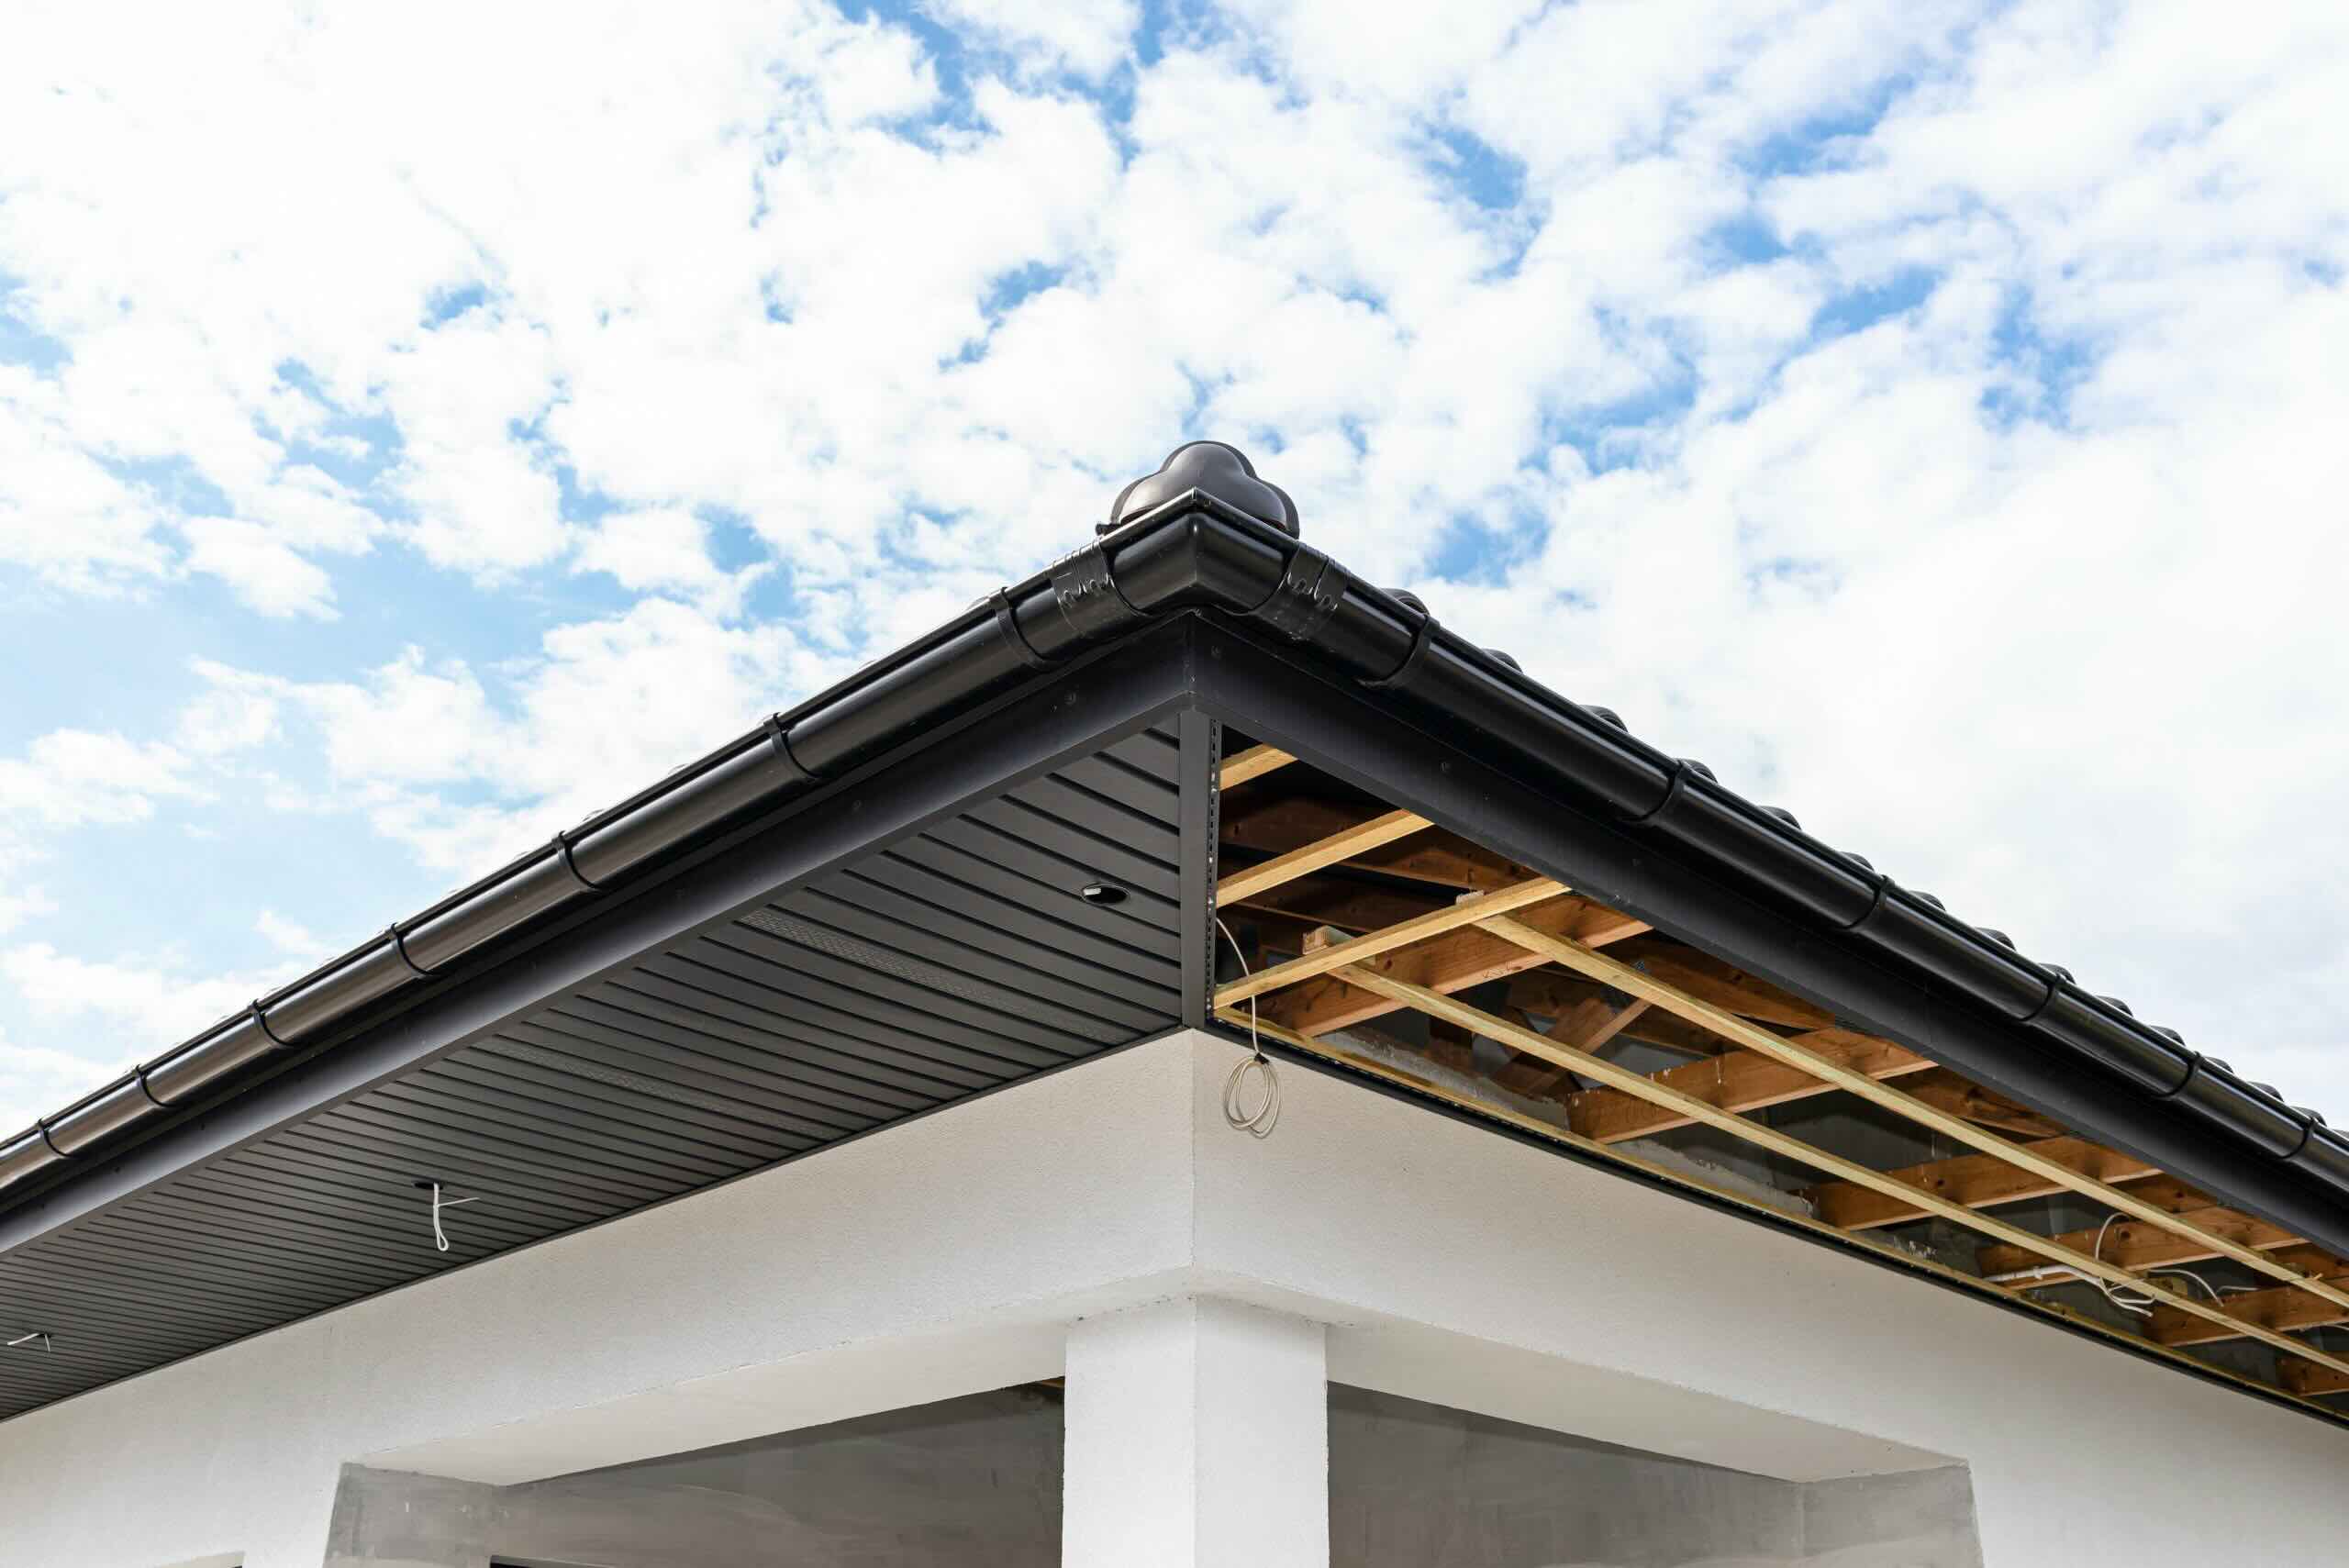
Step 3: Install Soffit Panels
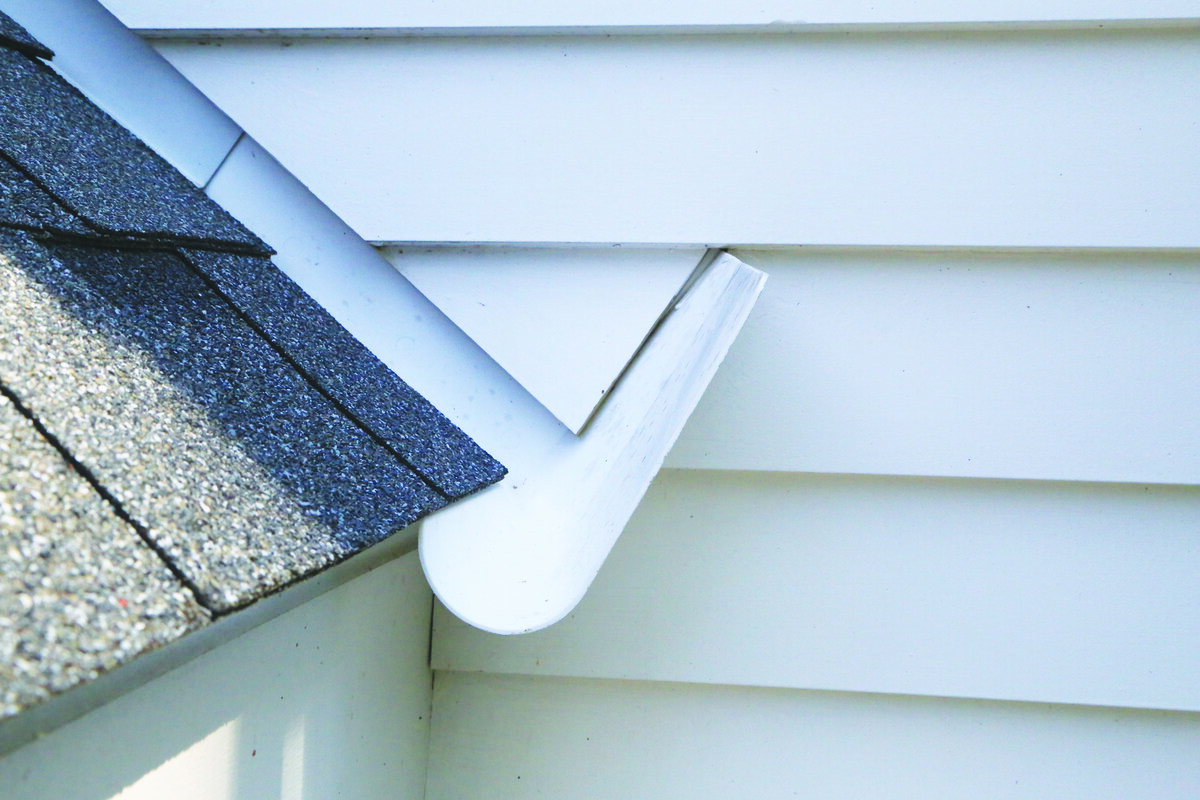
With the soffit panels accurately measured and cut to fit the dimensions of the eaves, the next crucial step is the installation process. Begin by positioning the first soffit panel at one end of the eaves, ensuring that it aligns flush with the underside of the roof overhang. Depending on the specific design of the soffit panels, they may feature interlocking edges or require individual fastening. If interlocking panels are being used, carefully engage the edges to create a seamless and secure connection.
When securing the soffit panels in place, it is essential to follow the manufacturer's guidelines regarding the recommended fastening method. This typically involves using soffit nails or screws to affix the panels to the underlying structure of the eaves. Ensure that the fasteners are driven in at regular intervals, maintaining a uniform and secure attachment of the soffit panels.
As you progress along the length of the eaves, continue positioning and securing the soffit panels, ensuring that each panel fits snugly against the preceding one. Pay close attention to alignment and spacing, as this will contribute to a visually pleasing and structurally sound installation. If incorporating ventilation into the soffit design, ensure that the ventilation strips or covers are installed seamlessly within the soffit panels to facilitate proper airflow.
In cases where the eaves feature corners or angles, take extra care to cut and fit the soffit panels accurately to maintain a cohesive and professional appearance. Utilize the appropriate cutting tools to achieve precise angles and ensure that the panels seamlessly conform to the unique contours of the eaves.
Throughout the installation process, periodically step back to assess the visual alignment and overall consistency of the soffit panels. This allows for adjustments to be made as needed, ensuring that the panels are installed with precision and attention to detail.
By methodically installing the soffit panels with meticulous attention to alignment, fastening, and integration of ventilation components, you are laying the groundwork for a visually striking and functionally effective soffit under the eaves. The installation process serves as a pivotal stage in transforming the exterior of your home, enhancing both its aesthetic appeal and structural integrity.
As you complete the installation of the soffit panels, you are one step closer to achieving a professionally executed home renovation project that not only elevates the visual allure of your property but also contributes to its long-term durability and weather resistance.
Step 4: Secure Soffit Panels in Place
Once the soffit panels are positioned and aligned along the eaves, the next critical phase of the installation process involves securely fastening the panels in place. Properly securing the soffit panels not only ensures a visually seamless finish but also contributes to the structural integrity and long-term durability of the installation.
When securing the soffit panels, it is essential to adhere to the manufacturer's guidelines regarding the recommended fastening method. Depending on the type of soffit panels and the underlying structure of the eaves, the appropriate fasteners, such as soffit nails or screws, should be utilized. These fasteners are typically driven through the panels and into the eaves' framework at regular intervals to create a secure attachment.
The spacing of the fasteners plays a crucial role in maintaining the stability and uniformity of the soffit installation. By following the manufacturer's recommendations for the placement of fasteners, you ensure that the panels are adequately supported and resistant to potential shifting or displacement over time. Additionally, consistent spacing contributes to a professional and polished appearance, reflecting attention to detail and precision in the installation process.
As you secure the soffit panels in place, it is important to maintain a level alignment and ensure that the panels are flush with the underside of the eaves. This meticulous approach not only enhances the visual appeal of the installation but also prevents potential issues such as sagging or uneven surfaces. By systematically fastening the panels with care and precision, you create a cohesive and visually appealing soffit under the eaves that complements the overall aesthetic of your home's exterior.
In cases where the soffit design incorporates ventilation components, such as ventilation strips or covers, it is essential to integrate these elements seamlessly into the installation. Properly securing the ventilation components within the soffit panels ensures that adequate airflow is maintained, contributing to the overall ventilation and moisture control of the attic space.
By methodically securing the soffit panels in place with meticulous attention to the recommended fastening method and alignment, you establish a foundation for a durable, visually appealing, and professionally executed installation. This stage of the process is integral to the overall success of the soffit installation, as it directly impacts the longevity and performance of the soffit under the eaves.
As you complete the securement of the soffit panels, you are one step closer to achieving a transformative enhancement of your home's exterior, characterized by a harmonious blend of functionality and aesthetic appeal.
Step 5: Finishing Touches and Maintenance Tips
With the installation of the soffit panels under the eaves successfully completed, attention turns to the final touches that elevate the overall aesthetic and functionality of the newly installed soffit. Additionally, incorporating maintenance tips ensures the longevity and optimal performance of the soffit, contributing to the sustained appeal and protection of your home's exterior.
Soffit Trim and Edging
To achieve a polished and seamless appearance, the addition of soffit trim and edging is essential. Soffit trim serves to neatly finish the edges of the soffit panels, creating a cohesive transition where the soffit meets the walls or fascia. By carefully installing the trim, you enhance the visual appeal of the soffit installation while providing a protective barrier against moisture and debris infiltration.
Sealant Application
Applying weather-resistant sealant to the joints and edges of the soffit panels is a critical step in safeguarding the installation against water penetration. Sealant serves as a protective barrier, preventing moisture from seeping into the underlying structure and compromising the integrity of the soffit. Regular inspection and maintenance of the sealant ensure that it remains effective in preserving the soffit's durability and weather resistance.
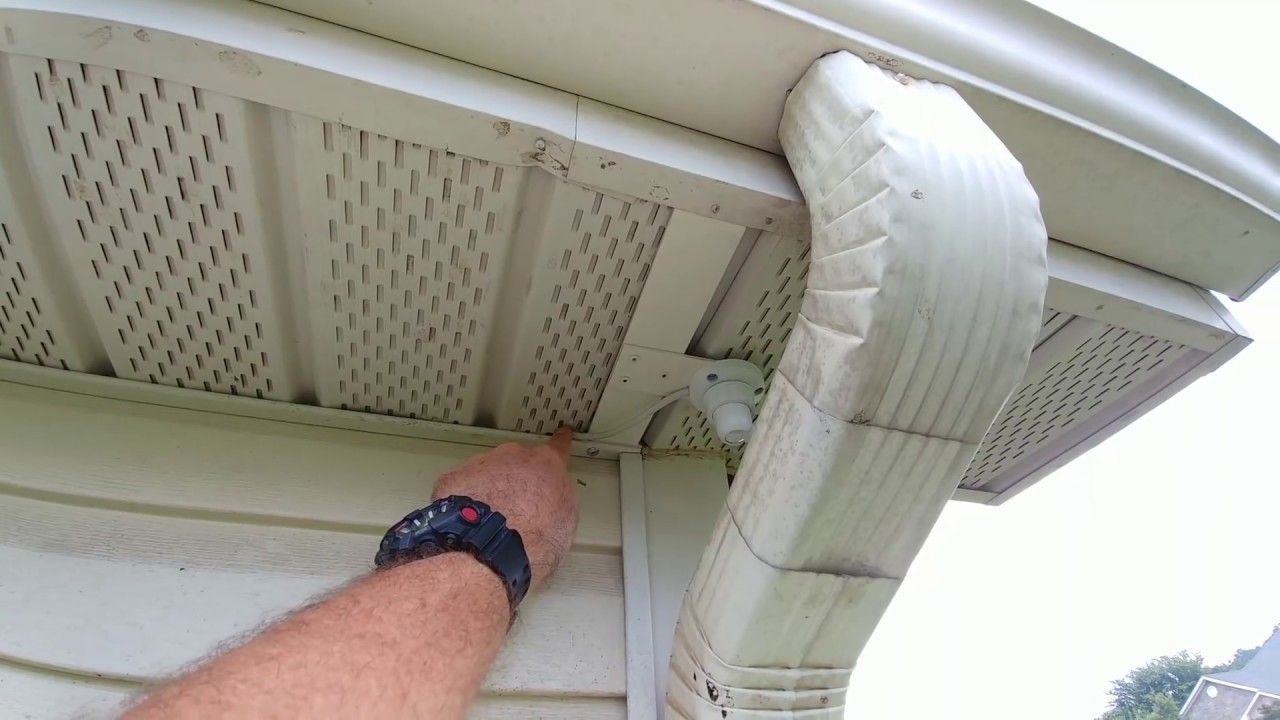
Ventilation Maintenance
If the soffit design incorporates ventilation components, such as ventilation strips or covers, regular maintenance is essential to uphold proper airflow and moisture control in the attic space. Periodically inspect and clear any debris or obstructions that may impede the ventilation channels, ensuring that the soffit continues to facilitate adequate air circulation and prevent moisture buildup.
Cleaning and Inspection
Routine cleaning and inspection of the soffit panels contribute to their longevity and visual appeal. Remove accumulated dirt, debris, and mildew from the soffit surface using a gentle cleaning solution and a soft brush or cloth. Regular inspections allow for the early detection of any signs of damage or deterioration, enabling prompt maintenance and preservation of the soffit's pristine condition.
Professional Maintenance Services
For comprehensive maintenance and periodic assessments of the soffit's condition, consider engaging professional maintenance services. Experienced professionals can conduct thorough inspections, address any underlying issues, and provide expert recommendations for preserving the soffit's integrity and appearance over time.
By attending to these finishing touches and implementing proactive maintenance practices, you ensure that the newly installed soffit under the eaves remains a resilient and visually captivating feature of your home's exterior. Embracing these maintenance tips not only prolongs the lifespan of the soffit but also contributes to the overall protection and allure of your property.
Frequently Asked Questions about How To Install Soffit Under Eaves
Was this page helpful?
At Storables.com, we guarantee accurate and reliable information. Our content, validated by Expert Board Contributors, is crafted following stringent Editorial Policies. We're committed to providing you with well-researched, expert-backed insights for all your informational needs.


0 thoughts on “How To Install Soffit Under Eaves”