Articles
How To Lay Indoor/Outdoor Carpet
Modified: February 25, 2024
Looking for articles on how to lay indoor/outdoor carpet? Find step-by-step guides and expert tips to help you with your carpet installation project.
(Many of the links in this article redirect to a specific reviewed product. Your purchase of these products through affiliate links helps to generate commission for Storables.com, at no extra cost. Learn more)
Introduction
When it comes to enhancing the comfort and aesthetics of your indoor or outdoor space, laying carpet can be a game-changer. Whether you want to revamp your living room or create a cozy outdoor patio area, installing indoor/outdoor carpet is a fantastic option.
This comprehensive guide will walk you through the step-by-step process of laying indoor/outdoor carpet. From preparing the surface to trimming excess carpet, we’ll cover everything you need to know to achieve professional-looking results.
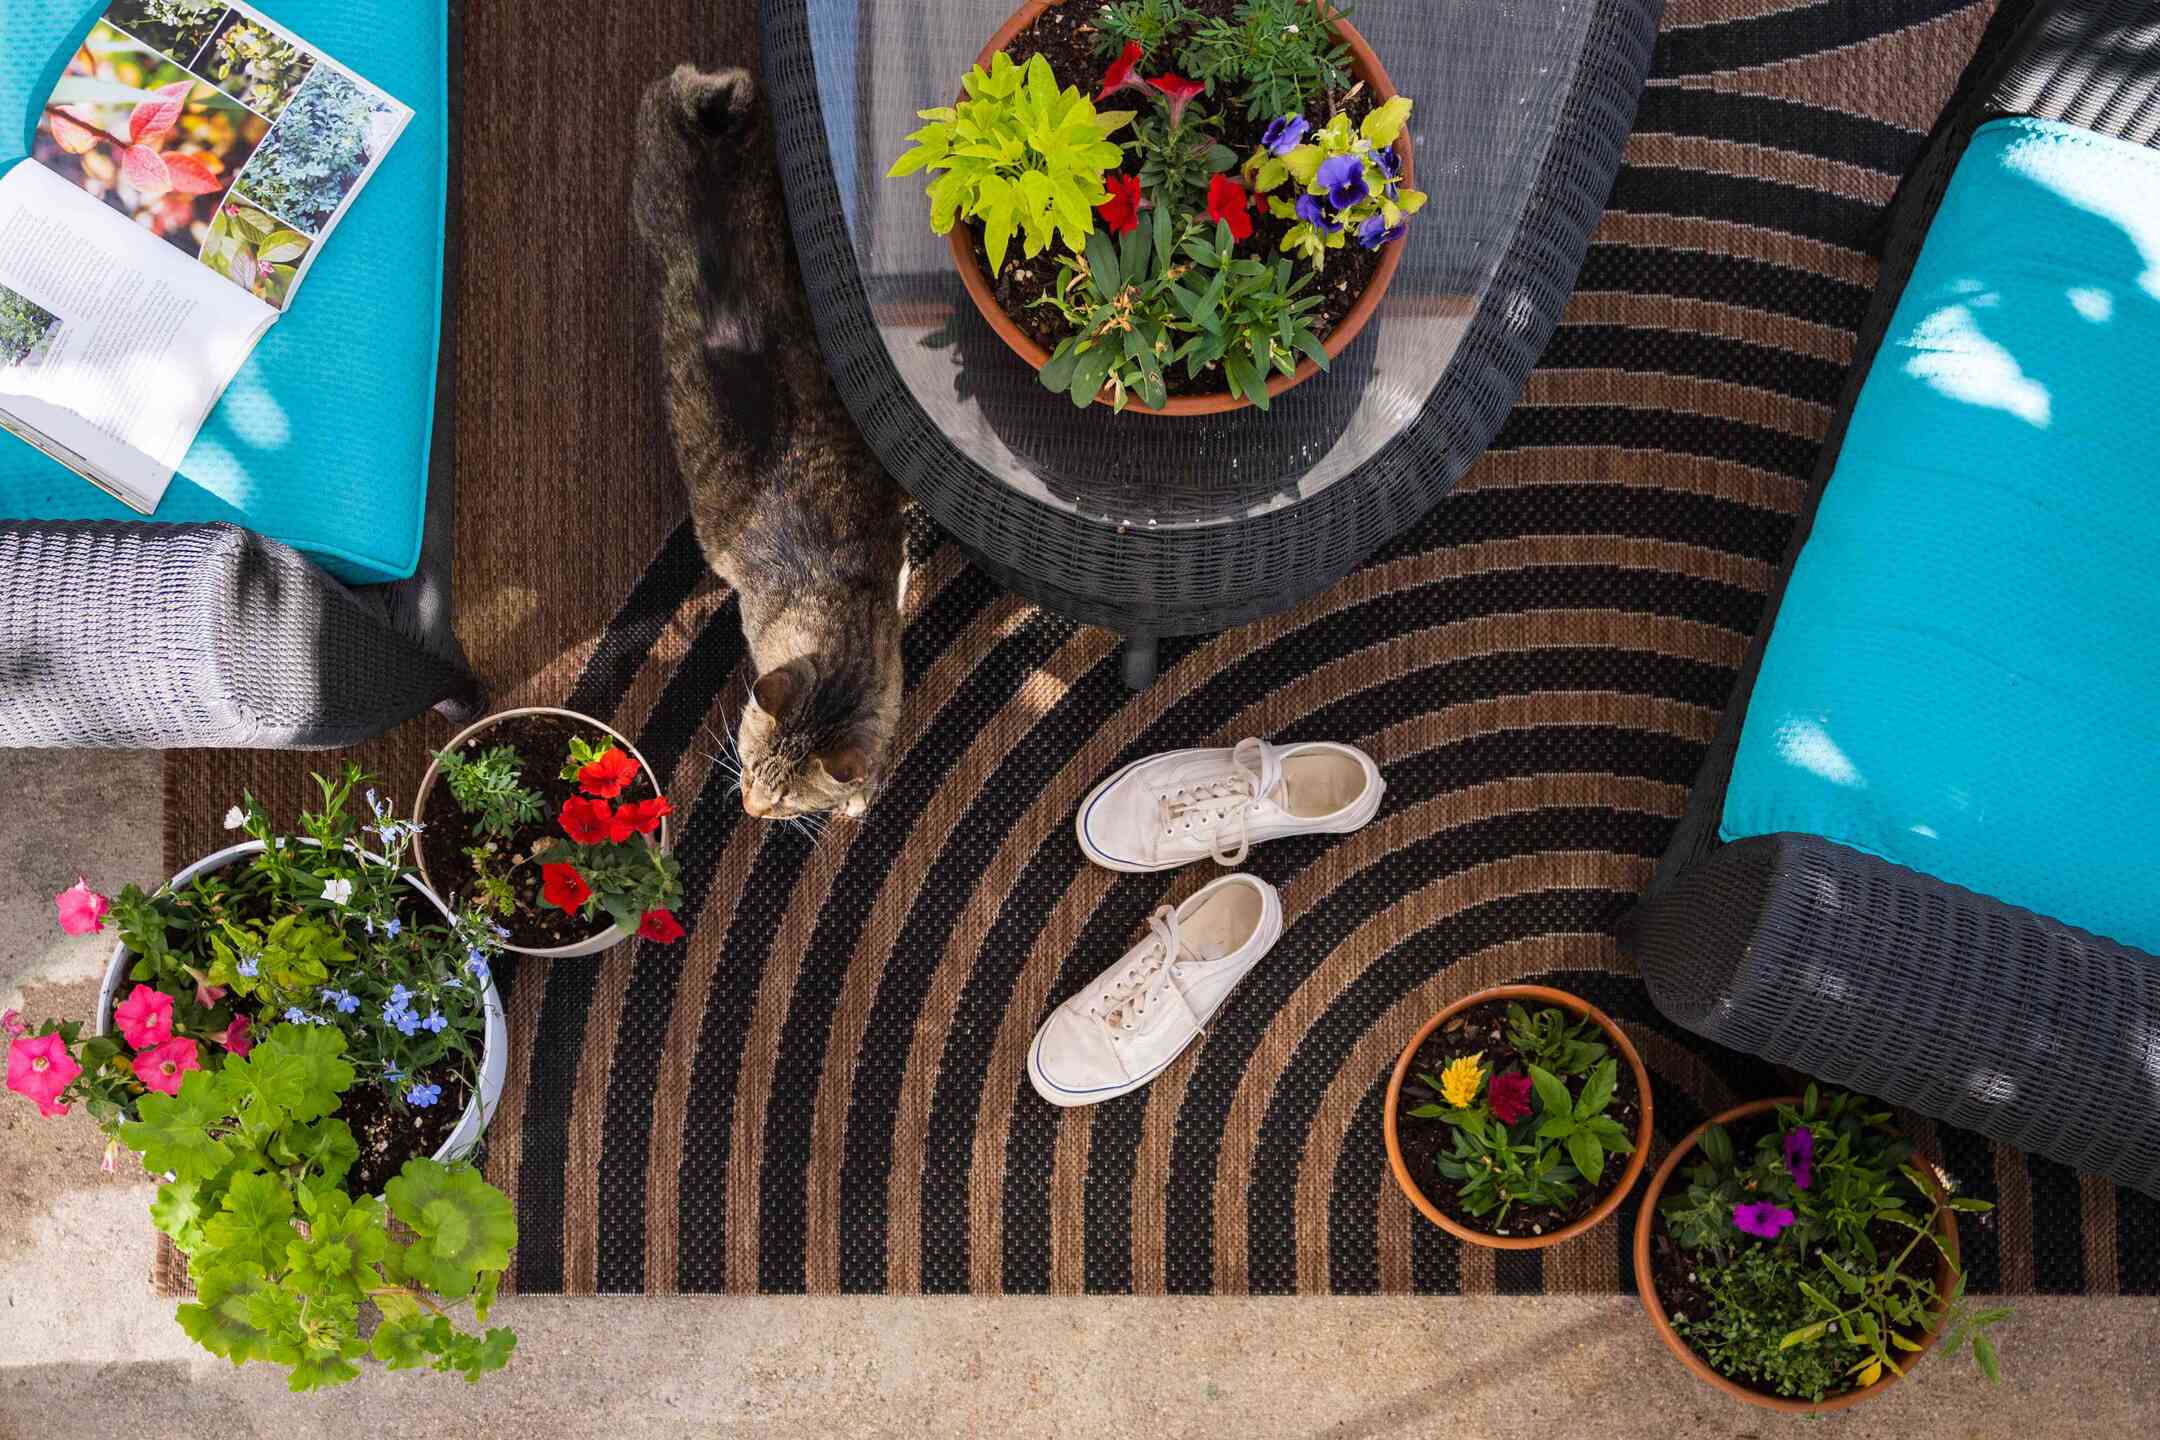
Indoor/outdoor carpet is designed to withstand heavy foot traffic, resist stains, and withstand exposure to various weather conditions. It offers a versatile and durable solution for both indoor and outdoor applications, making it an excellent choice for high-traffic areas like entryways, porches, basements, and decks.
Before you start, it’s important to gather the necessary tools and materials for the job. Here’s a list of what you’ll need:
- Indoor/outdoor carpet
- Carpet adhesive
- Measuring tape
- Straight edge
- Utility knife
- Roller or trowel
- Scissors
- Stiff broom or brush
- Bucket
- Clean cloth
Now that you’re equipped with the necessary tools, let’s dive into the step-by-step process of laying indoor/outdoor carpet.
Key Takeaways:
- Proper surface preparation, precise measurements, and careful adhesive application are crucial for achieving a professional-looking indoor/outdoor carpet installation. Attention to detail is key for a seamless and durable result.
- Allowing the carpet to settle, thorough clean-up, and precise trimming of excess carpet are essential final steps for a polished and long-lasting indoor/outdoor carpet installation. Patience and attention to detail pay off for a professional finish.
Read more: How To Lay Carpet
Step 1: Prepare the Surface
Before laying indoor/outdoor carpet, it’s crucial to ensure that the surface is clean, smooth, and free from any debris. Proper preparation of the surface is essential for achieving a long-lasting and professional-looking installation.
Here’s how you can prepare the surface:
- Clean the area: Sweep or vacuum the surface to remove any dirt, dust, or loose particles. For outdoor applications, you may need to pressure wash the area to remove stubborn stains or grime.
- Repair any damage: If you notice any cracks, holes, or unevenness on the surface, it’s important to patch or repair them before proceeding. Fill in any gaps or cracks with a suitable patching compound and smooth it out using a trowel.
- Smooth out the surface: Using a straight edge or level, check for any high or low spots on the surface. If you find any uneven areas, you may need to use a self-leveling compound to create a smooth and even surface. Follow the manufacturer’s instructions for mixing and applying the compound.
- Allow the surface to dry: Depending on the type of patching compound or self-leveling compound used, the drying time may vary. It’s crucial to allow the surface to fully dry before moving on to the next steps. Refer to the manufacturer’s instructions for the recommended drying time.
By taking the time to properly prepare the surface, you’ll ensure a solid foundation for the carpet installation. A clean and smooth surface will not only improve the overall appearance of the carpet but also enhance its durability and longevity.
Step 2: Measure and Cut the Carpet
Accurate measurements are essential for a successful carpet installation. Before cutting the carpet, ensure that you have the correct measurements to avoid any wastage or ill-fitting pieces.
Follow these steps to measure and cut the carpet:
- Measure the area: Use a measuring tape to determine the length and width of the area where you’ll be installing the carpet. Be sure to measure from the longest and widest points to account for any irregularities in the shape of the space.
- Add extra for trimming: To allow for proper fitting and trimming, it’s recommended to add a few inches to each side of the measurements. This extra margin will give you flexibility during installation.
- Roll out the carpet: Roll out the carpet in a flat and open space, ensuring that it is free from any wrinkles or creases.
- Mark the measurements: Using a straight edge and a marker or chalk, mark the measurements on the backside of the carpet. Double-check the measurements to ensure accuracy.
- Cut the carpet: With a sharp utility knife, carefully cut along the marked lines to separate the carpet from the roll. Take your time and make precise cuts to achieve clean edges.
It’s important to note that if you are working with a patterned carpet, align the pattern correctly according to the measurements to ensure a seamless and aesthetically pleasing installation.
Once the carpet is cut, it’s ready to be installed. In the next step, we’ll discuss how to apply the adhesive and begin laying the carpet.
Step 3: Apply Adhesive
To ensure that your indoor/outdoor carpet stays firmly in place, it’s crucial to apply the appropriate adhesive. The adhesive creates a bond between the carpet and the surface, providing stability and preventing any shifting or movement.
Follow these steps to apply adhesive:
- Choose the right adhesive: Select an adhesive that is specifically designed for indoor/outdoor carpet installation. Consult the manufacturer’s instructions or speak with a professional to determine the most suitable adhesive for your project.
- Prepare the adhesive: Before applying the adhesive, thoroughly mix it according to the manufacturer’s instructions. Follow any recommended steps for activating or preparing the adhesive for use.
- Apply the adhesive: Using a roller or trowel, apply a thin and even layer of adhesive onto the prepared surface. Start in a corner and work your way towards the center of the area, ensuring full coverage. Avoid applying excess adhesive as it can impact the final result.
It’s important to note that if you’re installing carpet tiles, you may need to apply the adhesive directly to the backside of each tile, following the manufacturer’s instructions.
Once the adhesive is applied, allow it to set according to the manufacturer’s instructions. This typically involves allowing a specific amount of time for the adhesive to become tacky before proceeding to the next steps.
In the next step, we’ll discuss how to begin laying the carpet onto the adhesive-covered surface.
Step 4: Begin Laying the Carpet
Now that the adhesive is applied and ready, it’s time to start laying the indoor/outdoor carpet onto the surface. This step requires precision and attention to detail to ensure a smooth installation.
Follow these steps to begin laying the carpet:
- Start in a corner: Begin in one corner of the room or area where you’re installing the carpet. This corner will act as your starting point.
- Align the carpet: Carefully align the edge of the carpet with the corresponding edge of the wall or starting point. Make sure the carpet is straight and centered.
- Press down the carpet: Gently press the carpet onto the adhesive, starting from the corner where you began. Use your hands or a carpet roller to smooth out any wrinkles or air bubbles as you go. Continue pressing and smoothing the carpet as you gradually work your way across the area.
- Work in small sections: For larger areas, it’s recommended to work in small sections rather than attempting to lay the entire carpet at once. This will make it easier to manage and ensure proper positioning and alignment.
- Adjust as needed: If necessary, make slight adjustments to the position or alignment of the carpet as you go. This will help you achieve a seamless installation.
Continue laying the carpet in the above manner until the entire area is covered. Take your time and pay attention to the details to ensure a professional-looking result.
In the next step, we’ll discuss how to smooth out the carpet for a polished appearance.
When laying indoor/outdoor carpet, make sure to properly prepare the surface by cleaning and smoothing it out. Use a strong adhesive and secure the edges to prevent lifting. Finally, consider using a sealer to protect the carpet from moisture and stains.
Read more: How To Lay Down Carpet
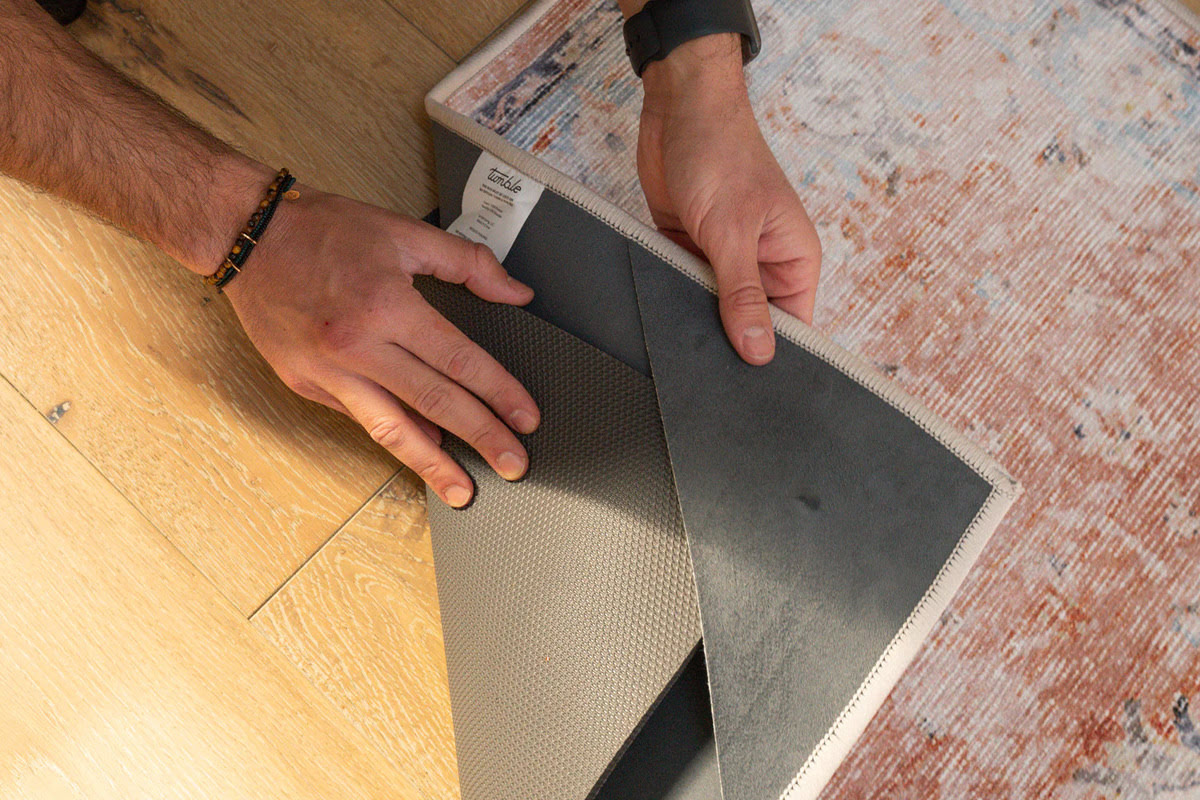
Step 5: Smooth Out the Carpet
After laying the indoor/outdoor carpet onto the adhesive-covered surface, it’s important to smooth it out to ensure a neat and polished appearance. This step will help eliminate any wrinkles or uneven areas, resulting in a professionally installed carpet.
Follow these steps to smooth out the carpet:
- Use a carpet roller: A carpet roller is a tool specifically designed to smooth out carpet and ensure proper adhesion. Starting from the center of the carpet, use the roller to exert even pressure and roll it towards the edges. This will help ensure a strong bond between the carpet and the adhesive.
- Smooth with your hands: In addition to using the carpet roller, you can also use your hands to gently smooth out any remaining wrinkles or uneven areas. Start from the center and work your way towards the edges, applying even pressure to flatten the carpet.
- Check for gaps or lifted edges: As you smooth out the carpet, keep an eye out for any gaps or lifted edges. If you notice any, use your fingers or the carpet roller to press down and secure the edges firmly onto the adhesive.
- Inspect the carpet for air bubbles: Carefully inspect the carpet for any air bubbles that may have formed during the installation process. If you spot any, use a utility knife to make a small incision in the affected area. Gently press down on the carpet to allow the air to escape, then smooth out the area again.
Take your time during this step to ensure that all wrinkles, gaps, and air bubbles are eliminated. The smoother and more even the carpet, the more professional and visually pleasing the overall result will be.
Next, we’ll move on to trimming any excess carpet for a clean and finished look.
Step 6: Trim Excess Carpet
Once you have smoothed out the indoor/outdoor carpet and achieved a neat and even installation, it’s time to trim any excess carpet to give it a clean and finished look. Trimming the edges will give your carpeting a polished appearance and ensure that it fits perfectly within the designated area.
Follow these steps to trim excess carpet:
- Measure and mark: Use a measuring tape to determine how much excess carpet needs to be trimmed. Make sure to measure each side of the carpet individually for accuracy.
- Make a straight cut: With a sharp utility knife, cut along the marked line to remove the excess carpet. Ensure that the knife is angled slightly away from the wall or edge to create a clean and flush cut.
- Dispose of the trimmed carpet: Gather the trimmed pieces of carpet and dispose of them properly. If feasible, consider recycling or repurposing the excess carpet to minimize waste.
When trimming the carpet, take your time and make precise cuts to achieve the desired result. It’s important to be cautious and avoid cutting too much, as it can lead to gaps or exposed edges.
Once you have finished trimming the excess carpet, take a moment to step back and admire your work. You should now have a beautifully installed indoor/outdoor carpet that fits seamlessly within your space.
Now it’s time to allow the carpet to settle in and complete the final steps of the installation process.
Step 7: Allow Carpet to Settle
After you have laid and trimmed the indoor/outdoor carpet, it’s important to allow it some time to settle. This step in the installation process ensures that the carpet adheres properly to the adhesive and adjusts to its new environment.
Here’s what you should do to allow the carpet to settle:
- Avoid walking on the carpet: For the first 24 to 48 hours after installation, try to minimize foot traffic on the carpeted area. This will allow the adhesive to fully cure and the carpet to adhere firmly to the surface.
- Avoid heavy furniture placement: If possible, avoid heavy furniture or objects on the carpeted area during the settling period. The weight of these items can create indentations or unevenness in the carpet.
- Keep the area well-ventilated: Proper ventilation is essential for the carpet to properly settle. Open windows or use fans to ensure good air circulation, especially if you have used a carpet adhesive that requires air curing.
- Follow manufacturer’s recommendations: Refer to the manufacturer’s instructions or guidelines for the specific indoor/outdoor carpet and adhesive that you have used. They may have additional instructions or recommendations for the settling period.
By allowing the carpet to settle, you give it the opportunity to fully adhere to the surface, minimizing the risk of any shifting or movement. It ensures a stable and long-lasting installation.
Once the settling period is complete, you can confidently enjoy your newly installed indoor/outdoor carpet.
Lastly, let’s discuss the final step: cleaning up after the installation.
Step 8: Clean Up
After successfully installing your indoor/outdoor carpet, it’s important to properly clean up the area to ensure a tidy and polished final result. This will enhance the overall appearance and longevity of your carpet.
Here are some key steps to follow for a thorough clean-up:
- Remove excess adhesive: Using a clean cloth or sponge, carefully wipe away any excess adhesive that may have seeped out during the installation process. It’s important to remove this before it dries and hardens.
- Clean the carpet: Give the carpet a good cleaning to remove any dirt, dust, or debris that may have accumulated during the installation. You can use a vacuum cleaner to remove loose particles and then spot clean any stains or spills with a suitable carpet cleaner.
- Sweep or vacuum the surrounding area: Don’t forget to sweep or vacuum the surrounding floor or outdoor space to remove any remnants of dust, carpet fibers, or debris from the installation process.
- Dispose of waste: Dispose of any leftover carpet scraps, packaging materials, or other waste generated during the installation process responsibly. Recycle or discard them according to your local regulations.
Taking the time to properly clean up after the installation will leave you with a pristine and attractive indoor/outdoor carpet. It will also contribute to the overall cleanliness and comfort of your space.
Congratulations! You have completed the entire process of installing indoor/outdoor carpet. By following these steps, you have achieved a professional-looking and high-quality flooring solution.
Should you ever need to replace or reinstall the carpet in the future, you can refer back to this guide as a helpful reference.
Enjoy your newly installed indoor/outdoor carpet and the enhanced comfort and style it brings to your living space!
Read more: How To Lay A Carpet Pad
Conclusion
Congratulations! You have successfully learned how to lay indoor/outdoor carpet through a comprehensive step-by-step guide. By following these instructions, you can achieve a professional and visually appealing installation.
Installing indoor/outdoor carpet can greatly enhance the comfort and aesthetics of your space, whether it’s an outdoor patio, a basement, or a high-traffic area like an entryway. With the right tools, materials, and techniques, you can transform any space into a cozy and inviting environment.
Remember to carefully prepare the surface, accurately measure and cut the carpet, apply the appropriate adhesive, and lay the carpet with precision. Taking your time during each step and paying attention to detail will ensure a seamless and long-lasting installation.
Allow the carpet to settle and adhere properly, and take the necessary time for cleaning up the area after the installation. These final touches will contribute to the overall appearance and longevity of your indoor/outdoor carpet.
By following this guide, you have equipped yourself with the knowledge and skills to tackle your own indoor/outdoor carpet installation projects. You can create a comfortable and stylish space that reflects your personal style and preferences.
Remember to refer back to this guide as a helpful resource for future carpet installations or replacements. With this newfound expertise, you can confidently tackle any carpeting project and achieve professional-looking results.
Enjoy your newly laid indoor/outdoor carpet and the enhanced comfort and beauty it brings to your living space!
Frequently Asked Questions about How To Lay Indoor/Outdoor Carpet
Was this page helpful?
At Storables.com, we guarantee accurate and reliable information. Our content, validated by Expert Board Contributors, is crafted following stringent Editorial Policies. We're committed to providing you with well-researched, expert-backed insights for all your informational needs.