Home>Construction & Tools>Building Materials>How To Lay Brick Patio
Building Materials
How To Lay Brick Patio
Modified: February 18, 2024
Learn how to lay a brick patio with step-by-step instructions and tips for choosing the right building materials. Create a beautiful outdoor space with our expert guidance.
(Many of the links in this article redirect to a specific reviewed product. Your purchase of these products through affiliate links helps to generate commission for Storables.com, at no extra cost. Learn more)
Introduction
Are you dreaming of a charming outdoor space where you can relax, entertain, and soak up the sun's warmth? A brick patio might just be the perfect addition to your home. Not only does it add a touch of timeless elegance to your outdoor area, but it also provides a durable and low-maintenance surface for various activities.
Creating a brick patio is a rewarding project that allows you to unleash your creativity while adding value to your property. Whether you're a seasoned DIY enthusiast or a novice looking for a fulfilling challenge, building a brick patio can be an immensely satisfying endeavor. This comprehensive guide will walk you through the process, from meticulous planning to the final touches, ensuring that you're well-equipped to tackle this project with confidence.
So, roll up your sleeves, gather your tools, and let's embark on this exciting journey of transforming your outdoor space into a stunning brick patio that will be the envy of your neighborhood.
Key Takeaways:
- Planning and preparation are crucial for building a brick patio. Consider the location, size, local regulations, budget, and your skill level before starting the project.
- Building a brick patio involves meticulous steps, from gathering materials to laying the bricks and adding finishing touches. Attention to detail and careful planning will result in a beautiful and functional outdoor space.
Read more: How To Lay A Mortared Brick Patio
Planning and Preparation
Before diving into the physical labor of laying bricks, meticulous planning and thorough preparation are essential for a successful patio project. Here are the key steps to consider:
Determine the Patio Location and Size
First and foremost, decide where you want your patio to be located. Consider factors such as sunlight exposure, proximity to the house, and the natural flow of your outdoor space. Additionally, determine the size of the patio based on your intended use and available space.
Check Local Regulations
It’s crucial to check with local authorities or homeowner associations regarding any building codes, zoning regulations, or permits required for constructing a patio. Compliance with these regulations will save you from potential legal hassles in the future.
Create a Detailed Plan
Sketch out a detailed plan for your patio, including measurements, layout, and design. This will serve as a roadmap during the construction phase and help you visualize the end result.
Read more: How To Lay Brick
Assess Your Skill Level and Resources
Assess your DIY skills and the tools at your disposal. While building a brick patio is achievable for many enthusiasts, it’s essential to be realistic about your capabilities and seek professional assistance if needed.
Set a Budget
Establish a budget for your project, factoring in the cost of materials, tools, and any professional services you may require. Having a clear budget will guide your purchasing decisions and prevent overspending.
By meticulously planning and preparing for your brick patio project, you’ll lay a solid foundation for a smooth and successful construction process, setting the stage for the enjoyable tasks that lie ahead.
Gathering Materials
With your plan in place, it’s time to gather the essential materials and tools necessary for building your brick patio. Here’s a comprehensive list to ensure you have everything you need:
Bricks
The primary building blocks of your patio, bricks come in various materials, sizes, and colors. Choose a type of brick that complements your home’s aesthetic and suits your design preferences.
Read more: How To Lay Brick Pavers
Sand
Sand is a crucial component for creating a stable base and filling the gaps between bricks. Coarse sand is typically recommended for its excellent drainage properties and compaction capabilities.
Gravel
For proper drainage and stability, gravel serves as a foundational layer beneath the sand. It aids in preventing water accumulation and soil shifting, contributing to the longevity of your patio.
Edging Material
Edging materials, such as plastic or metal paver restraints, are essential for containing the bricks and preventing them from shifting over time. These edging materials help maintain the structural integrity of the patio.
Landscape Fabric
Landscape fabric, also known as weed barrier, is used to inhibit weed growth between the gravel and sand layers, reducing maintenance efforts and preserving the patio’s appearance.
Read more: How To Lay A Cobblestone Patio
Tools
Ensure you have the necessary tools, including a shovel, wheelbarrow, tamper, level, and masonry saw. These tools will facilitate the excavation, leveling, and cutting of materials during the construction process.
Safety Gear
Don’t overlook the importance of safety gear. Equip yourself with gloves, safety glasses, and sturdy footwear to protect against potential hazards while working on the patio.
By gathering these materials and tools, you’ll be well-prepared to commence the physical construction of your brick patio, bringing you one step closer to enjoying your outdoor oasis.
Marking and Excavating the Area
With the materials in hand, it’s time to mark and excavate the area where your brick patio will take shape. This phase sets the stage for creating a stable foundation to support the patio’s structure.
Marking the Layout
Using stakes and string, mark the perimeter of the patio according to your planned dimensions. This visual guide will help you visualize the final shape and ensure the layout aligns with your initial design.
Read more: How To Lay Brick Floor
Excavation Process
Begin by excavating the marked area to a depth that accommodates the layers of gravel, sand, and bricks. Typically, a depth of around 8 inches is recommended to allow for proper compaction and drainage.
Leveling the Ground
Once the area is excavated, use a shovel and a rake to level the ground, ensuring it’s even and free of any obstructions. This step is crucial for creating a stable and uniform base for the patio.
Compacting the Soil
Using a tamper, compact the soil thoroughly to create a firm and stable foundation. Proper compaction minimizes the risk of settling and ensures the patio remains level over time.
Installing Edging Material
Place the edging material around the perimeter of the excavated area, securing it firmly to contain the base materials and provide a clear boundary for the patio.
By meticulously marking and excavating the area, you’ve established the groundwork for a resilient and long-lasting brick patio. The next steps will involve creating a sturdy base and laying the bricks, bringing your vision to life one step at a time.
Read more: How To Lay Brick For A Fireplace
Creating a Base
With the groundwork laid out, it’s time to focus on building a solid base that will provide stability and support for your brick patio. The base consists of layers of gravel and sand, carefully constructed to ensure proper drainage and prevent shifting over time.
Adding Gravel
Begin by adding a layer of gravel to the excavated area. This layer serves as the foundation for the patio, providing essential drainage and stability. Spread the gravel evenly and use a rake to level it, creating a uniform surface.
Compact the Gravel
Using a tamper, compact the gravel layer to enhance its stability and load-bearing capacity. Proper compaction minimizes the risk of settling and ensures a solid foundation for the subsequent layers.
Installing Landscape Fabric
Place a layer of landscape fabric over the compacted gravel. This fabric acts as a weed barrier, preventing weed growth and minimizing the potential for vegetation to disrupt the patio’s structure over time.
Read more: How To Lay Brick Walkway
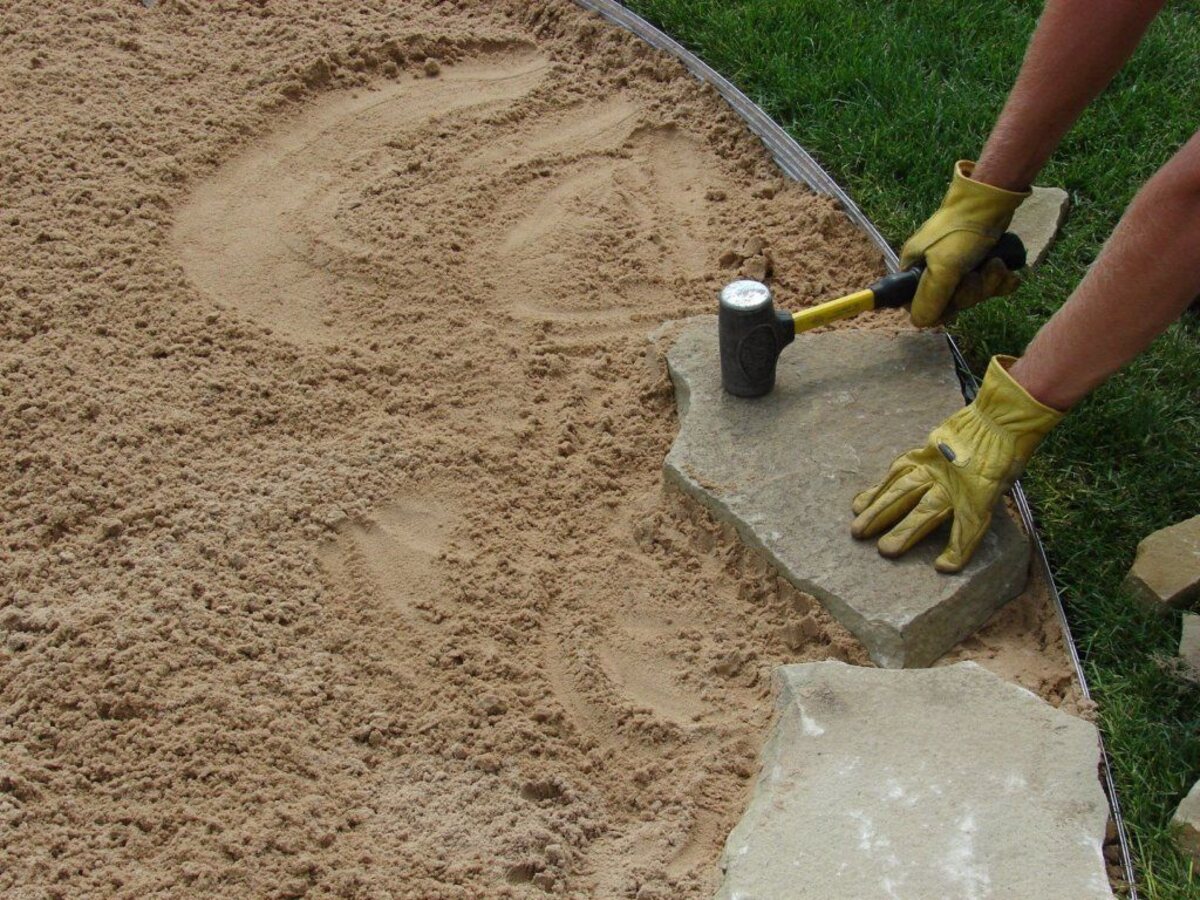
Adding Sand Layer
On top of the landscape fabric, add a layer of coarse sand. The sand provides a level surface for laying the bricks and allows for minor adjustments to achieve the desired patio elevation and slope for water drainage.
Leveling and Compacting the Sand
Using a screed board or a long, straight board, level the sand layer to ensure a uniform surface. Then, compact the sand with a tamper to create a stable and even base for the brick installation.
By meticulously constructing a sturdy base, you’ve set the stage for the exciting phase of laying the bricks. The carefully prepared foundation will ensure the longevity and structural integrity of your beautiful brick patio.
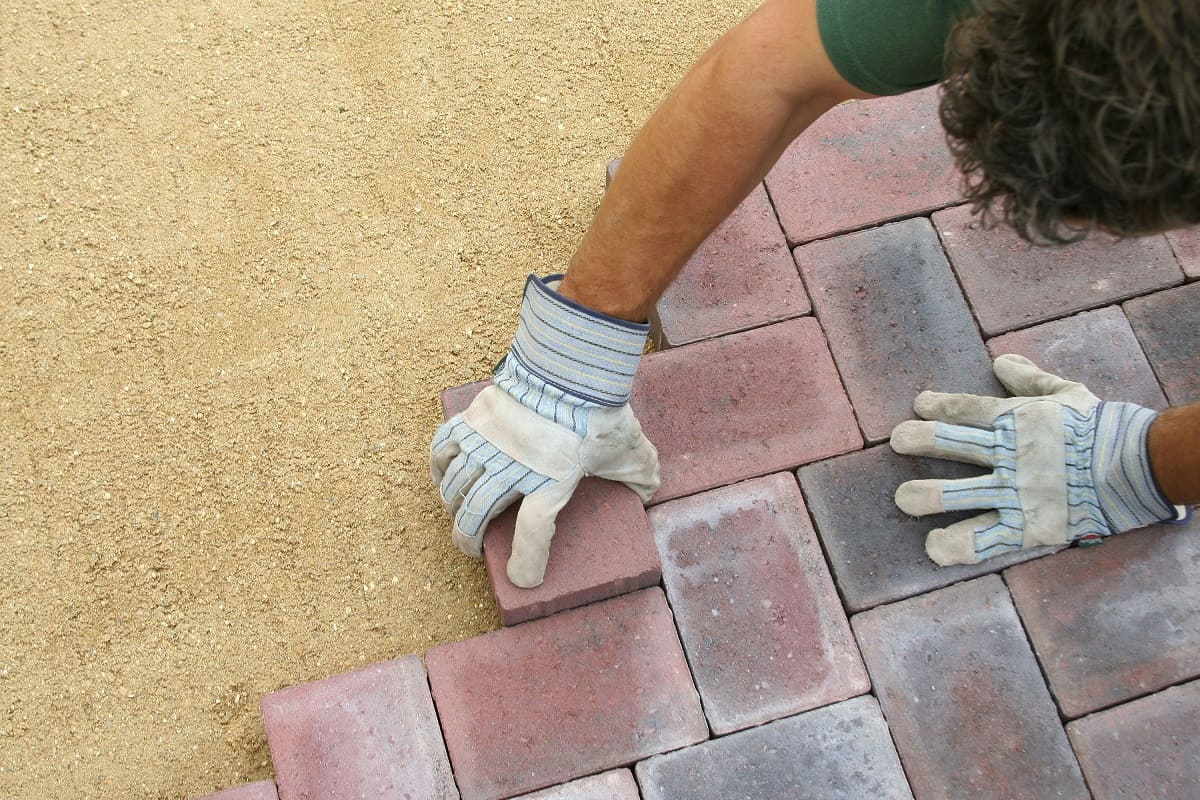
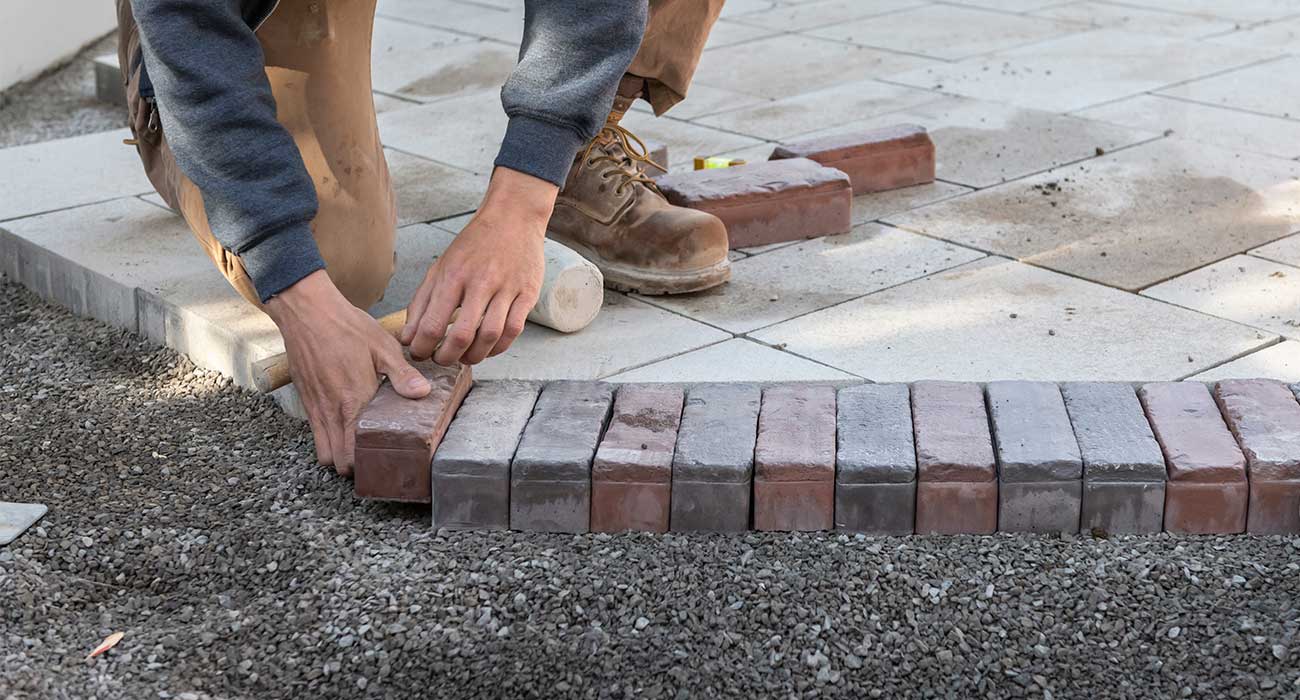
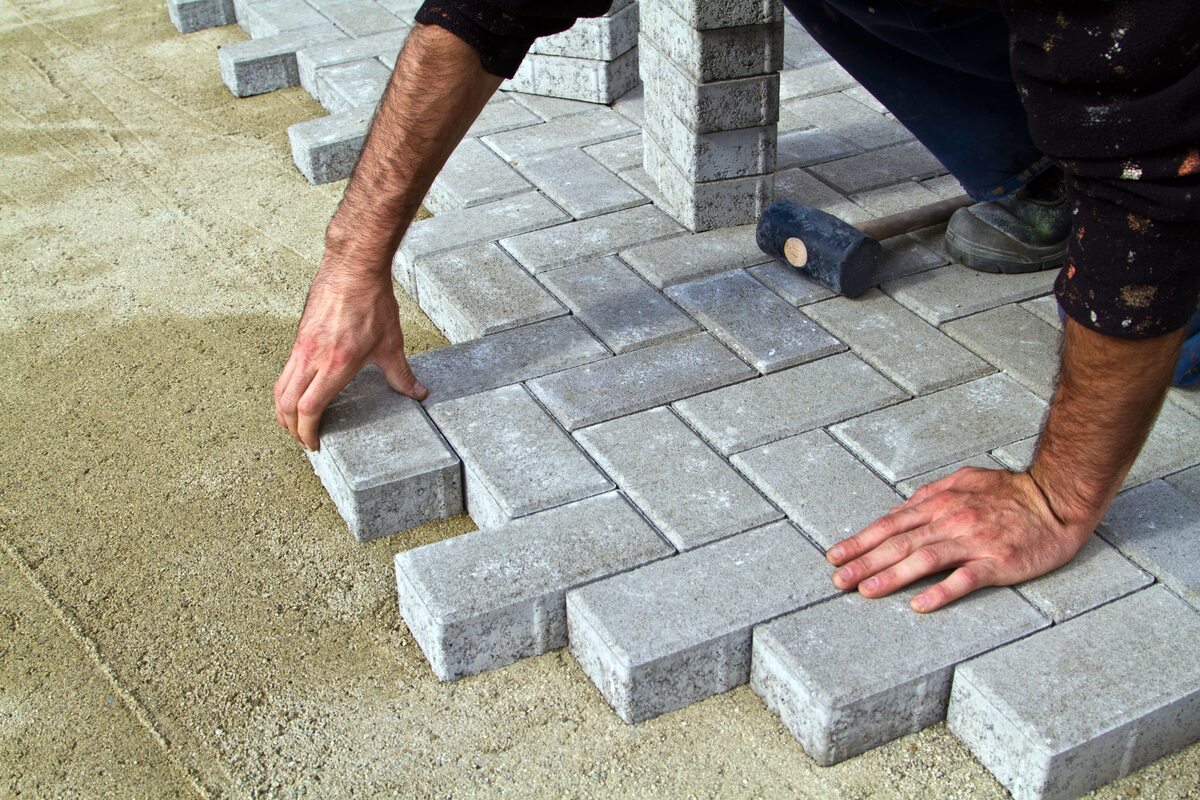
Laying the Bricks
With the solid base in place, it’s time to bring your brick patio to life by laying the bricks in a precise and visually appealing pattern. This phase requires attention to detail and patience to ensure a professional-looking finish.
Begin with a Dry Layout
Before permanently setting the bricks, arrange them in your desired pattern on top of the compacted sand. This dry layout allows you to visualize the design, make any necessary adjustments, and ensure a seamless fit before proceeding with the permanent installation.
Read more: How To Lay A Patio Slab
Start at One End
Commence laying the bricks at one end of the patio area, working methodically in one direction. This approach helps maintain a consistent pattern and ensures a visually pleasing result.
Use a String as a Guide
To maintain straight lines and proper alignment, use a taut string as a guide for laying the bricks. This technique helps achieve a professional finish and minimizes the risk of uneven or crooked rows.
Apply the Right Technique
When setting each brick in place, use a gentle twisting motion to ensure it settles firmly into the sand bed. This technique promotes a secure bond between the bricks and the base, enhancing the patio’s stability.
Fill the Gaps
As you lay the bricks, ensure the joints are consistently filled with sand to secure the bricks in place and prevent shifting. Use a broom to sweep sand over the surface and into the joints, creating a cohesive and stable structure.
Read more: How To Lay A Stone Patio
Check for Consistency
Regularly step back to assess the overall consistency of the brick layout, ensuring uniformity in pattern, alignment, and spacing. Making adjustments as you progress will result in a polished and professional-looking patio surface.
By meticulously laying the bricks with precision and care, you’re transforming the groundwork into a visually stunning and functional brick patio. The next steps will involve adding the finishing touches to complete the project and showcase your craftsmanship.
Finishing Touches
As the brick patio nears completion, attention turns to the finishing touches that will enhance its visual appeal, durability, and functionality. These final steps add polish and character to the project, elevating it from a construction site to a captivating outdoor space.
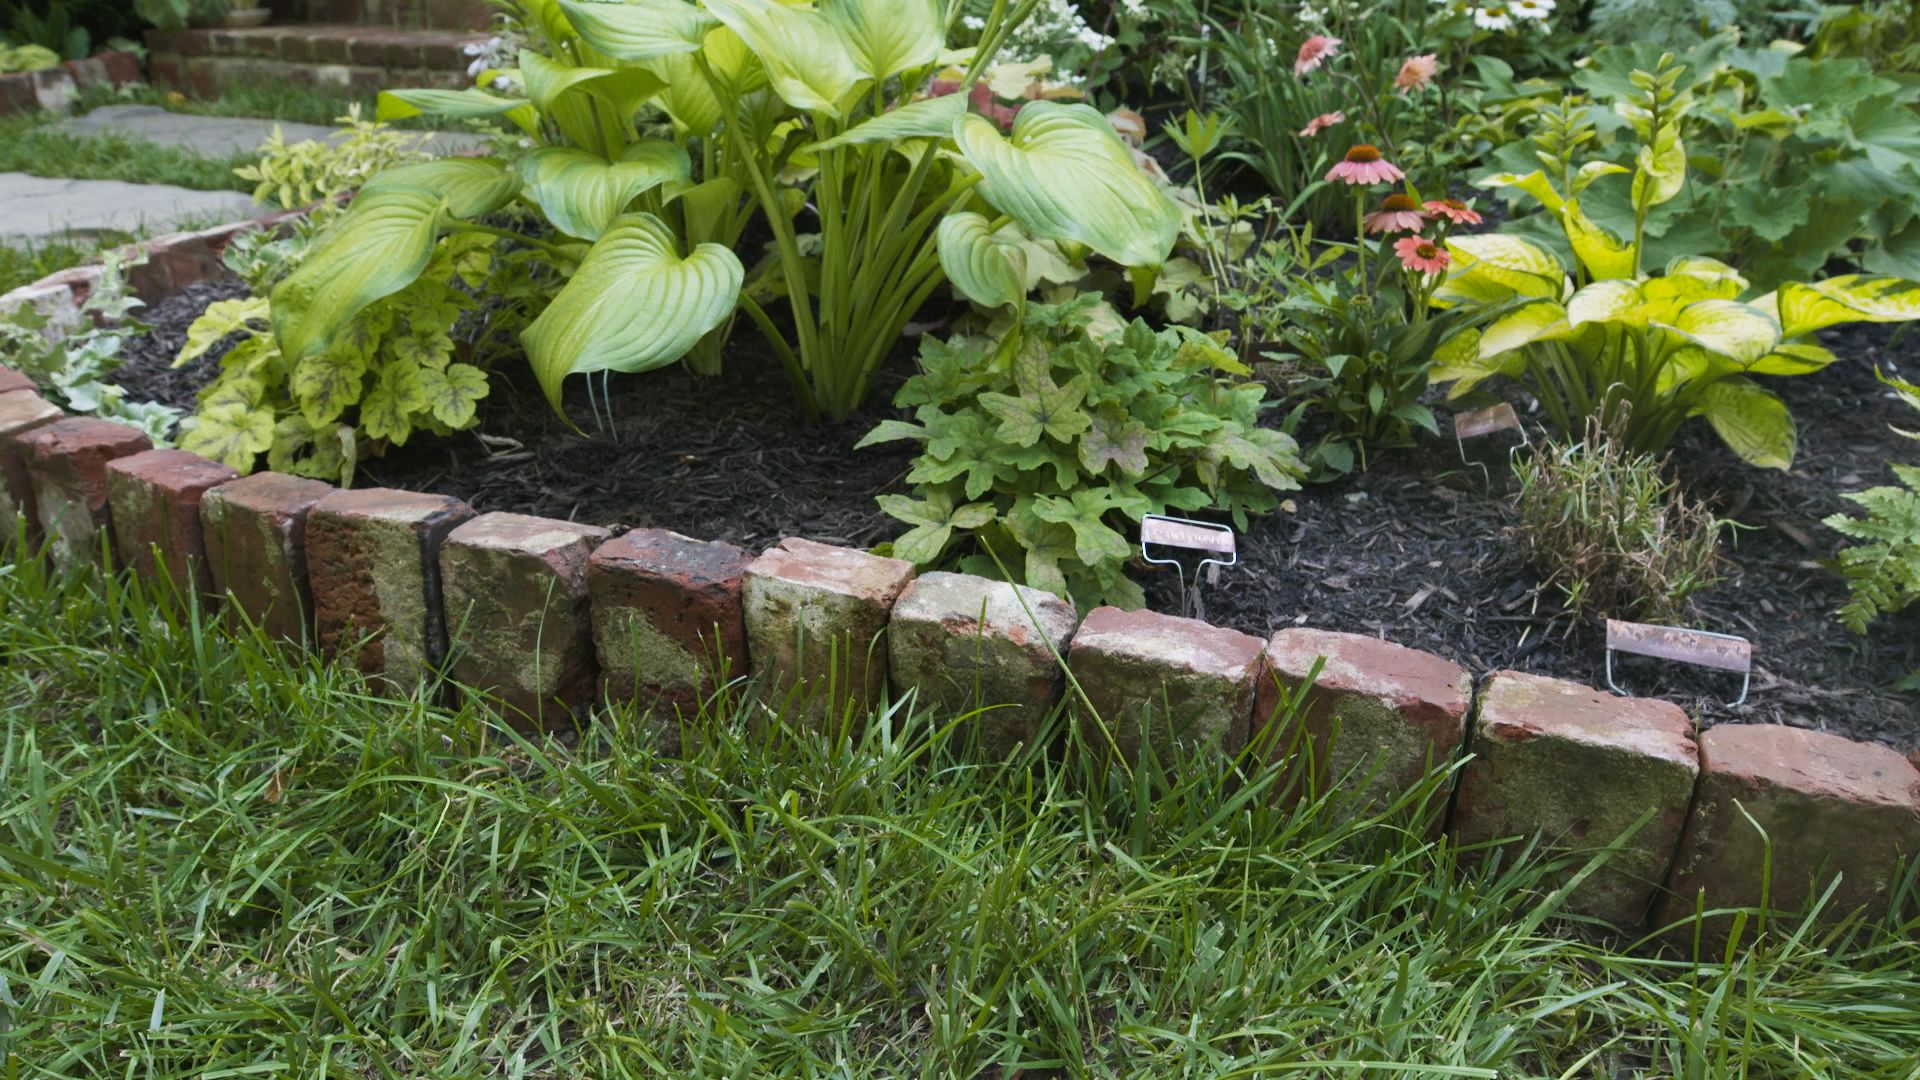
Edging and Borders
Consider incorporating edging and borders to define the perimeter of the patio and create a clean, finished look. Whether using matching bricks or contrasting materials, well-defined borders add visual interest and structure to the design.
Sealing the Surface
Applying a quality sealant to the brick surface offers protection against stains, moisture penetration, and the effects of weathering. This step helps preserve the bricks’ appearance and prolongs their lifespan, ensuring long-term beauty and durability.
Read more: How To Lay Flagstone On A Patio
Adding Furniture and Accents
Introduce outdoor furniture, planters, and decorative accents to personalize the patio and make it a welcoming and functional space. Choose furnishings and decor that complement the style of your home and create an inviting atmosphere for relaxation and entertainment.
Enhancing with Greenery
Incorporate greenery through potted plants, flower beds, or a border of lush vegetation around the patio. The addition of natural elements softens the hardscape, adds color and texture, and contributes to a harmonious outdoor environment.
Lighting Features
Consider incorporating lighting features to extend the patio’s functionality into the evening hours. From string lights and lanterns to built-in fixtures, strategic lighting enhances safety, ambiance, and the overall enjoyment of the outdoor space.
Maintenance Guidelines
Provide maintenance guidelines to ensure the longevity and pristine condition of the patio. This may include recommendations for regular cleaning, weed prevention, and addressing any potential issues that may arise over time.
By attending to these finishing touches, your brick patio evolves into a captivating and functional outdoor retreat. With careful consideration of design elements and maintenance, you’ll create a space that enriches your lifestyle and adds value to your home for years to come.
Read more: How To Lay Bluestone Patio
Conclusion
Congratulations on successfully completing the construction of your brick patio! This transformative project has not only added a charming outdoor space to your home but has also provided a fulfilling opportunity to showcase your creativity and craftsmanship. As you admire the finished result, it’s evident that your efforts have yielded a beautiful and functional addition to your property.
Building a brick patio is a testament to the rewarding nature of hands-on projects, allowing you to shape your environment and create a space that reflects your unique style and preferences. The process, from meticulous planning and thorough preparation to the precise laying of bricks and the thoughtful finishing touches, has been a journey of dedication and vision.
As you bask in the satisfaction of your completed patio, envision the countless moments of enjoyment and relaxation that await. Whether it’s hosting gatherings with friends and family, savoring quiet moments in the sun, or simply appreciating the beauty of your outdoor sanctuary, your brick patio is poised to become a cherished focal point of your home.
Remember that the completion of the project is just the beginning of your patio’s story. Regular maintenance and care will ensure its longevity and enduring appeal. By following recommended maintenance guidelines and periodically refreshing its appearance, you’ll continue to derive pleasure from your patio for years to come.
With your brick patio now a captivating reality, take pride in the craftsmanship and dedication that have brought this vision to life. Your outdoor space has been transformed into a haven of relaxation, entertainment, and natural beauty, enriching your home and lifestyle in countless ways.
May your brick patio be a source of joy, inspiration, and cherished memories for years to come, serving as a testament to your creativity and the enduring allure of well-crafted outdoor spaces.
Frequently Asked Questions about How To Lay Brick Patio
Was this page helpful?
At Storables.com, we guarantee accurate and reliable information. Our content, validated by Expert Board Contributors, is crafted following stringent Editorial Policies. We're committed to providing you with well-researched, expert-backed insights for all your informational needs.

0 thoughts on “How To Lay Brick Patio”