
Articles
How To Lay Cobblestone Walkway
Modified: March 1, 2024
Learn how to lay cobblestone walkway with our comprehensive articles. Find step-by-step instructions, tips, and tricks for creating a beautiful and durable walkway.
(Many of the links in this article redirect to a specific reviewed product. Your purchase of these products through affiliate links helps to generate commission for Storables.com, at no extra cost. Learn more)
Introduction
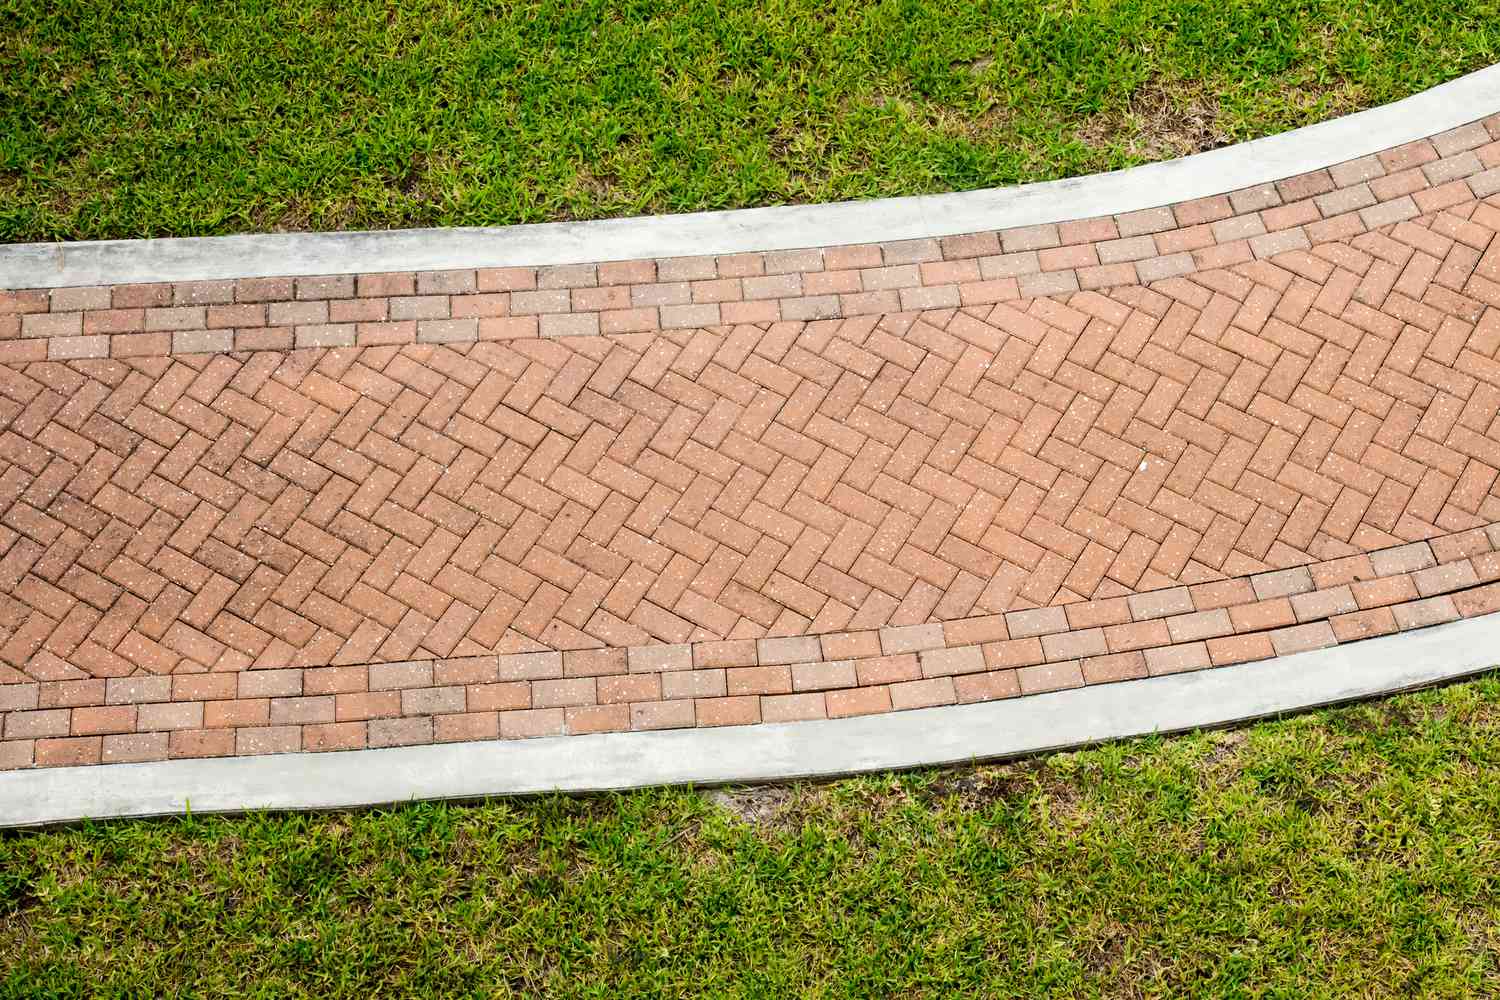
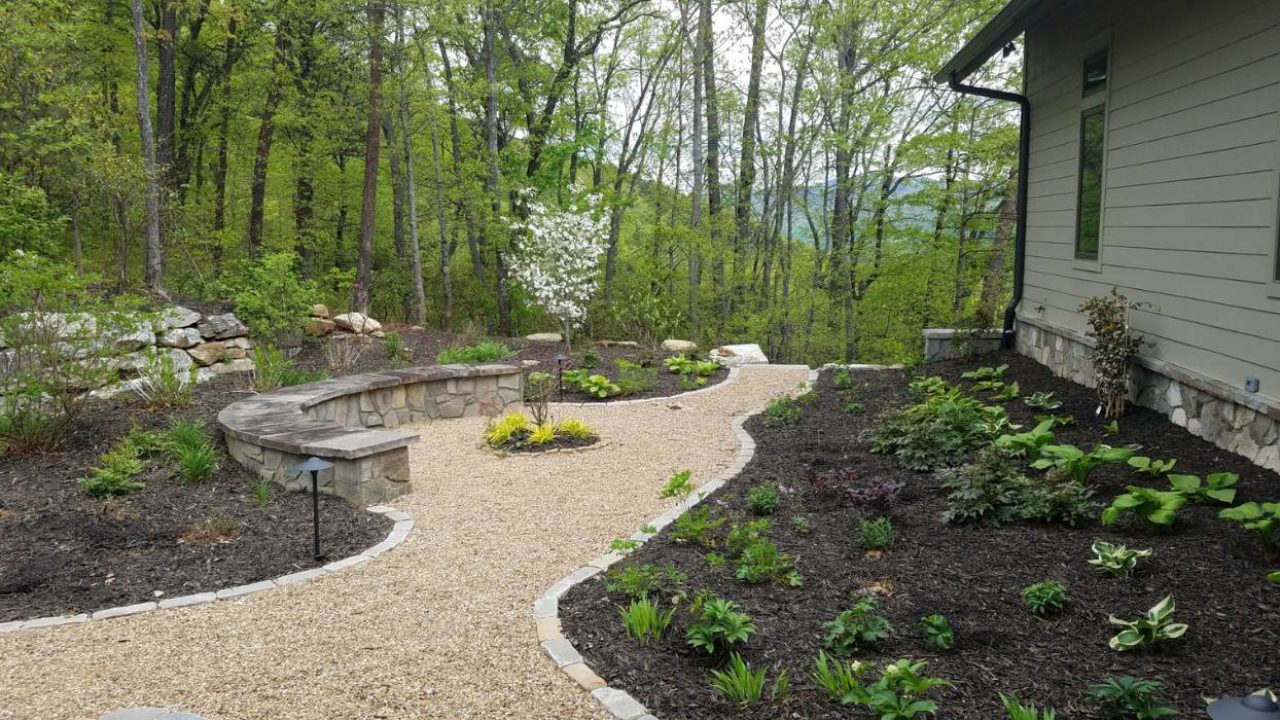
A cobblestone walkway can add charm and character to any outdoor space. Whether you’re creating a path in your garden or leading up to your front door, a cobblestone walkway is a timeless and elegant choice. In addition to its aesthetic appeal, cobblestone is durable and can withstand heavy foot traffic, making it a practical choice as well.
In this article, we will guide you step-by-step on how to lay a cobblestone walkway. We will cover everything from planning and preparation to the final finishing touches. By following these instructions, you’ll be able to create a beautiful and functional walkway that will enhance the overall look and value of your property.
Before we start, it’s important to note that laying a cobblestone walkway requires some physical labor and attention to detail. It’s a project that can be tackled by a confident DIYer, but if you’re unsure about any step, it’s always a good idea to consult with a professional.
Now, let’s dive into the process of creating your own cobblestone walkway!
Key Takeaways:
- Transform your outdoor space with a durable and elegant cobblestone walkway. From meticulous planning to precise installation, create a visually appealing and long-lasting path that adds charm and value to your property.
- Enjoy the beauty and functionality of your cobblestone walkway by adding finishing touches like landscape lighting and edging. Maintain its integrity with regular cleaning and joint filling for a timeless outdoor focal point.
Read more: How To Lay A Cobblestone Patio
Step 1: Planning and Preparation
The first and most crucial step in laying a cobblestone walkway is proper planning and preparation. This involves taking measurements, choosing the right materials, and considering the design layout.
Start by measuring the area where you want to install the walkway. This will help you determine the amount of materials you’ll need, including cobblestones, base material, and joint filler. It’s a good idea to add a few extra cobblestones to account for any breakage or mistakes during the installation process.
Next, consider the design of your walkway. You can opt for a traditional straight path or get creative with curves and angles. Take into account the overall look and feel of your outdoor space, as well as any existing landscaping features you want to complement.
With your measurements and design layout in hand, it’s time to gather the necessary materials. Cobblestones come in a variety of materials, such as granite, limestone, or even concrete. Choose a material that suits your aesthetic preferences and budget.
In addition to cobblestones, you will need a base material to ensure stability and longevity of the walkway. Common choices include crushed stone or gravel, which provides adequate drainage. You’ll also need a joint filler, such as sand or mortar, to fill the gaps between the cobblestones.
Lastly, make sure you have the necessary tools for the project. This may include a shovel, wheelbarrow, level, mallet, and a plate compactor for compacting the base material. It’s also a good idea to have safety equipment, such as gloves and safety goggles, to protect yourself during the construction process.
Once you have all the materials and tools ready, you’re set to move on to the next step: clearing and leveling the area for your cobblestone walkway.
Step 2: Clearing and Leveling the Area
Clearing and leveling the area is an important step in preparing the foundation for your cobblestone walkway. It ensures that the surface is stable, smooth, and free of any obstacles that could interfere with the installation process.
Start by clearing the area of any existing vegetation, rocks, or debris. Use a shovel or a garden rake to remove any loose materials. It’s important to create a clean and level surface to ensure the stability of your walkway.
Once the area is cleared, you’ll need to assess the existing grade or slope. Ideally, you want the walkway to have a slight slope away from any structures to facilitate proper drainage. Use a level or a string line to determine the slope and make adjustments if needed.
If the area has a significant slope, you may need to consider installing retaining walls or steps to create a level surface. These additional structures will help prevent erosion and ensure that the cobblestones sit evenly.
After leveling the area, it’s time to lay down a weed barrier. This is a crucial step to prevent weeds and grass from growing between the cobblestones. Roll out the weed barrier fabric over the entire walkway area, overlapping the edges to ensure complete coverage.
The next step is to add a layer of base material. This will provide stability and support for the cobblestones. Spread a 4-6 inch layer of crushed stone or gravel evenly over the entire area. Use a rake or a shovel to distribute the material and ensure a uniform thickness.
Once the base material is spread, use a plate compactor to compact it. This will help to create a solid and stable base for your cobblestone walkway. Follow the manufacturer’s instructions for operating the compactor, making sure to go over the entire area multiple times to achieve optimal compaction.
After compacting the base material, check for any low or high spots. Use additional base material to fill in any low areas and a rake or shovel to remove excess material from high spots. The goal is to create a smooth and even surface for laying the cobblestones.
With the clearing and leveling process complete, you’re now ready to move on to the next step: marking the layout of your cobblestone walkway.
Step 3: Marking the Layout
Marking the layout of your cobblestone walkway is an essential step that will guide you during the installation process. It ensures that the walkway is aligned correctly and allows you to visualize the final design before placing the cobblestones.
Start by using stakes and string to outline the borders of your walkway. Place the stakes at the corners, making sure they’re securely inserted into the ground. Then, tie a string between the stakes, pulling it taut to create straight lines.
Next, measure the width of your cobblestone pavers and mark the desired distance between each paver along the string lines. This will help you maintain consistent spacing and ensure that the walkway looks visually appealing.
As you mark the layout, it’s important to consider any curves or angles in your design. Use a flexible hose or a length of rope to create smooth curves, or use a protractor or a carpenter’s square to mark precise angles.
Take your time during this step to make sure the layout is accurate and suits your desired aesthetic. It’s a good idea to step back and assess the overall look of the marked layout from various angles to ensure you’re satisfied with the design.
Once you’re satisfied with the marked layout, you can proceed to the next step: excavating the area for the cobblestone walkway.
Remember, precision is key when marking the layout of your cobblestone walkway. Take your time to ensure accuracy, as any mistakes made at this stage can affect the overall appearance and functionality of the walkway.
Step 4: Excavating the Area
Excavating the area is a crucial step in the process of laying a cobblestone walkway. It involves removing the soil and creating a space for the base material and cobblestones to be installed.
Start by using a shovel to dig out the marked area. The depth of excavation will depend on the thickness of the base material and the cobblestones you’re using. Typically, you’ll need to excavate about 4-6 inches deep, taking into account the thickness of the base material and the height of the cobblestones.
As you excavate, pay attention to maintaining a consistent depth across the entire walkway. Use a measuring tape or a level to check the depth periodically and make adjustments as needed.
If the soil is compacted and difficult to remove, consider using a pickax or a compact excavator to break it up and make the excavation process easier. Be careful not to damage any existing utilities or irrigation systems that may be underground.
As you excavate, remove any rocks, roots, or other debris from the area. It’s important to create a clean and clear space for the base material and cobblestones to be installed.
Once the area is excavated, inspect the soil and make any necessary adjustments. If the soil is loose or has poor drainage, consider adding a layer of gravel or crushed stone to improve stability and drainage.
Remember to maintain the slope or grade that you determined in the previous step. This will ensure proper drainage and prevent water from pooling on the surface of the walkway.
With the area excavated and prepared, you’re ready to move on to the next step: installing the base material for your cobblestone walkway.
Take your time during the excavation process, ensuring a thorough and even removal of the soil. This will provide a solid foundation and result in a durable and stable walkway.
Read more: How To Lay Cobblestone Driveway
Step 5: Installing the Base Material
Installing the base material is a crucial step in the construction of your cobblestone walkway. The base material provides stability and support for the cobblestones, ensuring the longevity and durability of the walkway.
Start by spreading a layer of coarse gravel or crushed stone evenly over the excavated area. The depth of the base material should be about 2-4 inches, depending on the thickness of the cobblestones and the desired height of the walkway.
Use a rake or a shovel to distribute the base material and create a smooth and even layer. Take care to avoid any low or high spots, as these can affect the stability and appearance of the walkway.
After spreading the base material, use a plate compactor to compact it. This will ensure that the base material is tightly packed and provides a solid foundation for the cobblestones.
Start the compactor at one corner of the walkway and work your way across the entire area. Make multiple passes with the compactor, applying firm and even pressure. Check the level of the base material periodically to ensure it’s evenly compacted.
Continue compacting until the base material is firm and does not shift when walking on it. This step is crucial as it prevents the cobblestones from sinking or shifting over time.
After compacting, check the level of the base material again. Use a level or a straight edge to ensure that the surface is smooth and even. If there are any low areas, add more base material and compact it until the surface is level.
With the base material properly installed and compacted, you’re now ready to move on to the next step: leveling the base for the cobblestone walkway.
Take your time during the installation of the base material, ensuring that it’s spread evenly and compacted thoroughly. This will provide a solid and stable foundation for the cobblestone walkway, ensuring its long-term durability.
When laying a cobblestone walkway, make sure to properly prepare the base by excavating and adding a layer of compacted gravel for stability and drainage. This will help prevent shifting and settling over time.
Step 6: Compact and Level the Base
Compact and leveling the base of your cobblestone walkway is essential to ensure proper stability and longevity. This step helps create a solid foundation for the cobblestones and ensures a level surface for a seamless installation.
Start by inspecting the compacted base material. Look for any low or uneven areas that need to be corrected. Use a rake or shovel to add more base material to the low areas and distribute it evenly.
Once the base material is evenly distributed, use a plate compactor to compact it again. Start at one corner of the walkway and work your way across, making multiple passes to ensure optimal compaction.
Pay attention to any high spots during the compaction process. If you notice any areas where the base material is raised, use the compactor or a hand tamper to compact the material until it’s level with the surrounding surface.
After compacting, use a level or a straight edge to check the overall levelness of the base. Place the level across the surface in various directions, ensuring that there are no significant deviations from a level plane.
If you find any areas that are not level, adjust the base material accordingly. Add or remove base material as needed until the surface is perfectly level and even.
Remember to periodically check the levelness of the base as you continue to compact and adjust. This will help ensure that the entire walkway is level and prevent any issues with drainage or stability in the future.
With the base material compacted and leveled, you have successfully prepared the foundation for your cobblestone walkway. Proceed to the next step: beginning the process of laying the cobblestones.
Take your time during the compaction and leveling process, ensuring that the base is smooth and level. This attention to detail will result in a sturdy and aesthetically pleasing cobblestone walkway.
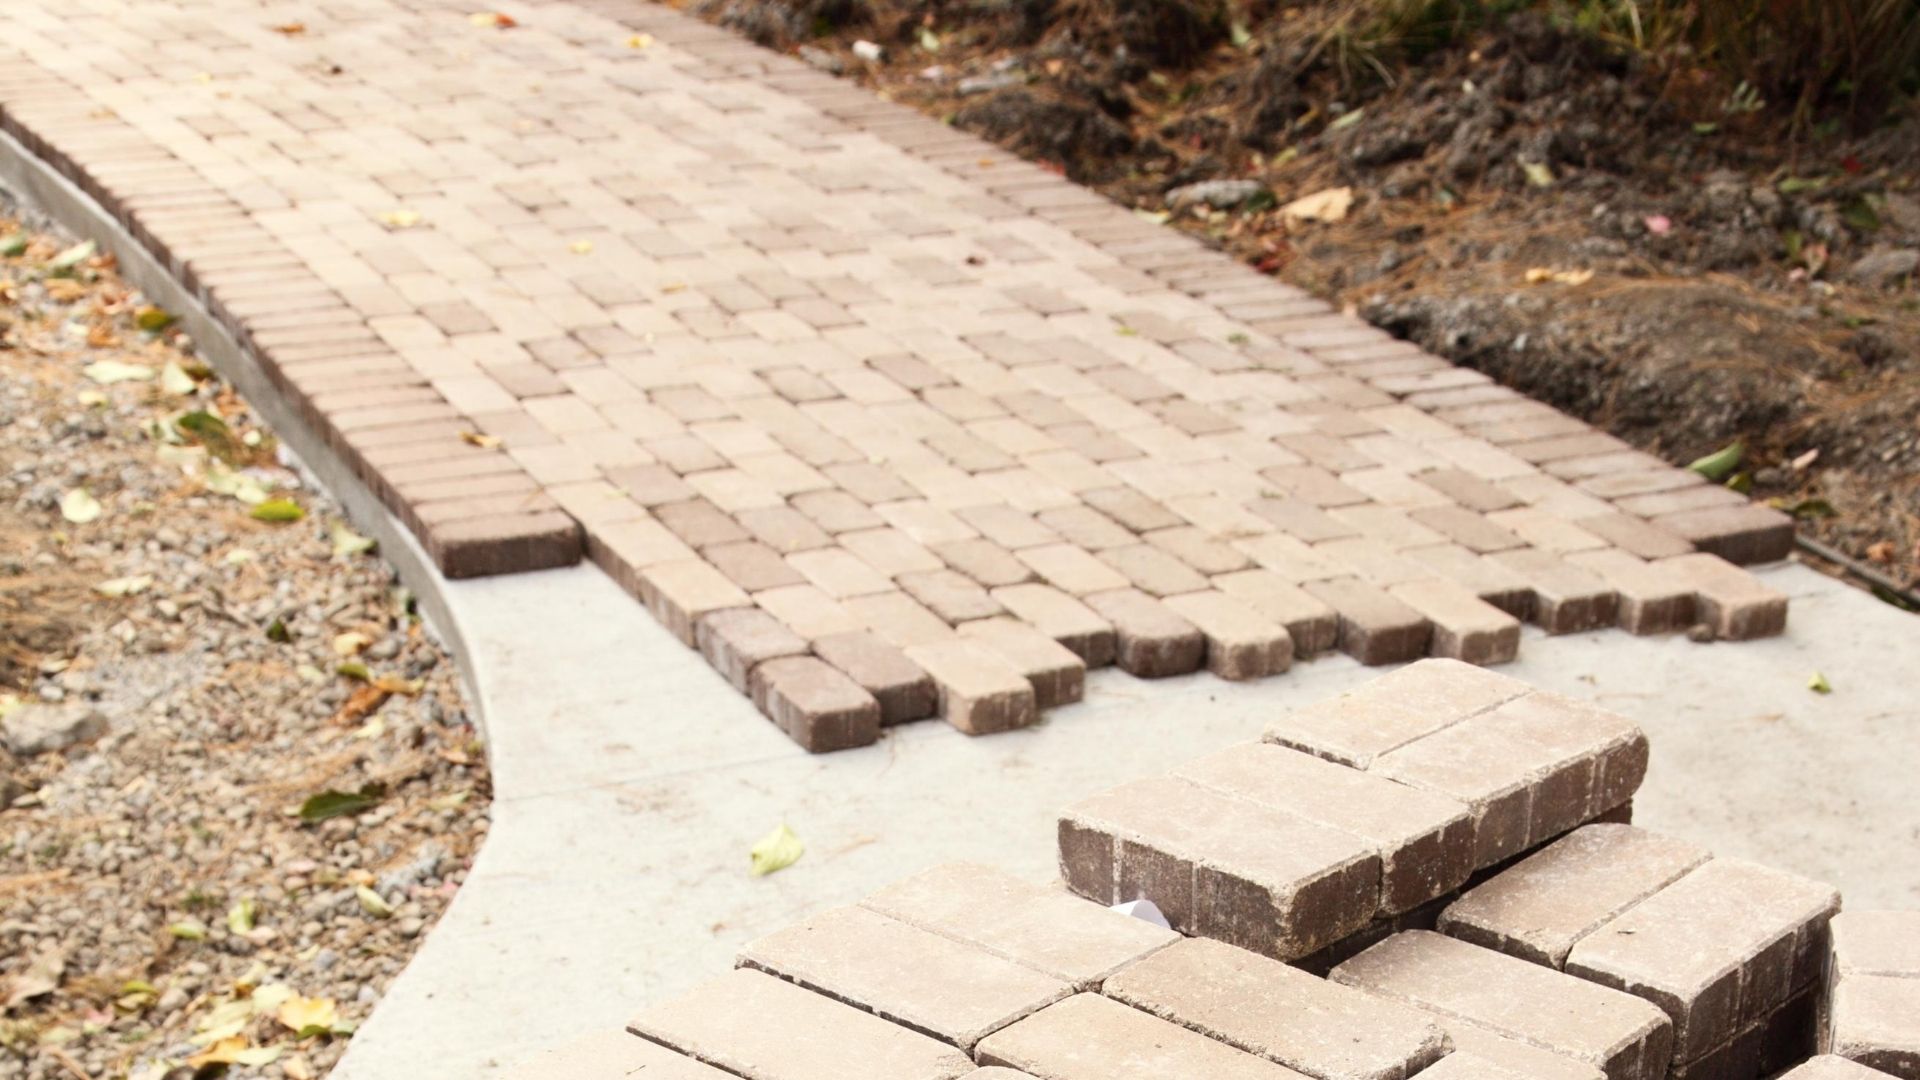
Step 7: Begin Laying the Cobblestones
With the base prepared and leveled, it’s time to start laying the cobblestones for your walkway. This step requires careful placement and attention to detail to ensure a visually appealing and structurally sound result.
Begin by selecting a starting point for your walkway. It’s often best to start at one end and work your way towards the other end, following the marked layout and spacing.
Apply a layer of joint filler material, such as sand or mortar, over the compacted base. This will help to stabilize the cobblestones and fill in any gaps between them.
Place the first cobblestone at the starting point of the walkway, pressing it firmly into the joint filler material. Use a rubber mallet or a hammer and a block of wood to ensure a secure and level placement.
Continue placing the remaining cobblestones one by one, following the marked layout and maintaining consistent spacing between them. Tap each cobblestone gently with the mallet or hammer to ensure a tight fit and a level surface.
As you lay the cobblestones, periodically check the levelness of the walkway with a straight edge or a level. This will help you identify any areas that are higher or lower than the desired level and allow you to make necessary adjustments.
If you encounter any irregularly shaped or larger cobblestones, you may need to use a chisel and a hammer to shape them or break them to fit into the designated space. Take your time to ensure a proper fit and a seamless appearance.
Continue laying the cobblestones until the entire walkway is covered, ensuring that they are tightly placed and level with one another. Periodically check the overall alignment and spacing to ensure a consistent and visually pleasing result.
Once all the cobblestones are laid, gently sweep the joint filler material into the gaps between the cobblestones. This will help stabilize the walkway and prevent any shifting or movement.
With the cobblestones laid and the joints filled, you have successfully completed the installation of your cobblestone walkway. However, there is one more important step to ensure the long-term integrity of the walkway: filling the joints.
Take your time and pay attention to detail while laying the cobblestones, ensuring a secure and level placement. This will result in an attractive and durable cobblestone walkway that will enhance your outdoor space.
Step 8: Filling the Joints
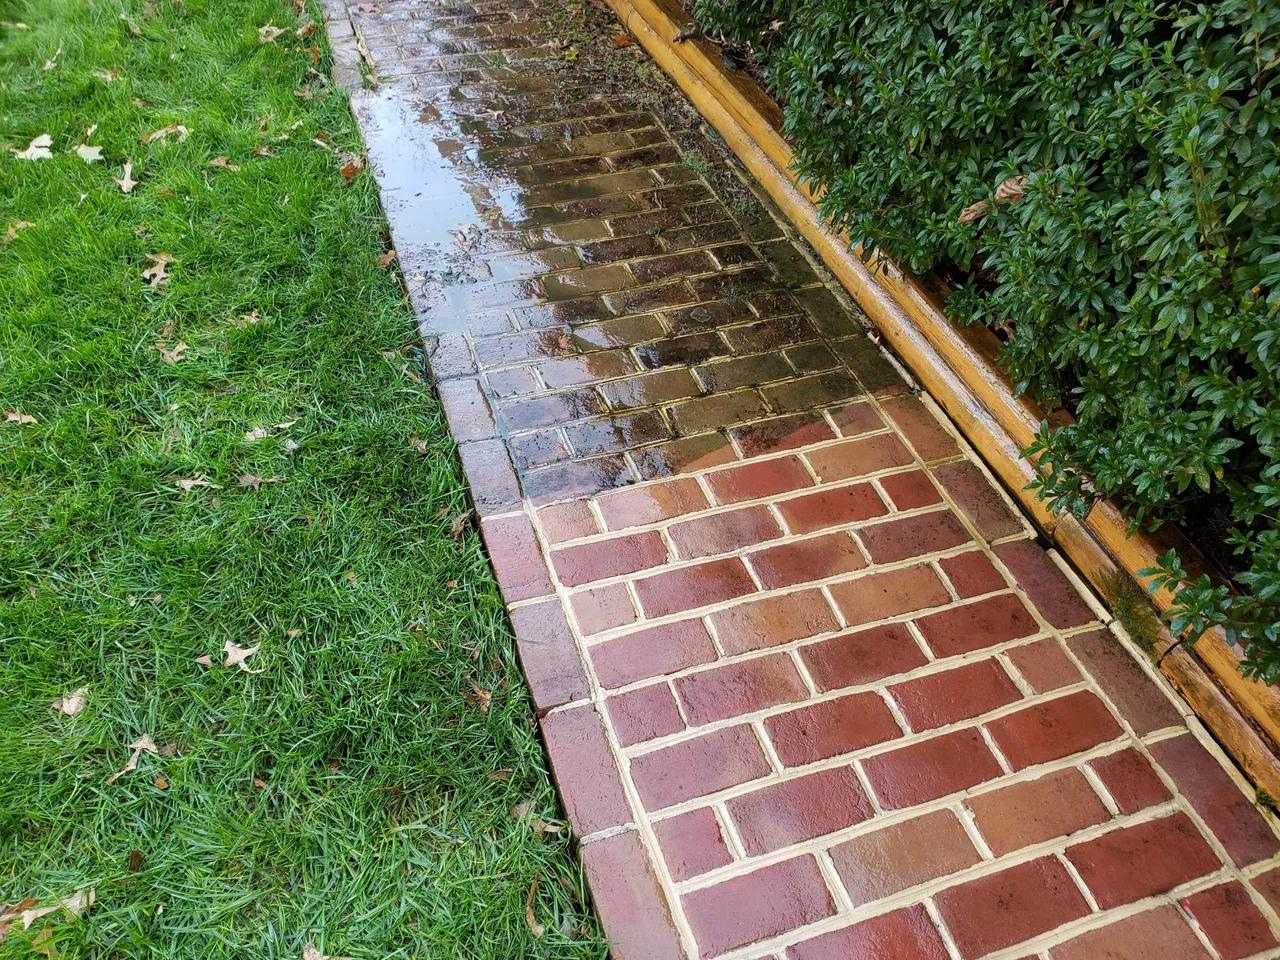
Filling the joints between the cobblestones is a crucial step in the construction of your walkway. It not only enhances the overall appearance of the installation but also provides stability and prevents weed growth.
Start by ensuring that the cobblestones and the joints are clean and free of any debris. Use a broom or a brush to sweep away any loose dirt, dust, or excess joint filler material.
Next, choose a suitable joint filler material such as fine sand or polymeric sand. Polymeric sand is a popular choice as it hardens when activated with water, providing a more durable and long-lasting joint.
Sprinkle the joint filler material evenly over the cobblestones, making sure it fills the gaps completely. Use a brush or a broom to push the filler material into the joints, ensuring a tight and compacted fill.
Once the joints are filled, use a misting spray bottle or a gentle stream of water to lightly wet the joint filler material. Avoid using excessive water pressure, as it may dislodge the filler material from the joints.
Allow the water to soak into the joint filler material and activate the binding agents in the case of polymeric sand. Follow the manufacturer’s instructions for the specific drying and activation time.
After the joint filler material has dried and hardened, use a broom or a brush to sweep away any excess material from the surface of the cobblestones. This will reveal a clean and neat walkway with filled joints.
Periodically inspect the joints over time and reapply joint filler material as needed. This will help maintain the stability and appearance of your cobblestone walkway.
Congratulations! You have successfully filled the joints of your cobblestone walkway. The final step is to add a few finishing touches to complete the project.
Take your time while filling the joints, ensuring a thorough and even fill. This will result in a visually appealing and long-lasting cobblestone walkway that adds charm and character to your outdoor space.
Read more: How To Lay Stone Walkway
Step 9: Finishing Touches
After completing the main installation of your cobblestone walkway, it’s time to add the finishing touches that will elevate its overall appearance and ensure its longevity.
Start by cleaning the surface of the cobblestones and removing any dust or debris that may have accumulated during the installation process. Use a broom or a brush to sweep away loose particles, or consider using a mild detergent and water solution to give the cobblestones a thorough cleaning.
Once the walkway is clean, take a step back and assess the overall appearance. Look for any areas that may need further adjustment, such as uneven cobblestones or gaps in the joints. Make any necessary repairs to ensure a visually pleasing and structurally sound walkway.
Consider adding edging to your cobblestone walkway to define its borders and prevent the cobblestones from shifting over time. This can be done using materials such as metal or plastic edging, or by constructing a low stone or brick border alongside the walkway.
Another finishing touch to consider is the addition of landscape lighting. Installing lights along the edges or strategically placing them to highlight certain areas of the walkway can enhance the ambience and safety of your outdoor space, especially during the evening hours.
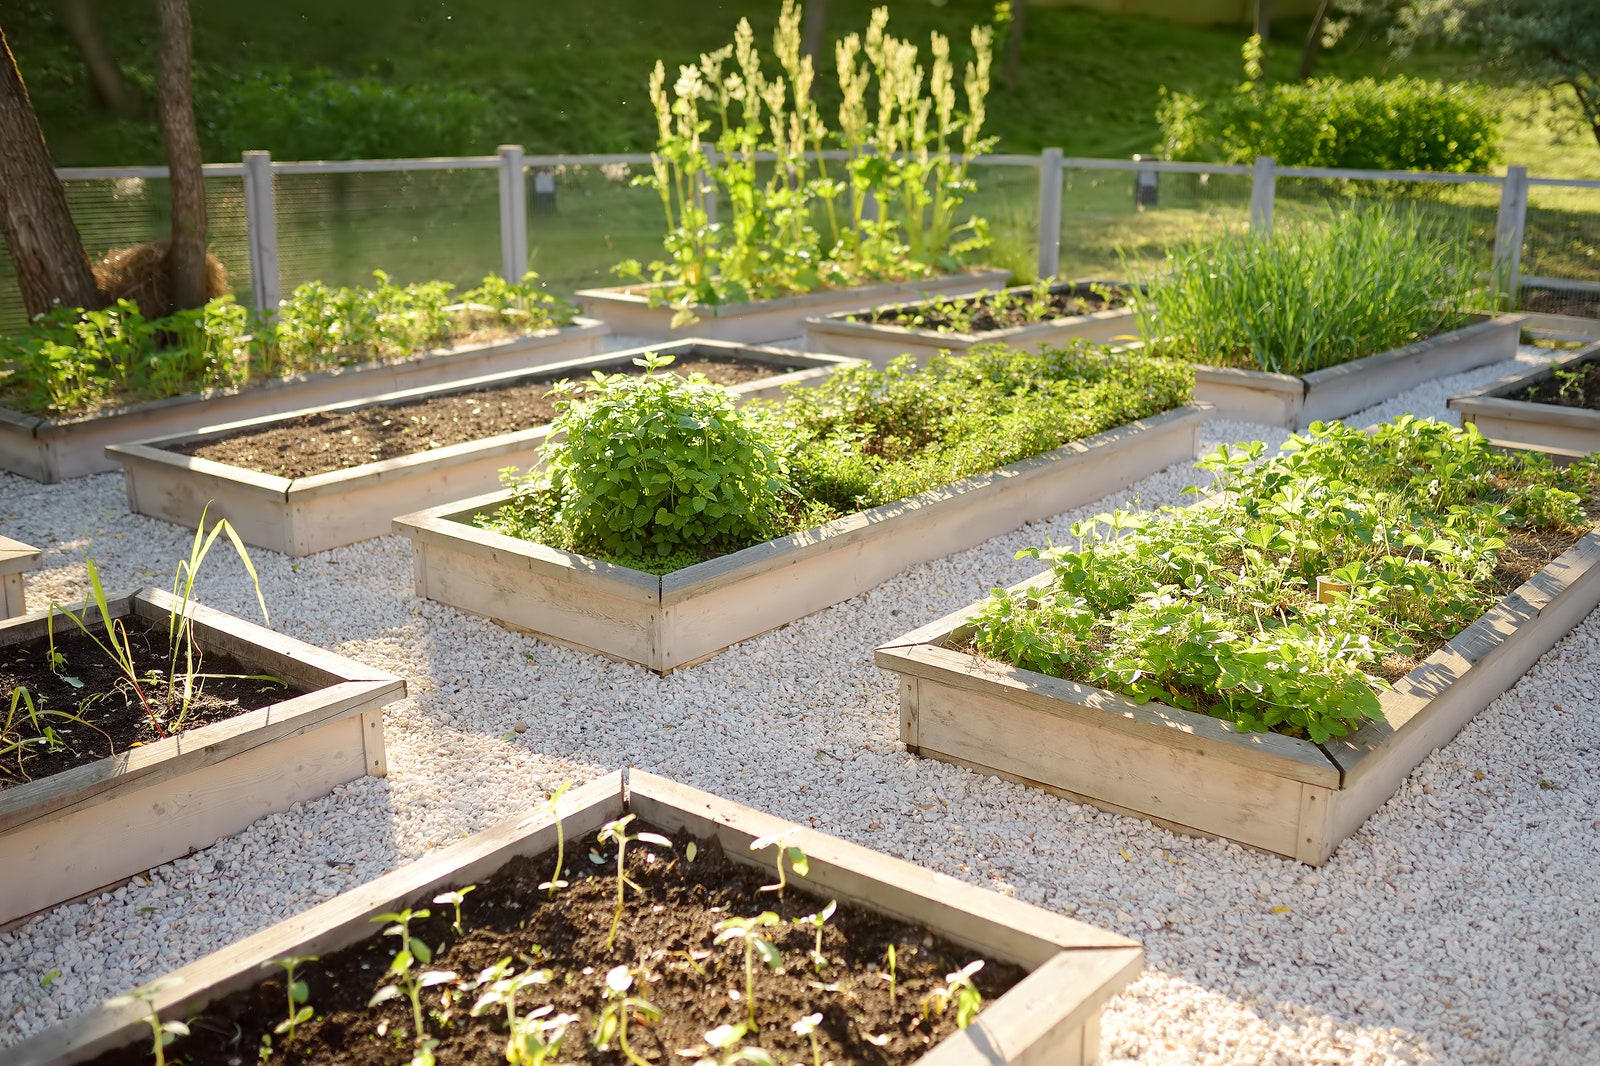
Lastly, don’t forget to incorporate some landscaping elements around the cobblestone walkway. This can include planting flowers, shrubs, or even placing potted plants along the edges. Adding greenery and colorful blooms will further enhance the beauty of your walkway.
With the finishing touches complete, take a moment to enjoy your newly created cobblestone walkway. Admire the craftsmanship, the visual appeal, and the added value it brings to your outdoor space.
Remember to periodically maintain and clean your cobblestone walkway to ensure its longevity. Sweep away debris, remove any weeds that may grow between the joints, and reapply joint filler material as needed.
Congratulations on successfully completing your cobblestone walkway project! It’s now time to sit back, relax, and enjoy the beauty and functionality of your newly transformed outdoor space.
Conclusion
Congratulations on completing the construction of your cobblestone walkway! By following the steps outlined in this guide, you have transformed your outdoor space into a beautiful and functional area that adds charm and character to your property.
From the careful planning and preparation to the precise installation and finishing touches, each step was essential in creating a long-lasting and visually appealing walkway. Your attention to detail and dedication to the project have paid off.
A cobblestone walkway not only enhances the aesthetic appeal of your outdoor space but also provides a durable and stable surface for foot traffic. The timeless beauty of the cobblestones coupled with the sturdy base ensures that your walkway will withstand the test of time.
Remember to maintain your walkway by regularly checking for any signs of damage, such as loose or sunken cobblestones, and addressing them promptly. Periodically cleaning the surface and filling the joints will also help maintain its integrity and appearance.
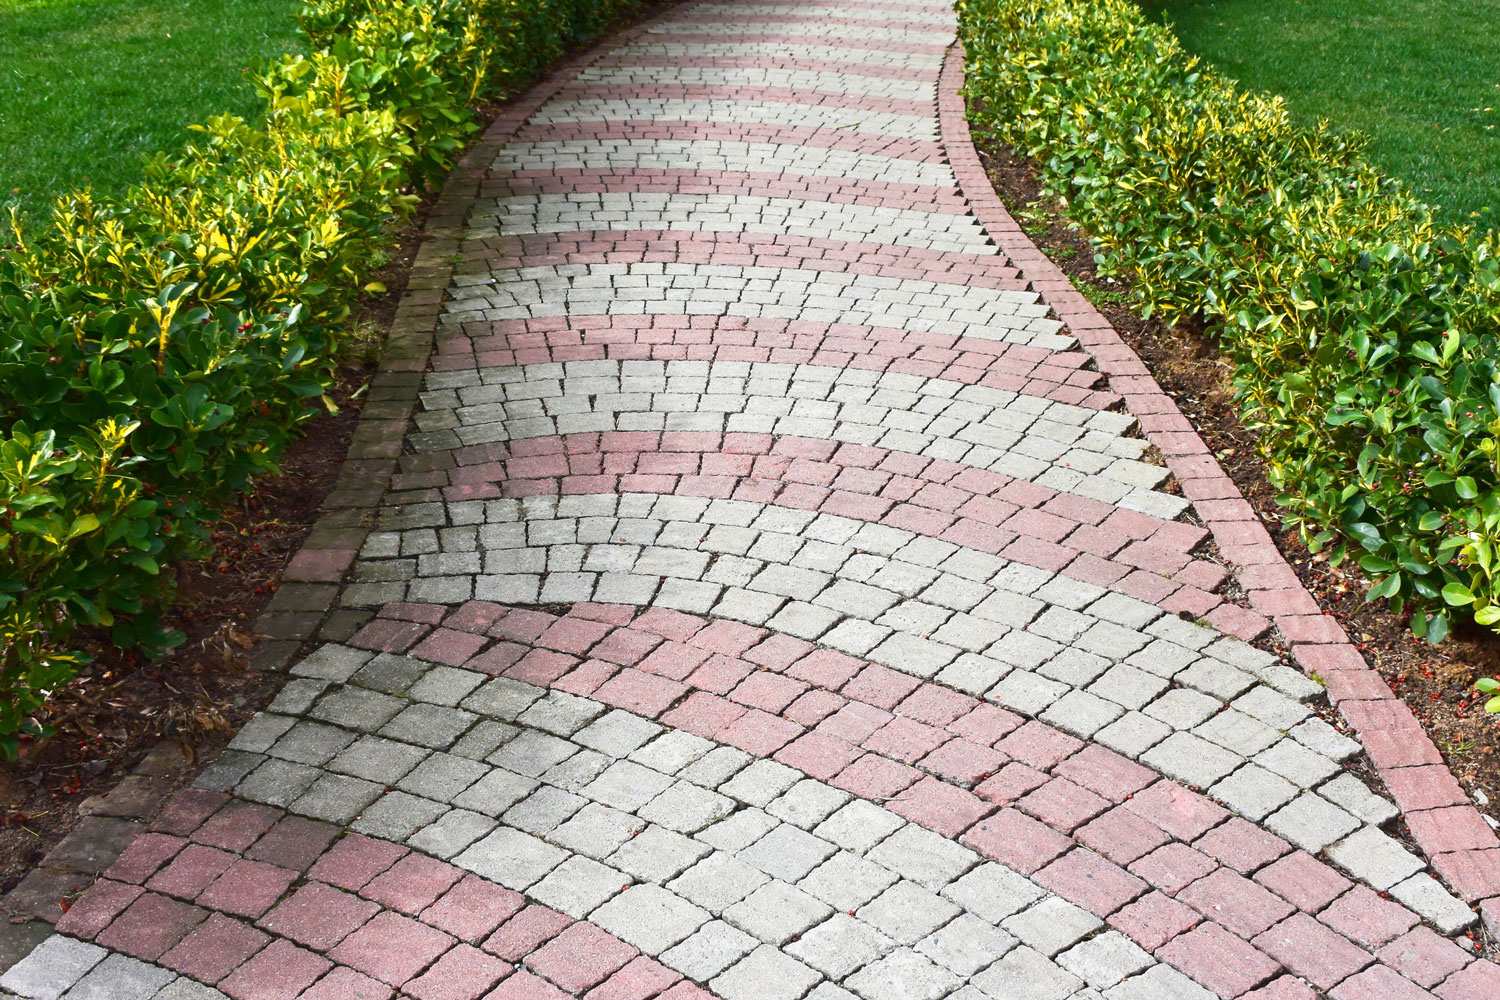
Whether it’s a walkway through your garden, leading to your front door, or creating a path through your backyard, your cobblestone walkway will be a focal point that enhances the overall look and value of your property.
Enjoy the countless moments you will spend strolling along the charming cobblestone path, surrounded by the beauty of your outdoor space. It’s a project that not only adds functionality but also brings a sense of pride and accomplishment.
Thank you for choosing to embark on this cobblestone walkway journey with us. We hope this guide has been helpful and that you feel confident in your ability to create a stunning walkway. Best of luck with your future construction projects!
Frequently Asked Questions about How To Lay Cobblestone Walkway
Was this page helpful?
At Storables.com, we guarantee accurate and reliable information. Our content, validated by Expert Board Contributors, is crafted following stringent Editorial Policies. We're committed to providing you with well-researched, expert-backed insights for all your informational needs.


0 thoughts on “How To Lay Cobblestone Walkway”