Articles
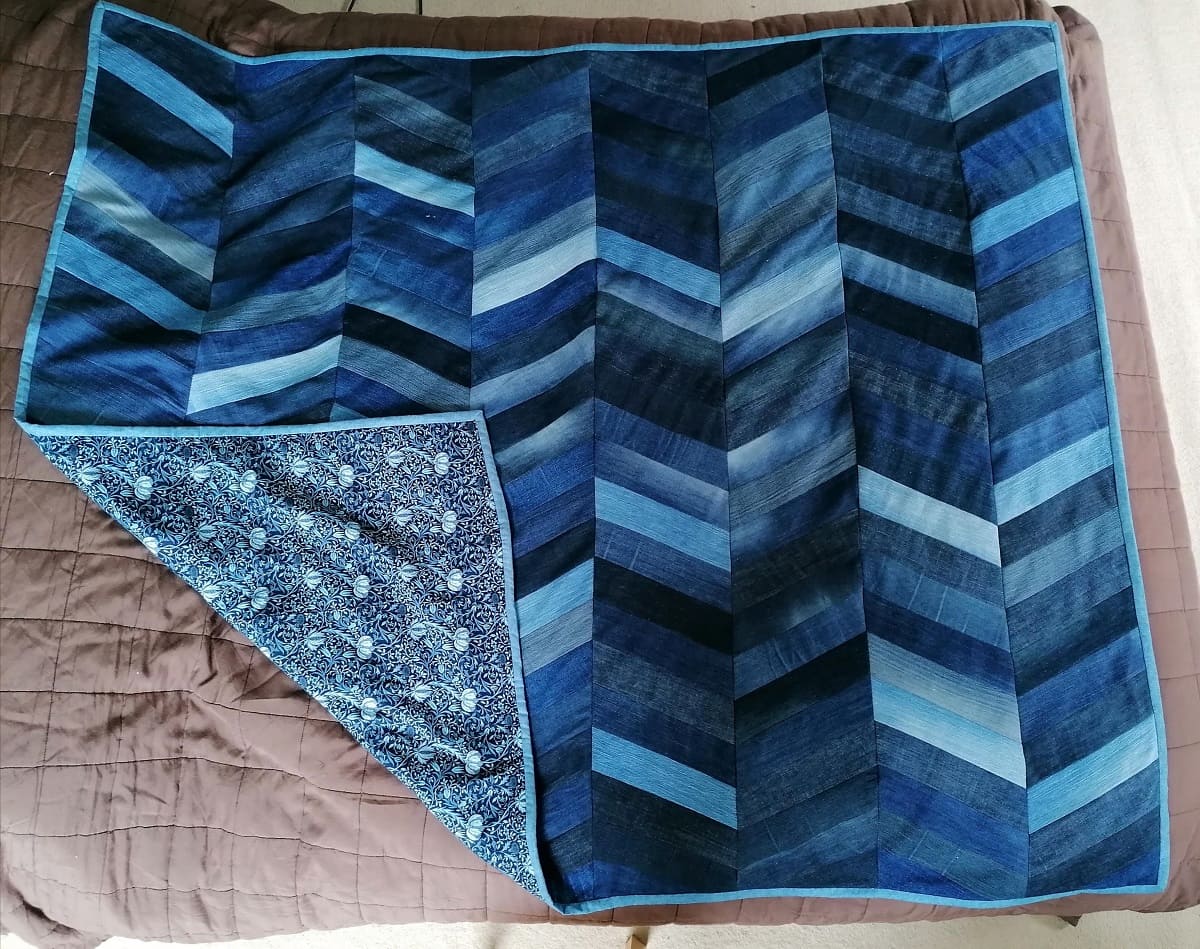
How To Make A Jeans Quilt
Modified: February 24, 2024
Learn how to make a stylish and cozy jeans quilt by repurposing your old denim articles. Step-by-step instructions and helpful tips provided.
(Many of the links in this article redirect to a specific reviewed product. Your purchase of these products through affiliate links helps to generate commission for Storables.com, at no extra cost. Learn more)
Introduction
The art of quilting has been passed down through generations, allowing us to create beautiful and practical items from fabric scraps. While quilting traditionally involves stitching together small pieces of fabric to form intricate patterns, there’s a modern twist that adds a touch of casual charm to this timeless craft: the jeans quilt.
A jeans quilt, as the name suggests, is made from old pairs of jeans that have seen better days. Instead of throwing them away, why not repurpose them into a cozy quilt that can be treasured for years to come? Not only does this project save money and reduce waste, but it also provides an opportunity to create a unique and personal keepsake.
In this guide, we’ll take you through the step-by-step process of making your own jeans quilt. So, grab your sewing machine and let’s get started on this creative and sustainable journey.
Key Takeaways:
- Transform old jeans into a cozy, sustainable quilt, preserving memories and embracing creativity. Enjoy the rewarding journey of repurposing fabric and creating a unique, sentimental keepsake.
- Dive into the art of quilting with old jeans, adding a touch of casual charm to a timeless craft. Celebrate craftsmanship, creativity, and the joy of handmade creations.
Read more: How To Make A Quilt
Materials Needed
Before diving into the project, it’s essential to gather all the necessary materials. Here’s a list of what you’ll need:
- Old jeans: Collect a variety of denim fabric from old jeans. Choose different shades and textures for a visually interesting quilt.
- Scissors or rotary cutter: Use sharp scissors or a rotary cutter to cut the denim into squares.
- Ruler or template: A ruler or template will help you achieve accurate and consistent square shapes.
- Sewing machine: A sewing machine will make the quilting process faster and more efficient.
- Thread: Choose a strong thread that matches the color of your denim fabric.
- Backing fabric: Select a soft and durable fabric for the quilt backing.
- Batting or quilt wadding: Choose a batting that provides warmth and thickness to your quilt.
- Pins or clips: These will hold the layers of the quilt together during the sewing process.
- Quilting ruler and rotary cutter (optional): These tools are useful for trimming and squaring up the quilt after it’s assembled.
- Binding fabric: Pick a fabric that complements your quilt design for binding the edges.
- Iron and ironing board: These will help you press the fabric and achieve crisp, neat seams.
Make sure you have all these materials ready before you start, as it will make the process smoother and more enjoyable. Now that you have everything, let’s move on to the next step: preparing the denim.
Step 1: Gather Old Jeans
The first step in making a jeans quilt is to gather old jeans that you no longer wear or that have become worn out. Raid your closet, ask friends or family for jeans they no longer need, or even visit thrift stores or flea markets to find a variety of denim fabrics.
When selecting jeans, look for different shades and textures to add visual interest to your quilt. Consider using jeans of various sizes as it will provide a mix of different fabric thicknesses and stretch levels, enhancing the overall texture and feel of the quilt.
Remember, the more jeans you gather, the larger your quilt can be. If you’re making a smaller quilt, you may only need a few pairs of jeans. However, if you’re aiming for a larger quilt, gather as many jeans as necessary to achieve your desired size.
Inspect the jeans for any damages such as holes or stains. While small imperfections can add character to the quilt, larger damages may need to be avoided or patched up before using the denim fabric. Cut away pockets and any non-denim parts of the jeans, as these won’t be used in the quilt.
Once you have gathered your jeans and prepared them by removing any non-usable parts, you’re ready to move on to the next step: preparing the denim.
Step 2: Prepare the Denim
Now that you have gathered your old jeans, it’s time to prepare the denim for your quilt. This step involves cutting the denim fabric into squares that will ultimately form the patchwork design of your quilt.
Start by washing and drying the jeans to ensure they are clean and ready for use. This step is important as it will remove any dirt, stains, or odors from the fabric.
Once the jeans are dry, lay them flat on a large work surface. Using sharp scissors or a rotary cutter, carefully cut along the inseams and around the crotch area to separate the jeans into separate pieces of fabric. Be mindful of any decorative seams or pockets that you may want to incorporate into your quilt.
Next, decide on the size of your denim squares. Common sizes for jeans quilt squares are typically between 6 to 8 inches, although you can choose any size that suits your preference. Using a ruler or template, measure and mark your desired square size on the denim fabric.
As you cut the denim fabric into squares, be sure to leave a ¼ to ½ inch seam allowance on all sides. This will allow room for the seams when you sew the squares together.
Continue cutting the denim fabric until you have enough squares to create your desired quilt size. Remember to mix and match different shades and textures of denim for a visually appealing quilt.
Once you have prepared all the denim squares, it’s time to move on to the next step: cutting the squares.
Step 3: Cut the Denim Squares
With your denim fabric prepared, it’s time to cut the squares that will make up the patchwork design of your jeans quilt. This step requires precision to ensure that all the squares are the same size and will fit together evenly.
Using a ruler or quilting template, measure and mark the desired size for your denim squares. Common sizes range from 6 to 8 inches, but you can choose any size that suits your preference and the overall design of your quilt.
Once you have determined the size, place the ruler or template on top of the denim fabric, aligning it with the marked lines. Use a fabric marker or tailor’s chalk to trace around the ruler or template, creating an outline of the square.
Continue tracing and cutting the denim squares until you have enough to complete your quilt. Remember to cut squares from a variety of denim fabrics, including different shades and textures, for a visually interesting design.
A helpful tip is to use a rotary cutter along with a quilting ruler to ensure clean and precise cuts. This will make the process quicker and more accurate, especially when dealing with multiple layers of denim fabric.
Don’t worry if some squares are slightly different in size or shape. Quilts with small variations add a charming handmade touch.
After cutting all the denim squares, you’re now ready to move on to the next step: arranging the squares into a design.
Read more: How To Make A Quilt Larger
Step 4: Arrange the Squares
Now that you have your denim squares ready, it’s time to unleash your creativity and arrange them into a design for your jeans quilt. This step allows you to play with different layouts and patterns to create a visually appealing quilt.
Start by clearing a large space where you can lay out your denim squares. This can be a table, a clean floor, or even a design wall if you have one. The important thing is to have enough room to arrange and rearrange the squares until you’re satisfied with the design.
Begin by randomly placing the denim squares, alternating between different shades and textures. This will give your quilt a playful and eclectic look. If you prefer a more organized design, you can sort the squares by color or value.
As you arrange the squares, step back and observe the overall layout. Pay attention to the distribution of colors, patterns, and textures. Make adjustments as needed to achieve a balanced and visually pleasing arrangement. Don’t be afraid to move squares around or try different combinations until you’re happy with the design.
Consider incorporating any unique elements from the jeans, such as decorative seams or pockets, into the design. These details can add an extra touch of charm and personality to your quilt.
You may also want to take a photo or make a sketch of your final design. This will serve as a helpful reference when sewing the squares together.
Once you’re satisfied with the arrangement, it’s time to move on to the next step: sewing the squares together.
When making a jeans quilt, be sure to use a denim needle in your sewing machine to prevent breakage. Denim can be tough to sew through, so a sturdy needle is essential.
Step 5: Sew the Squares Together
Now that you have your denim squares arranged in your desired design, it’s time to sew them together to create the quilt top. This step requires careful stitching to ensure that the squares are securely attached to each other.
Start by taking the first two squares in your design layout. Place them right sides together, aligning the edges that need to be sewn. Pin or clip them together to hold them in place.
Using a sewing machine, stitch along the pinned or clipped edge with a ¼ inch seam allowance. Backstitch at the beginning and end of the seam to secure the stitching. This will create a seam that joins the two squares together.
Continue sewing the remaining squares together in the same manner, following the layout you’ve designed. Always stitch right sides together and use a consistent ¼ inch seam allowance.
As you sew the squares, take caution when feeding them through the machine to prevent stretching or distorting the fabric. You may want to use a walking foot or adjust the machine’s tension if necessary.
Once all the squares are stitched together, press the seam allowances open or to one side. This will help the quilt lay flat and reduce bulk in the seams.
If your quilt design has multiple rows, sew the rows together using the same process until the quilt top is fully assembled.
After sewing all the squares together and pressing the seams, admire your newly created quilt top. You’re now ready to move on to the next step: adding a backing fabric.
Step 6: Add a Backing Fabric
Now that your denim squares are sewn together to create the quilt top, it’s time to add a backing fabric to complete the quilt sandwich. The backing fabric not only provides a finished look to the quilt but also adds stability and durability to the overall structure.
Choose a soft and durable fabric for the backing that complements the design and style of your denim quilt. It should be large enough to cover the entire quilt top with a few inches of extra fabric on all sides.
Before attaching the backing fabric, make sure it is clean and free of any wrinkles or creases. You may need to iron or press the fabric to achieve a smooth surface.
Spread the backing fabric on a clean, flat surface with the right side down. Smooth out any wrinkles or folds to ensure an even placement.
Place the quilt top on top of the backing fabric, aligning the edges and making sure it is centered. You can use pins or clips to hold the layers together, preventing any shifting while you work.
Trim the excess backing fabric, leaving a border of about 2-3 inches on all sides of the quilt top. This excess fabric will later be used for binding the edges of the quilt.
Once the backing fabric is properly aligned and trimmed, you’re now ready to move on to the next step: quilting the layers together.
Step 7: Quilt the Layers
With the quilt top and backing fabric securely sandwiched together, it’s time to quilt the layers to ensure they are firmly attached. Quilting not only enhances the durability of the quilt but also adds texture and visual interest to the design.
There are several ways to quilt the layers together, and the method you choose will depend on your personal preference and the style of your quilt. Here are a few common quilting techniques:
- Hand quilting: Hand quilting involves stitching through the layers of the quilt using a needle and thread. It requires patience and precision but allows for intricate designs and a traditional look.
- Machine quilting: Machine quilting involves using a sewing machine to stitch through the layers. This method is faster and more efficient, making it a popular choice for many quilters. You can choose from a variety of quilting designs, such as straight lines, free-motion quilting, or using a quilting foot for decorative patterns.
- Tie quilting: Tie quilting involves tying knots at regular intervals throughout the quilt to hold the layers together. This method provides a charming, rustic look and is often used for cozy, casual quilts.
Whichever quilting method you choose, start quilting from the center of the quilt and work your way out towards the edges. This ensures that the layers remain smooth and wrinkle-free.
Quilt as desired, following your chosen pattern or design. Take your time and make sure the stitches are secure and evenly spaced. Adjust the tension and stitch length on your sewing machine as needed to achieve the desired result.
Once you have finished quilting, inspect the quilt to ensure all layers are adequately secured. Remove any pins or clips as you go along.
The quilting step adds depth and dimension to your denim quilt, bringing it to life. Now, let’s move on to the next step: binding the edges.
Read more: How Much Is It To Make A Quilt
Step 8: Bind the Edges
After quilting the layers together, it’s time to bind the edges of your denim quilt. Binding not only provides a clean and finished look but also helps to secure the layers and protect the raw edges.
Here’s a step-by-step guide to binding your quilt:
- Measure the perimeter of your quilt to determine the length of binding fabric you’ll need. Add a few extra inches to account for corners and seams.
- Cut strips of fabric for the binding. The width of the strips will depend on your preference, but a common size is 2.5 inches wide.
- Join the strips together by stitching them diagonally from one end to the other. Trim the excess fabric, leaving a ¼ inch seam allowance.
- Press the binding strips in half lengthwise, wrong sides together.
- Starting in the middle of one side of the quilt, align the raw edge of the binding with the raw edges of the quilt top. Pin or clip it in place.
- Using a ¼ inch seam allowance, sew the binding to the quilt top, mitering the corners as you go along. Take your time to ensure the stitches are neat and secure.
- When you reach the starting point, leave a few inches of binding unsewn. Trim the excess binding, leaving a tail.
- Join the ends of the binding by folding the ends back and aligning them. Stitch them together, ensuring the fold lines meet seamlessly.
- Complete sewing the binding to the quilt, folding it over the raw edges and hand-stitching it to the back of the quilt. Use a blind or ladder stitch for an invisible finish.
- Once the binding is sewn, press the quilt to ensure all the layers are smooth and the binding lays flat.
Binding the edges of your denim quilt not only adds a professional touch but also ensures the longevity and durability of your quilt. Now, let’s move on to the final step: adding the finishing touches.
Step 9: Finishing Touches
Congratulations! You’re in the final step of completing your denim quilt. Now, it’s time to add those finishing touches that will truly make your quilt shine.
Here are a few ideas to consider:
- Labeling: Add a personalized touch by including a label on the back of your quilt. This label can include your name, the date, or a special message. You can either embroider the information directly onto the fabric or create a separate label to attach.
- Embroidery or Appliqué: Take your quilt to the next level by adding embroidery or appliqué designs. This can be done on individual denim squares or as borders or accents throughout the quilt.
- Quilting Embellishments: Consider adding additional quilting embellishments, such as buttons, beads, or ribbons, to enhance the design and texture of your quilt.
- Washing and Final Press: Before sharing or using your quilt, gently wash it to remove any markings or residue. Follow the care instructions for your quilt to ensure it retains its shape and appearance. Once dried, give it a final press to smooth out any wrinkles.
Remember, these finishing touches are optional and can be customized according to your preferences and the style of your denim quilt. They add your personal touch to the quilt, making it truly unique and special.
Once you’ve completed the finishing touches, step back, and admire your beautiful denim quilt. It’s now ready to be enjoyed or gifted to someone special.
Quilting with old jeans not only creates a cozy and unique quilt but also allows you to embrace sustainability by repurposing materials. The process of transforming old jeans into a functional item filled with memories is truly rewarding.
Congratulations on completing your jeans quilt! Now, wrap yourself up in the warmth and sentimentality of your handmade creation.
Conclusion
Creating a jeans quilt is not just a craft project but a journey that combines creativity, sustainability, and the joy of repurposing. By transforming old jeans into a cozy and sentimental quilt, you have breathed new life into fabric that would have otherwise been discarded.
Throughout the steps of gathering old jeans, preparing the denim, cutting the squares, arranging the design, sewing the squares together, adding the backing fabric, quilting the layers, binding the edges, and adding the finishing touches, you have poured your time and effort into creating a truly unique and personal quilt.
Your denim quilt tells a story. It combines different shades and textures, each piece representing memories and experiences. The design you carefully arranged reflects your creative vision and style.
Moreover, by participating in the art of quilting, you have contributed to the larger quilting community—a community that celebrates craftsmanship, companionship, and the preservation of a time-honored tradition. Your denim quilt is a testament to the beauty of handmade creations.
Now, as you wrap yourself in the warmth of your denim quilt, take a moment to appreciate the journey you’ve undertaken. You’ve turned ordinary fabric into a functional work of art, keeping memories and history alive.
Whether you keep the denim quilt for yourself or gift it to someone special, it will serve as a symbol of your creativity, resourcefulness, and love. It’s not just a quilt; it’s a labor of love and a source of comfort.
So, continue to explore the world of quilting, experiment with different fabrics, designs, and techniques. Let your imagination run wild as you create more quilts that reflect your unique style and values.
Enjoy the warmth and beauty that your denim quilt provides, and cherish the memories it holds. Happy quilting!
Frequently Asked Questions about How To Make A Jeans Quilt
Was this page helpful?
At Storables.com, we guarantee accurate and reliable information. Our content, validated by Expert Board Contributors, is crafted following stringent Editorial Policies. We're committed to providing you with well-researched, expert-backed insights for all your informational needs.


0 thoughts on “How To Make A Jeans Quilt”