Articles
How To Use Double Fold Quilt Binding
Modified: August 27, 2024
Learn how to use double fold quilt binding in our informative articles. Step-by-step instructions and helpful tips await. Become a pro at binding quilts today!
(Many of the links in this article redirect to a specific reviewed product. Your purchase of these products through affiliate links helps to generate commission for Storables.com, at no extra cost. Learn more)
Introduction
Welcome to this comprehensive guide on how to use double fold quilt binding. Quilt binding is an essential step in finishing off a quilt, as it not only adds a decorative touch but also serves to secure the quilt layers together. Double fold binding is a popular choice among quilters due to its durability and clean finish.
In this article, we will walk you through the step-by-step process of cutting and folding the binding strips, attaching the binding to the quilt, mitering corners, joining the ends of the binding, stitching the binding to the back of the quilt, and adding those final finishing touches. Whether you’re a seasoned quilter or a beginner, this guide will equip you with the knowledge and techniques to achieve professional-quality bindings for your quilts.
But before we dive into the tutorial, let’s take a look at the materials you’ll need to get started.
Key Takeaways:
- Master the art of double fold quilt binding to achieve professional-quality finishes and durable edges for your quilts. Precision and attention to detail are key in creating seamless and polished bindings.
- Embrace the versatility of double fold quilt binding, whether you’re a seasoned quilter or a beginner. Add both functionality and decorative appeal to your quilts while honing your skills with each project.
Read more: How To Bind A Quilt Using The Backing
Materials Needed
Before you begin the process of creating a double fold quilt binding, gather the following materials:
- Fabric: Choose a fabric that complements your quilt. It can be a solid color that matches or contrasts with the quilt, or a patterned fabric that adds interest.
- Cutting mat: A self-healing cutting mat is ideal for accurately cutting the binding strips.
- Rotary cutter: This tool allows for precise and straight cutting of fabric.
- Quilting ruler: A clear quilting ruler with measurements is essential for accurate cutting.
- Scissors: Quality fabric scissors are needed for cutting and trimming.
- Pins: Straight pins will be used to secure the binding in place.
- Iron: An iron is necessary for pressing the fabric and creating crisp folds.
- Sewing machine: A sewing machine will be used to stitch the binding to the quilt.
- Thread: Choose a thread color that matches or complements the fabric.
- Hand sewing needle: A needle will be used for hand stitching the final part of the binding.
Now that you have gathered all the necessary materials, let’s proceed to the first step of cutting the binding strips.
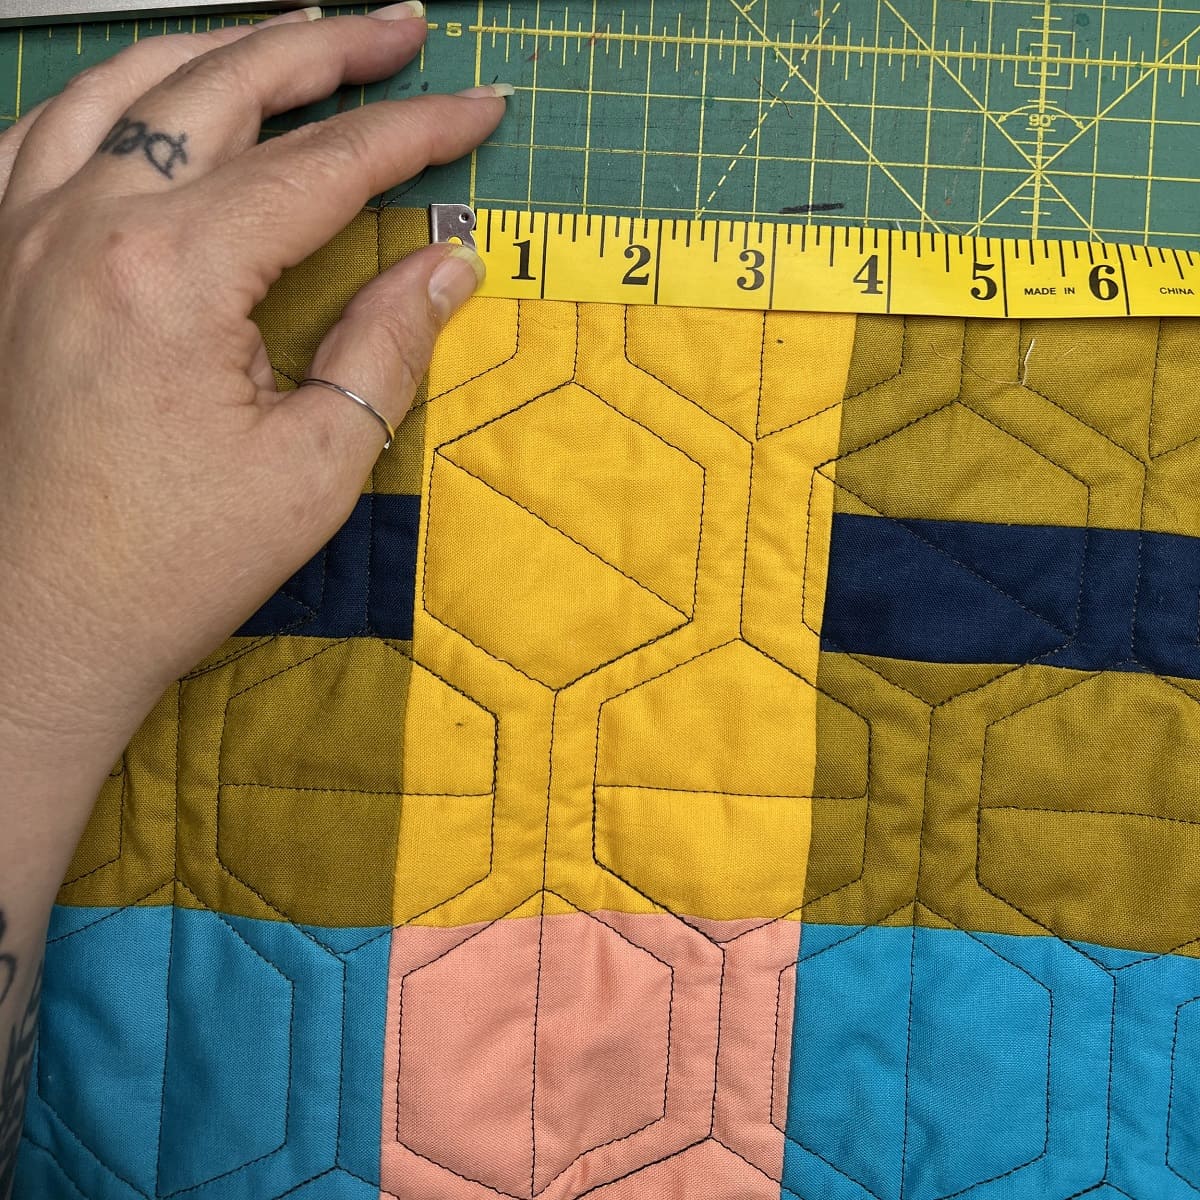
Step 1: Cutting the Binding Strips
The first step in creating a double fold quilt binding is to cut the fabric into strips. The width of the strips will depend on your preference, but a common width is 2.5 inches.
Here’s how to cut the binding strips:
- Prepare your fabric by pressing it to remove any wrinkles or creases.
- Using your rotary cutter and quilting ruler, cut the fabric into strips. For a standard size quilt, you will need enough strips to cover the perimeter of the quilt. However, if you prefer a wider binding, you may need to cut more strips.
- Make straight cuts parallel to the selvage edge of the fabric. If your fabric is not wide enough to cover the entire length needed for the binding, you can stitch the strips together to create longer lengths.
- Trim the short ends of the strips to ensure they are straight and even.
Once you have cut the binding strips, it’s time to move on to the next step of folding the strips to create the double fold.
Step 2: Folding the Binding Strips
Now that you have cut the binding strips, it’s time to fold them to create the double fold. This double fold will encase the raw edges of the quilt and provide a clean and durable finish.
Here’s how to fold the binding strips:
- Lay one binding strip flat on your work surface with the right side facing down.
- Take the left edge of the strip and fold it inward towards the center, aligning it with the raw edge of the strip. Use your iron to press the fold and create a crease.
- Next, take the right edge of the strip and fold it inward towards the center, overlapping the previous fold. Press the fold with your iron to create another crease.
- Now you have a strip with a double fold. The raw edges of the strip should be entirely encased within the folds.
- Repeat this process for each binding strip, folding them all in the same manner.
Once you have folded all the binding strips, it’s time to move on to the next step of attaching the binding to the quilt.
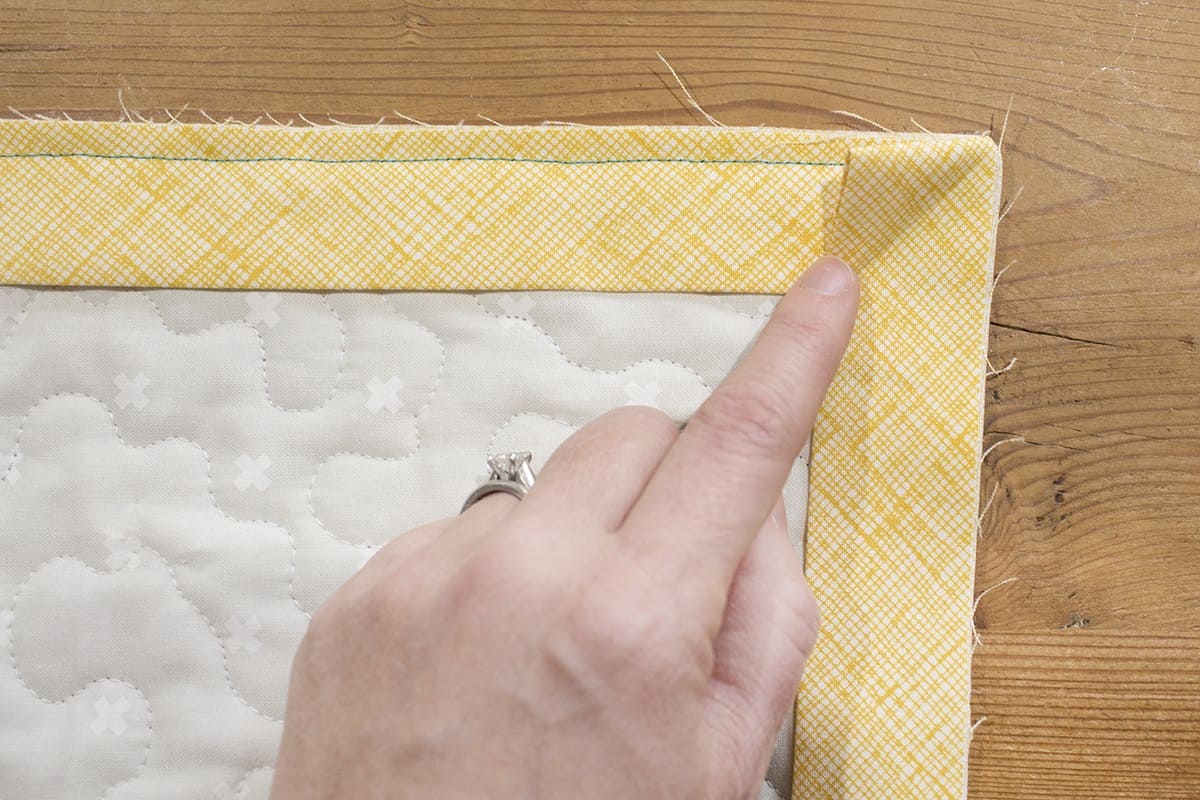
Step 3: Attaching the Binding to the Quilt
With the binding strips cut and folded, it’s time to attach them to the quilt. This step will secure the binding to the raw edges of the quilt and prepare it for the final stitching.
Follow these steps to attach the binding to the quilt:
- Starting at one corner of the quilt, align the raw edges of the binding strip with the raw edges of the quilt. Leave a tail of binding extending beyond the corner.
- Using pins or clips, secure the binding in place along the edge of the quilt. Make sure to pin through all layers – the binding, quilt top, and backing fabric.
- Continue pinning or clipping the binding around the entire perimeter of the quilt, easing it smoothly around corners and curves.
- As you approach the starting corner, stop stitching a few inches before reaching the corner. This will leave room for creating a mitered corner in the next step.
Once you have attached the binding to the quilt, it’s time to move on to the next step of mitering the corners.
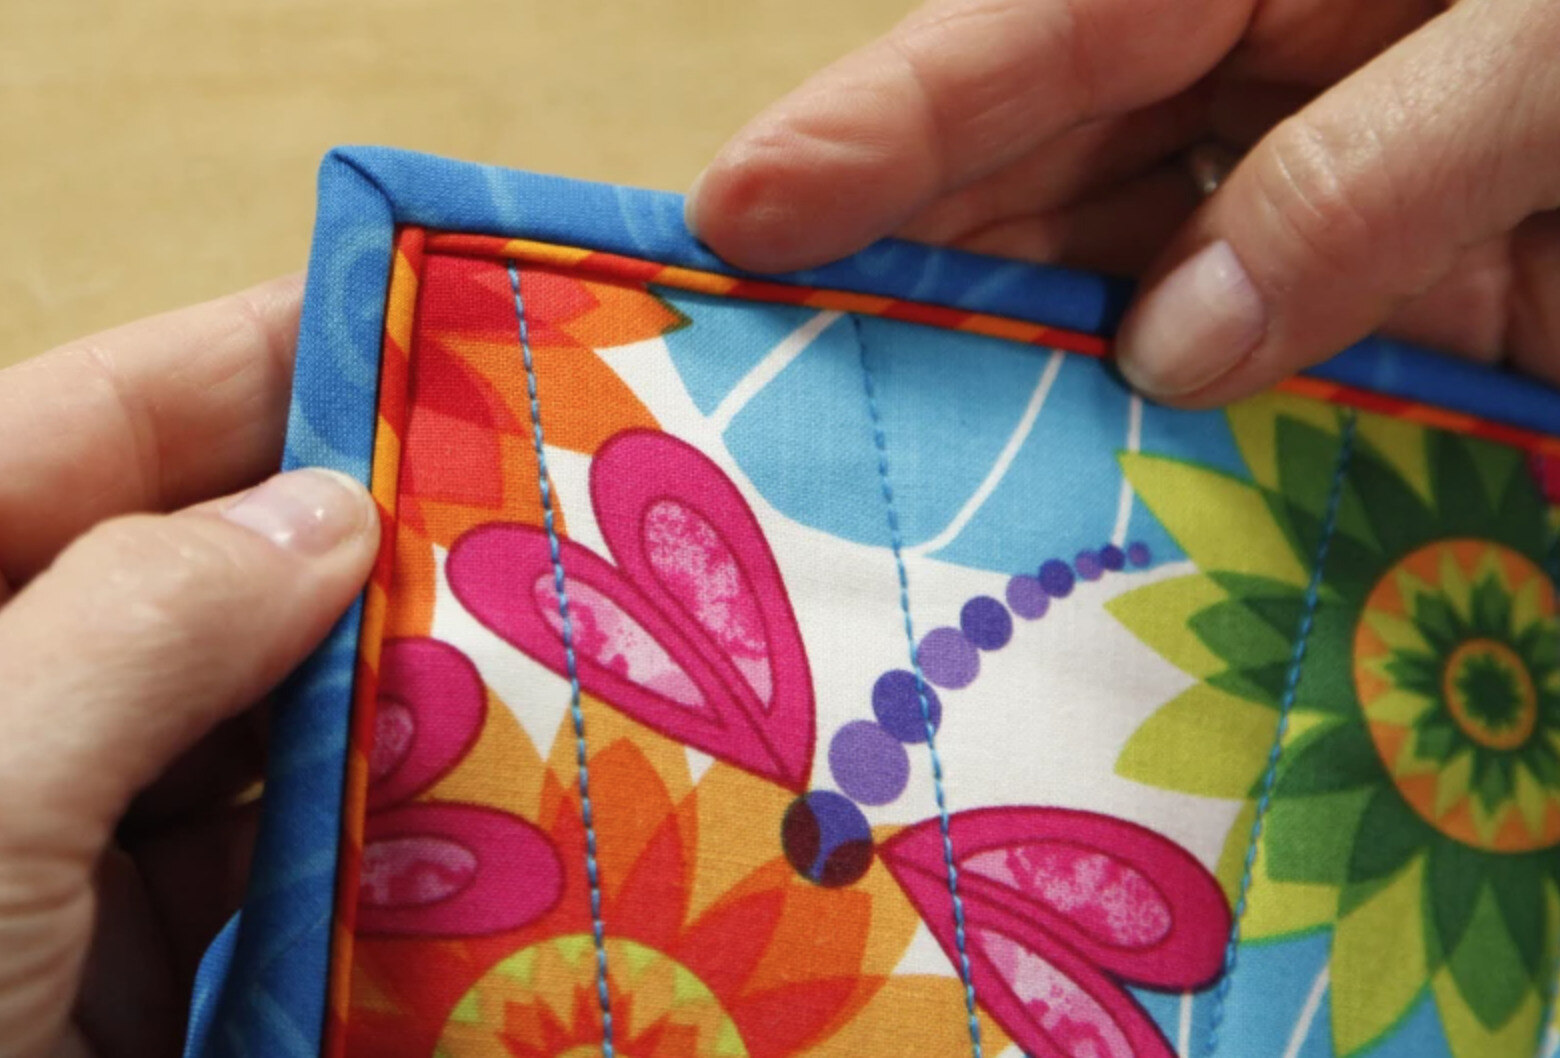
When attaching double fold quilt binding, start sewing along the edge with a 1/4 inch seam allowance, and miter the corners for a clean finish. Use clips to hold the binding in place as you sew.
Read more: How To Join Ends Of Quilt Binding
Step 4: Mitering Corners
Mitering the corners of the quilt binding is an essential step to achieve neat and professional-looking corners. This technique creates a clean finish and eliminates bulk in the corners.
Follow these steps to miter the corners:
- Stop stitching a few inches before reaching the corner of the quilt. This will create a gap between the two binding strips.
- Take the binding strip on the right and fold it diagonally, bringing the folded edge up to the top edge of the quilt. The right side of the binding should be facing up.
- Fold the binding strip on the left diagonally, bringing the folded edge up and overlapping it with the previous fold. The right side of the binding should be facing down, and the raw edges should align with the raw edges of the quilt.
- Pin or clip the mitered corner in place.
- Continue stitching the binding, starting from the corner, and continue around the quilt.
By mitering the corners, you will achieve sharp and professional-looking corners. Once you have mitered all the corners, it’s time to move on to the next step of joining the ends of the binding.
Step 5: Joining the Ends of the Binding
Joining the ends of the binding is a crucial step to create a seamless and continuous border around the quilt. This technique ensures that the binding appears uninterrupted and professional.
Follow these steps to join the ends of the binding:
- Before reaching the starting point, stop stitching a few inches from the edge of the binding.
- Trim the excess binding, leaving a tail of binding that extends beyond the starting point.
- Take the tail of the binding and unfold it, exposing the raw edges.
- Lay the tail of the binding flat on the quilt, aligning it with the edge of the quilt and overlapping it with the starting point.
- Mark the overlap point and trim the excess binding, leaving a small overlap of about 1/2 inch.
- Open up both ends of the binding and place them right sides together.
- Stitch across the marked overlap point, securing the two ends of the binding together.
- Trim any excess fabric and press the seam open.
By joining the ends of the binding, you will create a seamless and continuous loop. Now, you’re ready to move on to the next step of stitching the binding to the back of the quilt.
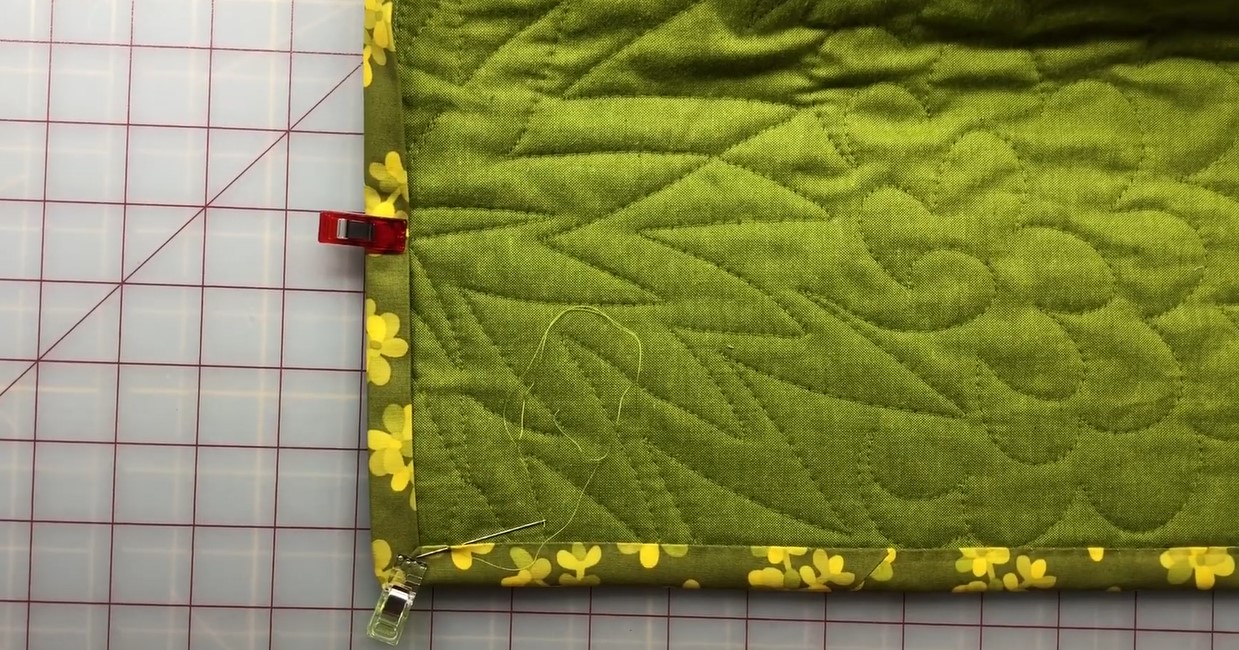
Step 6: Stitching the Binding to the Back of the Quilt
Stitching the binding to the back of the quilt is the final step in securing the binding in place and completing the polished look of your quilt. This step ensures that the binding is neatly attached and the raw edges are hidden.
Follow these steps to stitch the binding to the back of the quilt:
- Flip the quilt over so that the back side is facing up.
- Fold the binding over to the back of the quilt, covering the raw edges and encasing them within the binding fold.
- Pin or clip the binding in place along the edge of the quilt. Make sure to catch both sides of the binding with your pins or clips.
- Using a sewing machine, stitch in the ditch along the folded edge of the binding or stitch just next to the binding to secure it in place. Make sure to backstitch at the beginning and end to reinforce the stitching.
- Continue stitching the binding along the entire perimeter of the quilt.
Stitching the binding to the back of the quilt ensures that it is securely attached, and the finished quilt will have a professional appearance. Once you have completed stitching the binding, it’s time for some finishing touches.
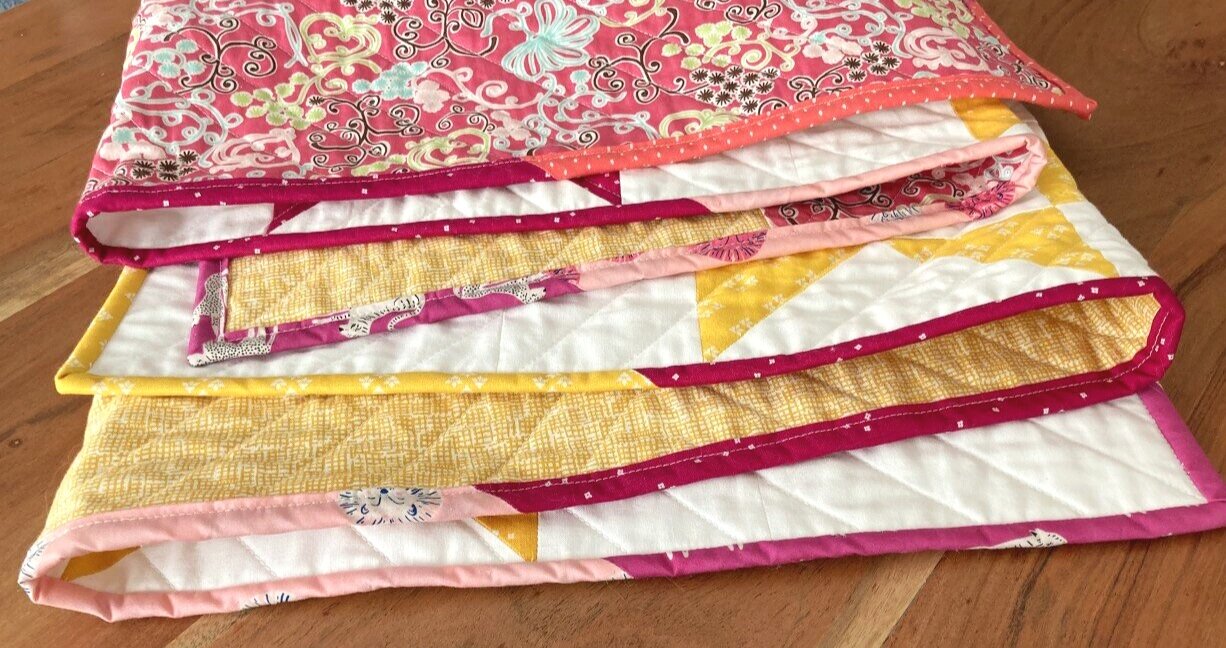
Step 7: Finishing Touches
After stitching the binding to the back of the quilt, there are a few final touches you can add to enhance the overall look and durability of your quilt binding.
Here are some finishing touches to consider:
- Trim any excess threads or loose fabric along the binding.
- Give the entire binding a final press with an iron to ensure that it lays flat and looks crisp.
- If desired, you can add decorative hand stitching along the binding using a contrasting thread. This can be done using a slip stitch or a decorative stitch to add a personalized touch to your quilt.
- Inspect the quilt binding for any missed spots or areas that may need reinforcement. Hand stitch any loose areas or gaps to ensure a sturdy and long-lasting binding.
- Finally, give the entire quilt a final press to remove any wrinkles or creases, and admire your beautifully finished quilt with its professionally attached double fold binding!
Remember, practice makes perfect, so don’t be discouraged if your first attempt at double fold quilt binding isn’t flawless. With time and experience, your binding techniques will improve, resulting in beautifully finished quilts.
Congratulations on completing the process of using double fold quilt binding. Your quilt is now ready to be cherished and enjoyed for years to come!
Now that you have learned how to use double fold quilt binding, you can explore different binding styles and techniques to further enhance your quilting projects. Happy quilting!
Read more: How To Make Binding On Quilt
Conclusion
Congratulations! You have successfully learned how to use double fold quilt binding to add a professional and polished finish to your quilts. By following the step-by-step guide outlined in this article, you have acquired the skills and knowledge needed to create beautiful and durable quilt bindings.
Remember, the key to achieving a high-quality binding is precision and attention to detail. From cutting and folding the binding strips to attaching them to the quilt and mitering corners, each step plays a crucial role in creating a seamless and finished look.
Whether you’re a seasoned quilter or a beginner, double fold quilt binding is a versatile technique that adds both functionality and decorative appeal to your quilts. It not only secures the edges of the quilt layers together but also provides a clean and professional finish that enhances the overall appearance of your quilt.
As with any new skill, practice is key to mastering the art of quilt binding. With each project, you will gain more confidence and refine your techniques, leading to even more impressive bindings in the future.
So, gather your materials and get started on your next quilting project. With your newfound knowledge of double fold quilt binding, you’re on your way to creating stunning quilts that can be treasured for generations to come!
Frequently Asked Questions about How To Use Double Fold Quilt Binding
Was this page helpful?
At Storables.com, we guarantee accurate and reliable information. Our content, validated by Expert Board Contributors, is crafted following stringent Editorial Policies. We're committed to providing you with well-researched, expert-backed insights for all your informational needs.


0 thoughts on “How To Use Double Fold Quilt Binding”