Articles
How To Make A Miniature Quilt
Modified: August 28, 2024
Learn how to create beautiful miniature quilts with our informative articles. Discover tips, techniques, and inspiration for your next quilting project.
(Many of the links in this article redirect to a specific reviewed product. Your purchase of these products through affiliate links helps to generate commission for Storables.com, at no extra cost. Learn more)
Introduction
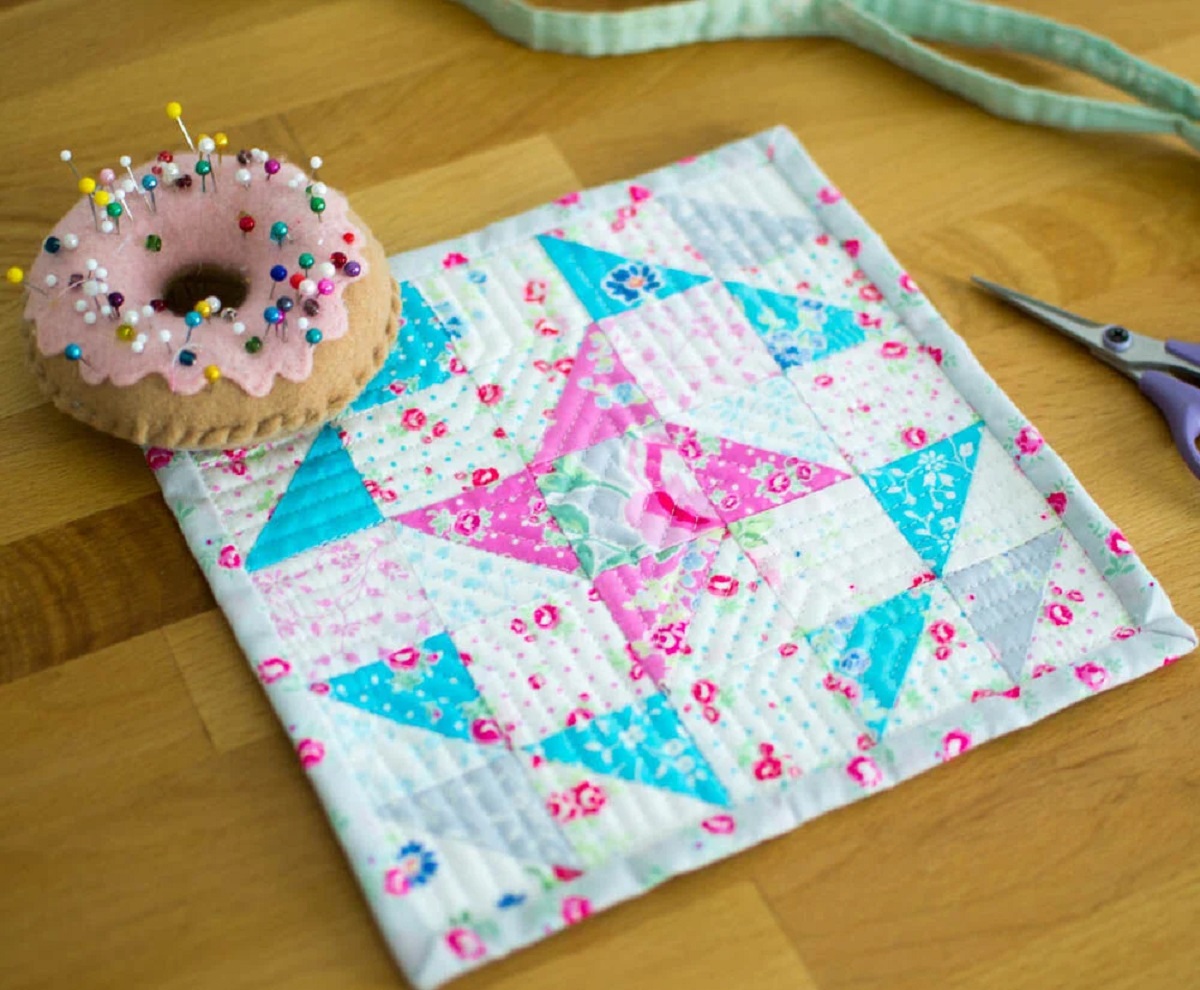
Quilting is a beloved craft that allows you to create beautiful and intricate designs using fabric and thread. While creating a full-sized quilt may require significant time and expertise, you can still enjoy the art of quilting by making a miniature quilt. Miniature quilts are tiny versions of traditional quilts, typically measuring no more than 24 inches in width and length. Making a miniature quilt is not only a fun and rewarding project, but it also allows you to showcase your creativity and attention to detail.
In this article, we will walk you through the step-by-step process of making a miniature quilt. From selecting the right fabrics to adding the finishing touches, you will learn all the essential techniques and tips to create a stunning miniature quilt.
Before we dive into the specifics, let’s take a moment to gather all the materials you will need for this project.
Key Takeaways:
- Dive into the world of quilting with a fun and rewarding project – making a miniature quilt. Showcase your creativity and attention to detail while exploring fabric selection, precise cutting, and intricate sewing techniques.
- Elevate your quilting skills by creating a visually pleasing and well-constructed miniature quilt. From choosing fabrics to adding personalized labels, enjoy the journey of crafting a unique and cherished piece of art.
Read more: How To Make A Miniature Hammock
Materials Needed
Before getting started on your miniature quilt project, it’s important to gather all the necessary materials. Here’s a list of what you’ll need:
- Fabric: Choose a variety of fabrics in different colors and patterns. It’s best to use cotton fabric, as it is easy to work with and provides a nice drape for your quilt.
- Quilting thread: Opt for a high-quality thread specifically designed for quilting. This thread is stronger and ensures that your quilt stitches will hold up over time.
- Needles: Invest in quilting needles or a set of assorted needles. These needles have a larger eye and are specifically designed for hand quilting.
- Scissors: A sharp pair of fabric scissors is essential for cutting your fabric accurately. You will need both large shears for cutting larger pieces of fabric and smaller scissors for more intricate cuts.
- Rotary cutter and cutting mat: These tools are optional but can make the cutting process faster and more precise. If you choose to use them, make sure to invest in a high-quality rotary cutter and a self-healing cutting mat.
- Ruler: A quilting ruler is indispensable for measuring and cutting your fabric. Look for one with clear markings and a non-slip backing.
- Pins: Use straight pins to hold your fabric pieces in place while sewing. Opt for fine, sharp pins that won’t damage your fabric.
- Iron and ironing board: Pressing your fabric is crucial for achieving neat and accurate seams. Make sure you have a reliable iron and a sturdy ironing board.
- Quilt batting: This is the layer that provides warmth and thickness to your quilt. Choose a batting that complements the size of your miniature quilt.
- Backing fabric: Select a fabric for the back of your quilt that coordinates with the front. The backing fabric should be slightly larger than your quilt top.
- Binding fabric: Binding is the fabric strip that covers the raw edges of your quilt. Choose a contrasting or coordinating fabric that will frame your quilt nicely.
Now that you have all the necessary materials, it’s time to move on to the next step: choosing the fabrics for your miniature quilt.
Choosing Fabrics
When it comes to choosing fabrics for your miniature quilt, the possibilities are endless. You have the freedom to mix and match colors, patterns, and textures to create a quilt that reflects your personal style. Here are a few tips to help you make the right fabric choices:
- Consider the overall theme: Determine the theme or mood you want to convey with your miniature quilt. Whether it’s a floral design, a modern geometric pattern, or a vintage-inspired look, select fabrics that align with your theme.
- Think about color palette: Decide on a color scheme that harmonizes well together. You can opt for a monochromatic palette, complementary colors, or even a rainbow of hues. Play with different shades and tones to create depth and interest.
- Mix different patterns: Don’t be afraid to combine various patterns, such as stripes, polka dots, florals, or even novelty prints. Just make sure that the scale of the patterns is appropriate for the size of your miniature quilt.
- Consider fabric texture: Adding fabrics with different textures can create visual interest in your quilt. Consider incorporating fabrics with a subtle texture, like linen or chambray, along with smoother cotton fabrics.
- Pay attention to scale: Since you are working with a smaller quilt, be mindful of the scale of the prints you choose. Large-scale prints may overpower the miniature size, while small-scale prints might not showcase their details as well.
- Test your fabric choices: Lay out your fabric selections on a table or design board to get a sense of how they work together. This will allow you to see if any fabrics clash or if there is a need for adjustments.
Remember, there are no hard and fast rules in fabric selection. The key is to choose fabrics that make you happy and create a visually pleasing composition. Once you have finalized your fabric choices, it’s time to move on to the next step: cutting the fabric for your quilt.
Cutting the Fabric
Now that you have selected your fabrics, it’s time to start cutting them into the necessary pieces for your miniature quilt. Follow these steps to ensure accurate and precise cuts:
- Prepare your work area: Clear a large, flat surface like a table or cutting mat. Make sure the area is clean and free of any obstructions that may hinder your cutting process.
- Iron your fabric: Before cutting, iron your fabrics to remove any wrinkles or creases. This will help you achieve more accurate measurements and cuts.
- Measure and mark: Use your quilting ruler to measure and mark the dimensions of each fabric piece. Take into consideration the size of your quilt blocks and any seam allowances required for your pattern.
- Use sharp scissors or a rotary cutter: Depending on your preference, use either sharp fabric scissors or a rotary cutter to cut along the marked lines. Make sure your cuts are clean and straight to ensure precise piecing.
- Label your fabric pieces: To keep track of the different sections of your quilt, it’s helpful to label each cut fabric piece with a small piece of masking tape or a removable fabric marker.
- Organize your fabric pieces: Keep your fabric pieces organized by grouping them together based on their use in the quilt pattern. This will make it easier to assemble the quilt top later on.
As you cut your fabric, double-check your measurements and make any necessary adjustments to ensure the pieces fit together correctly. It’s important to remember that accuracy during this step will greatly affect the outcome of your quilt. Take your time and be precise in your cutting process.
Now that you have all your fabric pieces cut and organized, it’s time to move on to the next step: sewing the quilt blocks.
Sewing the Quilt Blocks
The quilt blocks are the building blocks of your miniature quilt. Each block consists of several fabric pieces sewn together to create a unique design. Follow these steps to sew your quilt blocks:
- Arrange your fabric pieces: Lay out your cut fabric pieces in the desired arrangement for your quilt block. Take a moment to visualize how the colors and patterns will come together.
- Pin the pieces together: Once you are satisfied with the layout, use straight pins to pin the fabric pieces together along the edges. Make sure that the right sides of the fabric are facing each other.
- Sew the pieces together: Set your sewing machine to a straight stitch with an appropriate stitch length. Sew along the pinned edges, using a 1/4-inch seam allowance or as specified in your pattern. Backstitch at the beginning and end of each seam to secure the stitches.
- Press the seams: After sewing each seam, press the seam allowances to one side using a hot iron. This will help to flatten the fabric and create crisp, clean lines.
- Trim excess fabric: If needed, trim any excess fabric from the seam allowances to reduce bulk. Be careful not to cut into the stitches or the fabric itself.
- Repeat for each block: Continue sewing and assembling the remaining quilt blocks following the same steps.
As you complete each quilt block, take the time to admire your progress. The quilt blocks are the foundation of your miniature quilt, and sewing them accurately will ensure that the final result is visually appealing and well-constructed.
Once you have finished sewing all the quilt blocks, it’s time to move on to the next step: assembling the quilt top!
When making a miniature quilt, be sure to use small, precise cuts and accurate seam allowances to ensure that your pieces fit together neatly and the finished quilt looks proportional and well-crafted.
Read more: How To Make Miniature Pillows
Assembling the Quilt Top
Now that you have completed sewing the quilt blocks, it’s time to assemble them into the quilt top. The quilt top is the main part of your miniature quilt where all the blocks come together in a cohesive design. Follow these steps to assemble the quilt top:
- Arrange the quilt blocks: Lay out your finished quilt blocks on a large, flat surface. Play with the arrangement until you are satisfied with the overall design. Consider factors such as color placement, pattern distribution, and balance.
- Join the blocks: Once you have decided on the layout, take the first two blocks and place them right sides together. Align the edges and pin them together. Sew along the pinned edge using a 1/4-inch seam allowance. Press the seam allowance flat.
- Continue joining blocks: Repeat the process of joining blocks until all the blocks are sewn together into rows.
- Join the rows: Now it’s time to join the rows of blocks. Take the first two rows and place them right sides together. Align the edges and pin them together. Sew along the pinned edge using a 1/4-inch seam allowance. Press the seam allowance flat.
- Continue joining rows: Repeat the process of joining rows until all the rows are sewn together, forming the complete quilt top.
- Press the quilt top: Once the quilt top is fully assembled, give it a final press with a hot iron. This will help to set the seams and create a smooth, professional-looking finish.
As you assemble the quilt top, make sure to check for any inconsistencies or misalignments. Adjust as necessary to ensure a well-aligned and visually pleasing quilt top. Take your time during this step to ensure a high-quality result.
Now that your quilt top is complete, it’s time to move on to the next step: adding borders to your miniature quilt.
Adding Borders
Adding borders to your miniature quilt is an important step that not only enhances the design but also provides a finishing touch. Borders are strips of fabric that frame the quilt top, giving it a polished look. Follow these steps to add borders to your miniature quilt:
- Measure your quilt top: Start by measuring the length and width of your quilt top. This will help you determine the dimensions of the borders.
- Calculate the border size: Decide on the desired width of your borders. This can vary depending on your personal preference and the overall design of your quilt. Keep in mind that narrower borders can create a more modern look, while wider borders add more visual impact.
- Cut the border fabric: Using your ruler and scissors or a rotary cutter, cut strips of fabric for the borders. Make sure the length of each strip matches the corresponding side of the quilt top, plus the width of the borders and seam allowances.
- Attach the borders: Take one border strip and align it with one side of the quilt top, right sides together. Pin in place and sew using a 1/4-inch seam allowance. Repeat this process for the remaining sides of the quilt top.
- Press the borders: After each border strip is sewn on, press the seam allowances away from the quilt top. This helps to flatten the fabric and ensures the borders lie flat.
- Measure and cut the remaining borders: Measure the quilt top, including the recently added borders. Cut the remaining border strips to match the measurements of the quilt top, plus the width of the borders and seam allowances.
- Attach the remaining borders: Align each border strip with the corresponding side of the quilt top, right sides together. Pin and sew as before. Press the seam allowances away from the quilt top.
- Press the entire quilt top: Once all the borders are attached, give the entire quilt top a thorough press with a hot iron. This will ensure that the borders lay flat and the quilt top looks neat and professional.
Adding borders not only frames your quilt top but also provides an opportunity to introduce a contrasting or complementary fabric to enhance the overall design. Take your time to measure and align the borders accurately for a polished and well-finished look.
Now that your miniature quilt has borders, the next step is to quilt the layers together.
Quilting the Layers
Quilting is the process of stitching the layers of a quilt together. This step not only secures the quilt sandwich but also adds texture and design to your miniature quilt. Follow these steps to quilt the layers of your quilt:
- Prepare your quilt sandwich: Lay the quilt backing fabric flat, wrong side facing up. Place the quilt batting on top of the backing fabric, followed by the quilt top, right side facing up. Smooth out any wrinkles or bumps in the layers.
- Baste the layers: To keep the layers in place during the quilting process, you will need to baste them together. There are several methods you can use, such as safety pins, hand basting with large stitches, or using special basting sprays. Choose the method that works best for you and secure the layers.
- Choose your quilting design: Decide on the quilting design you want to use for your miniature quilt. This can range from simple straight lines to intricate free-motion designs. Consider the overall aesthetic of your quilt and choose a quilting pattern that complements it.
- Set up your sewing machine: If using a machine, attach a walking foot or quilting foot to help feed the quilt layers evenly. Thread your machine with quilting thread in a color that complements your quilt top or choose a neutral color that blends well with all the fabrics.
- Begin quilting: Start quilting by stitching along the desired quilting lines. Take your time and work methodically, ensuring even stitch lengths and consistent spacing. If you’re new to quilting, consider practicing on a scrap fabric piece before quilting your quilt.
- Experiment with different quilting techniques: Quilting allows you to showcase your creativity. Explore different techniques such as straight line quilting, free-motion quilting, or even using decorative stitches on your machine. Choose techniques that accentuate the design and fabric patterns of your quilt.
- Continue quilting: Keep quilting until you have covered the entire quilt top with your chosen quilting design. Take breaks if needed to avoid fatigue and to maintain the quality of your stitches.
Quilting can be a time-consuming process, but it is a rewarding step that brings your miniature quilt to life. Explore different quilting designs and techniques to add your personal touch and make your quilt truly unique.
Once you have finished quilting, the next step is to bind the edges of your quilt for a neat and professional finish.
Binding the Quilt
Binding is the final step in completing your miniature quilt. The binding not only provides a clean and finished edge but also helps to secure all the layers together. Follow these steps to bind your quilt:
- Measure and cut the binding fabric: Determine the length needed for your binding by measuring the perimeter of your quilt. Add a few extra inches to accommodate the corners and the joining seam. Cut fabric strips that are 2.5 inches wide, along the length of your binding fabric.
- Prepare the binding strips: Take the binding strips and sew them together at a 45-degree angle to create one continuous strip. Trim the excess fabric and press the seams open. Fold the strip in half lengthwise and press to create a double-fold binding.
- Attach the binding to the quilt: Starting in the middle of one side of your quilt, align the raw edges of the binding strip with the raw edges of the quilt. Leave a small tail of binding unattached and begin stitching along the edge, using a 1/4-inch seam allowance. Stop sewing approximately 8-10 inches before reaching the starting point.
- Miter the corners: When you approach a corner, stop sewing 1/4 inch away from the corner. Fold the binding strip up, creating a 45-degree angle, and then fold it back down along the adjacent side of the quilt. Continue sewing along the new edge, starting 1/4 inch away from the corner. Repeat this process for all four corners.
- Join the ends of the binding: When you reach the starting point, trim the excess binding and tuck the end inside the binding tail you left earlier. Fold the tail over, aligning the raw edges, and continue stitching to join the ends of the binding together.
- Finish sewing the binding: Complete the binding by stitching along the remaining edge until you reach the starting point. Backstitch to secure the stitches, then trim any excess thread.
- Press the binding: Press the binding away from the quilt, pushing the seam allowances towards the binding. This will help the binding to lie flat and create a neat finish.
Once the binding is attached and pressed, take a moment to admire your completed quilt. The binding not only adds a professional touch but also protects the edges of your quilt, ensuring its longevity.
The next and final step is to add the finishing touches to your miniature quilt.
Read more: How To Make A Miniature Dollhouse Chandelier
Finishing Touches
As you near the completion of your miniature quilt, it’s time to add the finishing touches that will elevate its overall appearance and make it truly special. These final steps will ensure that your quilt is ready to be admired and cherished:
- Trim any excess threads: Take a close look at your quilt and trim any loose threads or stray fabric that may be sticking out. This will give your quilt a clean and polished look.
- Give it a final press: Use a hot iron to press your quilt one last time. This will help to flatten any remaining wrinkles and creases and give your quilt a crisp finish.
- Add personalized labels: Consider adding a personalized label to your quilt. This label can include your name, the date, and any special message or sentiment you’d like to include. Attach the label securely to the back of your quilt for a personal touch.
- Document your journey: Keep a record of your quilt-making process, including any challenges, inspirations, or techniques you employed. Taking photos and writing a short description can serve as a wonderful memory of your quilting journey.
- Display or gift your quilt: Once your miniature quilt is complete, you have the option to proudly display it on a wall or a table. Alternatively, consider gifting your quilt to a loved one or friend who will appreciate the time and effort you put into creating it.
Remember, the finishing touches are what truly make a quilt unique and personal. Enjoy this final stage as you add the small details that will bring your miniature quilt to life.
Creating a miniature quilt is a rewarding endeavor that allows you to showcase your creativity and skills. Take pride in your finished quilt and continue to explore the world of quilting, experimenting with new patterns, designs, and techniques.
Congratulations on completing your miniature quilt, and happy quilting!
Frequently Asked Questions about How To Make A Miniature Quilt
Was this page helpful?
At Storables.com, we guarantee accurate and reliable information. Our content, validated by Expert Board Contributors, is crafted following stringent Editorial Policies. We're committed to providing you with well-researched, expert-backed insights for all your informational needs.


0 thoughts on “How To Make A Miniature Quilt”