Home>Furniture>Outdoor Furniture>How To Make A Miniature Hammock
Outdoor Furniture
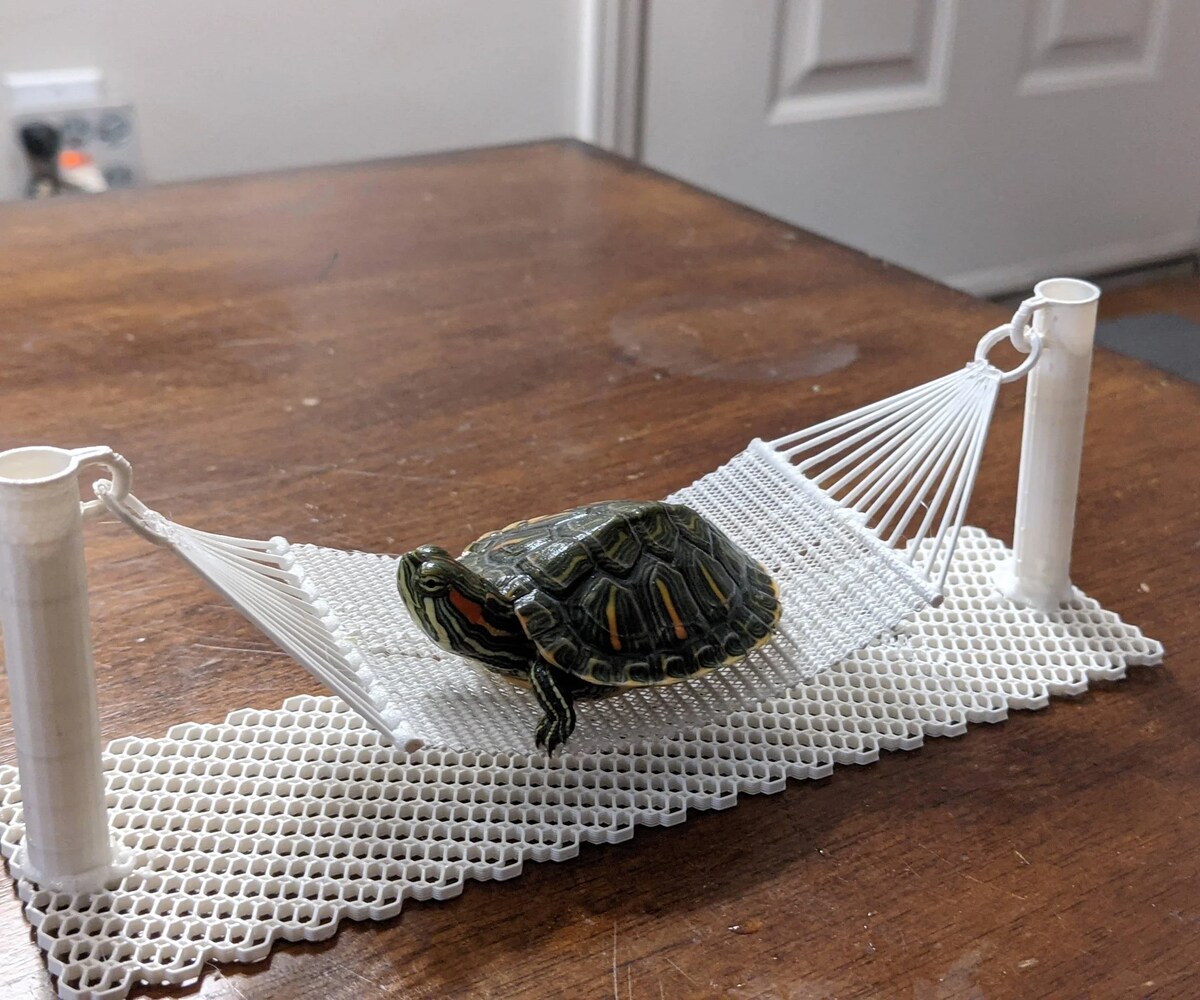
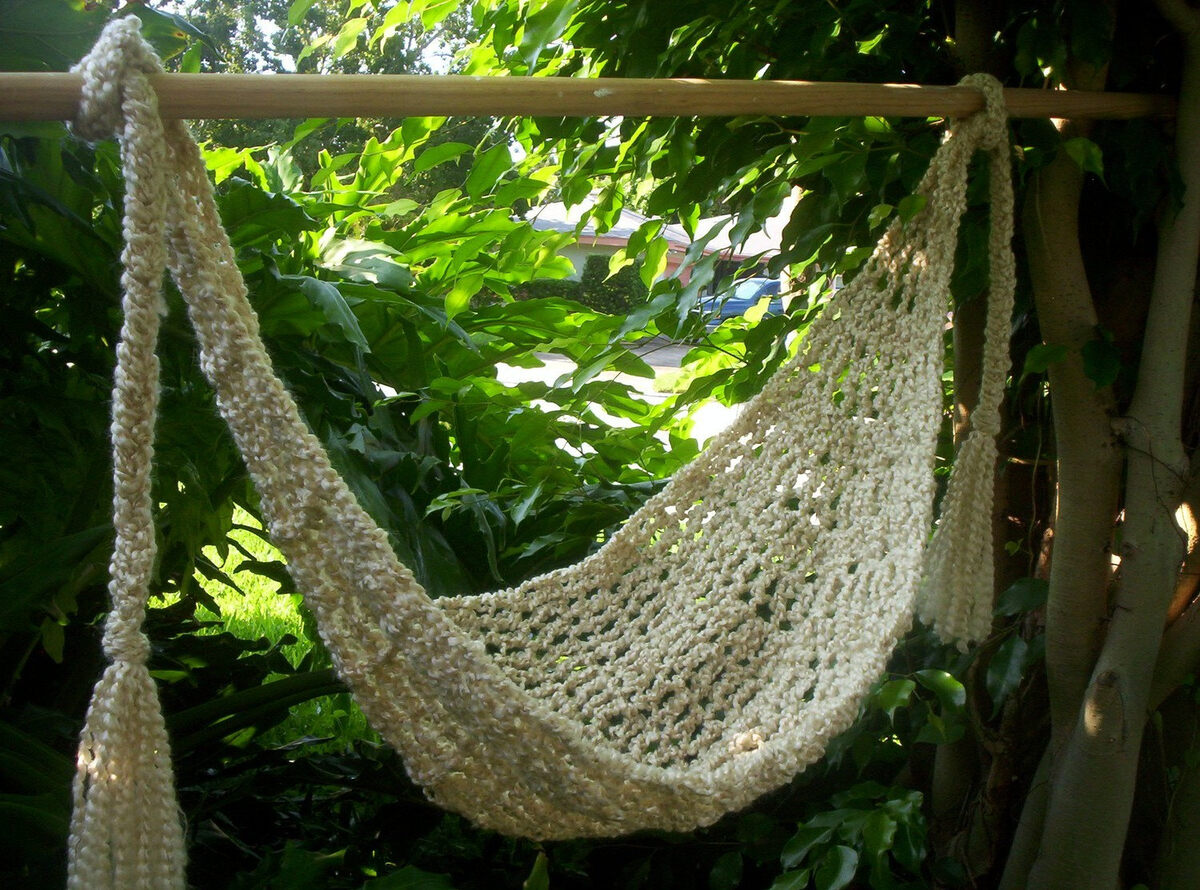
How To Make A Miniature Hammock
Modified: March 16, 2024
Discover the simple steps to make your own miniature hammock for your outdoor furniture. Perfect DIY project for relaxation and comfort.
(Many of the links in this article redirect to a specific reviewed product. Your purchase of these products through affiliate links helps to generate commission for Storables.com, at no extra cost. Learn more)
Introduction
Welcome to the world of miniature hammocks! If you love outdoor furniture and enjoy crafting, making a miniature hammock can be a fun and rewarding project. Whether you want to create a charming addition to a dollhouse, a unique decoration for a plant, or a creative gift for a friend, a mini hammock is sure to delight.
In this article, we will guide you through the process of making your very own miniature hammock. Using simple materials and basic crafting skills, you’ll be able to create a tiny retreat that exudes relaxation and charm.
Before we dive into the step-by-step instructions, let’s gather the materials you’ll need for this project.
Key Takeaways:
- Crafting a miniature hammock is a fun and rewarding project that requires simple materials and basic skills. It adds charm and relaxation to any miniature scene or display.
- By following step-by-step instructions, you can create a sturdy and visually appealing miniature hammock. It’s a great way to showcase your creativity and passion for outdoor furniture.
Read more: How To Make Miniature Pillows
Materials Needed
Before you begin, make sure you have the following materials:
- Thin fabric or yarn: Choose a material that is lightweight and flexible, such as cotton or nylon. You can opt for a solid color or a patterned fabric to add visual interest to your miniature hammock.
- Scissors: A sharp pair of scissors will be essential for trimming the fabric and cutting any necessary threads.
- Thread: Select a thread that matches the color of your fabric for seamless stitching.
- Needle: A small sewing needle that is suitable for the fabric you are using.
- Small wooden dowels or sticks: These will form the frame of your miniature hammock. Choose dowels or sticks that are thin enough to be easily manipulated but sturdy enough to support the weight of the fabric.
- Glue: A strong adhesive or craft glue for securing the fabric to the frame.
- Suspension system: You will need a string, twine, or miniature hooks to hang your hammock.
- Optional embellishments: If desired, you can add decorative elements such as beads, miniature pillows, or tassels to enhance the aesthetic appeal of your miniature hammock.
Once you have gathered all the materials, you’re ready to embark on your mini hammock-making adventure! Let’s move on to the first step: gathering supplies.
Step 1: Gathering Supplies
The first step in making your miniature hammock is to gather all the necessary supplies. Make sure you have the thin fabric or yarn, scissors, thread, needle, small wooden dowels or sticks, glue, suspension system, and any optional embellishments you wish to add. Take a few moments to organize your materials and ensure everything is easily accessible.
When selecting your fabric or yarn, consider the desired size of your miniature hammock. If you’re making a small-scale version, opt for thinner materials to ensure the hammock doesn’t become too bulky. If you’re aiming for a larger hammock, choose a slightly thicker fabric that can still be easily maneuvered.
Next, examine your wooden dowels or sticks. If they are too long for your desired hammock size, use the scissors to carefully trim them down to the appropriate length. It’s important to have evenly sized dowels or sticks for a balanced and stable frame.
Right before you start assembling your miniature hammock, make sure you have a clean and clutter-free workspace. This will help you stay organized and focused throughout the process.
With all your supplies in order, you’re ready to move on to the next step: preparing the fabric.
Step 2: Preparing the Fabric
Now that you have gathered your supplies, it’s time to prepare the fabric for your miniature hammock. Follow these steps to get your fabric ready:
- Measure and cut the fabric: Determine the desired size of your hammock and use the scissors to cut the fabric accordingly. Give yourself some extra fabric to account for any fraying or additional stitching.
- Finish the edges: To prevent fraying, you can either use a sewing machine to sew a narrow hem along the edges or apply a fabric glue to secure them. If you’re using yarn instead of fabric, you can skip this step.
- Add decorative elements (optional): If you want to add decorative elements such as beads or tassels, now is the time to attach them to your fabric. You can sew or glue them in place, ensuring they are evenly distributed along the edges or corners.
Once you have completed these steps, your fabric is prepared and ready for the next stage of the hammock-making process. Take a moment to admire your handiwork and get ready for the next step: creating the frame.
Step 3: Creating the Frame
With your fabric prepared, it’s time to move on to creating the frame for your miniature hammock. Follow these steps to construct the frame:
- Take two of the small wooden dowels or sticks and lay them parallel to each other, with a small gap between them. These will serve as the sides of your hammock frame.
- Position two additional dowels or sticks perpendicular to the side pieces, creating a rectangular shape. Make sure the ends of the cross pieces overlap with the sides, forming a sturdy connection.
- Use adhesive or glue to secure the joints of the frame. Apply a small amount of glue to each joint and press the pieces firmly together. Allow the glue to dry completely before moving on to the next step.
Once the glue has dried, you will have a solid frame for your miniature hammock. Take a moment to ensure that all the pieces are securely connected and that the frame is stable.
Now that you have completed the frame, it’s time to attach the fabric to create the hammock bed. Continue to the next step for the detailed instructions on how to do this.
When making a miniature hammock, use strong and durable materials like cotton or nylon thread to ensure it can hold weight. Be sure to tie secure knots to prevent the hammock from unraveling.
Read more: How To Make A Miniature Quilt
Step 4: Attaching the Fabric to the Frame
Now that you have a sturdy frame for your miniature hammock, it’s time to attach the fabric to create the hammock bed. Follow these steps to secure the fabric to the frame:
- Lay the fabric flat on your workspace, ensuring it is free of any wrinkles or creases.
- Position the frame on top of the fabric, making sure it is centered and aligned with the edges of the fabric.
- Starting from one end, fold the fabric over the top of the frame and secure it in place using small stitches or adhesive. Repeat this process for all sides of the frame, pulling the fabric taut as you go.
- Trim any excess fabric, leaving a small allowance for stitching or gluing.
- If you’d like to add additional reinforcement, you can sew or glue a strip of fabric along the edges of the hammock bed, covering the fold of the fabric and providing extra strength.
As you attach the fabric, ensure that it is securely fastened to the frame, allowing it to support the weight of small dolls or objects. Take a moment to test the stability of your hammock and make any necessary adjustments.
Now that the fabric is secured to the frame, it’s time to move on to the next step: adding the suspension system.
Step 5: Adding the Suspension System
To ensure your miniature hammock can be properly hung, you’ll need to add a suspension system. Follow these steps to incorporate a suspension system for your mini hammock:
- Decide on the type of suspension system you want to use. You can either tie strings directly to the ends of the frame or attach miniature hooks that will act as attachment points for the strings.
- If you’re using strings, cut two equal lengths that are long enough to provide the desired height for your hammock. Attach one end of each string to one side of the frame, ensuring they are securely tied or glued in place.
- If using miniature hooks, carefully affix them to the ends of the frame using glue or by screwing them in if they have small threads. Make sure they are aligned and level with each other.
- Attach strings to the hooks, ensuring they are adjusted to create an even hammock bed when hung. Tie them securely to the hooks, allowing for a slight amount of slack.
Once you have added the suspension system, take a step back and admire your miniature hammock taking shape. Test the stability of the suspension system by gently pulling on the strings or hooks to ensure they are securely attached.
Now that your miniature hammock is almost complete, let’s move on to the final step: testing and adjusting.
Step 6: Testing and Adjusting
Now that you have completed the construction of your miniature hammock, it’s time to test its functionality and make any necessary adjustments. Follow these steps to ensure your hammock is ready for use:
- Hang your hammock in a suitable location. Choose a place where it can be easily admired and accessed, such as a dollhouse, a plant display, or a miniature scene.
- Gently place small dolls or objects in the hammock to test its ability to hold weight. Make sure the hammock remains stable and level.
- Observe the fabric and frame for any signs of strain or weakness. If you notice any areas that need reinforcement, apply additional stitching or adhesive to strengthen them.
- Adjust the suspension system if needed. If the hammock is too loose or too tight, untie or reposition the strings to achieve a comfortable and balanced hang.
- Take a step back and admire your finished creation. Ensure that all the elements of your miniature hammock are visually appealing and cohesive.
By testing and adjusting your miniature hammock, you can ensure that it is not only functional but also aesthetically pleasing. Don’t hesitate to make any necessary modifications or improvements to enhance the overall design and usability of your creation.
Congratulations! You have successfully completed the process of making a miniature hammock. Enjoy the satisfaction of your handcrafted creation and share it with others to inspire their own creativity and craftiness.
Remember, the beauty of crafting lies in the joy of creating something unique. Let your miniature hammock be a testament to your creativity and passion for outdoor furniture.
Now, go ahead and find the perfect spot for your miniature hammock, where it can provide a touch of relaxation and charm to your miniature world. Happy crafting!
Conclusion
Congratulations on completing your very own miniature hammock! Through careful preparation, crafting, and adjustments, you have created a charming and functional piece of outdoor furniture. This project not only showcases your creativity but also adds a touch of relaxation and whimsy to any miniature scene or display.
As you reflect on your crafting journey, remember the joy that comes from creating something with your own hands. The process of making a miniature hammock allowed you to explore different materials, hone your sewing or gluing skills, and envision a tranquil space in a small-scale world.
Now that your hammock is complete, take a moment to admire and enjoy it. Display it in a dollhouse, hang it among plants, or incorporate it into a miniature scene. You can even personalize it further by adding miniature pillows, blankets, or other decorative elements.
Additionally, your miniature hammock can be a wonderful gift for friends and loved ones who appreciate the beauty of handmade items. It is sure to spark their curiosity and bring a smile to their faces.
Remember, the possibilities with miniature crafting are endless. You can explore different materials, textures, and designs to create a variety of unique hammocks. Don’t be afraid to experiment and let your imagination run wild!
Now, gather your supplies, unleash your creativity, and venture into the world of miniature hammocks. Embrace the joy of crafting and the satisfaction of creating something delightful and extraordinary. Let your miniature hammock become a symbol of relaxation, imagination, and the love for outdoor furniture.
Enjoy the process, and happy crafting!
Frequently Asked Questions about How To Make A Miniature Hammock
Was this page helpful?
At Storables.com, we guarantee accurate and reliable information. Our content, validated by Expert Board Contributors, is crafted following stringent Editorial Policies. We're committed to providing you with well-researched, expert-backed insights for all your informational needs.


0 thoughts on “How To Make A Miniature Hammock”