
Articles
How To Make A Quilt Frame
Modified: December 7, 2023
Learn how to make a quilt frame with our informative articles. Discover tips, tricks, and step-by-step instructions for creating your own quilting masterpiece.
(Many of the links in this article redirect to a specific reviewed product. Your purchase of these products through affiliate links helps to generate commission for Storables.com, at no extra cost. Learn more)
Introduction
Quilting is a beloved craft that has been passed down through generations. It is a beautiful and creative way to make durable, warm, and decorative blankets. While there are different methods and techniques for quilting, having a quilt frame is essential for many quilters.
A quilt frame is a sturdy structure that holds the layers of the quilt taut and in place, making it easier to stitch and quilt. It provides stability and allows for precise and even stitches, resulting in a beautifully finished quilt. While there are various types of quilt frames available in the market, making your own quilt frame can be a rewarding and cost-effective project.
In this article, we will guide you through the process of making a quilt frame from scratch. We will cover everything from choosing the size of the frame to assembling the pieces, attaching the fabric, adjusting the tension, and adding finishing touches. So, let’s dive in and learn how to make a quilt frame that will become an essential tool in your quilting journey.
Key Takeaways:
- Create a customized quilt frame to fit your quilting needs and space, saving costs and adding a personal touch to your crafting experience. Enjoy the process of constructing, adjusting, and using your handmade frame for beautiful quilting projects.
- Embrace the artistry and creativity of quilting with your newly constructed quilt frame. Enjoy the therapeutic and fulfilling hobby while creating stunning, durable quilts that will be cherished for generations to come.
Read more: How To Make Quilt Frame Leaders
Materials Needed
Before you begin making your quilt frame, it’s important to gather all the necessary materials. Here’s a list of items you’ll need:
- 2×4-inch lumber (the length will depend on the size of the frame you want to make)
- Screws
- Drill
- Saw (a circular saw or miter saw will work)
- Measuring tape
- Clamps
- Staple gun and staples
- Canvas or heavy cotton fabric (large enough to cover the frame)
- Scissors
- Pliers
- Hammer
Make sure you have all the materials readily available before you start constructing the quilt frame. This will ensure a smooth and uninterrupted process.
Step 1: Choosing the Size of the Quilt Frame
The first step in making a quilt frame is determining the desired size of the frame. This will depend on the size of the quilts you usually work on and the available space in your quilting area.
Consider the following factors when choosing the size of your quilt frame:
- Quilt Size: The frame should be large enough to accommodate the quilts you typically work on. Measure the largest quilt you have made or plan to make and add a few extra inches to ensure enough room for maneuvering.
- Available Space: Take into account the space you have in your quilting area. Measure the wall or the area where you intend to set up the frame to make sure it fits comfortably without obstructing other furniture or equipment.
Once you have determined the appropriate size for your quilt frame, you can proceed to gather the necessary tools and materials for the construction process.
Step 2: Gathering the Necessary Tools
Now that you have determined the size of your quilt frame, it’s time to gather the necessary tools for constructing it. Here’s a list of tools you’ll need:
- 2×4-inch lumber (the length will depend on the size of the frame you want to make)
- Screws
- Drill
- Saw (a circular saw or miter saw will work)
- Measuring tape
- Clamps
- Staple gun and staples
- Canvas or heavy cotton fabric (large enough to cover the frame)
- Scissors
- Pliers
- Hammer
Having these tools readily available will streamline the construction process and ensure that you have everything you need at hand.
It’s also a good idea to wear protective gear such as safety glasses and gloves when working with power tools and handling sharp objects.
Once you have gathered all the necessary tools, you can proceed to the next step of assembling the frame pieces.
Step 3: Assembling the Frame Pieces
With the necessary tools in hand, it’s time to start assembling the frame pieces for your quilt frame. Follow these steps:
- Measure and cut the 2×4-inch lumber according to the size you determined for your frame.
- Place two of the cut pieces on the floor or a sturdy work surface, parallel to each other, with the shorter ends facing inward. These will be the side rails of the frame.
- Take another piece of cut lumber and place it perpendicular across the ends of the side rails to form the top rail.
- Secure the joints using screws and a drill. Ensure that the frame pieces are aligned and level before tightening the screws.
- Repeat the previous steps to attach the bottom rail to the side rails, completing the rectangular frame structure.
- Use clamps to keep the frame pieces in place while you work on attaching them together.
- Check that the frame is sturdy and stable. Make any necessary adjustments or reinforcements if needed.
Once the frame is securely assembled, you can move on to the next step of attaching the fabric to the frame, which will provide the surface for quilting.
When making a quilt frame, ensure that the corners are square and the frame is sturdy to prevent any warping or distortion of the quilt while working on it.
Read more: How To Hand Quilt Without A Frame
Step 4: Attaching the Fabric to the Frame
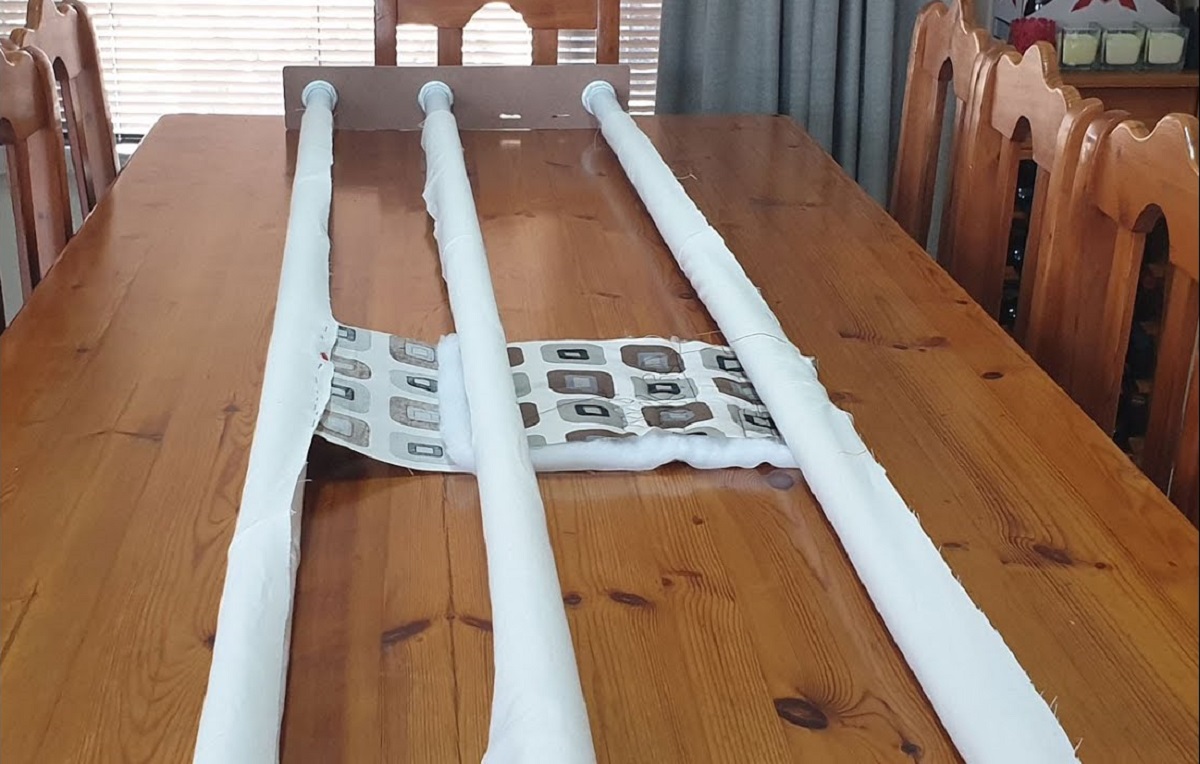
Now that you have completed the construction of the frame, it’s time to attach the fabric to create the surface for quilting. Follow these steps:
- Lay the canvas or heavy cotton fabric flat on the floor or a large, clean work surface.
- Place the frame on top of the fabric, making sure it is centered and aligned.
- Starting at one side, pull the fabric up and over the frame, ensuring that it is taut but not overly stretched.
- Secure the fabric to the frame by using a staple gun and staples. Begin by stapling the fabric in the center of each side, then work your way out towards the corners, spacing the staples evenly.
- Continue to pull the fabric tightly and staple it along the sides of the frame, leaving the corners for now.
- Once the sides are stapled securely, move on to the corners. Fold the fabric neatly at each corner and staple it in place.
- Check to ensure that the fabric is smooth and wrinkle-free, making any adjustments as necessary.
Remember to maintain even tension while stapling the fabric to ensure a flat and stable surface for quilting. Avoid overstretching the fabric, as it may lead to distortions in the quilt.
With the fabric securely attached, your quilt frame is now ready to be used for quilting. However, before you dive into the quilting process, it’s important to adjust the frame tension to ensure optimal results.
Step 5: Adjusting the Frame Tension
Once the fabric is attached to the quilt frame, it’s important to ensure that the tension is properly adjusted. Proper tension is crucial for smooth and even stitches while quilting. Follow these steps to adjust the frame tension:
- Check the tension of the fabric by gently tapping it with your fingertips. It should have a slight bounce and feel taut but not overly tight.
- If the fabric feels too loose, use pliers to carefully remove the staples from one side of the frame.
- Adjust the tension by gently pulling the fabric tighter and re-stapling it to the frame.
- Work your way along the loosened side, adjusting the tension and stapling at regular intervals.
- Repeat the process for the remaining sides, checking the tension and adjusting as needed.
- Ensure that the fabric is evenly tensioned across the frame, with no significant wrinkles or sagging.
- Once you are satisfied with the tension and the fabric is securely attached, trim any excess fabric using scissors.
Remember, achieving the right tension may take some trial and error. It’s important to make small adjustments and test the tension as you go.
With the fabric properly tensioned, your quilt frame is now ready for the final step of adding some finishing touches.
Step 6: Adding Finishing Touches
Now that you have constructed and tensioned your quilt frame, it’s time to add some finishing touches to enhance its functionality and durability. Follow these steps to complete your quilt frame:
- Inspect the frame for any rough edges or splinters. Use sandpaper or a file to smooth out any rough spots.
- If desired, you can give the frame a coat of paint or stain to protect the wood and add a decorative touch. Allow the paint or stain to dry completely before proceeding.
- Consider adding rubber grips or feet to the bottom of the frame to prevent it from sliding or scratching the floor.
- If you plan to frequently adjust the tension or fabric, you may want to attach clamps or clips to the sides of the frame to hold the fabric securely in place.
- Ensure that all screws and staples are tightened and secure.
- Take a moment to step back and admire your handmade quilt frame. You have created a valuable tool that will assist you in your quilting journey.
Now that your quilt frame is ready, all that’s left to do is to enjoy the process of quilting and creating beautiful masterpieces. Remember to maintain cleanliness and keep the frame in good condition to ensure its longevity.
With practice, you will learn to maximize the potential of your quilt frame and create stunning quilts that will be cherished for years to come.
Congratulations on completing your quilt frame!
Conclusion
Congrats! You have reached the end of this comprehensive guide on how to make a quilt frame. By following the steps outlined in this article, you have learned how to construct a quilt frame from scratch, attach fabric to create a taut quilting surface, adjust the frame tension, and add finishing touches for functionality and aesthetics.
A quilt frame is an essential tool for quilters, providing stability and allowing for precise stitching and quilting. By making your own quilt frame, you have the opportunity to customize it to your preferred size and design, while also saving costs compared to buying a pre-made frame.
As you begin using your handmade quilt frame, embrace the artistry and creativity of quilting. Enjoy the process of selecting fabric, designing patterns, and bringing your quilts to life. With your new quilt frame, you can now tackle more ambitious and intricate quilt projects.
Remember to take care of your quilt frame by keeping it clean and making any necessary adjustments or repairs over time. This will ensure its durability and longevity, allowing you to enjoy countless hours of quilting pleasure.
So, go ahead and unleash your creativity with your newly constructed quilt frame. Quilting is not only a beautiful craft but also a therapeutic and fulfilling hobby. Delight in the joy of creating stunning quilts that will be cherished for generations to come.
Happy quilting!
Frequently Asked Questions about How To Make A Quilt Frame
Was this page helpful?
At Storables.com, we guarantee accurate and reliable information. Our content, validated by Expert Board Contributors, is crafted following stringent Editorial Policies. We're committed to providing you with well-researched, expert-backed insights for all your informational needs.


0 thoughts on “How To Make A Quilt Frame”