
Articles
How To Make A Quilt Out Of Sweaters
Modified: January 18, 2024
Learn how to create cozy quilts using old sweaters in this collection of informative articles. Discover step-by-step instructions and helpful tips for repurposing your sweaters into beautiful quilts.
(Many of the links in this article redirect to a specific reviewed product. Your purchase of these products through affiliate links helps to generate commission for Storables.com, at no extra cost. Learn more)
Introduction
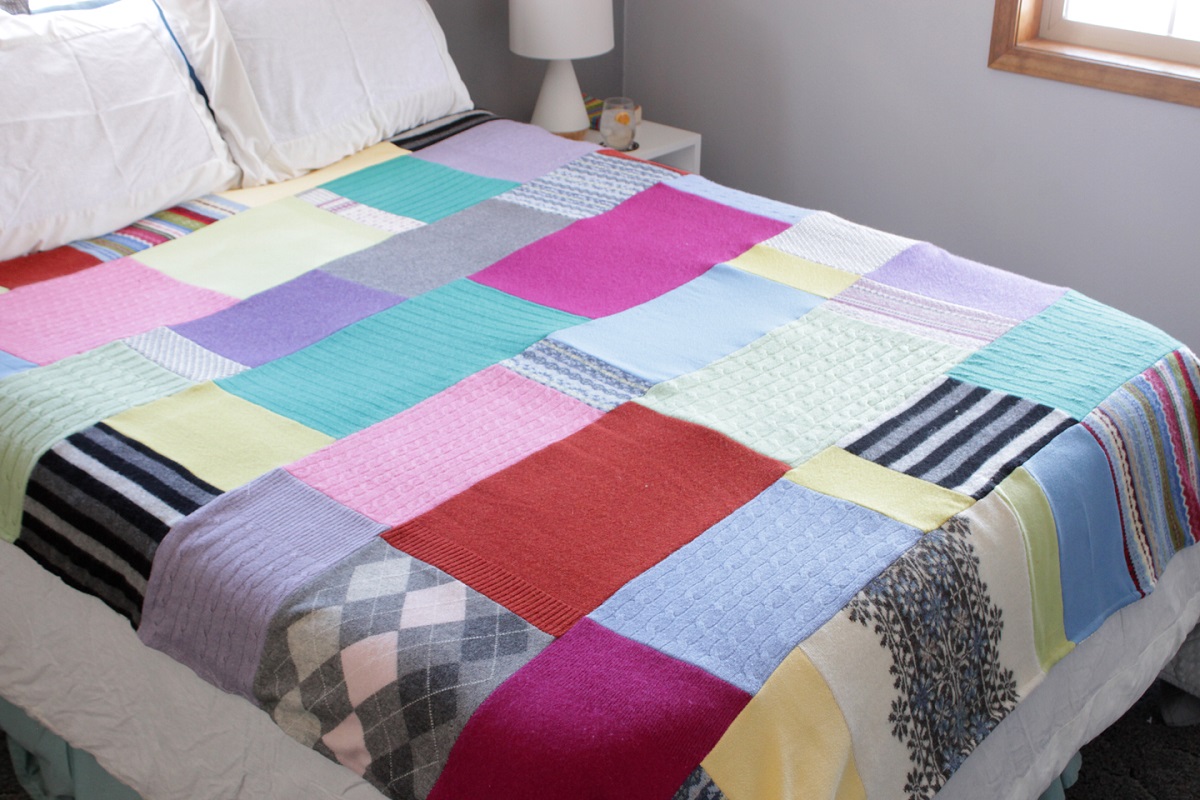
Quilting is a beloved craft that allows you to create beautiful and functional pieces to cherish for years to come. If you’re tired of your old sweaters taking up space in your closet, why not repurpose them into a cozy and unique quilt? Making a quilt out of sweaters not only gives a new life to your worn-out garments but also adds a touch of warmth and personalization to your home decor.
In this article, we will guide you through the process of making a quilt out of sweaters, from choosing the right ones to adding the finishing touches. So gather up your old sweaters, grab your sewing kit, and let’s get started on this exciting project!
Note: Before diving into the process, it’s important to have basic sewing skills and access to a sewing machine. If you’re just starting out, consider taking a beginner’s sewing class or consulting a sewing tutorial for additional guidance.
Key Takeaways:
- Transform old sweaters into a cozy quilt by carefully selecting, preparing, and sewing the fabric. Add personal flair with unique designs and finishing touches for a meaningful and sustainable home decor piece.
- Embrace the art of quilting and repurpose old sweaters into a cherished quilt. Enjoy the creative process, unleash your personal style, and celebrate the warmth and sentimentality of your unique creation.
Read more: How To Make A Quilt Out Of Crown Royal Bags
Choosing the Right Sweaters
When it comes to making a quilt out of sweaters, the first step is selecting the right ones to use. Here are some factors to consider:
- Material: Look for sweaters made from natural fibers such as wool, cashmere, or cotton. These materials are more durable and easier to work with compared to synthetic fibers.
- Condition: Choose sweaters that are in good condition with no holes, stains, or excessive pilling. This will ensure that your quilt looks pristine and holds up well over time.
- Color and Pattern: Consider the color palette and patterns of the sweaters. Mixing different hues and designs can add visual interest to your quilt. Alternatively, you can choose sweaters in a specific color scheme or style for a cohesive look.
- Size: Opt for sweaters of similar sizes to ensure easier cutting and sewing. Having sweaters of different sizes may require more adjustments and could affect the overall look of your quilt.
To gather the necessary sweaters, you have a few options. You can go through your own wardrobe and sort out the ones you no longer wear. Additionally, you can visit thrift stores or ask friends and family if they have any old sweaters they would be willing to donate for your project. This way, you can add a sentimental touch to your quilt by incorporating pieces from loved ones.
Once you have collected the sweaters, give them a gentle wash and allow them to dry completely. This will not only ensure that they are clean but will also prevent any shrinkage or distortion in size when you start cutting and sewing them together.
With the right selection of sweaters, you are now ready to move on to the next step: preparing the sweaters for quilting!
Preparing the Sweaters
Before you can begin cutting and sewing the sweaters, it’s important to properly prepare them to ensure the best results. Here are the steps to follow:
- Remove buttons, zippers, and embellishments: Check each sweater for any buttons, zippers, or other decorative elements. Use a seam ripper or small scissors to carefully remove them. This will make it easier to work with the fabric and prevent any interference during the quilting process.
- Press the sweaters: Iron each sweater to remove any wrinkles or creases. This will make it easier to cut and sew them accurately. Set the iron to the appropriate heat level for the fabric and use a pressing cloth or a clean, thin fabric to protect the sweater from direct heat.
- Stabilize the sweaters (optional): If you’re working with stretchy or lightweight sweaters, it can be helpful to stabilize them to prevent the fabric from stretching or warping during sewing. You can use a fusible interfacing or stabilizer specifically designed for knit fabrics. Follow the manufacturer’s instructions for application.
- Mark and cut the sweaters: Lay out the sweaters on a flat surface and use a ruler or measuring tape to mark the desired dimensions for your quilt blocks. Make sure to leave a little extra fabric around each mark for seam allowances. Use sharp fabric scissors or a rotary cutter to cut along the marked lines. Take your time and be precise to ensure clean and even cuts.
As you prepare the sweaters, it’s important to pay attention to the fabric’s stretch and direction. Some sweaters may have more stretch in one direction than the other, which can affect the overall shape and fit of the quilt blocks. Take this into consideration when cutting and arranging the pieces.
By properly preparing the sweaters, you’ll set yourself up for success in the next stage of the quilting process: cutting the sweaters into quilt blocks!
Cutting the Sweaters
Now that you have properly prepared the sweaters, it’s time to cut them into quilt blocks. Here are the steps to follow:
- Decide on block size: Determine the desired size of your quilt blocks. Common sizes are 12 inches, 6 inches, or even smaller. This will depend on your personal preference and the design you have in mind.
- Measure and mark: Using a ruler or a quilting template, measure and mark the dimensions of your chosen block size on the sweaters. Take into account any seam allowances you’ll need to add.
- Cut the blocks: Use fabric scissors or a rotary cutter to carefully cut along the marked lines, creating uniform quilt blocks from the sweaters. Take your time and be precise to ensure consistent sizes for all the blocks.
- Sort and organize: As you cut the blocks, sort them based on color, pattern, or any other criteria you have in mind for your quilt design. This will make it easier to arrange the blocks later on.
When cutting the sweaters, it’s important to consider the sweater’s design and pattern. Pay attention to any motifs or details that you want to keep intact on the quilt blocks. Position the patterned areas within the block as desired, ensuring a cohesive and visually appealing result.
Remember to handle the sweater fabric gently when cutting to avoid excessive stretching or distorting the blocks. As you progress, double-check your measurements and adjust if necessary to maintain consistency in block sizes.
With the sweaters cut into quilt blocks, you’re now one step closer to turning them into a beautiful quilt. The next stage is to design your quilt pattern, so let’s dive in!
Designing Your Quilt Pattern
Designing the quilt pattern is an exciting and creative part of the process. It allows you to showcase your personal style and create a visually appealing composition with your sweater blocks. Here are some tips to help you with this step:
- Layout options: Consider different layout options for arranging your sweater blocks. You can opt for a traditional grid pattern, such as a simple straight set or a checkerboard layout. Alternatively, you can experiment with more modern designs, such as a diagonal set, a starburst pattern, or even a custom layout of your own creation.
- Color scheme: Think about how you want to arrange the colors within your quilt. You can create a cohesive look by using a limited color palette or mix and match different colors for a more eclectic design. Play with the contrast between light and dark colors to create depth in your quilt.
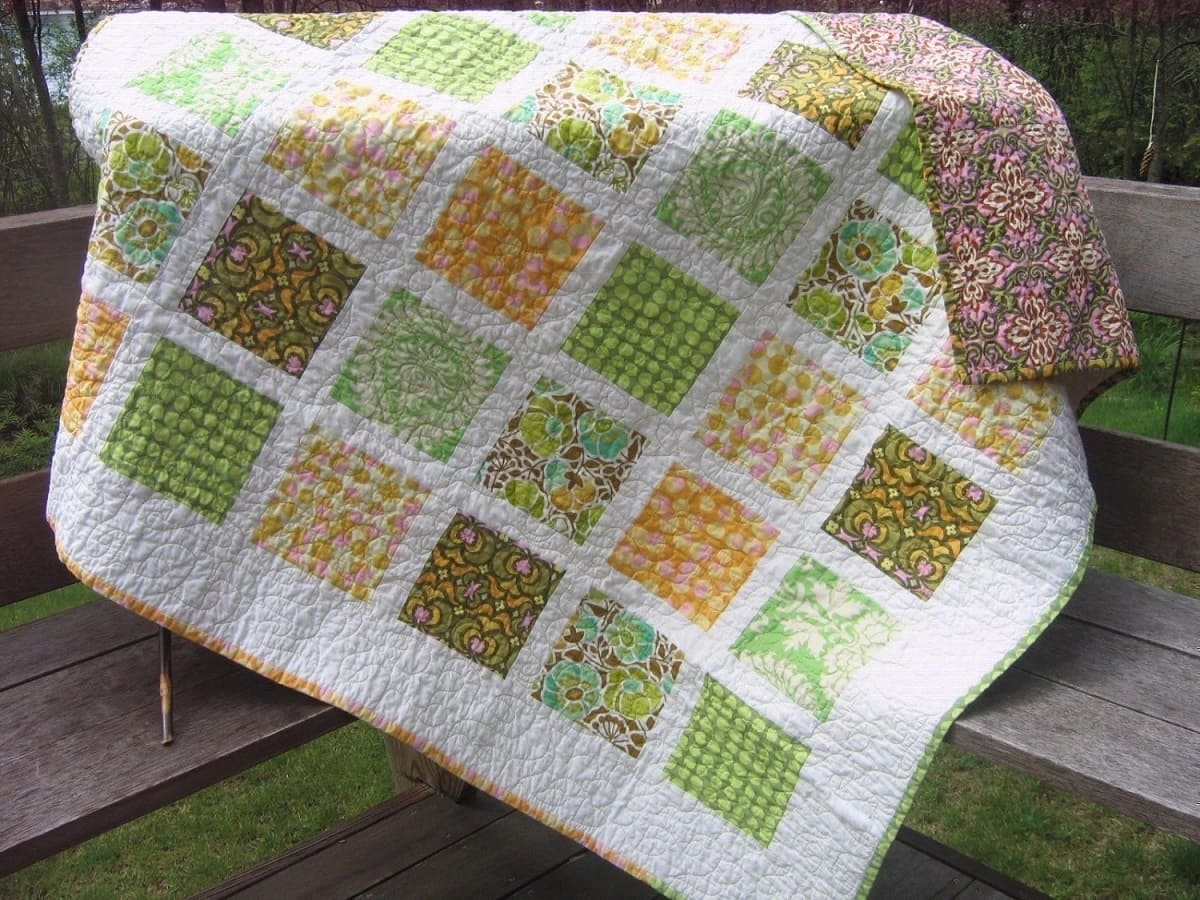
- Sashing and borders: Consider adding sashing, which is a strip of fabric placed between the blocks, to create a clean and organized look. You can also add borders around the edges of your quilt to frame the design and add a finishing touch.
- Focus on balance: Aim for a balanced distribution of colors, patterns, and block arrangements. Pay attention to the overall visual weight and ensure that no one element dominates the quilt. Experiment with different combinations and step back periodically to assess the overall balance.
- Play with layout: Before committing to a specific pattern, try out different layouts by arranging the sweater blocks on a design wall or a large table. This will help you visualize the final result and make any necessary adjustments before sewing the blocks together.
Remember, there are no strict rules when it comes to designing your quilt pattern. The beauty of quilting is that it allows for freedom of creativity. Trust your instincts and have fun with the process.
Once you have settled on a design that you love, it’s time to start sewing the sweater pieces together to bring your quilt pattern to life. Get ready for the next exciting phase!
When making a quilt out of sweaters, be sure to use a stabilizer on the back of each sweater piece to prevent stretching and distortion during the quilting process.
Read more: How To Make A Quilt
Sewing the Sweater Pieces Together
Now that you have decided on the quilt pattern and layout, it’s time to sew the sweater pieces together to create the quilt top. Follow these steps to sew the sweater blocks:
- Arrange the blocks: Lay out the sweater blocks according to your chosen pattern. Take a picture or make a sketch of the layout as a reference to keep track of the arrangement.
- Start sewing the rows: Begin sewing the blocks together row by row. Place two blocks right sides together and align the edges. Use a ¼-inch seam allowance and a stretch needle or a ballpoint needle on your sewing machine to prevent any damage to the sweater fabric.
- Press the seams: After sewing each row, press the seams flat with an iron. Set the seam by pressing it closed, and then open the seam and press it to one side or press it open, depending on your preference.
- Join the rows: Once all the rows are completed, sew the rows together. Match up the seams, pin them if necessary, and sew along the edges using a ¼-inch seam allowance.
- Press the quilt top: Press the quilt top to remove any wrinkles or creases. Be cautious while pressing, using a pressing cloth or ironing from the back of the sweater fabric to protect it.
As you sew the sweater pieces together, it’s important to maintain accuracy and precision to ensure that the blocks align properly and the overall quilt top looks cohesive. Take your time and use pins or clips, if needed, to keep the fabric in place during sewing.
Once the sweater blocks are sewn together, stand back and admire your quilt top taking shape. The next step is to add batting and backing to create the quilt’s layered structure!
Adding Batting and Backing
Adding batting and backing to your quilt is an essential step that provides structure, warmth, and durability. Follow these steps to complete this stage:
- Choose your batting: Select a batting material that suits your preferences. Options include cotton, polyester, wool, or a blend of these materials. Consider factors such as warmth, loft, and ease of quilting when making your choice.
- Cut the batting and backing: Measure and cut the batting and backing fabric to match the size of your quilt top, leaving a few extra inches on all sides for trimming and securing.
- Layer the quilt: Lay the backing fabric on a flat surface wrong side up, followed by the batting, and then the quilt top right side up. Smooth out any wrinkles or puckers.
- Baste the layers: To hold the layers together temporarily, baste them with large, loose stitches or use safety pins. Start from the center and work your way out to ensure an even distribution of basting stitches.
- Trim the excess: Using scissors or a rotary cutter and ruler, trim away the excess batting and backing, aligning them with the edges of the quilt top.
While adding the batting and backing, make sure the layers are smooth and flat without any bunching or wrinkles. Take your time to ensure that everything aligns properly and the quilt is well-prepared for the final quilting step.
With the batting and backing secured, it’s time to move on to the exciting stage of quilting the layers together!
Quilting the Layers Together
Quilting is the process of stitching the layers of the quilt together, creating a decorative and functional element that adds texture and stability. Here’s how you can quilt the layers together:
- Select your quilting technique: Choose a quilting technique that suits your skill level and desired outcome. Options include hand quilting, machine quilting, or a combination of both. If you’re new to quilting, simple straight-line quilting or stitching in the ditch (quilting along the seam lines) can be a good starting point.
- Choose your quilting design: Decide on the design and spacing of your quilting stitches. Options include straight lines, curves, free-motion quilting, or using specific quilting patterns like stippling, meandering, or feathers. Consider the overall aesthetic and functionality of your quilt.
- Mark your quilting lines (optional): If you want to follow specific quilting lines, use fabric markers or tape to mark the lines on the quilt top. This will serve as a guide as you quilt.
- Start quilting: Begin stitching the layers together following your chosen design. Make sure to secure the start and end of each quilting line by backstitching or knotting the thread. Take your time and maintain even stitch lengths for a polished finish.
- Continue quilting: Work your way across the quilt, quilting one section at a time. As you quilt, smooth out any wrinkles or bunching in the layers to ensure a neat and professional-looking result.
- Finishing touches: Once you’ve completed the quilting, trim any excess threads and inspect the quilt for any loose stitches or areas that may need reinforcement. Give the quilt a final press with an iron to create a smooth and crisp finish.
Quilting is a time-consuming process but one that can truly transform your quilt into a work of art. Be patient and enjoy the journey as you add your personal touch to the project.
With the layers quilted together, you’re almost there! The final step is to add the finishing touches to your quilt.
Finishing Touches
Adding the finishing touches to your quilt is an exciting and rewarding step. It’s where you give your quilt its final touches and make it ready for use or display. Here are some essential finishing steps to consider:
- Trim the edges: Use a rotary cutter and ruler to trim the edges of your quilt to ensure they are straight and even.
- Add binding: Binding is the fabric strip that covers the raw edges of the quilt. You can use pre-made binding or make your own by cutting fabric strips, folding and pressing them, and attaching them to the quilt edges using machine or hand sewing.
- Label your quilt: Personalize your quilt by adding a label that includes your name, the date, and any other relevant details. This will serve as a special reminder of your quilting journey and make the quilt even more meaningful.
- Give it a final press: Once all the finishing touches are complete, give your quilt a final press with an iron on a low heat setting to make it look fresh and crisp.
- Enjoy your quilt: Your quilt is now complete! Display it proudly on a bed, couch, or wall, or snuggle up with it to enjoy its warmth and comfort.
Remember, the finishing touches are an opportunity to add your personal flair and style to the quilt. You can experiment with different binding fabrics, add decorative elements like embroidery or appliqué, or even incorporate quilt labels that reflect the theme or occasion of the quilt.
Now that you’ve completed all the steps, take a moment to admire your handiwork. You’ve transformed a collection of old sweaters into a cozy and beautiful quilt that will bring joy and warmth for years to come!
Congratulations on making a quilt out of sweaters. Your creativity and hard work have resulted in a unique and meaningful creation. Cherish your quilt and continue exploring the world of quilting to create more amazing projects in the future!
Read more: How To Make A Quilt Larger
Conclusion
Making a quilt out of sweaters is a wonderful way to breathe new life into old garments and create a cozy and personalized piece for your home. By repurposing sweaters, you not only reduce waste but also add a touch of warmth and nostalgia to your living space.
Throughout this article, we’ve explored the step-by-step process of creating a sweater quilt, from choosing the right sweaters to adding the finishing touches. By carefully selecting sweaters based on material, condition, color, and size, you set the foundation for a beautiful quilt. Preparing the sweaters through removing buttons and zippers, and pressing them ensures a smooth sewing process.
Cutting the sweaters into uniform blocks and designing a quilt pattern allows you to unleash your creativity and create a visually appealing composition. Sewing the sweater pieces together with precision and care brings your pattern to life, while adding batting and backing provides structure and warmth. Lastly, quilting the layers together and adding the finishing touches completes your quilt-making journey.
As you embark on your sweater quilt project, remember to enjoy the process and let your creativity shine. Whether you choose a classic or contemporary design, your quilt will be a unique reflection of your style and craftsmanship.
So gather your old sweaters, sharpen your sewing skills, and embrace the art of quilting. Transforming forgotten garments into a cherished quilt is a rewarding and fulfilling endeavor. Embrace the warmth, comfort, and sentimentality of your sweater quilt, and celebrate the beauty of repurposing and creativity.
Happy quilting!
Frequently Asked Questions about How To Make A Quilt Out Of Sweaters
Was this page helpful?
At Storables.com, we guarantee accurate and reliable information. Our content, validated by Expert Board Contributors, is crafted following stringent Editorial Policies. We're committed to providing you with well-researched, expert-backed insights for all your informational needs.


0 thoughts on “How To Make A Quilt Out Of Sweaters”