Articles
How To Make A Sliding Driveway Gate
Modified: December 7, 2023
Learn how to make a sliding driveway gate with our informative articles. Get step-by-step instructions and expert tips for a successful project.
(Many of the links in this article redirect to a specific reviewed product. Your purchase of these products through affiliate links helps to generate commission for Storables.com, at no extra cost. Learn more)
Introduction
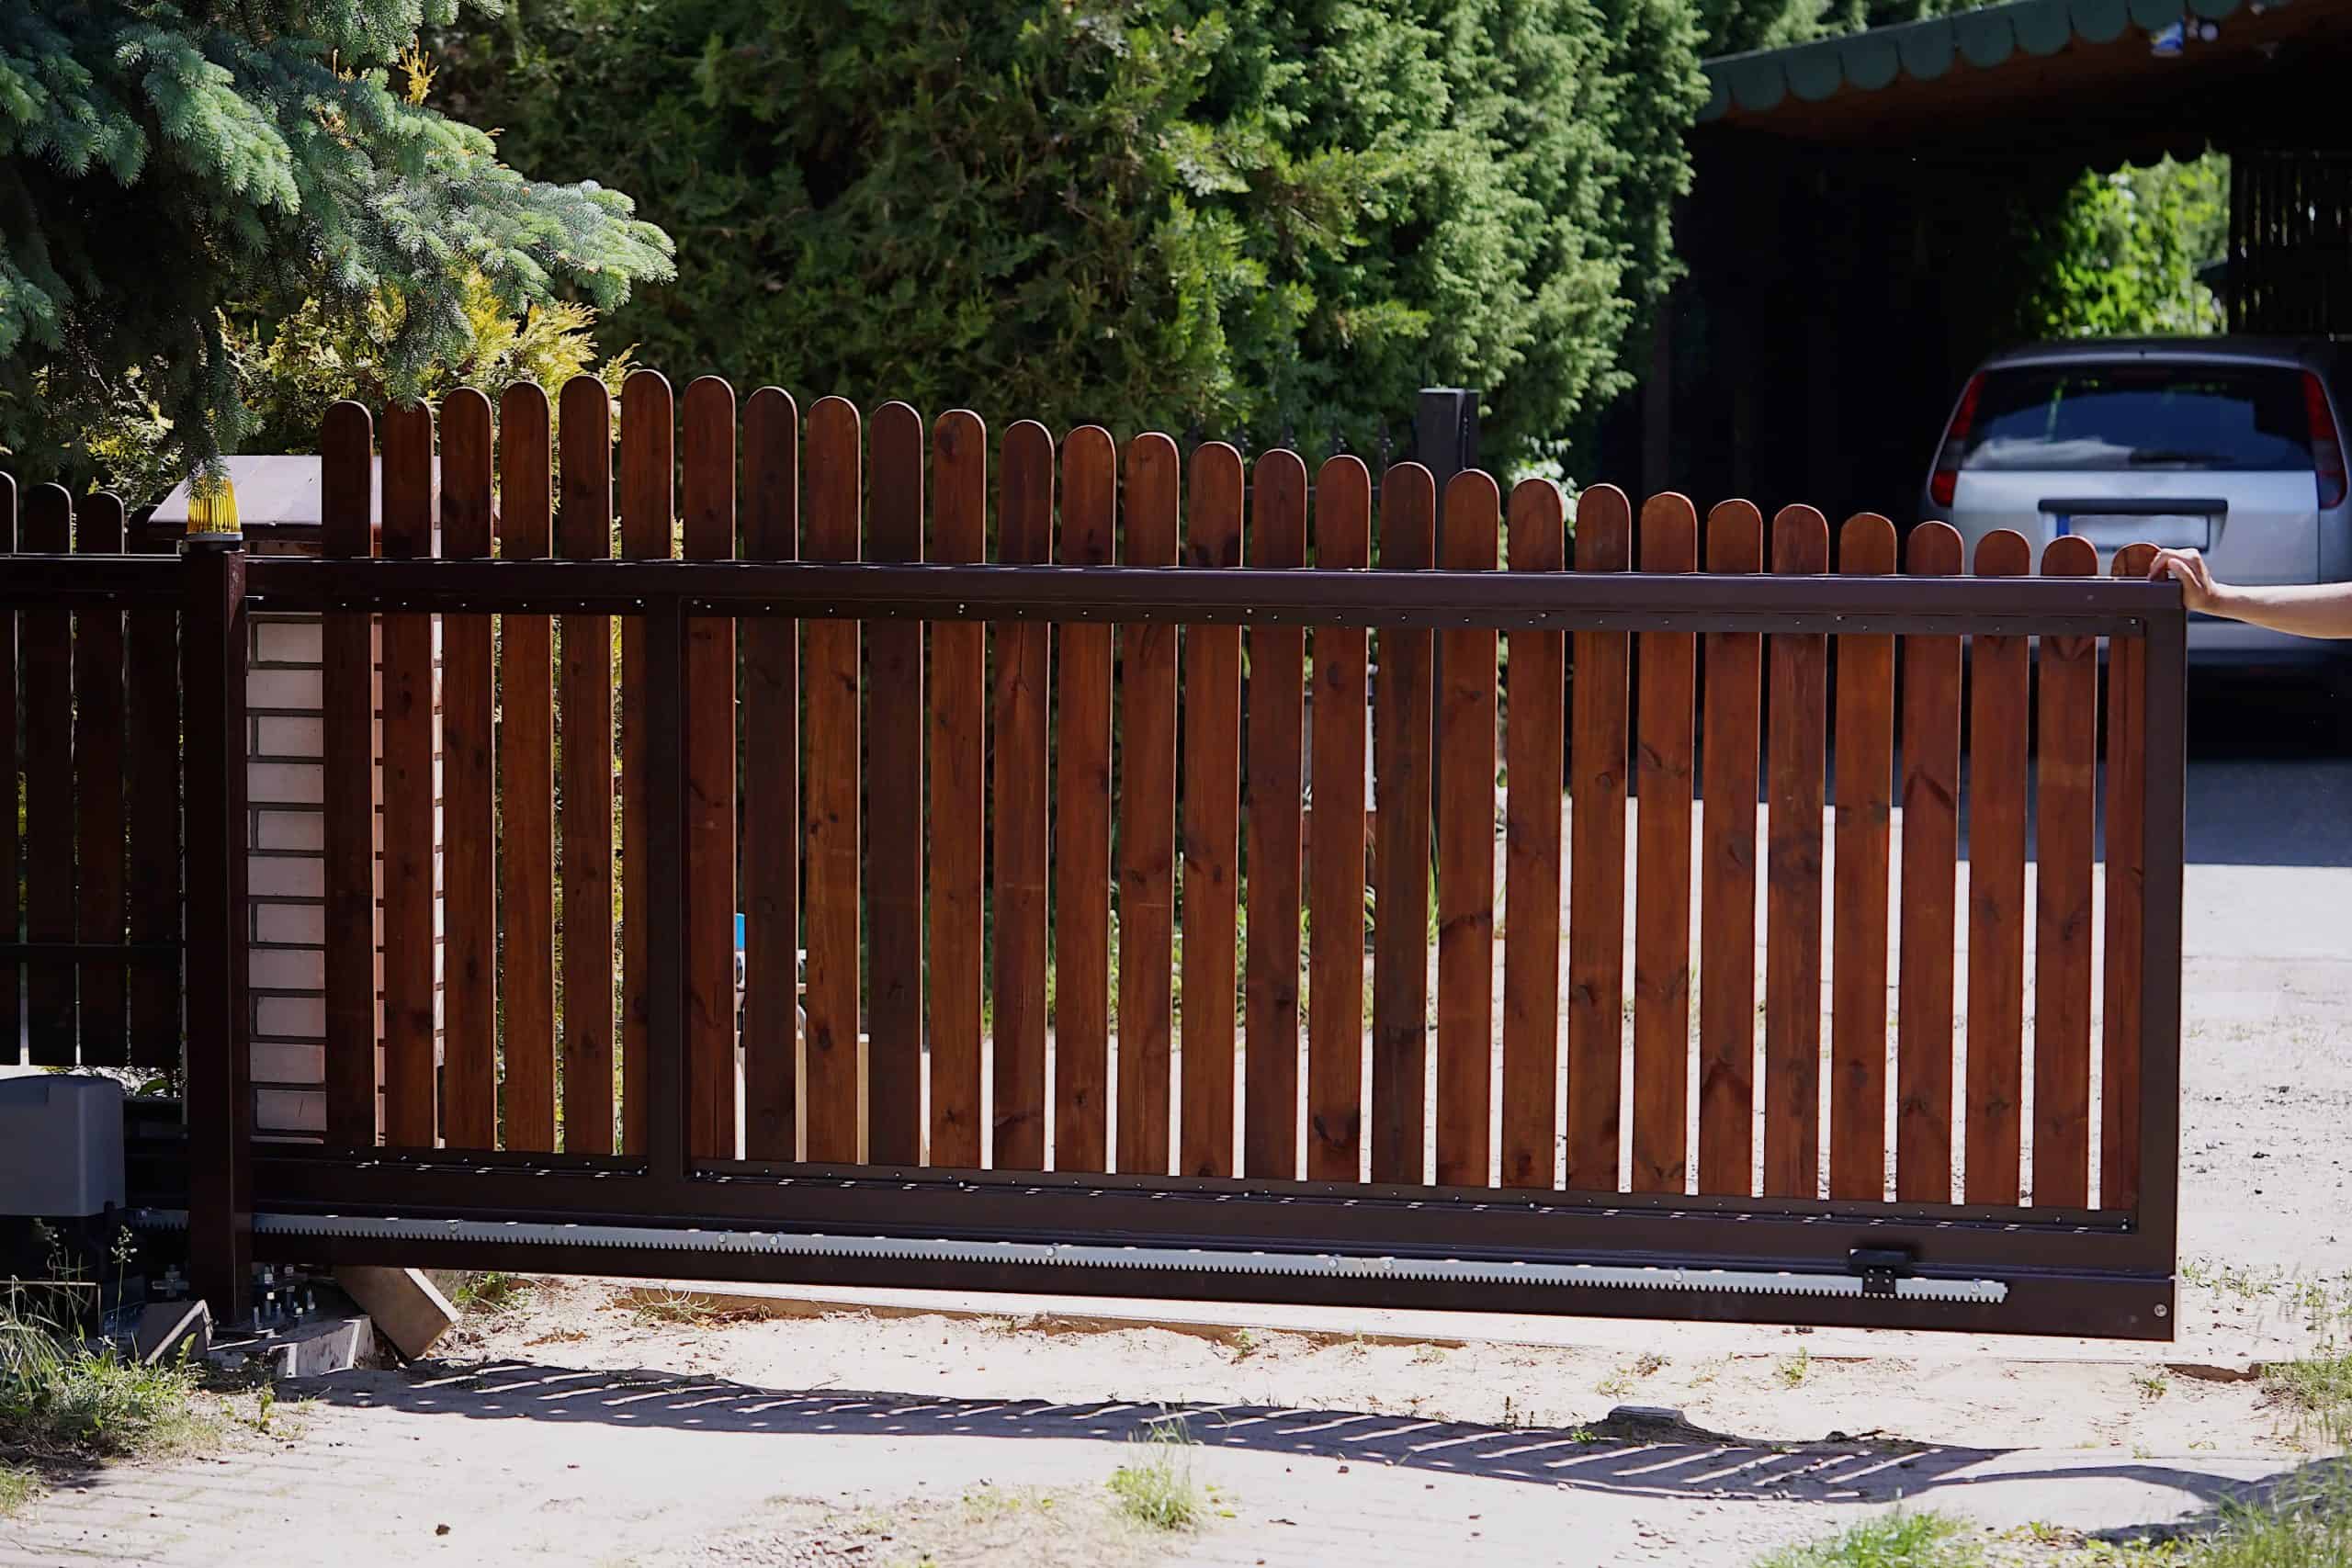
Having a sliding driveway gate not only adds security but also enhances the overall aesthetic of your property. The sleek and modern design of a sliding gate not only provides a grand entrance but also maximizes the space in your driveway. If you’re up for a DIY project and want to add a sliding driveway gate to your home, this guide will walk you through the step-by-step process of creating your own.
Before we dive into the details, it’s essential to note that building a sliding driveway gate requires some technical skills and knowledge of basic carpentry. It’s important to consult your local building codes and regulations, as well as any homeowners’ association guidelines, to ensure your gate meets the necessary requirements. Additionally, make sure you have all the necessary tools and materials before starting this project.
Are you ready to create a stunning sliding driveway gate? Let’s get started!
Key Takeaways:
- Building a sliding driveway gate requires careful planning, precise measurements, and the right materials and tools. From setting the posts to installing the gate opener, each step contributes to a secure and stylish entrance for your property.
- Adding slats and a gate opener enhances the functionality and aesthetics of your sliding driveway gate. Regular maintenance ensures its longevity, providing security, convenience, and elegance to your home.
Read more: How To Make Driveway Gates
Materials and Tools Needed
Before beginning the project, gather the following materials and tools:
- Sliding gate kit or gate hardware
- 4×4 pressure-treated lumber for posts
- 2×4 pressure-treated lumber for the gate frame
- 1×6 or 1×8 lumber for the slats
- Gallo or similar metal brackets
- Gallo or similar metal tracks
- Gallo or similar metal wheels
- Gallo or similar gate opener (optional)
- Screws and nails appropriate for outdoor use
- Cement or concrete mix
- Level
- Tape measure
- Post hole digger
- Shovel
- Drill
- Saw
- Hammer
- Wrench
- Work gloves and safety glasses
Make sure to choose pressure-treated lumber for the posts, as it provides durability and resistance to rot and insects. Additionally, stainless steel screws and nails are recommended for outdoor projects to prevent rusting.
It’s important to wear protective gear, such as work gloves and safety glasses, throughout the construction process to ensure your safety.
Once you have gathered all the necessary materials and tools, you’re ready to move on to the next steps.
Step 1: Measure and Mark
The first step in building a sliding driveway gate is to measure and mark the location where the gate will be installed. Start by determining the width of your driveway and the desired width of the gate. Keep in mind that the gate should be slightly narrower than the driveway to allow for smooth sliding.
Once you have determined the dimensions, use a tape measure to measure and mark the placement of the gate posts. Make sure the marks are level and evenly spaced to ensure proper alignment of the gate. Consider marking the location of any existing underground utilities to avoid any potential damages.
Next, mark the location where the gate opener will be installed, if applicable. The gate opener should be positioned at a convenient height, allowing easy access for operation.
Take your time during this step to ensure accurate measurements and precise marking. Double-check your measurements to avoid any mistakes later in the construction process.
Once you have completed this step, you are ready to move on to the next step: digging post holes.
Step 2: Dig Post Holes
After measuring and marking the placement of the gate posts, it’s time to dig the post holes. The depth and size of the holes will depend on the type of gate and the local building codes. Generally, the post holes should be deep enough to provide stability and support for the gate.
Start by using a post hole digger to dig the holes at each marked location. Make sure the holes are wide enough to accommodate the size of the gate posts. As a general guideline, the diameter of the hole should be approximately one-third the width of the post.
While digging, remove any rocks, roots, or other debris that may hinder the installation of the posts. It’s essential to have a clean and well-prepared hole for a sturdy gate foundation.
Once the holes are dug, check the depth and ensure they are level. Adjust the holes as necessary to achieve the desired depth and alignment.
Before proceeding to the next step, it is recommended to pour a few inches of gravel into each hole for proper drainage. This will help prevent moisture buildup and potential rotting of the posts.
With the post holes adequately prepared, you are now ready to proceed to the next step: setting the posts.
Step 3: Set the Posts
Now that the post holes are ready, it’s time to set the posts in place. This step is crucial for the stability and integrity of the sliding driveway gate.
Begin by placing the first gate post into one of the prepared holes. Use a level to ensure that the post is plumb and straight. Make any necessary adjustments by adding or removing soil at the base of the hole.
Once the first post is securely positioned, fill the hole with a cement or concrete mix. Follow the instructions on the packaging for the appropriate mixing ratio and pouring technique. Use a shovel or trowel to level the cement or concrete mix around the post, ensuring it is evenly distributed.
Repeat the same process for the second gate post, ensuring it is aligned with the first post and level. Fill the hole with the cement or concrete mix and level it off. Allow the cement or concrete to set according to the manufacturer’s instructions.
Once the cement or concrete has dried and hardened, double-check the posts to ensure they are securely set and level. This step is critical for the stability and longevity of the sliding driveway gate.
With the gate posts firmly in place, you are now ready to move on to the next step: installing the wheels for the sliding gate.
Read more: How To Install A Driveway Gate
Step 4: Install the Wheels
With the gate posts set securely, it’s time to install the wheels that will allow your sliding driveway gate to smoothly glide along the track. The wheels provide stability and ease of movement for the gate.
Start by attaching the metal brackets or track to the gate posts, depending on the type of sliding gate hardware you are using. Make sure to position the brackets or track at the correct height to align with the wheels.
Next, attach the wheels to the brackets or track. Ensure that they are securely fastened and aligned properly. The wheels should be able to smoothly roll along the track without any obstructions.
Test the movement of the wheels by gently pushing the gate along the track. Make any necessary adjustments to ensure smooth and effortless sliding.
It’s important to note that the number and placement of the wheels will depend on the size and weight of your sliding gate. Refer to the manufacturer’s instructions or consult a professional if you are unsure about the proper wheel placement for your specific gate.
Once the wheels are installed and the gate glides smoothly, you are ready to proceed to the next step: attaching the gate frame.
When installing a sliding driveway gate, make sure to properly measure the opening and choose a gate that is the right size and weight capacity for your needs. This will ensure smooth operation and longevity of the gate.
Step 5: Attach the Gate Frame
Now that the wheels are installed and the gate can smoothly slide along the track, it’s time to attach the gate frame. The gate frame provides support and structure for the sliding driveway gate.
Start by measuring and cutting the pressure-treated 2×4 lumber to the desired height and width of your gate. Ensure that the frame is slightly smaller than the opening to allow for smooth sliding.
Position the gate frame between the gate posts, making sure it is centered and level. Use clamps or temporary supports to hold the frame in place while you secure it to the posts.
Attach the frame to the gate posts using screws or nails. Make sure to secure the frame at multiple points to ensure stability and durability. Use a level to check that the frame is straight and plumb throughout the attachment process.
Double-check all connections and tighten any loose screws or nails as needed. The gate frame should be securely fastened to the gate posts, providing a solid foundation for the sliding driveway gate.
With the gate frame in place, you are now ready to proceed to the next step: adding the slats to complete the gate design.
Step 6: Add the Slats
Adding slats to your sliding driveway gate not only enhances its appearance but also provides privacy and security. The slats also help to prevent unauthorized access while still allowing airflow and visibility.
Start by measuring the width and height of each section of the gate frame where the slats will be installed. Cut the 1×6 or 1×8 lumber to the appropriate lengths, accounting for any necessary spacing between the slats.
Position the first slat at the bottom of the gate frame and secure it to the frame using screws or nails. Use a level to ensure that the slat is straight and adjust as needed.
Continue adding slats one by one, spacing them evenly apart along the gate frame. Make sure each slat is level and securely attached to the frame. Use a spacer or scrap piece of lumber between slats to maintain consistent spacing.
Once all the slats are installed, check them for any loose or uneven ones, and tighten or adjust as needed. The slats should be aligned, providing a visually appealing and uniform appearance to your sliding driveway gate.
With the slats in place, you are now ready to proceed to the next step: installing the gate opener, if desired.
Step 7: Install the Gate Opener
If you want to enhance the convenience and functionality of your sliding driveway gate, installing a gate opener is a great option. A gate opener allows you to open and close your gate automatically with just a push of a button.
To install the gate opener, start by selecting a suitable gate opener model that is compatible with your sliding driveway gate and meets your specific needs. Follow the manufacturer’s instructions and safety guidelines for your chosen gate opener.
Begin by mounting the gate opener bracket to the gate post or a nearby structure, as specified by the manufacturer. Ensure that the bracket is securely fastened and level to provide a stable support for the gate opener mechanism.
Next, install the gate opener motor and mechanism according to the manufacturer’s instructions. Make all necessary electrical connections, ensuring proper grounding and following local electrical codes.
Attach the gate opener arm or chain to the gate frame, allowing it to move the gate smoothly along the track. Make adjustments as necessary to ensure proper alignment and movement.
Test the gate opener to ensure it operates correctly and smoothly. You may need to adjust the sensitivity, speed, or force settings of the gate opener as per the manufacturer’s instructions to achieve optimal performance.
It’s important to note that if you are not familiar with electrical work, it’s recommended to hire a licensed electrician to install the gate opener for safety and to ensure compliance with electrical regulations.
With the gate opener successfully installed, you are now ready to move on to the final step: testing and adjusting the gate.
Read more: How To Build A Metal Gate For Driveway
Step 8: Test and Adjust the Gate
After completing the installation of your sliding driveway gate and any additional components such as wheels, slats, and a gate opener, it’s important to thoroughly test and make any necessary adjustments to ensure the smooth operation of the gate.
Begin by testing the manual operation of the gate by gently pushing or pulling it along the track. Pay attention to any resistance or sticking points, as these may indicate the need for adjustments.
If you have installed a gate opener, test its functionality by using the remote control or keypad to open and close the gate. Observe the movement of the gate as it is operated by the gate opener, ensuring that it operates smoothly and without any obstructions.
Check the alignment and levelness of the gate by using a level and measuring the gaps between the gate and its surroundings. Make any necessary adjustments to ensure the gate is properly aligned and evenly spaced.
Inspect all connections, hinges, and moving parts to ensure they are secure and functioning properly. Tighten any loose screws or bolts, and lubricate any necessary parts for smooth movement.
It’s important to periodically inspect and maintain your sliding driveway gate to keep it in optimal condition. This includes regular cleaning, oiling or greasing of moving parts, and addressing any issues or damages promptly to prevent further deterioration.
By thoroughly testing and adjusting your sliding driveway gate, you can ensure its reliable and efficient operation, providing you with enhanced security and convenience for years to come.
Congratulations! You have successfully completed the installation of your sliding driveway gate, making your property more secure and visually appealing. Enjoy the benefits of your DIY project and take pride in your accomplishment!
Conclusion
Building a sliding driveway gate is a rewarding DIY project that not only enhances the security of your property but also adds a touch of elegance and sophistication to your home. Following the step-by-step process outlined in this guide allows you to create a functional and beautiful sliding gate that perfectly fits your driveway.
Throughout the construction process, it’s crucial to ensure that you have the necessary materials, tools, and knowledge to complete the project safely and effectively. Be sure to consult local building codes and regulations, as well as any homeowners’ association guidelines, before starting your project.
From measuring and marking the placement of the gate to installing the gate opener, each step plays a vital role in creating a sturdy and smoothly operating sliding driveway gate. Take the time to carefully measure, level, and attach the gate components to ensure a secure and reliable installation.
Adding slats to the gate not only enhances its appearance but also provides privacy, security, and airflow. Additionally, incorporating a gate opener automates the gate’s operation, adding convenience and ease of use to your daily life.
Remember to regularly inspect and maintain your sliding driveway gate to keep it in optimal condition. This includes periodic cleaning, lubrication of moving parts, and addressing any issues promptly to extend the lifespan of your gate.
By successfully completing the installation of your sliding driveway gate, you have not only increased the security of your property but also transformed the entrance into a welcoming and stylish feature.
Enjoy the benefits of your hard work and take pride in the security, elegance, and functionality that your new sliding driveway gate brings to your home!
Frequently Asked Questions about How To Make A Sliding Driveway Gate
Was this page helpful?
At Storables.com, we guarantee accurate and reliable information. Our content, validated by Expert Board Contributors, is crafted following stringent Editorial Policies. We're committed to providing you with well-researched, expert-backed insights for all your informational needs.


0 thoughts on “How To Make A Sliding Driveway Gate”