Articles
How To Make Garden Gate
Modified: October 20, 2024
Learn how to make a beautiful garden gate with our expert gardening tips and step-by-step guide. Create a stunning entrance to your garden and enhance its overall aesthetic.
(Many of the links in this article redirect to a specific reviewed product. Your purchase of these products through affiliate links helps to generate commission for Storables.com, at no extra cost. Learn more)
Introduction
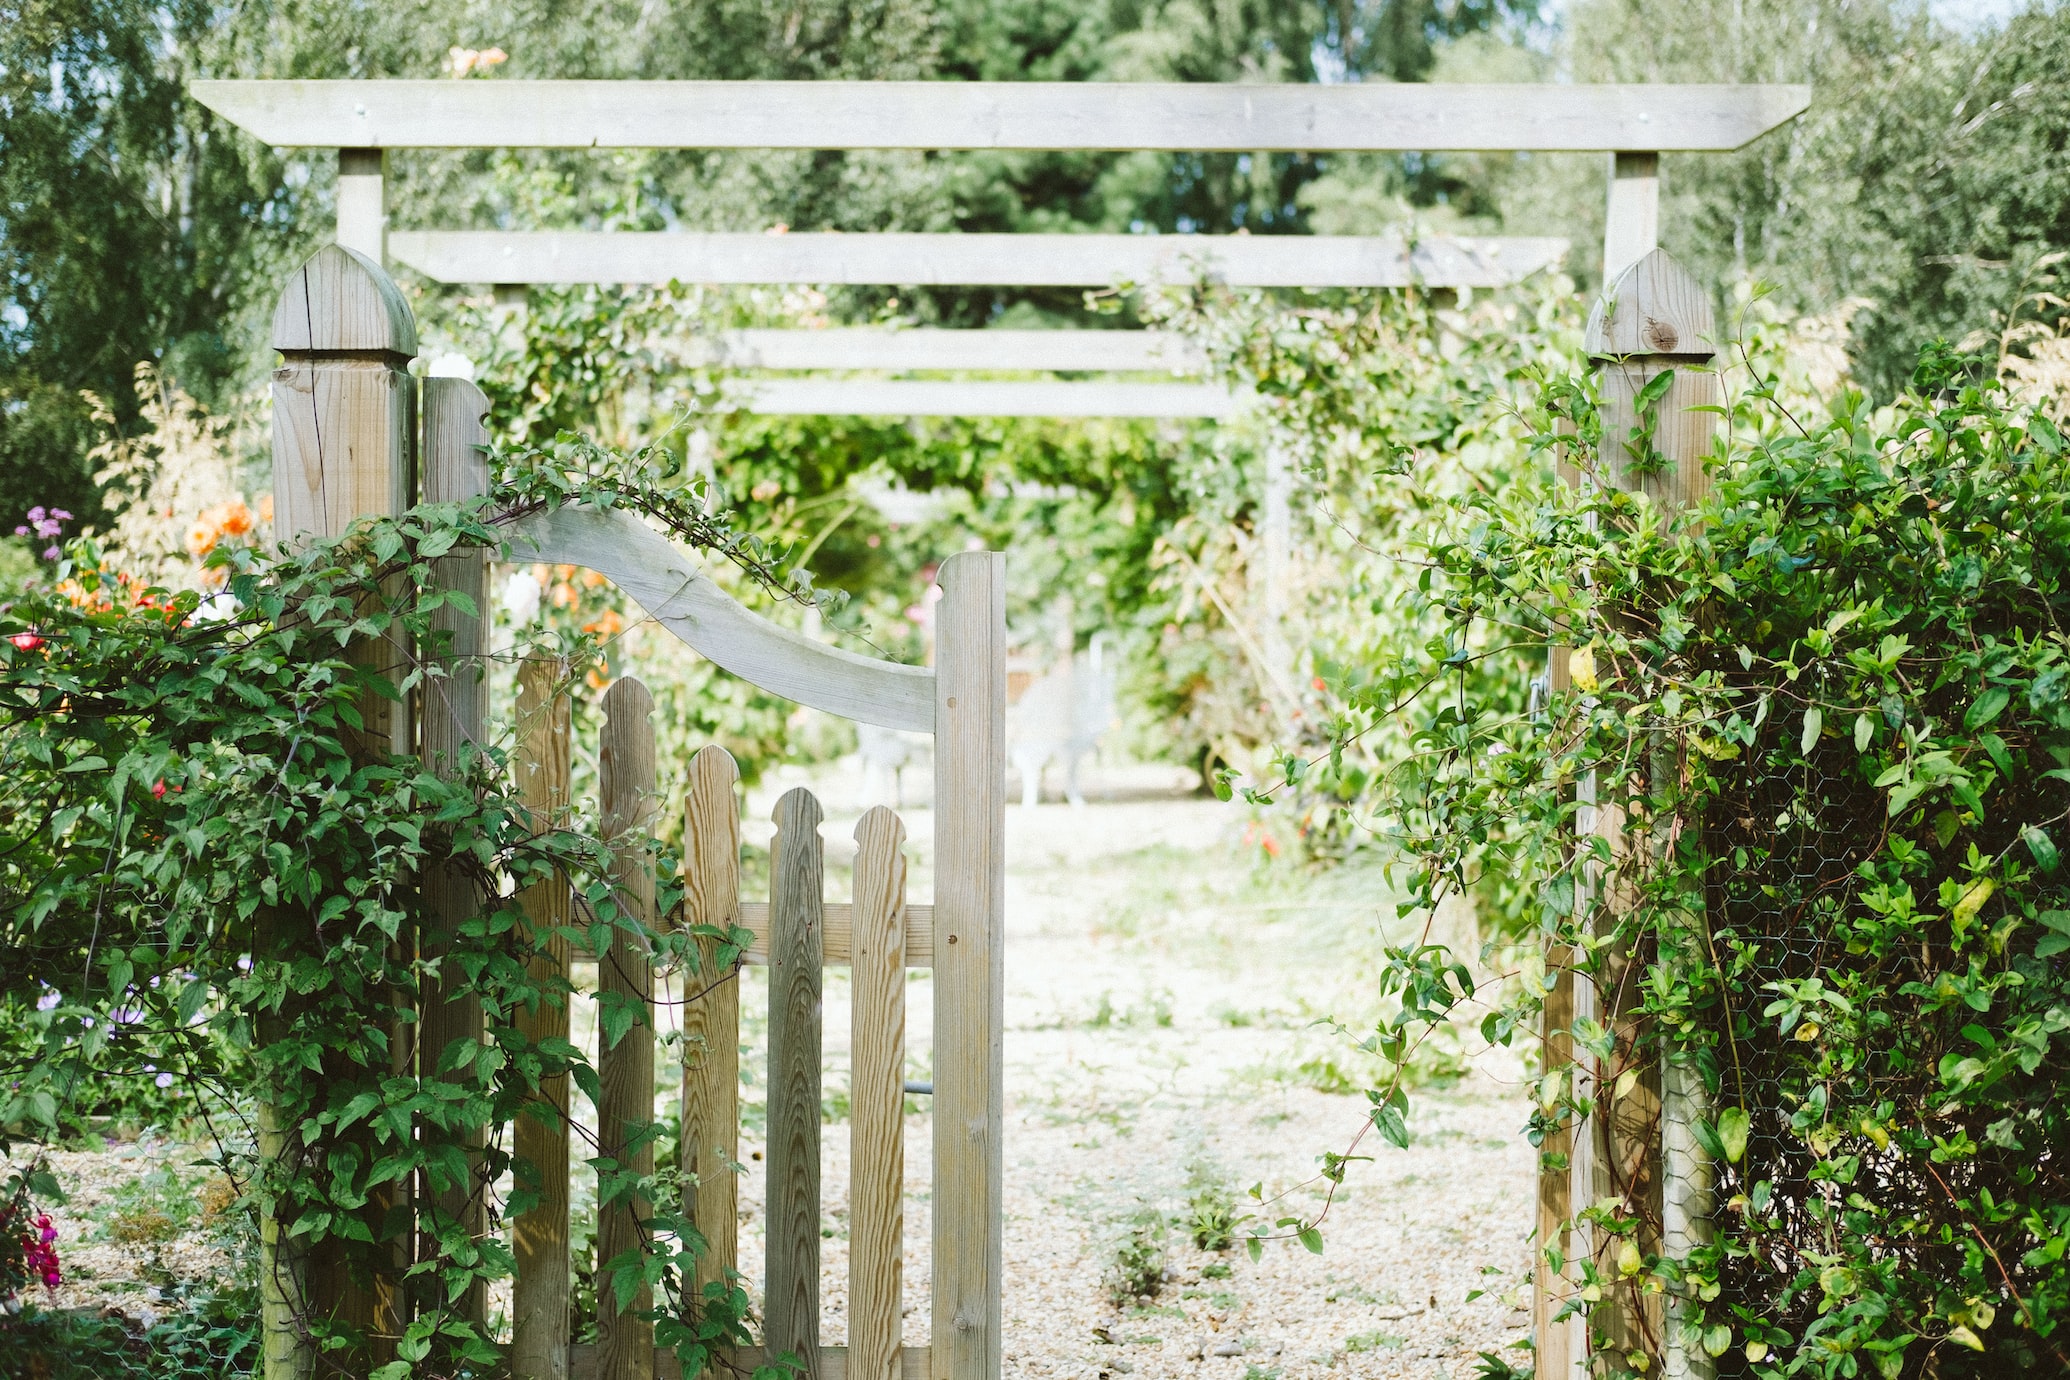
Welcome to the world of gardening where creativity and functionality blend seamlessly. If you’re looking to add a charming touch to your garden while maintaining its privacy and security, a garden gate is the perfect addition. A well-crafted garden gate not only enhances the visual appeal of your outdoor space but also provides a boundary that keeps unwanted visitors at bay. In this article, we will guide you through the process of building your own garden gate, allowing you to unleash your creativity and customize it to suit your garden’s unique style.
Building a garden gate may seem like a daunting task, but with the right materials and a step-by-step approach, it can be a rewarding DIY project. Whether you have a small urban garden or a sprawling backyard, a garden gate can be tailored to fit your space perfectly.
Before we dive into the process, it’s important to gather the necessary materials. You will need:
- Pressure-treated or rot-resistant wood
- Measuring tape and pencil
- Saw
- Drill
- Screws
- Hinges
- Latch
- Sandpaper
- Exterior wood finish
Now that you have your materials ready, let’s move on to the first step – measuring and marking.
Key Takeaways:
- Create a charming and secure garden entrance by following step-by-step instructions to build and install a personalized garden gate, adding both functionality and visual appeal to your outdoor space.
- Embrace the satisfaction of crafting a sturdy and aesthetically pleasing garden gate, and enjoy the tranquility and beauty of your outdoor sanctuary as you pass through your handcrafted entrance.
Read more: How To Make Driveway Gates
Step 1: Gather Materials
Before you begin constructing your garden gate, it’s essential to ensure you have all the necessary materials. Here’s a breakdown of what you’ll need:
- Pressure-treated or rot-resistant wood: Opt for a sturdy and durable wood type that can withstand the elements. Cedar or redwood are popular choices for their natural resistance to rot and decay.
- Measuring tape and pencil: Accurate measurements are crucial for a well-fitted gate. Use a measuring tape to determine the dimensions you want for your gate and mark them with a pencil.
- Saw: Depending on the size and design of your gate, you’ll need a saw to cut the wood to the desired lengths. A circular saw or a miter saw can make the task easier.
- Drill: A drill will be necessary to create pilot holes for screws, as well as to attach hinges and latches.
- Screws: Choose exterior-grade screws that are long enough to securely fasten the gate components together.
- Hinges: Select hinges that are suitable for exterior use and can support the weight of your gate. Heavy-duty strap hinges or decorative gate hinges are popular options.
- Latch: Depending on your preference, choose a latch that complements the style of your gate. It could be a simple gate latch or a decorative lockset.
- Sandpaper: You’ll need sandpaper to smooth any rough edges and prepare the wood for finishing.
- Exterior wood finish: To protect your gate from moisture and enhance its longevity, use an exterior wood finish or stain. This will also add a touch of aesthetic appeal.
Once you have gathered all the necessary materials, you’re ready to embark on the journey of building your garden gate. But first, let’s move on to the next step – measuring and marking the dimensions for your gate.
Step 2: Measure and Mark
Now that you have all the materials ready, it’s time to measure and mark the dimensions for your garden gate. Follow these steps to ensure accurate measurements:
- Determine the location: Decide where you want to install your garden gate. Consider factors such as the terrain, existing fences or structures, and the overall layout of your garden.
- Measure the opening: Using a measuring tape, measure the width of the opening where the gate will be placed. Take multiple measurements to ensure accuracy, as the opening may not be perfectly square.
- Mark the height: Determine the desired height of your gate. Consider both aesthetics and functionality. If you have existing fences, align the height of the gate with the surrounding fence or choose a height that suits your preferences.
- Mark the dimensions: Use a pencil to mark the measurements on the wood. Take into account the width of the gate boards and any additional space needed for hinges and latches.
Remember to double-check your measurements before proceeding to the next step. A small error in measurement can significantly impact the final fit of your gate.
Once you have accurately measured and marked the dimensions for your garden gate, you’re ready to move on to the next step – cutting the wood.
Step 3: Cut the Wood
With the dimensions marked on the wood, it’s time to cut the pieces that will form the structure of your garden gate. Follow these steps to ensure precise cuts:
- Prepare your workspace: Find a suitable area where you can safely cut the wood without any obstructions. Ensure you have ample space to maneuver the saw and support the wood.
- Secure the wood: Use clamps or weights to secure the wood in place before cutting. This will prevent any movement and ensure a clean and accurate cut.
- Cut the frame pieces: Start by cutting the vertical frame pieces to the desired height. Use a saw to carefully follow the marked lines and make straight cuts. Repeat the process for the horizontal frame pieces.
- Cut the gate boards: Measure and mark the dimensions for individual gate boards. Use a saw to make the necessary cuts. Remember to account for any gaps or spacing you desire between the boards.
- Double-check the cuts: After cutting all the wood pieces, double-check the measurements and compare them with the marked dimensions. This step is crucial to ensure all the cut pieces align properly during assembly.
Accuracy is key when cutting the wood for your garden gate. Take your time and make precise cuts to ensure that each piece fits perfectly during assembly. Once you have all the necessary components cut, you can move on to the next step – assembling the frame.
Step 4: Assemble the Frame
Now that you have all the wood pieces cut to size, it’s time to assemble the frame of your garden gate. The frame provides the structure and stability for the gate, so follow these steps to ensure a sturdy assembly:
- Lay out the frame pieces: Lay the vertical and horizontal frame pieces on a flat surface in the desired formation. This will give you a visual idea of how the gate will come together.
- Align the corners: Ensure that the corners of the frame are flush and properly aligned. Use a square tool to check for 90-degree angles. Making precise adjustments at this stage will result in a well-fitted gate.
- Create pilot holes: Using a drill with an appropriate drill bit, create pilot holes where the frame pieces intersect. This will prevent the wood from splitting when screws are inserted, and make assembly easier.
- Secure the frame: Drive screws through the pilot holes to secure the frame pieces together. Start with one corner and work your way around, ensuring all connections are tight and secure.
- Check for squareness: Once the frame is assembled, double-check for squareness by measuring the diagonals. The measurements should be equal if the frame is square. Make any necessary adjustments before proceeding.
By following these steps, you will have a solid and well-constructed frame for your garden gate. It is important to take your time during this stage to ensure a strong foundation for the rest of the gate assembly. Now that the frame is complete, let’s move on to the next step – attaching the gate boards.
Read more: How To Make A Fence Panel Into A Gate
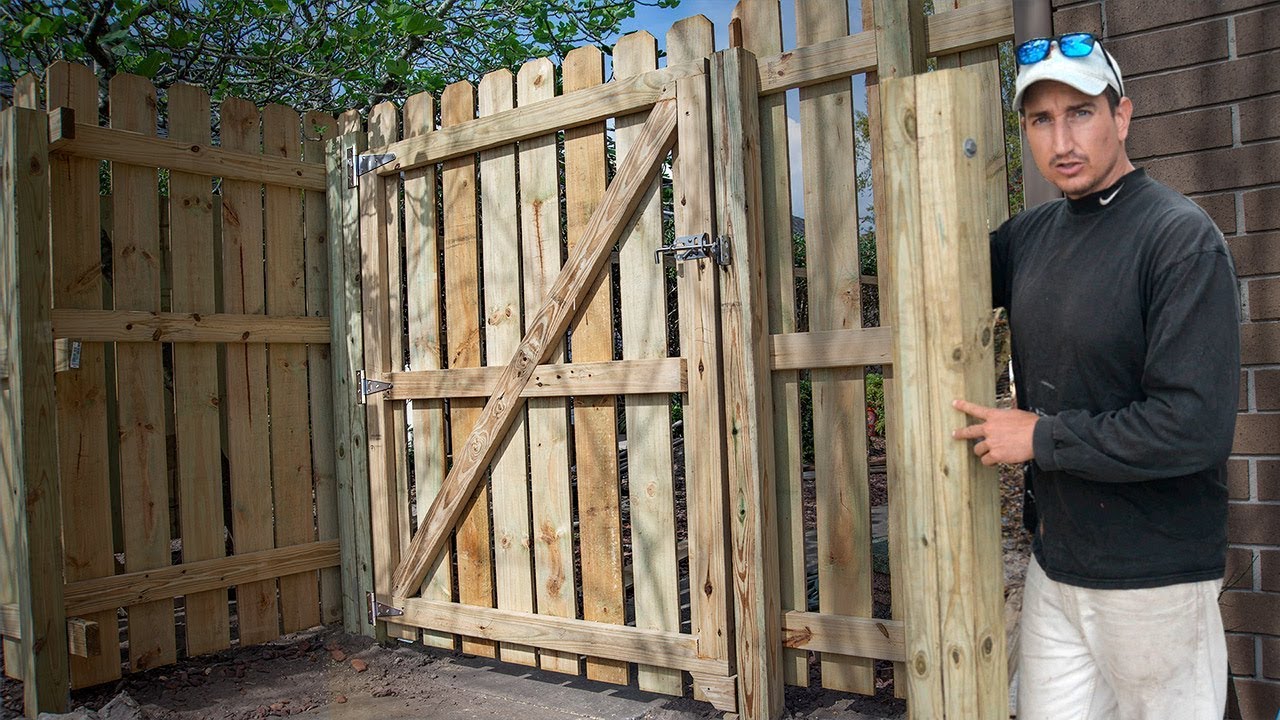
Step 5: Attach the Gate Boards
With the frame assembled, it’s time to attach the gate boards that will fill in the open spaces and add character to your garden gate. Follow these steps to ensure proper attachment:
- Lay out the gate boards: Lay the gate boards horizontally across the frame, evenly spaced and ensuring they cover the entire width of the gate. This will give you a visual reference and help you determine the desired configuration.
- Create pilot holes: Using a drill with an appropriate drill bit, create pilot holes through the gate boards and into the frame. These holes will allow the screws to go in without splitting the wood.
- Secure the gate boards: Drive screws through the pilot holes, securing the gate boards to the frame. Start at one end and work your way to the other, ensuring each board is securely fastened.
- Check for alignment: As you attach the gate boards, periodically check for alignment and make any necessary adjustments to ensure they are straight and evenly spaced.
- Trim excess: If any gate boards extend beyond the frame, use a saw to carefully trim them to match the frame’s dimensions. This will give your gate a clean and polished appearance.
Attaching the gate boards is a crucial step that not only adds stability but also adds visual appeal to your garden gate. Take your time to ensure the boards are securely attached and aligned properly. Once the gate boards are in place, you’re ready to move on to the next step – adding braces for support.
When building a garden gate, make sure to use weather-resistant wood and durable hardware to ensure longevity. Additionally, consider adding a diagonal brace for added strength and stability.
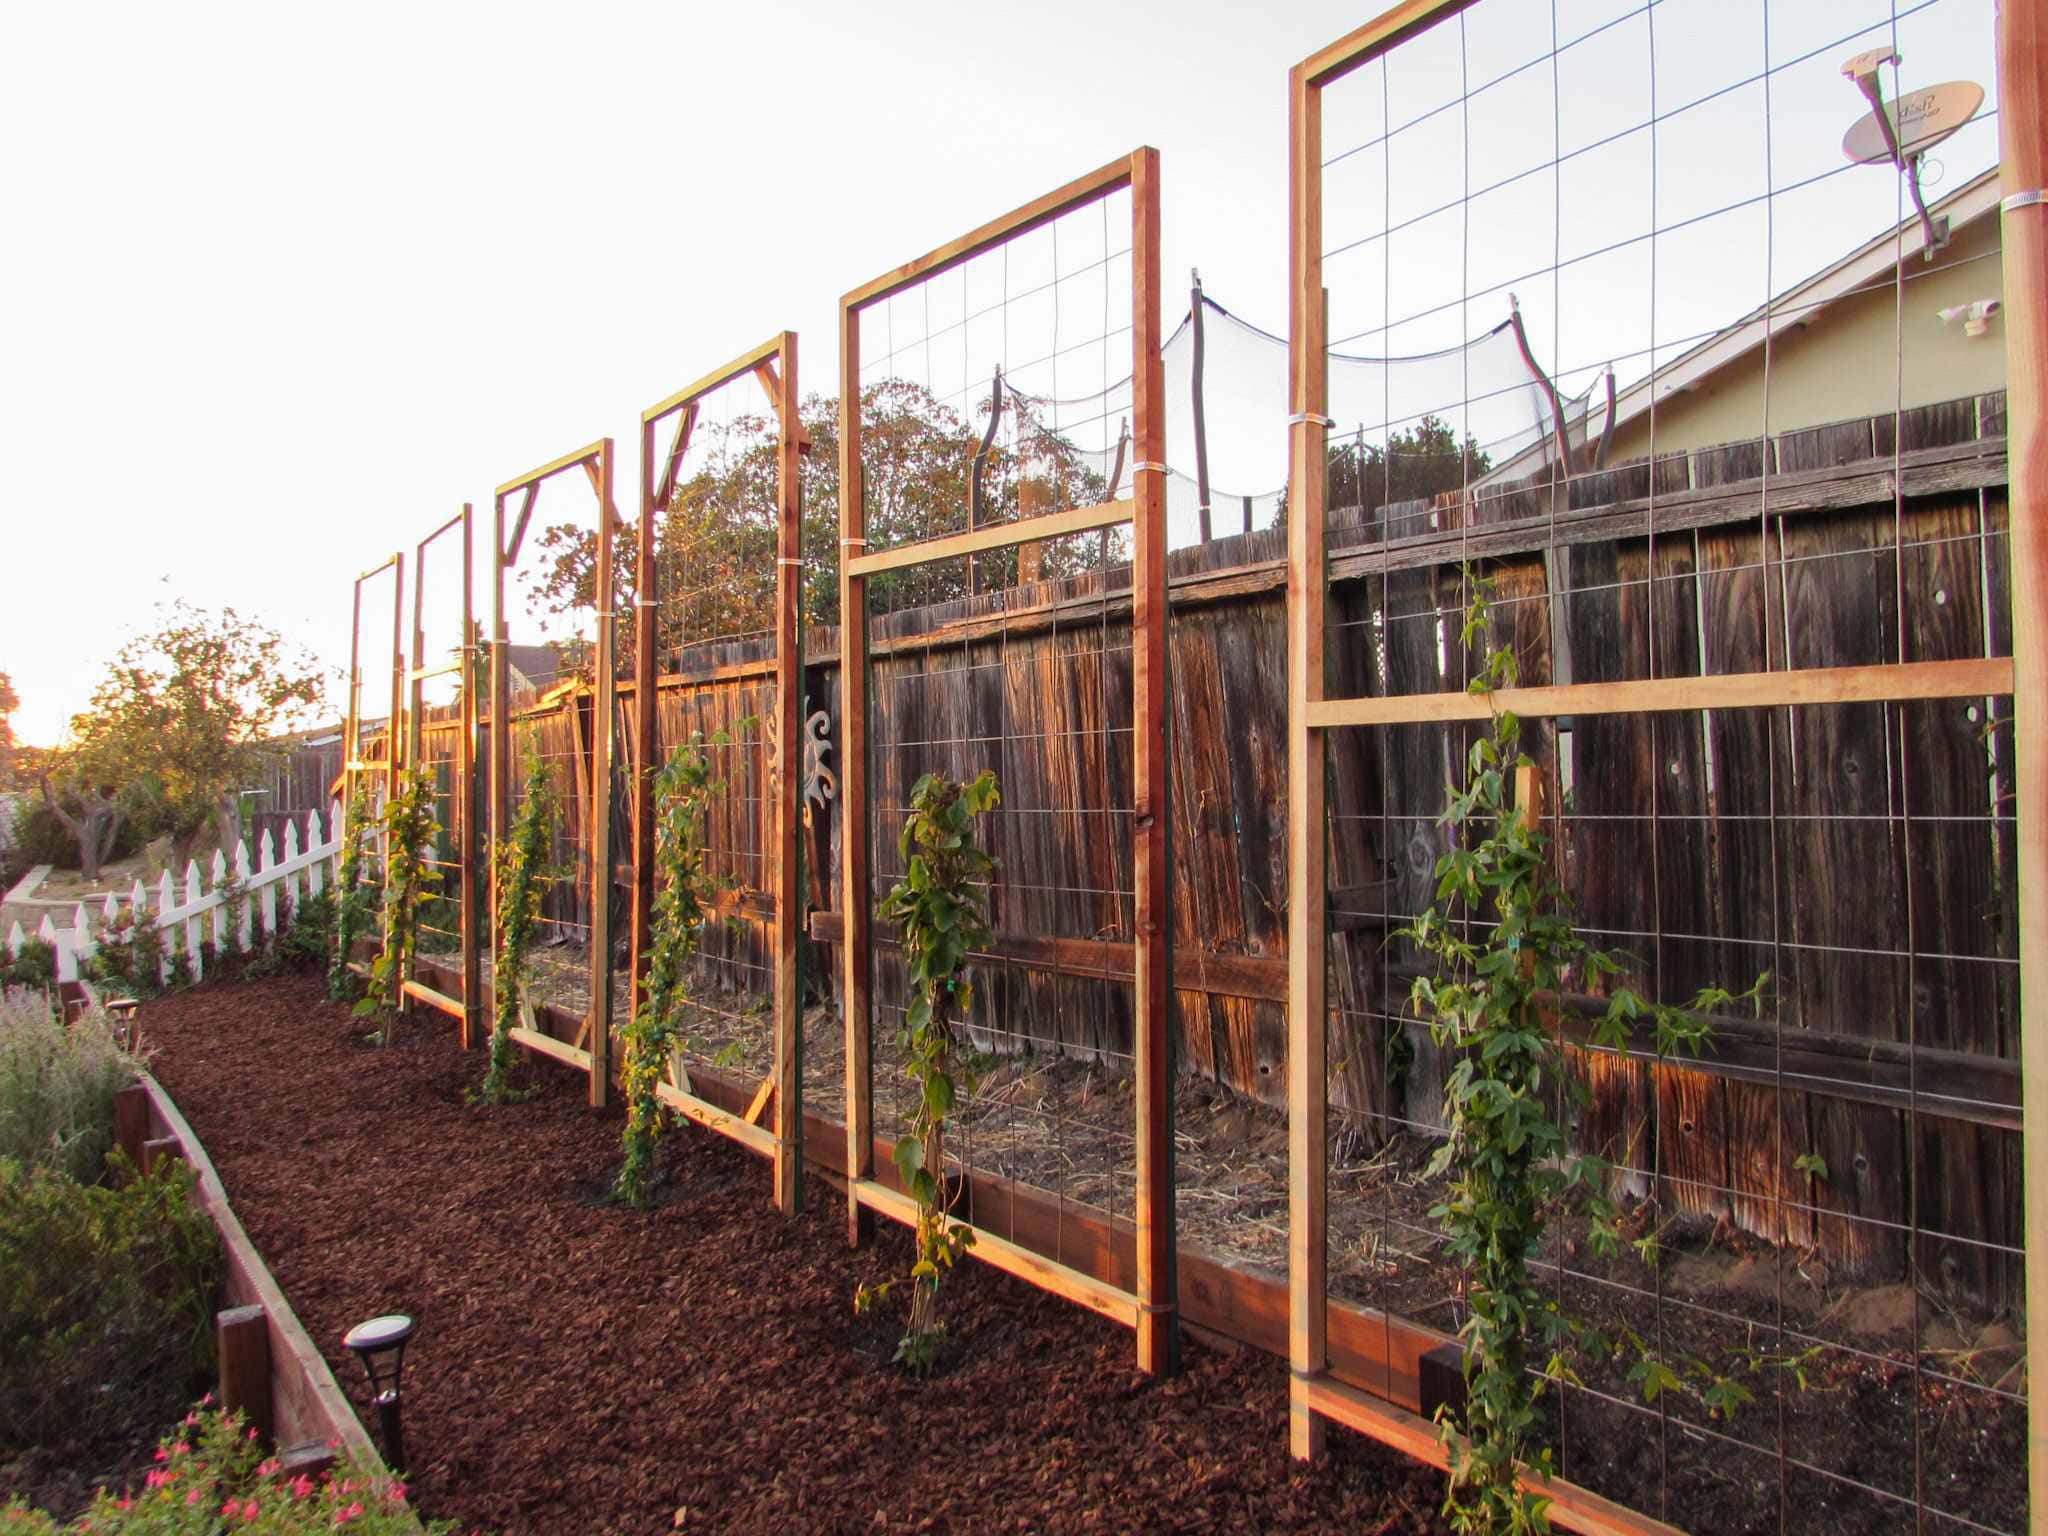
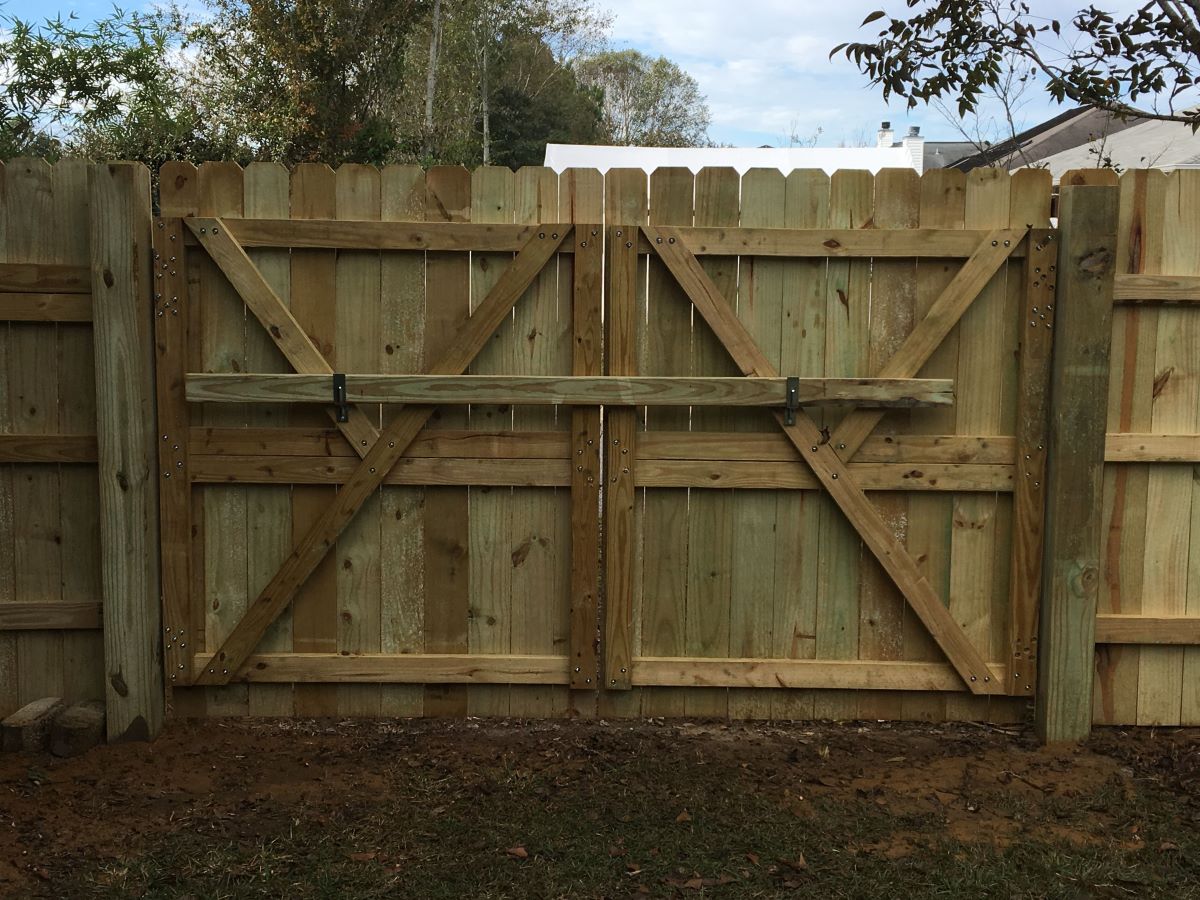
Step 6: Add Braces for Support
Braces provide additional support and stability to your garden gate, especially for larger or heavier gates. They help prevent sagging and maintain the gate’s structural integrity. Follow these steps to add braces to your gate:
- Measure the length of the braces: Determine the length of the diagonal braces based on the height and width of your gate. The braces should span from one corner of the gate frame to the opposite corner.
- Cut the braces: Use a saw to cut the braces to the appropriate length. Make sure the cuts are precise, as this will ensure a snug fit and maximum stability.
- Position the braces: Place the braces diagonally across the back of the gate, connecting the corners. Ensure that the braces intersect with the vertical and horizontal frame pieces for optimal support.
- Secure the braces: Using a drill and screws, secure the braces to the frame. Place the screws at each point where the braces intersect with the frame pieces, ensuring a strong connection.
- Double-check for stability: Shake the gate gently to test its stability. If there is any noticeable movement or wobbling, recheck the tightness of the screws and make any necessary adjustments to ensure a sturdy gate.
Adding braces to your garden gate is an essential step that enhances its strength and resilience. It provides additional support and ensures that your gate stands the test of time. With the braces in place, your gate is almost ready. Let’s move on to the next step – attaching hinges and a latch.
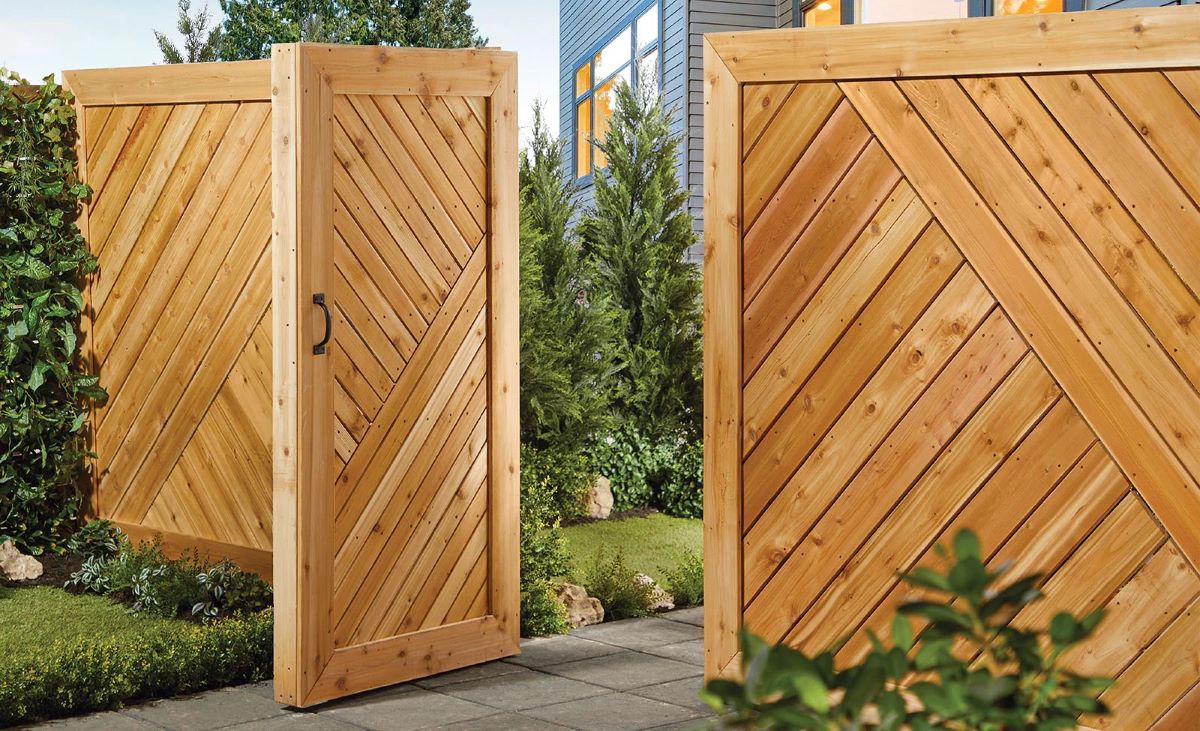
Step 7: Attach Hinges and Latch
Now that your garden gate is taking shape, it’s time to attach the hinges and latch, which will allow your gate to swing open and securely close. Follow these steps to properly attach the hinges and latch:
- Position the hinges: Determine where you want to place the hinges on both the gate and the supporting structure, such as a fence post or a wall. Typically, hinges are attached to the back side of the gate and the adjacent structure.
- Mark the hinge locations: Using a pencil or marker, mark the positions where the hinges will be installed. Make sure the marks are aligned and level on both the gate and the structure.
- Attach the hinges: Using screws and a drill, secure the hinges to the gate and the supporting structure. Ensure that the hinge plates are flat against the wood and the screws are tightened properly.
- Check the hinge alignment: Open and close the gate to test the hinge alignment. It should swing smoothly without binding or sticking. Make any necessary adjustments if the gate does not move freely.
- Attach the latch: Determine the position of the latch on the gate and the adjacent structure. Mark the location and attach the latch using screws and a drill. Ensure that the latch is securely fastened and properly aligned for easy operation.
- Test the latch: Open and close the gate repeatedly to test the latch. It should engage smoothly and securely to keep the gate closed. Make any adjustments to the latch if needed.
Attaching hinges and a latch is a crucial step in the construction of your garden gate, as it allows for easy and secure access to your outdoor space. Take your time to properly align and secure the hinges and latch, as this will ensure the functionality and longevity of your gate. With the hinges and latch in place, your gate is nearly complete. Let’s move on to the next step – sanding and finishing the gate.
Step 8: Sand and Finish the Gate
As you near the completion of your garden gate, it’s time to focus on sanding and finishing the wood. This step not only enhances the gate’s appearance but also helps protect it from the elements. Follow these steps to sand and finish your gate:
- Prepare the surface: Start by ensuring the gate is clean and free of any debris. Use a brush or a cloth to remove any dust or dirt.
- Sand the wood: Using sandpaper or a handheld sander, gently sand the entire surface of the gate. This will smooth out any rough areas, splinters, or imperfections in the wood.
- Focus on the edges: Pay extra attention to the edges and corners of the gate while sanding. These areas tend to be more rough and may require additional sanding to achieve a smooth finish.
- Wipe off dust: After sanding, use a clean cloth or a tack cloth to wipe away any residual dust or particles from the wood surface. This will ensure a clean and even finish.
- Apply a wood finish: Choose an exterior-grade wood finish or stain that suits your aesthetic preferences. Follow the manufacturer’s instructions and apply the finish evenly on all sides of the gate, including the edges and corners.
- Allow for drying time: Give the wood finish ample time to dry according to the product’s recommendations. This will ensure that the finish properly adheres to the wood surface and provides long-lasting protection.
Sanding and finishing your garden gate is the final touch that adds a polished look and protects the wood from moisture, UV rays, and other outdoor elements. Take your time during this step to achieve a smooth and professional-looking finish. With the gate sanded and finished, you’re almost ready to install it in your garden. Let’s move on to the final step – installing the garden gate.
Read more: How To Make A Raised Garden
Step 9: Install the Garden Gate
With your garden gate built and finished, the final step is to install it in its designated location. Follow these steps to properly install your garden gate:
- Prepare the installation area: Clear any debris or obstacles from the area where the gate will be installed. Ensure the ground is level and free from any obstructions.
- Position the gate: Carefully position the gate in its desired location, ensuring it is aligned with the opening and any existing fence or structure.
- Mark the hinge and latch locations: Use a pencil or marker to mark the positions where the hinges and latch will be attached to the supporting structure.
- Attach the hinges: Using screws and a drill, secure the hinges to the supporting structure. Ensure they are properly aligned and securely fastened.
- Test the gate swing: Open and close the gate to ensure it swings freely and smoothly. Make any necessary adjustments to the hinge placement or tightness of screws for optimal performance.
- Attach the latch: Align the latch with its corresponding mechanism on the supporting structure. Attach it securely using screws and a drill.
- Test the latch: Open and close the gate again, checking that the latch engages properly and securely. Make any adjustments if needed to ensure a snug and secure closure.
- Finalize the installation: Once you are satisfied with the positioning, swing, and security of the gate, finalize the installation by checking all screws for tightness and ensuring the gate is stable.
Proper installation is essential to ensure your garden gate functions effectively and stands the test of time. Take your time during this step, making any necessary adjustments along the way. Once your garden gate is securely installed, stand back and admire your hard work!
Congratulations! You have successfully built and installed your own garden gate. Not only does it add functionality and security to your outdoor space, but it also enhances the visual appeal of your garden. Enjoy the fruits of your labor as you enter and exit your garden through your beautifully crafted gate.
Remember, maintaining your gate by regular cleaning, inspection, and any necessary repairs will help extend its lifespan and ensure its continued functionality. Happy gardening!
Conclusion
Congratulations on completing your journey to build and install a garden gate! By following these step-by-step instructions, you have successfully created a functional and aesthetically pleasing entrance to your outdoor sanctuary. Your garden gate not only provides privacy and security but also adds charm and character to your space.
Throughout the process, you learned how to gather the necessary materials, accurately measure and mark dimensions, cut and assemble the wood pieces, attach hinges and a latch, and finish the gate to protect it from the elements. Each step required attention to detail and a bit of craftsmanship, leading to a well-constructed and sturdy gate.
Remember to regularly inspect and maintain your garden gate to ensure it remains in optimal condition. Check for any loose screws, signs of wear, or wood damage, and address them promptly to prolong the lifespan of your gate. Additionally, consider applying a fresh coat of finish periodically to maintain its appearance and protection.
Your garden gate not only serves as a functional element but also contributes to the overall beauty and ambiance of your garden. It invites visitors to enter your outdoor oasis and highlights your creativity and passion for gardening. So take a moment to admire your handiwork and enjoy the satisfaction of a job well done.
Now, as you pass through your garden gate, immerse yourself in the tranquility and beauty of your outdoor haven. Embrace the joy of gardening and the serenity that your sanctuary provides. Let your garden gate be a symbol of the creativity and dedication you bring to your gardening journey.
Thank you for joining us on this adventure of building a garden gate. We hope you found this article helpful and inspiring. Happy gardening!
Frequently Asked Questions about How To Make Garden Gate
Was this page helpful?
At Storables.com, we guarantee accurate and reliable information. Our content, validated by Expert Board Contributors, is crafted following stringent Editorial Policies. We're committed to providing you with well-researched, expert-backed insights for all your informational needs.


0 thoughts on “How To Make Garden Gate”