Articles
How To Make A Woven Chair Seat
Modified: December 7, 2023
Learn how to make a woven chair seat with our informative articles. Discover step-by-step instructions and expert tips for creating beautiful woven designs.
(Many of the links in this article redirect to a specific reviewed product. Your purchase of these products through affiliate links helps to generate commission for Storables.com, at no extra cost. Learn more)
Introduction
Welcome to the world of woven chair seats! Woven seats add a touch of elegance and authenticity to any chair, whether it’s a classic antique or a modern piece. Not only do they provide a comfortable seating surface, but they also showcase a beautiful craftsmanship that can be admired by all.
Creating a woven chair seat may seem like a daunting task, but with the right materials and a little patience, you can transform an ordinary chair into a stunning piece of art. In this article, we will guide you through the step-by-step process of making a woven chair seat.
Before we dive into the details, let’s quickly go over the materials you will need for this project. You’ll need a sturdy chair frame, preferably one with a removable seat. You’ll also need woven strips, which can be made of various materials such as cane, rush, or even synthetic alternatives like paper cord or sea grass. Additionally, you’ll need basic woodworking tools like a measuring tape, a saw, and a hammer.
Now that you have a clear idea of what’s ahead, let’s get started on creating your very own woven chair seat. Just imagine the satisfaction of sitting on something you’ve crafted with your own hands!
Key Takeaways:
- Transform an ordinary chair into a stunning piece of art with a woven seat, adding elegance and authenticity to any space while showcasing your craftsmanship and attention to detail.
- Embrace the journey of creating a woven chair seat, from preparing the frame to weaving the intricate design, and savor the satisfaction of crafting something truly special with your own hands.
Materials Needed
To create a woven chair seat, you will need the following materials:
- A sturdy chair frame with a removable seat
- Woven strips (cane, rush, paper cord, sea grass, etc.)
- Measuring tape
- Saw
- Hammer
- Nails (if necessary)
- Scissors
- Clamps
- Wood glue
- Sandpaper
- Stain or paint (optional)
- Brush or sponge for applying stain/paint (optional)
Having these materials on hand will ensure that you are fully prepared for the weaving process. It’s important to note that the specific materials you choose may vary depending on your chair frame and personal preference. If you’re unsure about which woven strips to use, do some research to find the best option for your project.
It’s also worth considering the overall design vision for your chair. If you plan on staining or painting the chair frame, choose a color that complements the woven strips you’ve selected. This will result in a cohesive and visually appealing finished product.
Now that you have all the necessary materials, let’s move on to the step-by-step process of creating your woven chair seat. Picturing the end result and the joy of sitting on your own creation will keep you motivated throughout this project!
Step 1: Preparing the Frame
The first step in creating a woven chair seat is to prepare the frame. If your chair already has a removable seat, remove it carefully. If not, you may need to disassemble the chair to access the seat frame.
Inspect the frame for any loose or damaged parts. Tighten any screws or fasteners, and reinforce any weak joints if necessary. Use sandpaper to smooth any rough edges or surfaces. This step ensures that your chair is sturdy and in good condition before proceeding with the weaving process.
If you plan to stain or paint the chair frame, now is the time to do it. Choose a stain or paint color that complements the overall aesthetic you envision for your chair. Apply the stain or paint evenly, following the product instructions, and allow it to dry completely before moving on to the next step.
Once your frame is prepared and any finishes are dry, you’re ready to move on to the exciting part of creating the woven seat. Securing the frame securely to a work surface using clamps will provide stability and make the weaving process easier.
Now that your chair frame is prepped and ready, let’s move on to measuring and cutting the woven strips.
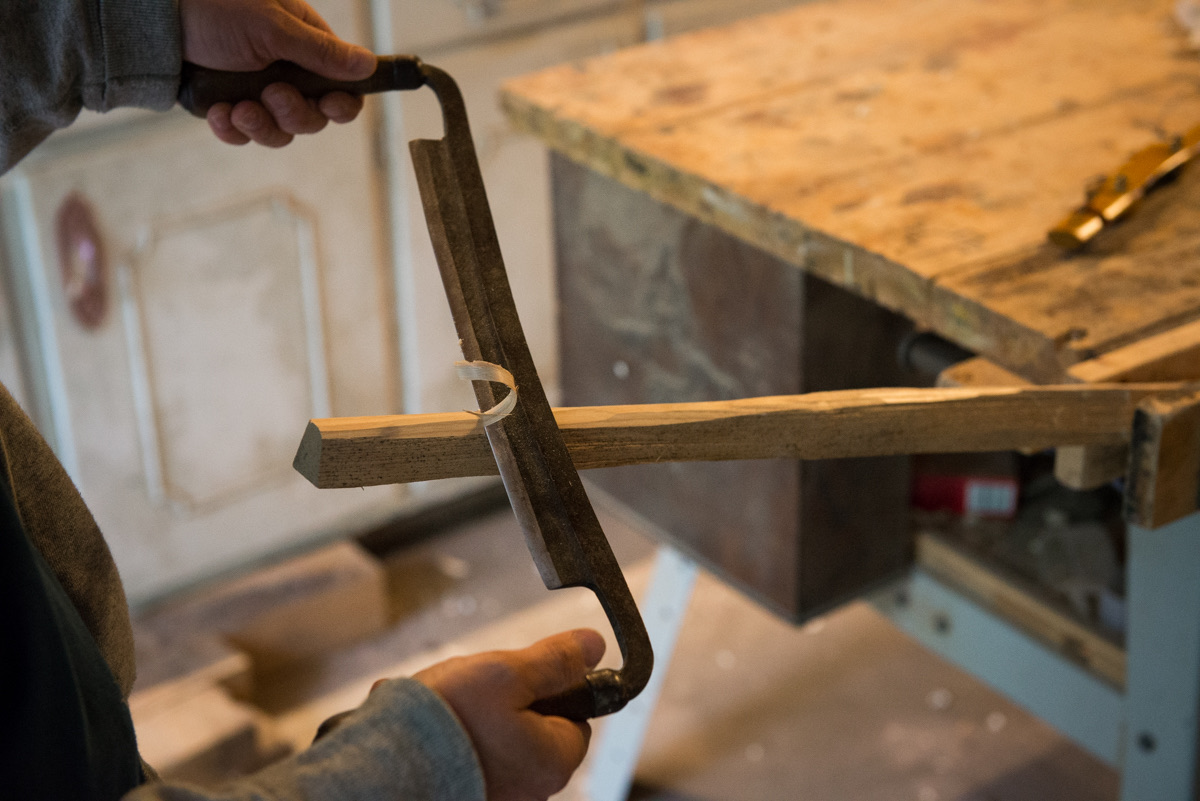
Step 2: Measuring and Cutting the Woven Strips
Measuring and cutting the woven strips is a critical step in creating a woven chair seat. The accuracy of your measurements will determine the final fit and appearance of the woven seat.
Start by measuring the width and length of the seat frame. Use a measuring tape to determine the dimensions accurately. It’s essential to measure both the interior and exterior dimensions of the frame since the woven strips will need to fit properly within the seat.
Once you have the measurements, add a few inches to each side to account for the weaving process. This extra length will provide you with enough material to securely attach and finish the woven strips.
Next, choose the type of woven material you will be using, such as cane, rush, or paper cord. Different materials may require different cutting techniques. If you’re using cane, for example, you’ll need to soak it in water before cutting to make it more pliable.
Using sharp scissors or a utility knife, cut the woven strips according to the measured dimensions. It’s essential to cut the strips as straight and even as possible to ensure a neat and professional-looking woven seat. If you need multiple strips to cover the entire seat, ensure they are all cut to the same length.
Remember to double-check your measurements and cuts before proceeding to the next step. Any inaccuracies at this stage can affect the overall integrity of the woven seat.
Now that you have your woven strips measured and cut, it’s time to move on to creating the base weave of the chair seat.
When weaving a chair seat, start by measuring and cutting the weaving material to ensure it’s the right size. Then, use a weaving pattern that is tight and secure to create a durable seat. Finally, finish off the edges neatly for a polished look.
Step 3: Creating the Base Weave
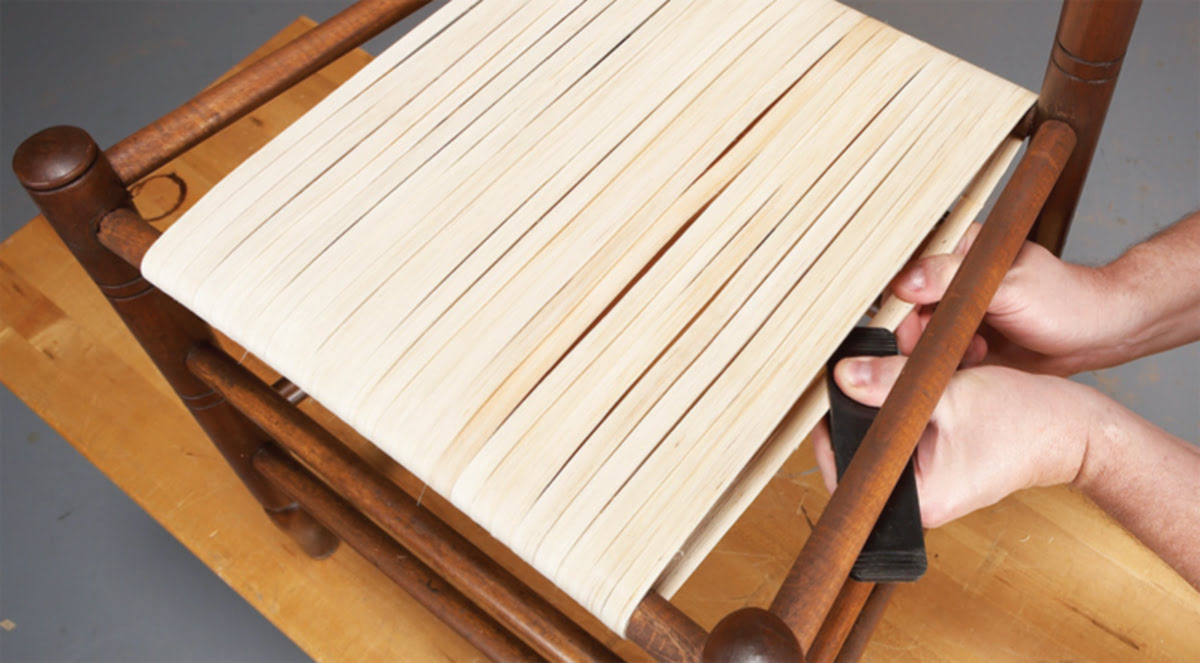
Creating the base weave of the chair seat is the foundation upon which the entire woven design will be built. This step involves weaving the strips of material in a crosshatch pattern to provide stability and support.
Start by positioning one woven strip horizontally across the front of the seat frame, ensuring it’s centered. Use clamps or nails to hold it in place temporarily. This strip will serve as the “warp” or the base of the weave.
Take another woven strip and weave it vertically over and under the horizontal strip. Begin by placing it under the left side of the horizontal strip, then over the right side, and continue this pattern across the seat. Ensure that the vertical strips are evenly spaced and taut, but not so tight that they warp the chair frame.
Continue weaving the strips in the opposite direction, going under and over the horizontal strips until the seat frame is completely covered. As you weave, gently adjust the strips to maintain a straight and consistent pattern.
It’s crucial to maintain an even tension throughout the base weave to ensure a sturdy and professional-looking result. Take your time and double-check the alignment and spacing as you go.
Once the base weave is complete, secure the ends of the strips by tucking them under the adjacent woven strips or by applying a small amount of wood glue. This will prevent the woven strips from shifting and ensure the integrity of the base weave.
Allow the glue to dry completely if you used any. Once dry, you can remove the temporary clamps or nails used to hold the base weave in place.
Now that the base weave is set, it’s time to move on to the exciting part of creating the intricate woven pattern that will make your chair seat truly stand out.
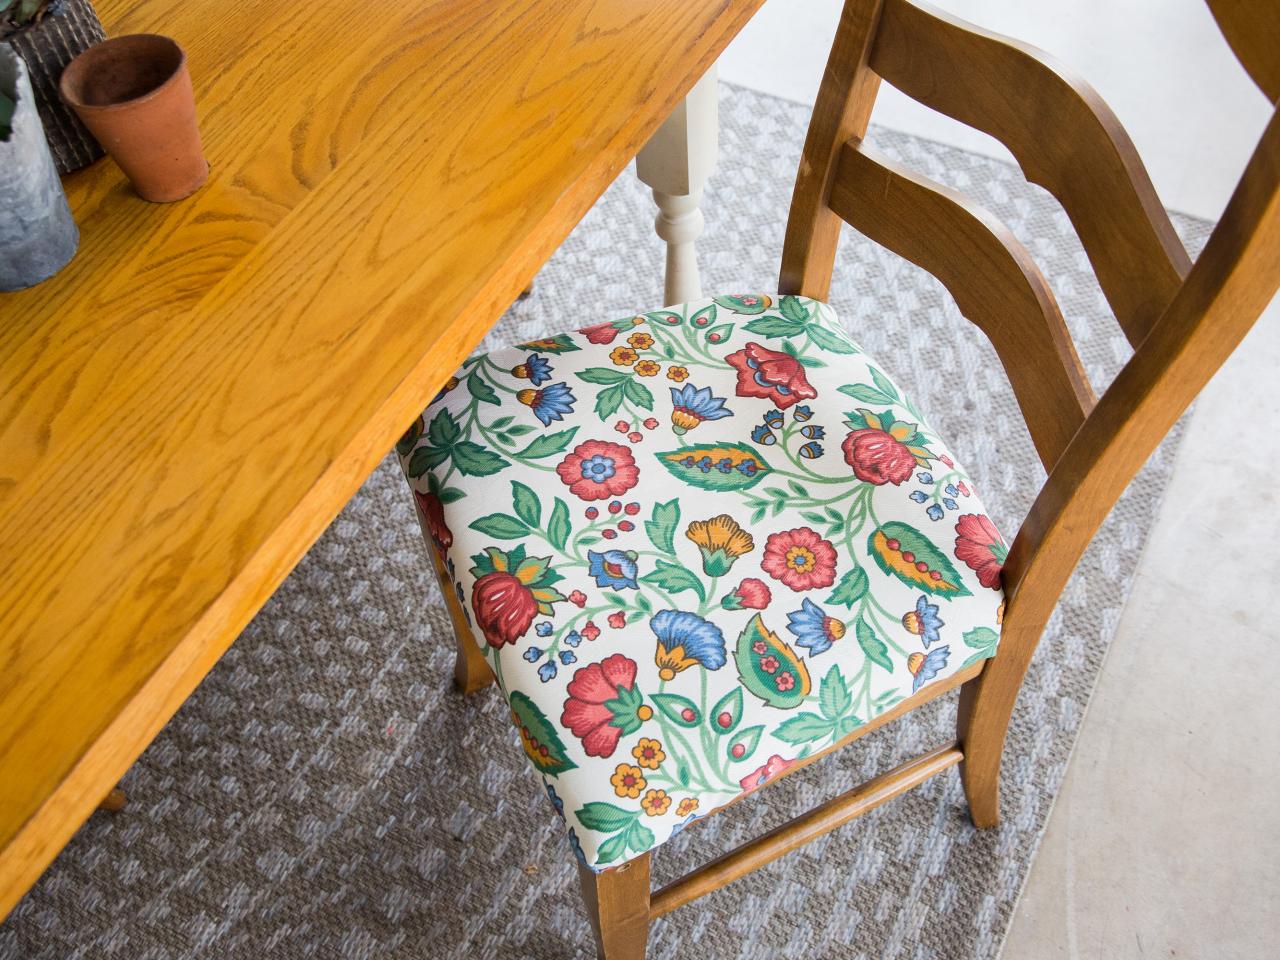
Read more: How To Cover A Dining Chair Seat
Step 4: Weaving the Seat
Now comes the creative and intricate part of weaving the seat. This step involves interlacing the woven strips in a specific pattern to create a unique and beautiful design.
Start by selecting a weaving pattern that suits your preferred style and the type of woven material you’re using. There are various patterns to choose from, such as the traditional herringbone, twill, or basket weave. Research different patterns and choose one that resonates with your aesthetic vision.
To begin weaving, position one end of a new strip over the base weave, either horizontally or vertically, depending on your chosen pattern. Secure the end of the strip to the chair frame using clamps or nails.
Start weaving the strip through the base weave, following your chosen pattern. This may involve going over and under certain woven strips or layering the strips in a specific sequence.
As you weave, maintain a consistent tension to keep the woven strips snug and secure. Ensure that the strips lay flat and are aligned properly, avoiding any gaps or bulges.
Continue weaving the strips, switching between horizontal and vertical placements, and following the chosen pattern. Take your time and pay attention to the details to create a visually appealing design.
If your woven material is pliable, you may need to soak it in water to make it more workable. This can make the weaving process easier and help achieve a tight and neat weave.
Once you’ve reached the end of a woven strip or want to switch to a different color or material, secure the end by tucking it under the adjacent woven strips or using a small amount of wood glue.
Continue weaving with additional strips until the entire seat is covered, ensuring a cohesive and balanced design. Take breaks as needed to rest your hands and keep a fresh perspective on the overall weaving pattern.
Once you’ve completed the weaving process, step back and admire your intricate and handcrafted woven chair seat. But before considering it finished, let’s move on to the final step of adding those finishing touches.
Step 5: Finishing Touches
After all the hard work of weaving the seat, it’s time to put the finishing touches on your woven chair masterpiece. This final step involves adding any necessary adjustments and applying a protective finish.
Start by examining the woven seat for any uneven areas, loose ends, or gaps. Carefully adjust the woven strips to ensure a smooth and consistent surface. Use a small pair of scissors or a utility knife to trim any excess material or frayed edges.
If you notice any gaps or areas where the woven strips aren’t tightly secured, you can use a small amount of wood glue to reinforce those spots. Apply the glue sparingly and allow it to dry according to the manufacturer’s instructions.
Once the seat is secure and even, it’s time to consider adding a protective finish. This is especially important if you’re using natural woven materials like cane or rush, as it helps to maintain the durability and appearance of the seat.
You have a few options for finishes, such as applying a clear varnish, a coat of polyurethane, or using a wood stain that matches the overall aesthetic of your chair. Consider the durability, desired sheen, and color enhancement when selecting a finish.
Apply the finish according to the product instructions, using a brush or sponge to evenly coat the entire woven seat. Take care not to overapply or create drips, as this can affect the appearance of the seat. Allow the finish to dry completely before using the chair.
Once the finish is dry, give your chair a final inspection to ensure everything is in place and looking flawless. Now, sit down and enjoy the fruits of your labor on your beautifully woven chair seat.
Remember, practice and patience are key when it comes to mastering the art of creating woven chair seats. Each project will improve your skills, and soon you’ll be able to create stunning woven designs with ease.
Congratulations on completing the process of making a woven chair seat! Your handiwork will surely be appreciated and admired by all who have the pleasure of sitting on it.
Now go ahead, take a seat, and savor the satisfaction of crafting something truly special.
Conclusion
Creating a woven chair seat is a labor of love that combines both functionality and artistic craftsmanship. Throughout this article, we’ve walked you through the step-by-step process of bringing a woven chair seat to life.
Starting with the preparation of the frame, ensuring its stability and giving it a fresh look with a coat of stain or paint, you laid the foundation for the woven masterpiece to come. With careful measurements, cutting woven strips, and creating a strong base weave, you set the stage for the intricate weaving process.
The weaving itself is a creative and meticulous endeavor, where you carefully interlaced the strips to form a beautiful and visually stunning design. Paying attention to the chosen pattern, tension, and alignment, you devoted time and effort to achieve a perfectly woven seat.
Finally, with the finishing touches and protective finish, you ensured the longevity and beauty of your handmade creation. Trimming any loose ends, adjusting any imperfections, and applying a protective coat, you added the final touch of professionalism and preservation to your woven chair seat.
The satisfaction of completing your woven chair seat project is not just in the end result, but also in the journey itself. You’ve honed your skills, learned new techniques, and embraced the art of weaving. The chair that was once plain and ordinary has been transformed into a unique and captivating piece of furniture.
Now, whenever you or someone else sits on your woven chair seat, you can take pride in knowing that it was created with your own hands. From the careful selection of materials to the meticulous weaving process, you have crafted a functional work of art that adds character and elegance to any space.
So go ahead, share your newfound expertise with others, or embark on more weaving projects to further refine your skills. The possibilities are endless, and the joy of creating something beautiful with your own hands is immeasurable.
Remember, creating a woven chair seat is a journey worth taking. Embrace the process, enjoy the satisfaction of completion, and revel in the comfort and beauty of your woven masterpiece for years to come.
Frequently Asked Questions about How To Make A Woven Chair Seat
Was this page helpful?
At Storables.com, we guarantee accurate and reliable information. Our content, validated by Expert Board Contributors, is crafted following stringent Editorial Policies. We're committed to providing you with well-researched, expert-backed insights for all your informational needs.


0 thoughts on “How To Make A Woven Chair Seat”