Articles
How To Make Back Tab Curtains Slide Easily
Modified: October 20, 2024
Learn how to make back tab curtains slide easily with these helpful articles. Find tips and tricks for improving the functionality of your curtains and creating a smooth sliding experience.
(Many of the links in this article redirect to a specific reviewed product. Your purchase of these products through affiliate links helps to generate commission for Storables.com, at no extra cost. Learn more)
Introduction
Welcome to our guide on how to make back tab curtains slide easily. Back tab curtains are a versatile and popular window treatment option, known for their clean and elegant appearance. However, if these curtains are not sliding smoothly along the curtain rod, it can be frustrating and affect the overall functionality and aesthetics of your space. In this article, we will explore the common issues faced with back tab curtains and provide you with useful tips and techniques to ensure they glide effortlessly.
Back tab curtains differ from traditional curtain styles as they feature hidden tabs on the backside of the panel, which allow them to be hung directly onto a curtain rod. This creates a sleek and modern look, with the curtain fabric gracefully falling in soft folds. While back tab curtains offer numerous benefits, such as light control, privacy, and insulation, they can sometimes become problematic if not properly managed.
One of the most common issues with back tab curtains is their tendency to get stuck or hang unevenly along the rod. This can make opening and closing the curtains a challenging and frustrating task. The main reason for this is the friction between the fabric and the curtain rod, which can cause resistance and hinder smooth sliding. Additionally, factors like the fabric weight, length, and maintenance also play a role in the curtain’s sliding performance.
Ensuring that your back tab curtains slide easily is important not only for convenience but also for maintaining the overall aesthetics of your space. Smoothly sliding curtains create a cohesive and polished look, allowing natural light to filter through and enhancing the ambiance of any room. Whether you have recently installed back tab curtains or have been struggling with their movement for some time, the following tips and techniques will help you make your curtains glide effortlessly along the rod.
Key Takeaways:
- Achieving smooth sliding for back tab curtains is crucial for effortless operation, enhanced aesthetics, and extended lifespan. From fabric choice to regular maintenance, attention to detail ensures a visually pleasing and functional curtain setup.
- Selecting the right fabric, proper installation, and regular maintenance are key to ensuring back tab curtains slide effortlessly. Attention to weight, length, and lubrication enhances functionality and elevates room aesthetics.
Read more: How To Make Curtains Slide Easily
Understanding Back Tab Curtains
Before diving into the tips and techniques for making back tab curtains slide easily, let’s take a closer look at what exactly back tab curtains are and how they differ from other curtain styles.
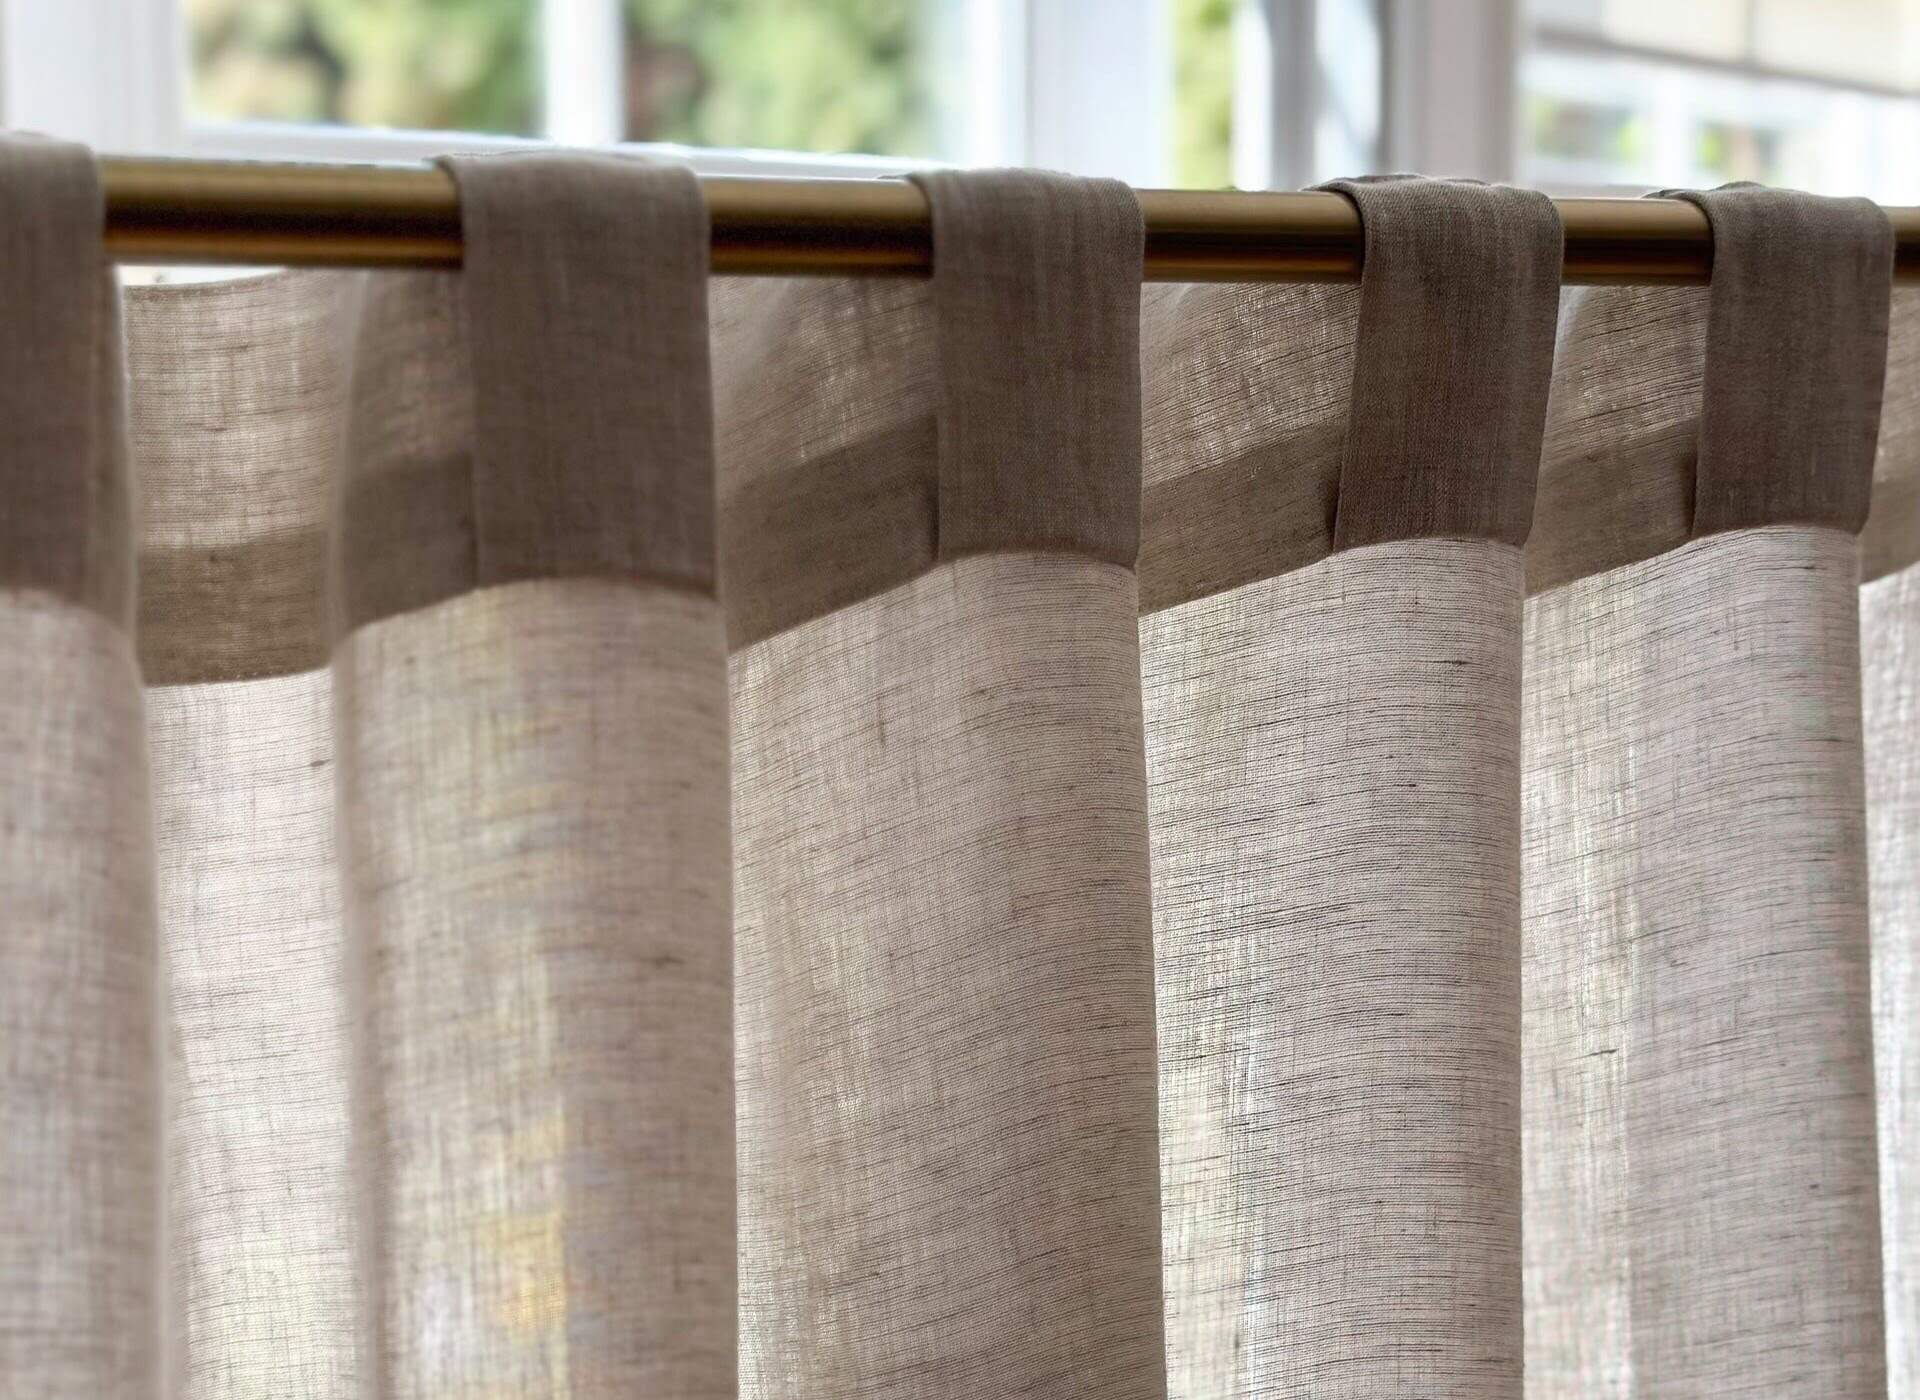
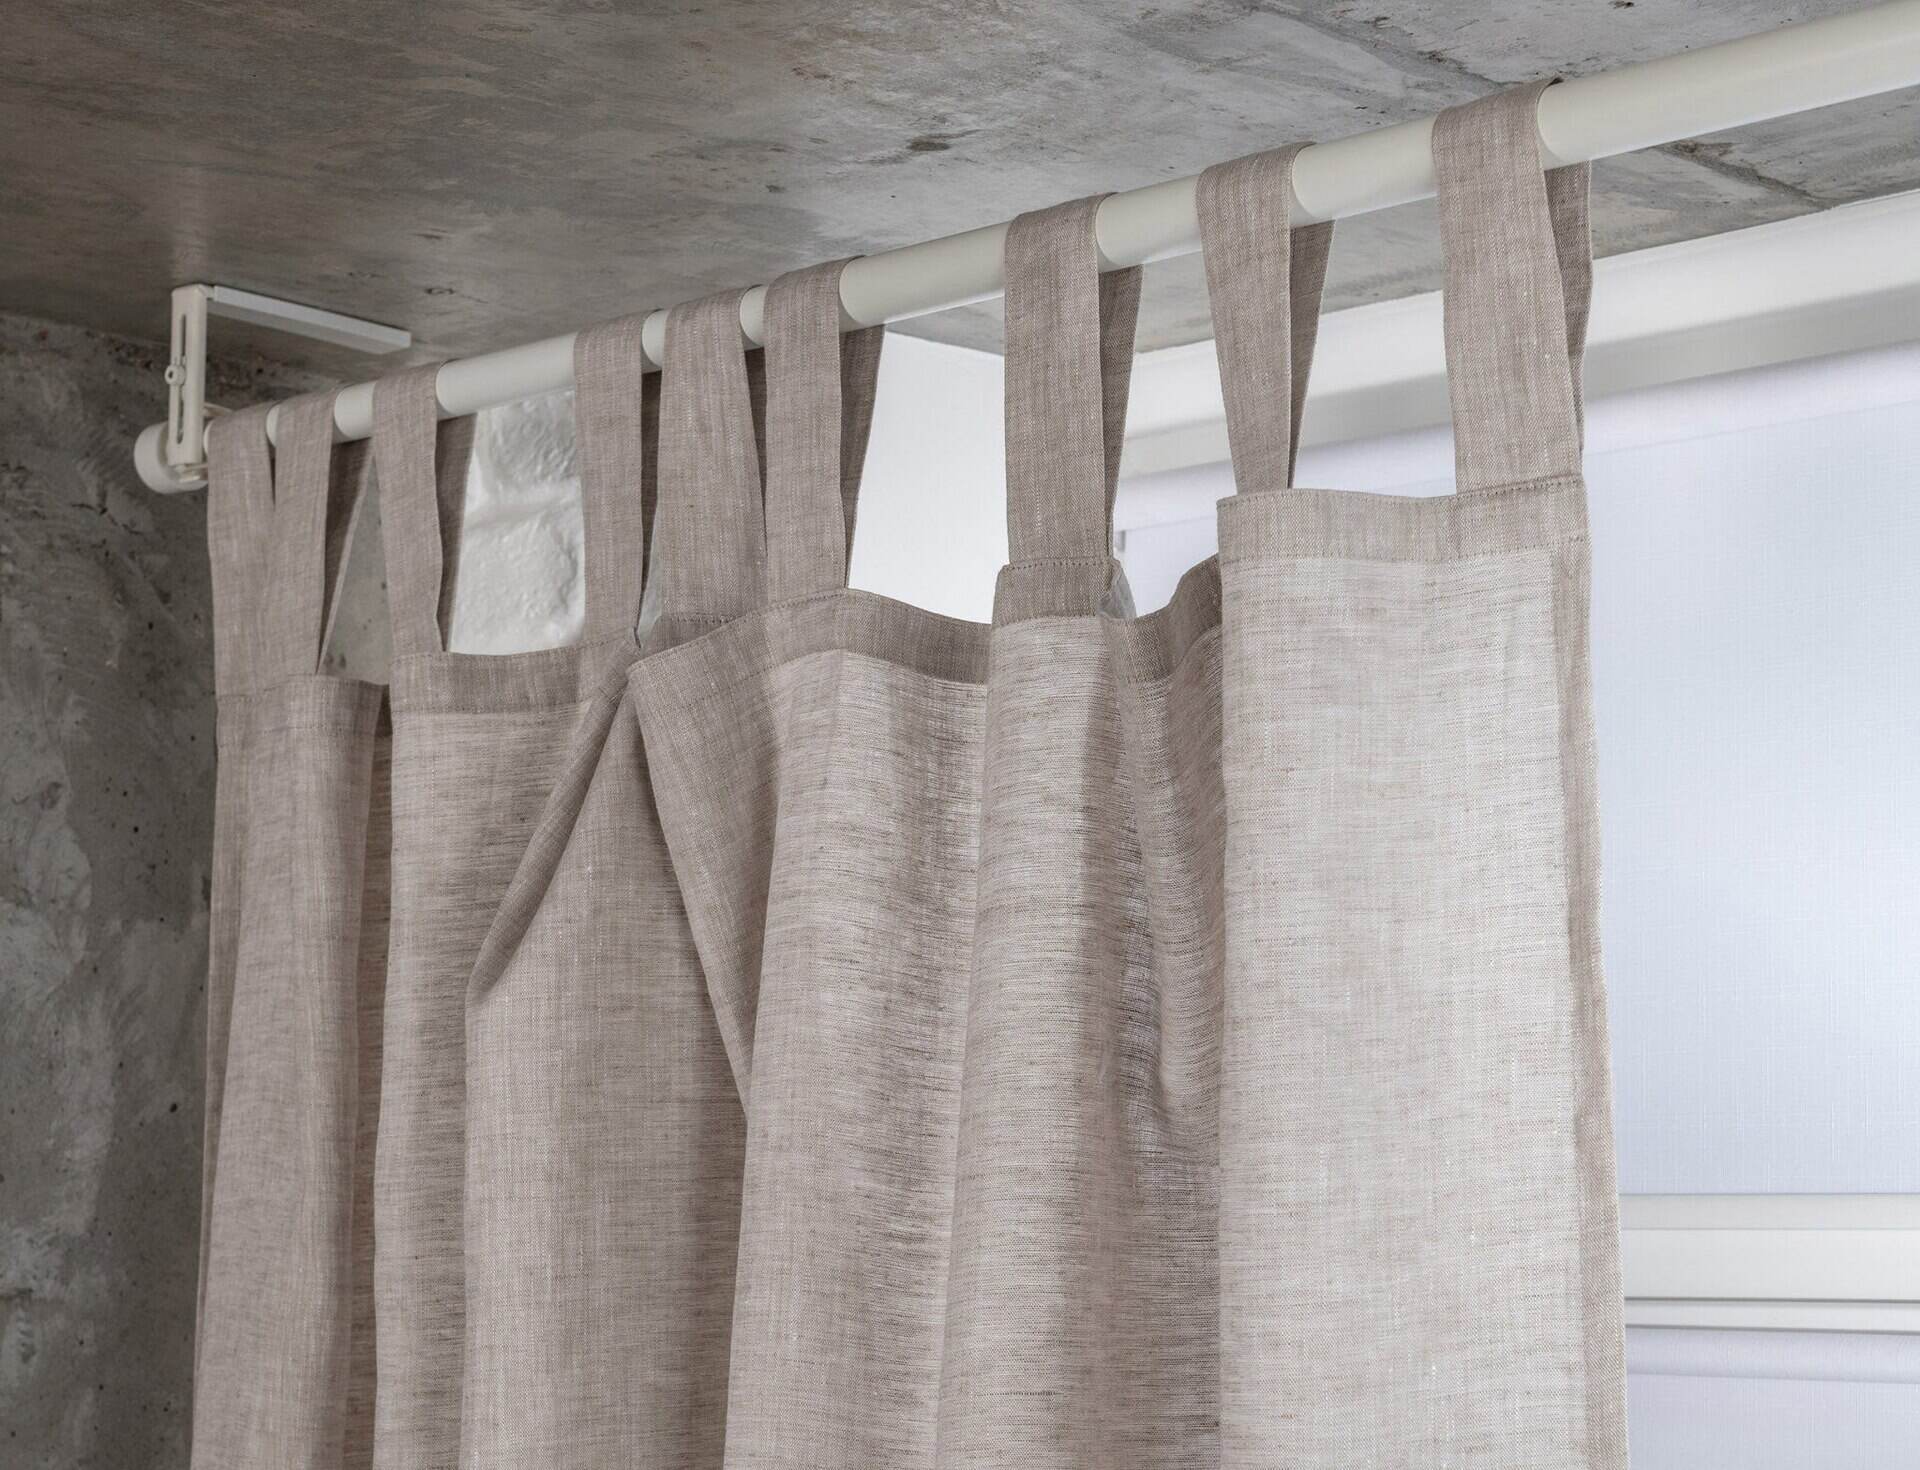
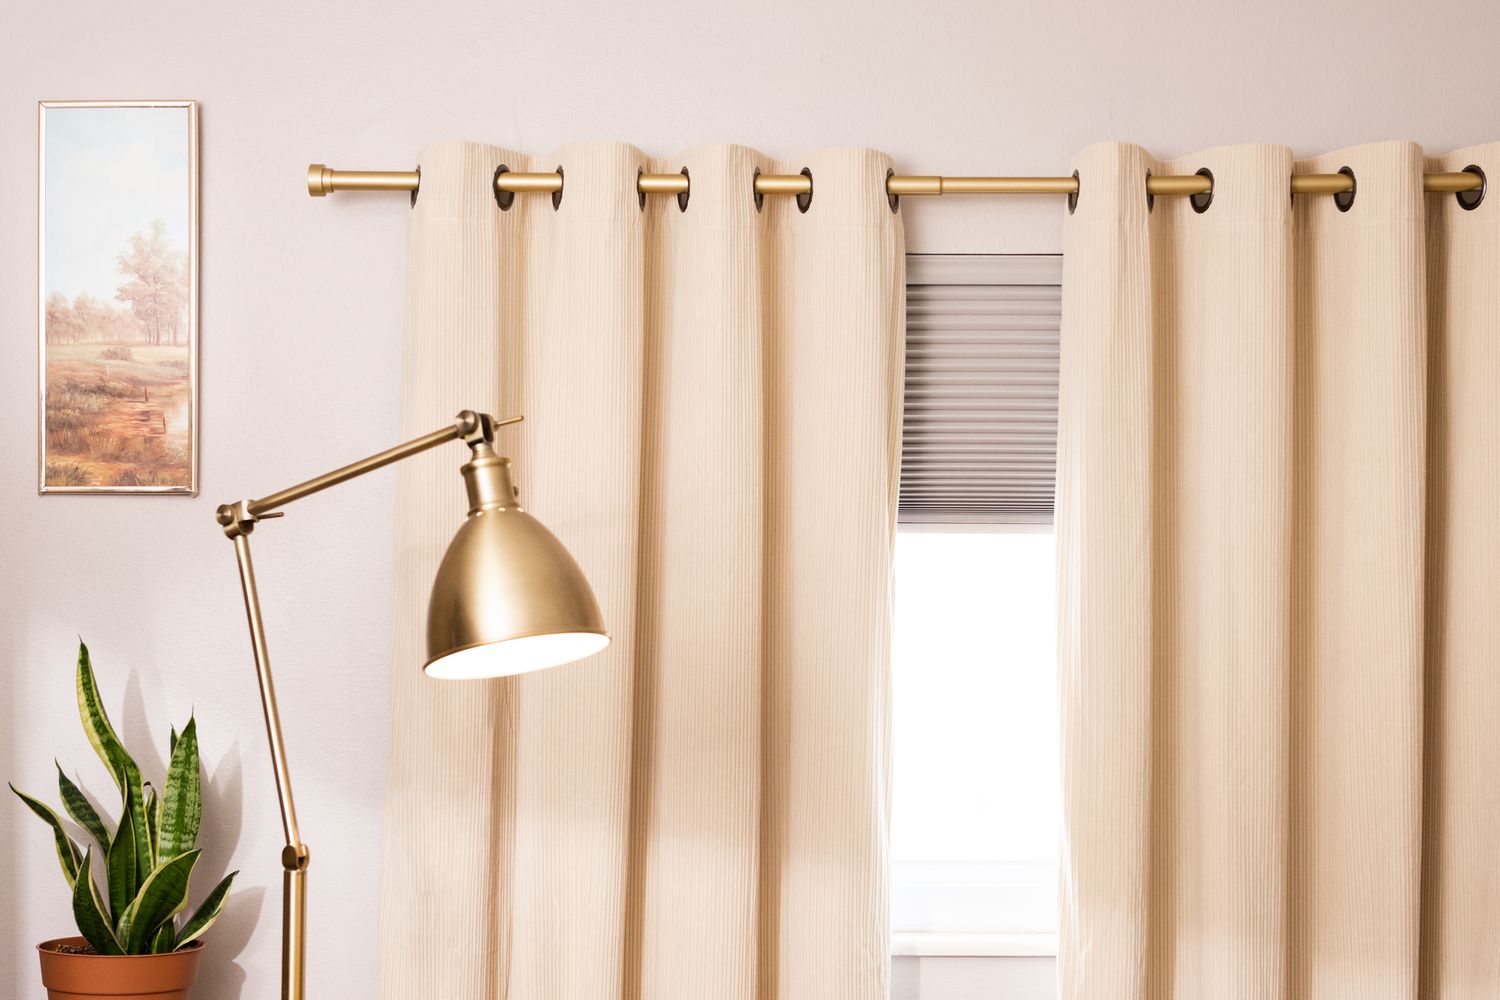
Back tab curtains, also known as hidden tab curtains, are a type of window treatment that utilizes a series of fabric loops or tabs on the backside of the curtain panel. These tabs are used to hang the curtains directly on a curtain rod, creating a clean and streamlined appearance.
Unlike traditional curtains with grommets or rod pockets, back tab curtains offer a more modern and tailored look. The fabric loops or tabs are designed to create soft, evenly spaced pleats when hung, which adds an elegant touch to any room.
Back tab curtains are available in various fabrics, patterns, and colors, making them a versatile choice for different interior design styles. From lightweight sheers to heavy blackout options, you can find back tab curtains to suit your specific needs and preferences.
These curtains are also highly functional, providing privacy, light control, and insulation. When opened, the tabs neatly fold and stack the fabric to the sides, allowing natural light to flood the room. When closed, the fabric hangs effortlessly, providing privacy and helping to regulate indoor temperature.
It’s important to note that while back tab curtains offer many advantages, they do require proper installation and maintenance to ensure optimal performance. The way the curtains are hung and the type of fabric used can greatly impact how easily they slide along the curtain rod.
Now that we have a better understanding of what back tab curtains are, let’s explore some of the common issues that can arise with these curtains and the importance of smooth sliding.
Common Issues with Back Tab Curtains
While back tab curtains are a popular choice for window treatments, they can sometimes present a few common issues that can affect their functionality and appearance. Understanding these issues will help you identify and address any problems you may encounter with your back tab curtains.
1. Stiff or Heavy Fabric: One of the most common issues is when the fabric used for the curtains is stiff or heavy. This can create excessive friction between the fabric and the curtain rod, making it difficult for the curtains to slide smoothly. As a result, you may notice that the curtains get stuck or do not fold neatly when opened or closed.
2. Uneven Pleats: Back tab curtains are designed to create soft and even pleats when hung. However, if the curtains are not properly aligned or hung, you may notice that the pleats are uneven. This can not only affect the aesthetic appeal but also impact the functionality of the curtains.
3. Excessive Length: Back tab curtains that are too long can also cause issues with sliding. When the fabric touches the floor or gets caught under furniture, it can create resistance and prevent smooth movement. Trimming or hemming the curtains to the appropriate length can help resolve this issue.
4. Inadequate Curtain Rod Support: Another common issue is insufficient support from the curtain rod. If the rod is not sturdy enough or does not have proper brackets or support, it may sag under the weight of the curtains. This can lead to uneven hanging and difficulty in sliding the curtains along the rod.
5. Lack of Maintenance: Like any other household item, back tab curtains require regular maintenance to ensure their optimal performance. Dust, dirt, and debris can accumulate on the fabric, which can make the curtains less smooth to slide. Routine cleaning and care can help prevent this issue.
By understanding these common issues, you can take the necessary steps to address them and ensure your back tab curtains slide smoothly and enhance the overall look and functionality of your space. In the next section, we will delve into the importance of smooth sliding and why it is crucial for your back tab curtains.
Importance of Smooth Sliding
The smooth sliding of back tab curtains is not just a matter of convenience; it plays a crucial role in achieving the desired functionality and aesthetics of your space. Understanding the importance of smooth sliding will help you appreciate the impact it can have on the overall look and feel of your room.
1. Effortless Operation: When your back tab curtains slide effortlessly along the curtain rod, it makes opening and closing them a breeze. This ease of operation allows for quick and convenient adjustment of privacy levels, light control, and airflow in your space. With smooth sliding curtains, you can effortlessly transition between bright, sunlit rooms and intimate, cozy spaces.
2. Aesthetic Appeal: Smoothly sliding back tab curtains contribute to the overall aesthetic appeal of your room. When the curtains glide effortlessly, they create clean and uniform folds, enhancing the visual impact. Neatly hung curtains can elevate the interior design of your room, creating a sense of sophistication and elegance.
3. Improved Functionality: The functionality of your back tab curtains relies on their ability to smoothly move along the curtain rod. Curtains that slide easily allow for optimal light control, privacy, and temperature regulation. Whether you want to darken a room for better sleep or allow natural light to filter in, smoothly sliding curtains ensure you can effortlessly achieve your desired ambiance.
4. Extended Curtain Lifespan: When back tab curtains do not slide smoothly, the excessive friction can cause strain on the fabric loops and the curtain rod. This can lead to premature wear and tear, potentially shortening the lifespan of your curtains. By keeping the curtains sliding smoothly, you can help preserve their quality and durability over time.
5. Enhanced Room Flexibility: Smooth sliding curtains offer greater flexibility in terms of adjusting the amount of light and privacy in your room. Whether you want complete darkness or a soft diffusion of sunlight, being able to easily slide the curtains allows you to customize the ambiance to suit your needs at different times of the day.
By recognizing the importance of smooth sliding, you can take the necessary measures to ensure your back tab curtains glide effortlessly along the curtain rod. In the following section, we will provide you with useful tips and techniques to make your back tab curtains slide easily and maintain their optimal performance.
Tips and Techniques for Making Back Tab Curtains Slide Easily
If you’re facing challenges with the sliding movement of your back tab curtains, don’t worry! There are several tips and techniques you can use to improve their performance and make them glide effortlessly along the curtain rod. Follow these suggestions to ensure that your back tab curtains slide smoothly and enhance the overall functionality and aesthetics of your space:
- Choosing the Right Fabric: Opt for lightweight and smooth fabrics that have less friction when in contact with the curtain rod. Fabrics like silk, satin, and polyester blends are excellent choices as they tend to slide more easily.
- Proper Installation of Curtain Rods: Ensure that your curtain rods are securely installed and properly aligned. A sturdy and level rod provides a stable foundation for the curtains and facilitates smooth sliding.
- Using Appropriate Curtain Hooks: Use curtain hooks designed specifically for back tab curtains. These hooks provide a secure attachment to the fabric loops and help distribute the weight evenly, reducing friction and allowing for smoother movement.
- Avoiding Excessive Weight and Length: Heavy curtains or curtains that are too long can create additional strain on the fabric loops, leading to difficulty in sliding. Opt for lighter fabrics and ensure that the curtains are not floor-length unless necessary.
- Regular Cleaning and Maintenance: Keep your curtains clean and free from dust and debris by regularly vacuuming or gently shaking them. This helps prevent buildup that can contribute to friction and hinder smooth sliding.
- Lubricating the Curtain Rod: Apply a small amount of lubricant, such as silicone spray or a bar of soap, to the curtain rod. This reduces the friction between the rod and the fabric, allowing for easier sliding. Be sure to wipe off any excess lubricant to avoid staining the curtains.
- Utilizing Curtain Rings or Clips: If your back tab curtains are still not sliding smoothly, you can try attaching curtain rings or clips to the tabs. This can help reduce friction and allow for more effortless movement along the curtain rod.
By implementing these tips and techniques, you can significantly improve the sliding performance of your back tab curtains. Experiment with different methods to find what works best for your specific curtains and curtain rods. Remember to regularly maintain and care for your curtains to ensure their continued smooth operation.
Implementing these simple strategies will not only enhance the functionality of your back tab curtains but also add a touch of elegance and ease to your living space. With smooth-sliding curtains, you can effortlessly transform the look and feel of your room, creating a comfortable and visually appealing environment.
Read more: What Is Back Tab Curtains
Choosing the Right Fabric
The fabric you choose for your back tab curtains plays a significant role in their sliding performance. Selecting the right fabric can greatly improve the ease of movement and ensure smooth sliding along the curtain rod. Here are some key factors to consider when choosing the fabric for your back tab curtains:
- Weight: Opt for lightweight fabrics that have less bulk and are easier to maneuver. Heavy fabrics can create more friction against the curtain rod, making it harder for the curtains to slide smoothly. Lighter options, such as silk, satin, or polyester blends, are excellent choices as they tend to have a sleeker texture that facilitates effortless gliding.
- Weave: Consider the weave of the fabric. Fabrics with a tight weave or a smoother texture tend to have less resistance against the curtain rod, allowing for easier sliding. Avoid fabrics with rough textures or intricate weaves that can cause snags or excessive friction.
- Fiber Content: Different fiber content can affect the sliding performance of your back tab curtains. Fabrics made from synthetic fibers like polyester or nylon often have smoother surfaces and tend to slide more easily. On the other hand, natural fibers like cotton or linen may have more texture and friction. Consider the specific qualities of different fabrics and choose one that aligns with your desired sliding experience.
- Finish: Look for fabrics with a smooth finish. Fabrics that have been treated with a special finish or have undergone a process like mercerization tend to have a silky feel and slide more effortlessly.
- Thickness: Opt for thinner fabrics that are less likely to bunch or get caught as they slide along the curtain rod. Thicker fabrics may create more resistance and hinder smooth sliding.
Ultimately, the fabric you choose should be both visually appealing and conducive to smooth sliding. Consider the specific requirements of your space, taking into account factors like the amount of natural light you want to allow in and the overall aesthetic you envision. Consulting with a professional or visiting a fabric store can be helpful in finding the perfect fabric that meets your needs.
Remember, though, that the choice of fabric is just one factor in ensuring smooth sliding for your back tab curtains. Proper installation, appropriate curtain hooks, and regular maintenance are equally important. By carefully selecting the fabric and implementing other tips and techniques, you can enjoy the beauty and functionality of back tab curtains that effortlessly glide along the curtain rod.
Proper Installation of Curtain Rods
When it comes to ensuring smooth sliding for your back tab curtains, proper installation of curtain rods is essential. A secure and well-aligned rod provides a stable foundation for the curtains, allowing them to glide effortlessly along the rod. Here are some tips to help you with the proper installation of curtain rods:
- Choose a Sturdy Rod: Select a curtain rod that is strong and sturdy enough to support the weight of your back tab curtains. Consider the length and weight of the curtains when choosing the appropriate rod. A flimsy or weak rod may sag under the curtain’s weight, causing uneven hanging and hindering smooth sliding.
- Measure and Align: Accurate measurements are crucial for the proper installation of curtain rods. Measure the width of your window and determine the ideal placement for the brackets. Make sure the brackets are level and evenly spaced. Using a level and a measuring tape will help ensure precision and alignment.
- Secure the Brackets: Use appropriate screws and anchors to secure the brackets firmly to the wall. The strength and stability of the brackets are crucial in supporting the weight of the curtains and allowing for smooth sliding. Follow the manufacturer’s instructions for installation, and consider consulting a professional if needed.
- Consider Extension Rods: For wider windows, consider using extension rods in the middle to provide additional support and prevent sagging. This ensures that the curtains can slide smoothly without encountering any obstacles or uneven surfaces along the rod.
- Test Slide: Before hanging the curtains, test the sliding motion of the rod to ensure smooth movement. If you encounter any resistance or unevenness, recheck the alignment of the brackets and make any necessary adjustments.
Proper installation of the curtain rod is crucial for the optimal performance of back tab curtains. A securely installed rod provides a stable base for the curtains to hang and slide smoothly. It eliminates any unnecessary friction or resistance that can hinder the sliding motion. By following these installation tips and ensuring a sturdy and level rod, you can enjoy the effortless gliding of your back tab curtains.
Remember that the curtain rod installation is just one aspect of achieving smooth sliding for your back tab curtains. Other factors, such as the fabric choice and regular maintenance, also contribute to their overall performance. By considering all these aspects collectively, you can create a seamless and visually appealing curtain setup that enhances the functionality and aesthetics of your space.
To make back tab curtains slide easily, try using curtain rod rings with clips. The clips will help the curtains glide smoothly along the rod, making it easier to open and close them.
Using Appropriate Curtain Hooks
Choosing the right curtain hooks is a crucial consideration for ensuring smooth sliding of your back tab curtains. The hooks play a significant role in securely attaching the curtains to the rod and reducing friction, allowing for effortless gliding. Here are some tips on using appropriate curtain hooks for your back tab curtains:
- Back Tab Curtain Hooks: Use hooks specifically designed for back tab curtains. These hooks have a unique shape that allows them to easily slide into the fabric loops on the backside of the curtain panel. They provide a secure attachment while distributing the weight evenly, minimizing friction and facilitating smoother sliding.
- Hook Size: Consider the size of the hooks in relation to the fabric loops on your back tab curtains. The hooks should fit comfortably inside the loops without causing any strain or stretching. Test a few different sizes to find the one that offers the best fit and allows for smooth sliding.
- Material: Opt for hooks made from materials that reduce friction and promote smooth movement. Metal hooks, such as stainless steel or nickel-plated hooks, are often a good choice as they are smooth and durable. Avoid hooks with rough or sharp edges that can catch on the fabric and impede sliding.
- Secure Attachment: Ensure that the hooks are securely attached to the fabric loops on the curtains. Double-check that each hook is properly inserted into the loops and that they are evenly spaced. A secure attachment helps maintain the alignment of the curtains and prevents them from bunching or tangling as they slide.
- Regular Inspection: Periodically inspect the hooks to ensure they are in good condition. Over time, hooks can become worn or bent, which can affect their performance and cause resistance during sliding. If you notice any damaged or bent hooks, replace them with new ones to maintain smooth sliding.
Using appropriate curtain hooks for your back tab curtains is crucial for achieving optimal sliding performance. These hooks ensure a secure and balanced attachment to the curtain rod while reducing friction, allowing for smooth movement. By following these tips and selecting high-quality hooks that fit well with your curtains, you can enjoy the effortless gliding of your back tab curtains.
Remember, the choice of curtain hooks is just one aspect of ensuring smooth sliding. Proper installation of the curtain rod, choosing the right fabric, and regular maintenance are equally important. By considering all these elements together, you can create a well-functioning and visually pleasing curtain setup that enhances the overall aesthetics of your space.
Avoiding Excessive Weight and Length
To ensure smooth sliding of your back tab curtains, it’s important to pay attention to the weight and length of the curtains. Excessive weight or length can create strain on the fabric loops and hinder their ability to glide effortlessly along the curtain rod. Here are some tips for avoiding excessive weight and length in your back tab curtains:
- Choose Lightweight Fabrics: Opt for lightweight fabrics that are easier to handle and slide more smoothly. Fabrics such as silk, chiffon, or polyester blends are excellent choices as they offer a lighter weight and tend to slide more effortlessly. Avoid dense or heavy fabrics that can create additional friction and resistance.
- Consider Sheer or Semi-Sheer Fabrics: Sheer or semi-sheer fabrics not only provide a light and airy look but also tend to be lighter in weight. These fabrics allow for better fluidity and ease of sliding. Additionally, their translucency can create a beautiful play of light and shadows in the room.
- Limit the Curtain Length: Avoid excessively long curtains that touch the floor or bunch up on the ground. When the fabric drags on the floor, it can create resistance and make sliding difficult. Measure your window height accurately and trim or hem the curtains to the desired length, ensuring they hang just above the floor or at a height that allows for smooth sliding.
- Avoid Excessive Fullness: Back tab curtains should have a moderate fullness to allow for smooth movement along the rod. Avoid creating excessive folds or pleats that can cause the curtain to bunch up and impede sliding. Opt for a tailored look that maintains an even distribution of fabric and promotes ease of movement.
- Consider Multiple Panels: If you have wider windows, consider using multiple panels instead of a single large panel. This reduces the weight of each individual panel and allows for better weight distribution along the rod. Remember to ensure that the panels are evenly spaced and properly aligned for seamless sliding.
By avoiding excessive weight and length in your back tab curtains, you can ensure that they slide smoothly and effortlessly. Lighter fabrics and appropriate curtain length contribute to a more fluid and graceful movement. Additionally, proper weight distribution and minimal bunching will help reduce friction and resistance, allowing for seamless sliding along the curtain rod.
Remember that considering the weight and length of the curtains is just one aspect of achieving smooth sliding. Proper installation of the curtain rod, selection of appropriate curtain hooks, and regular maintenance are equally essential. By taking all these factors into account, you can create a well-functioning and visually pleasing curtain setup that enhances the overall aesthetics of your space.
Read more: How To Make Tab Top Curtains
Regular Cleaning and Maintenance
Regular cleaning and maintenance are vital aspects of ensuring smooth sliding for your back tab curtains. Over time, dust, dirt, and debris can accumulate on the fabric, causing friction and hindering their movement along the curtain rod. By incorporating proper cleaning and maintenance practices, you can keep your curtains in optimal condition and promote easy sliding. Here are some tips for regular cleaning and maintenance:
- Regular Dusting: Dust your back tab curtains regularly to prevent the buildup of dirt and debris. Use a soft brush or a vacuum cleaner with a brush attachment to gently remove dust from the fabric surface. This helps keep the curtains clean and minimizes friction during sliding.
- Spot Cleaning: Attend to any stains or spills promptly to prevent them from setting into the fabric. Use a mild detergent or a recommended cleaning solution suitable for the fabric type. Gently blot the stain with a clean cloth or sponge, being careful not to rub or scrub aggressively, as it may damage the fabric. Follow the manufacturer’s instructions for specific cleaning recommendations.
- Professional Cleaning: Consider professional cleaning for your back tab curtains, especially if they require deep or thorough cleaning. Professional cleaning can help remove stubborn stains, rejuvenate the fabric, and restore its original texture and appearance. Be sure to choose a reputable cleaner experienced in handling delicate curtains.
- Avoid Excessive Moisture: Limit exposure to excessive moisture, as it can cause fabric shrinkage and damage. Keep your curtains away from humid areas, such as bathrooms or kitchens, where they may be exposed to moisture and steam. If necessary, use appropriate window treatments that are designed to withstand high humidity.
- Gentle Handling: Handle your back tab curtains with care to prevent unnecessary pulling or stress on the fabric loops. Avoid yanking or tugging the curtains when opening or closing them. Instead, gently guide them along the rod to ensure smooth sliding without straining the fabric or the loops.
- Regular Inspection: Regularly inspect your curtains for any signs of damage or wear. Check the fabric loops for loose threads or fraying and repair them promptly. Taking care of small repairs early can prevent them from becoming larger issues that may affect the sliding performance.
By incorporating regular cleaning and maintenance practices, you can keep your back tab curtains in excellent condition and ensure smooth sliding. Regular dusting, spot cleaning, and professional cleaning when necessary will help maintain the fabric’s quality and reduce friction. Gentle handling and regular inspection for repairs contribute to the overall longevity and functionality of your curtains.
Remember that cleaning and maintenance are just as important as other factors such as fabric choice, proper installation, and appropriate curtain hooks. By combining these elements, you can enjoy the beauty and functionality of back tab curtains that effortlessly glide along the curtain rod.
Lubricating the Curtain Rod
Lubricating the curtain rod is a simple yet effective technique to improve the sliding performance of your back tab curtains. The application of a lubricant reduces friction between the rod and the fabric loops, allowing the curtains to glide smoothly and effortlessly. Here are some tips for lubricating the curtain rod:
- Choose the Right Lubricant: Select a suitable lubricant that is safe to use on your curtain rod material and will not cause any damage to the fabric. Popular options include silicone spray, powdered graphite, or even a bar of soap. Avoid using oil-based lubricants that can leave residue on the fabric.
- Preparation: Before applying the lubricant, make sure to remove the curtains from the rod to prevent any contact with the fabric. Lay down a protective cloth or paper underneath the rod to catch any excess lubricant that may drip.
- Apply the Lubricant: Spray a small amount of silicone spray or powdered graphite along the length of the curtain rod. If using a bar of soap, rub it onto the rod surface. Be sure to cover the entire rod evenly, ensuring that the lubricant reaches all areas that come into contact with the fabric loops.
- Spread and Wipe Off Excess: After applying the lubricant, use a soft cloth to spread it evenly over the surface of the rod. This helps to distribute the lubricant and prevent any concentrated areas. Wipe off any excess lubricant using a clean cloth to avoid staining the curtains or allowing dirt to stick to the rod.
- Test the Sliding: After lubricating the rod, test the sliding motion of the back tab curtains to ensure that they are moving effortlessly. If needed, apply additional lubricant or make any adjustments to ensure a smooth gliding motion.
- Reapply as Needed: Over time, the lubricant may wear off, and you may notice the sliding becoming less smooth. Monitor the sliding performance of your curtains and reapply the lubricant as needed to maintain optimal functionality.
Lubricating the curtain rod is a quick and simple process that can significantly improve the sliding performance of your back tab curtains. The reduced friction allows for smooth gliding and ensures a seamless opening and closing experience. By incorporating this step into your regular curtain maintenance routine, you can enjoy the effortless movement of your back tab curtains for a longer period.
Remember that lubricating the curtain rod is just one aspect of achieving smooth sliding. Proper installation of the curtain rod, appropriate curtain hooks, and regular cleaning and maintenance are equally important. By considering all these factors together, you can create a well-functioning and visually pleasing curtain setup that enhances the overall aesthetics of your space.
Utilizing Curtain Rings or Clips
Utilizing curtain rings or clips is a useful technique to improve the sliding performance of your back tab curtains. These accessories can help reduce friction between the fabric loops and the curtain rod, allowing for smoother and more effortless sliding. Here are some tips for effectively using curtain rings or clips:
- Choose the Right Type: Opt for curtain rings or clips that are specifically designed for back tab curtains. These accessories are typically equipped with smooth surfaces and mechanisms that facilitate easy sliding along the curtain rod.
- Proper Attachment: Attach the curtain rings or clips to the fabric loops on the backside of your curtains. Ensure that they are securely fastened, evenly spaced, and aligned with each other. This will help maintain the proper positioning of the curtains and prevent any bunching or tangling during sliding.
- Consider Ring or Clip Style: Depending on your personal preference and the aesthetic you wish to achieve, select curtain rings or clips that complement your curtains. Options range from simple metal rings to decorative clips with intricate designs. Choose a style that enhances the overall look of your curtains and complements your interior decor.
- Spacing and Number: Determine the appropriate number of rings or clips to use based on the weight and width of your curtains. Avoid overcrowding or leaving too much space between each ring or clip. Maintaining a balanced spacing ensures smooth sliding and even distribution of weight along the curtain rod.
- Regular Inspection: Periodically check the condition of the curtain rings or clips. Look for any signs of wear or damage, such as loose or broken parts. Replace any damaged accessories to prevent issues with sliding and maintain the optimal functionality of your back tab curtains.
- Additional Support: For wider windows or heavier curtains, consider using additional rings or clips in the middle of the panel to provide extra support. This helps distribute the weight evenly and prevents sagging, allowing for smooth and seamless sliding.
Utilizing curtain rings or clips is an effective way to enhance the sliding performance of your back tab curtains. By reducing friction and providing balanced weight distribution, these accessories promote effortless movement along the curtain rod. Incorporate them into your curtain setup and enjoy the smooth gliding motion of your back tab curtains.
Remember that utilizing curtain rings or clips is just one aspect of achieving smooth sliding. Proper installation of the curtain rod, appropriate fabric choice, regular cleaning and maintenance, and lubricating the rod are equally important. By considering all these factors holistically, you can create a well-functioning and visually pleasing curtain arrangement that elevates the overall aesthetics of your space.
Conclusion
Ensuring that your back tab curtains slide easily is essential for both functionality and aesthetics. Smooth sliding allows for effortless adjustment of privacy, light control, and airflow, while also enhancing the overall visual appeal of your space. By following the tips and techniques outlined in this article, you can achieve smooth sliding for your back tab curtains and optimize their performance.
It starts with selecting the right fabric that is lightweight, smooth, and conducive to smooth sliding. Proper installation of the curtain rod ensures stability and provides a sturdy foundation for the curtains. Using appropriate curtain hooks designed for back tab curtains helps distribute weight and reduce friction. Avoiding excessive weight and length in your curtains minimizes strain and resistance during sliding.
Regular cleaning and maintenance are crucial to prevent the accumulation of dust and debris that can impede smooth sliding. Lubricating the curtain rod with a suitable lubricant reduces friction and promotes effortless gliding. Additionally, utilizing curtain rings or clips can further enhance sliding by providing balanced weight distribution and reducing contact between the fabric and the rod.
By considering these tips and techniques, you can overcome common issues with back tab curtains and ensure they slide easily. Remember to tailor these suggestions to your specific needs and preferences, as different curtains and environments may require slight adjustments.
Investing time and effort into achieving smooth sliding for your back tab curtains is worth it. The benefits include effortless operation, enhanced aesthetic appeal, improved functionality, extended curtain lifespan, and increased room flexibility. With smooth-sliding curtains, you can create a comfortable and visually pleasing environment that reflects your personal style and enhances the ambiance of your space.
So, take these tips to heart, implement the techniques, and enjoy the seamless glide of your back tab curtains. By paying attention to fabric choice, installation, curtain hooks, weight and length control, regular cleaning and maintenance, lubrication, and the use of curtain rings or clips, you can ensure that your back tab curtains slide smoothly and elevate the overall look and feel of your room.
Frequently Asked Questions about How To Make Back Tab Curtains Slide Easily
Was this page helpful?
At Storables.com, we guarantee accurate and reliable information. Our content, validated by Expert Board Contributors, is crafted following stringent Editorial Policies. We're committed to providing you with well-researched, expert-backed insights for all your informational needs.


0 thoughts on “How To Make Back Tab Curtains Slide Easily”