Home>Gardening & Outdoor>Landscaping Ideas>How To Make A Raised Garden Bed With Bricks

Landscaping Ideas
How To Make A Raised Garden Bed With Bricks
Modified: August 30, 2024
Learn how to create a stylish raised garden bed using bricks with our easy landscaping ideas. Enhance your outdoor space today!
(Many of the links in this article redirect to a specific reviewed product. Your purchase of these products through affiliate links helps to generate commission for Storables.com, at no extra cost. Learn more)
Introduction
Creating a raised garden bed with bricks is an excellent way to add a touch of elegance and functionality to your outdoor space. Whether you're a seasoned gardener or a novice enthusiast, this DIY project offers a rewarding opportunity to cultivate a thriving garden while enhancing the aesthetic appeal of your landscape.
By opting for a raised garden bed, you can overcome common gardening challenges such as poor soil quality, drainage issues, and invasive weeds. The elevated structure not only provides better control over the soil composition but also offers improved drainage, which is crucial for the health of your plants. Additionally, the raised design minimizes the strain on your back and knees, making it easier and more comfortable to tend to your garden.
Constructing a raised garden bed with bricks also presents an opportunity to unleash your creativity. The versatility of bricks allows for various design possibilities, from classic and rustic to modern and sleek. You can customize the shape, size, and height of the bed to suit your preferences and available space, adding a personal touch to your outdoor oasis.
Furthermore, the use of bricks ensures durability and longevity, as they are resistant to weathering and provide a sturdy framework for your garden bed. This means that your investment of time and effort in building the bed will yield long-term benefits, allowing you to enjoy a flourishing garden for years to come.
In the following steps, we will guide you through the process of creating a raised garden bed with bricks, from selecting the ideal location to planting your favorite flowers, herbs, or vegetables. With a clear plan and a bit of creativity, you can transform your outdoor area into a vibrant and bountiful sanctuary, brimming with the beauty of nature. Let's embark on this fulfilling journey of building and nurturing a brick-raised garden bed together.
Key Takeaways:
- Building a raised garden bed with bricks offers a creative and durable way to grow plants. It provides better soil control, drainage, and reduces physical strain, making gardening easier and more enjoyable.
- By carefully selecting the location and materials, and nurturing the plants, a brick-raised garden bed becomes a vibrant sanctuary. It adds beauty to the landscape and fosters a deeper connection with nature.
Read more: How To Make A Raised Garden Bed With Pallets
Step 1: Choose a Location
Selecting the right location for your raised garden bed is a crucial first step in ensuring the success of your gardening endeavor. The ideal spot should receive an adequate amount of sunlight, typically six to eight hours per day, to support the healthy growth of plants. Take note of the sun's movement throughout the day to determine the best placement for your garden bed. Additionally, consider the proximity to a water source for convenient irrigation and the accessibility for regular maintenance.
When choosing a location, it's essential to assess the ground conditions. Look for a level area that is free from obstructions such as tree roots and large rocks. This will facilitate the construction process and promote even water distribution within the bed. Furthermore, ensure that the chosen spot allows for proper drainage to prevent waterlogging, which can be detrimental to plant roots.
Consider the surrounding landscape and the aesthetic appeal of the chosen location. A raised garden bed can serve as a focal point in your outdoor space, so it's beneficial to position it in an area that complements the overall design of your garden. Take into account the visual harmony with existing features such as pathways, fences, or other garden beds.
Another factor to consider is the type of plants you intend to grow. Different plants have varying sunlight and soil requirements, so it's important to select a location that can accommodate the specific needs of your chosen flora. For instance, if you plan to grow sun-loving vegetables or flowers, ensure that the location receives ample sunlight throughout the day.
Furthermore, consider the convenience of access. Position the raised garden bed in a location that allows for easy reach and maintenance. This is particularly important if you anticipate frequent planting, watering, and harvesting activities. Accessibility will contribute to a more enjoyable and efficient gardening experience.
By carefully considering these factors, you can select a location that provides the optimal conditions for your raised garden bed, setting the stage for a flourishing and visually appealing garden that brings joy and beauty to your outdoor space.
Step 2: Gather Materials
To embark on the construction of a raised garden bed with bricks, it is essential to gather the necessary materials and tools. By assembling the right components, you can ensure a smooth and efficient building process, setting the stage for a sturdy and visually appealing garden bed.
Bricks:
The primary material for constructing the raised garden bed is, of course, bricks. Opt for high-quality bricks that are durable and able to withstand outdoor conditions. You can choose from a variety of brick types, such as traditional red bricks for a classic look or interlocking bricks for a modern touch. The quantity of bricks required will depend on the dimensions of the bed, so calculate the approximate number needed based on the planned size and height of the garden bed.
Mortar:
Mortar serves as the binding agent for the bricks, providing stability and cohesion to the structure. Select a suitable mortar mix that is designed for outdoor use and offers good adhesion. The mortar will ensure that the bricks are securely held together, forming a robust framework for the raised garden bed.
Read more: How To Make A Small Raised Garden Bed
Leveling and Measuring Tools:
Accurate measurements and precise leveling are crucial for the construction of a stable and visually appealing raised garden bed. Equip yourself with a spirit level, measuring tape, and a straight edge to ensure that the bed is constructed with precision and uniformity. These tools will help you achieve a professional finish and a structurally sound garden bed.
Protective Gear:
Working with bricks and mortar requires safety precautions. Prioritize your safety by wearing appropriate protective gear, including gloves, safety goggles, and a dust mask. These items will shield you from potential hazards and ensure a safe and comfortable working environment.
Optional Components:
Depending on your design preferences, you may consider additional materials such as landscape fabric to line the interior of the bed, gravel for drainage, and topsoil for filling the bed. These optional components can enhance the functionality and longevity of the raised garden bed, contributing to optimal growing conditions for your plants.
By gathering these materials and tools, you will be well-equipped to commence the construction of your raised garden bed with bricks. With careful planning and the right resources at your disposal, you can look forward to creating a durable, visually appealing, and productive garden bed that enriches your outdoor space.
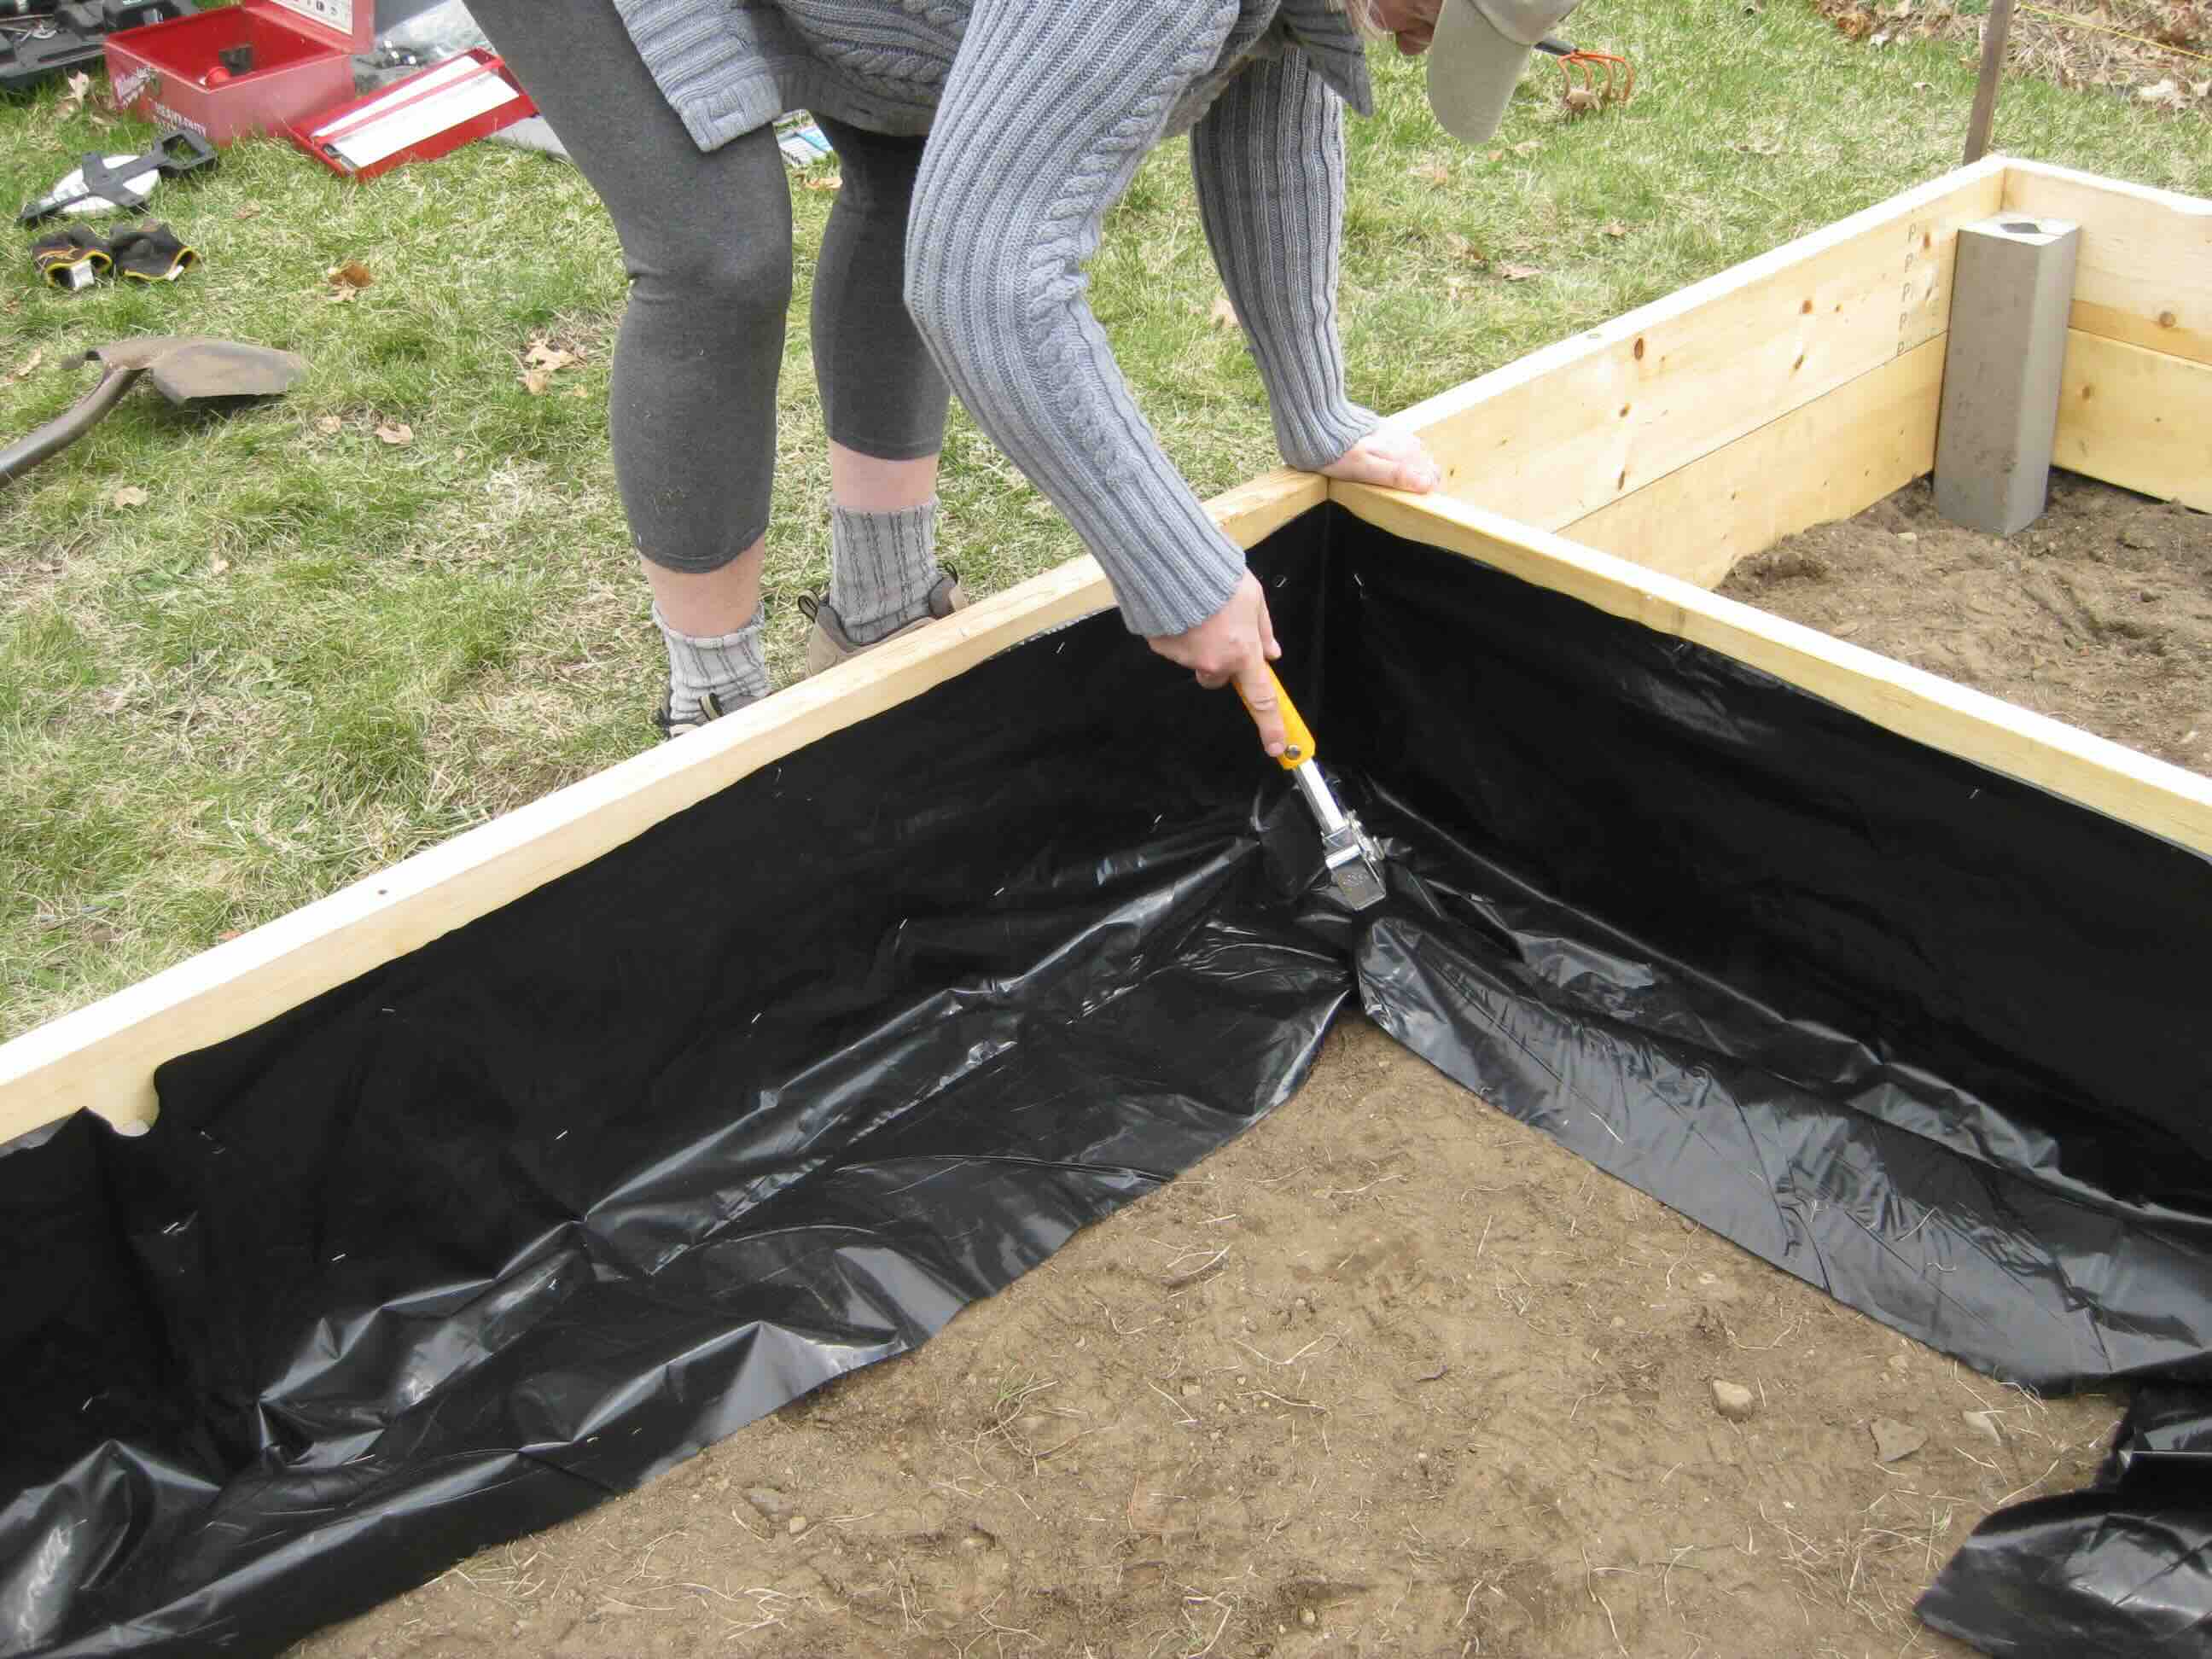
Step 3: Prepare the Ground
Before laying the bricks and constructing the raised garden bed, it is essential to prepare the ground thoroughly. This crucial step sets the foundation for a stable and long-lasting structure while ensuring optimal growing conditions for your plants.
Read more: How To Make A Raised Garden Bed Cheap
Clear the Area
Begin by clearing the designated area of any existing vegetation, debris, or obstacles. Remove weeds, rocks, and roots to create a clean and level surface for the construction of the raised garden bed. This process will prevent potential interference with the bed's stability and the growth of your plants.
Mark the Layout
Using stakes and a string or a spray paint, mark the layout of the raised garden bed on the cleared ground. Define the boundaries and shape of the bed according to your design preferences and available space. This visual guide will help you visualize the placement of the bricks and ensure that the bed is constructed with precision.
Excavate the Soil
Once the layout is marked, proceed to excavate the soil within the defined boundaries. Dig to a depth that accommodates the first layer of bricks, typically around 4 to 6 inches. This excavation allows for the proper placement of the bricks and provides a stable base for the raised garden bed. As you excavate, maintain a consistent depth throughout the area to ensure uniformity.
Level the Ground
After excavating the soil, use a shovel and a rake to level the ground within the marked boundaries. Ensure that the surface is even and flat, as this will contribute to the stability and uniformity of the raised garden bed. Use a spirit level to verify that the ground is level in all directions, making adjustments as necessary.
Read more: How To Build Brick Raised Beds
Add a Layer of Gravel
To enhance drainage within the raised garden bed, consider adding a layer of gravel to the leveled ground. The gravel layer promotes proper water drainage, preventing waterlogging and ensuring the health of your plants' roots. Spread a uniform layer of gravel across the excavated area, creating a well-draining foundation for the raised bed.
By meticulously preparing the ground in this manner, you establish a solid and level base for the construction of the raised garden bed. This groundwork sets the stage for the subsequent steps, ensuring that the bed is structurally sound and conducive to the flourishing growth of your garden plants.
Step 4: Lay the Bricks
With the ground meticulously prepared, it's time to embark on the exciting phase of laying the bricks to construct the raised garden bed. This step requires precision and attention to detail to ensure a sturdy and visually appealing structure that will serve as the foundation for your flourishing garden.
Arrange the First Layer
Begin by placing the first layer of bricks along the excavated and leveled ground, following the marked layout of the raised garden bed. Position the bricks carefully, ensuring that they are aligned and snugly fit together. Use a spirit level to verify that the bricks are even and level, making adjustments as needed to maintain uniformity.
Apply Mortar
Once the first layer is arranged, apply a layer of mortar on top of the bricks. The mortar serves as the binding agent, providing stability and cohesion to the structure. Use a trowel to spread the mortar evenly, creating a solid base for the subsequent layers of bricks. Ensure that the mortar is applied consistently to facilitate a secure bond between the bricks.
Read more: What Is A Raised Garden Bed
Stack Additional Layers
As you progress, continue stacking additional layers of bricks, applying mortar between each layer to secure the structure. Maintain uniformity and precision in the placement of the bricks, verifying the levelness of each layer with a spirit level. This meticulous approach will result in a well-constructed and visually appealing raised garden bed.
Create Corners and Intersections
When reaching corners or intersections, carefully cut the bricks to fit the desired angles and dimensions. Use a masonry saw or chisel to achieve clean and precise cuts, ensuring that the bricks seamlessly align to form the corners of the raised garden bed. Pay close attention to detail to achieve a professional finish at the corners and intersections.
Verify Alignment and Stability
Throughout the process of laying the bricks, consistently verify the alignment and stability of the structure. Use the spirit level to confirm that the bed is level in all directions, making adjustments as necessary. This meticulous attention to detail will result in a well-constructed and visually appealing raised garden bed that provides a sturdy framework for your plants.
By meticulously laying the bricks with precision and care, you will create a raised garden bed that not only enhances the aesthetic appeal of your outdoor space but also provides a durable and stable environment for your garden plants to thrive.
Step 5: Fill the Bed with Soil
With the raised garden bed structure firmly in place, the next crucial step is to fill it with high-quality soil, creating a nurturing environment for your plants to flourish. The selection and preparation of the soil play a pivotal role in the success of your garden, providing essential nutrients and a conducive medium for healthy plant growth.
Read more: Why A Raised Garden Bed
Choose the Right Soil
Opt for a well-balanced and nutrient-rich soil mix that is suitable for the specific types of plants you intend to grow in the raised garden bed. A high-quality garden soil blend, enriched with organic matter such as compost, provides an ideal foundation for robust plant development. Consider the pH requirements of your chosen plants and select a soil mix that aligns with their preferences, ensuring optimal growing conditions.
Fill the Bed
Begin by filling the raised garden bed with the selected soil mix, layering it evenly to achieve the desired depth. Use a shovel and a rake to distribute the soil uniformly, ensuring that it reaches all corners and edges of the bed. Aim for a level surface, making adjustments as needed to achieve a consistent soil depth throughout the bed.
Consider Amendments
Depending on the specific needs of your plants, you may consider incorporating soil amendments such as perlite for improved drainage, vermiculite for moisture retention, or organic fertilizers to boost nutrient levels. These amendments can enhance the overall quality of the soil, promoting optimal growing conditions and supporting the health and vigor of your garden plants.
Compact and Settle the Soil
Once the bed is filled with soil, gently compact the soil surface using a tamper or the back of a shovel. This compaction helps to settle the soil and eliminate air pockets, creating a stable and supportive foundation for planting. Ensure that the soil is firmly packed, providing a secure base for the root systems of your plants.
Read more: How To Seal A Raised Garden Bed
Prepare for Planting
With the soil in place, the raised garden bed is now primed and ready for planting. Take the time to plan the layout of your garden, considering the spacing and arrangement of your chosen plants. Whether you're cultivating vibrant flowers, aromatic herbs, or bountiful vegetables, the nutrient-rich soil within the raised bed sets the stage for a thriving and productive garden.
By filling the raised garden bed with nutrient-rich soil and preparing it for planting, you are one step closer to reaping the rewards of your gardening efforts. The carefully selected soil provides a fertile foundation for your plants, nurturing their growth and contributing to the beauty and abundance of your outdoor oasis.
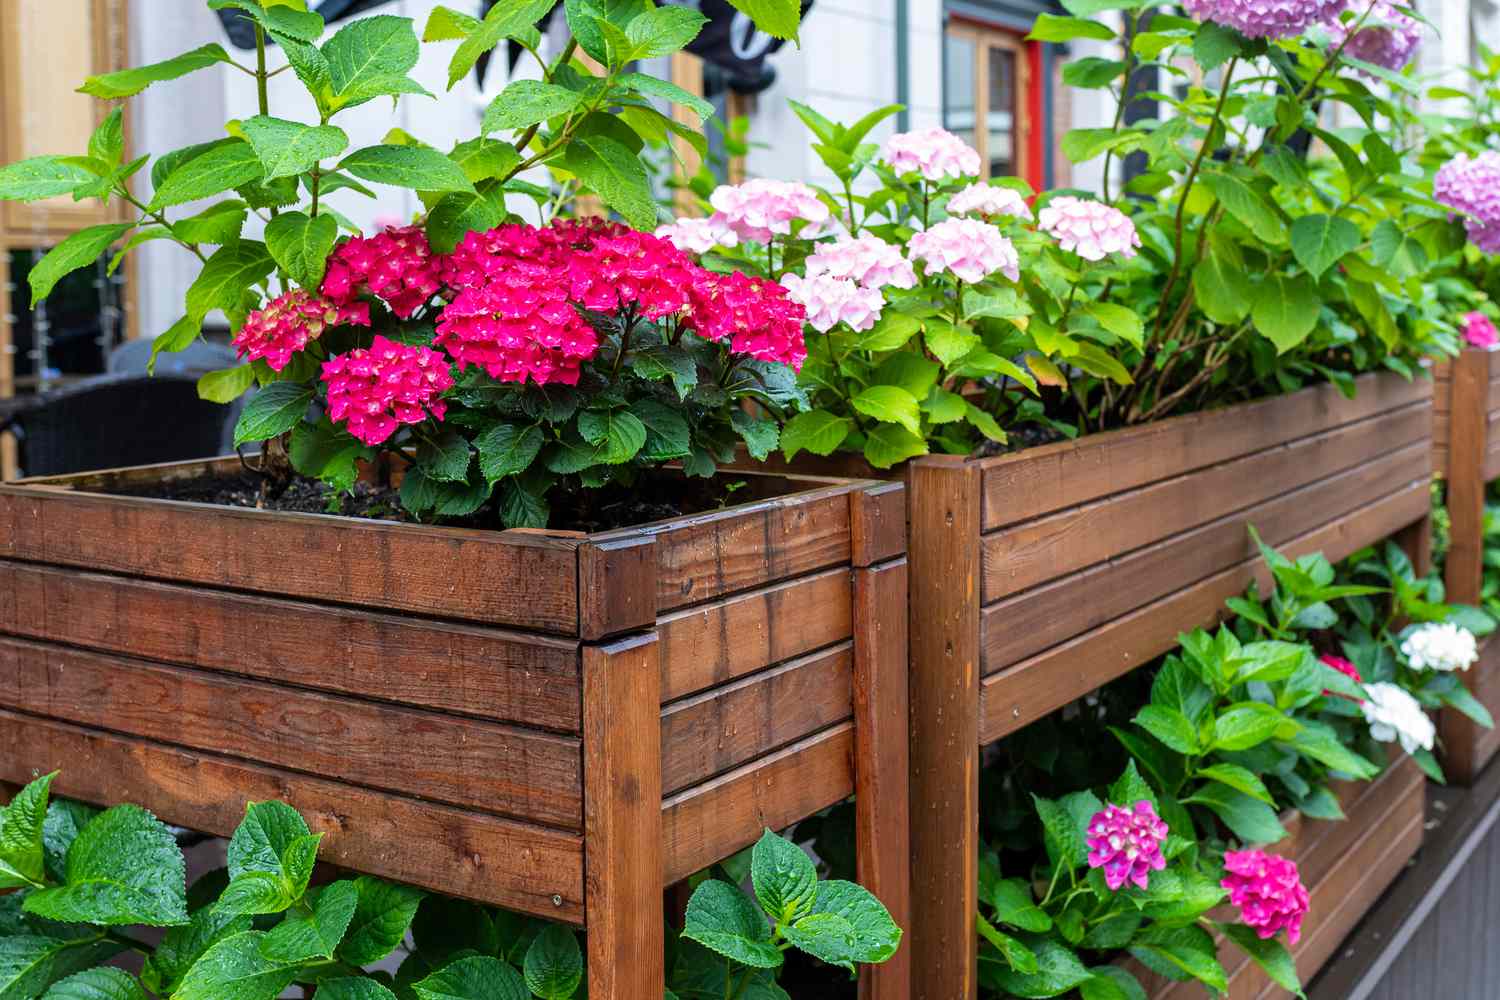
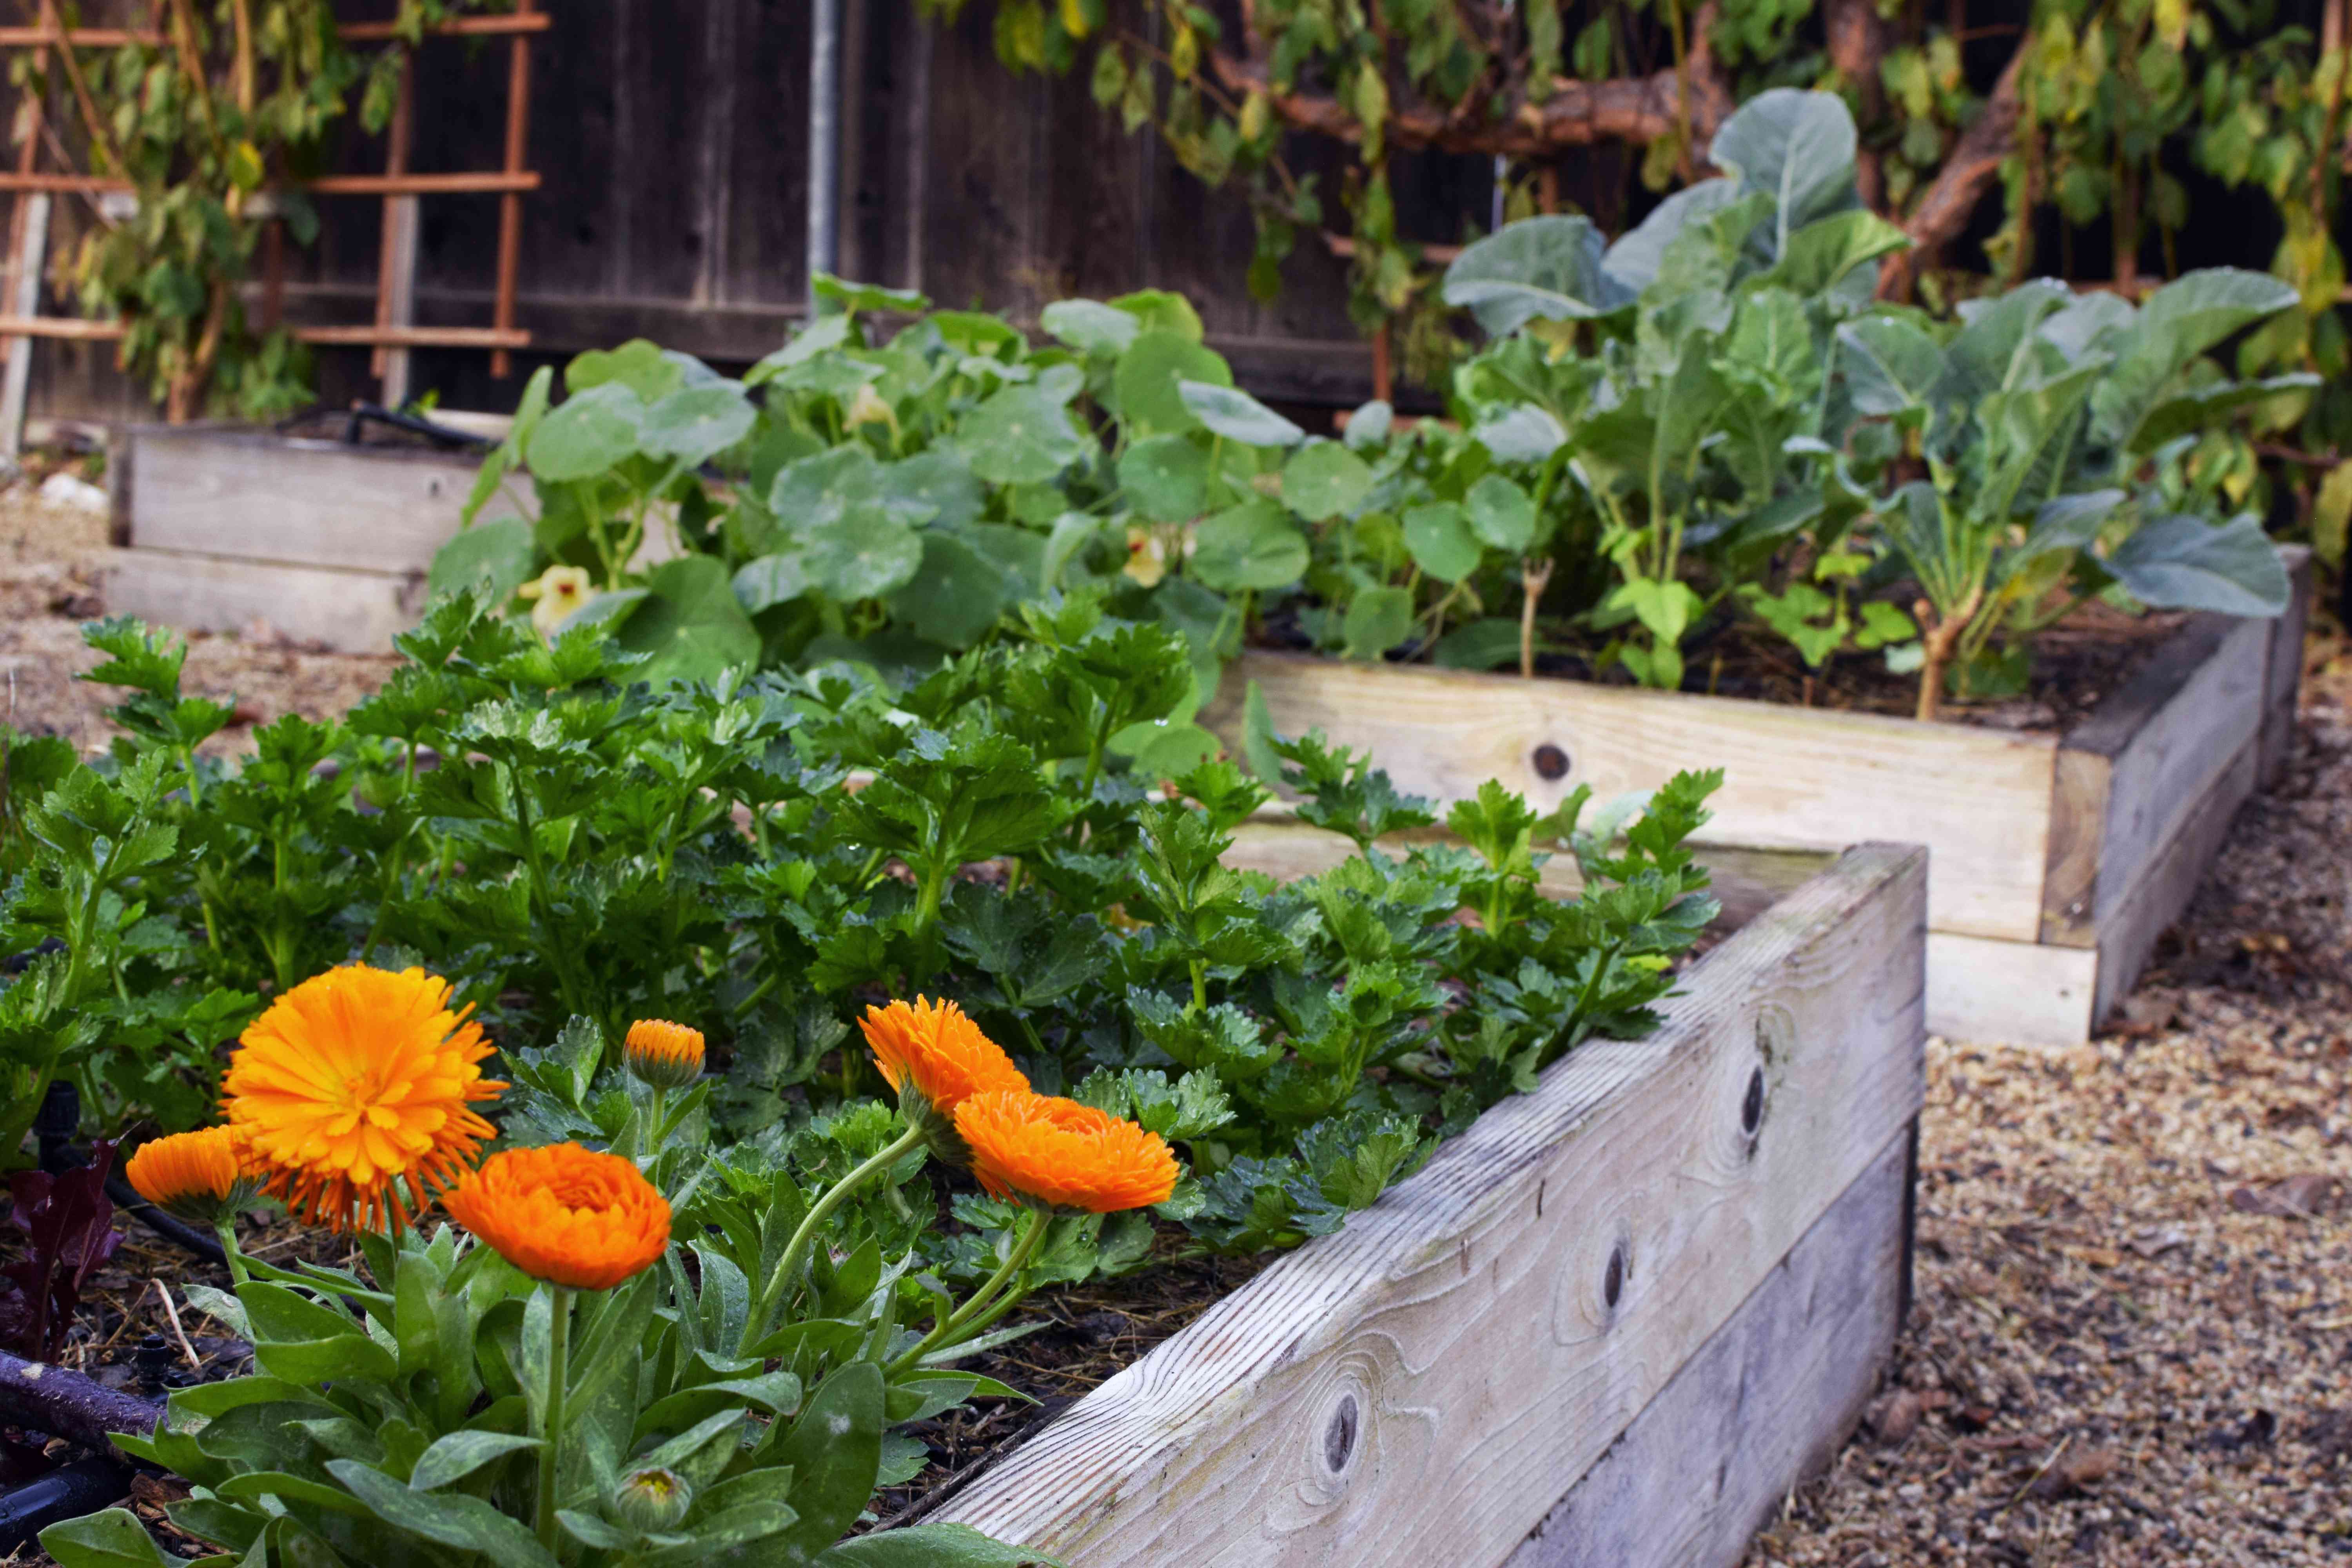
Step 6: Plant Your Garden
With the raised garden bed meticulously constructed and filled with nutrient-rich soil, the time has come to bring your garden to life through the joyful act of planting. This step marks the transition from the groundwork of construction to the vibrant essence of cultivation, as you carefully introduce an array of plants that will thrive and flourish within the confines of the raised bed.
Select Your Plants
Before delving into the planting process, take a moment to consider the selection of plants that will grace your garden bed. Whether you envision a colorful tapestry of flowers, a fragrant herb garden, or a bounty of fresh vegetables, the choice of plants will define the character and purpose of your garden. Consider the specific sunlight, water, and soil requirements of each plant species, ensuring that they are compatible with the conditions provided by the raised garden bed.
Plan the Layout
With a vision of your desired garden in mind, plan the layout of the plants within the raised bed. Consider the mature size of each plant, their growth habits, and the recommended spacing between them. By strategically arranging the plants, you can optimize the use of space and create an aesthetically pleasing composition that allows each species to thrive without overcrowding.
Read more: How To Cover A Raised Garden Bed
Planting Process
As you embark on the planting process, handle each plant with care and attention, ensuring that they are gently removed from their containers or root balls. Dig individual planting holes in the soil, making sure they are deep and wide enough to accommodate the root systems of the plants. Carefully position each plant in its designated hole, backfilling with soil and gently firming the surface around the base of the plant to provide stability.
Watering and Mulching
Following the planting of your garden, provide a generous watering to help the newly introduced plants establish their roots within the nutrient-rich soil. Monitor the moisture levels in the raised bed, ensuring that the soil remains consistently moist during the initial phase of plant establishment. Consider applying a layer of organic mulch around the base of the plants to conserve moisture, suppress weed growth, and promote a healthy soil environment.
Maintenance and Care
As your garden begins to take shape within the raised bed, commit to regular maintenance and care to support the ongoing health and vitality of the plants. Monitor the growth and development of each species, providing appropriate watering, fertilization, and pest control as needed. Embrace the nurturing role of a gardener, tending to your garden with attentiveness and dedication to foster a thriving and vibrant outdoor sanctuary.
By planting your garden within the raised bed, you infuse the space with the beauty and vitality of nature, creating a harmonious and bountiful oasis that enriches your outdoor environment. Each plant becomes a testament to your nurturing efforts, contributing to the visual allure and natural abundance of your garden.
Conclusion
In conclusion, the process of creating a raised garden bed with bricks is a fulfilling journey that culminates in the transformation of your outdoor space into a vibrant and bountiful sanctuary. From the initial selection of the ideal location to the meticulous construction of the bed and the joyful act of planting, every step contributes to the realization of a flourishing garden that enhances the beauty and functionality of your landscape.
The raised garden bed, elevated by the sturdy framework of bricks and filled with nutrient-rich soil, serves as a nurturing environment for a diverse array of plants. Whether you choose to cultivate a colorful tapestry of flowers, a fragrant herb garden, or a bountiful assortment of vegetables, the raised bed provides an optimal setting for their growth and development. The elevated design not only facilitates better control over soil quality and drainage but also minimizes physical strain, making it easier and more comfortable to tend to your garden.
Furthermore, the construction of a raised garden bed with bricks offers an opportunity for creative expression. The versatility of bricks allows for various design possibilities, enabling you to customize the shape, size, and height of the bed to suit your preferences and available space. This personal touch adds a unique and aesthetically pleasing element to your outdoor oasis, elevating the visual appeal of your garden.
As you embark on the journey of building and nurturing a brick-raised garden bed, you not only create a space of natural beauty but also cultivate a sense of connection with the earth. The act of planting and caring for your garden fosters a deeper appreciation for the cycles of growth and the wonders of nature, enriching your life with the rewards of a flourishing garden.
In essence, the construction of a raised garden bed with bricks transcends the mere act of gardening; it embodies a transformative process that imbues your outdoor space with vitality, beauty, and a touch of your own creativity. It is a testament to the enduring relationship between humans and the natural world, where the simple act of planting a seed can yield a bountiful harvest of joy, beauty, and fulfillment.
Now that you've mastered building a raised garden bed with bricks, why not expand your gardening skills? If you're keen on optimizing space and improving plant health, our guide on raised bed gardening provides valuable insights. This article is perfect for enthusiasts eager to elevate their gardening prowess, offering practical tips on efficient plant arrangement and soil management for optimal growth. So, roll up your sleeves and let's enhance your green thumb even further!
Frequently Asked Questions about How To Make A Raised Garden Bed With Bricks
Was this page helpful?
At Storables.com, we guarantee accurate and reliable information. Our content, validated by Expert Board Contributors, is crafted following stringent Editorial Policies. We're committed to providing you with well-researched, expert-backed insights for all your informational needs.


0 thoughts on “How To Make A Raised Garden Bed With Bricks”