Articles
How To Make Sulfur Candles
Modified: February 25, 2024
Learn how to make sulfur candles with our informative articles. Discover the benefits and step-by-step instructions for effective sulfur candle usage.
(Many of the links in this article redirect to a specific reviewed product. Your purchase of these products through affiliate links helps to generate commission for Storables.com, at no extra cost. Learn more)
Introduction
Welcome to the fascinating world of sulfur candles! Sulfur candles have been used for centuries due to their unique properties and benefits. From purifying the air to repelling insects, sulfur candles have proven to be a versatile and effective tool. In this article, we will guide you through the process of making your own sulfur candles, providing you with a step-by-step tutorial that will make it easy for you to create your very own candles at home.
Sulfur candles, also known as sulfur fumigants or sulfur vaporizers, are primarily used for pest control, specifically to eradicate mites, fleas, and other pests that can infest various spaces. These candles are also known for their ability to eliminate odors and purify the air by releasing sulfur dioxide gas.
While sulfur candles can be purchased from stores, making them yourself allows for customization and ensures that you know exactly what goes into your candles. Not to mention, it can be a fun and rewarding DIY project.
In this article, we will cover everything you need to know about making sulfur candles. We will discuss the materials needed, the step-by-step process, and tips for testing and storing the candles once they are made. So let’s get started on this exciting journey of crafting your own sulfur candles!
Key Takeaways:
- Embrace the art of DIY candle-making by crafting your own sulfur candles to repel pests and purify the air. Customize the concentration and fragrance to suit your needs, and enjoy the benefits of your homemade creations.
- Prioritize safety, proper ventilation, and storage when working with sulfur candles. Test the candles for functionality and store them in airtight containers to maintain their effectiveness. Share your newfound knowledge with others interested in DIY candle-making.
Read more: How To Store Sulfuric Acid
Materials Needed
Before diving into the process of making sulfur candles, it’s important to gather all the necessary materials. Here’s a list of what you’ll need:
- Sulfur powder
- Candle wax (preferably paraffin wax)
- Candle wicks
- Candle molds (metal or silicone)
- A double boiler or a heat-resistant container and a saucepan
- A thermometer
- Essential oils (optional, for fragrance)
- A stirring utensil (such as a wooden spoon or silicone spatula)
- A cutting tool (such as a knife or a sharp pair of scissors)
Sulfur powder is the key ingredient for sulfur candles, as it is what releases the sulfur dioxide gas when burned. You can find sulfur powder at your local gardening or chemical supply stores or purchase it online.
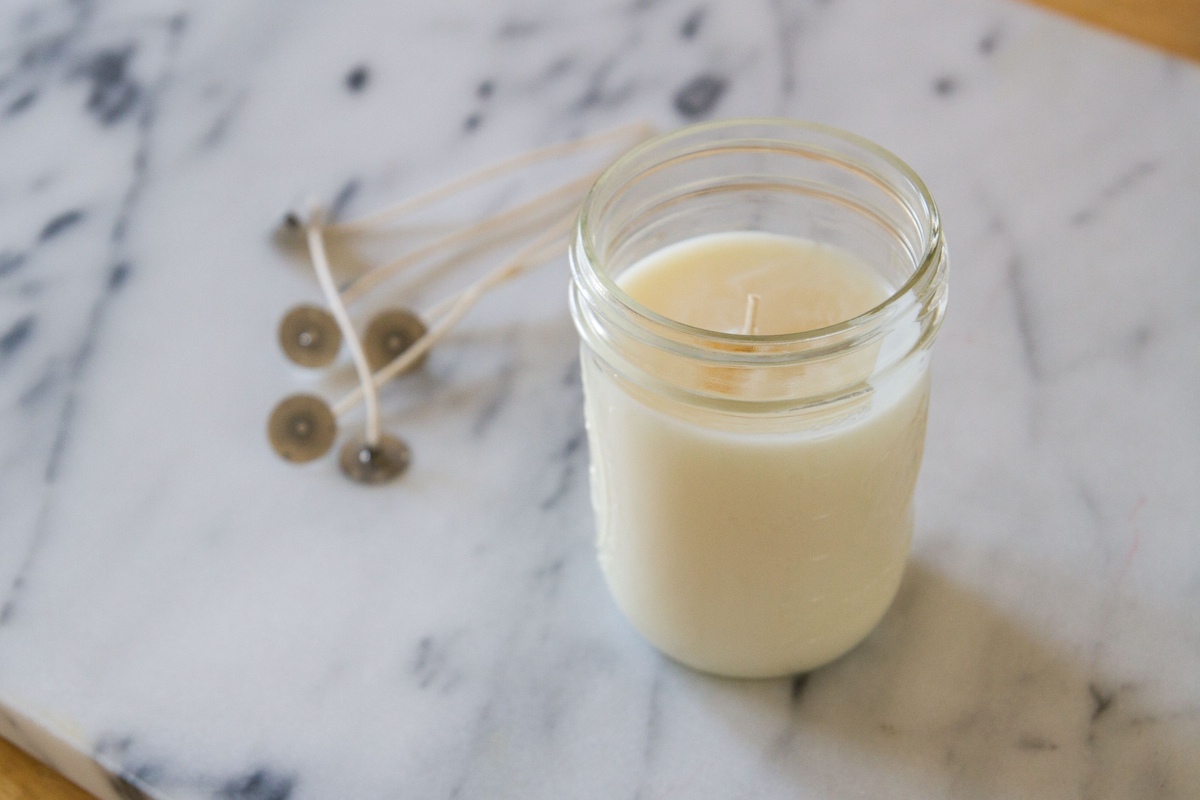
Candle wicks are essential for the candles to burn properly. Choose wicks that are suitable for the size of your candle molds. You can find pre-tabbed wicks that are already attached to metal tabs, making them easy to secure in the center of the candles.
When it comes to candle molds, you have options. Metal molds are durable and can withstand high temperatures, while silicone molds are flexible and allow for easy removal of the finished candles. Choose molds that suit your preference and the size of the candles you want to make.
A double boiler or a heat-resistant container and a saucepan are needed for melting the candle wax. The double boiler method provides a gentle and controlled heat, preventing the wax from overheating or catching fire. If you don’t have a double boiler, you can create a makeshift one by placing a heat-resistant container in a saucepan filled with water.
A thermometer is essential for monitoring the temperature of the wax. It ensures that the wax doesn’t get too hot, which can affect the quality and performance of the candles. Make sure to use a thermometer suitable for candle making.
If you want to add fragrance to your sulfur candles, you can use essential oils. Choose oils that are safe for candle making and suitable for your preferences. Keep in mind that the scent of sulfur may still be present, even with added fragrance.
A stirring utensil, such as a wooden spoon or silicone spatula, is needed to mix the sulfur and wax together. Avoid using utensils made of plastic, as they may melt when exposed to high temperatures.
Lastly, a cutting tool, such as a knife or a sharp pair of scissors, is necessary for trimming the wick once the candles have solidified.
Now that you have all the necessary materials, let’s move on to the step-by-step process of making sulfur candles.
Step 1: Gathering the Ingredients
The first step in making sulfur candles is to gather all the required ingredients. Before you begin, make sure you have the following items:
- Sulfur powder
- Candle wax (preferably paraffin wax)
- Candle wicks
- Candle molds (metal or silicone)
- A double boiler or a heat-resistant container and a saucepan
- A thermometer
- Essential oils (optional, for fragrance)
- A stirring utensil (such as a wooden spoon or silicone spatula)
- A cutting tool (such as a knife or a sharp pair of scissors)
Ensure that you have measured the appropriate amounts of these ingredients according to the number and size of candles you intend to make. The quantity will vary based on your desired candle size and the potency of sulfur you wish to achieve.
Remember to handle sulfur powder with care, as it can irritate the eyes, skin, and respiratory system. It is advisable to wear gloves and a protective mask when working with sulfur powder to minimize any potential risks.
Once you have gathered all the ingredients and taken the necessary safety precautions, you are ready to move on to the next step: preparing the mold.
Step 2: Preparing the Mold
After gathering all the ingredients for your sulfur candles, it’s time to prepare the mold. The mold will give your candles their desired shape and form. Here’s how you can prepare the mold:
- First, inspect your candle molds to ensure they are clean and free from any debris or residue. This will help you achieve smooth and professional-looking candles.
- If you are using metal molds, you may need to coat them with a thin layer of mold release spray or a small amount of vegetable oil. This will make it easier to remove the candles once they have solidified. Make sure to follow the manufacturer’s instructions when using mold release spray.
- If you are using silicone molds, there is no need for any additional preparation. Silicone molds are naturally non-stick and can be easily flexed or peeled off once the candles have hardened.
Ensure that your molds are placed on a flat and stable surface that is heat-resistant. This will prevent any accidents or spills during the pouring process.
Now that your mold is ready, it’s time to move on to the next step: melting the sulfur.
Step 3: Melting the Sulfur
Once you have prepared the mold for your sulfur candles, it’s time to move on to melting the sulfur. This step is crucial as it will allow the sulfur to be evenly distributed throughout the candle, ensuring its effectiveness. Here’s a guide on how to melt the sulfur:
- Begin by setting up a double boiler. Fill the bottom pot with water and place it on the stove over medium heat. Make sure the water does not touch the top pot.
- In the top pot of the double boiler, add the desired amount of sulfur powder. The quantity will depend on the size of the candles you are making and the desired concentration of sulfur.
- Allow the sulfur to melt slowly over medium heat, stirring it occasionally with a wooden spoon or a heat-resistant utensil. Be cautious, as sulfur has a low melting point and can catch fire if exposed to high temperatures.
- Continue heating and stirring until the sulfur has completely melted and has transformed into a liquid consistency. The melted sulfur should be smooth and free from any lumps or clumps.
It’s important to maintain a consistent temperature during this process. Use a thermometer to monitor the sulfur’s temperature, ensuring it does not exceed its melting point. The optimal temperature for melting sulfur is typically between 115 to 120 degrees Celsius (239 to 248 degrees Fahrenheit).
While melting the sulfur, you may notice a distinct odor. This is normal, as sulfur naturally has a strong and pungent smell. If the smell becomes overwhelming, consider working in a well-ventilated area or using a fan to help dissipate the odor.
Once the sulfur has melted completely, it’s time to proceed to the next step: pouring the sulfur mixture into the mold.
Read more: How To Make A Heater With Candles
Step 4: Pouring the Sulfur Mixture into the Mold
With the melted sulfur ready, it’s time to pour the sulfur mixture into the prepared mold. This step will shape the candles and allow the sulfur to solidify into its desired form. Follow these steps to pour the sulfur mixture into the mold:
- Ensure that the melted sulfur mixture is still warm and in a liquid state. If it has started to solidify, gently reheat the mixture until it becomes liquefied again.
- Place the mold, either metal or silicone, on a stable surface that can withstand heat.
- If you are using a metal mold, you may need to secure the wick in the center of the mold. Attach the metal tab of the wick to the bottom of the mold using a small amount of melted wax or a dab of hot glue. Ensure that the wick is centered and straight.
- Using a steady hand, pour the melted sulfur mixture carefully into the mold. Start from one side and slowly move towards the other, allowing the sulfur to fill the mold evenly. Be cautious of any spills or overfilling.
- Fill the mold completely, leaving a little space at the top to allow for contraction as the sulfur cools and solidifies.
Take your time while pouring the sulfur mixture to ensure a smooth and even distribution. Avoid rushing or shaking the mold, as this may cause uneven pouring or air bubbles to form within the candles.
If there are any bubbles or imperfections on the surface of the poured sulfur mixture, gently tap the mold or use a toothpick to remove them. This will help create a cleaner and more professional-looking finished product.
Now that the sulfur mixture is poured into the mold, it’s time to move on to the next step: allowing the sulfur candle to solidify.
When making sulfur candles, ensure proper ventilation and use caution as sulfur dioxide gas can be harmful if inhaled. Always follow safety guidelines.
Step 5: Allowing the Sulfur Candle to Solidify
Once you have poured the sulfur mixture into the mold, it’s important to allow the candle to solidify before moving on to the next step. Allowing sufficient time for the sulfur candle to cool and solidify will ensure that it maintains its shape and structure. Here’s what you need to do:
- Place the filled sulfur candle mold in an area where it can remain undisturbed and free from any external factors that may disrupt the solidification process.
- Avoid exposing the mold to direct sunlight or extreme temperature changes, as this can affect the quality and appearance of the candle.
- The cooling and solidification process may take several hours, depending on the size and thickness of the sulfur candle. It’s important to exercise patience during this step to achieve the best results.
- You can check the progress of the solidification by gently tapping the surface of the candle. If it feels firm and no longer gives a liquid-like sensation, it is likely to have solidified.
- For more accurate confirmation, you can also use a toothpick or a thin skewer to poke into the candle. If the toothpick comes out clean without any signs of wetness or stickiness, the candle is ready to be removed from the mold.
Keep in mind that larger and thicker candles may require a longer cooling time. It’s always better to err on the side of caution and allow ample time for the sulfur candle to completely solidify to ensure it maintains its shape and integrity.
As tempting as it may be, it’s crucial to resist the urge to remove the candle from the mold prematurely. Premature removal can result in misshapen or damaged candles.
Now that the sulfur candle has solidified, it’s time to move on to the next step: removing the candle from the mold.
Step 6: Removing the Candle from the Mold
Once the sulfur candle has solidified and cooled completely, it’s time to carefully remove it from the mold. Proper removal ensures that the candle maintains its shape and looks presentable. Here’s how you can safely remove the sulfur candle from the mold:
- Gently tap the sides of the mold to loosen the candle. This will help release any suction or adherence between the candle and the mold.
- If you are using a metal mold, you can try placing the mold in the freezer for a few minutes. The cold temperature will cause the sulfur candle to contract slightly, making it easier to remove from the mold.
- Once you feel that the candle has loosened, place a clean towel or a soft cloth on your work surface. Carefully invert the mold over the towel or cloth and gently tap it to release the candle.
- If you are using a silicone mold, you can easily flex or peel the mold to remove the candle. Start by gently pushing on one side of the mold to release the suction, then peel it back or flex it to extract the candle.
- If you encounter any resistance while trying to remove the candle, avoid using excessive force as it may cause the candle to break or deform. Instead, try tapping the mold or slightly warming the mold with a hairdryer to aid in the removal process.
Ensure that the surface where you are placing the candle after removal is clean and free from debris. This will help prevent any unwanted marks or damage to the candle’s surface.
Once you have successfully removed the sulfur candle from the mold, it’s time to proceed to the next step: trimming the wick.
Step 7: Trimming the Wick
After removing the sulfur candle from the mold, it’s important to trim the wick to the proper length. Trimming the wick not only enhances the appearance of the candle but also ensures an optimal burn. Follow these steps to effectively trim the wick:
- Inspect the length of the wick and determine the ideal length for your candle. A good rule of thumb is to trim the wick to about 1/4 inch (6mm) above the surface of the candle.
- Using a pair of sharp scissors or a wick trimmer, carefully cut the wick to the desired length. Be cautious not to cut the wick too short, as a shorter wick can result in a weaker flame or difficulty in lighting the candle.
- Discard the trimmed wick and any debris that may have accumulated from the cutting process.
Trimming the wick helps to prevent excessive smoking and soot buildup during burning. It also promotes better flame control and prolongs the life of the candle. Remember to trim the wick before each subsequent use of the sulfur candle to maintain its optimal burn and performance.
Now that the wick has been properly trimmed, it’s time to move on to the next step: testing and storing the sulfur candles.
Read more: How To Make Candles With Herbs
Step 8: Testing and Storing the Sulfur Candles
Once you have trimmed the wick of your sulfur candle, it’s important to test its functionality and store it properly to preserve its quality. Follow these steps to test and store your sulfur candles:
- Before lighting the candle, place it on a heat-resistant surface away from any flammable materials or drafts.
- Ensure that the area is well-ventilated to prevent the accumulation of sulfur dioxide gas.
- Using a long-reach lighter or a match, carefully ignite the wick of the sulfur candle. Observe the flame to ensure it burns steadily and evenly.
- Allow the sulfur candle to burn for a short period and observe the release of sulfur dioxide gas. If you notice an excessive or unpleasant odor, it may be an indication that the sulfur concentration is too high. Consider reducing the amount of sulfur powder in future candle-making endeavors.
- Extinguish the candle by gently blowing it out or using a candle snuffer. Ensure that the wick is fully extinguished and no longer smoldering.
- Store the sulfur candles in a cool and dry place, away from direct sunlight or extreme temperatures. It’s recommended to keep them in airtight containers or resealable bags to maintain their effectiveness and prevent any unwanted odors.
- Label the storage container or bag with the date of creation and any additional notes or instructions, such as the concentration or purpose of the sulfur candles.
When storing sulfur candles, it’s important to keep them away from children and pets. The sulfur dioxide gas released during burning can be harmful if inhaled in large amounts. Exercise caution and follow proper safety guidelines to ensure a safe and effective storage space for your sulfur candles.
With proper testing and storage, your sulfur candles will be ready for use whenever you need them for pest control or air purification purposes.
Congratulations! You have successfully completed the process of making sulfur candles and learned how to test and store them effectively. Enjoy the benefits of your homemade sulfur candles and consider sharing this newfound knowledge with others interested in DIY candle-making.
As a final note, remember to always prioritize safety, ventilation, and proper usage guidelines when working with sulfur candles or any other DIY projects involving chemicals or open flames.
Now it’s time to sit back, relax, and appreciate the results of your hard work and creativity.
Conclusion
Congratulations on completing the journey of making your own sulfur candles! By following the step-by-step guide provided in this article, you have learned how to create candles that can effectively repel pests, purify the air, and add a unique touch to your home.
Throughout the process, you learned about the importance of gathering the necessary materials, preparing the mold, melting the sulfur, pouring the sulfur mixture into the mold, allowing the candle to solidify, removing it from the mold, trimming the wick, and testing and storing the sulfur candles. Each step played a crucial role in ensuring the quality and functionality of the final product.
By customizing your own sulfur candles, you have the flexibility to adjust the concentration of sulfur to suit your needs, while also incorporating fragrances if desired. This DIY approach allows you to have greater control over the composition and quality of the candles, ensuring a safe and effective product.
Now that you have a batch of homemade sulfur candles, you can use them for pest control, air purification, or even as unique and eco-friendly decorative pieces. Place them strategically in areas prone to pests or where you want to improve air quality, and enjoy the benefits they bring to your home.
Remember to always follow safety precautions when handling sulfur powder and open flames. Keep the candles away from flammable materials, maintain proper ventilation, and never leave burning candles unattended.
With your newfound knowledge and expertise in making sulfur candles, consider sharing your experience with friends, family, or fellow DIY enthusiasts. Encourage others to embrace the art of candle-making and explore the world of homemade solutions.
Thank you for joining us on this exciting journey of creating sulfur candles. We hope you found this article informative and engaging. Now, go forth and illuminate your space with the power of your own handmade sulfur candles!
Frequently Asked Questions about How To Make Sulfur Candles
Was this page helpful?
At Storables.com, we guarantee accurate and reliable information. Our content, validated by Expert Board Contributors, is crafted following stringent Editorial Policies. We're committed to providing you with well-researched, expert-backed insights for all your informational needs.


