Articles
How To Make Massage Oil Candles
Modified: January 4, 2024
Discover helpful articles on how to make massage oil candles and create a soothing ambiance in your home. Get step-by-step instructions and tips for a relaxing self-care experience.
(Many of the links in this article redirect to a specific reviewed product. Your purchase of these products through affiliate links helps to generate commission for Storables.com, at no extra cost. Learn more)
Introduction
Welcome to the world of massage oil candles! If you’re looking for a unique and luxurious way to enhance your massage experience, then making your own massage oil candles is the perfect solution. These candles not only provide a warm and inviting ambiance, but they also melt into a pool of aromatic and nourishing oil that can be used for a soothing massage.
Creating your own massage oil candles allows you to customize the ingredients, scents, and even the container, giving you complete control over the entire process. Whether you want to indulge in a solo pampering session or surprise your loved one with a sensual massage, massage oil candles are a great way to enhance relaxation and intimacy.
In this article, we will guide you through the step-by-step process of making your own massage oil candles, from choosing the right ingredients to safely using the finished product. So, let’s dive in and learn how to create these rejuvenating and aromatic candles!
Key Takeaways:
- Create personalized massage oil candles for a luxurious and intimate experience. Choose skin-friendly ingredients, experiment with scents, and prioritize safety to enhance relaxation and connection during massages.
- Prioritize safety and creativity when making and using massage oil candles. Follow safety precautions, experiment with scents and containers, and enjoy the soothing and aromatic benefits of personalized candles.
Read more: How To Make Coconut Oil Candles
Choose the Right Ingredients
The first step in making massage oil candles is to gather the right ingredients. Here’s a list of ingredients you’ll need:
- Wax: Choose a wax that has a low melting point, such as soy wax or coconut wax. Avoid using paraffin wax, as it can emit harmful fumes when burned.
- Carrier Oil: Select a carrier oil that is skin-friendly and nourishing, such as sweet almond oil, jojoba oil, or coconut oil. These oils will help moisturize and soothe the skin during the massage.
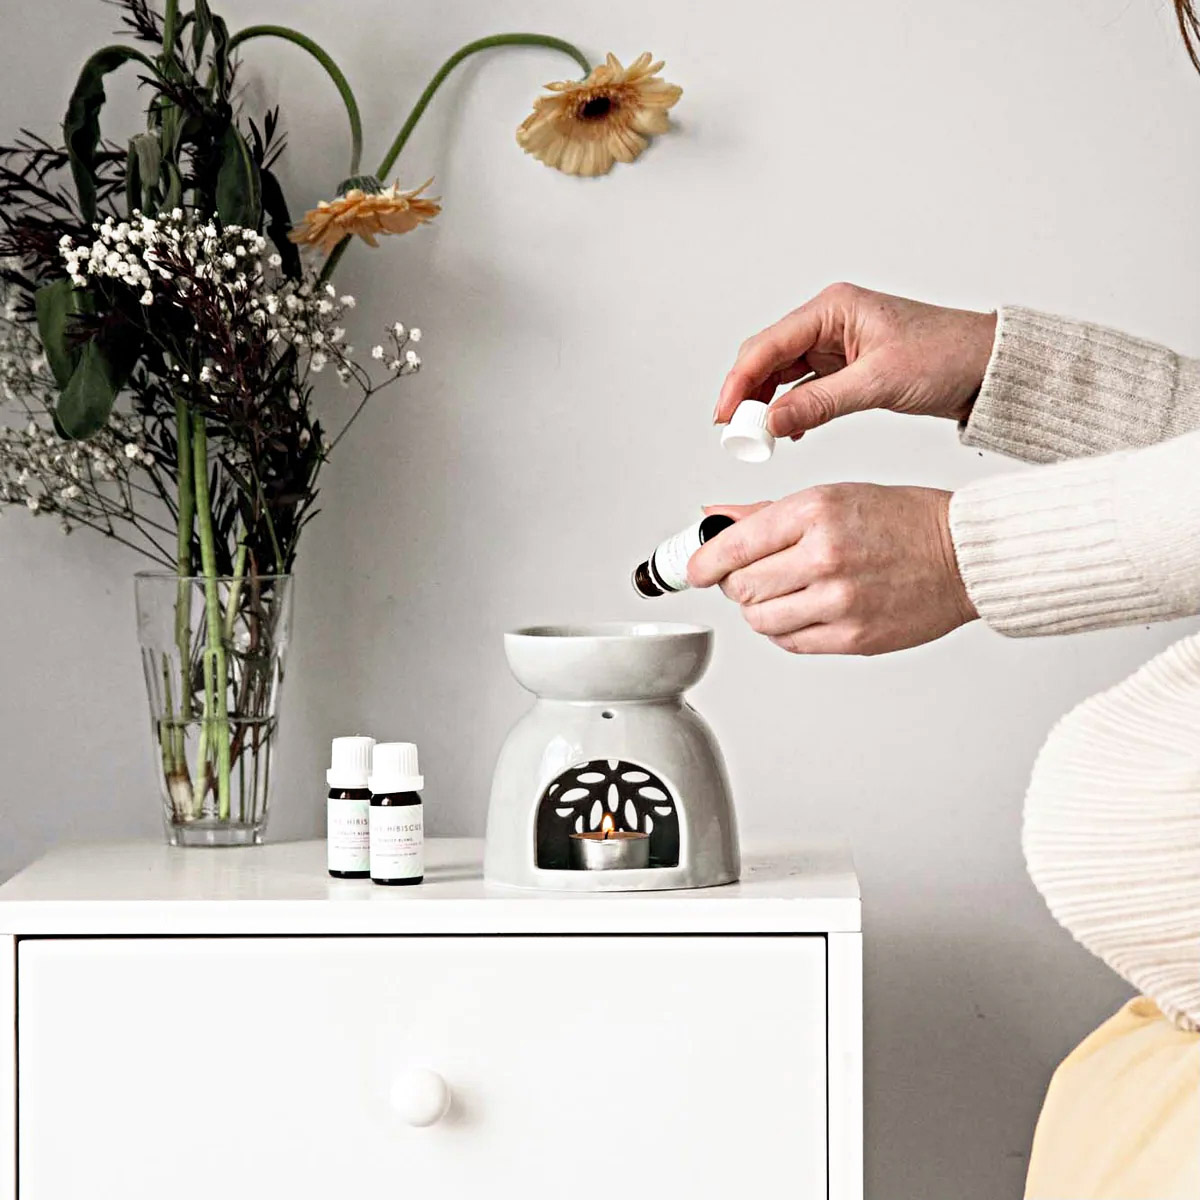
- Fragrance and Essential Oils: Decide on the scent you want for your massage oil candle. You can choose from a wide range of fragrance oils or opt for natural essential oils for a more therapeutic experience.
- Colorant (optional): If you want to add a pop of color to your massage oil candle, you can use skin-safe candle colorants or natural additives like dried flowers or herbs.
- Candle Wick: Select a cotton or hemp wick that is suitable for the size of your container.
- Container: Pick a heat-resistant container that is suitable for holding the melted wax and oil. Glass jars or tins with lids work well for massage oil candles.
- Optional Add-ons: You can get creative and add extras like dried botanicals, sparkles, or even small massage stones to enhance the aesthetic appeal of your massage oil candle.
When selecting your ingredients, it’s important to consider any allergies or skin sensitivities. Opt for hypoallergenic options and perform a patch test on your skin if you’re unsure about any specific ingredient.
Once you have all your ingredients ready, you’re set to move on to the next steps – selecting the perfect container for your massage oil candle.
Selecting the Perfect Container
Choosing the right container for your massage oil candle is crucial for a successful and enjoyable experience. Here are some factors to consider when selecting the container:
- Heat Resistance: Since you will be melting the wax and oil together, it’s important to choose a container that can withstand high temperatures. Glass jars, metal tins, or ceramic containers are ideal for this purpose.
- Size and Shape: Consider the size and shape of the container based on your preferences and intended use. If you’re making the candle for personal use, a smaller jar or tin would work well. For larger massage sessions, opt for a wider container that allows for easy access to the melted oil.
- Open or Closed Container: Decide if you want a container with a lid or an open-top. A closed container with a lid will help retain the fragrance and keep the massage oil fresh. An open-top container can allow for easy access to the oil and create a beautiful aesthetic when the candle is burning.
- Transparency: Consider whether you want a transparent or opaque container. Transparent containers allow you to see the melted oil pool, creating a visually appealing experience. Opaque containers, on the other hand, can add an element of surprise and mystery.
- Ease of Cleaning: Keep in mind that the container will need to be cleaned after each use. Choose a container that is easy to clean and can withstand repeated washing without compromising its integrity.
Ultimately, the container you choose should align with your personal preferences and the overall aesthetic you want to achieve with your massage oil candle. Experiment with different options and find the perfect container that enhances your massage experience.
Now that you have selected the container, the next step is to prepare the candle wick. Let’s dive into that process in the next section.
Preparing the Candle Wick
Preparing the candle wick is an essential step in making massage oil candles. Here’s how to do it:
- Measure the length: Start by measuring the desired length of the wick. It should be slightly longer than the height of your chosen container.
- Cut the wick: Use a pair of scissors or wick trimmers to cut the wick to the measured length. Make sure to cut it straight across for a clean burn.
- Secure the wick: Attach one end of the wick to the bottom of the container using a wick sticker or a small dab of hot glue. Make sure the wick is centered in the container and stands upright.
- Prepare the wick sustainer (optional): If your wick doesn’t come with a sustainer, you can create one using a small metal tab. Thread the other end of the wick through the hole in the sustainer and pinch it tightly to secure it in place.
Properly preparing the wick ensures that it stays in place as the wax melts and solidifies. It also allows for a consistent and even burn during the massage oil candle’s usage.
With the wick securely in place, it’s time to move on to the next step – adding fragrance and essential oils to create a delightful aroma. Let’s explore that process in the following section.
Adding Fragrance and Essential Oils
Adding fragrance and essential oils to your massage oil candle is where you can unleash your creativity and create a scented atmosphere that complements the massage experience. Here’s how to do it:
- Select your preferred scents: Choose fragrance oils or essential oils that appeal to your senses. Consider soothing scents like lavender or chamomile for relaxation, or invigorating scents like citrus or peppermint for a refreshing massage.
- Determine the amount: The amount of fragrance or essential oil you’ll need depends on the size of your candle and the intensity of the scent you desire. Typically, no more than 10% of the total wax weight should be fragrance or essential oil. Start with a smaller amount and gradually add more if needed.
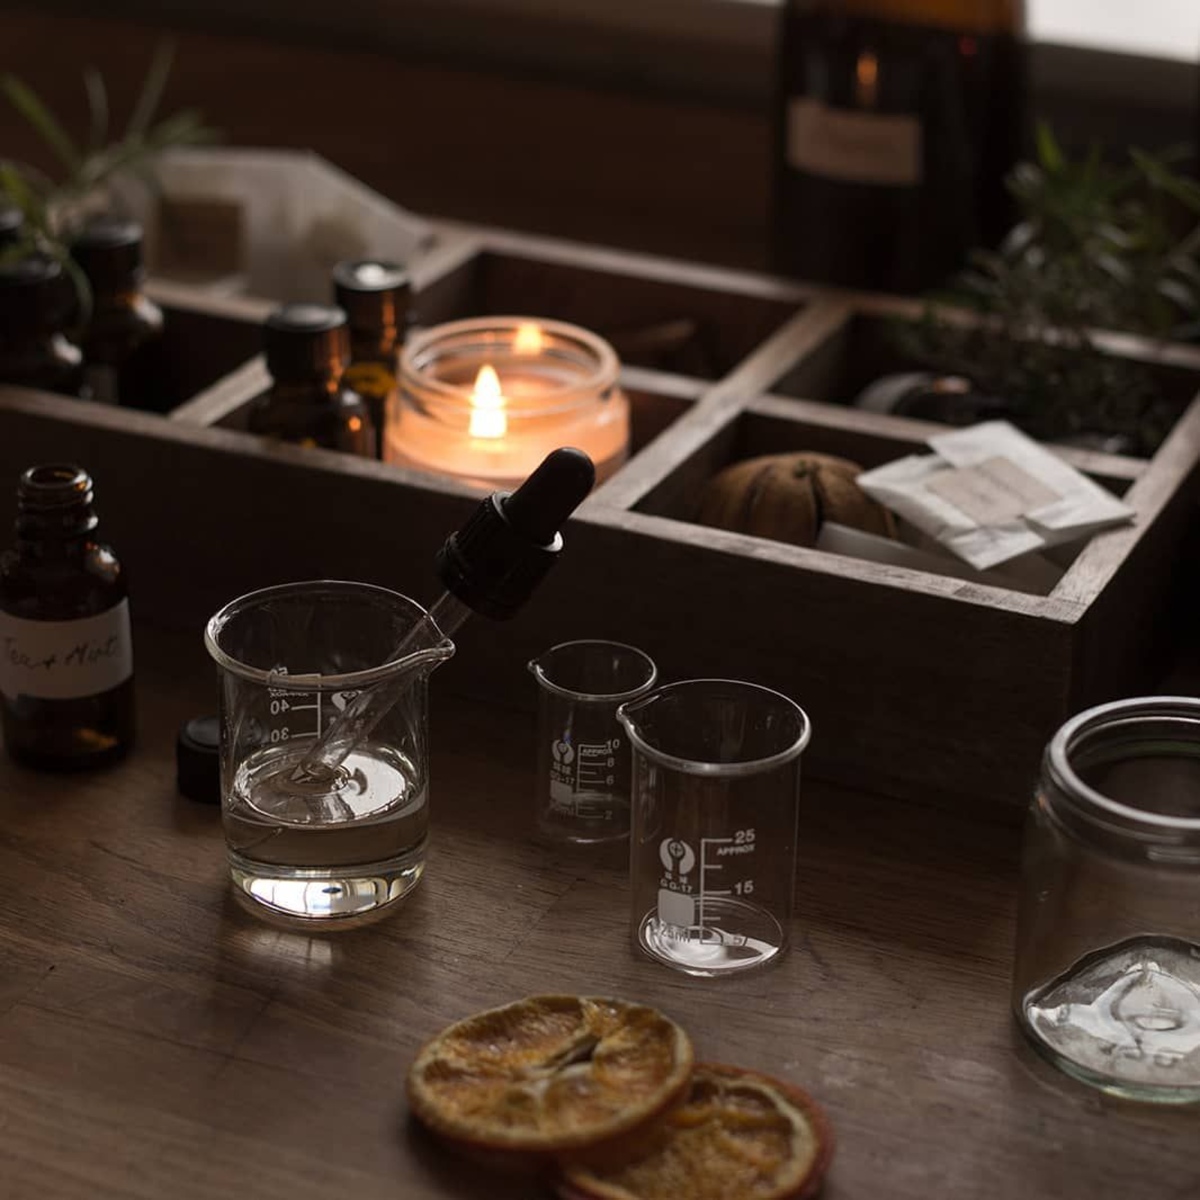
- Mix the oils: In a separate container, mix the fragrance or essential oil with the carrier oil you selected earlier. This blend will serve as the massage oil that is released when the candle is burned.
By combining the fragrance or essential oil with the carrier oil, you ensure that the scent is dispersed evenly throughout the melted oil and provides a pleasant aroma during the massage.
Once you have created the scented oil blend, it’s time to move on to the next step – melting the wax to create the massage oil candle. Let’s explore that process in the following section.
Read more: How To Make Pine Oil For Candles
Melting the Wax
Now that you have prepared the wick and created the scented oil blend, it’s time to melt the wax and transform it into a massage oil candle. Follow these steps to melt the wax:
- Use a double boiler: Fill a larger pot with water and place it on the stove. Place a smaller pot or heat-resistant container inside the larger pot. This creates a double boiler setup, which helps melt the wax gently and prevents overheating.
- Add the wax: Measure the appropriate amount of wax based on the size of your container, and place it into the smaller pot or container. Allow the wax to gradually melt over low to medium heat.
- Stir occasionally: As the wax melts, gently stir it with a heat-resistant utensil to ensure even melting and to prevent any clumps from forming.
- Monitor the temperature: Keep an eye on the temperature of the melted wax using a thermometer. It’s important to maintain a safe temperature range specific to the type of wax you’re using. Typically, soy wax melts between 120-150°F (49-65°C).
Remember to exercise caution and never leave the melting wax unattended. Wax can be flammable, so ensure you are working in a well-ventilated area and away from any flammable materials.
Once the wax has completely melted, you’re ready to move on to the next step – pouring the massage oil into the container. Let’s continue our journey by exploring that process.
When making massage oil candles, use a combination of skin-friendly oils like coconut, almond, and jojoba for a nourishing and moisturizing blend. Be sure to use a low melting point wax for a comfortable massage temperature.
Pouring the Massage Oil
With the melted wax ready, it’s time to pour it into your chosen container and create the massage oil candle. Follow these steps to pour the massage oil:
- Prepare the container: Make sure your container is clean and dry. If desired, you can place a wick holder or pencil across the top of the container to keep the wick centered during the pouring process.
- Slow and steady: Using a heat-resistant pour pitcher or a spoon, slowly pour the melted wax into the container. Pour it in a steady stream to avoid splashing or spills.
- Leave space for the massage oil: Leave a small amount of space at the top of the container, as you will be adding the scented oil blend to create the massage oil later.
- Settle the wax: Gently tap the container on a stable surface to remove any air bubbles and help the wax settle evenly. You can also use a toothpick or a skewer to swirl the wax for added visual interest.
Take your time while pouring the melted wax and ensure that it doesn’t spill over the sides of the container. If needed, you can use a paper towel to quickly clean up any accidental spills.
With the massage oil poured, the next step is to let the candle cool and set. Join me in the next section to explore the process of cooling and setting the candle.
Cooling and Setting the Candle
After pouring the melted wax into the container, it’s important to let the candle cool and set properly. Follow these steps to ensure a successful cooling and setting process:
- Allow the candle to cool: Find a safe and undisturbed location for the candle to cool. Avoid placing it in a drafty area, as it may affect the cooling process. Let the candle cool for several hours or overnight, depending on the size of the container.
- Check for sinkholes: As the candle cools, you may notice that the wax sinks in the center, creating a small “sinkhole.” To fix this, gently heat some additional wax and pour it into the sinkhole to level the surface. Allow the newly poured wax to cool and set.
- Trim the wick: Once the candle is completely cooled and set, trim the wick to approximately 1/4 inch (0.6 cm) in length. This helps ensure a clean and efficient burn during future usage.
It’s crucial to give the candle enough time to cool and set properly before using it. Rushing this process may result in an uneven burn, melting issues, or the container becoming too hot to handle.
Now that the candle is cooled and set, it’s time to explore the exciting part – using the massage oil candle! Join me in the next section to discover how to enjoy its wonderful benefits.
Using the Massage Oil Candle
Now that your massage oil candle is ready, it’s time to indulge in a soothing and luxurious massage experience. Follow these steps to use the massage oil candle:
- Find a relaxing environment: Set the mood by dimming the lights, playing some soft music, and creating a cozy and comfortable space for your massage.
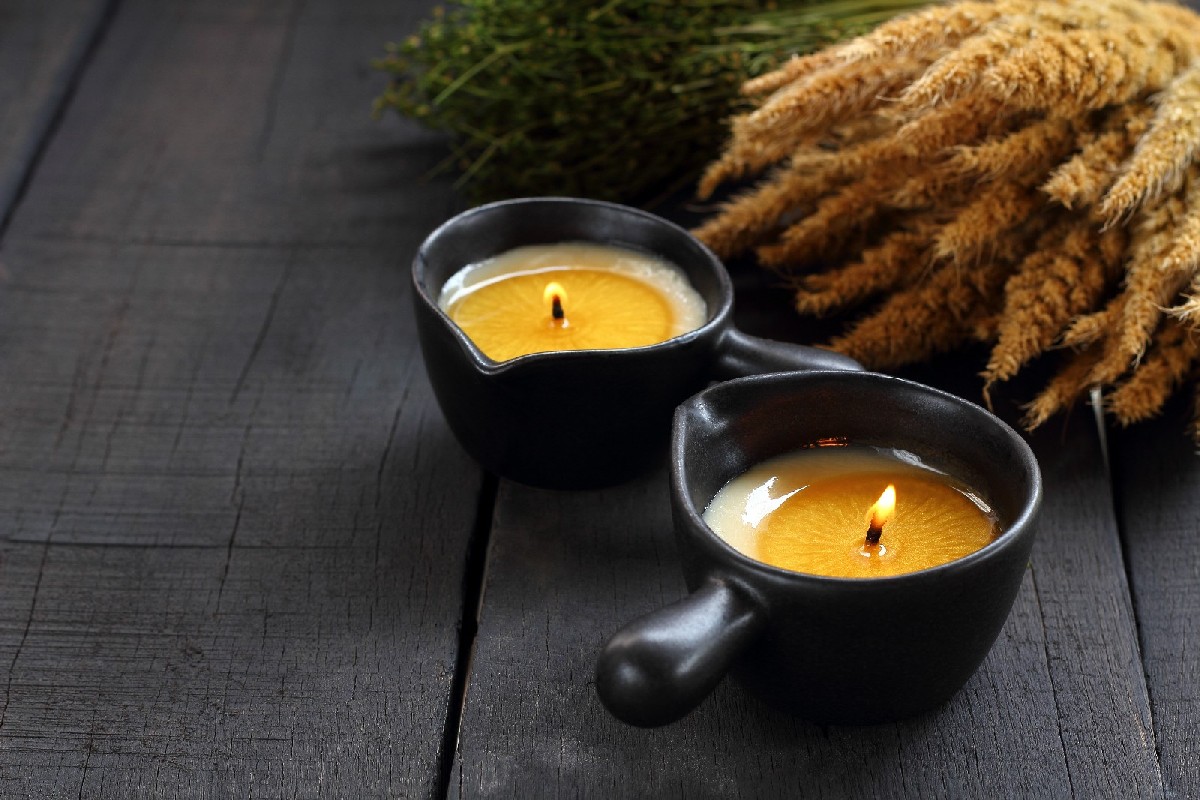
- Light the candle: Use a long-handled lighter or match to carefully light the wick of the massage oil candle. Allow the candle to burn for a few minutes until a pool of melted oil forms around the wick.
- Extinguish the flame: Gently blow out the flame and ensure that the wick is completely extinguished. Be cautious not to leave any burning debris or embers behind.
- Massage with the oil: Once the flame is extinguished, the melted oil is now ready to use for your massage. Carefully pour a small amount of the warm oil into your palm or directly onto the desired body area.
- Massage techniques: Use your hands to apply the warm oil onto the skin and use gentle strokes, circular motions, or kneading techniques to massage the body. Enjoy the relaxing aroma and the nourishing properties of the massage oil.
Remember to take your time and communicate with your massage partner to ensure a pleasurable and comfortable experience. You can always relight the candle and melt more oil as needed during the massage.
After the massage, you can extinguish the candle and securely cover it with the lid to preserve the remaining oil and fragrance. Store the candle in a cool and dry place for future use.
Now that you know how to use the massage oil candle, it’s essential to keep in mind some safety precautions to ensure a worry-free experience. Let’s explore those precautions in the next section.
Safety Precautions
While massage oil candles can enhance your relaxation and intimacy, it’s crucial to prioritize safety when using them. Here are some important safety precautions to keep in mind:
- Never leave the candle unattended: Always stay in the room and keep an eye on the candle while it’s burning. Accidents can happen quickly, so it’s important to be present and attentive.
- Keep the candle away from flammable items: Ensure that the candle is placed on a stable and heat-resistant surface, away from any flammable materials such as curtains, papers, or furniture.
- Do not touch the melted wax with bare hands: The melted wax can be extremely hot and cause burns. Wait for it to cool before touching or attempting to move the candle.
- Use caution while pouring the oil: When pouring the melted oil onto the skin, be mindful of the temperature to avoid burns. Test the oil on a small area of your skin before applying it to a larger area.
- Trim the wick before each use: Ensure that you trim the wick to about 1/4 inch (0.6 cm) before lighting the candle. This helps prevent large flames and excessive smoke.
- Store the candle safely: When not in use, store the candle in a cool and dry area away from direct sunlight and heat sources.
- Consider any allergies or sensitivities: If you or your massage partner have any allergies or sensitivities to specific oils or fragrances, choose alternatives that are safe and suitable for your needs.
By following these safety precautions, you can enjoy the benefits of the massage oil candle while ensuring a safe and pleasant experience.
As we conclude our journey into making and using massage oil candles, remember to use your creativity and experiment with different scents and containers to customize your own unique massage oil candles. Enjoy the relaxation, warmth, and intimacy that these candles add to your massage experiences.
Conclusion
Creating your own massage oil candles is a wonderful way to enhance your massage experience and indulge in relaxation and intimacy. By choosing the right ingredients, selecting the perfect container, preparing the candle wick, adding fragrance and essential oils, melting the wax, pouring the massage oil, and allowing the candle to cool and set, you’ve learned the step-by-step process of making these luxurious candles.
Remember to prioritize safety by following the necessary precautions such as never leaving the candle unattended, keeping it away from flammable items, and being cautious with hot wax and oil. Trim the wick before each use and store the candle in a safe place when not in use.
With your massage oil candle ready, you can create a soothing and aromatic environment, light the candle, extinguish the flame, and use the warm, melted oil for a sensual and relaxing massage. Enjoy the benefits of the scents and nourishing properties of the massage oil while taking the time to connect with your partner or enjoy a moment of self-care.
Get creative with different oils and fragrances, and explore various containers to find your personal touch and style. Experiment with different massage techniques to tailor the experience to your unique preferences and needs.
Now that you have the knowledge and steps to create your own massage oil candles, it’s time to embark on this blissful journey. So gather your ingredients, select your scents, and start creating your own personalized massage oil candles for an unrivaled sensory experience.
Make every massage session a moment of tranquility, relaxation, and rejuvenation with your very own massage oil candles. Embrace the warmth, the aroma, and the intimate connection they bring to your well-being.
Frequently Asked Questions about How To Make Massage Oil Candles
Was this page helpful?
At Storables.com, we guarantee accurate and reliable information. Our content, validated by Expert Board Contributors, is crafted following stringent Editorial Policies. We're committed to providing you with well-researched, expert-backed insights for all your informational needs.