
Articles
How To Make Survival Candles
Modified: October 20, 2024
Learn how to make survival candles with this detailed guide. Find step-by-step articles on creating homemade candles for emergencies and outdoor adventures.
(Many of the links in this article redirect to a specific reviewed product. Your purchase of these products through affiliate links helps to generate commission for Storables.com, at no extra cost. Learn more)
Introduction
Survival candles are an essential item for any emergency preparedness kit. They provide a reliable and long-lasting source of light and heat, making them invaluable during power outages, natural disasters, or any situation where access to electricity is limited. With just a few simple materials and some basic steps, you can easily create your own survival candles at home.
In this article, we will guide you through the process of making survival candles, from choosing the right wax to adding fragrance (optional) and allowing the wax to set. Whether you’re a seasoned survivalist or just starting your preparedness journey, learning how to make survival candles is a valuable skill that can come in handy when you need it the most.
Key Takeaways:
- Create reliable survival candles by choosing the right wax, container, and wick. Add optional fragrance for a pleasant scent. Follow safety precautions and enjoy the peace of mind of homemade light and heat sources.
- Master the art of making survival candles to be well-prepared for emergencies. Customize your candles with the right materials and prioritize safety throughout the process. Enjoy the sense of accomplishment and self-sufficiency.
Read more: How To Survive A Home Renovation
Materials Needed
Before you begin making your survival candles, gather the following materials:
- Wax – You can choose from a variety of waxes, such as soy wax, beeswax, or paraffin wax. Each type of wax has its own melting point and characteristics, so consider your specific needs when selecting the wax.
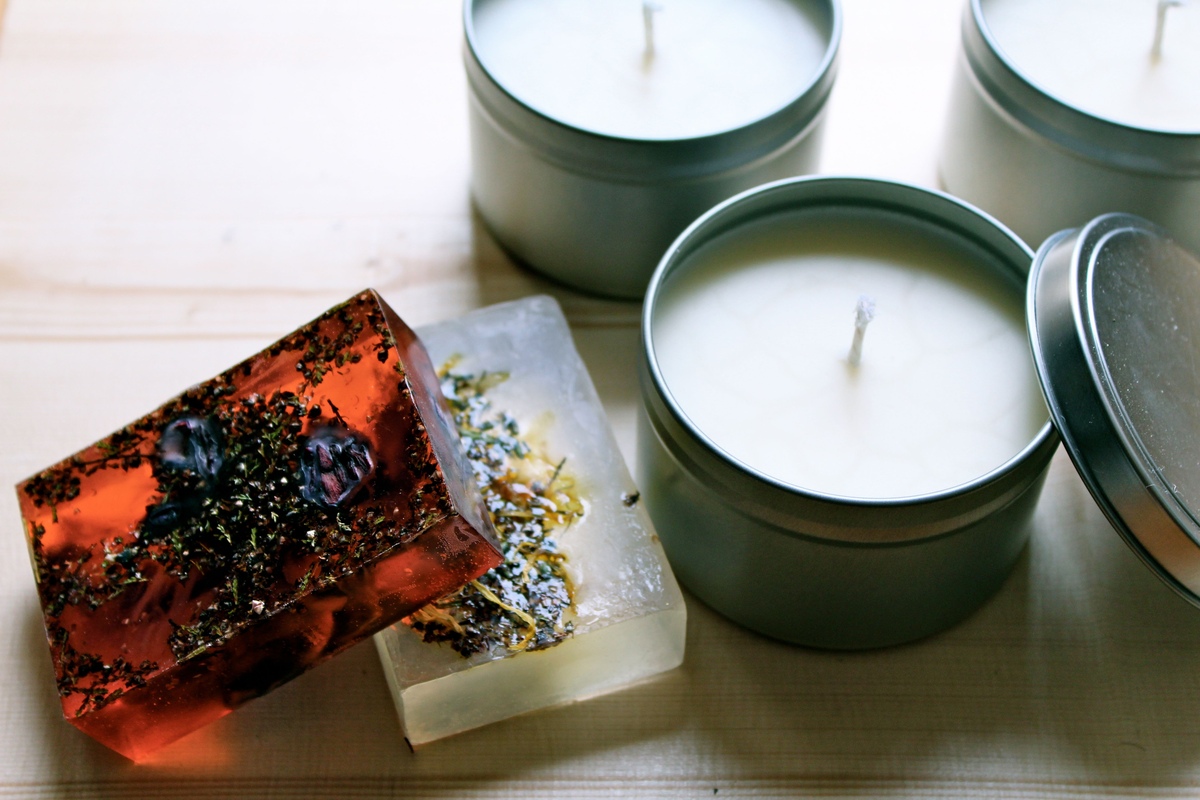
- Container – Select a heat-resistant container to hold the melted wax. This can be a glass jar, a metal tin, or any other vessel that can withstand high temperatures.
- Wick – Choose a wick that is suitable for the size of your container and the type of wax you’re using. Cotton wicks are commonly used for candle making.
- Fragrance (optional) – If desired, you can add fragrances or essential oils to your survival candles to create a pleasant scent when they are lit. Make sure to choose fragrances that are safe for candle use.
- Double Boiler or Heatproof Container – A double boiler is ideal for melting the wax, but if you don’t have one, you can use a heatproof container placed inside a pot of boiling water.
- Thermometer – To ensure that the wax reaches the correct temperature, use a thermometer to monitor its progress.
- Stirring Utensil – You’ll need a heat-resistant utensil, such as a wooden spoon or a stainless-steel stirrer, to mix the wax and fragrance (if using).
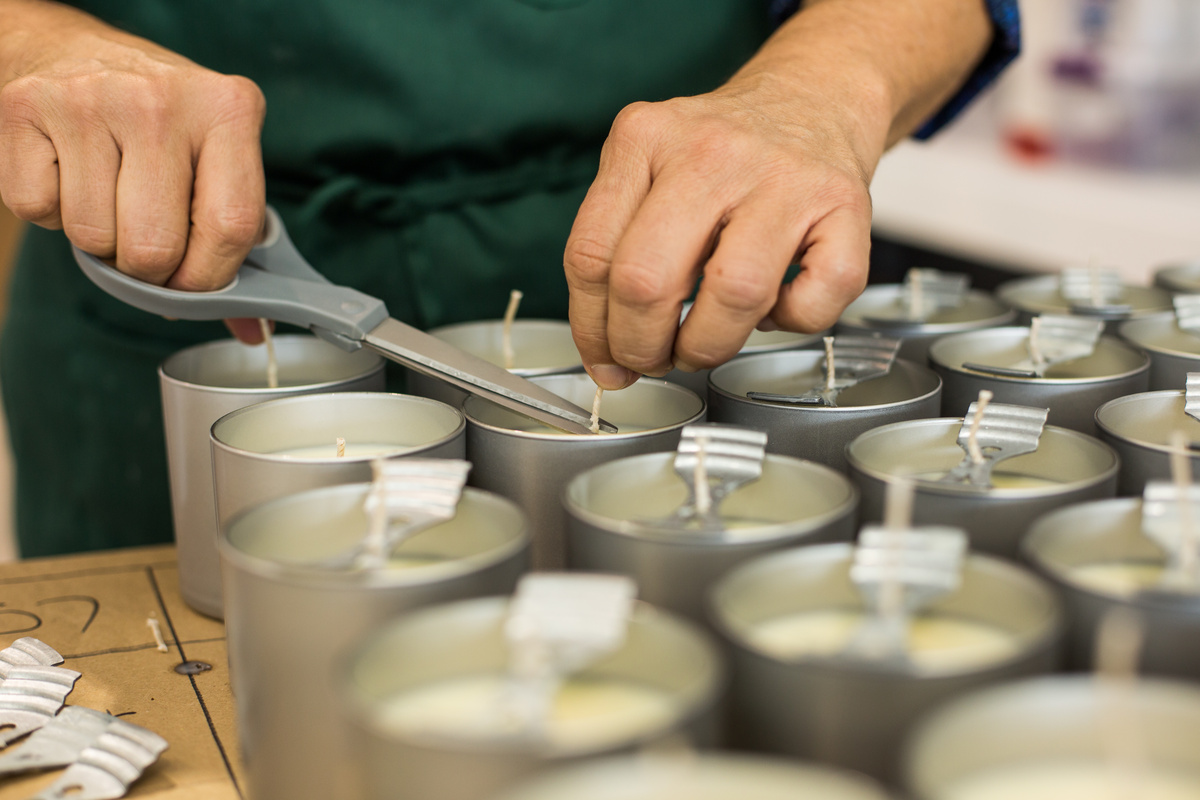
- Scissors – Prepare a pair of scissors to trim the wick once the candle has set.
- Protective Gloves – To protect your hands from hot wax and potential spills, wear heat-resistant gloves or oven mitts.
Now that you have all the necessary materials, you’re ready to start creating your own survival candles. Follow the step-by-step instructions below for a successful candle-making experience.
Step 1: Choosing the Wax
The type of wax you choose for your survival candles will depend on various factors, including your preferences, the intended use of the candle, and the availability of materials. Here are some common types of wax and their characteristics:
- Soy Wax: Soy wax is a popular choice for candle making due to its natural and renewable properties. It has a lower melting point than other waxes, which means it burns slower and longer. Additionally, soy wax has a clean, even burn and can hold fragrance well.
- Beeswax: Beeswax is another natural option that burns cleanly with a wonderful honey-like scent. It has a higher melting point compared to soy wax, resulting in a longer burn time. Beeswax candles are known for their golden warmth and soothing ambiance.
- Paraffin Wax: Paraffin wax is widely available and affordable. It has a high melting point, making it ideal for creating sturdy candles that withstand heat. However, paraffin wax is a petroleum-based product and may emit some soot when burned.
- Coconut Wax: Coconut wax is a sustainable and eco-friendly option that offers a clean burn and excellent scent throw. It has a similar melting point to soy wax and can easily be blended with other waxes.
Consider the burn time, scent throw, and sustainability factors when selecting the wax for your survival candles. It’s best to experiment with different types to find the one that best suits your needs and preferences.
Once you have chosen the type of wax, proceed to the next step of selecting a suitable container for your survival candle.
Step 2: Selecting a Container
Choosing the right container for your survival candle is essential for both functionality and aesthetics. Consider the following factors when selecting a container:
- Heat Resistance: Ensure that the container you choose is heat-resistant and can withstand high temperatures. Glass jars, metal tins, and ceramic vessels are commonly used for candle making.
- Size: Select a container that matches the desired size of your candle. Keep in mind that larger containers may require multiple wicks to ensure an even burn.
- Stability: Opt for a container that provides stability to prevent tipping over during use. It should have a flat bottom and a wide enough base to support the candle.
- Transparency: If you prefer to see the flame through the container, choose a transparent or lightly tinted glass jar. This can add a visual element to your candles.
- Aesthetics: Consider the overall design and aesthetic appeal of the container. This will determine the final look of your survival candle.
Additionally, ensure that the container is clean and free from any residue or impurities that could affect the burning process. It’s also important to note that the container should have a secure lid or cover to protect the candle during storage or transportation.
Once you have selected a suitable container, you’re ready to proceed to the next step of adding the wick to your survival candle.
Step 3: Adding the Wick
Adding the wick is a crucial step in the candle-making process as it determines how effectively the candle will burn. Follow these steps to properly add the wick to your survival candle:
- Measure and Cut: Start by measuring the height of your container. Add a few inches to this measurement and cut the wick accordingly. This extra length will allow you to trim the wick later for optimal burning.
- Secure the Wick: There are multiple ways to secure the wick to the bottom of the container. You can use a wick adhesive sticker or simply dip the end of the wick in melted wax and press it onto the container’s bottom. Make sure it is centered and straight.
- Align the Wick: To keep the wick centered and straight while pouring the wax, use a wick centering device or tie the top end of the wick around a pencil or thin dowel resting across the container’s opening.
Ensuring that the wick is securely attached and properly positioned will ensure an even and efficient burn throughout the life of your survival candle. Once the wick is in place, you can proceed to the next step of melting the wax.
Read more: How To Survive A Kitchen Renovation
Step 4: Melting the Wax
Now that you have chosen the wax, selected a container, and added the wick, it’s time to melt the wax. Follow these steps to melt the wax safely and efficiently:
- Prepare the Double Boiler: If you have a double boiler, fill the bottom pot with water and place it on the stovetop over medium heat. If you don’t have a double boiler, you can use a heatproof container placed in a pot filled with a few inches of water.
- Add the Wax: Measure the amount of wax you need based on the size of your container and the desired candle thickness. Place the wax in the top pot or heatproof container.
- Melt the Wax: Allow the water in the bottom pot to come to a simmer or gentle boil. The steam generated will provide indirect heat to melt the wax in the top pot. Stir the wax occasionally to help it melt evenly.
- Temperature Check: Use a thermometer to monitor the wax temperature. The melting point may vary depending on the type of wax you’re using. Refer to the manufacturer’s instructions for the specific melting point.
- Remove from Heat: Once the wax has completely melted and reached the desired temperature, remove it from the heat source. Be careful not to overheat the wax, as it may affect the quality and performance of your survival candle.
It’s important to note that safety precautions should be taken when melting wax. Never leave melting wax unattended, and ensure that children and pets are kept away from the area. Keep a fire extinguisher or a container of baking soda nearby to extinguish any flames in case of accidents.
With the wax melted and ready, you can move on to the next step of adding fragrance (if desired) to your survival candle.
When making survival candles, use a combination of beeswax and coconut oil for a longer burning time and a more pleasant scent.
Step 5: Adding Fragrance (Optional)
If you want to add a pleasant scent to your survival candles, you can include fragrance oils or essential oils during the candle-making process. Follow these steps to add fragrance to your candles:
- Select Your Fragrance: Choose a fragrance oil or essential oil that is safe for candle use. Consider scents that align with your preferences or the intended purpose of the survival candles. It’s recommended to start with a small amount of oil and adjust according to your desired scent intensity.
- Add Fragrance to the Wax: Once the wax has melted and has been removed from the heat source, it’s time to add the fragrance. Start by adding a few drops of oil and stir well to distribute it evenly throughout the melted wax. Continue adding more drops if desired, but be cautious not to overload the fragrance.
- Stir Well: Use a heat-resistant utensil to stir the wax thoroughly, ensuring the fragrance is well incorporated. Stir gently to avoid introducing air bubbles into the wax.
Adding fragrance to your survival candles can create a more pleasant and soothing atmosphere when they are lit. However, note that adding fragrance is entirely optional, and unscented candles can still serve their purpose effectively.
With the fragrance added, proceed to the next step of pouring the melted wax into the container.
Step 6: Pouring the Wax
With the melted wax and optional fragrance ready, it’s time to pour the wax into your chosen container. Follow these steps for a successful pouring process:
- Prepare the Container: Ensure that the container is clean and free from any debris or moisture that could affect the quality of your candle. Place the container on a heat-resistant surface or tray to catch any potential spills or drips.
- Stabilize the Wick: Hold the wick upright with one hand or use a wick holder device to keep it centered and straight during the pouring process. This will ensure an even burn and prevent the wick from leaning to one side.
- Pour Slowly and Carefully: Begin pouring the melted wax into the container, starting from the center and gradually moving towards the outer edges. Pouring slowly and steadily will help prevent air bubbles and ensure an even distribution of wax.
- Leave Space: It’s important to leave some space at the top of the container, usually around 0.5 to 1 inch, to allow for proper burning and to avoid overflow when the candle is lit.
Take your time when pouring the wax and ensure that it is flowing smoothly into the container. Avoid any sudden movements or disturbances that could cause the wick to move or the hot wax to spill.
Once you have poured the wax into the container, allow it to cool and solidify before moving on to the next step of allowing the wax to set.
Step 7: Allowing the Wax to Set
After pouring the melted wax into the container, it’s crucial to allow it to cool and set properly before moving or using the survival candle. Follow these steps to ensure the wax sets correctly:
- Room Temperature: Find a cool, undisturbed area with optimal room temperature for the wax to solidify. Avoid placing the candles in direct sunlight or near sources of heat, as this can cause uneven cooling and potential deformation.
- Patience Is Key: Depending on the size of the container and the type of wax used, the cooling process may take several hours or even overnight. It’s important to be patient and allow sufficient time for the wax to completely set.
- Avoid Disturbances: It’s crucial to avoid moving or touching the candle while the wax is setting. Any disturbances to the cooling process can result in an uneven surface or surface cracks.
During the cooling process, you may notice some shrinkage or slight changes in appearance as the wax solidifies. This is normal and does not affect the functionality of the survival candle.
Once the wax has completely hardened and set, you can move on to the final step: trimming the wick.
Read more: How To Survive Guarana Seeds
Step 8: Trimming the Wick
After the wax has fully set, it’s time to give your survival candle a final touch by trimming the wick. Trimming the wick ensures a clean and efficient burn each time you light the candle. Follow these steps to trim the wick:
- Inspect the Wick: Examine the length of the wick to determine if it needs trimming. Ideally, the wick should be approximately 1/4 inch in length.
- Trim with Scissors: Use a pair of scissors to carefully trim the wick to the desired length. Trim it as close to the surface of the wax as possible without cutting into the wax itself.
- Remove the Trimmed Wick: Gently remove the trimmed wick pieces from the candle to prevent them from falling into the wax pool.
Trimming the wick before each use of your survival candle helps to prevent excessive smoke, uneven burning, and soot buildup. It also ensures that the flame remains controlled and steady throughout the candle’s lifespan.
Once the wick is trimmed, your survival candle is ready to be used for emergencies, power outages, or any situation where reliable light and heat sources are necessary.
Remember to exercise proper safety precautions when using candles, such as placing them on a heat-resistant surface, keeping them away from flammable objects, and never leaving them unattended.
With these steps completed, you have successfully made your own survival candles. Enjoy the peace of mind knowing that you have a reliable and homemade light source ready for any unexpected situation.
Conclusion
Learning how to make survival candles is a valuable skill that can contribute to your preparedness arsenal. With just a few materials and some basic steps, you can create your own reliable and long-lasting light and heat source for emergency situations.
In this article, we covered the essential steps of making survival candles, from choosing the right wax to trimming the wick. By selecting the appropriate materials, including the type of wax, container, wick, and optional fragrance, you can customize your candles to suit your preferences and needs.
Remember to prioritize safety throughout the entire process. Take necessary precautions when melting wax, handling hot materials, and using open flames. Always follow manufacturer’s guidelines and practice caution to prevent accidents.
By mastering the art of making survival candles, you can have peace of mind knowing that you’re well-prepared for any situation that may arise, whether it’s a power outage, natural disaster, or other emergencies. These candles serve as a reliable source of light, warmth, and comfort when traditional sources of energy are unavailable.
So, gather your materials, follow the steps outlined in this article, and create your own survival candles. Not only will you gain a practical skill, but you’ll also have a sense of accomplishment and self-sufficiency that comes from knowing you can rely on your own resources.
Stay prepared, stay safe, and enjoy the peace of mind that comes with having your own homemade survival candles at the ready.
Frequently Asked Questions about How To Make Survival Candles
Was this page helpful?
At Storables.com, we guarantee accurate and reliable information. Our content, validated by Expert Board Contributors, is crafted following stringent Editorial Policies. We're committed to providing you with well-researched, expert-backed insights for all your informational needs.
